SwitchBot recently released its new Presence Sensor, an mmWave radar based device designed to detect static occupancy. This category has seen a wave of new releases this year, including devices like the Aqara FP300 and the Apollo R PRO-1. I also shared a DIY approach for building a Zigbee presence sensor using an ESP32-C6 paired with an LD2410 mmWave radar module.
In this review, I’m sharing my experience with the new SwitchBot Presence Sensor. This is a battery-powered, combo device with both mmWave radar and PIR sensors. The device is very affordable and quite promising, you can get it on Amazon US, Amazon DE, Amazon UK, Amazon CA, Amazon FR and Amazon NL.
Device Overview and Disassembly
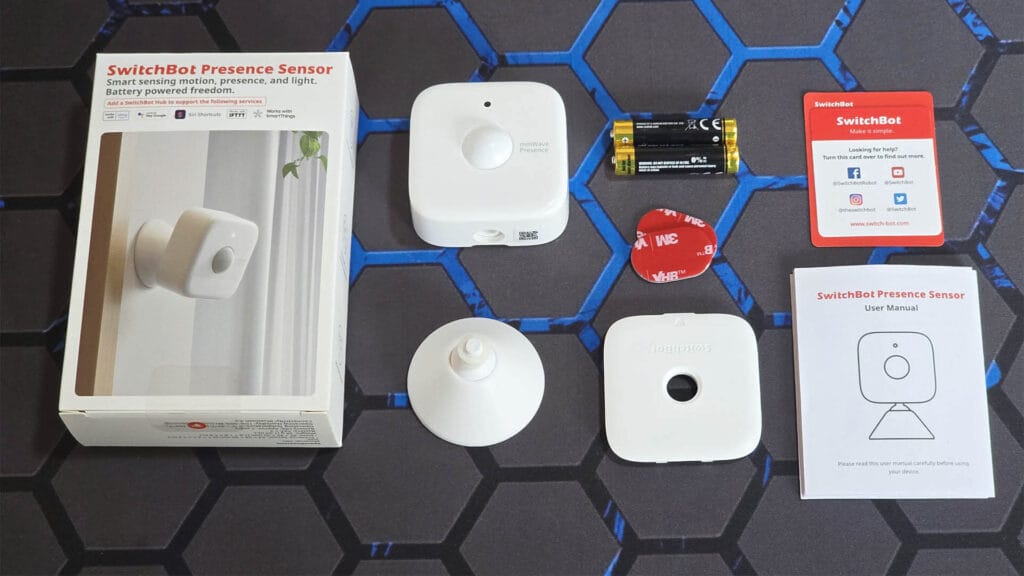
The SwitchBot Presence Sensor comes in a compact box that includes the sensor itself, a rotating mount, a set of AAA batteries, mounting stickers, and a user manual. The stand can be attached either to the bottom of the sensor for shelf or desk placement, or to the back for wall mounting.
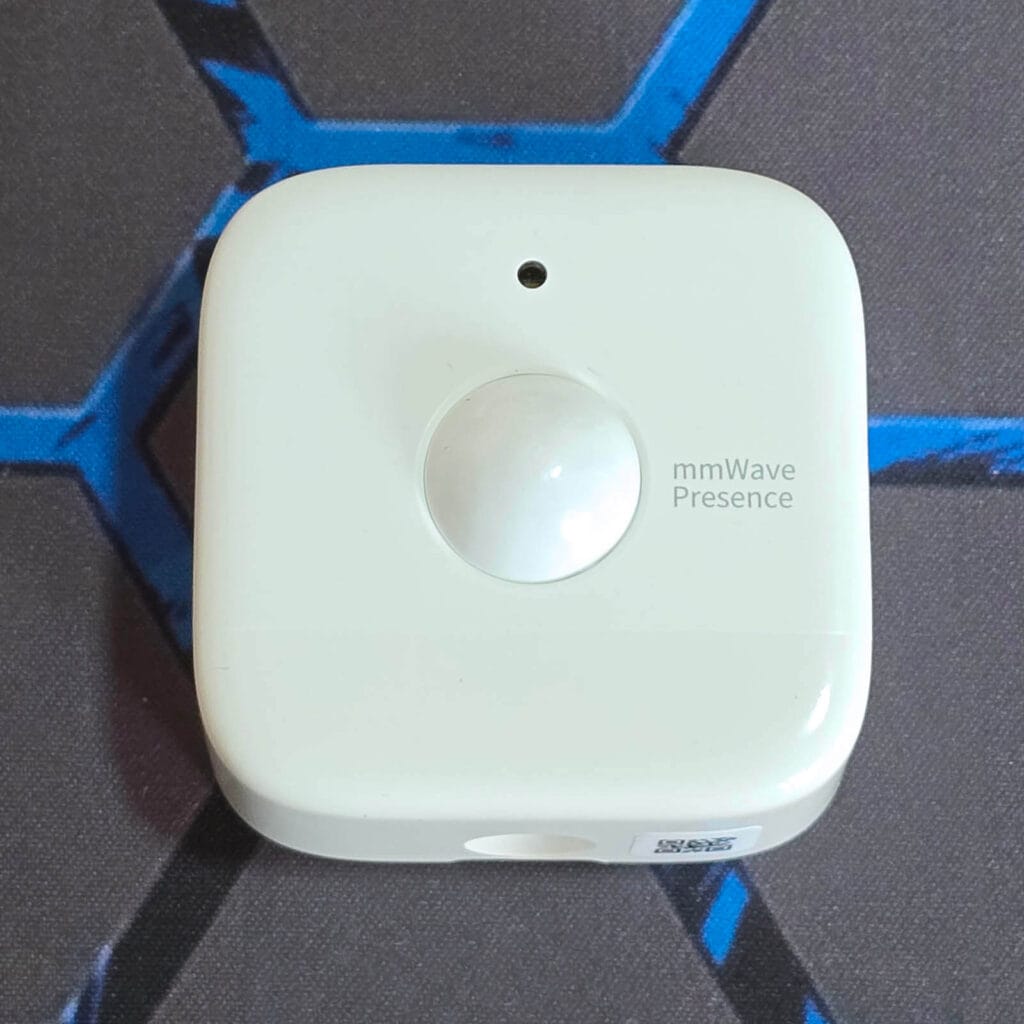
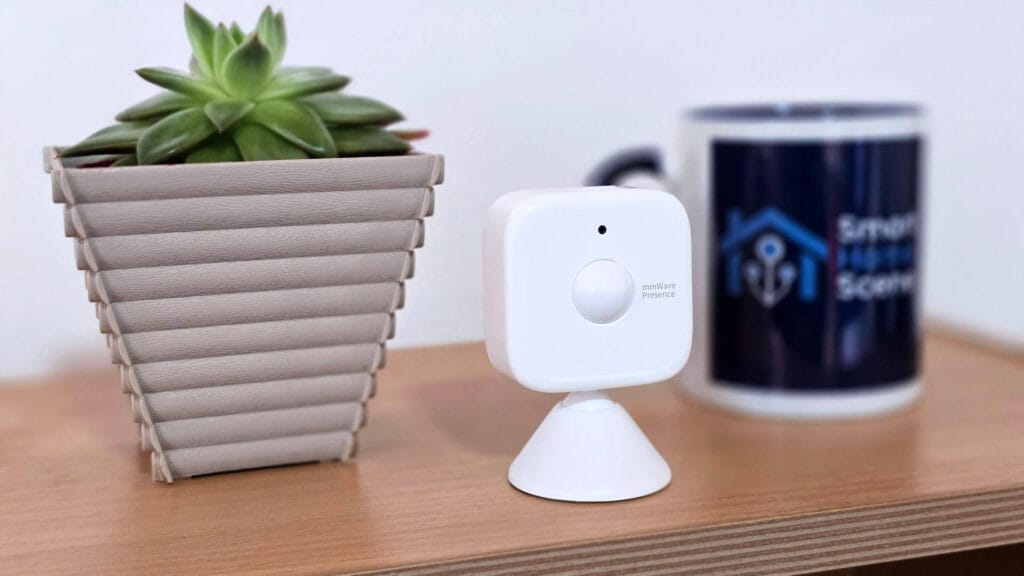
The new mmWave presence sensor looks nearly identical to the SwitchBot Motion Sensor. The all-white PIR Fresnel lens is mounted on the front in the middle, while the mmWave radar sits behind the faceplate at the bottom. This section is smoother, and it is unclear whether this is done for improved performance or if it is purely cosmetic.
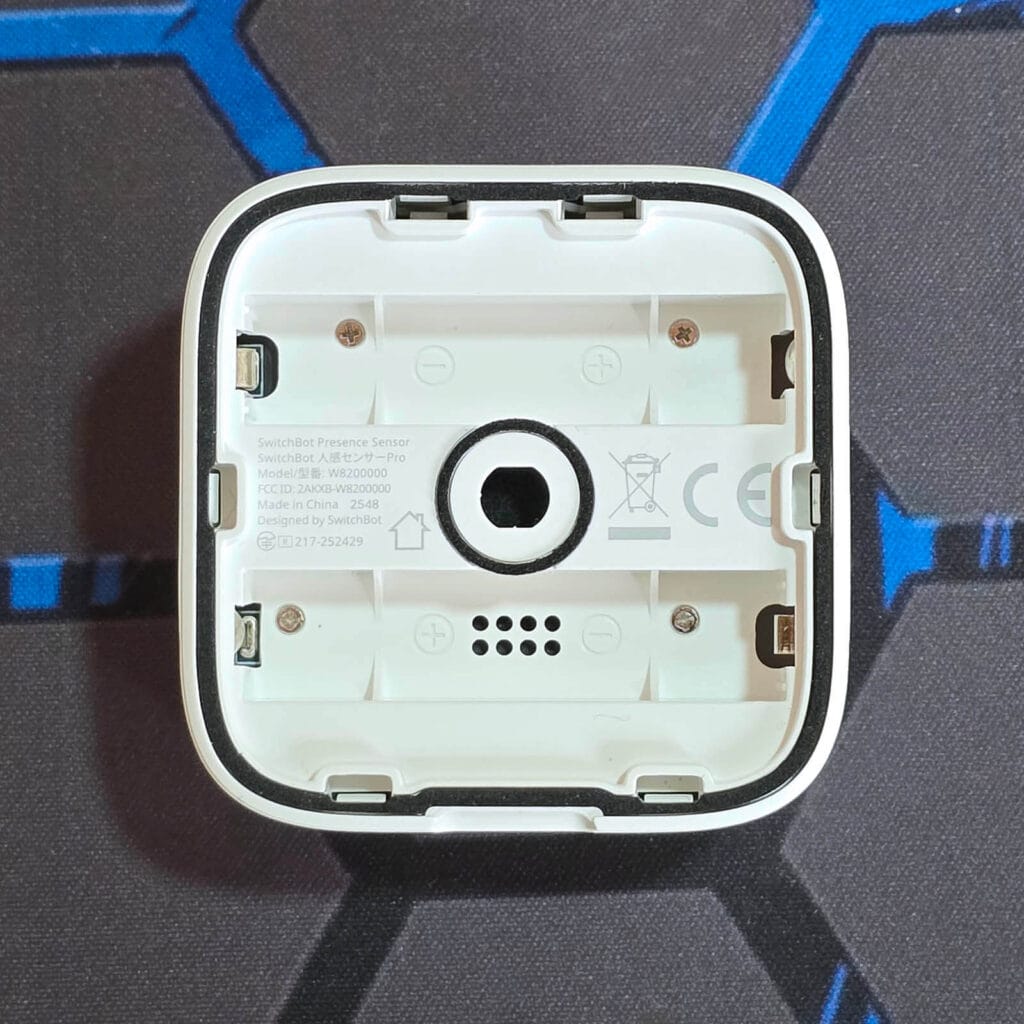
The rear houses two AAA batteries, which SwitchBot rates for up to 2 years of battery life. Some basic information such as the model number is printed near the central mounting slot. Since the sensor carries an IP55 rating for dust and water resistance, a sealing foam ring surrounds the housing to help prevent moisture from entering the device.
I removed the 4 small screws holding the enclosure together to inspect the internals. The first thing you notice is the PIR sensor positioned in the center. It appears to be a Senba Sensing RS412 [Datasheet] pyroelectric infrared sensor, rated for a 10m detection range with a 120° field of view. This PIR sensor is used for initial motion detection, waking up the mmWave radar when movement is detected.
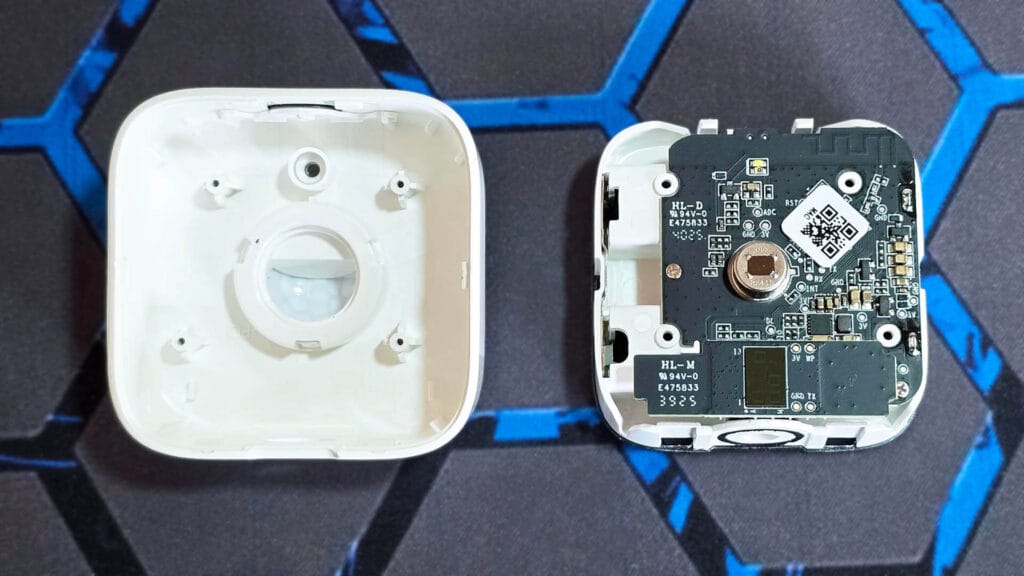
The biggest surprise here is the mmWave radar itself. The SwitchBot Presence Sensor uses the Possumic RS6130 [Datasheet] mmWave radar, which is a 60GHz sensor. This is a highly capable mmWave radar sensor with a theoretical maximum range of up to 15 m. It is impressive to see SwitchBot opt for such a high-end radar solution, as this chip is relatively rare in smart home products. For reference, the Aqara FP300 also uses this sensor.

SwitchBot App Onboarding
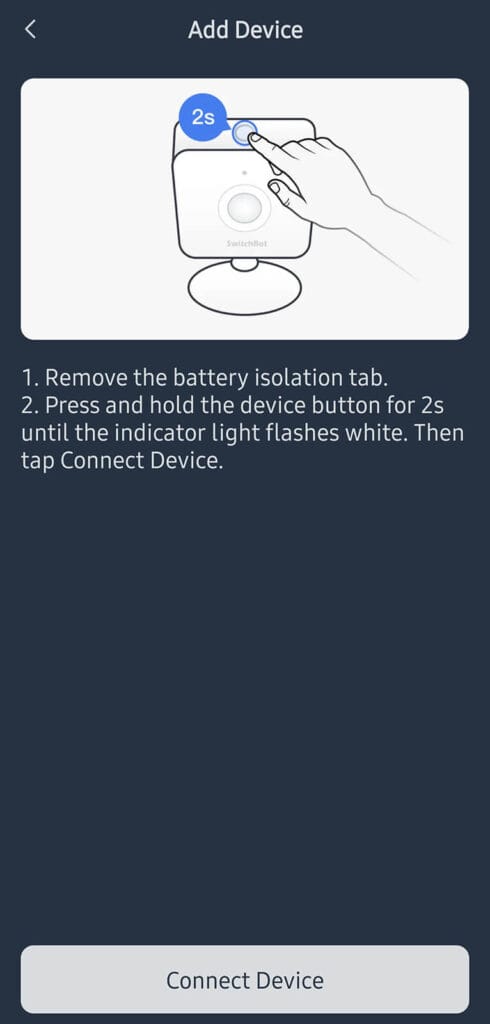
Like all SwitchBot devices, the Presence Sensor uses BLE to get auto-discovered and added to the app. The process is very quick, painless and takes less than a minute. The AAA batteries this sensor uses are included in the package, so once you insert them the device is ready to be paired. I took a few screenshots from the initial onboarding and the included pictorial mounting guide which SwitchBot includes in the app:

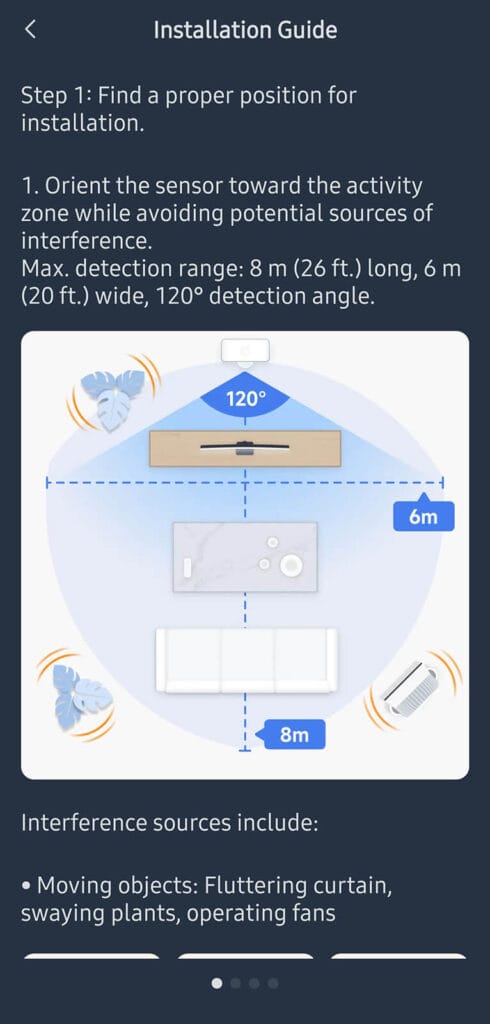
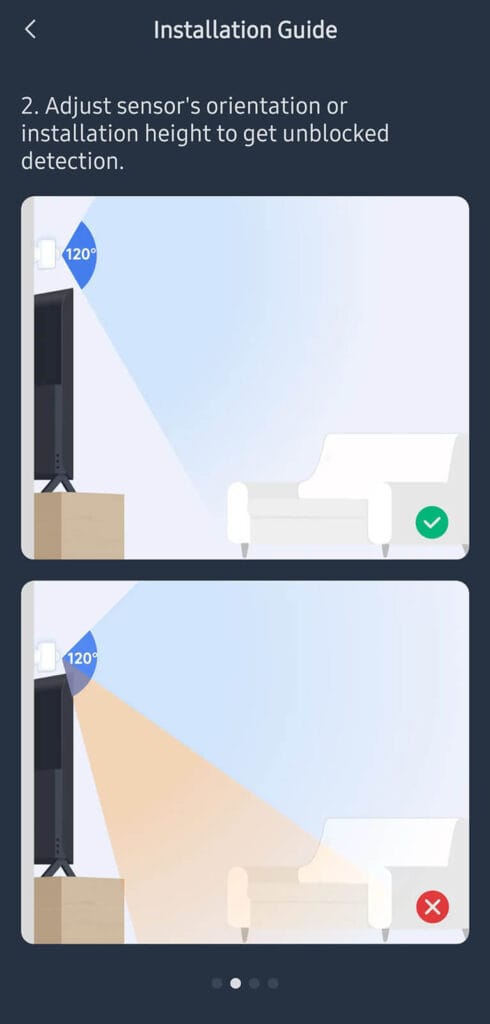
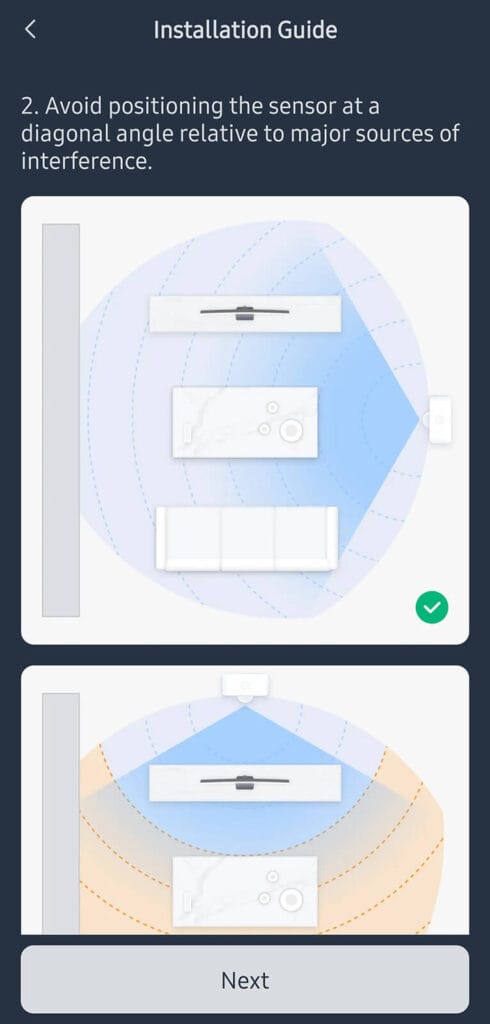
For best results, the sensor should be aimed directly at the main activity area within its effective coverage of up to 8 m in depth and 6 m in width, with a 120° field of view. It performs best when facing the space where people usually sit or stand, rather than being angled across the room. Keeping the detection zone unobstructed is important, as objects placed between the sensor and the target area can reduce accuracy even if they are well within the rated range.
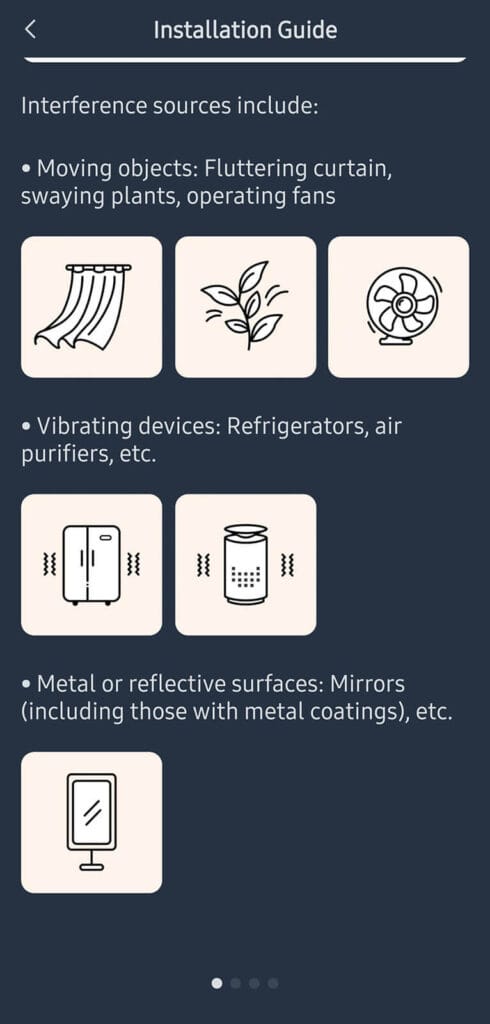
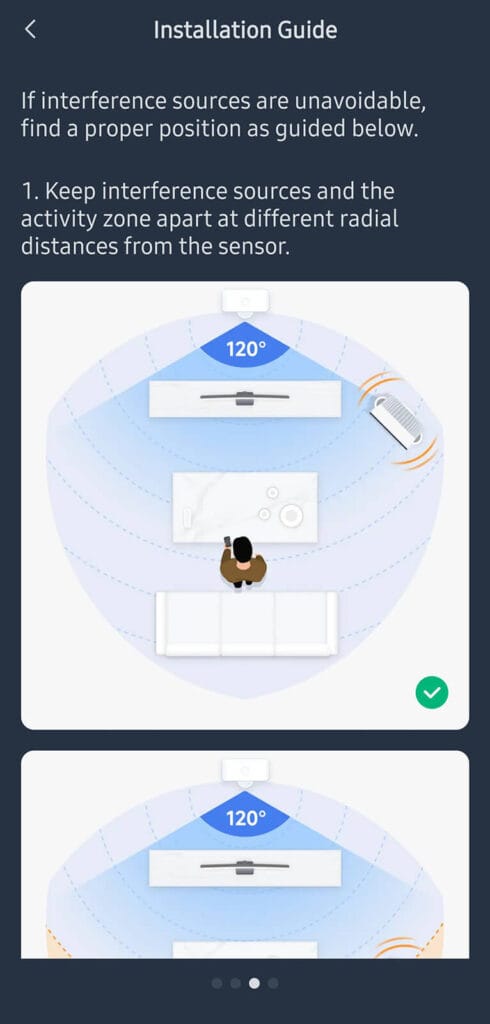
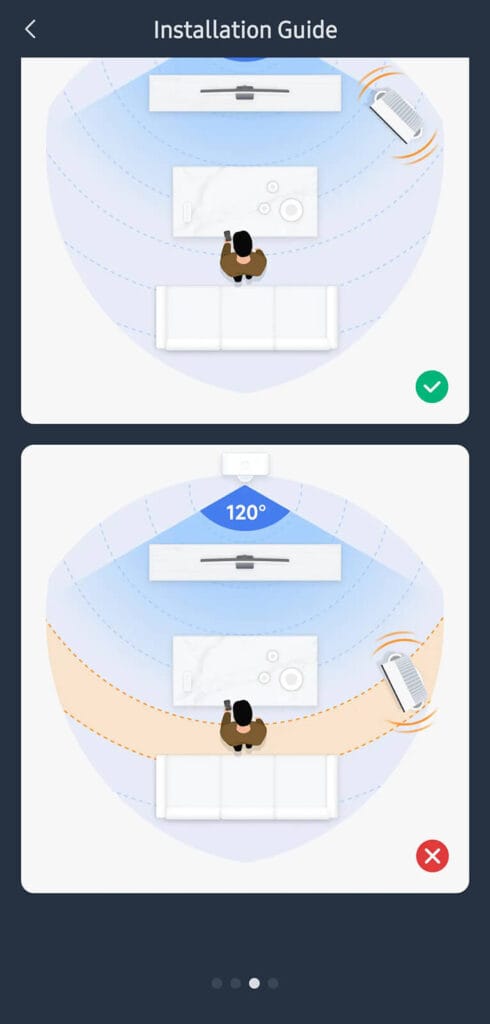
Obviously, interference plays a big role in mmWave performance, so placement matters. Moving objects such as curtains, plants, or fans inside the 120° coverage area can cause false presence events, while vibrating devices like refrigerators or air purifiers can introduce constant triggers. Reflective or metal surfaces, including mirrors, can also affect readings, so separating these interference sources from the main activity zone and keeping them at different distances from the sensor improves consistency.
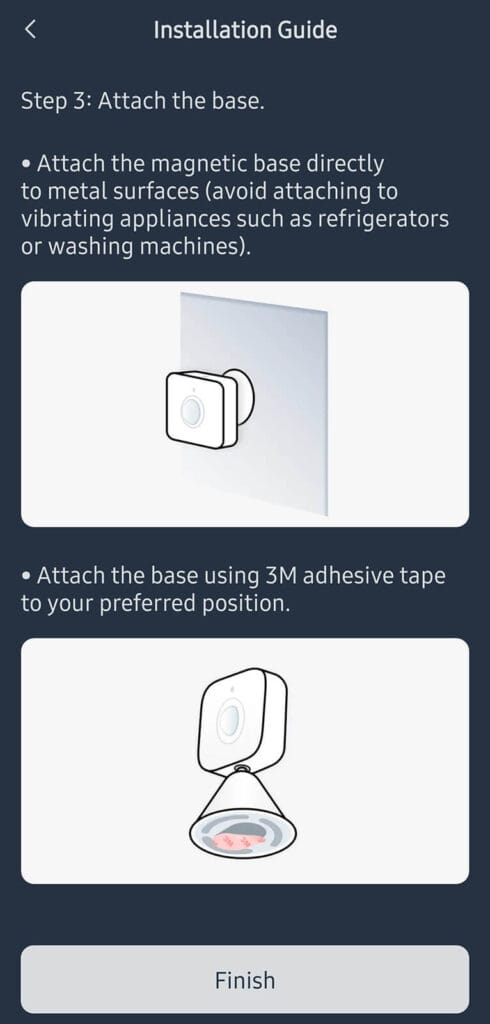
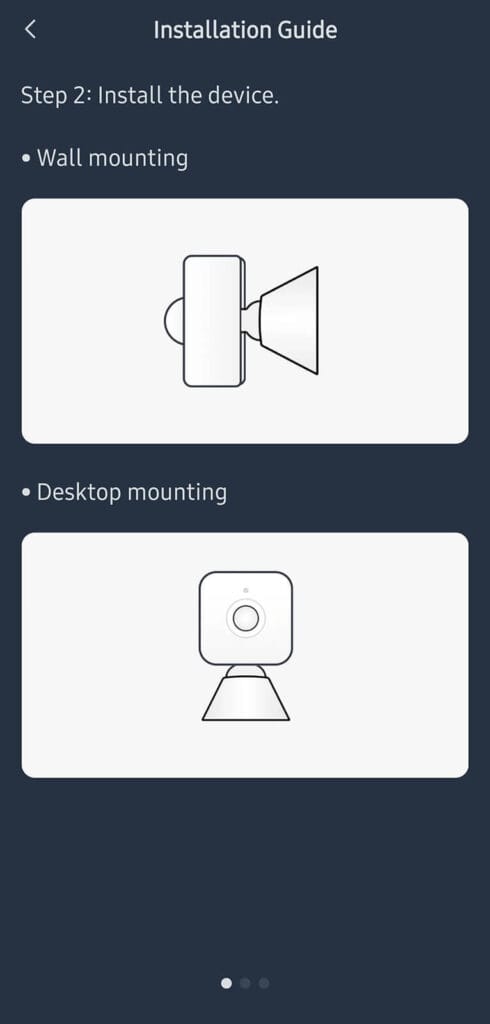
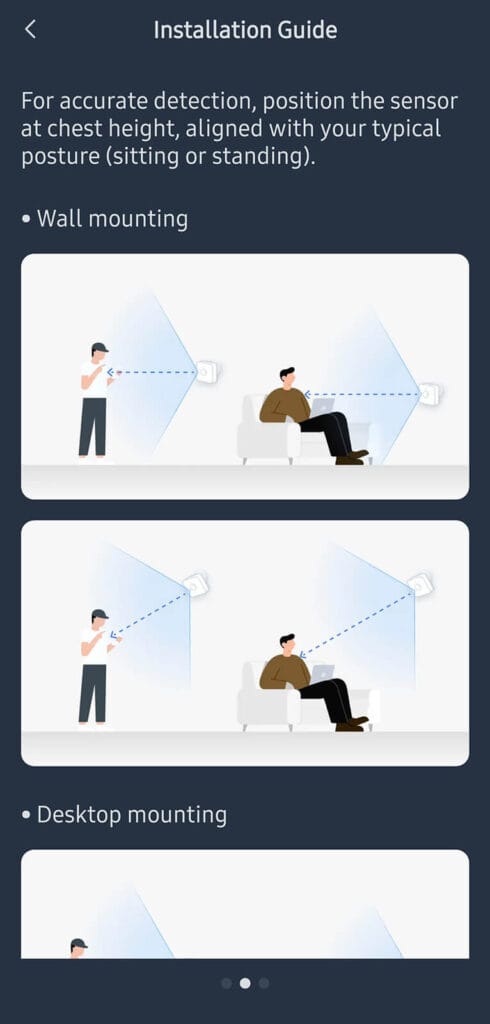
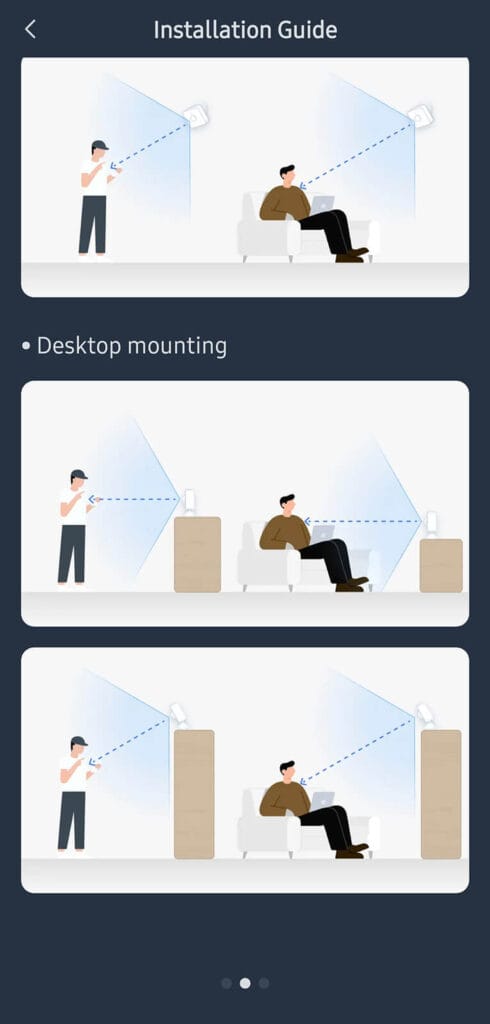
Mounting height and orientation matter just as much as distance. SwitchBot recommends positioning the sensor roughly at chest height and aligning it with typical human posture, whether seated or standing, so micro movements are detected reliably within the 8 m range. Wall and desktop mounting both work well if the sensor is stable and correctly oriented, while the magnetic base should only be used on non vibrating metal surfaces, with adhesive mounting being the safer option in most rooms.
SwitchBot App Configuration
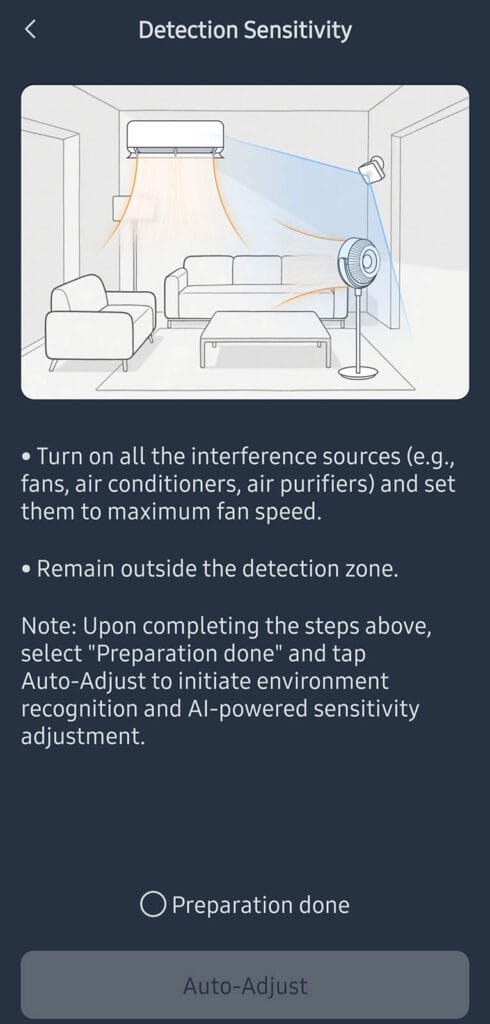
The key configuration feature of this sensor is AI based auto adjustment, which runs for about 3 minutes after setup. During this process, you are asked to turn on interference sources like fans or air conditioners and stay outside the detection zone. The sensor then analyzes the environment and automatically tunes detection sensitivity to reduce false positives. The process is fully automatic.

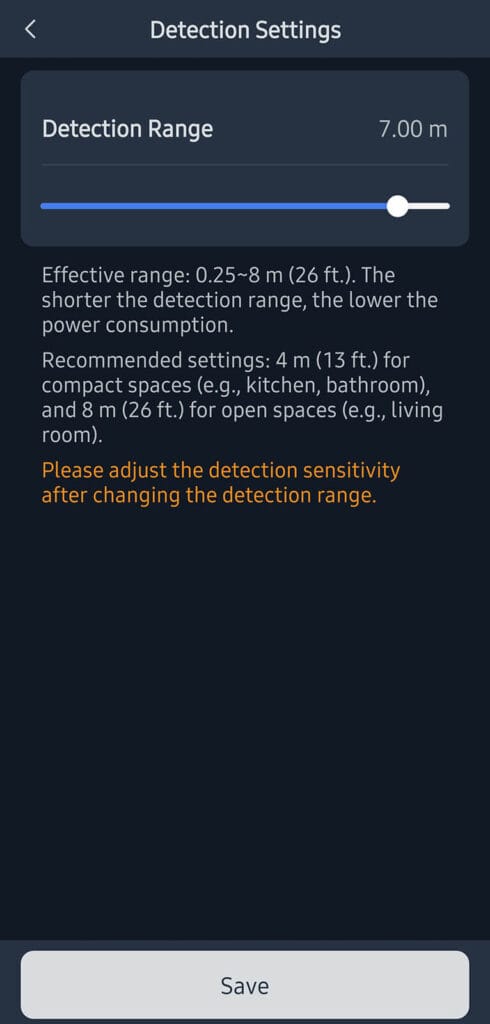
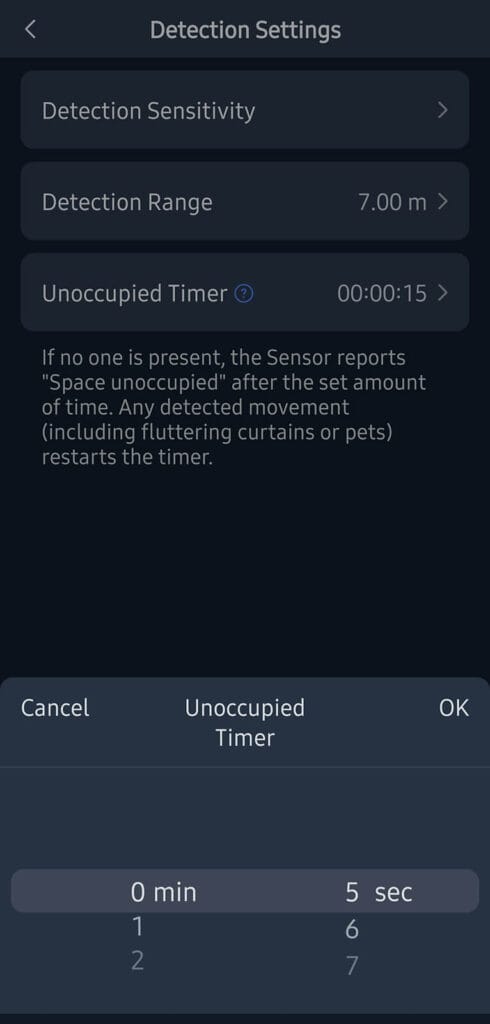

Detection range can be set between 0.25 m and 8 m. SwitchBot recommends around 4 m for smaller rooms such as bathrooms or kitchens and up to 8 m for open spaces like living rooms. Shorter ranges reduce power consumption, but any change to the range requires adjusting detection sensitivity to keep detection reliable.
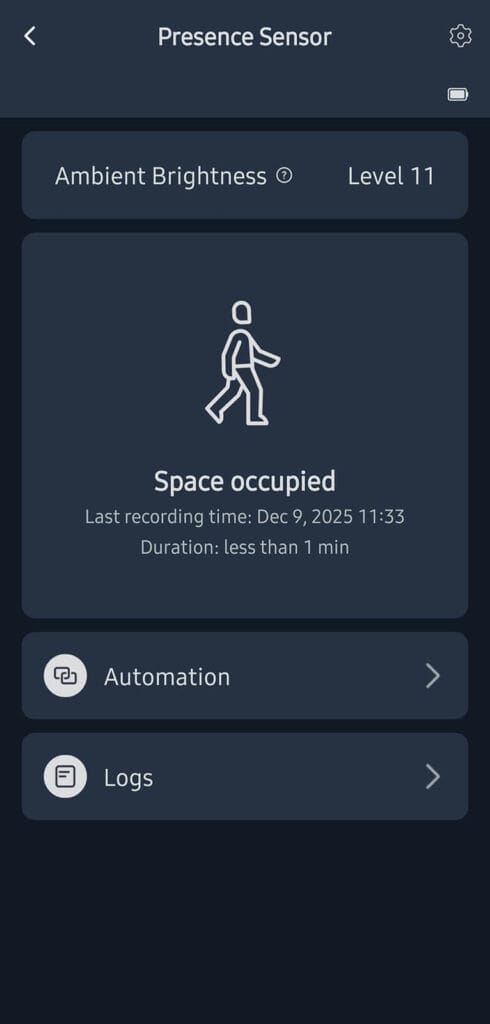
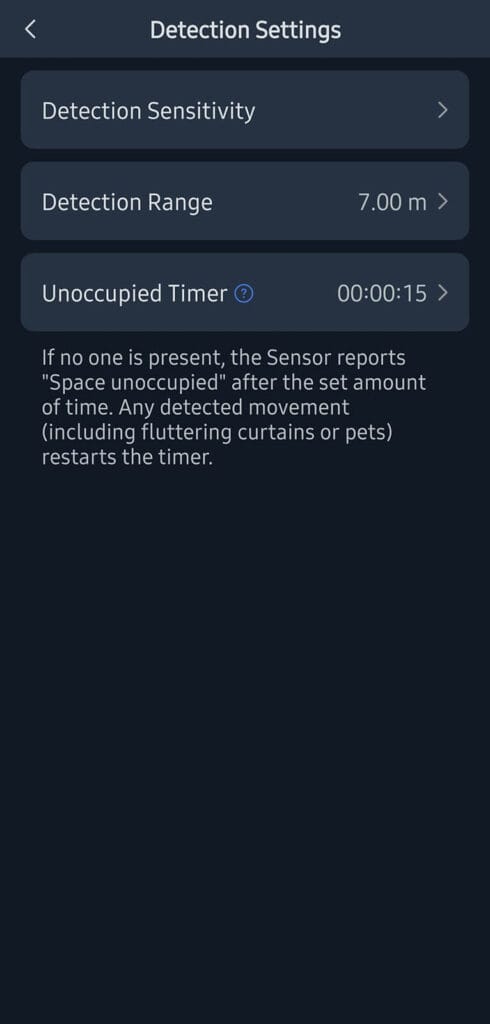
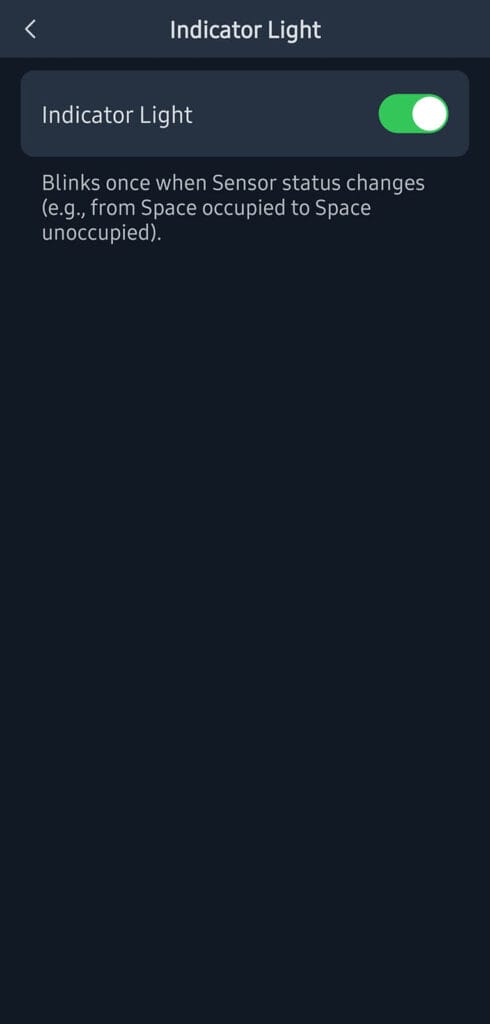
Next, the unoccupied timer controls how quickly the sensor switches to unoccupied, starting from 5 s, with common values around 15 s for fast automations. Any detected movement resets this timer. The sensor also reports ambient brightness as numeric levels, with values below 2 considered dark, 3 to 6 dim, 7 to 11 slightly bright, 12 to 17 bright, and above 18 very bright. Finally, the indicator light can be enabled or disabled since it briefly flashes once when the occupancy state changes.
Home Assistant Integration
The SwitchBot Presence Sensor is officially supported in Home Assistant through the SwitchBot Bluetooth integration. This requires Bluetooth support on your Home Assistant system, either via the host device’s built-in radio or through ESP32-based Bluetooth proxies placed around your home. Once added, this is what’s exposed in Home Assistant:
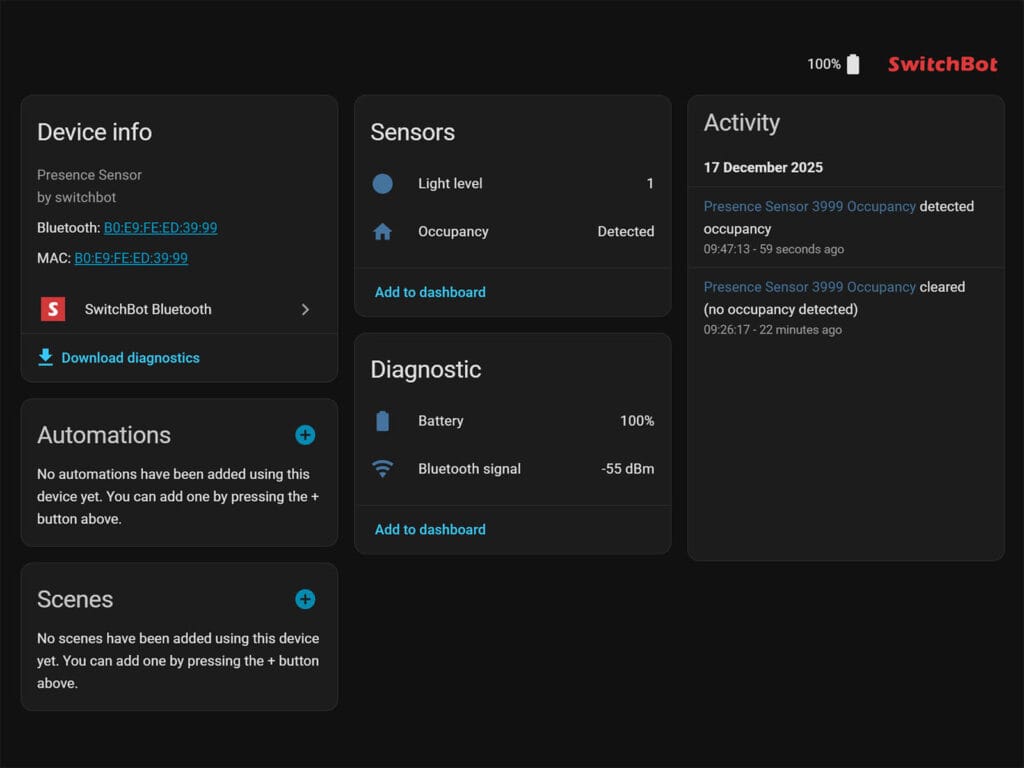
In Home Assistant, the sensor exposes a main occupancy entity, a light level sensor, a battery level sensor, and a Bluetooth signal strength sensor. The occupancy entity is a binary sensor, while the light level is reported as a standard sensor. The brightness values are not measured in lux, but instead use SwitchBot’s own numeric scale as described earlier. The Bluetooth signal sensor is mainly useful for diagnostics, which is especially relevant since this is a Bluetooth based device.
Testing and Real-world Use
Like most presence sensors I review, I mounted the SwitchBot Presence Sensor in my office on top of a shelf. This placement provides a clear line of sight across the entire room with very few potential interference sources. There is an air conditioner with a swinging flap in the room, which could be considered a source of movement, but it has never caused false triggers with other presence sensors and did not cause any issues here.
I ran the AI detection sensitivity calibration in the app and left the office during the process, as instructed. The detection range was set to 6 m, which is more than enough to cover the whole space. After calibration finished, I tested the sensor by triggering it from different positions to see if any part of the room had been incorrectly filtered out.
During these initial tests, the sensor performed very well and triggered instantly as soon as I entered the room. I monitored the state changes first in the SwitchBot app and then compared them directly in Home Assistant, with identical trigger timing and no noticeable delay. The cooldown period configured in the app was also respected, although I recommend setting it higher than the minimum 5sec value. A 30sec cooldown worked well in practice for me.
Final Thoughts
The SwitchBot Presence Sensor delivered reliable and fast presence detection in my setup, which I consider especially impressive given its price and battery powered design. In daily use, detection was consistent and responsive, and occupancy state changes were reflected immediately in both the SwitchBot app and Home Assistant. For a compact sensor in this category, overall performance is great.
The AI based detection calibration worked well in my office and required next to no effort to set up. Letting the 60GHz sensor learn the environment and filter out interference proved effective, but the lack of a manual sensitivity adjustment limits fine tuning for more advanced use cases. SwitchBot has acknowledged my feedback on this and are reportedly looking into adding manual adjustment in a firmware update.
Integration with Home Assistant is very straightforward, but depending on your setup, Bluetooth can be considered the main limitation. With multiple Bluetooth proxies deployed, reliability and response times are excellent. Relying on a single Bluetooth radio can and will introduce delays, which is something to keep in mind when planning placement. Despite these constraints, the SwitchBot Presence Sensor remains a strong, budget friendly option that performs well in real world setups. Here’s where you can get it:

Also on Amazon UK, Amazon NL, Amazon FR, Amazon CA and SwitchBot Website.


Is it better than XMOSB01XS?
Yes, its better in almost every way except the manual adjustability
Can you give more details why?
First off, it uses common AAA batteries instead of button cells. These will give you a better battery life, despite the fact Xiaomi claims 3 years on a single CR2450.
Next, it has a 60GHz mmWave radar instead of 24GHz, which is also superior for presence detection (more accurate, much fewer false triggers).
And finally, it has better range and coverage of the room. So yeah, I like the SwitchBot better, with the only drawback being the lack of manual adjustability
Do I understand correctly, that you can configure the sensor in the app without any gateway and then use it with Home Assistant?
Exactly. You don’t even need the app afterwards.
for some reason I find these slower than my Xiaomi ones, both Bluetooth. I can see it triggeres on the sensor quite quick but it takes another second or so to change in home assistant.
anyone else?