SwitchBot has recently released an interesting new smart video doorbell system. This two-part device features a wireless doorbell with detection capabilities and a companion unit that functions as both a small monitor and chime. This setup allows users to view the live feed and engage in two-way communication instantly.
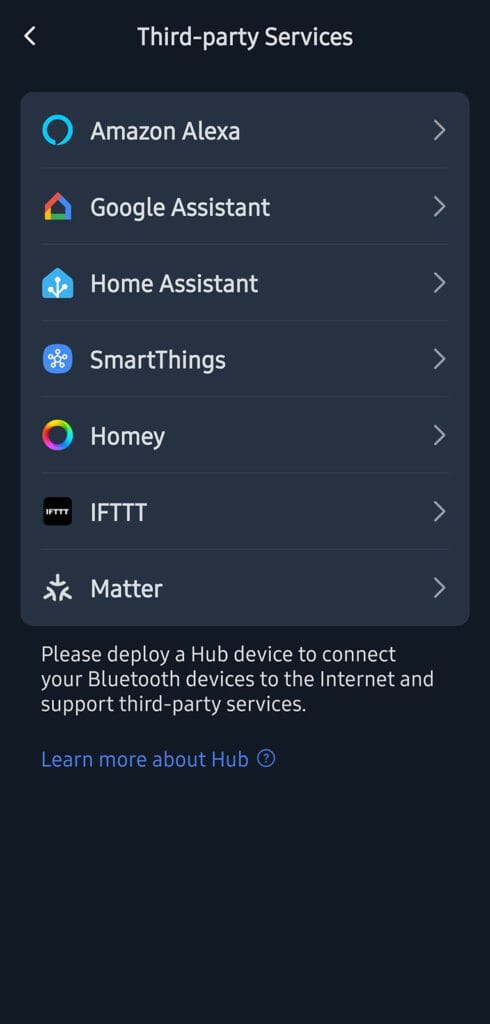
Furthermore, the device supports Matter out of the box. However, since camera support was only recently introduced with Matter 1.5, the video feed itself is not yet available via the Matter standard. Fortunately, the doorbell supports RTSP and ONVIF protocols, which allows it to be used for local streaming within Home Assistant.

In this article, I’m sharing my experience with the SwitchBot Video Doorbell. I’ve had it mounted on my front door for a while now, using and testing it in the app and Home Assistant at the same time. It’s available on Amazon US, Amazon DE, Amazon UK, Amazon NL, as well as the SwitchBot Official Webstore.
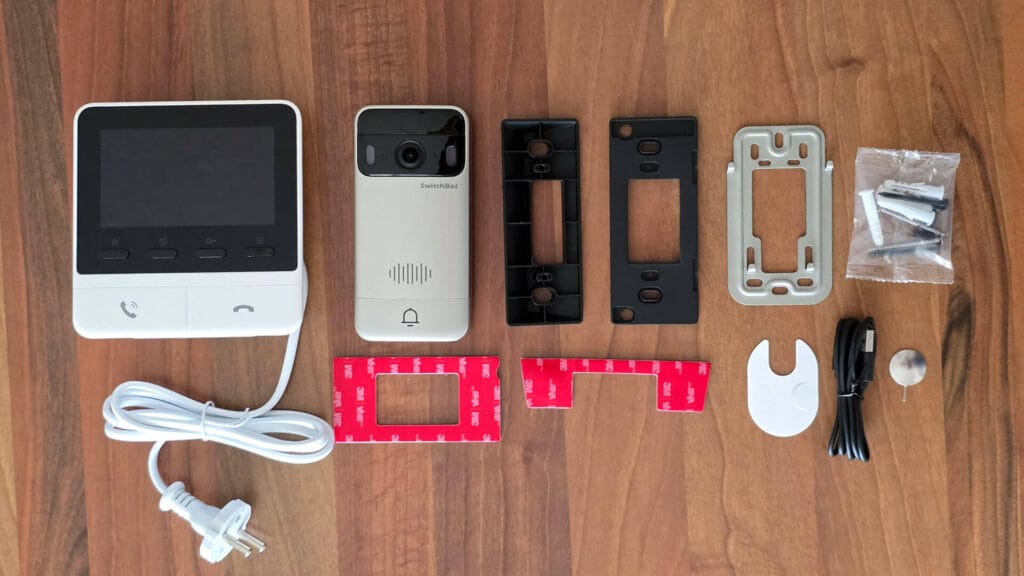
Overview and Package Contents
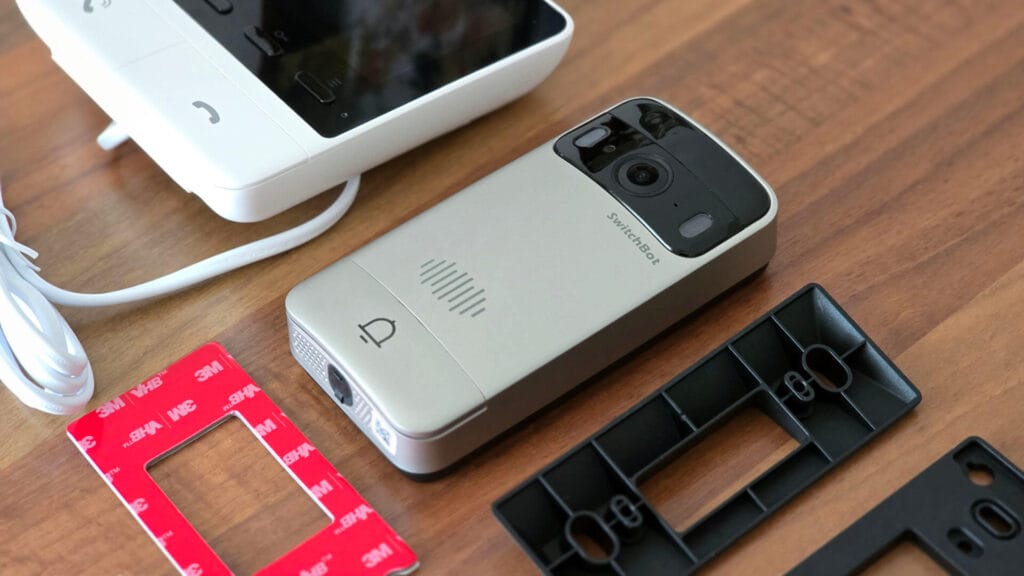
The SwitchBot Video Doorbell ships in a nice, company-branded box containing all necessary components. Inside, you will find the device itself and the video monitor, along with two mounting brackets: one for straight installation and another for angled installation. The package also includes adhesive stickers for screw-free mounting, a charging cable, a resetting pin, screws, dowels, and a user manual. Everything is neatly packaged and well-cushioned for shipping protection.
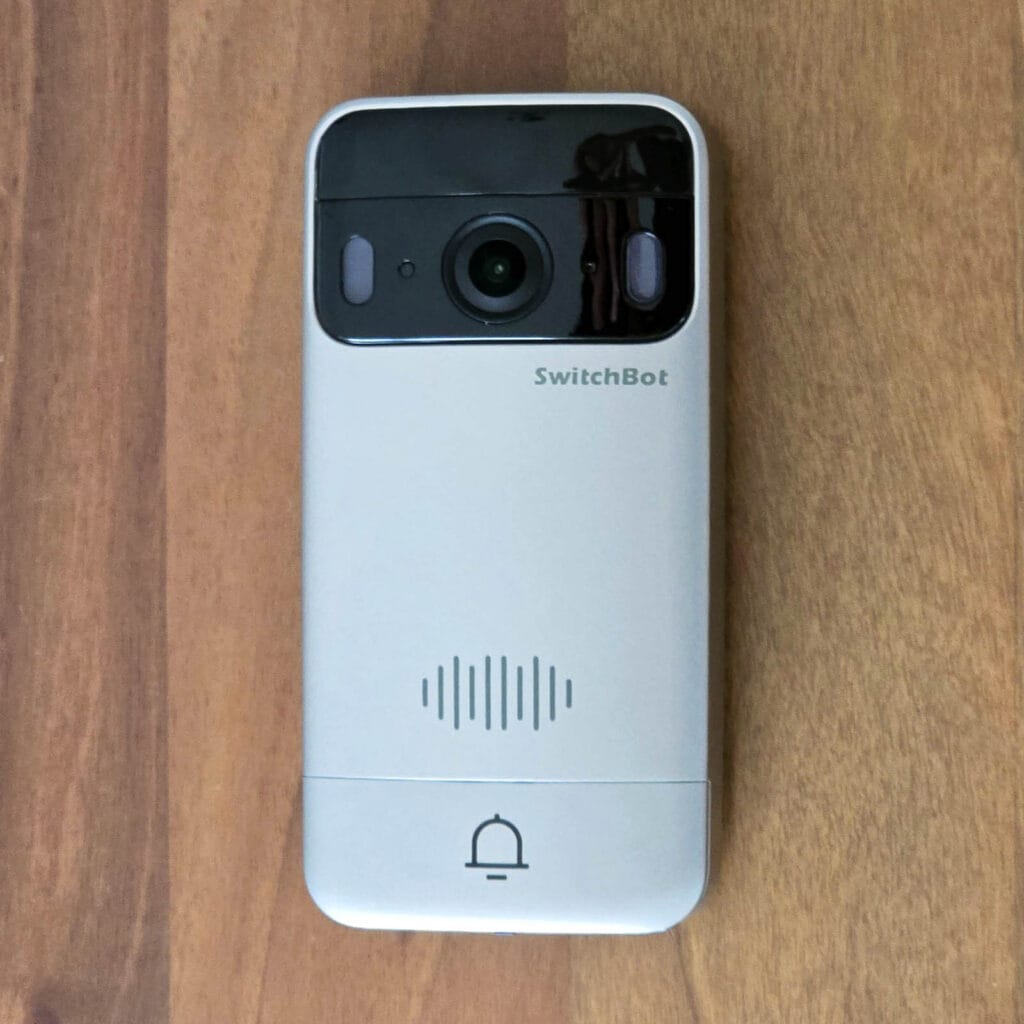
The video doorbell features a button on the bottom that activates the chime on the monitor when pressed. This bell symbol also illuminates when motion is detected or when the button is pressed, ensuring visitors can easily locate the button in the dark. Around the main lens, two LEDs are installed as an alternative to the built-in infrared night vision. These LEDs can turn on automatically when someone approaches, providing a full-color live feed instead of the standard infrared black and white video.
The video doorbell can be charged via a USB-C port located on the bottom. While this port is easy to reach, when the time came to recharge the unit, I decided to take it off the mounting frame and charge it indoors. Be careful, however, not to trigger the anti-tamper alarm when removing it from the frame, as it will sound a siren that can only be stopped using the app.
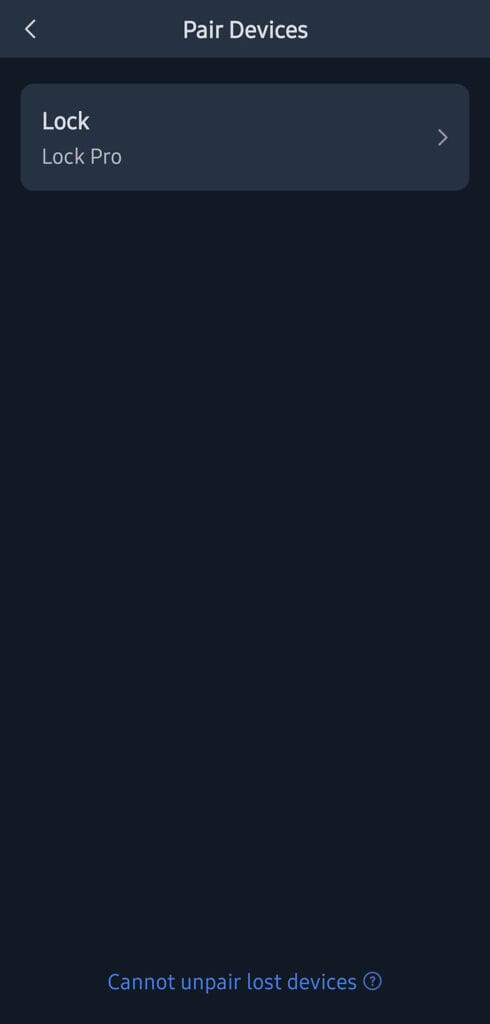
There is also a built-in NFC tag reader in the middle section of the doorbell which can be used to open a paired SwitchBot Lock. For example, you can opt not get a keypad and simply use the video doorbell as an NFC reader key.
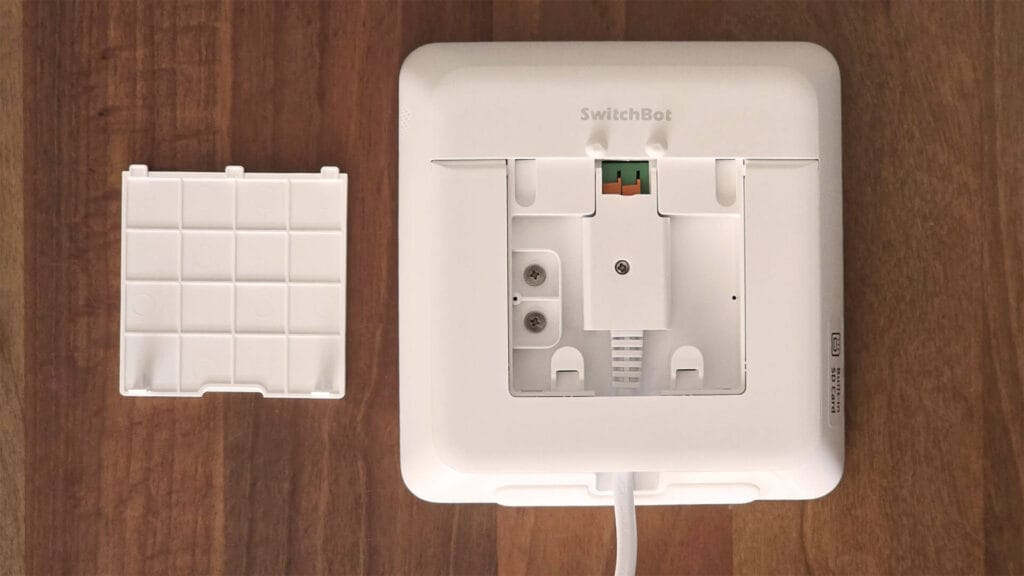
On the backside of the unit, there is a reset button and a main on/off switch that must be flipped on before the doorbell can be used. Similar to other SwitchBot products, such as the Keypad Vision and Keypad Touch, the doorbell slots into place sideways, which simultaneously engages the anti-tamper button.
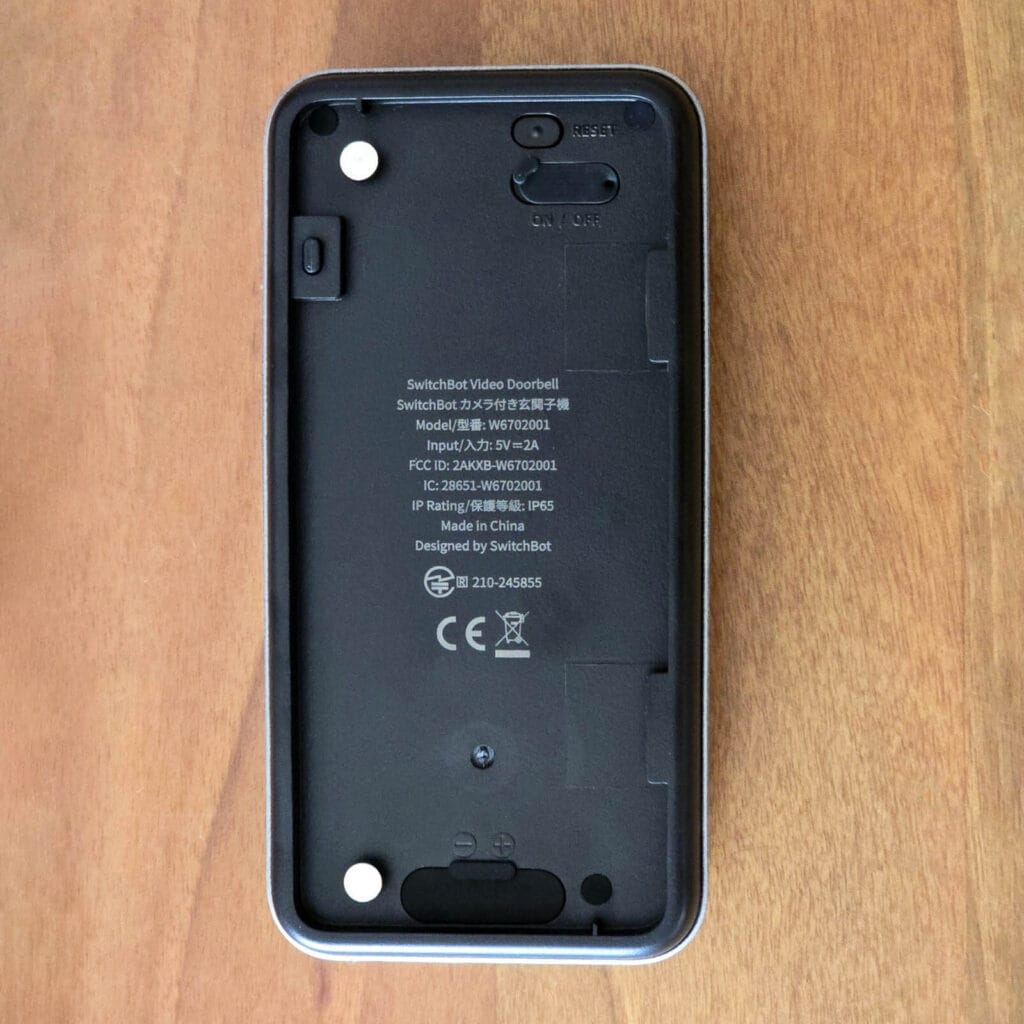
At the very bottom of the unit, there are two screw terminals that allow the doorbell to be powered by existing wiring at 5V2A DC. This is highly convenient for users who already have wiring in place, as it eliminates the need to recharge the doorbell battery.
If you are able to run a wire to the monitor, you can continuously power the doorbell directly via the monitor unit itself. There are two screw terminals on the backside of the monitor, which provide the needed 5V2A to power the doorbell continuously. The monitor itself can be wall-mounted or placed on its legs on a shelf or other flat surface.
SwitchBot Video Doorbell in the App
Pairing the SwitchBot video doorbell to their app is super simple. Once everything is powered on, you simply press “add new device” and it gets discovered immediately. To avoid any confusion, both the monitor and video doorbell show up as a single device in the app. The settings are quite tweakable, I took a few screenshots to show you (footage is blurred for privacy reasons):

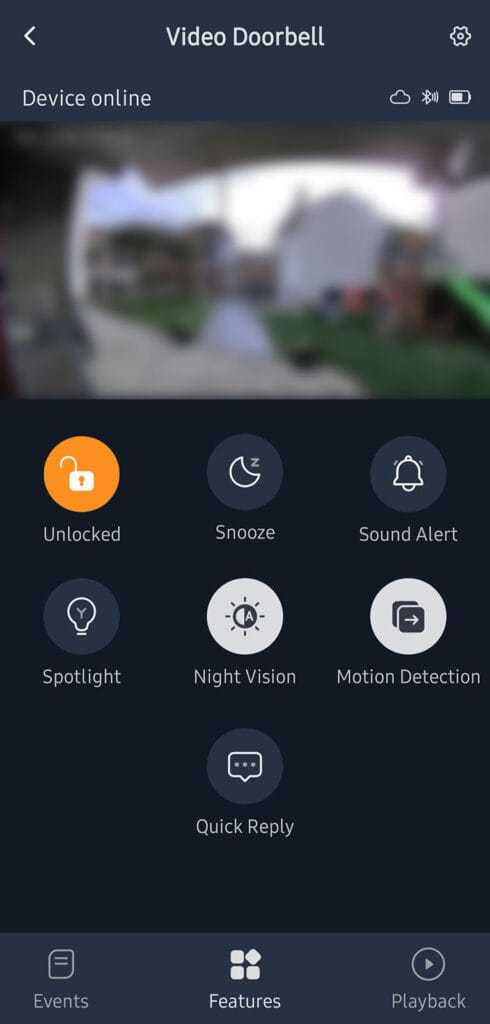


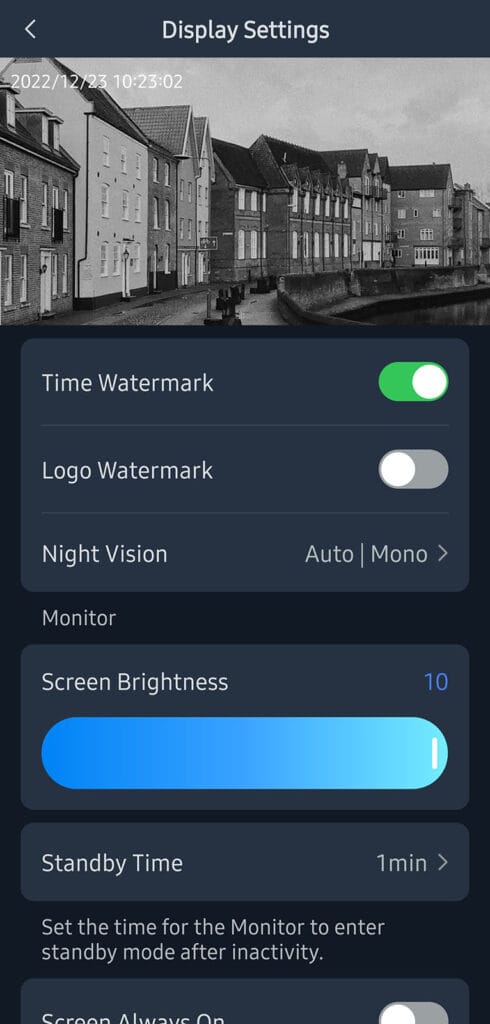
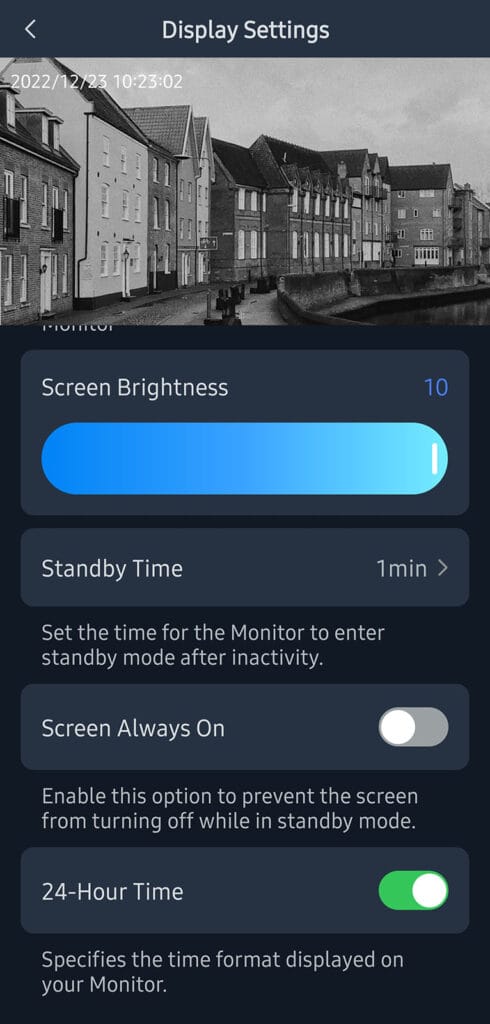

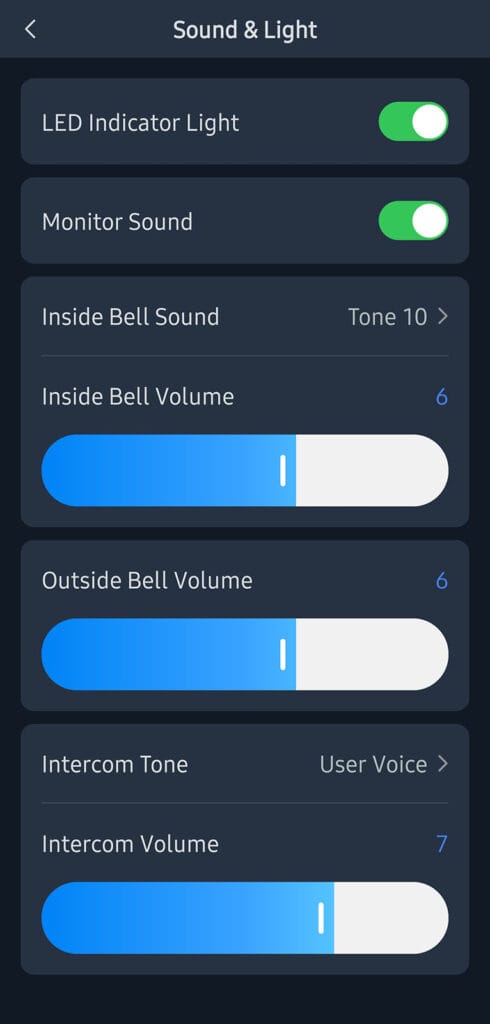
First, you can browse through the events on a clean, chronological timeline. This is a fairly standard design for detection-based recordings, and it works quite well. You can tweak the detection sensitivity in the settings, change the behavior of the LED indicator light, adjust the chime sound and volume, and choose the night vision mode.
I personally dislike having bright LEDs blaring in my face at night, so I decided to sacrifice color footage and use infrared night vision instead. Detection performance is not affected by this setting, and the camera appears to perform the same with either mode enabled. Interestingly, you can also record a custom greeting to be played back to your visitors when the button is pressed, instead of the classic ding-dong sound.
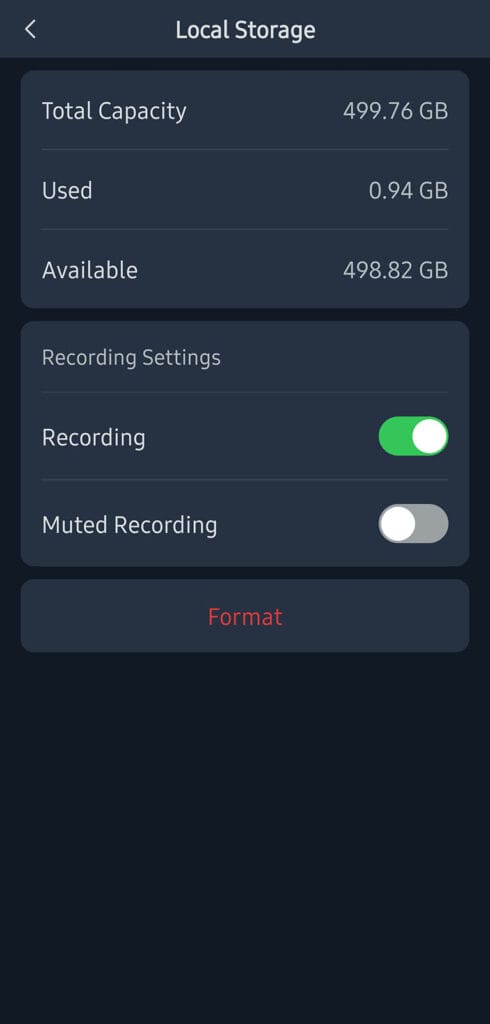
Footage is saved locally onto a microSD card; the doorbell supports cards up to 512GB. This local storage holds all your recordings and snapshots. For testing, I installed an off-brand 512GB card in the doorbell, and it functioned perfectly after formatting it within the app. However, you should use a high-quality SD card for saving recordings and snapshots, as card quality will affect reading speeds.
You can pair the SwitchBot Doorbell to one of SwitchBot’s smart locks and use it to control the lock. For example, you can use the NFC reader to unlock or use the button to lock behind you. Naturally, you can expose the system over Matter to third-party ecosystems as well, though it’s worth noting that Matter camera support has only recently rolled out, and the video feed is not yet transmitted via the Matter standard.
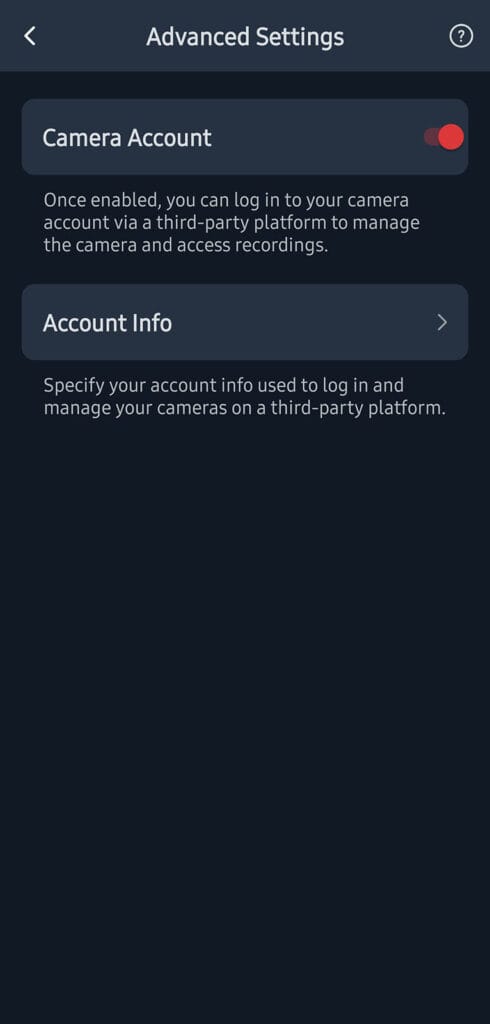
Perhaps the most important feature you will want to enable is called “Camera Account” in the app. This feature is what enables the RTSP/ONVIF stream and allows you to set your own username and password. More on this below.
Home Assistant Integration
Once the Camera Account setting is enabled and you’ve configured the username and password, you can access the RTSP and ONVIF features of the SwitchBot Video Doorbell.
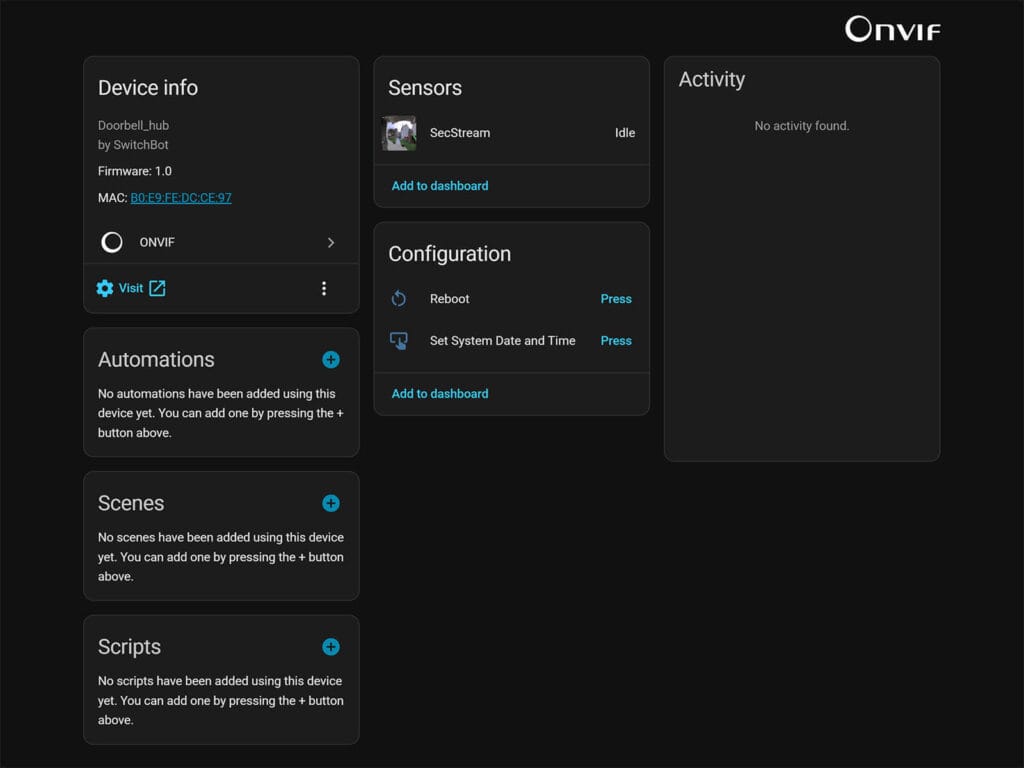
If you add the ONVIF integration, Home Assistant will auto-detect the doorbell on your local network. You simply select it from the list, enter the username and password you created and add it to Home Assistant. If for some reason it does not get auto-detected, you can always input the IP address manually.
If you choose the RTSP integration (Generic Camera), you will need to provide the URL of the stream for the doorbell. Select TCP as a transport protocol, choose digest as an authentication method, enter the camera account credentials and add the stream URL in the following format:
rtsp://192.168.1.100:554/B0E9FE555669/live1IMPORTANT: The stream URL must include the MAC address of the doorbell without colon. If your device MAC is B0:E9:FE:55:56:69, it needs to be set as B0E9FE555669 in the URL. Don’t forget to also replace the IP address with your own and set a static IP in your network router.
Now here’s where things get flaky. The Video Doorbell does not stream live, as it’s constantly sleeping to save battery until it gets woken up by a detection event. However, at the moment, the ONVIF integration does not publish detection events either. So it’s impossible to create an automation that would capture a recording or a snapshot in Home Assistant (or Frigate) based on motion events. I’m told an update is coming, as this is firmware 1.0, but for now, you cannot reliably use the SwitchBot Video Doorbell in Home Assistant.
Final Thoughts
I have had the SwitchBot Video Doorbell installed in my home for almost a month now. It works well, reliably detects motion events, and seamlessly feeds the stream to the monitor for local viewing. While this doorbell and monitor combination is not a new concept, it executes nicely and introduces some interesting features, such as the ability to lock the front door using a button on the monitor.
However, note that at the moment, you cannot use this video doorbell reliably with Home Assistant. Since the device does not publish motion events via ONVIF or Matter, there is currently no way for Home Assistant to capture a screenshot or recording when such an event occurs. You can still view the live feed when a person is present, but Home Assistant cannot notify you because it is unable to detect or receive the underlying motion data.
Ultimately, the SwitchBot Video Doorbell is an nice doorbell and monitor combo that does everything you would expect a device of this type to do. Since SwitchBot is an official Home Assistant partner now, I fully expect a firmware update to add the ONVIF/Matter missing features so that we can use the video doorbell fully in HA. If you have a use case for it, here’s where you can get it:

Also on: Amazon NL, Amazon UK, and SwitchBot’s Official Webstore


Can this operate locally? For example with the app connecting over a LAN or VPN with no internet connection?