This is a simple DIY project I wanted to share all winter but never found the time to write up. My pellet boiler is in the basement. Every time I wanted to know how much fuel was left, I had to walk downstairs and physically check the hopper. No gauge, no indicator, nothing. I got tired of it, so I built one.
This guide walks you through building a simple DIY pellet level monitor using an ESP32 board and an HC-SR04 ultrasonic sensor, flashed with ESPHome and integrated into Home Assistant. It sits on the lid of your pellet hopper, measures the distance to the pellet surface, and reports back two clean sensors: pellets remaining in kilograms and as a percentage. Now I check it from my phone without leaving the couch.
The build costs under €15 and takes about an hour from start to finish.
How the Pellet Level Monitor Works
The HC-SR04 is an ultrasonic distance sensor. It fires a short sound pulse and measures how long it takes to bounce back. From that timing, it calculates the distance to whatever is in front of it.
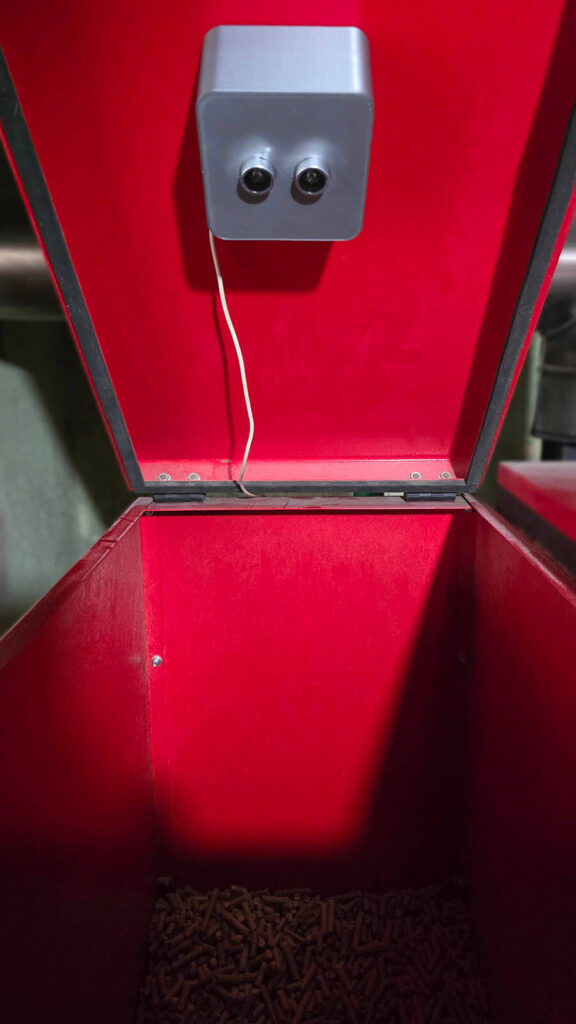
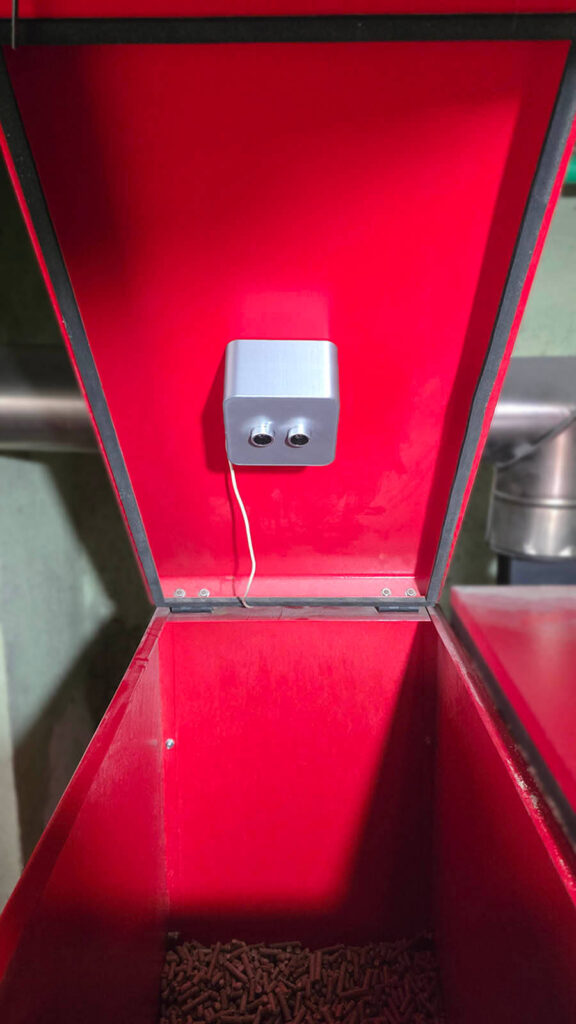
Mounted on the lid of a pellet hopper, the sensor points straight down at the pellet surface. When the hopper is full, the pellets are close to the sensor and the distance reading is small. As pellets are consumed, the surface drops further away and the distance increases. The ESP32 runs ESPHome firmware, which reads the raw distance from the sensor, filters out noise with a median filter, and converts the result into two useful values using simple math.
My particular stove is the Thermoflux Pelling 35, which has a maximum hopper depth of about 100 cm. At 0 cm, the hopper is full (95 kg). At 100 cm, it is empty. Everything in between maps linearly to a kilogram and percentage value, which are then pushed to Home Assistant via the ESPHome API.
What You Need
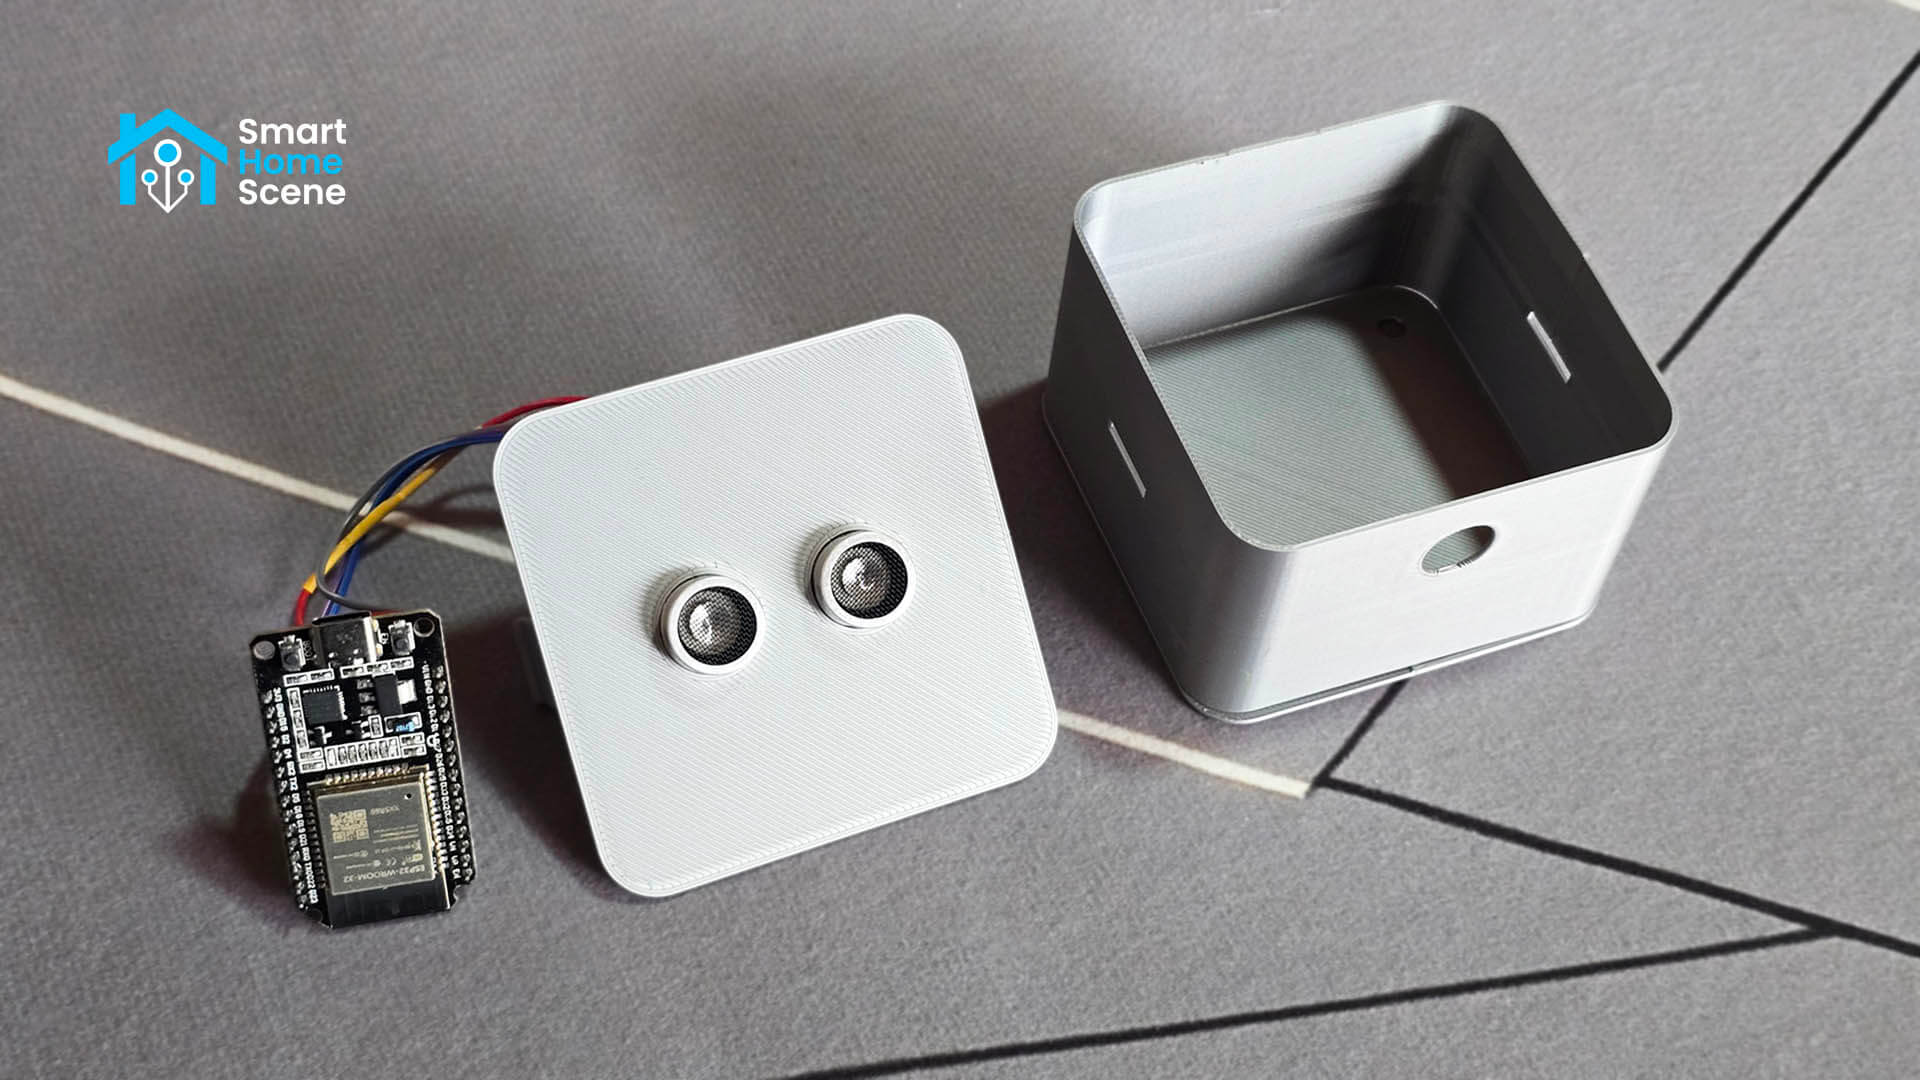
To build this project you need the following components:
- ESP32 Board [Amazon, AliExpress]
- HC-SR04 Ultrasonic Distance Sensor [Amazon, AliExpress]
- Dupont Jumper Wires [Amazon, AliExpress]
- 3D Printed Enclosure for mounting [I used this]
- USB cable for flashing
The total cost is well under €15 sourced from AliExpress, or slightly more from Amazon if you want faster shipping. If you are new to ESP32 projects and ESPHome, check out some of the other DIY ESPHome guides on SmartHomeScene to get familiar with the workflow before starting.
Wiring the HC-SR04 to the ESP32
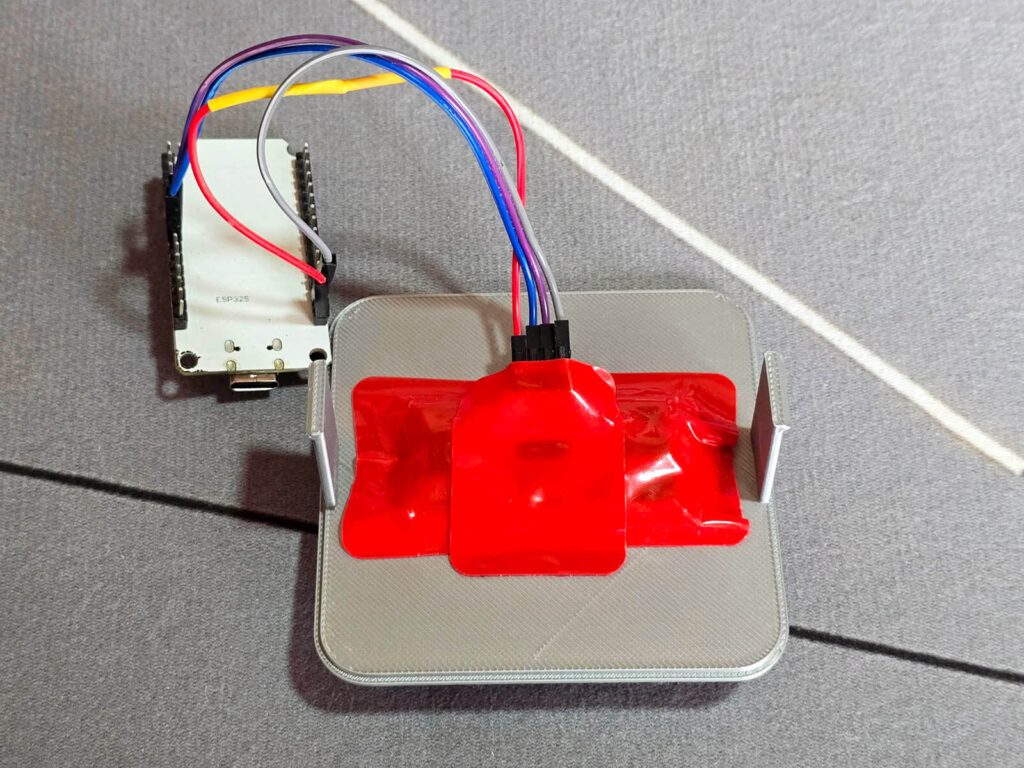
The HC-SR04 has four pins. Depending on the board you use, you can connect them in several ways. For example, here is how to connect them to a generic ESP32-WROOM-32 board:
| HC-SR04 Pin | ESP32 Pin |
|---|---|
| VCC | 5V (VIN) |
| GND | GND |
| TRIG | GPIO5 |
| ECHO | GPIO18 |
I used Dupont connectors to connect the sensor to the board, which makes it easy to swap components without soldering. Everything sits inside a 3D printed case which mounts on the hopper lid and keeps the sensor aimed straight down at the pellets.
ESPHome Configuration and Flashing
If you already have ESPHome set up in Home Assistant, create a new device and paste the configuration below. If you are starting from scratch, the ESPHome add-on can be installed directly from the Home Assistant app store.
Replace the API key, OTA password, and Wi-Fi fallback hotspot password with your own generated values. The Wi-Fi credentials are pulled from your ESPHome secrets file.
esphome:
  name: ultrasonic-distance-sensor
  friendly_name: Ultrasonic Distance Sensor

esp32:
  board: esp32dev
  framework:
    type: esp-idf

logger:
api:
  encryption:
    key: "/Akz0CRpygbXXXX"

ota:
  - platform: esphome
    password: "017c856914XXXX"

wifi:
  ssid: !secret wifi_ssid
  password: !secret wifi_password
  ap:
    ssid: "Ultrasonic-Distance-Sensor"
    password: "lsWUXXXX"

captive_portal:

sensor:
  - platform: ultrasonic
    trigger_pin: GPIO5
    echo_pin: GPIO18
    id: ultrasonic_raw
    internal: true
    update_interval: 10s
    filters:
      - median:
          window_size: 5
          send_every: 5
          send_first_at: 1
      - multiply: 100
      - clamp:
          min_value: 0
          max_value: 100
    on_value:
      then:
        - sensor.template.publish:
            id: pellets_kg
            state: !lambda 'return (1.0 - (x / 100.0)) * 95.0;'
        - sensor.template.publish:
            id: pellets_pct
            state: !lambda 'return (1.0 - (x / 100.0)) * 100.0;'

  - platform: template
    name: "Pellets Remaining"
    id: pellets_kg
    unit_of_measurement: "kg"
    device_class: weight
    state_class: measurement
    accuracy_decimals: 1

  - platform: template
    name: "Pellets Remaining %"
    id: pellets_pct
    unit_of_measurement: "%"
    state_class: measurement
    accuracy_decimals: 0
A few things worth noting about this configuration:
The raw ultrasonic sensor is set to internal: true, which means it never appears in Home Assistant. Only the two calculated sensors are exposed. The median filter collects five readings before publishing, which smooths out noise caused by the uneven surface of the pellet pile. The on_value trigger then fires immediately on the first valid reading and on every subsequent update, pushing the calculated values to the template sensors via sensor.template.publish. This is the correct way to link template sensors to a hardware sensor in ESPHome.
Adding the Sensor to Home Assistant
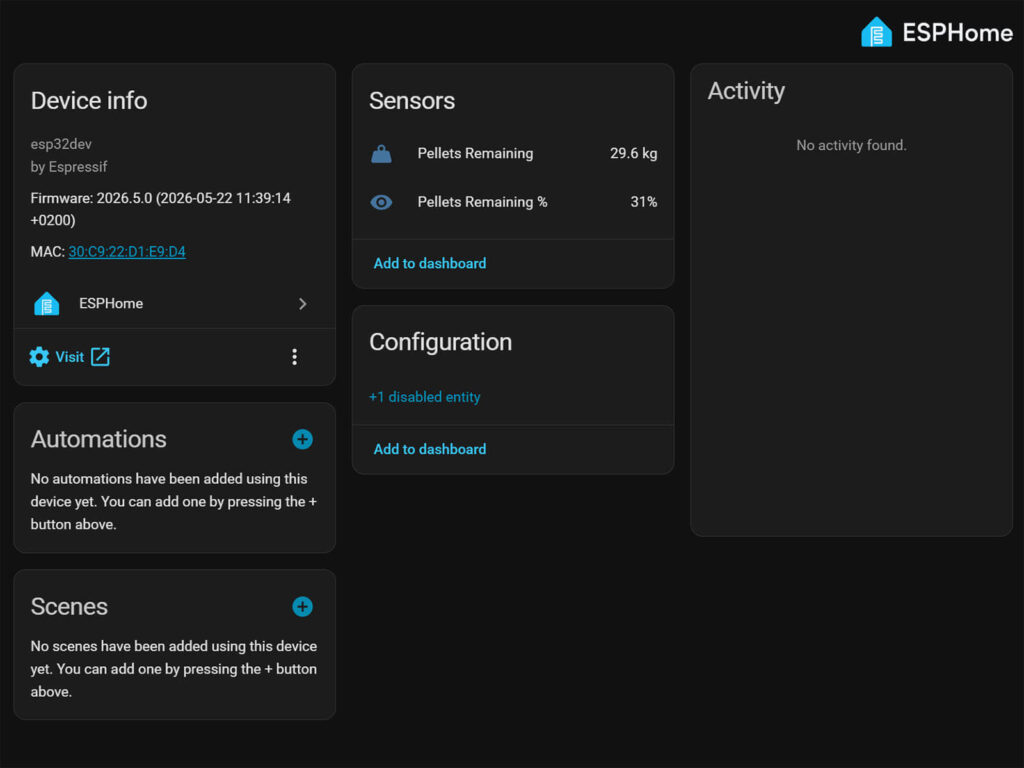
Once you flash the configuration and the device boots up, Home Assistant will automatically discover it through the ESPHome integration. You will receive a notification to add the new device. Accept it, enter the encryption key from your configuration if prompted, and the device is ready.
Two entities will appear under the device:
- Pellets Remaining (in kg)
- Pellets Remaining %
Both update roughly every 50 seconds, which is more than enough for a fuel level sensor. You can add them to any dashboard, use them in automations to send a low pellet alert, or simply check them on your phone whenever you need to know if it is time to order another bag.
Adapting for Your Own Pellet Stove
This configuration is built around a specific hopper with a 100 cm usable depth and a 95 kg maximum load. If your setup is different, two values need to change.
- Maximum depth is the distance from the sensor mounting point on the lid to the empty bottom of the hopper, measured in centimeters. Replace
100.0in both lambda expressions and in theclampfilter with your measured value. - Maximum weight is the total kg your hopper holds when full. Replace
95.0in both lambda expressions with your value.
For example, if your hopper is 80 cm deep and holds 70 kg when full:
state: !lambda 'return (1.0 - (x / 80.0)) * 70.0;'


- clamp:
    min_value: 0
    max_value: 80
For basic pellet monitoring, that is all that needs to change. The rest of the configuration works for any rectangular hopper regardless of brand or model. If you build this for a different stove, feel free to share your measurements in the comments.
What about irregular hopper shapes?
Many pellet hoppers are not perfectly rectangular. The Thermoflux Pelling 35 used in this guide, for example, has a rectangular upper section that tapers into a pyramid-shaped funnel at the bottom. In that case, the volume per centimeter of depth is different in the two zones, and a simple linear calculation will be slightly off in the lower portion of the hopper.
You can account for this by splitting the lambda into two zones: one linear calculation for the upper section, and a truncated pyramid formula for the tapered lower section. It is more accurate, but also more complex to set up.
Honestly, for most practical purposes you do not need it. If you just want to know whether you have enough pellets to last the day, a simple linear scale is more than sufficient. The readings will be slightly optimistic when the hopper is nearly empty, but that is exactly the moment you are already thinking about refilling anyway.
For more DIY sensor builds with ESPHome and ESP32, check out the waterproof double probe temperature sensor guide and DIY Capacitive Soil Moisture Sensor v1.2 for more examples of the same workflow applied to different sensors.


