About Waveshare E-Paper Displays
Waveshare is a company specializing in the design and manufacturing of electronic components, including development boards, displays, and sensors, for use in areas such as IoT, robotics, and education. If you’ve ever encountered beautiful, large e-paper (e-ink) displays used with ESPHome and Home Assistant, chances are they were made by Waveshare.
Unlike LED or LCD panels, e-paper displays typically feature only several colors or come only in black and white. This is because their underlying technology, primarily electrophoretic displays (EPDs), relies on the physical movement of charged pigment particles to form an image.
In simpler words, it’s like tiny specks of colored dust are physically moved around to create what you see, rather than lights turning on or off. This physical movement is much harder to do with many different colors quickly and vibrantly.
In this article, I am sharing my experience with Waveshare e-Paper displays and ESPHome. My goal is to clear up the confusion of which models work with ESPHome, what features and colors are supported and perhaps give you some ideas for use cases.
Waveshare and ESPHome Compatibility
Waveshare produces a very wide range of e-paper displays, which can quickly become overwhelming when considering Home Assistant and ESPHome compatibility. This is further complicated by variations of the same panels, making the process of figuring things out even more difficult.
To remedy this to an extent, I’ve dug deep into the niche forums and discussion groups to identify which models are officially supported, partially supported, and unsupported. Additionally, because Waveshare offers a very convenient ESP32 e-Paper driver board, I’ve noted which panels are directly compatible with it without needing extra drivers or breakout boards.
| Model (ePaper) | Device Size Display Size (mm) | Colors Resolution1 | Refresh Rate | Partial Refresh | Driver Board Compatibility2 | ESPHome Model3 | Price (USD) |
|---|---|---|---|---|---|---|---|
 1.54″ ePaper 12561 | 37.32×31.80×1.05 27.60×27.60 | BW 200×200 | 2sec | 0.3sec | ESP32 ESP8266 | 1.54in1.54inv24 | Amazon US Amazon DE AliExpress |
 1.54″ ePaper (B) 13275 | 31.8×37.32×1.05 27.60×27.60 | BWR 200×200 | 14sec | X | ESP32 ESP8266 | 1.54inv2-b | Amazon US Amazon DE AliExpress |
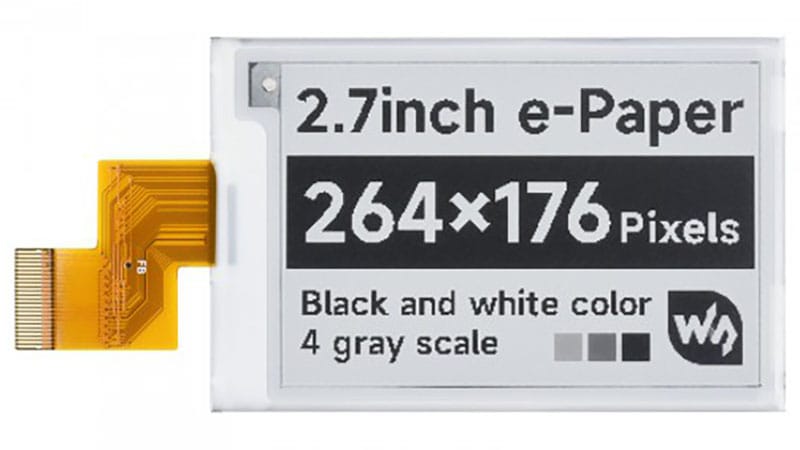 2.70″ ePaper 13378 | 70.42×45.8×0.98 57.29×38.20 | BW 264×176 | 6sec | 0.3sec | ESP32 ESP8266 | 2.70inv2 | Amazon US Amazon DE AliExpress |
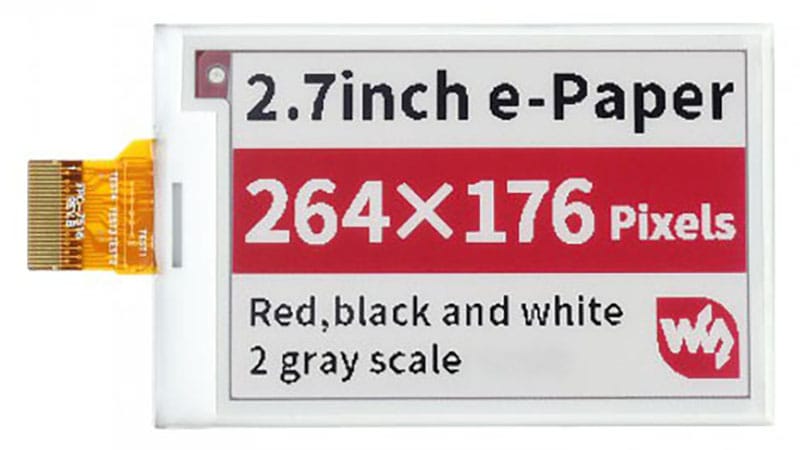 2.70″ ePaper (B) 13185 | 70.42×45.8×0.98 57.29×38.20 | BWR 264×176 | 15sec | X | ESP32 ESP8266 | 2.70in-b2.70in-bv25 | N/A |
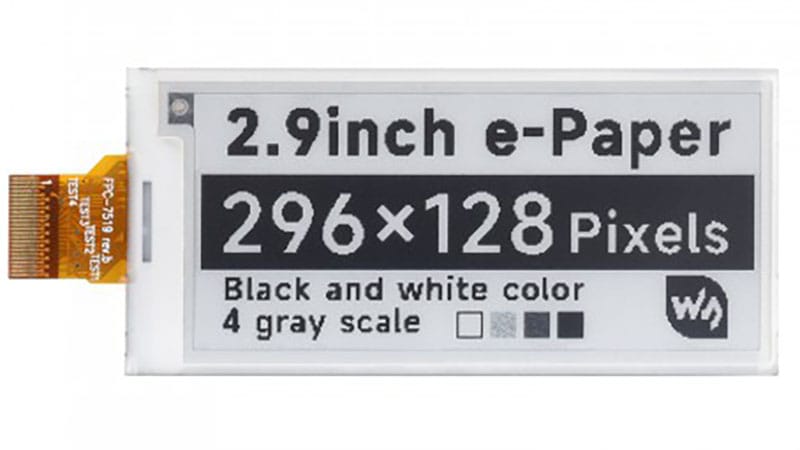 2.90″ ePaper 12563 | 79.00×36.70×1.05 66.89×29.05 | BW 296×128 | 3sec | 0.6sec | ESP32 ESP8266 | 2.90in2.90in-dke2.90inv262.90inv2-r27 | Amazon US Amazon DE AliExpress |
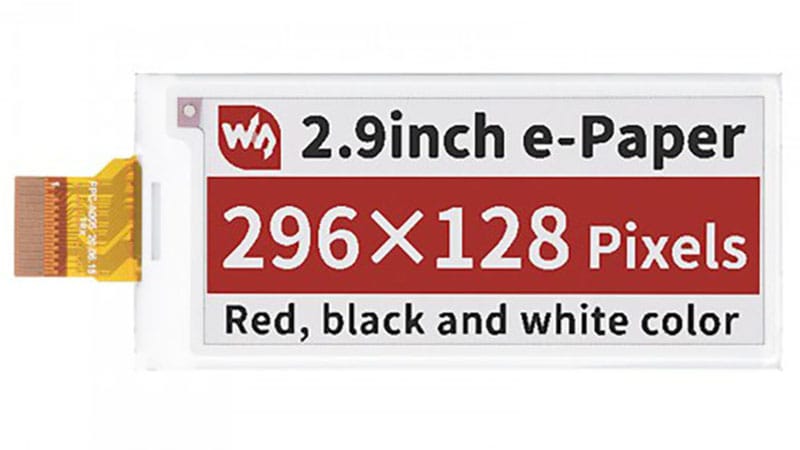 2.90″ ePaper (B) 13276 | 79.00×36.70×1.20 66.90×29.06 | BWR 296×128 | 14sec | 1.8sec | ESP32 ESP8266 | 2.90in-b82.90in-bV39 | Amazon US Amazon DE AliExpress |
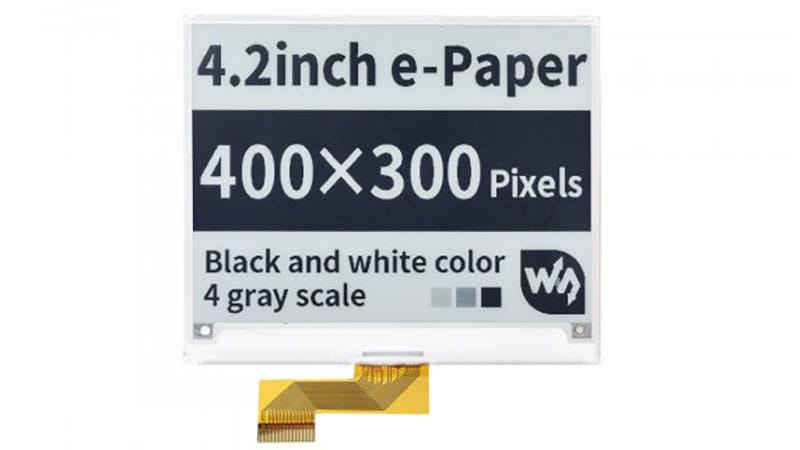 4.20″ ePaper 13186 | 91.00×77.00×1.18 84.80×63.60 | BW 400×300 | 5sec | 1.5sec | ESP32 ESP8266 | 4.20in | Amazon US Amazon DE AliExpress |
 4.20″ ePaper (B) 13379 | 91.00×77.00×1.05 84.80×63.60 | BWR 400×300 | 15sec | X | ESP32 ESP8266 | 4.20in-bV2104.20in-bV2-bwr11 | Amazon US Amazon DE AliExpress |
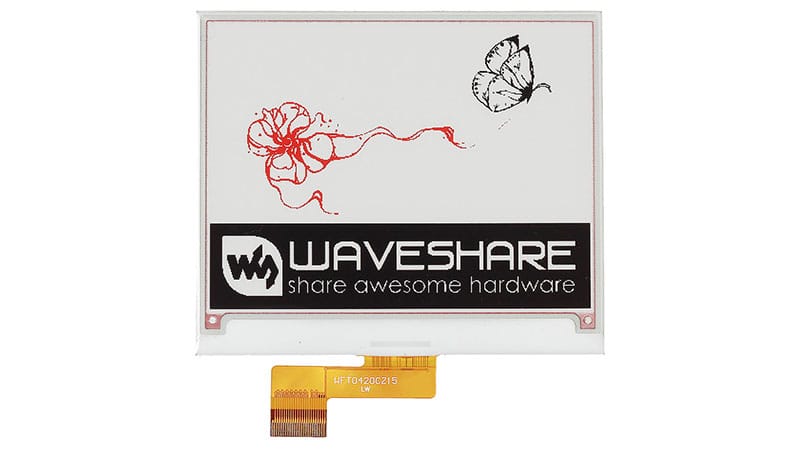
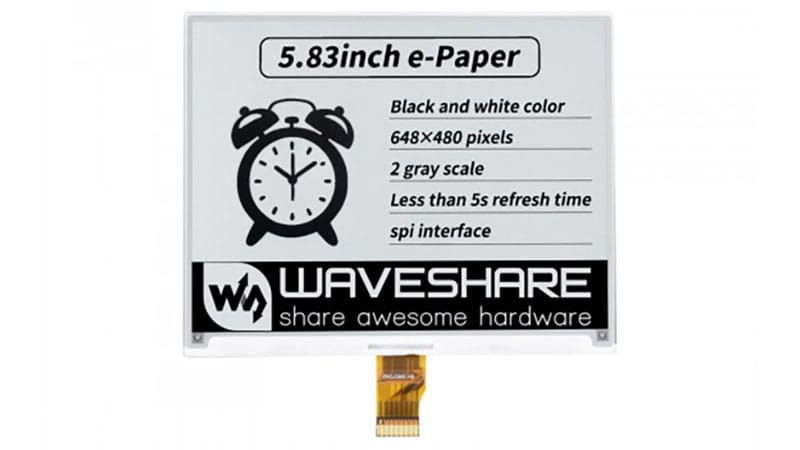 5.83″ ePaper 14410 | 125.40×99.50×1.18 119.23×88.32 | BW 640×480 | 5sec | X | ESP32 ESP8266 | 5.83in5.83inv212 | Amazon US Amazon DE AliExpress |
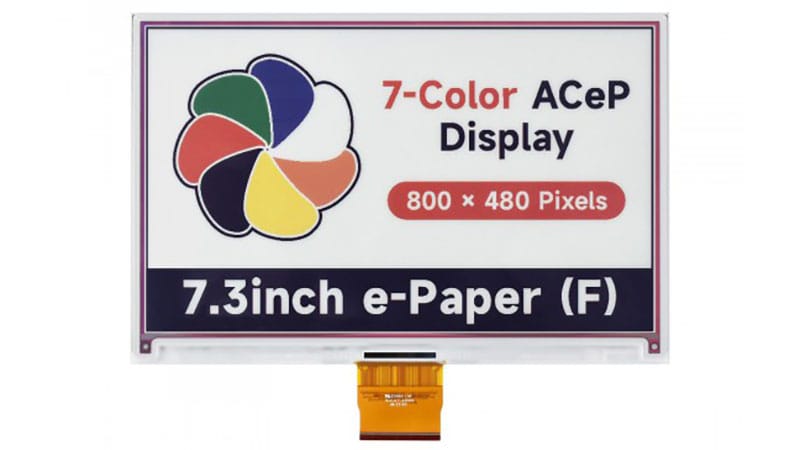 7.30″ ePaper (F) 23434 | 170.20×111.20×0.91 160.00×96.00 | BWRYBGO 800×480 | 35sec | X | X X | 7.30in-f13 | Amazon US Amazon DE AliExpress |
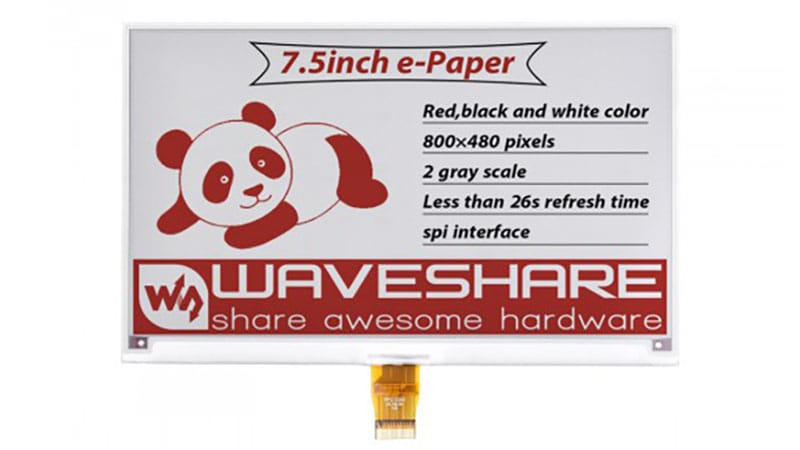
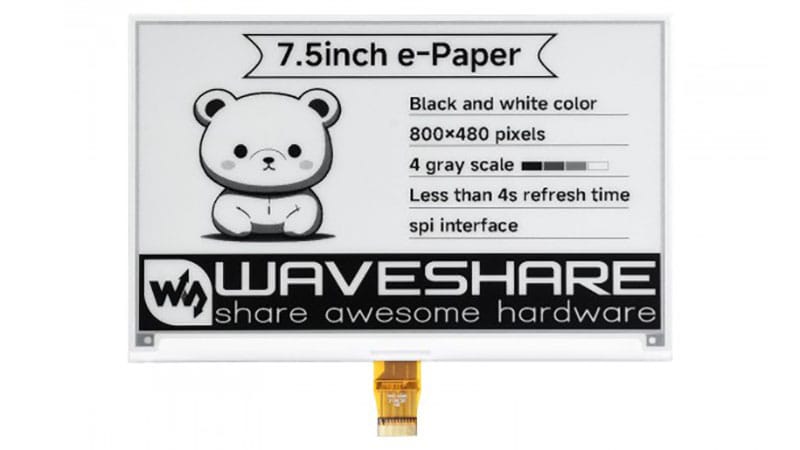 7.50″ ePaper 13187 | 170.20×111.20×0.98 163.20×97.92 | BW 800×480 | 4sec | 0.4sec | ESP32 X | 7.50in7.50inV2147.50inV2alt157.50inV2p16 | Amazon US Amazon DE AliExpress |
 7.50″ ePaper (B) 13380 | 170.20×111.20×1.18 163.20×97.92 | BWR 800×480 | 26sec | 1.5sec | ESP32 X | 7.50in-bV2177.50in-bV3187.50in-bV3-bwr197.50in-bc20 | Amazon US Amazon DE AliExpress |
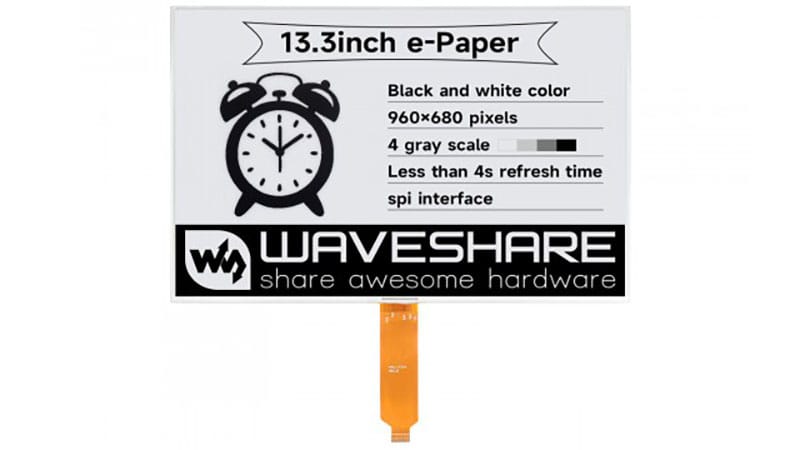 13.3″ ePaper (K) 25725 | 286.32×212.26×1.20 275.52×195.16 | BW 960×680 | 5sec | 0.7sec | ESP32 ESP8266 | 13.3in-k21 | Amazon US Amazon DE AliExpress |
2 – Compatibility with Waveshare ESP32 Driver Board (15823) or ESP8266 Driver Board (14138) in relation to ESPHome
3 – ESPHome model configuration variable. Some displays have more than one possible configuration model.
4 – For version 2 of the 1.54″ e-Paper Display
5 – For version 2 of the 2.70″ e-Paper (B) Display
6 – For version 2 of the 2.90″ e-Paper Display
7 – For version 2 of the 2.90″ e-Paper Display. Different initialization and full/partial display refresh rate support.
8 – For version 2 of the 2.90″ (B) e-Paper Display, but only supports B/W rendering.
9 – For version 3 of the 2.90″ (B) e-Paper Display, but only supports B/W rendering.
10 – For version 2 of the 4.20″ (B) e-Paper Display, but only supports B/W rendering.
11 – For version 2 of the 4.20″ (B) e-Paper Display, supports B/W/R rendering.
12 – For version 2 of the 5.83″ e-Paper Display
13 – Full support for 7.3″ 7-color display 23434
14 – For version 2 of the 7.50″ e-Paper Display. Can’t be used with ESP8266.
15 – Alternate model for version 2 of the 7.50″ e-Paper Display. Can’t be used with ESP8266.
16 – For version 2 of the 7.50″ e-Paper Display, with partial and fast refresh support.
17 – For version 2 and 3 of the 7.50″ (B) e-Paper Display, but only supports B/W rendering.
18 – For version 3 of the 7.50″ (B) e-Paper Display, but only supports B/W rendering.
19 – For version 3 of the 7.50″ (B) e-Paper Display, supports B/W/R rendering.
20 – For 7.50″ (B) e-Paper displays with (C) sticker on the back, black and white rendering only.
21 – For version (K) of the 13.3″ e-Paper Display, but only supports B/W rendering.
When choosing an e-ink display, your first decision is the desired color capability. More colors typically mean slower refresh times. While some screens offer partial refresh to mitigate this, it’s a feature that doesn’t always perform reliably and adds to the full refresh time of the screen.
The next decision you’ll make is the display size. For small e-paper displays acting as single-device status boards in your smart home, a 1.5-3″ screen will suffice. However, if you plan to showcase full dashboards with multiple data sensors, you should consider screens ranging from 4-13.3″.
Finally, you’ll need to account for the price of Waveshare e-paper displays. As e-paper screens are quite costly, expenses can quickly add up, especially if you’re deploying several large units with their associated driver boards. Naturally, this is very individual thing and beyond the scope of this guide.
Waveshare ESP32 and ESP8266 Driver Boards
All Waveshare e-paper screens, with the exception of the 7.3″ 7-color model, are compatible with the official Waveshare ESP32 Driver Board. While some models also work with the ESP8266 version, I highly recommend getting the ESP32 version, as it’s similar in price, yet has superior performance.
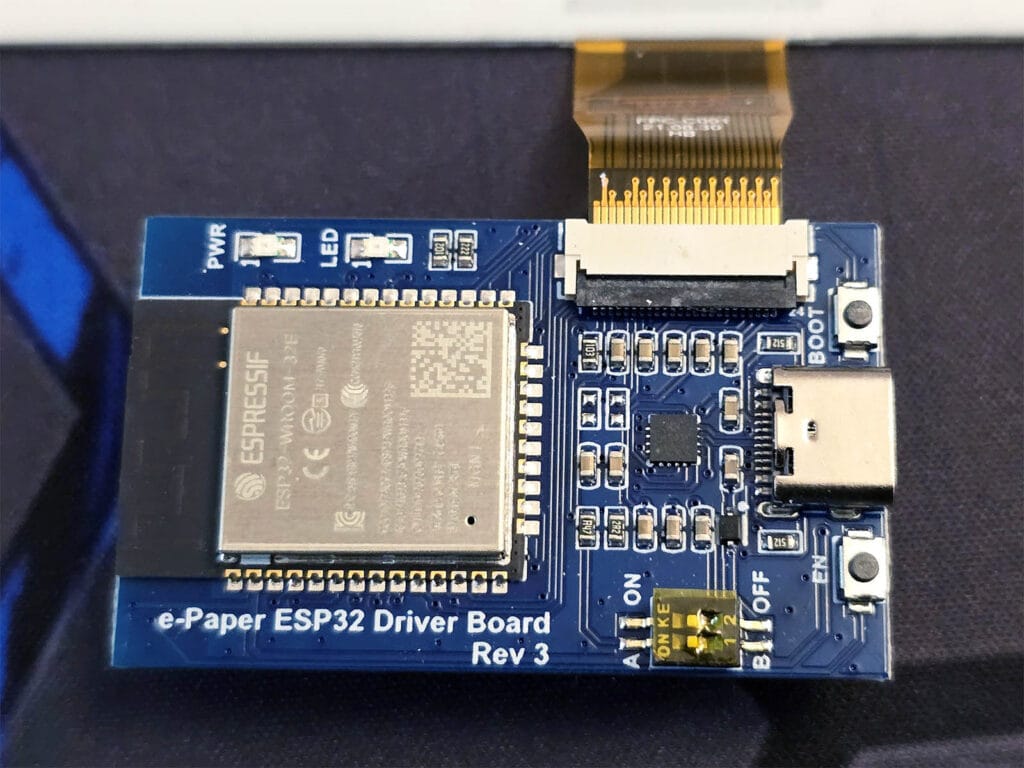
Using these driver boards makes installation virtually plug-and-play: just connect the display’s flat cable to the board, and it’s ready for flashing. Whichever display you choose to use with the official driver boards, it will always have the following PIN configuration:
| PIN | ESP32 | ESP8266 | Description |
|---|---|---|---|
| VCC | 3V3 | VCC | Power input (3.3V) |
| GND | GND | GND | Ground |
| DIN | GPIO14 (P14) | GPIO13 (D7) | SPI MOSI, data input |
| SCK | GPIO13 (P13) | GPIO14 (D5) | SPI CLK, clock signal input |
| CS | GPIO15 (P15) | GPIO15 (D8) | Chip selection, low active |
| DC | GPIO27 (P27) | GPIO4 (D2) | Data/command, low for commands, high for data |
| RST | GPIO26 (P26) | GPIO2 (D4) | Reset, low active |
| BUSY | GPIO25 (P25) | GPIO5 (D1) | Bust status output pin (busy) |
The next thing you need to figure out is setting the proper resistor configuration of the board. Both models have a small switch that you need to flick to the correct position according to your e-paper screen model. On both boards, this can be either A or B, which correspond to the following Waveshare e-Paper displays:
| Mode | ESP32 | ESP8266 |
|---|---|---|
| A – Mode | 1.54inch e-Paper 1.54inch e-Paper (B) 2.9inch e-Paper 2.9inch e-Paper (B) 4.2inch e-Paper 4.2inch e-Paper (B) 13.3inch e-Paper (K) | 1.54inch e-Paper 2.9inch e-Paper |
| B – Mode | 2.7inch e-Paper 2.7inch e-Paper (B) 5.83inch e-Paper 7.5inch e-Paper 7.5inch e-Paper (B) | 1.54inch e-Paper (B) 2.7inch e-Paper 2.7inch e-Paper (B) 2.9inch e-Paper (B) 4.2inch e-Paper 4.2inch e-Paper (B) 7.5inch e-Paper 7.5inch e-Paper(b) |
Getting started with Waveshare and ESPHome
To get started with Waveshare and ESPHome, you simply need to plug the flat cable of the e-paper display to the ESP driver board. In my example, I am using the Waveshare ESP32 E-Paper Driver Board and a Waveshare 7.50″ ePaper (B) Tri-color display. Further, I am using the default ESPHome Display Component for this model, as I found LVGL causes more issues than it solves and development is not there yet.
The ESP32 Board is initialized just like any other ESP board in ESPHome, with the basic configuration remaining the same. The core functionality involves defining the waveshare_epaper component and spi connection, before anything can be rendered on screen. For example:
esphome:
  name: waveshare
  friendly_name: waveshare
.....
spi:
  clk_pin: GPIO13
  mosi_pin: GPIO14
display:
  - platform: waveshare_epaper
    id: waveshare
    model: 7.50in-bV3-bwr #Version 3 of the 7.50" (B) e-Paper Display, supports B/W/R rendering.
    cs_pin:
      number: GPIO15
      ignore_strapping_warning: True
    dc_pin: GPIO27
    busy_pin:
      number: GPIO25
      inverted: true
    reset_pin: GPIO26
    lambda: |-
.....
On this board, GPIO15 is a strapping pin. These pins are read by the chip during a power-on reset to configure its initial operation, such as enabling bootstrap (flashing) mode or setting the operating voltage. By adding ignore_strapping_warning: true, I am telling ESPHome to ignore the warning.
Further, the Busy PIN on the Waveshare 7.30in-f, Waveshare 7.50inV2 and V3 models must be inverted to prevent permanent display damage. Do not forget to set this parameter, otherwise you might experience issues and cause screen damage!
Defining Colors
The next step is to define colors in the ESPHome configuration. These need to have a unique ID, which will be called upon in the lambda function to render components on the screen. You can define them in HEX or RGB, check out the ESPHome display colors documentation. For my particular tri-color display:
color:
  - id: color_black
    red: 100%
    green: 100%
    blue: 100%
    white: 100%
  - id: color_red
    red: 100%
    green: 0%
    blue: 0%
    white: 0%
You will notice the background color, which is white, is not defined. This is because there is no need to define and use it, the screen fills everything with white when there is no color set in the lambda.
Adding Fonts
The next step is to add some fonts which ESPHome can use to render text and sensor data on the display. ESPHome has a very capable and versatile Font Renderer Component, which allows multiple fonts to be used from a variety of sources. You can even upload and host them locally. For example:
font:
  - file:
      type: gfonts
      family: Source Code Pro
      weight: 700
    id: font_roboto
    size: 26
  - file: "gfonts://Roboto"
    id: roboto_20
    size: 20
Adding Icons
If you are looking to create a rich dashboard with material design icons, the simplest way is to add and define each icon manually as an image. You need to define the type, which can be either binary, grayscale, rgb or rgb565 and set an icon size. The downside of this approach is that you cannot change the color and size in the lambda, which means you would need to add the same icon several times if you intend to use it in a different color or dimension. For example:
image:
  - file: mdi:alert-outline
    type: binary
    id: alert
    resize: 80x80
.....

# TO RENDER
display:
  - platform: waveshare_epaper
    id: waveshare
.....
    lambda: |-
      it.image(400, 200, id(alert));
Alternatively, you can load the material design icons font file manually and map the icons you need in the lambda. Weatherman by Madelena is a great example of this implementation, it looks something like this:
font:
  - file: "fonts/materialdesignicons-webfont.ttf" #Hosted locally, adjust the path if needed
    id: material_icons
    size: 60 # Adjust size as needed
    glyphs: &mdi-weather-glyphs
          - "\U000F0599" # mdi-weather-sunny #Define as many icons as needed
.....
display:
  - platform: waveshare_epaper
    id: waveshare
.....
    lambda: |-
      // Map weather states to MDI characters.
      std::map<std::string, std::string> weather_icon_map
        {
          {"sunny", "\U000F0599"}, #Map as many icons as needed
        };
      it.print(5, 300, id(material_icons), id(color_black), weather_icon_map["sunny"].c_str());
Adding Images
The last use case you might want to consider is rendering actual images on your Waveshare display. While images are not really suitable for e-paper screens, they can be rendered if needed. You can upload your own image and render it on the display. For example:
image:
  - file: "fonts/smarthomescene-logo-black.jpg"
    type: binary
    id: logo
    resize: 250x250
    invert_alpha: true
.....
display:
  - platform: waveshare_epaper
    id: waveshare
.....
    lambda: |-
      it.image(100, 500, id(logo));
Now, when you send a full-color or even grayscale image to such a display, it has to significantly simplify the image data, essentially guessing whether each tiny dot should be black, white, or red. This causes the image to be displayed in all black, not displayed at all or distorted significantly.
There are ways to get around this, but in the end it will only be displayed in the 3 colors the e-paper display is actually capable of rendering. Therefore, the most effective solution is to prepare your image beforehand to match the display’s capabilities precisely. This involves opening your image and converting it to a pure black and white (1-bit) image. Ensure there are absolutely no shades of gray, no anti-aliasing, and that the background is a solid white, not transparent. The colors of the image can be inverted by setting invert_alpha: true. This is especially useful for manipulating images on e-paper displays.
Configuring Refresh Rate
E-Paper (E-Ink) displays typically have a slow refresh rate. As explained earlier, this is because their underlying technology relies on the physical movement of charged pigment particles to form an image or render text. Because of this, it’s good practice to lower the full refresh rate of the display as much as possible to suit your use case. Alternatively, if your Waveshare display supports it, you can implement the partial refresh feature.
You can control how your display updates using several options. E-paper displays have two main modes: a quicker partial update that only changes the pixels that have actually changed, and a full update mode that first clears the entire screen before redrawing the whole image. The partial update is much faster and provides a smoother experience, but a full update is necessary every so often to clear away any lingering “ghosting” or artifacts that might build up over time.
Some specific Waveshare models, like the 1.54in, 1.54inv2, 2.13in, 2.13inv2, 2.90in, 2.90inv2, 7.50inV2p, and gdew029t5, allow you to set full_update_every to perform a full refresh only after a certain number of partial updates, defaulting to every 30 updates on these models, while others always do a full update.
The reset_duration option controls how long the display takes to perform its reset operation, which defaults to 200 milliseconds. However, setting this value to a shorter 2 milliseconds can help resolve common issues with newer e-Paper Driver modules, such as the Waveshare 7.50″ ePaper (B) Tri-color display. Finally, the update_interval determines how often the screen automatically redraws its contents, with a default of 1 second. If you prefer to have complete manual control over when the screen updates, you can set this to never and trigger updates only through a component.update command, which is useful for static displays or to conserve power. For example:
display:
  - platform: waveshare_epaper
    id: waveshare
    model: 7.50in-bV3-bwr
    reset_duration: 2ms
    update_interval: 300s #Update every 5 minutes
.....
Adjusting Rotation
You can easily orient your display to fit your physical setup using the rotation option. This setting will rotate everything you draw within the lambda section by your chosen degree, allowing for flexible display orientations such as 0° (the default), 90°, 180°, or 270°. This means you don’t have to adjust your drawing coordinates for different physical screen positions; you just set the rotation once, and ESPHome handles the rest. For example:
display:
  - platform: waveshare_epaper
    id: waveshare
    model: 7.50in-bV3-bwr
    rotation: 90 #Vertical display
.....
Rendering Content
With the ESPHome building blocks in place, you can start rendering contents on your Waveshare E-Paper Display. The ESPHome Display Rendering Engine is quite powerful, but complex. It can be a challenge to render exactly what you are trying to achieve. I found that in time, you get the hang of it and it becomes a matter of trial and error.

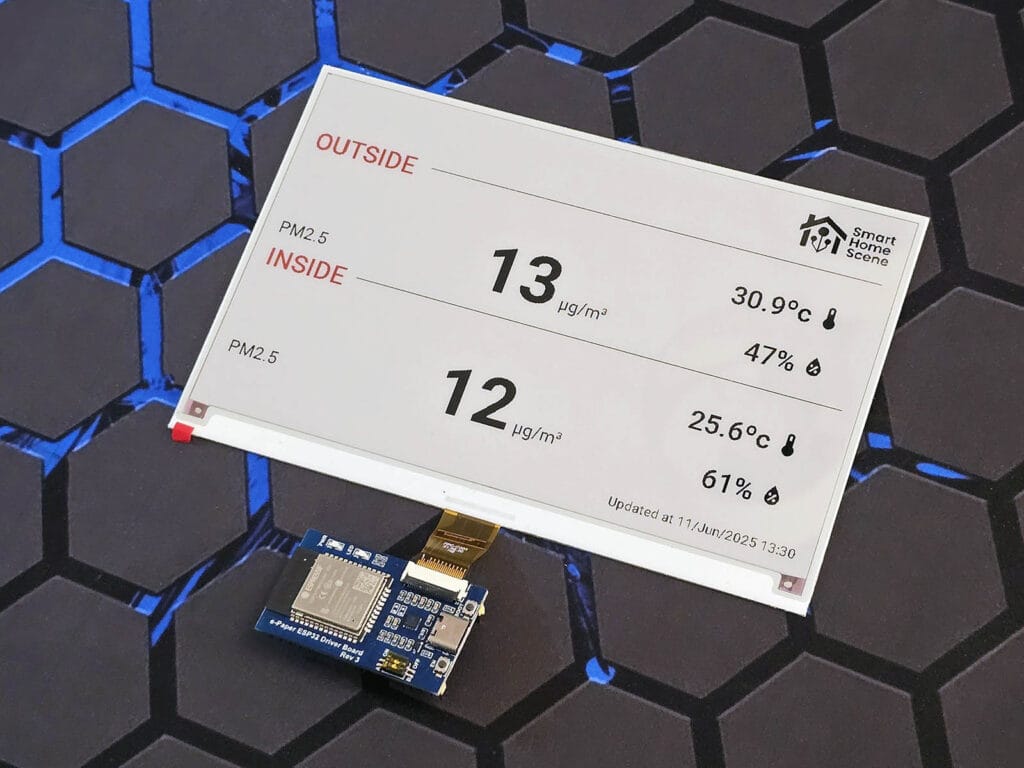
Displaying Home Assistant Sensor Data
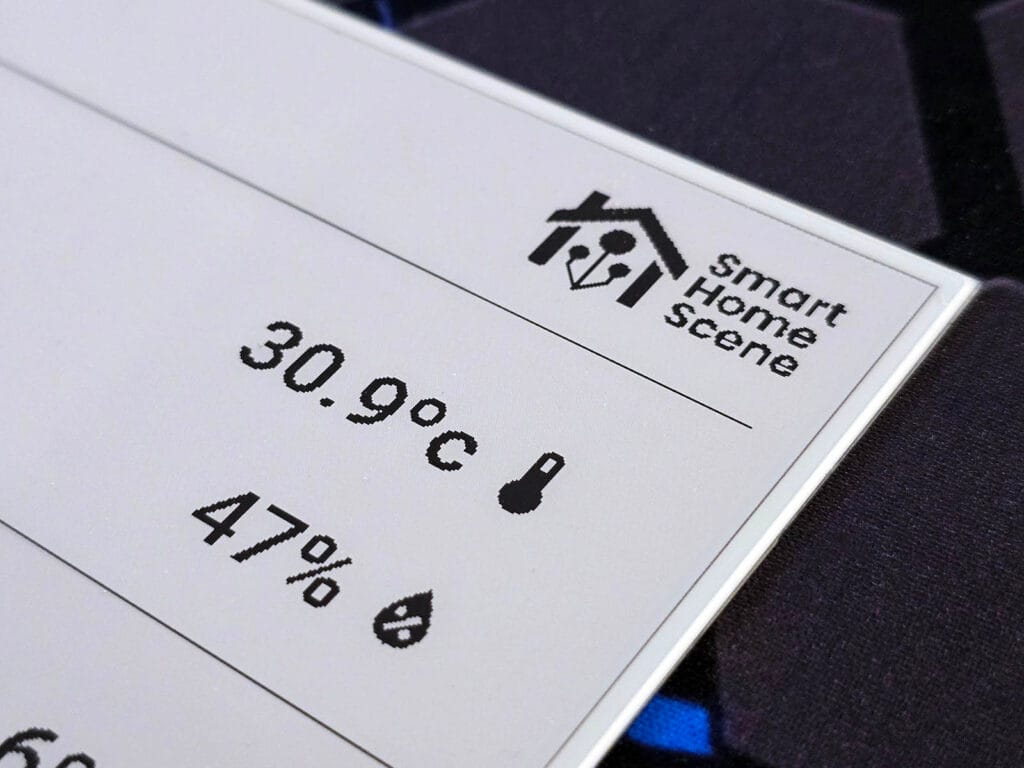
Just like any other ESP32 project, Home Assistant sensor data can be pushed via ESPHome and showcased to a connected display. For my particular Waveshare Tri-color model, here’s a simple example:
sensor:
### Living Room ###
  - platform: homeassistant
    id: living_room_temperature
    entity_id: sensor.air_quality_living_room_temperature
    accuracy_decimals: 1
    unit_of_measurement: "°C"
  - platform: homeassistant
    id: living_room_humidity
    entity_id: sensor.air_quality_living_room_humidity
    accuracy_decimals: 1
    unit_of_measurement: "%"
......
display:
  - platform: waveshare_epaper
    id: waveshare
    model: 7.50in-bV3-bwr
......
    lambda: |-
      it.printf(5, 5, id(font_1), color_black, "Living Room:");
      it.printf(240, 5, id(font_1), color_red, "%.1f°C • %.1f%%", id(living_room_temperature).state, id(living_room_humidity).state);
Any Home Assistant Sensor can be pushed through ESPHome and displayed on these screens. It’s also good practice to set the refresh rate to never and think of a clever way for refreshing on demand. For example, say you want to update the screen only when motion or presence is detected in the vicinity. This practice ensures the display refreshes with current data only when you approach, staying dormant otherwise:
sensor:
### Living Room ###
  - platform: homeassistant
    id: living_room_temperature
    entity_id: sensor.air_quality_living_room_temperature
    accuracy_decimals: 1
    unit_of_measurement: "°C"
  - platform: homeassistant
    id: living_room_motion
    entity_id: binary_sensor.living_room_motion_sensor
    on_value:
      - then:
          component.update: waveshare
......
display:
  - platform: waveshare_epaper
    id: waveshare
    model: 7.50in-bV3-bwr
    rotation: 90
    reset_duration: 2ms
    update_interval: never
    lambda: |-
      it.printf(5, 5, id(font_1), color_black, "Living Room:");
      it.printf(240, 5, id(font_1), color_red, "%.1f°C • %.1f%%", id(living_room_temperature).state;
Weatherman by Madelena
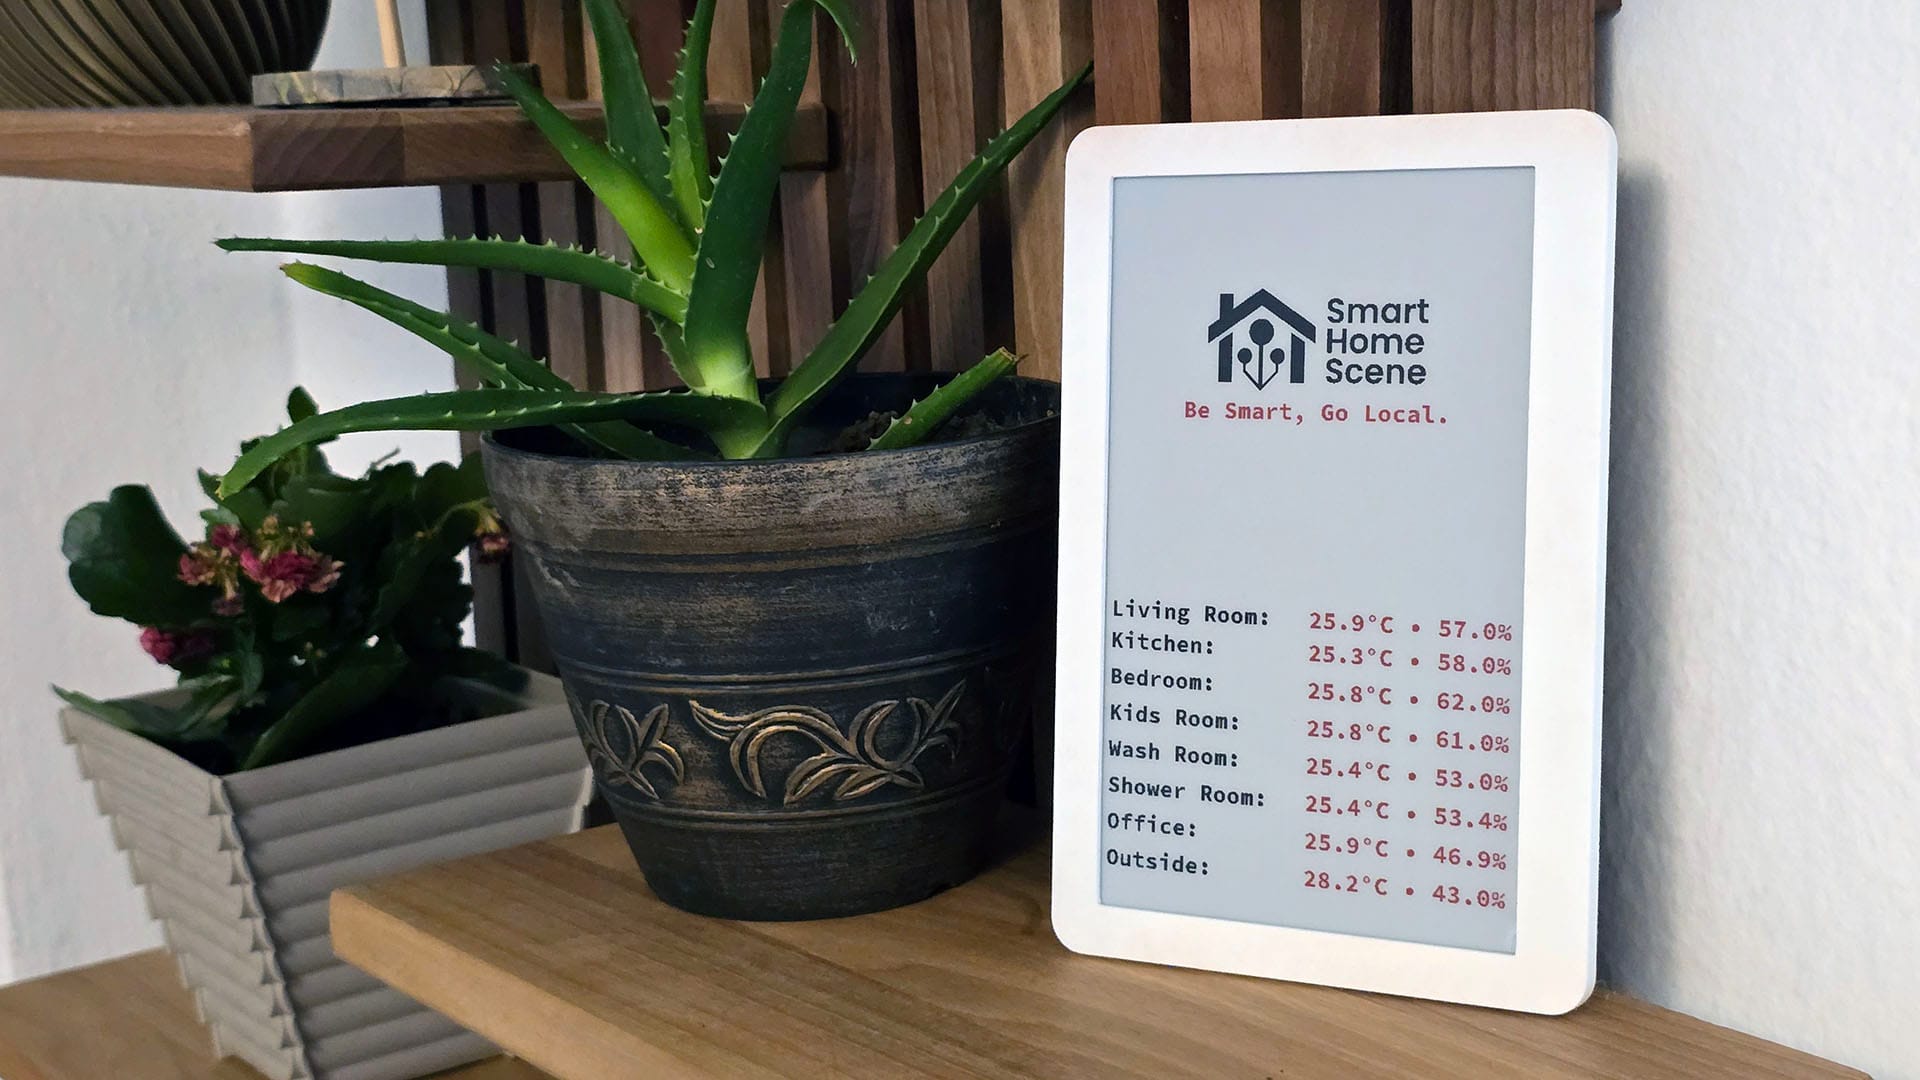
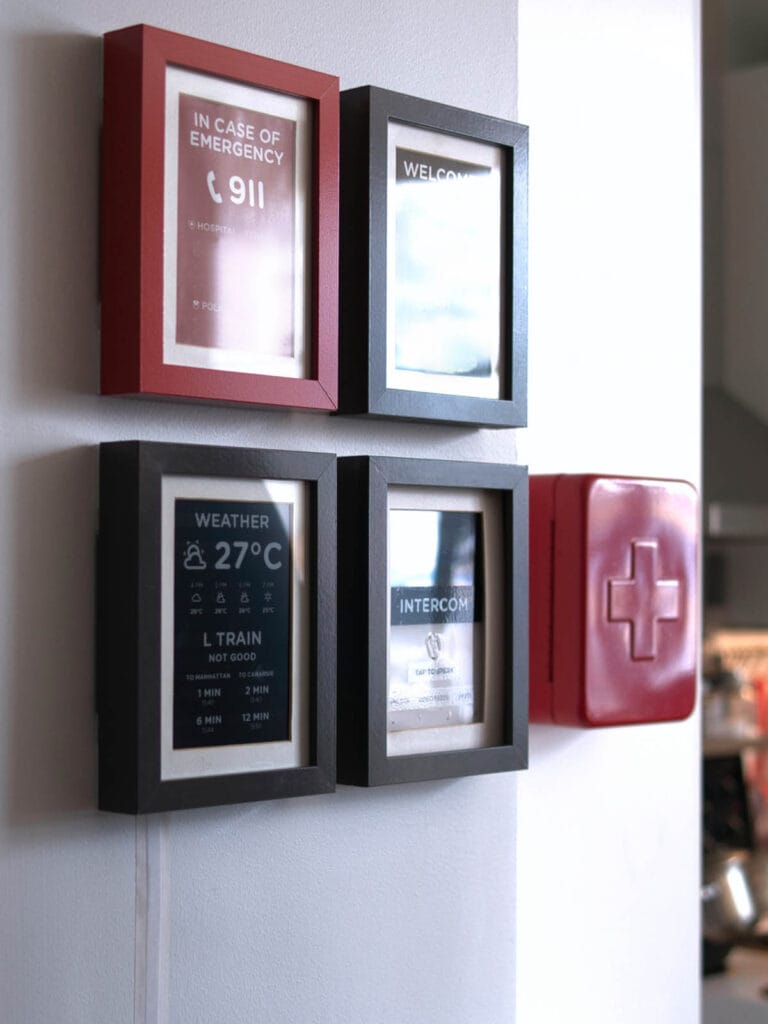
Weatherman is a very popular project made by Madelena which uses ESP32 boards and Waveshare e-paper screens for displaying all kinds of data. It’s easy to implement and looks great once wall-mounted with a nice frame or a 3D printed enclosure. Weatherman uses the Waveshare 7.5″ two-color display instead of three and this simple photo frame to mount it on a wall.
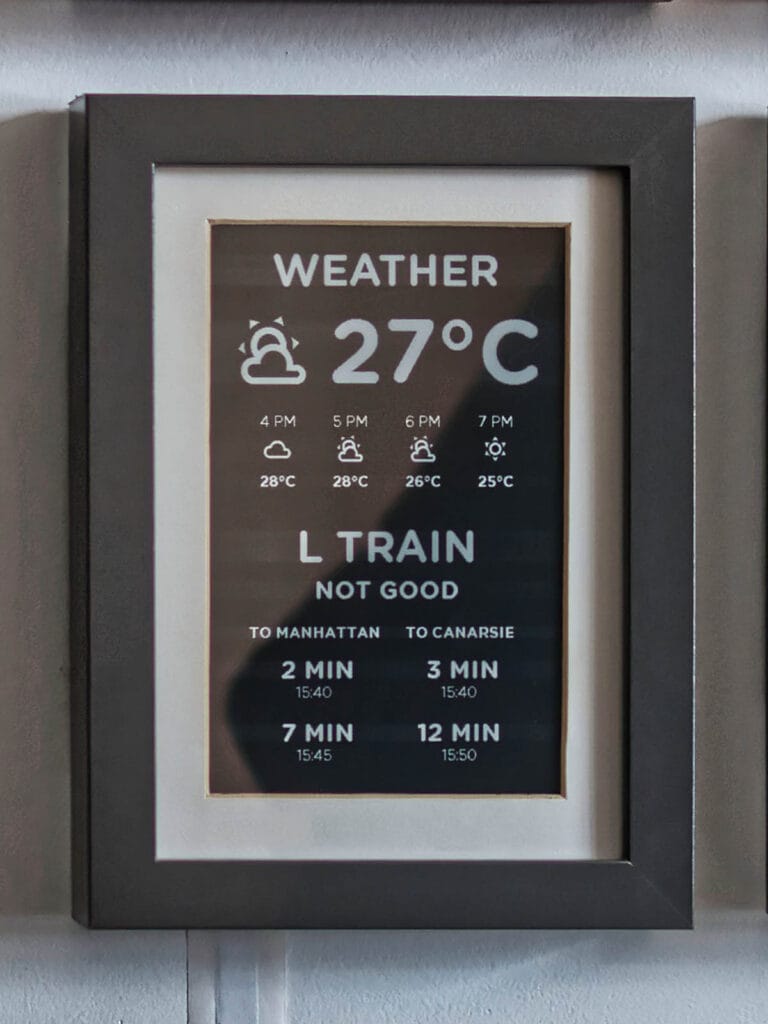
Madelena’s code is very detailed and complete, implementing a weather dashboard via Home Assistant sensors. You will need to create some template sensors to pull weather data, or you can create your own and simply adopt the lambda used in Weatherman.
Final Thoughts
Working with e-ink or e-paper displays is trickier compared to LCD or AMOLED panels. If you are interested in a process comparison, I highly suggest your check out this DIY Info Display with LILYGO T-Display-S3 in ESPHome.
On the other hand, true e-paper displays, such as those from Waveshare, produce a clear paper-like image viewable from all angles. There are no distortions, glares or glow when the room gets dark. They are beautiful to look at and are a great fit for wall-mounted status dashboards.
With ESPHome as the powerhouse driving such a display and the simplicity of a plug-and-play ESP32 board, the process becomes only a matter of writing the code. Hopefully, my examples gave you an idea of where and how to start. In this guide, this is what I used:


Full YAML Config
esphome:
  name: waveshare
  friendly_name: waveshare

esp32:
  board: esp32dev
  framework:
    type: arduino

# Enable logging
logger:

# Enable Home Assistant API
api:
  encryption:
    key: "XXXXX"

ota:
  - platform: esphome
    password: "XXXXX"

wifi:
  ssid: !secret wifi_ssid
  password: !secret wifi_password
  manual_ip:
    static_ip: 192.168.0.154
    gateway: 192.168.0.1
    subnet: 255.255.255.0

  # Enable fallback hotspot (captive portal) in case wifi connection fails
  ap:
    ssid: "Waveshare Fallback Hotspot"
    password: "XXXXX"

captive_portal:

spi:
  clk_pin: GPIO13
  mosi_pin: GPIO14
image:
  - file: "fonts/smarthomescene-logo-black.jpg"
    type: binary
    id: logo
    resize: 250x250
    invert_alpha: true
font:
  - file:
      type: gfonts
      family: Source Code Pro
      weight: 700
    id: font_roboto
    size: 26
  - file: "fonts/materialdesignicons-webfont.ttf" # Adjust the path if needed
    id: material_icons
    size: 60 # Adjust size as needed
    glyphs: &mdi-weather-glyphs
          - "\U000F0590" # mdi-weather-cloudy
          - "\U000F0F2F" # mdi-weather-cloudy-alert
          - "\U000F0E6E" # mdi-weather-cloudy-arrow-right
          - "\U000F0591" # mdi-weather-fog
          - "\U000F0592" # mdi-weather-hail
          - "\U000F0F30" # mdi-weather-hazy
          - "\U000F0898" # mdi-weather-hurricane
          - "\U000F0593" # mdi-weather-lightning
          - "\U000F067E" # mdi-weather-lightning-rainy
          - "\U000F0594" # mdi-weather-night
          - "\U000F0F31" # mdi-weather-night-partly-cloudy
          - "\U000F0595" # mdi-weather-partly-cloudy
          - "\U000F0F32" # mdi-weather-partly-lightning
          - "\U000F0F33" # mdi-weather-partly-rainy
          - "\U000F0F34" # mdi-weather-partly-snowy
          - "\U000F0F35" # mdi-weather-partly-snowy-rainy
          - "\U000F0596" # mdi-weather-pouring
          - "\U000F0597" # mdi-weather-rainy
          - "\U000F0598" # mdi-weather-snowy
          - "\U000F0F36" # mdi-weather-snowy-heavy
          - "\U000F067F" # mdi-weather-snowy-rainy
          - "\U000F0599" # mdi-weather-sunny
          - "\U000F0F37" # mdi-weather-sunny-alert
          - "\U000F14E4" # mdi-weather-sunny-off
          - "\U000F059A" # mdi-weather-sunset
          - "\U000F059B" # mdi-weather-sunset-down
          - "\U000F059C" # mdi-weather-sunset-up
          - "\U000F0F38" # mdi-weather-tornado
          - "\U000F059D" # mdi-weather-windy
          - "\U000F059E" # mdi-weather-windy-variant
color:
  - id: color_black
    red: 100%
    green: 100%
    blue: 100%
    white: 100%
  - id: color_red
    red: 100%
    green: 0%
    blue: 0%
    white: 0%
sensor:
### Living Room ###
  - platform: homeassistant
    id: living_room_temperature
    entity_id: sensor.air_quality_living_room_temperature
    accuracy_decimals: 1
    unit_of_measurement: "°C"
  - platform: homeassistant
    id: living_room_humidity
    entity_id: sensor.air_quality_living_room_humidity
    accuracy_decimals: 1
    unit_of_measurement: "%"
### Bedroom ###
  - platform: homeassistant
    id: bedroom_temperature
    entity_id: sensor.air_quality_bedroom_temperature
    accuracy_decimals: 1
    unit_of_measurement: "°C"
  - platform: homeassistant
    id: bedroom_humidity
    entity_id: sensor.air_quality_bedroom_humidity
    accuracy_decimals: 1
    unit_of_measurement: "%"
### Kitchen ###
  - platform: homeassistant
    id: kitchen_temperature
    entity_id: sensor.air_quality_kitchen_temperature
    accuracy_decimals: 1
    unit_of_measurement: "°C"
  - platform: homeassistant
    id: kitchen_humidity
    entity_id: sensor.air_quality_kitchen_humidity
    accuracy_decimals: 1
    unit_of_measurement: "%"
### Kids Room ###
  - platform: homeassistant
    id: kids_room_temperature
    entity_id: sensor.air_quality_kids_room_temperature
    accuracy_decimals: 1
    unit_of_measurement: "°C"
  - platform: homeassistant
    id: kids_room_humidity
    entity_id: sensor.air_quality_kids_room_humidity
    accuracy_decimals: 1
    unit_of_measurement: "%"
### Shower Room ###
  - platform: homeassistant
    id: shower_room_temperature
    entity_id: sensor.air_quality_shower_room_temperature
    accuracy_decimals: 1
    unit_of_measurement: "°C"
  - platform: homeassistant
    id: shower_room_humidity
    entity_id: sensor.air_quality_shower_room_humidity
    accuracy_decimals: 1
    unit_of_measurement: "%"
### Wash Room ###
  - platform: homeassistant
    id: wash_room_temperature
    entity_id: sensor.air_quality_wash_room_temperature
    accuracy_decimals: 1
    unit_of_measurement: "°C"
  - platform: homeassistant
    id: wash_room_humidity
    entity_id: sensor.air_quality_wash_room_humidity
    accuracy_decimals: 1
    unit_of_measurement: "%"
### Outside ###
  - platform: homeassistant
    id: outdoor_temperature
    entity_id: sensor.air_quality_outdoor_temperature
    accuracy_decimals: 1
    unit_of_measurement: "°C"
  - platform: homeassistant
    id: outdoor_humidity
    entity_id: sensor.air_quality_outdoor_humidity
    accuracy_decimals: 1
    unit_of_measurement: "%"
### Office ###
  - platform: homeassistant
    id: office_temperature
    entity_id: sensor.office_temperature
    accuracy_decimals: 1
    unit_of_measurement: "°C"
  - platform: homeassistant
    id: office_humidity
    entity_id: sensor.office_humidity
    accuracy_decimals: 1
    unit_of_measurement: "%"

display:
  - platform: waveshare_epaper
    id: waveshare
    model: 7.50in-bV3-bwr
    rotation: 90
    reset_duration: 2ms
    update_interval: never
    cs_pin:
      number: GPIO15
      ignore_strapping_warning: True
    dc_pin: GPIO27
    busy_pin:
      number: GPIO25
      inverted: true
    reset_pin: GPIO26
    lambda: |-
      // Map weather states to MDI characters. Not USED, testing purposes only.
      std::map<std::string, std::string> weather_icon_map
        {
          {"cloudy", "\U000F0590"},
          {"cloudy-alert", "\U000F0F2F"},
          {"cloudy-arrow-right", "\U000F0E6E"},
          {"fog", "\U000F0591"},
          {"hail", "\U000F0592"},
          {"hazy", "\U000F0F30"},
          {"hurricane", "\U000F0898"},
          {"lightning", "\U000F0593"},
          {"lightning-rainy", "\U000F067E"},
          {"night", "\U000F0594"},
          {"night-partly-cloudy", "\U000F0F31"},
          {"partlycloudy", "\U000F0595"},
          {"partly-lightning", "\U000F0F32"},
          {"partly-rainy", "\U000F0F33"},
          {"partly-snowy", "\U000F0F34"},
          {"partly-snowy-rainy", "\U000F0F35"},
          {"pouring", "\U000F0596"},
          {"rainy", "\U000F0597"},
          {"snowy", "\U000F0598"},
          {"snowy-heavy", "\U000F0F36"},
          {"snowy-rainy", "\U000F067F"},
          {"sunny", "\U000F0599"},
          {"sunny-alert", "\U000F0F37"},
          {"sunny-off", "\U000F14E4"},
          {"sunset", "\U000F059A"},
          {"sunset-down", "\U000F059B"},
          {"sunset-up", "\U000F059C"},
          {"tornado", "\U000F0F38"},
          {"windy", "\U000F059D"},
          {"windy-variant", "\U000F059E"},
        };
      int w = it.get_width(); // Should be 480
      // Center the logo horizontally, place it at the top
      it.image((w - 250) / 2, 120, id(logo));
      // Add website text below the logo, centered
      it.printf(w / 2, 250, id(font_roboto), color_red, TextAlign::CENTER, "Be Smart, Go Local.");
      int y_offset = 450;
      it.printf(5, y_offset + 5, id(font_roboto), color_black, "Living Room:");
      it.printf(240, y_offset + 5, id(font_roboto), color_red, "%.1f°C • %.1f%%", id(living_room_temperature).state, id(living_room_humidity).state);
      it.printf(5, y_offset + 40, id(font_roboto), color_black, "Kitchen:");
      it.printf(240, y_offset + 40, id(font_roboto), color_red, "%.1f°C • %.1f%%", id(kitchen_temperature).state, id(kitchen_humidity).state);
      it.printf(5, y_offset + 80, id(font_roboto), color_black, "Bedroom:");
      it.printf(240, y_offset + 80, id(font_roboto), color_red, "%.1f°C • %.1f%%", id(bedroom_temperature).state, id(bedroom_humidity).state);
      it.printf(5, y_offset + 120, id(font_roboto), color_black, "Kids Room:");
      it.printf(240, y_offset + 120, id(font_roboto), color_red, "%.1f°C • %.1f%%", id(kids_room_temperature).state, id(kids_room_humidity).state);
      it.printf(5, y_offset + 160, id(font_roboto), color_black, "Wash Room:");
      it.printf(240, y_offset + 160, id(font_roboto), color_red, "%.1f°C • %.1f%%", id(wash_room_temperature).state, id(wash_room_humidity).state);
      it.printf(5, y_offset + 200, id(font_roboto), color_black, "Shower Room:");
      it.printf(240, y_offset + 200, id(font_roboto), color_red, "%.1f°C • %.1f%%", id(shower_room_temperature).state, id(shower_room_humidity).state);
      it.printf(5, y_offset + 240, id(font_roboto), color_black, "Office:");
      it.printf(240, y_offset + 240, id(font_roboto), color_red, "%.1f°C • %.1f%%", id(office_temperature).state, id(office_humidity).state);
      it.printf(5, y_offset + 280, id(font_roboto), color_black, "Outside:");
      it.printf(240, y_offset + 280, id(font_roboto), color_red, "%.1f°C • %.1f%%", id(outdoor_temperature).state, id(outdoor_humidity).state);
button:
  - platform: template
    name: "Update E-Paper Display"
    on_press:
      then:
        - component.update: waveshare


Thanks for the article.
I have implemented the Weatherman by Madalena a few years ago and I was never able to get a clear display pic on my eink display (as the pics shown see on your article). I have the same model 7.5in v3 sticker BWR.
But when I pick the BWR the image rendered is really faint, while the regular v3 does not have this issue.
Would you know what could be the cause?
Also, the logs on esphome always shows: Timeout while displaying image! Do you get the same warning?
Could be it’s running out of memory. Is the image very large? Have you optimized it?
It is the same code as Madelena project with minor changes. There is no image but just text so I don’t think there is much optimization to be done.
Hi, great article.
Total newbie here.
Could you possibly post a complete yaml??
So that i have something to work with and adjust??
Hey, I just added a full YAML config at the very bottom of the article.
Adjust as needed:
https://smarthomescene.com/diy/e-paper-dashboards-with-waveshare-and-esphome/#final-thoughts
Thank you very much!!
Good article 🙂
I’ve recently got one of these e-paper displays and find them really nice.
It might be worth adding to your article a mention of the Puppet addon ( https://github.com/balloob/home-assistant-addons ). It takes a screenshot of a dashboard and allows you to display it via URL on a ESPHome epaper display.
I find using a dashboard screenshot is stupidly easier than trying to position elements correctly within ESPHome. It also makes it a lot easier to edit as you go along – just use a HASS dashboard!
Wow, how was I not aware of this? Thanks for sharing, I’ll give it a try!
I was not able to use that as I could not generate a png that code be decoded due to some lack of memory or something. Using a 1bit BMP generation also didn’t work as the puppet generate a failure on taking a screenshot of it. After a day I stopped figurting it out and started drawing it myself
Hi!
Thanks for the write-up!
The ESPHome documentation states:
“The BUSY pin on the gdew0154m09, the Waveshare 7.30in-f and the Waveshare 7.50in V2 models must be inverted to prevent permanent display damage. Set the busy pin to inverted: true in the config.”
How come you have set inverted:true in your config even though you are using a V3 model?
I have the same V3 version of the 7.5 BWR display and am a bit nervous about whether or not to set inverted:true 😉
It’s needed for newer boards, even though it does not say so. Try it for yourself, you want cause damage immediately.
Thanks! I will set it to inverted:true then 🙂
Maybe we should contact ESPHome so they can update the documentation?
Hi, nice article as always – many thanks!
I just bought a Waveshare 7.5-inch display after reading this article and started playing with it. The package included the Driver HAT and a small connector that was already attached to the HAT. It also came with a 9-pin JST connector with wires: one side plugs into the HAT, and the other side can be connected to any ESP32-Dev board pins (female jumper wire connectors).
Apparently, the newer HAT version (2.3) has 9 pins instead of the previous 8. The extra pin is labeled PWR, which can be a bit misleading since it’s not actually the power source. However, it does need to be pulled HIGH (3.3V) for the display to start working. If you leave it unconnected, the display won’t power on -so maybe the name does make sense after all.
Using a Waveshare 4.2inch e-Paper Module Rev 2.1 with the V2 sticker on the PCB and I had problems with the 3 colors (black/red/white)…
This solved it with ESPHome 2025.7.4
“`
esp32:
board: wemos_d1_mini32
framework:
type: arduino
spi:
clk_pin: GPIO19
mosi_pin: GPIO23
color:
– id: color_black
red: 0%
green: 0%
blue: 0%
white: 0%
– id: color_red
red: 100%
green: 0%
blue: 0%
white: 0%
– id: color_white
red: 0%
green: 0%
blue: 0%
white: 100%
font:
– file:
type: gfonts
family: “IBM Plex Sans Condensed”
weight: 700
id: ibm_20
size: 24
display:
– platform: waveshare_epaper
id: waveshare
model: 4.20in-bv2-bwr
update_interval: 300s #Update every 5 minutes
cs_pin:
number: GPIO18
dc_pin: GPIO16
busy_pin:
number: GPIO21
# inverted: true
reset_pin: GPIO17
lambda: |-
it.fill(color_white);
it.printf(5, 5, id(ibm_20), color_black, “Hello World!”);
it.printf(5, 45, id(ibm_20), color_red, “Hello World!”);
“`
WARNING for 4.2inch Version 2 Rev. 2.2
I used this guide as orientation for supported e-paper Displays. Unfortunately the current Version of 4.2inch e-Paper Module with Rev. 2.2 does not work! (SKU 13353)
The problem is in Rev. 2.2, older revisions seem to work.
There is currently an open PR on github, which tries to fix this. This helped me to get it working, but was not what I wanted to do…
Here is the PR with the discussions which helped me to get it working:
https://github.com/esphome/esphome/pull/6209