ESPHome recently released a new OpenThread core component, adding Thread support for ESPHome devices. The purpose of this component is to allow ESPHome nodes to communicate over a Thread network. It permits the state of sensors and binary sensors to be sent to Home Assistant via 6LoWPAN packets.
This article is a step-by-step guide for flashing compatible ESP32 boards with OpenThread ESPHome firmware. In other words, your nodes will use Thread as a connectivity protocol instead of Wi-Fi and operate as FTDs (Full Thread Devices) or MTDs (Minimal Thread Devices).
Supported ESP Boards
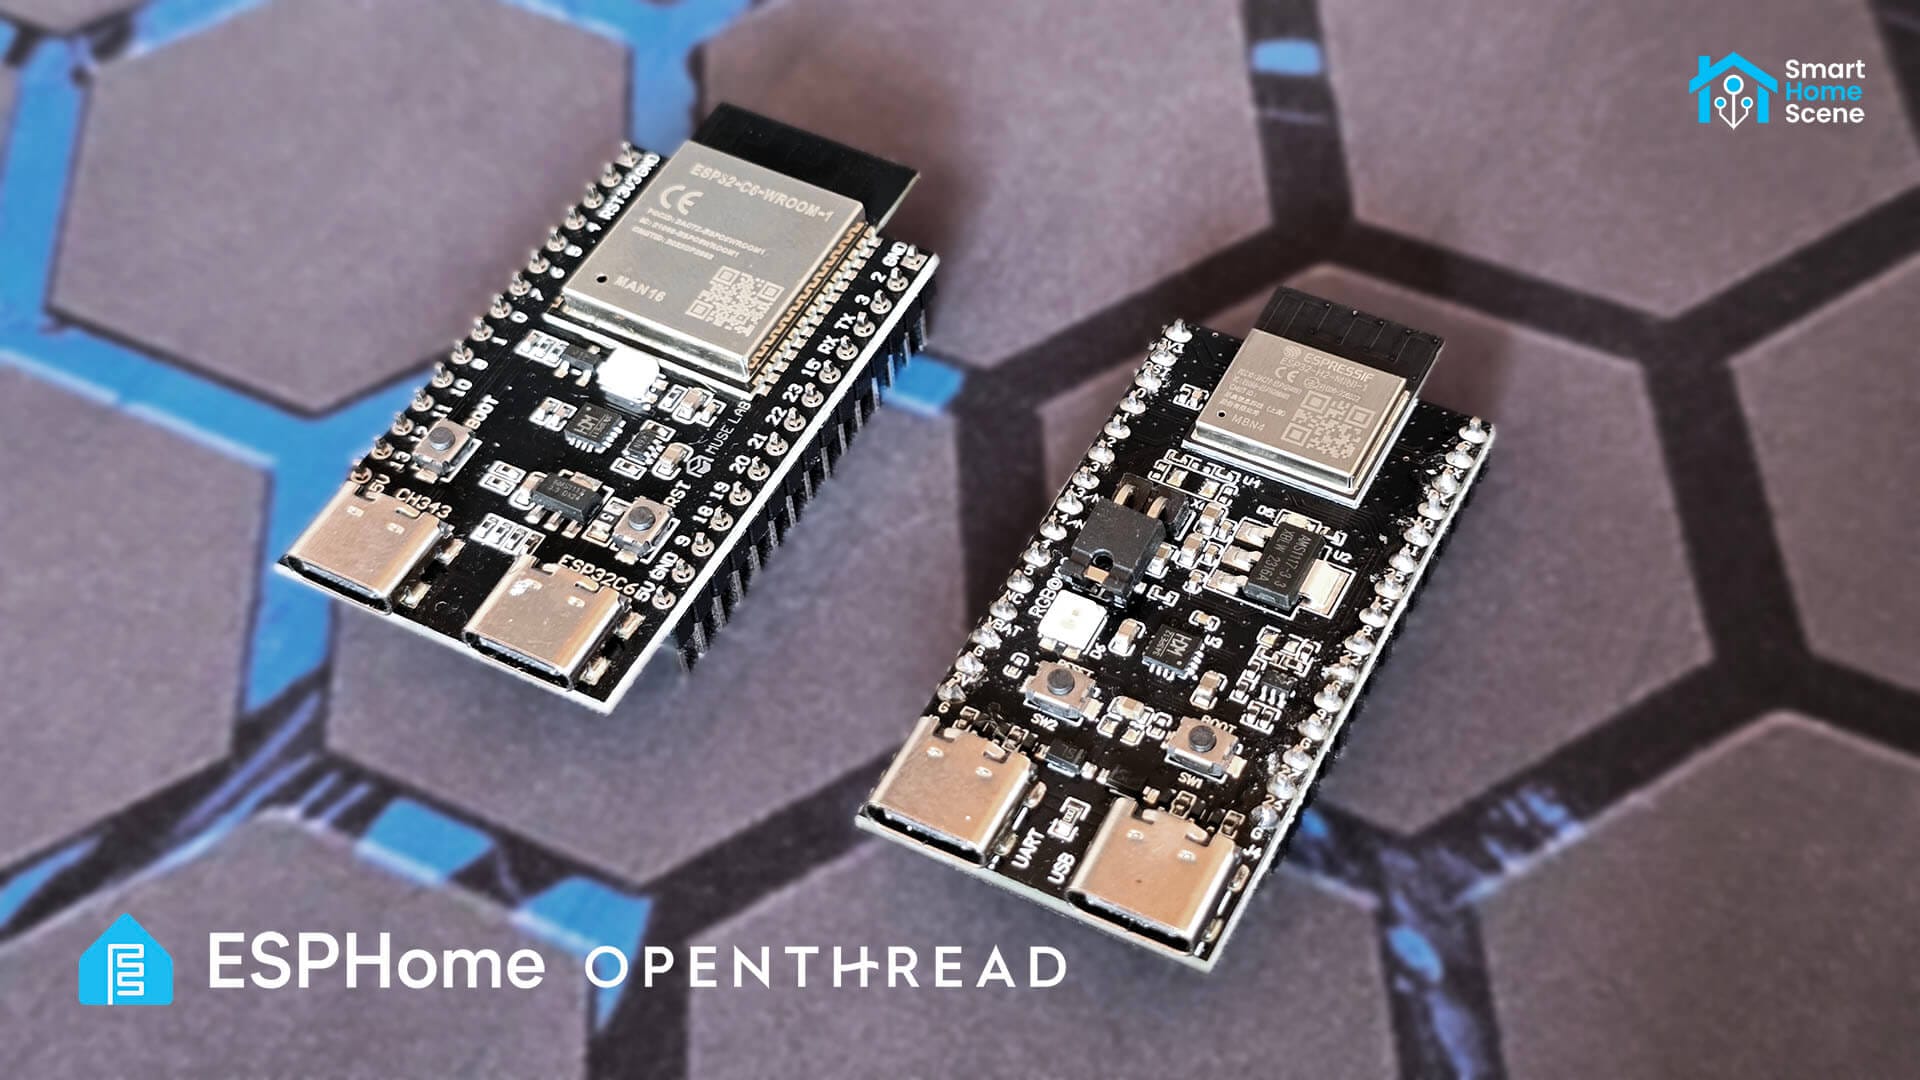
The OpenThread ESPHome component supports the ESP32-C6 and ESP32-H2 boards only. These boards are the only Espressif devices equipped with Thread modules, which can be used with this ESPHome component or Espressif’s own ZeroCode platform.


It’s worth noting that the ESP32-C6 is pricier than the ESP32-H2, but it does support Wi-Fi while the ESP32-H2 doesn’t. The ESP32-H2 supports Thread, Zigbee, and Bluetooth only. Both boards rely on a single-core 32-bit RISC-V with a frequency of up to 96 MHz. Both have 320 KB SRAM, 128 KB ROM, 2 MB Flash and 19 separate GPIOs with ADC, SPI, UART, I2C, I2S, RMT, GDMA and LED PWM support. If you are getting a new board, go for the ESP32-C6.
Considerations and Limitations
It’s worth remembering that Thread is designed as a low-power, low-bandwidth networking protocol. In this regard, it’s very similar to Zigbee as it’s specifically optimized for IoT devices with minimal data transmission needs, battery-powered or energy-efficient applications and mesh networking scenarios.
From an ESPHome device perspective, this simply means that Thread is not suitable for applications requiring high-frequency sensor data transmission. If you are building an ESPHome device that sends large payloads, has many sensors and updates very frequently (e.g. Apollo R PRO-1), you are better of using Wi-Fi.
Furthermore, the OpenThread component in ESPHome supports FTD and MTD devices, but not “Sleepy End Devices” (low-power sleep functionality). At this moment, you will not be able to create a Thread device that utilizes battery power very effectively.
Obtaining Thread Network Info
Before preparing and flashing the ESP board with Thread, you will need to obtain your Thread network info. In my testing instance, I am running the SMLight SLZB-MR1 Dual Radio coordinator with the OpenThread Border Router Add-on. The SLZB-MR1 has two individual antennas that support both Zigbee and Thread.
In Home Assistant, navigate to Settings > Devices & Services > Thread > Configure (cogwheel). Click the small information button in the corner of your preferred network and you will be able to see the network name, channel, pan ID and the active TLV dataset.
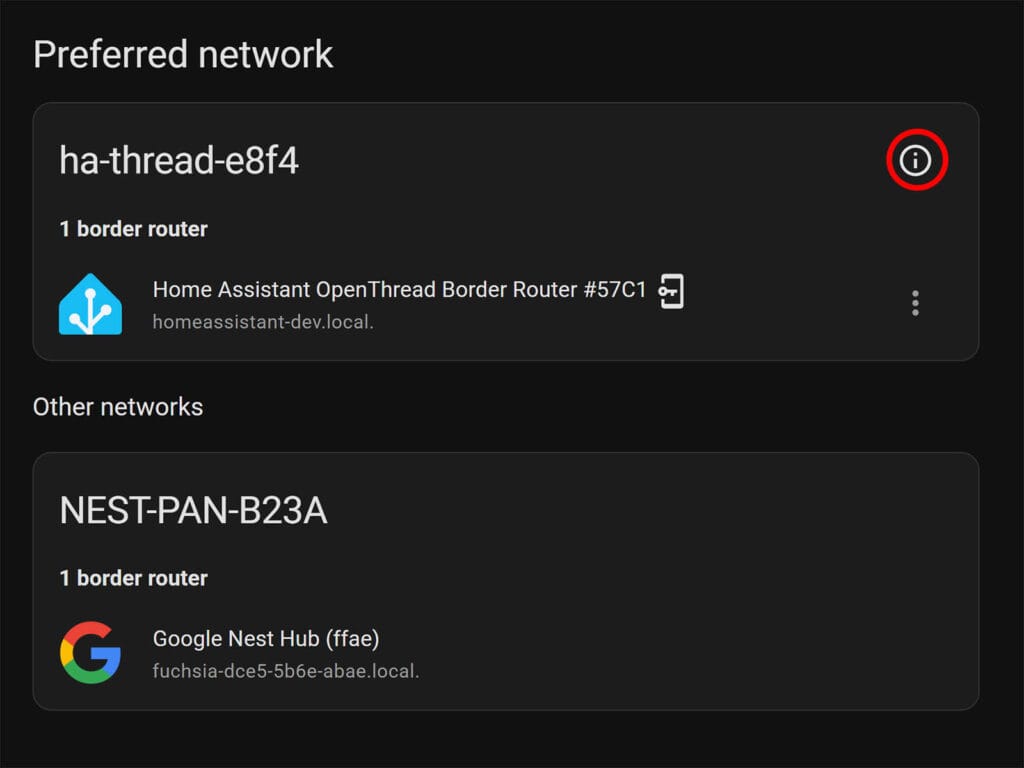
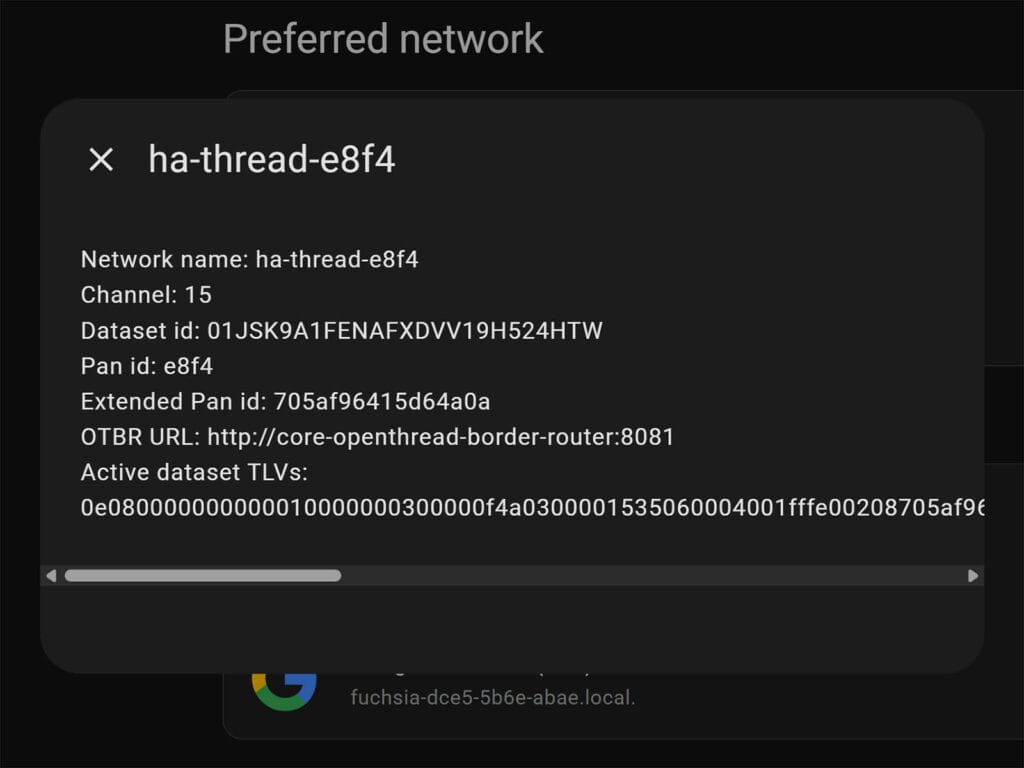
Save the network information in a file somewhere for easy copy-pasting. The Thread network information will be added to ESPHome instead of Wi-Fi, making the node communicate over Thread. The TLV dataset configuration is easier and straightforward, so make sure the TLV string is correct when saving.
Flashing the ESP32 with OpenThread
The next step is to create a new ESPHome device and flash it with a basic configuration. The easiest way to do this is to use the ESPHome builder add-on directly in Home Assistant. However, instead of configuring Wi-Fi, we will configure OpenThread directly and connect the node to your existing Thread network.
- Open the ESPHome Builder Add-on
- Click + New Device and give it a name
- Under device type, select your board (e.g. ESP32-C6)
- At the Install window, click Skip
There is no need to flash the board with the default Wi-Fi-generated configuration first. You can do so if you want to verify the board is working properly, but you can simply add the OpenThread configuration and flash the board directly. Under your newly created device, click the Edit button. Remove the wifi and captive_portal components and paste the following:
network:
  enable_ipv6: true

openthread:
  tlv: 0e080000000000010000000300000f4a0300001535060004001fffe00208705af96415d64a0a0708fd5ca8324cb383c0051061023d547b525edc174a08169bee1809030e68612d7468726561642d653866340102e8f404103e7c0e82c83b1b2b5098e6b2d3c38b820c0402a0f7f8
Replace the tlv string with your own that you saved from your Thread network info. Pasting the TLV will allow ESPHome to automatically extract all data from your network and commission the node automatically. There is no need to manually configure the network, but if you want, you can configure it in this format:
# Example OpenThread component configuration
network:
  enable_ipv6: true

openthread:
  device_type: FTD
  channel: 13
  network_name: OpenThread-8f28
  network_key: 0xdfd34f0f05cad978ec4e32b0413038ff
  pan_id: 0x8f28
  ext_pan_id: 0xd63e8e3e495ebbc3
  pskc: 0xc23a76e98f1a6483639b1ac1271e2e27
  mesh_local_prefix: fd53:145f:ed22:ad81::/64
  force_dataset: true
Save the configuration, click Install and select Manual download. Choose the Factory Format (previously Modern) and save the .bin file somewhere on your computer. Connect your ESP32 via USB, open ESPHome’s Web Flasher, click Connect, select your board, and click Install. Select the firmware file and wait for the process to finish. Done!
Connecting the Thread node
Once the node reboots, it will automatically connect to your configured Thread network. At the moment, there isn’t an obvious way to verify the node is using Thread instead of Wi-Fi. Since Thread is just a communication protocol, an application layer like Matter or ESPHome’s API is needed to actually interact with the device.
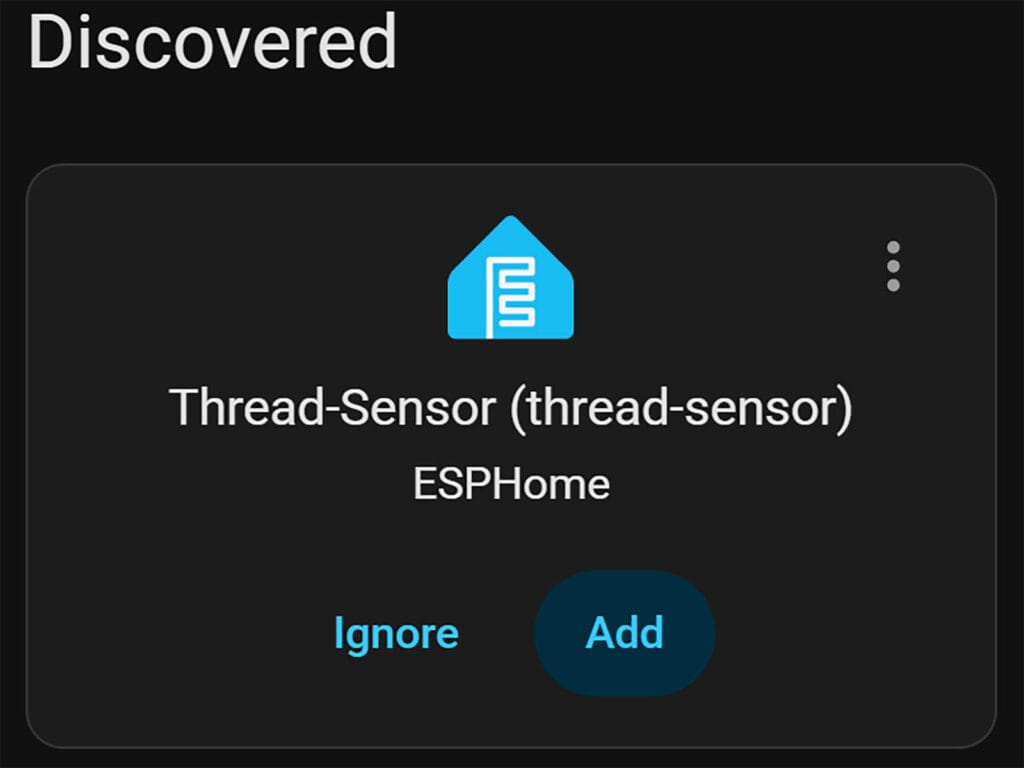
When the Thread device boots back up, it will get auto-discovered in Home Assistant, just like a regular ESPHome device. You would expect it will appear as a new Thread device, but since it’s added via the ESPHome API, it appears as regular ESPHome device. You simply click Add to add it to Home Assistant.
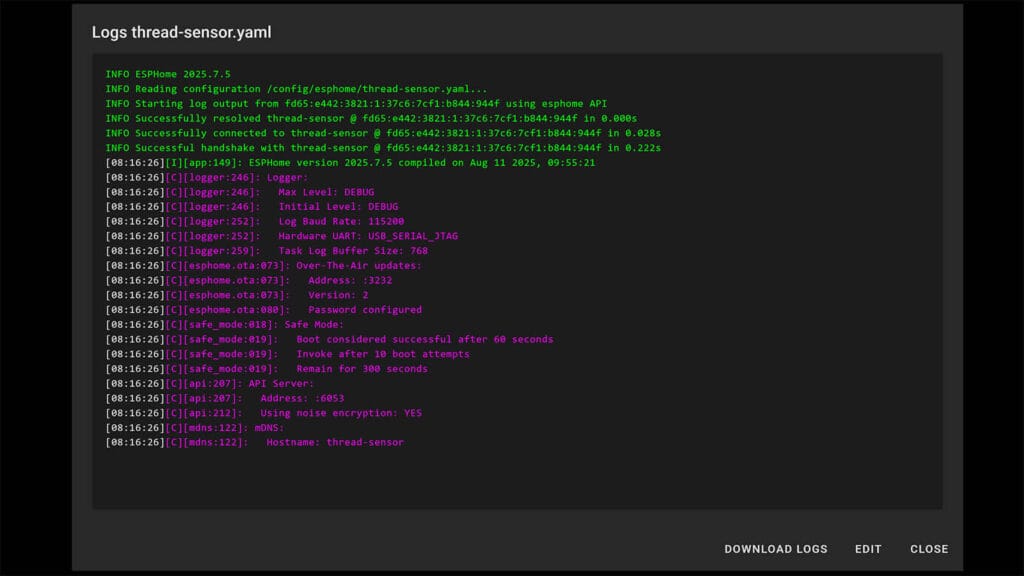
If you navigate to the ESPHome Builder, select your device and click Logs, you will be able to see the device is using OpenThread. As there isn’t a Wi-Fi configuration added at all, the device is connected via an IPV6 address to your existing Thread network.
Checking Thread network topology
ESPHome allows you create several text sensors, exposing the state of your OpenThread nodes. By adding these to your device configuration in the builder, the network information will be exposed to Home Assistant. Please note, wireless flashing is much slower over Thread compared to Wi-Fi, so be patient.
text_sensor:
- platform: openthread_info
ip_address:
name: "IP Address"
channel:
name: "Channel"
role:
name: "Device Role"
rloc16:
name: "RLOC16"
ext_addr:
name: "Extended Address"
eui64:
name: "EUI64 Interface ID"
network_name:
name: "Network Name"
network_key:
name: "Network Key"
pan_id:
name: "PAN ID"
ext_pan_id:
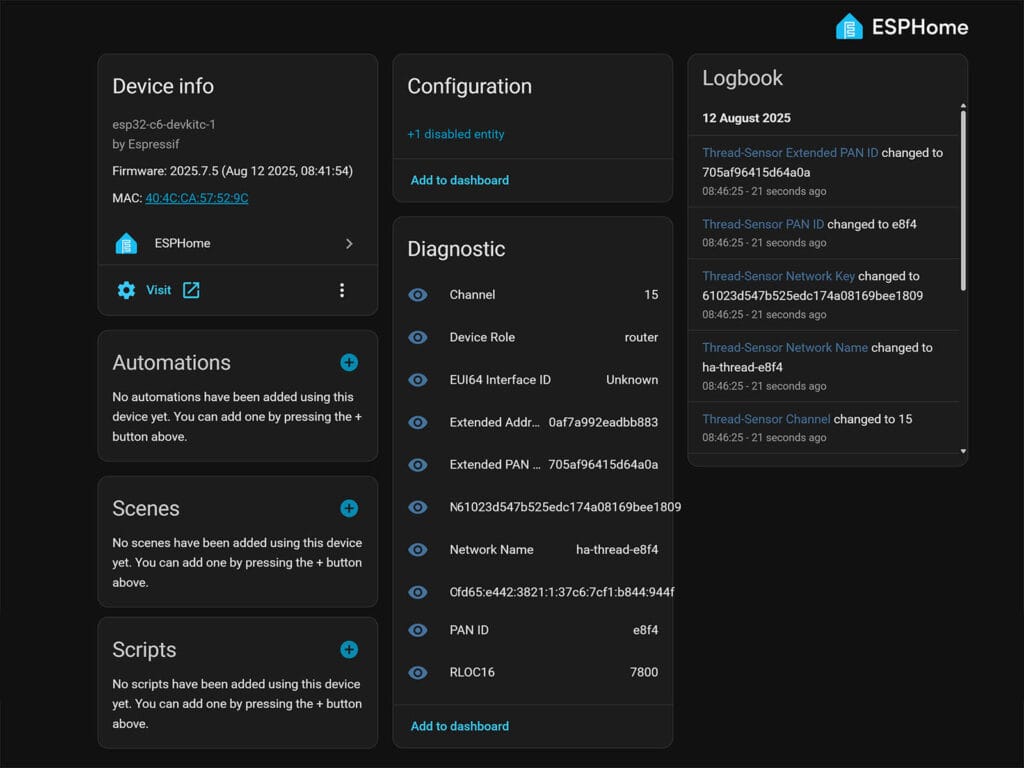
name: "Extended PAN ID"Once the device reboots, the new sensors will be added to Home Assistant:
Now, to truly verify the connection, I removed any existing Thread devices from this testing network. I left only the border router and my new ESPHome thread sensor. The OTBR Add-on allows you to access the network topology once you expose a web port and access the UI. This is disabled by default and you can enable it as follows in Home Assistant:
- Navigate to Settings > Add-ons
- Click OpenThread Border Router Add-on
- Click Configuration at the top
- Scroll down to Network and set the two ports:
- OpenThread Web port: 8080
- OpenThread REST API port: 8081
- Change them to something else if these are already taken
- Click Save and restart the Add-on
With the port exposed, access the OpenThread Add-on interface with your local Home Assistant IP address followed by the OTBR web port (e.g. 192.168.0.220:8080). On the left side of the menu, click Topology and let the map load. In my case, I should see only my SLZB-MR1 border router and new Thread Sensor:
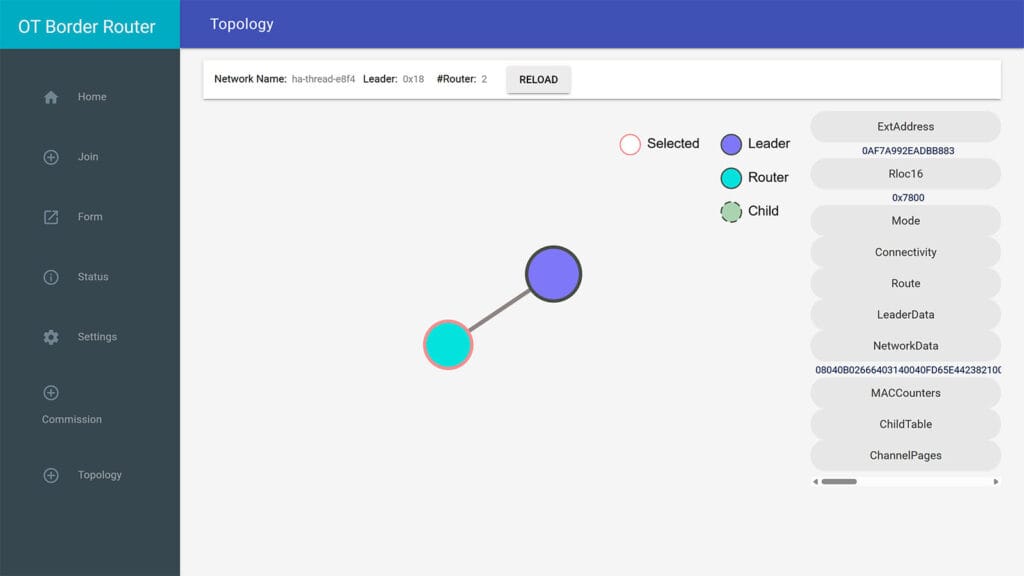
Selecting the new Thread Sensor and comparing the data to the Home Assistant sensors verifies the device is connected and working properly with OpenThread. As my node is configured as a FTD (Full Thread Device), it operates as a Router. It will relay traffic from neighboring devices back to the Border Router, solidifying and extending my mesh network.
Final Thoughts
The addition of OpenThread support to ESPHome is a great development. The supported ESP32-C6 [Amazon, AliExpress] and ESP32-H2 [Amazon, AliExpress] boards are a very affordable way to build out your Thread network, especially when compared to commercial Thread routers. By strategically placing these low-cost boards around your home, you can easily strengthen and expand your Thread mesh network.
The great thing is you can freely turn them into any kind of DIY smart device, attaching sensors or peripherals like you normally would with ESPHome Wi-Fi devices. For example, you can turn them into soil sensors, mmWave radar sensors or temperature probe sensors.
However, it is important to remember that Thread is a low-bandwidth protocol. It is designed for small, infrequent data transmissions, not large data payloads. If you plan on building a data-heavy or sensor-rich device that needs to send a lot of information, a Wi-Fi connection would be a much better choice.
Do you have any ideas or suggestions? Let me know below.


It’s Esphome over Thread, not Matter at all. So you need Esphome API running (in Your Home Assistant), instead of Matter.
Exactly, I never said otherwise.
I use a Google nest hub 2nd Gen as thread border router and it doesn’t seem to expose the TLV in home assistant is there another way of getting it? Or maybe using this without that?
You can try the manual configuration and populate each parameter yourself, without TLV.
It should work.
Hello,
With ESPHome 2025.10.3, Home Assistant 2025.10.4, and OpenThread Border Router Add-On 2.15.0, I flashed an ESP32C6 with a similar example.
The module seems to connect fine to OTBR. The connection appears in the “Topology” page of the OTBR web interface.
However, the module does not appear in HA. And I have this error in the module log that would explain the problem:
[12:46:44][E][api:135]: No clients; rebooting
How does the module connect to the HA API via thread?
The device should get auto-discovered in HA via the ESPHome API.
So, it will still use the ESPHome integration in Home Assistant, just like any other ESP device.
You can enter the mDNS address when you add manually , e.g.
thread-sensor.localor you can simply use the IPv6 IP address, e.g.fd53:145f:ed22:ad81:e301:e562:80ac:d52d.You can find both when you open the logs in ESPHome.
I have the same problem and after much research the only way is too add the thread device manually to homeassistant with the IPv6 address. The problem only occurs with the esp-otbr apparently it is being worked on.
Thanks,
I was able to ping once the IPV6 addr (ping esp32c6-2.local) for a little time. but it doesn’t work anymore.
I had this LOG in yaml to force printing IP Addr, but this alway return a empty string
With this text_sensor:
text_sensor:
– platform: openthread_info
ip_address:
name: “IP Address”
id: ipaddress
…
ESP_LOGD(“MYLOG”, “IP ADDR: %s”, id(ipaddress).state.c_str());
here is an extract from the log:
…
[18:43:44][C][mdns:179]: Hostname: esp32c6-2
[18:43:44][D][text_sensor:085]: ‘Network Name’: Sending state ‘ha-thread-559c’
[18:43:44][D][text_sensor:085]: ‘Device Role’: Sending state ‘detached’
[18:43:44][D][text_sensor:085]: ‘Extended PAN ID’: Sending state ‘dcf25cd54bda6c68’
[18:43:44][D][text_sensor:085]: ‘Network Key’: Sending state ‘a04c2586ce3ca1dcf2d42fa6010569b8’
[18:43:48][D][sensor:131]: ‘esp32c6-2 Uptime’: Sending state 4.43100 s with 0 decimals of accuracy
[18:43:48][D][MYLOG:053]: IP ADDR: <= EMPTY IP ADDR !!!!
[18:43:49][D][text_sensor:085]: 'EUI64 Interface ID': Sending state 'f0f5bdfffe1a976c'
[18:44:12][D][text_sensor:085]: 'RLOC16': Sending state 'fffe'
[18:44:18][D][text_sensor:085]: 'RLOC16': Sending state '7c00'
[18:44:18][D][text_sensor:085]: 'Device Role': Sending state 'leader'
[18:44:44][I][safe_mode:042]: Boot seems successful; resetting boot loop counter
An idea of the problem ?
I don’t understand.
Yesterday, I tested two Xiao ESP32C6 modules again, and HA detected them correctly. Both were accessible via their IPV6 addresses.
OTBR can see them:
# ot-ctl
> srp server host
esp32c6-1.default.service.arpa.
deleted: false
addresses: [fd43:b533:bfc7:1:2d14:3659:b25e:ac02]
esp32c6-2.default.service.arpa.
deleted: false
addresses: [fd43:b533:bfc7:1:faa5:206:2404:942e]
Done
I added a log to display the module’s IP address:
[D][sensor:131]: ‘esp32c6-1 Uptime’: Sending state 542.58899 s with 0 decimals of accuracy
[D][MYLOG:047]: IP ADDR: ‘fd43:b533:bfc7:1:2d14:3659:b25e:ac02’
A few hours later, they were no longer accessible and the module log no longer displayed their @IP.
[D][sensor:131]: ‘esp32c6-1 Uptime’: Sending state 482.58301 s with 0 decimals of accuracy
[D][MYLOG:047]: IP ADDR: ”
I will replace the nrf52840 USB dongle connected to the OTGR with a SONOFF ZBDONGLE-E flashed with openthread rcp firmware and see if I get the same behavior.
Thank you for your help, I will keep you posted.
As of time of writing ESP32-H2 is not selectable as a type when doing the steps above in esphome. c6 is there, so what should I choose ?
Not selectable where? I’m not sure I follow?
As per the instructions above:-
1. Open the ESPHome Builder Add-on
2. Click + New Device and give it a name
3. Under device type, select your board (e.g. ESP32-C6)
4. At the Install window, click Skip
Step 3, the ESP32-H2 does not exist as a type to select from the list.
Oh, I see. And you are right, the H2 isn’t on that list yet.
Simply select the generic first one, save the config, click edit and replace it with this:
esp32:board: esp32-h2-devkitm-1
variant: ESP32H2
framework:
type: esp-idf