SmartWings is a brand that produces high-quality window coverings of all kinds, including zebra, cellular, woven shades, draperies, and more. The company is also a strong Matter supporter and industry leader, offering Matter over Thread motors across its product range, as well as the first-ever Matter over Ethernet blinds with PoE support.
In this article, I’m sharing my experience with the new SmartWings Skylight Shades for roof windows. I helped a friend install two of them in his home, in the Cream color design. These shades use Matter over Thread motors and integrate directly with Home Assistant. They are available on the official SmartWings website in various designs, sizes, motor types with different connectivity options, and a range of accessories.
Package Contents and Disassembly
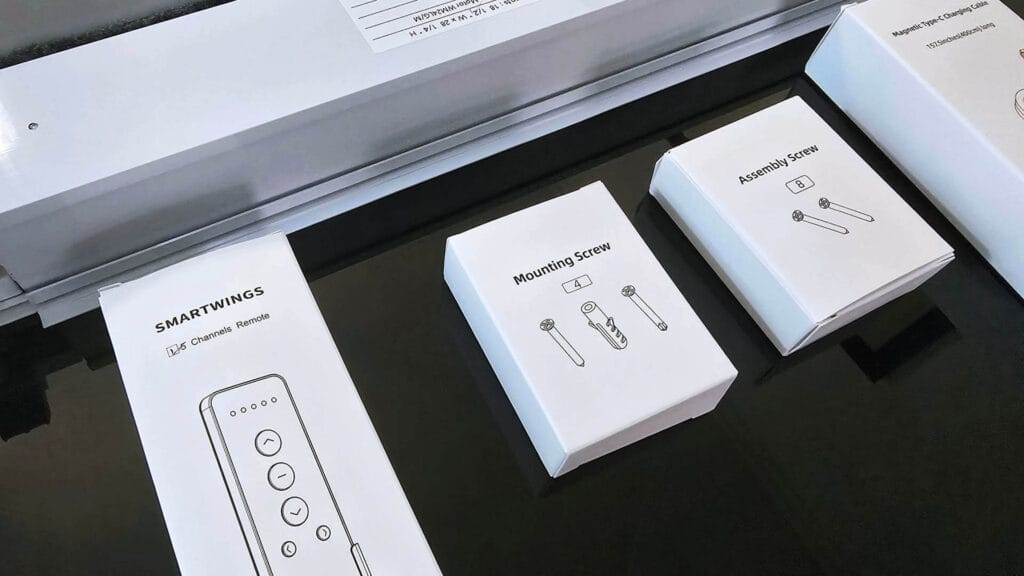
The SmartWings Skylight shades ship disassembled, containing four parts of the frame, a set of assembly screws, a set of mounting screws, a user manual and any accessories you ordered. In this case, we got a solar panel for continuous power, a 433MHz remote and a USB extension cable for the panel. Everything was neatly packaged and cushioned inside the box to prevent shipping damage.
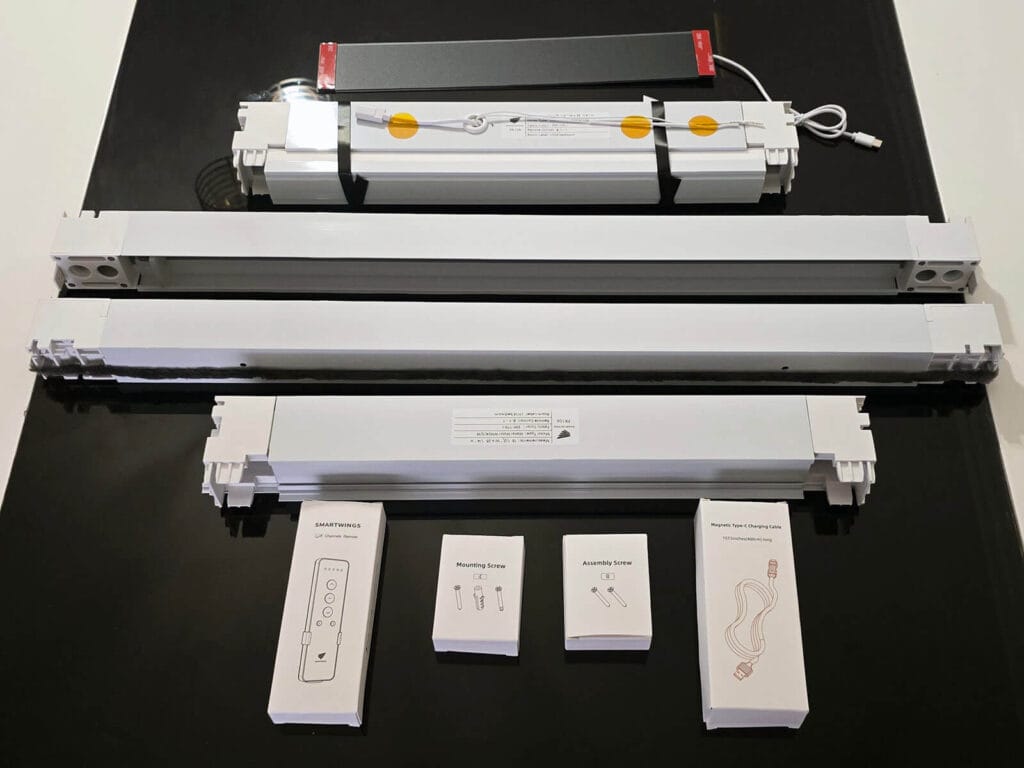
The eight assembly screws are used to assemble the window frame, with two at each corner forming a rectangle. The mounting screw box includes four screws and four rivets for securing the assembled shade to your window frame or ceiling opening. Since this was a relatively small window, four screws were more than enough to hold it securely in place, though larger windows would likely require additional fasteners.
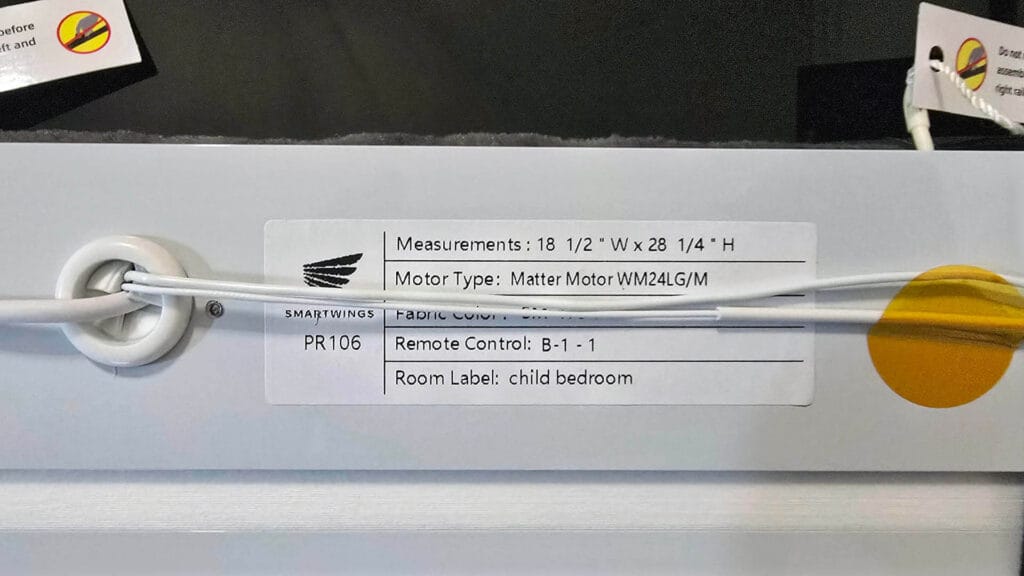
The bottom bar of the window frame features a simple informational sticker displaying the shade’s dimensions, the Matter motor model (WM24LG/M), the fabric color, and the remote channel to which the blind is paired. The Matter QR code is located on the underside of the frame, making it easier to scan once the smart shade is mounted on the ceiling. The Matter sticker should be saved somewhere for safekeeping.
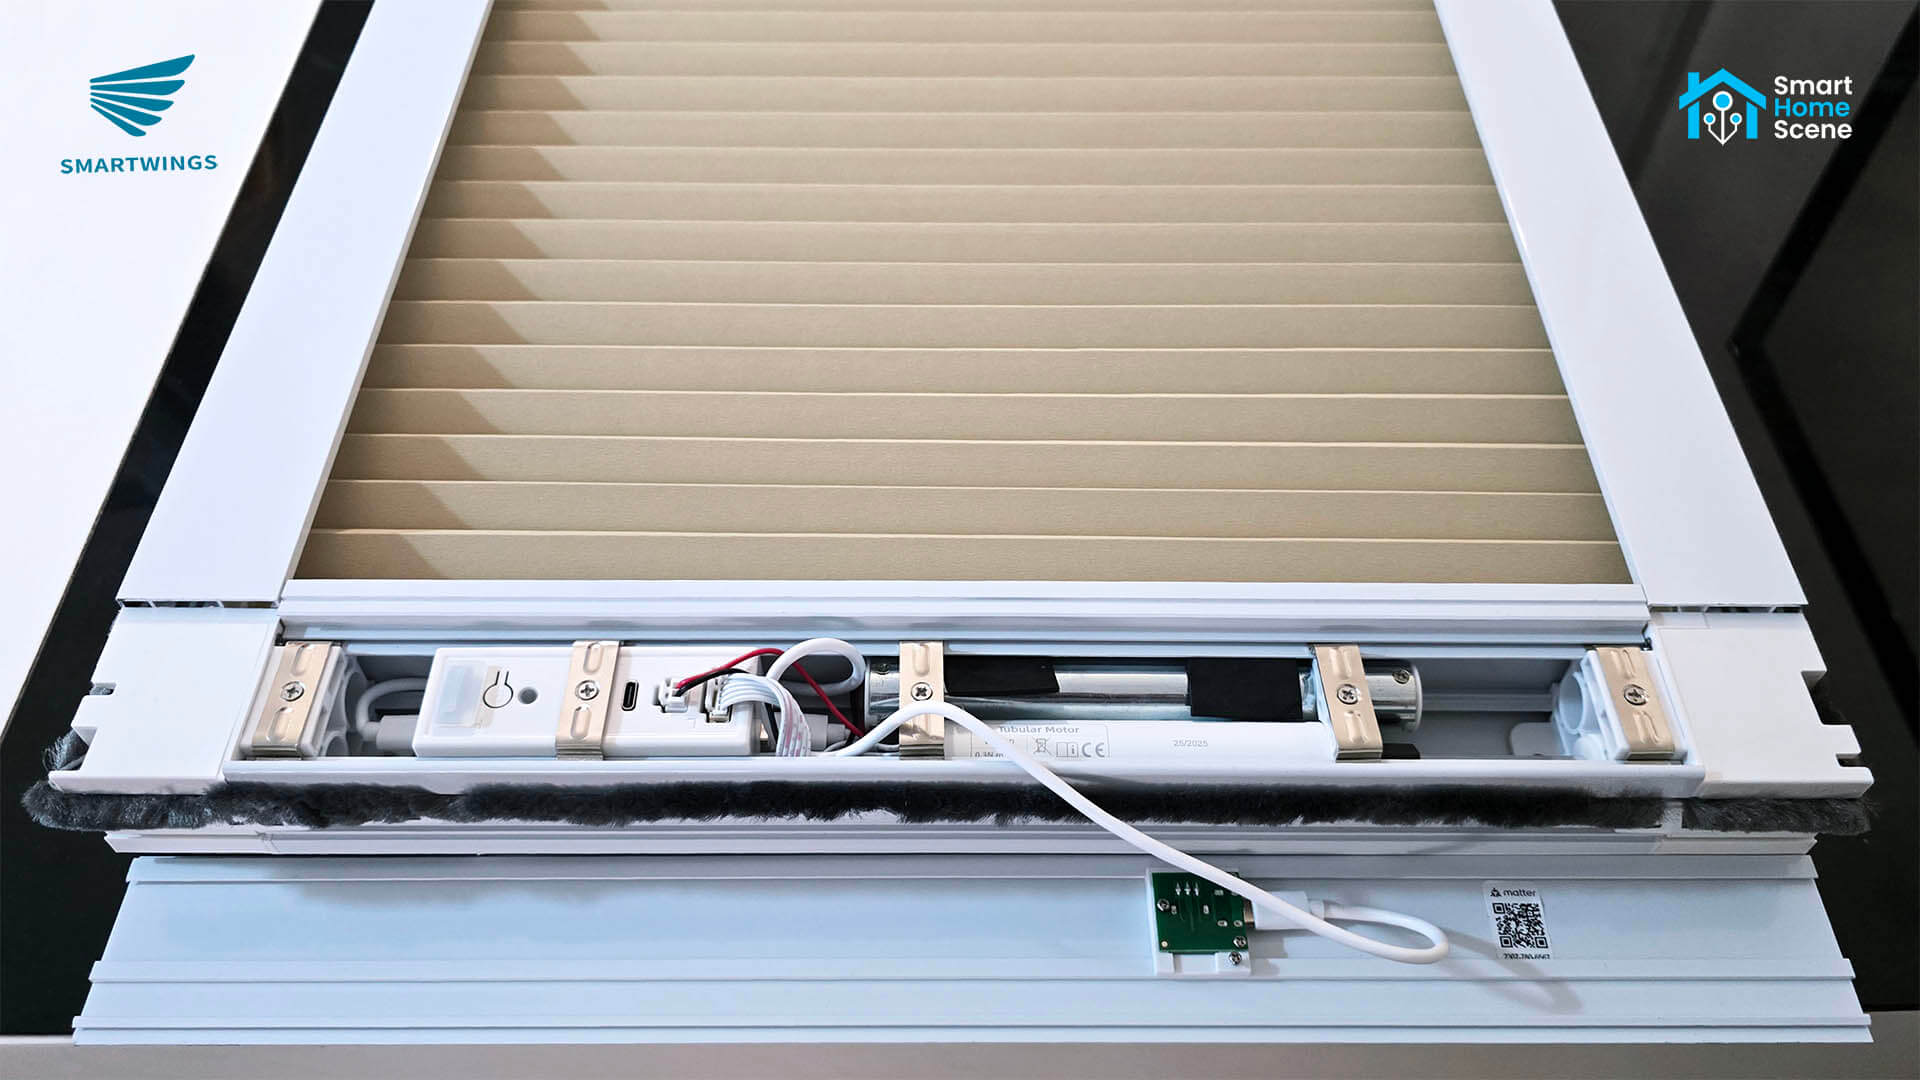
Before assembling the SmartWings Skylight Shades, I removed the aluminum cover that conceals the wiring and main motor. My first impression was that these skylight shades are more complex than typical blinds with simple tubular motors, mainly because the entire drive mechanism is different.
Since these shades are installed on a slanted ceiling and hang downward, the fabric needs to travel smoothly between two side rails to stay in place. To achieve this, the motor drives a small mechanism on each side that’s linked together, ensuring both sides move in perfect sync.
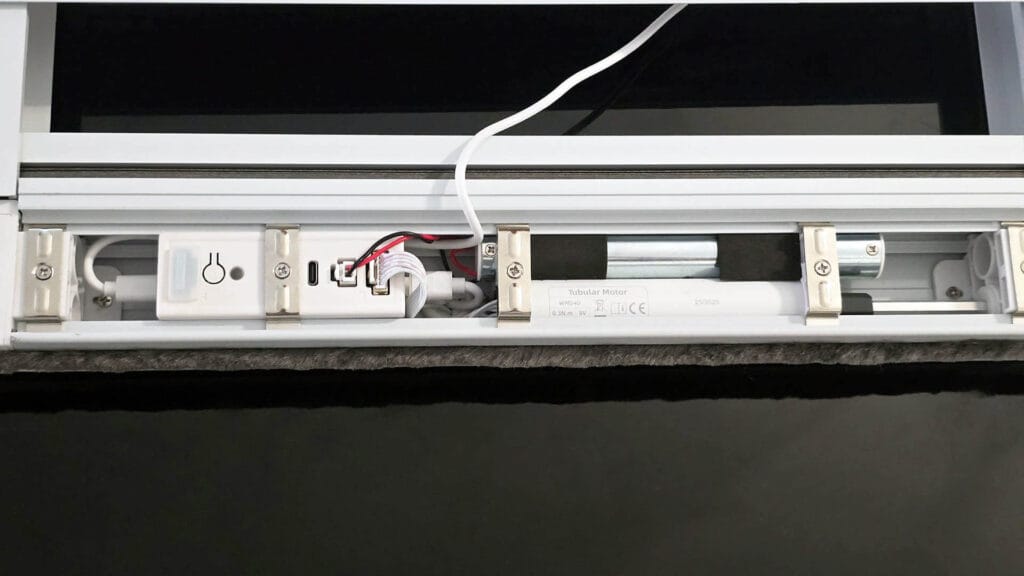
The power module that controls the motor contains a small pairing button used for resetting the controller, along with a USB-C port that serves as the power input for either the solar panel or a standard USB power adapter. The attached cables route power to the tubular motor and communication lines between the two, while the compact design keeps everything neatly housed inside the frame for a clean installation.
Assembly and Installation
SmartWings could not have made the assembly process easier. Each side of the frame is clearly labeled, so you always know which pieces connect together. Bars marked A1 slot into the other parts labeled A1, and B1 connects to B1, while the opposite ends are marked A2 and B2 for the corresponding sides.
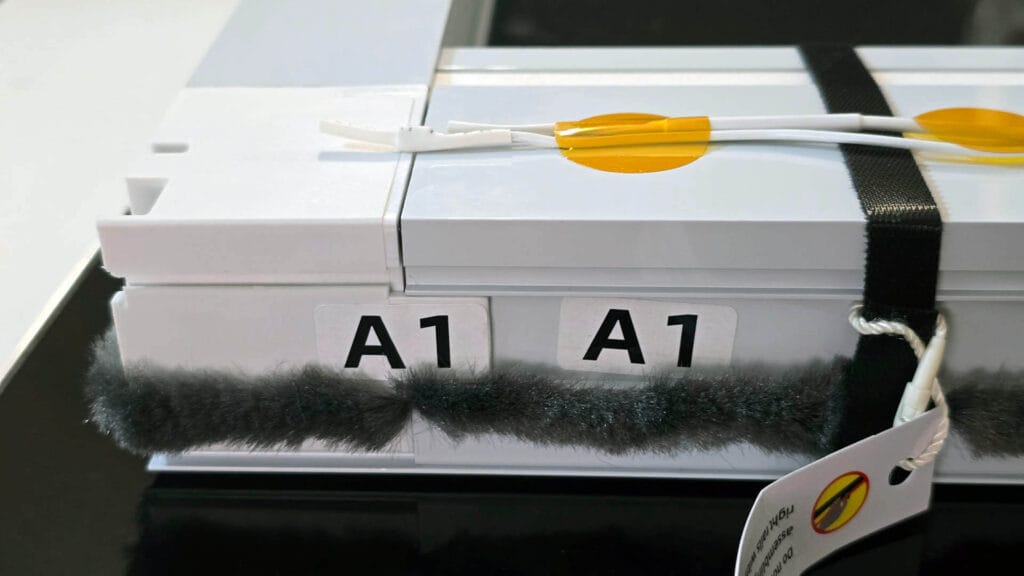
This makes the process nearly foolproof, even though the frame bars could technically fit the wrong way, the labels ensure you can’t make a mistake if you follow the markings. Once aligned correctly, you secure the bars with the included assembly screws to form a solid rectangular frame.
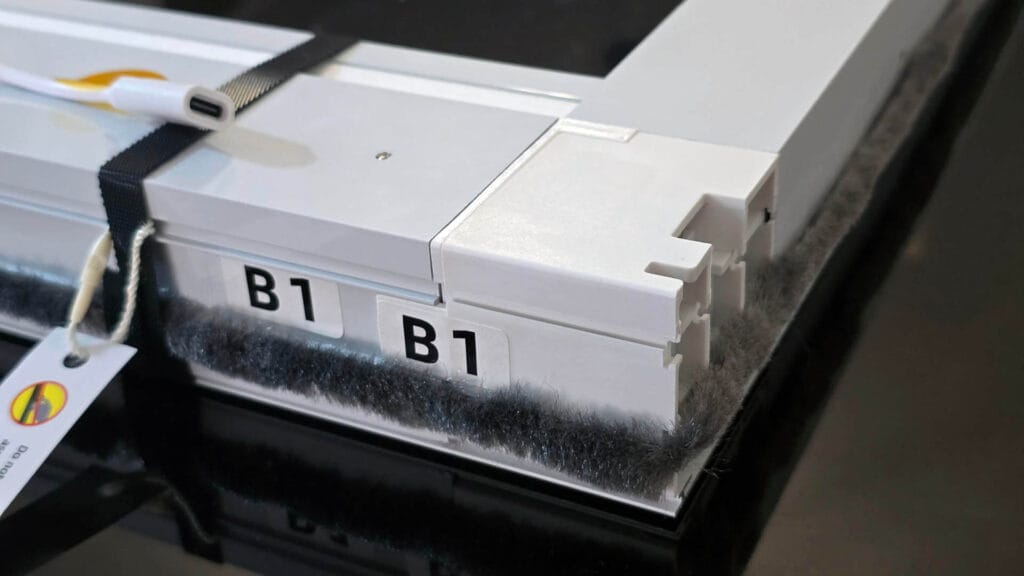
The precision of the components is impressive; each corner fits tightly, and the pre-drilled holes line up perfectly. The soft weather-stripping around the edges is already attached, which helps seal the frame when mounted and prevents light leakage. You do not need a helping hand for assembling these SmartWings Skylight shades, you can do it by yourself.

The whole process took less than five minutes, and I was ready to mount the Skylight Shades in place. To install them, you first raise the shade with the remote and position it correctly over the window. Then, using a marker, you mark the spots for the mounting screws through the four small holes on each side of the frame. After that, you insert the rivets and secure the frame by tightening the screws in place. Done!
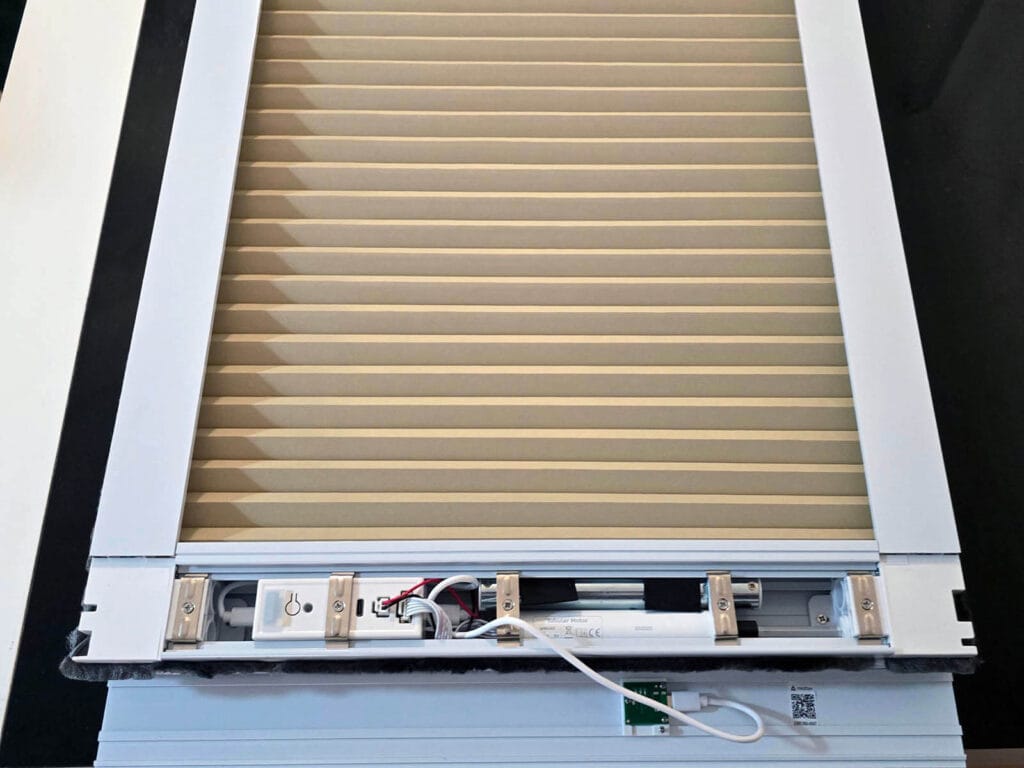
Interestingly, the Matter QR code is also located underneath the aluminum cover for safekeeping. The small PCB visible on the aluminum frame houses a female USB-C connector extended from the main power block. This port can also be used to connect the solar panel or to charge the blind with a standard 5V adapter.
Home Assistant Integration
The SmartWings Skylight Shades paired with Home Assistant smoothly using Matter-over-Thread. Before starting the setup, you need to remove the aluminum cover to access the motor housing. To enter pairing mode, press and hold the small button on the motor head for about six seconds until the motor jogs twice and the LED indicator lights up red.
As these shades communicate over Thread, you’ll need an active Thread Border Router, such as the new Sonoff Dongle Max, SLZB-06M, HomePod Mini, or any Matter-certified router connected to your network. Once the QR code is scanned in Home Assistant through the “Add Matter Device” option, the shade is discovered immediately and paired without issues.
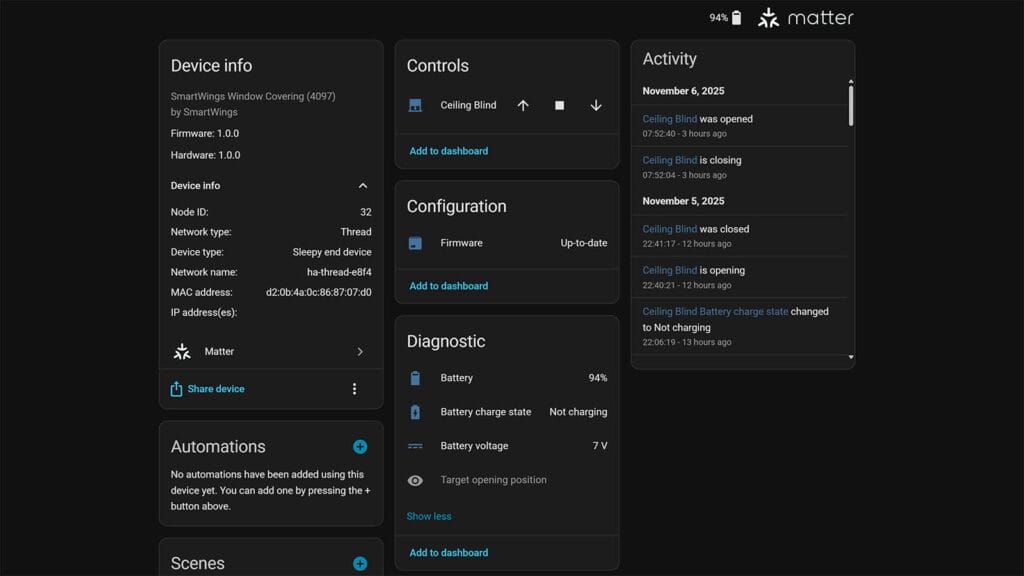
After pairing, the Skylight Shades appear in Home Assistant as standard cover entities, allowing full control for opening, closing, and adjusting positions, along with real-time feedback. You can also view battery status, signal strength, and device details directly from the Home Assistant interface.
The physical remote that comes with the SmartWings Skylight Shade arrives pre-paired to the motor, so it works right out of the box. Each channel on the remote corresponds to a specific shade, and the factory pairing ensures that the shade can be controlled immediately without any additional setup. You can use the remote to raise, lower, or stop the shade, as well as to fine-tune its position with precise incremental adjustments. If you ever need to re-pair or assign the remote to a different channel, the process is clearly described in the manual and only takes a few seconds using the same pairing button on the motor head.
Final Thoughts
The SmartWings Skylight Shades deliver an excellent mix of build quality, smart integration, and ease of use. The frame and fabric feel premium, the assembly process is simple, and the motion is smooth and quiet. Every component fits together precisely, and the motor operates without any noticeable vibration, which is particularly important for roof-mounted installations. The overall design looks refined and modern, blending in naturally with most interiors.
Smart integration is where these shades really stand out. Pairing via Matter-over-Thread is straightforward, and once connected, control through Home Assistant is fast and reliable. Even though these are sleepy end devices, it takes less than a second for Home Assistant to wake them up and execute a command. The response feels instant, and the position tracking stays perfectly in sync across platforms once I shared them (Google Home).
If you are looking for smart roof shades of this type, SmartWings are an excellent choice. Shades designed specifically for roof or skylight windows are already rare, and finding ones with a Matter-certified motor and Thread connectivity is even harder. These are premium products, and the price reflects that. Costs vary significantly depending on the size, fabric type, and chosen motor configuration. Here’s where you can get them:


