

I recently I started looking into getting a standing desk. This was one of the rare times I did not check beforehand whether I could automate it with Home Assistant, since durability, stability, and build quality mattered more this time around.
I figured since the controls are usually at arms length, I wouldn’t need to. I would just press the button and raise or lower it when needed, without any automations built around it. After a lot of research, I settled on the DESKSPACE Titan frame, a monster of a four legged desk that can lift up to 200kg.
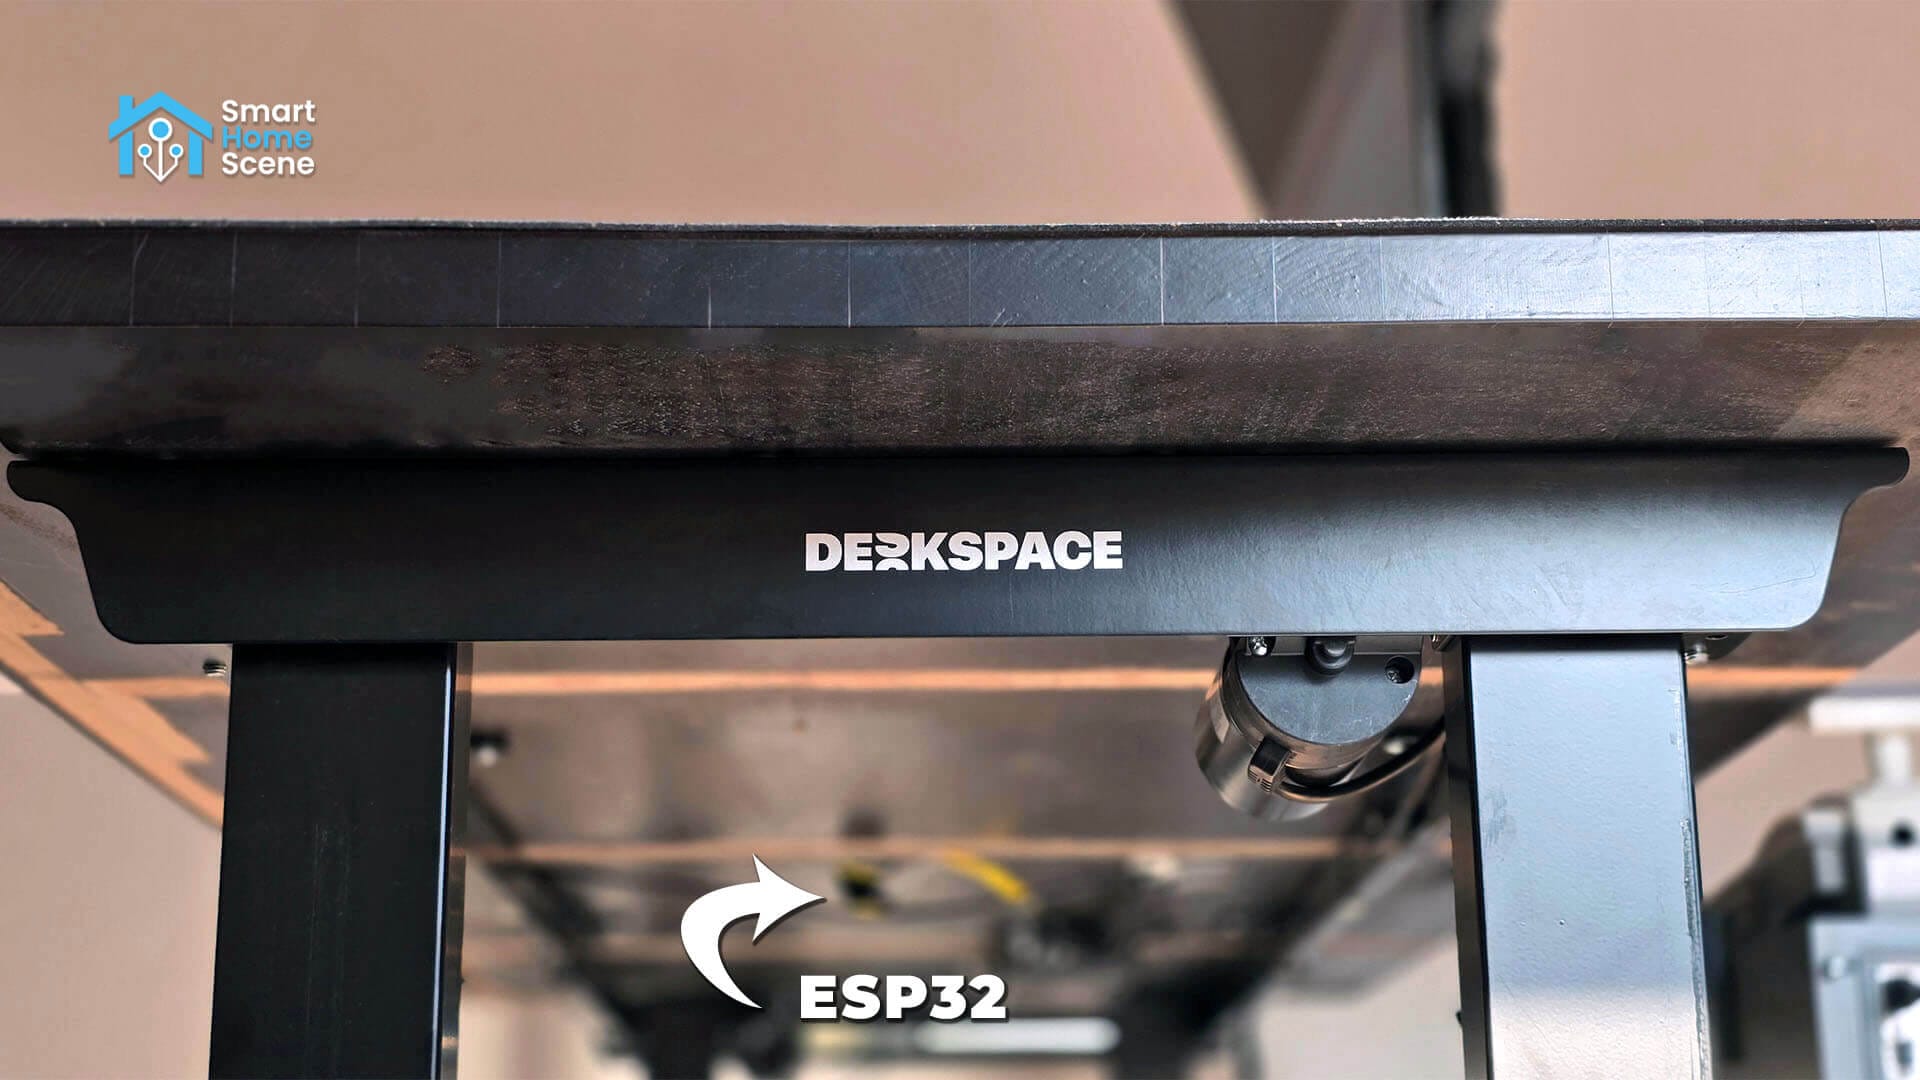
But then the tinkerer in me took over, and yeah, I just had to make an ESPHome controller. This guide walks through exactly how I wired my DESKSPACE Titan, the full ESPHome configuration I ended up running, and solving a few obstacles I hit along the way.
Requirements and Compatible Models
It turns out many electric standing desks, including popular FlexiSpot models, run on control hardware made by a company called LoctekMotion. This brand produces various control boxes with RJ45 or RJ12 ports for connecting peripherals and controlling the desk. That port is basically a full serial interface into the desk’s brain. Wire an ESP32 into it, flash ESPHome, and the desk becomes just another device in Home Assistant, height sensor, cover control, presets and all.
My guide is based on this pretty awesome project and this interceptor which basically decoded how these desks work. I was very glad someone took the time to do this and share it with the community, as it meant I didn’t have to reverse engineer how these control boxes work. Full credit to the authors of both projects, as my setup is a working, updated, and optimized implementation of it.
What you actually need:
- ESP32 Board
- Ethernet cable
- Dupont connectors or soldering iron
- Desk with LoctekMotion controller
As I mentioned earlier, my own desk is a DESKSPACE Titan, a four leg, dual motor beast of a desk. It is rated for 200kg of load capacity with a height range of 66 to 132cm, a top speed of about 25mm per second, and noise under 45dB when adjusting. It has been rock solid since day one, no wobble even at full height, no motor strain, nothing.
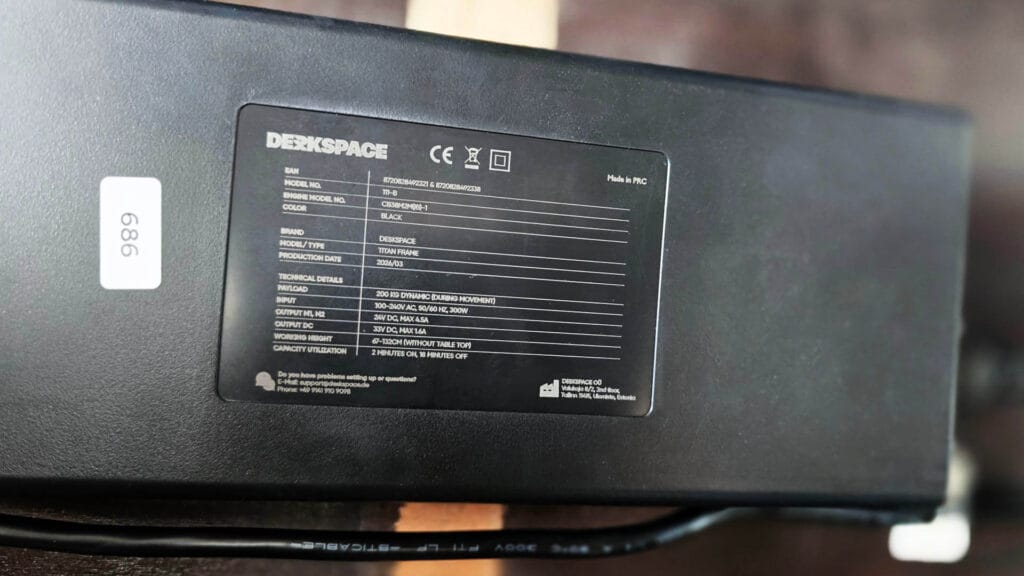
The control box is labelled as CB38MBM and model 111-B, which is the same family of controller LoctekMotion supplies to several FlexiSpot models, including the E7 and several EK/HS series desks. If your desk uses a LoctekMotion control box under a different brand name, there is a good chance this same wiring and firmware works for you too.
Standing Desk ESPHome Wiring Guide
The wiring itself is simple once you know the pin mapping. All you are doing is connecting five wires from a standard ethernet cable into five pins on the ESP32. No microcontroller programming knowledge needed for this part, just a bit of patience with a soldering iron. You can also use DuPont connectors instead.
The pin-out used here works across a wider range of LoctekMotion control panels, not just one specific model. The original project maintainers tested it directly against panels like the HS13A-1, HS13B-1, and HS01B-1, and found the same pin mapping is compatible with their broader lineup of control boxes. You can check out this list for alternative pinouts.
Wiring without passthrough
If your control box has a second, unused RJ45 port like mine does, this is the easier and cleaner path. You are not touching the existing keypad connection at all, you are just plugging into the spare port directly.
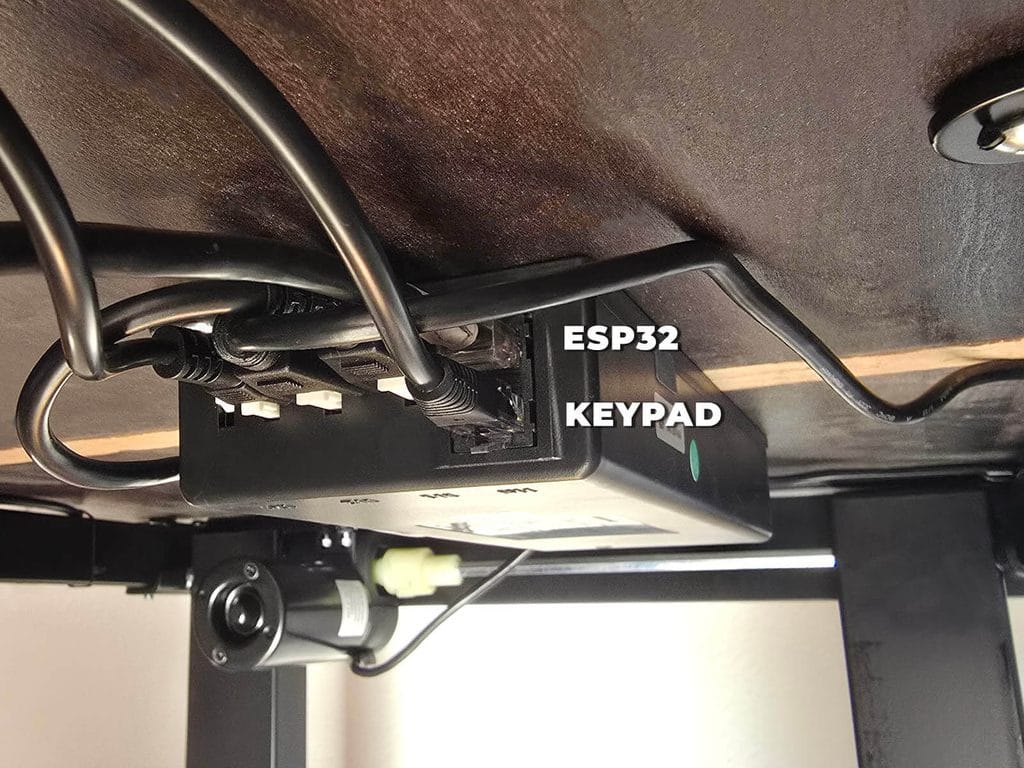
Cut one end off a standard ethernet cable and keep the RJ45 plug intact on the other end, that plug goes straight into the desk controller’s spare port. Strip back the outer jacket on the cut end and identify five individual wires by color.
| Function | Ethernet Wire Color | ESP32 Pins |
|---|---|---|
| +5V (VDD) | Brown | VIN |
| GND | White-Brown | GND |
| TX | Green | GPIO17 |
| RX | White-Blue | GPIO16 |
| PIN 20 (wake signal) | Blue | GPIO23 |
Once wired, double check the polarity on VIN and GND before powering anything on. A reversed 5V and GND connection can damage the board immediately. With everything correct, the ESP32 draws its power directly from the desk controller, no separate USB power supply needed once it is flashed and mounted.
Wiring with passthrough
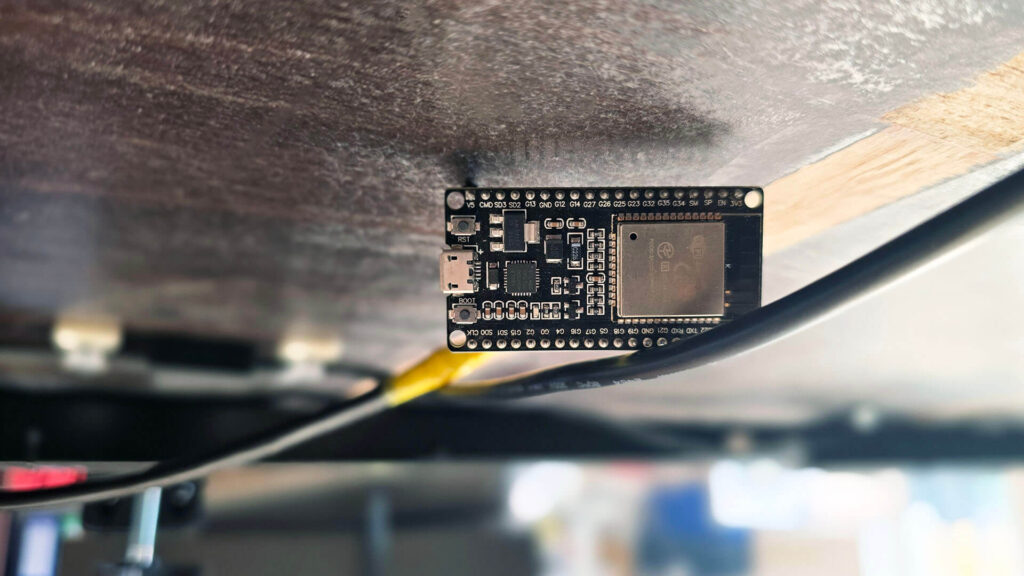
If your control box only has a single RJ45 port, you cannot simply plug into a spare port since you don’t have one. Instead, you can use small Ethernet breakout boards for connecting the Keypad and desk controller. The ESP32 sits between the keypad and the controller, splitting a few of the lines rather than going into an unused connector.
| Function | Ethernet Wire Color | Desk controller | ESP32 | Keypad |
|---|---|---|---|---|
| +5V (VDD) | Brown | Connected | VIN | Connected |
| GND | White-Brown | Connected | GND | Connected |
| TX | Green | Connected | TX2 (GPIO17) | Not connected |
| TX (Keypad) | Green | Not connected | RX0 (GPIO3) | Connected |
| RX | White-Blue | Connected | RX2 (GPIO16) | Connected |
| PIN 20 | Blue | Not required | Not required | Not required |
| Unknown | White-Green | Not required | Not required | Not required |
| SWIM | Orange | Pass-through | Not connected | Pass-through |
| RESET | White-Orange | Pass-through | Not connected | Pass-through |
The +5V, GND, and RX lines are the three way splits, wired to all three devices at once. TX is really two separate wires sharing the same function, since it is a different physical RJ45 connector on each side, the desk controller’s own TX line feeds the ESP32’s second UART the same way it does in the direct connect setup, while the keypad’s separate TX line feeds a different ESP32 UART entirely, so the board can listen to both sides independently. SWIM and RESET skip the ESP32 completely and run straight between the controller and the keypad.
This setup is more involved than the direct connection above, since you are working with a live signal path that your existing keypad still depends on for normal desk operation. Furthermore, on the direct-connect setup, unplugging the ESP32 has no effect on the desk’s built-in controls. On a passthrough setup, removing the ESP32 means re-attaching the keypad back to a direct connection. If your desk only has one port, treat every connection carefully, as making a mistake here risks losing keypad functionality entirely, not just the smart features.
ESPHome Config and Flashing
With the wiring done, the rest of this project is entirely ESPHome. The first thing I did was update the code to run on ESP-IDF rather than the Arduino framework the original project defaulted to. ESP-IDF produces a smaller, more efficient build and is now the default ESPHome framework.
The original project relied on an external component pulled in from GitHub at compile time, which handles the height sensor decoding. It works partially, but I ran into two problems with it. First, I hit a compile error, stray '\302' in program, caused by the legacy custom sensor platform this project originally used. That platform type was deprecated in ESPHome 2025.2.0, and every implementation using it now fails to build on a current install. Second, I just did not want an external dependency at all, since a change to that repository down the line could silently break my desk’s firmware on my next reflash without me touching anything.
So I rewrote the height decoding logic myself, directly inside the YAML, as a template sensor with a lambda. It replicates the exact same byte parsing the original component does, reading the desk’s serial broadcast and decoding the display data into a usable height value, just without needing a separate file or an external component reference.
I also cleaned up the presets to actually match my desk. The original config included commands mapped to generic “Sit” and “Stand” presets, but my Titan only has three physical preset buttons, not four. I dropped the Sit preset entirely and renamed what was originally a fourth preset command into Preset 3, since that is the command my keypad’s third button actually corresponds to.
Here is the entire ESPHome configuration I used for the DESKSPACE Titan:
DESKSPACE Titan ESPHome Config:
esp32:
  board: esp32dev
  framework:
    type: esp-idf

esphome:
  name: ${name}
  friendly_name: ${device_name}
  comment: Used to control your ${device_name} standing desk via Home Assistant.
  on_boot:
    priority: -100
    then:
      - delay: 10s
      - button.press: button_wake_screen
      - delay: 300ms
      - button.press: button_m

logger:

ota:
  platform: esphome
  password: !secret office_desk__ota_password

wifi:
  ssid: !secret wifi_ssid
  password: !secret wifi_password
  ap:

api:
  encryption:
    key: !secret office_desk__encryption_key

captive_portal:

substitutions:
  device_name: Office Desk
  name: office-desk
  unit_of_measurement: "cm"
  min_height: "67"
  max_height: "132"
  tx_pin: GPIO17
  rx_pin: GPIO16
  screen_pin: GPIO23

uart:
  - id: desk_uart
    baud_rate: 9600
    tx_pin: ${tx_pin}
    rx_pin: ${rx_pin}

sensor:
  - platform: wifi_signal
    name: "WiFi signal"
    update_interval: 60s

  - platform: uptime
    name: Uptime

  - platform: template
    id: desk_height
    name: "Desk height"
    unit_of_measurement: cm
    icon: "mdi:arrow-expand-vertical"
    accuracy_decimals: 1
    state_class: measurement
    device_class: distance
    update_interval: 20ms
    lambda: |-
      static uint8_t history[5] = {0, 0, 0, 0, 0};
      static uint8_t msg_len = 0;
      static uint8_t msg_type = 0;
      static bool valid = false;
      static float value = 0;
      static float last_published = -1;

      auto bit = [](uint8_t s, int i) -> bool { return (s >> i) & 1; };

      auto hex_to_int = [&bit](uint8_t s) -> int {
        if (bit(s,0) && bit(s,1) && bit(s,2) && bit(s,3) && bit(s,4) && bit(s,5) && !bit(s,6)) return 0;
        if (!bit(s,0) && bit(s,1) && bit(s,2) && !bit(s,3) && !bit(s,4) && !bit(s,5) && !bit(s,6)) return 1;
        if (bit(s,0) && bit(s,1) && !bit(s,2) && bit(s,3) && bit(s,4) && !bit(s,5) && bit(s,6)) return 2;
        if (bit(s,0) && bit(s,1) && bit(s,2) && bit(s,3) && !bit(s,4) && !bit(s,5) && bit(s,6)) return 3;
        if (!bit(s,0) && bit(s,1) && bit(s,2) && !bit(s,3) && !bit(s,4) && bit(s,5) && bit(s,6)) return 4;
        if (bit(s,0) && !bit(s,1) && bit(s,2) && bit(s,3) && !bit(s,4) && bit(s,5) && bit(s,6)) return 5;
        if (bit(s,0) && !bit(s,1) && bit(s,2) && bit(s,3) && bit(s,4) && bit(s,5) && bit(s,6)) return 6;
        if (bit(s,0) && bit(s,1) && bit(s,2) && !bit(s,3) && !bit(s,4) && !bit(s,5) && !bit(s,6)) return 7;
        if (bit(s,0) && bit(s,1) && bit(s,2) && bit(s,3) && bit(s,4) && bit(s,5) && bit(s,6)) return 8;
        if (bit(s,0) && bit(s,1) && bit(s,2) && bit(s,3) && !bit(s,4) && bit(s,5) && bit(s,6)) return 9;
        if (!bit(s,0) && !bit(s,1) && !bit(s,2) && !bit(s,3) && !bit(s,4) && !bit(s,5) && bit(s,6)) return 10;
        return 0;
      };

      auto is_decimal = [](uint8_t b) -> bool { return (b & 0x80) == 0x80; };

      uint8_t incoming_byte;
      while (id(desk_uart)->available() > 0) {
        if (id(desk_uart)->read_byte(&incoming_byte)) {
          if (incoming_byte == 0x9b) {
            msg_len = 0;
            valid = false;
          }

          if (history[0] == 0x9b) {
            msg_len = incoming_byte;
          }

          if (history[1] == 0x9b) {
            msg_type = incoming_byte;
          }

          if (history[2] == 0x9b) {
            if (msg_type == 0x12 && (msg_len == 7 || msg_len == 10)) {
              if (incoming_byte != 0 && hex_to_int(incoming_byte) != 0) {
                valid = true;
              }
            }
          }

          if (history[4] == 0x9b) {
            if (valid) {
              int height1 = hex_to_int(history[1]) * 100;
              int height2 = hex_to_int(history[0]) * 10;
              int height3 = hex_to_int(incoming_byte);
              if (height2 != 100) {
                float final_height = height1 + height2 + height3;
                if (is_decimal(history[0])) {
                  final_height = final_height / 10;
                }
                value = final_height;
              }
            }
          }

          history[4] = history[3];
          history[3] = history[2];
          history[2] = history[1];
          history[1] = history[0];
          history[0] = incoming_byte;

          if (incoming_byte == 0x9d) {
            if (value != 0 && value != last_published) {
              last_published = value;
            }
          }
        }
      }

      if (last_published != id(desk_height).state) {
        return last_published;
      }
      return {};
    on_value_range:
      - below: ${min_height}
        then:
          - switch.turn_off: switch_down
          - button.press: button_wake_screen
      - above: ${max_height}
        then:
          - switch.turn_off: switch_up
          - button.press: button_wake_screen
    on_value:
      then:
        - cover.template.publish:
            id: desk_cover
            position: !lambda |-
                float position = (float(x) - float(${min_height})) / (float(${max_height}) - float(${min_height}));
                return position;
        - component.update: set_desk_height

switch:
  - platform: gpio
    name: "Virtual screen"
    pin:
      number: ${screen_pin}
      mode: OUTPUT
    restore_mode: ALWAYS_ON
    entity_category: "config"
    internal: true

  - platform: uart
    name: "Up"
    id: switch_up
    icon: mdi:arrow-up-bold
    data: [0x9b, 0x06, 0x02, 0x01, 0x00, 0xfc, 0xa0, 0x9d]
    uart_id: desk_uart
    send_every: 108ms
    internal: true
    on_turn_on:
      - button.press: button_wake_screen
      - delay: 200ms

  - platform: uart
    name: "Down"
    id: switch_down
    icon: mdi:arrow-down-bold
    data: [0x9b, 0x06, 0x02, 0x02, 0x00, 0x0c, 0xa0, 0x9d]
    uart_id: desk_uart
    send_every: 108ms
    internal: true
    on_turn_on:
      - button.press: button_wake_screen
      - delay: 200ms

  - platform: uart
    name: "Alarm off"
    id: switch_alarm
    icon: mdi:alarm
    data: [0x9b, 0x06, 0x02, 0x40, 0x00, 0xAC, 0x90, 0x9d]
    uart_id: desk_uart
    send_every: 108ms
    on_turn_on:
      - delay: 3000ms
      - switch.turn_off: switch_alarm
    entity_category: "config"

  - platform: uart
    name: "Child lock"
    id: switch_child_lock
    icon: mdi:account-lock
    data: [0x9b, 0x06, 0x02, 0x20, 0x00, 0xac, 0xb8, 0x9d]
    uart_id: desk_uart
    send_every: 108ms
    on_turn_on:
      - delay: 5000ms
      - switch.turn_off: switch_child_lock
    entity_category: "config"

button:
  - platform: template
    name: "Preset 1"
    icon: mdi:numeric-1-box
    on_press:
      - button.press: button_wake_screen
      - delay: 200ms
      - uart.write:
          id: desk_uart
          data: [0x9b, 0x06, 0x02, 0x04, 0x00, 0xac, 0xa3, 0x9d]

  - platform: template
    name: "Preset 2"
    icon: mdi:numeric-2-box
    on_press:
      - button.press: button_wake_screen
      - delay: 200ms
      - uart.write:
          id: desk_uart
          data: [0x9b, 0x06, 0x02, 0x08, 0x00, 0xac, 0xa6, 0x9d]

  - platform: template
    name: "Preset 3"
    icon: mdi:numeric-3-box
    on_press:
      - button.press: button_wake_screen
      - delay: 200ms
      - uart.write:
          id: desk_uart
          data: [0x9b, 0x06, 0x02, 0x10, 0x00, 0xac, 0xac, 0x9d]

  - platform: template
    name: "Memory"
    id: button_m
    icon: mdi:alpha-m-box
    entity_category: "config"
    on_press:
      - uart.write:
          id: desk_uart
          data: [0x9b, 0x06, 0x02, 0x20, 0x00, 0xac, 0xb8, 0x9d]

  - platform: template
    name: "Wake screen"
    id: button_wake_screen
    icon: mdi:gesture-tap-button
    entity_category: "config"
    on_press:
      - uart.write:
          id: desk_uart
          data: [0x9b, 0x06, 0x02, 0x00, 0x00, 0x6c, 0xa1, 0x9d]

  - platform: template
    name: "Alarm"
    id: button_alarm
    icon: mdi:alarm
    entity_category: "config"
    on_press:
      - uart.write:
          id: desk_uart
          data: [0x9b, 0x06, 0x02, 0x40, 0x00, 0xAC, 0x90, 0x9d]

  - platform: restart
    name: "Restart"
    entity_category: "config"

cover:
  - platform: template
    id: "desk_cover"
    icon: mdi:desk
    name: "Desk"
    device_class: blind
    has_position: true
    position_action:
      - if:
          condition:
            - lambda: !lambda |-
                return pos > id(desk_cover).position;
          then:
            - cover.open: desk_cover
            - wait_until:
                lambda: |-
                  return id(desk_cover).position >= pos;
            - cover.stop: desk_cover
          else:
            - cover.close: desk_cover
            - wait_until:
                lambda: |-
                  return id(desk_cover).position <= pos;
            - cover.stop: desk_cover
    stop_action:
      - switch.turn_off: switch_up
      - switch.turn_off: switch_down
      - button.press: button_wake_screen
    open_action:
      - switch.turn_off: switch_down
      - switch.turn_on: switch_up
    close_action:
      - switch.turn_off: switch_up
      - switch.turn_on: switch_down
    optimistic: false

number:
  - platform: template
    name: "Desk height"
    id: set_desk_height
    min_value: ${min_height}
    max_value: ${max_height}
    icon: "mdi:counter"
    unit_of_measurement: ${unit_of_measurement}
    device_class: "distance"
    step: 0.1
    lambda: !lambda |-
      return id(desk_height).state;
    set_action:
      - if:
          condition:
            - lambda: !lambda |-
                return x > id(desk_height).state;
          then:
            - cover.open: desk_cover
            - wait_until:
                lambda: |-
                  return id(desk_height).state >= x;
            - cover.stop: desk_cover
          else:
            - cover.close: desk_cover
            - wait_until:
                lambda: |-
                  return id(desk_height).state <= x;
            - cover.stop: desk_cover
Adapting Config to Your Own Desk
Before you flash this onto your own desk, a handful of values and behaviors are worth understanding before you use them. Beyond the obvious things like your own Wi-Fi credentials, API key, and OTA password, which are standard ESPHome fields unrelated to the desk wiring itself, a few settings here are specific to how your particular desk behaves and need adjusting for your setup.
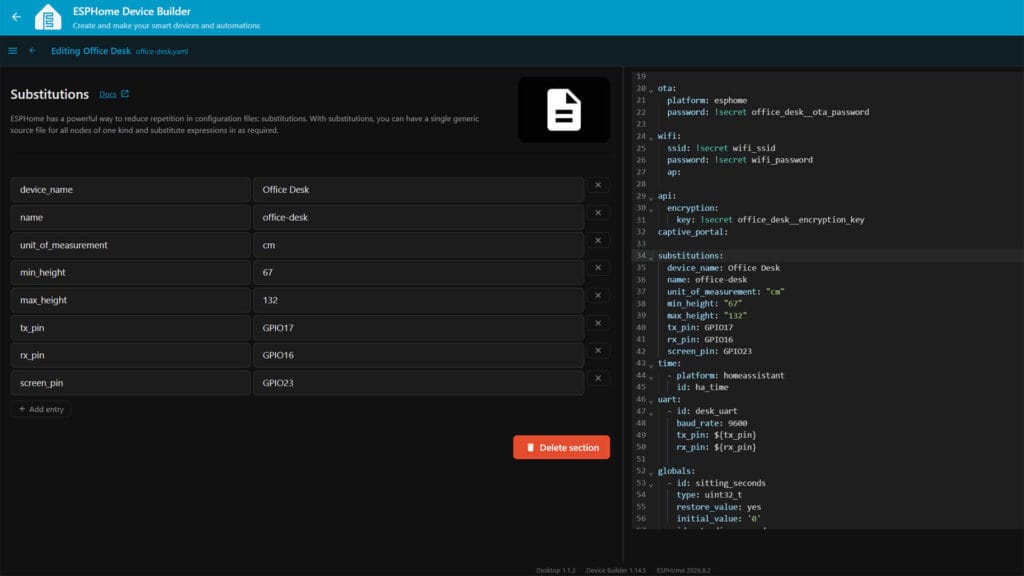
First, change the min_height and max_height under substitutions. These need to match your own desk’s actual travel range. Mine is set to the Titan’s 67 to 132cm span. If you leave these at my values and your desk has a different range, the cover position percentage and the low and high safety triggers will be wrong for your desk. Check your desk’s spec sheet, or just raise and lower it once while watching the height sensor to find the real numbers.
Next, it’s possible you will need to adapt the preset config as well. The DESKSPACE Titan has exactly three physical presets, so Preset 1 and 2 keep their original commands, while Preset 3 reuses what was originally a fourth preset command in the source project. If your keypad has four, you can clone the fourth preset using the same pattern.
Finally, if you are using a different ESP32 board or a different pinout, change the tx_pin, rx_pin and screen_pin accordingly before flashing. Obviously, you can also change the names and labels, which are purely cosmetical. Once you are done, save and flash the initial config via USB. Every flash after that works over OTA normally.
Home Assistant Integration and Control
Once the device shows up in Home Assistant via the ESPHome integration, you get a cover entity for the desk itself, a height sensor, three preset buttons, an alarm toggle, and a child lock switch, all controllable from your dashboard or through automations. Here is what each one actually does, and why a couple of them are built the way they are.
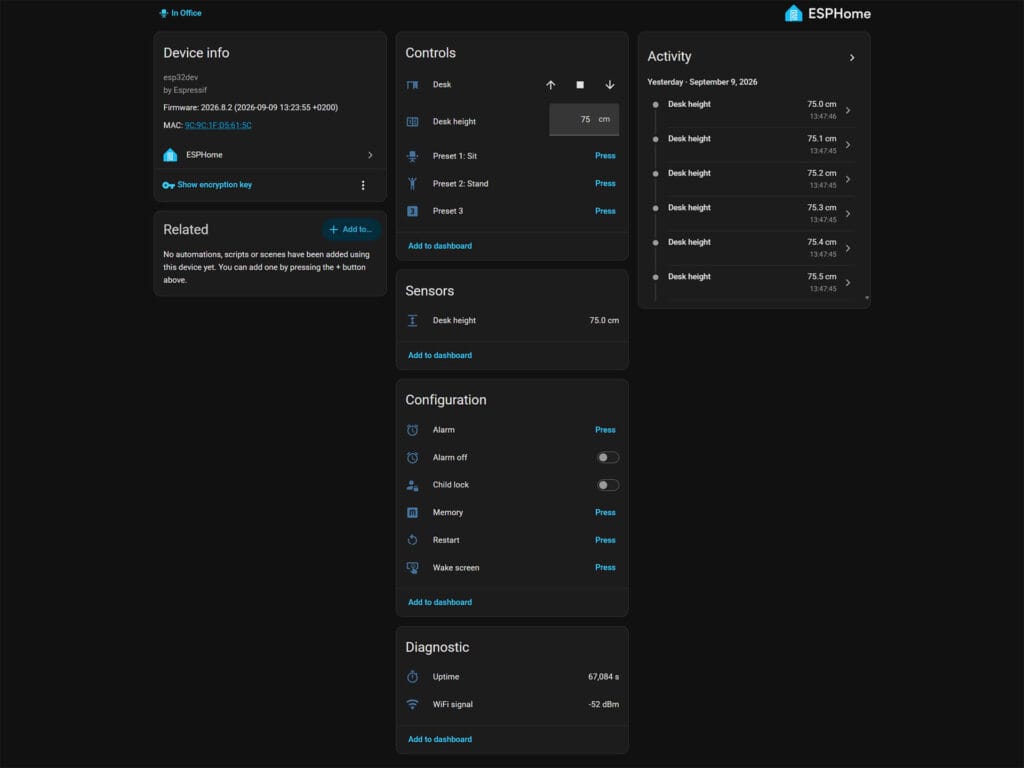
Desk height and cover. The height sensor decodes the raw serial bytes the desk broadcasts into an actual centimeter value and publishes it in a controllable number entity. The cover entity just translates that height into a 0 to 100% position so it behaves like any other Home Assistant cover entity.
Preset 1, 2, and 3. These simply replay the exact serial commands your desk’s own keypad sends when you press its physical preset buttons once they are in memory. Nothing fancy, they just let Home Assistant trigger the same action your hand normally would.
Memory button. This is how you save a new preset position, mirroring how you would do it on the keypad itself. Move the desk to the height you want, then press Memory followed by the preset number you want to save it under.
Wake screen. This one looks like it does nothing when you press it, and most of the time that is exactly right. It sends the same wake up command that every other button here fires automatically before doing its real job, it just tells the control box to start listening again. If the desk’s display is already lit up, which it usually is right after any other interaction, this button has nothing visible left to do. Its only real job is being the first step every other command relies on.
Alarm off switch versus Alarm button. These two look like they duplicate each other, and by raw payload they technically do, but they exist for a reason. Turning the alarm off on the physical keypad is not a single tap, it is a press and hold for a few seconds. A button entity in ESPHome cannot replicate that behavior, since a button only fires once. So the alarm switch is built to repeat that same command roughly every 100 milliseconds for 3 seconds straight while it is on, then automatically flips itself back off, mimicking a held press rather than a single tap. The separate Alarm button, by contrast, fires the command exactly once, which is used for actually arming the alarm. Two entities, two different physical gestures, one shared command underneath.
Child lock. Same held-press pattern as the alarm, repeating its command for 5 seconds before automatically switching off, matching how long you would hold the equivalent physical button combination.
Home Assistant Automations and Sitting Time Tracking
The cover entity can be used in Home Assistant automations, just like you would build anything around a blind or garage door. The height sensor on its own is also useful as a trigger, for example flashing a smart light briefly if you have been sitting for too long, prompting you to stand up and stretch. Obviously, these are just ideas, and there are many ways to automate around an electric standing desk.
To me, there is one additional idea worth implementing: tracking your full sitting and standing time in a work day. Home Assistant’s built in History Stats helper can measure that for you, based on a simple threshold comparison against the height sensor. You can also pair it with the Utility Meter integration to automatically reset those totals at the start of each day or week, rather than only ever showing a rolling window.
Final Thoughts
This project ended up being one of the most useful DIY things I’ve done. Even though I never checked before purchasing if I can automate the desk, I’m glad I ultimately did. Now I have a couple of reminders in the office to remind me to stand up and stretch, along with data for total sitting and standing time.
If you already have an ESP32 lying around and a spare Ethernet cable, this is a cheap, low risk project to try. Worst case, you unplug the board and your desk goes right back to working exactly as it did before. The DESKSPACE Titan itself is a great electric standing desk and I can wholeheartedly recommend it.








I have a MotionGrey desk with dual motors. The controller does look like same as yous.. You gave me a great idea!! Thank you.
You’re welcome! Yeah, a lot of these are made by the same company. Do it 🙂
Thanks for the child lock idea! I found out that the manufacturer of my durable design desk (Rol Ergo) also makes many of IKEA’s desks. So I’m going to replicate this:
https://calvin.me/ikea-bekant-megadesk/
I’m also going to play around with the idea of sitting on the floor (floor-to-stand desk), as well as working while walking on a treadmill.