

Cheap Zigbee door and window sensors from AliExpress are everywhere. Most of them look identical, cost under $10, and come with a model name that reads like a Wi-Fi password. So I did what any smart home enthusiast would do: I ordered six of the most popular Zigbee contact sensors from AliExpress, stuck them all on the same door, and let them run for a month.
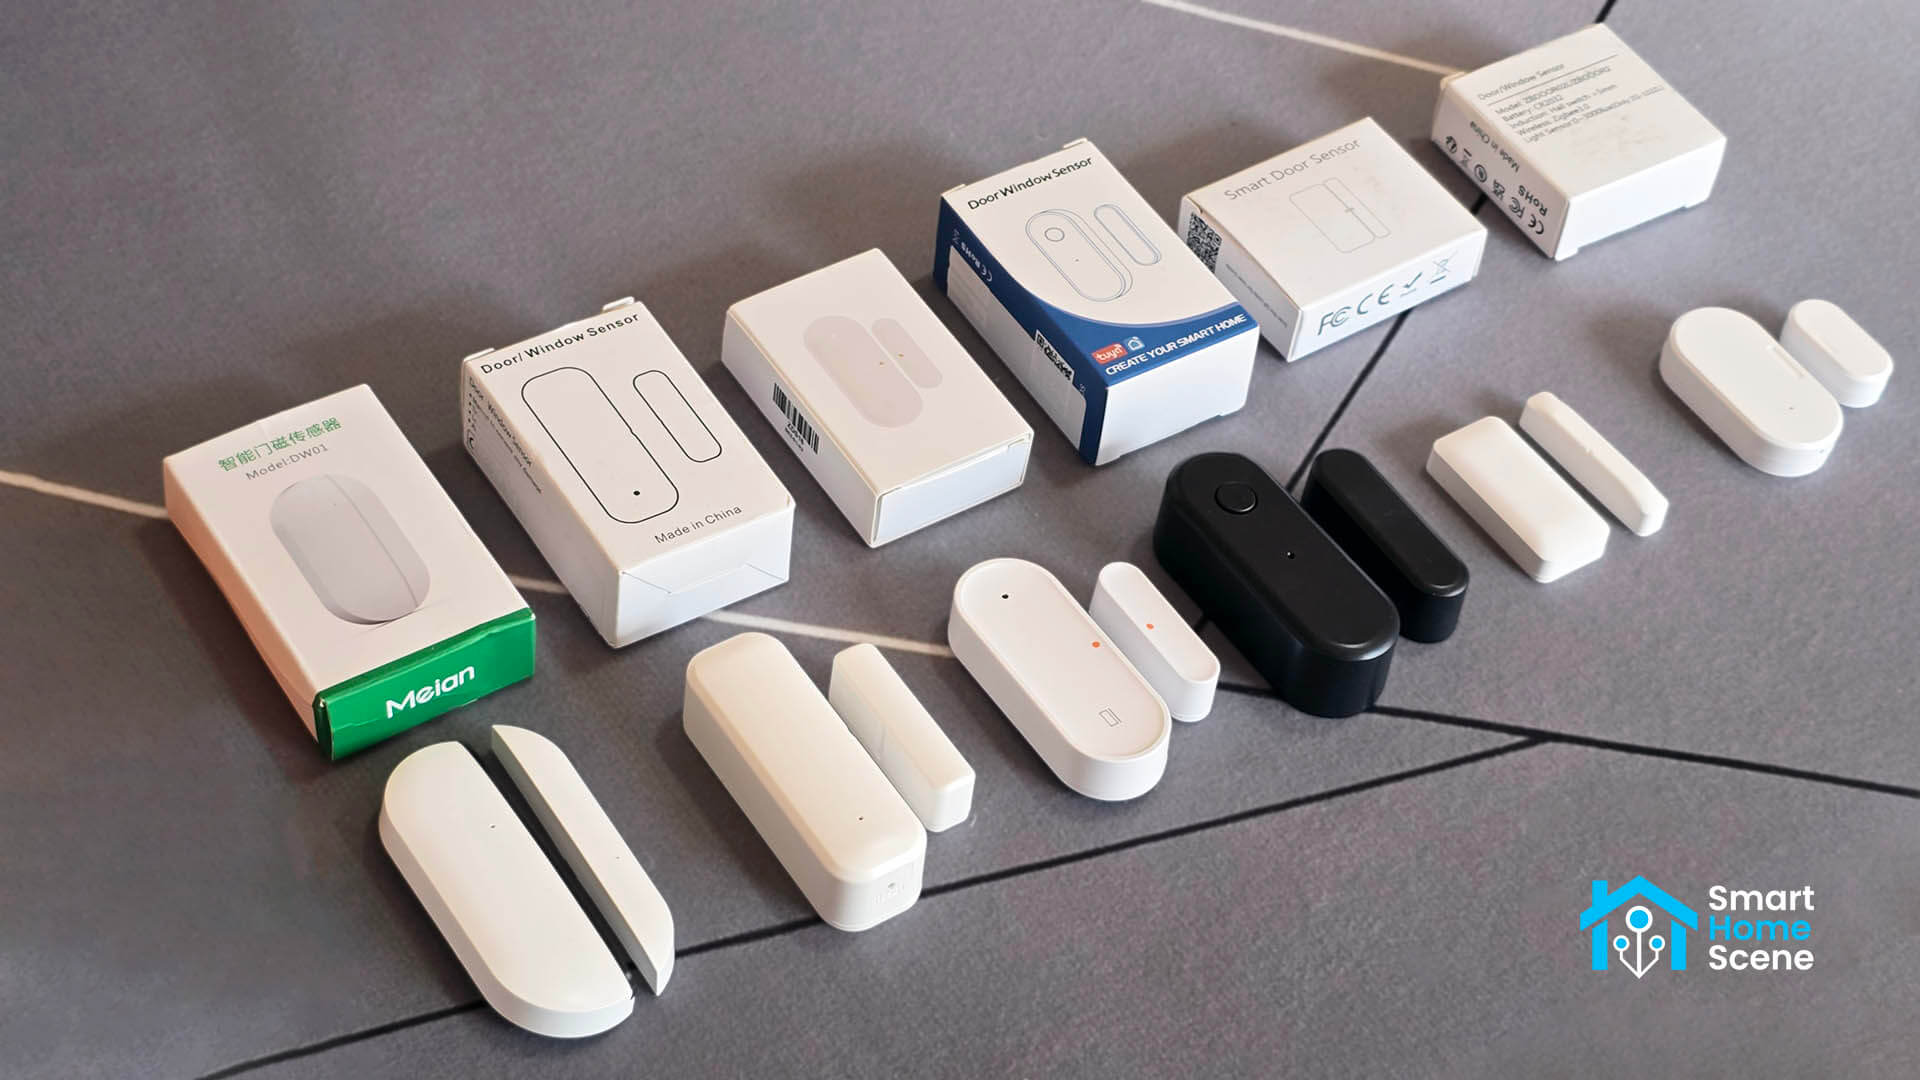
The selection was deliberate. I sorted AliExpress by most purchased Zigbee door and window sensors and set a hard cutoff of $15. If a sensor was not selling in volume, it did not make the list. The six that kept showing up at the top of those results are the ones you are about to read about.
Total spend: $48.03 for all six sensors, installed, tested, and ranked.
Testing Methodology
These sensors have been installed on my home office door for over a month. This is not a controlled lab environment. This is a real door that gets opened and closed more than 20 times a day, every day, as part of normal use. That kind of sustained real world load tells you things that a quick bench test never will: which sensors drop off the mesh after a week, which ones start reporting phantom events, and which ones just quietly get on with the job.
For the latency portion of the test, I ran over 50 dedicated open and close cycles across three separate sessions, watching the Zigbee2MQTT MQTT log in real time to track which sensor reported each state change first. The log timestamps are millisecond-level precision, which is more than sufficient to identify clear and repeatable patterns across that many cycles.
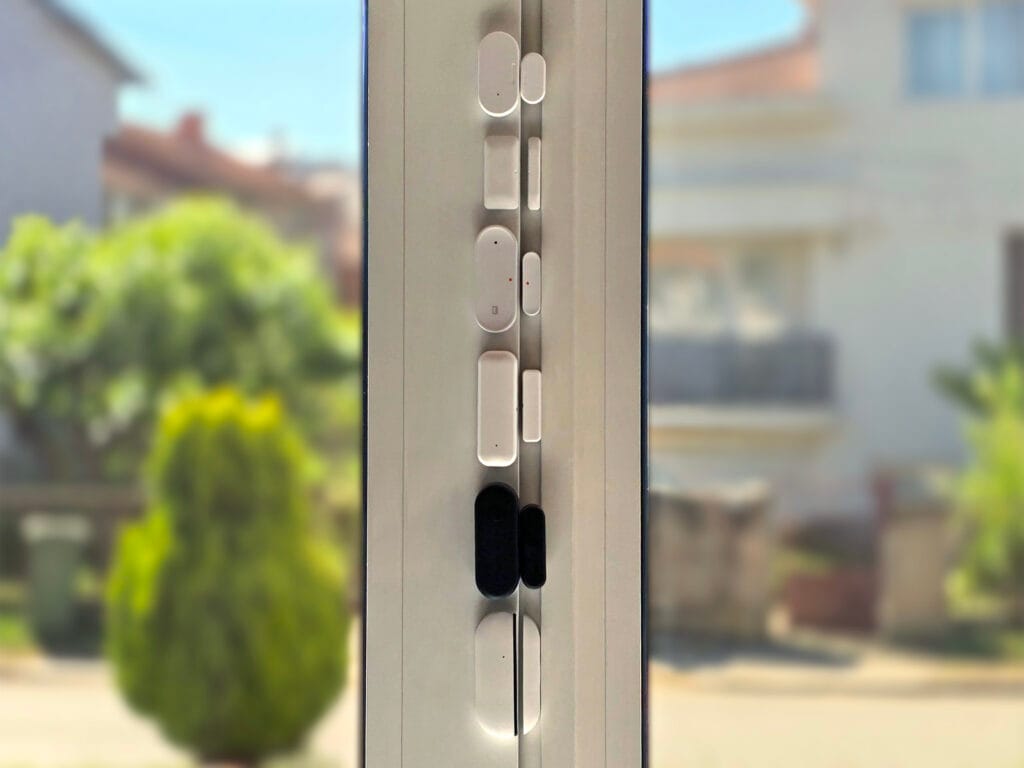
My testing setup:
- Coordinator: SMLIGHT SLZB-Ultima 3 (EFR32MG24)
- Software: Zigbee2MQTT 2.9.1-dev
- Platform: Home Assistant OS 17.3
- Five mains-powered routers in network
- All six sensors paired at a distance of 3 meters from the coordinator
- All six mounted on the same door, tested simultaneously on every open and close event
Side note: The SLZB-Ultima 3 is a professional grade multi-radio coordinator combining a Texas Instruments CC2674P10 and a Silicon Labs EFR32MG24 in a single PoE device. Using a strong, stable coordinator matters for latency testing: any delays you see in the results below are sensor side, not network side.
Models, Brands and Specification
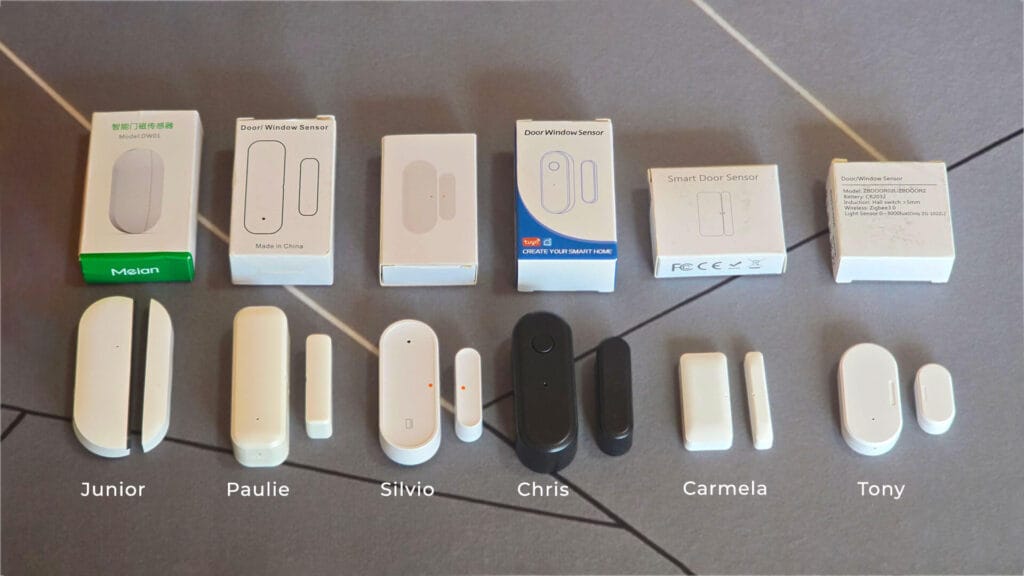
Five of the six sensors I tested are Tuya devices. On the surface they look similar, cost roughly the same, and do the same job. The differences are in the details, and those details matter more than the AliExpress listing will ever tell you. As their model names are gibberish to the average user, I decided to color and name code them and keep the article readable.
Meet the Sopranos.
| Model | White Label | Manufacturer | Zigbee Model | Zigbee Manufacturer | Price | AliExpress | Amazon |
|---|---|---|---|---|---|---|---|
Tony ●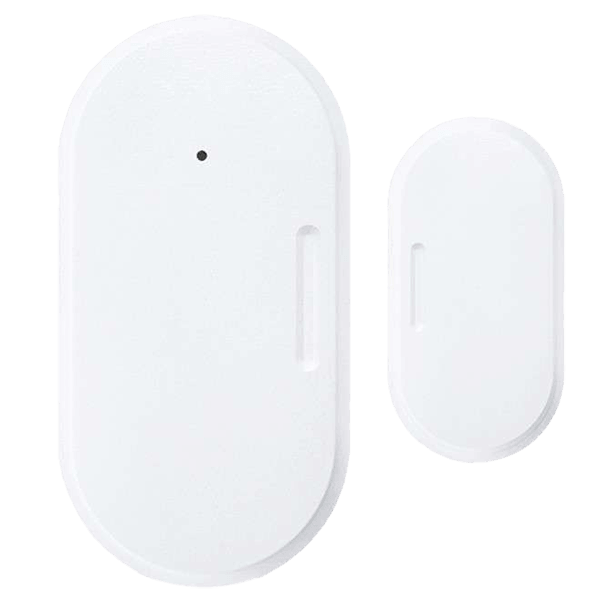 | DS01 | Sonoff | DS01 | Zbeacon | From $6.52 | AliExpress AliExpress 2 | Amazon US Amazon DE |
Carmela ●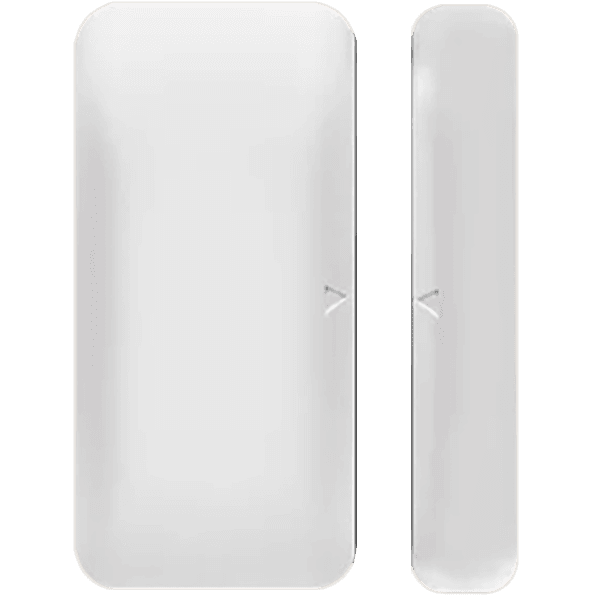 | D06-HAZB | Tuya | TS0203 | LINCUKOO | From $7.95 | AliExpress AliExpress 2 | Amazon US Amazon DE |
Silvio ●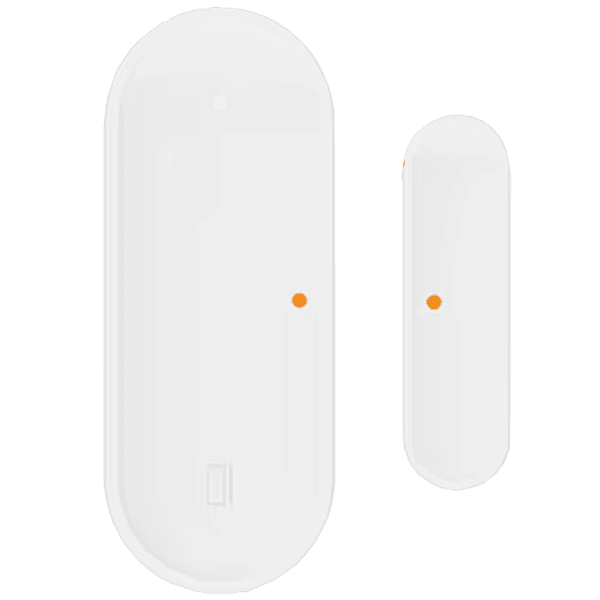 | ZDS16 | Tuya | TS0203 | _TZ3000_wut53hfm | From $8.72 | AliExpress AliExpress 2 | Amazon US Amazon DE |
Paulie ●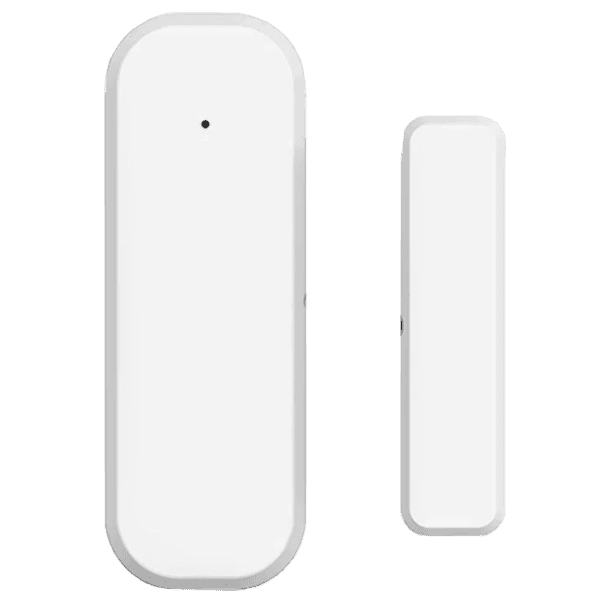 | ZBDOOR2 | Tuya | TS0203 | Zbeacon | From $6.74 | AliExpress AliExpress 2 | Amazon US Amazon DE |
Chris ●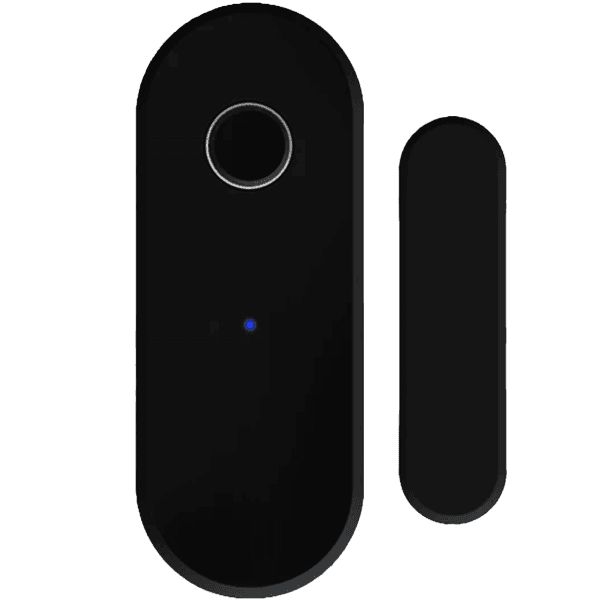 | TS0203 | Tuya | TS0203 | _TZ3000_zutizvyk | From $7.52 | AliExpress AliExpress 2 | Amazon US Amazon DE |
Junior ●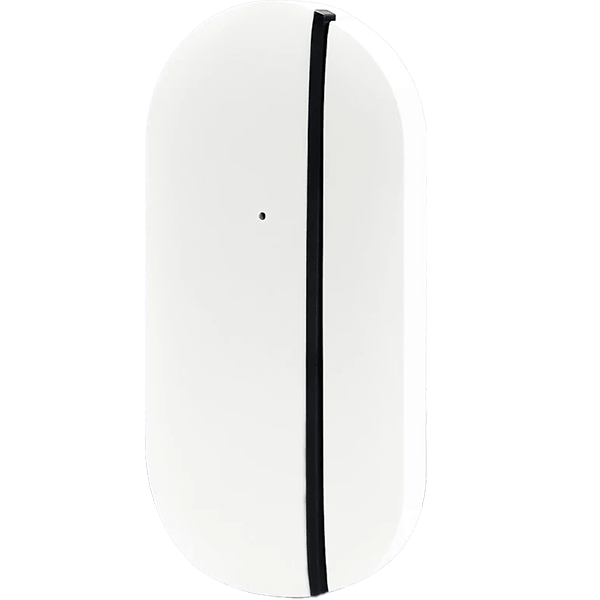 | DW01 | Tuya | TS0203 | _TZ3000_ayc0ccuk | From $10.58 | AliExpress AliExpress 2 | Amazon US Amazon DE |
Five of the six are Tuya TS0203 devices identified under different Zigbee manufacturer strings in Zigbee2MQTT. Tony ● is the odd one out: an eWelink device identified as Sonoff SNZB-04 / DS01, which is also the cheapest sensor of the group.
Hardware Specifications
| Code Name | Battery Type | Body (mm) HxWxD | Magnet (mm) HxWxD | Sensor Type | MCU Chip | Trigger Distance | Tamper Switch |
|---|---|---|---|---|---|---|---|
| Tony ● | 1×CR2032 | 50×25×11 | 30×14×11 | Hall effect | Telink TLSR8656 | ≤15mm | No |
| Carmela ● | 2×CR1632 | 44×21×9.3 | 44×8×9.3 | Hall effect | Telink TLSR8656 | ≤15mm | No |
| Silvio ● | 1×CR2032 | 65×26×12.7 | 38.8×10.9×12.7 | Reed switch | Tuya ZTU | ≤10mm | Yes |
| Paulie ● | 2×AAA | 70×25×20 | 43×11×15 | Hall effect | Telink TLSR8251 | ≤15mm | No |
| Chris ● | 2×AAA | 69.5×24×24 | 40.5×14.8×20 | Hall effect | Tuya ZTU | ≤15mm | No |
| Junior ● | 2×CR2032 | 76×25×12 | 76×10×12 | Reed switch | Tuya ZT5 | ≤20mm | Yes |
Size and Form Factor
Size matters on a door sensor, not just because you want it discreet, but because the form factor affects where you can actually install it and how it looks on a door frame you stare at every day.
Carmela ● is the clear winner here. At 44x21x9.3mm it is the smallest and thinnest sensor of the group, barely thicker than a key fob. The magnet piece runs the full length of the body, which gives the installed pair a clean, intentional look rather than the usual mismatched two-piece appearance you get on most of these cheap sensors.
Tony ● is the second most compact at 50x25x11mm, running on a single CR2032 which keeps the profile slim and the weight low. It is not as elegant as Carmela ● but it is small enough that it blends in with most door frames.
Junior ● sits at the opposite end of the spectrum. The DW01 has excellent looks for a cheap AliExpress sensor. The long flat form factor and matching full-length magnet look deliberate and tidy on a door frame. But it is also 76mm tall and 25mm wide at just 12mm deep, which is a significant footprint on a door frame.
Paulie ● and Chris ● are both notably chunky due to their AAA battery format. Paulie ● measures 70x25x20mm and Chris ● comes in at 69.5x24x24mm, that 24mm depth making it the thickest sensor in the group. Neither is the kind of thing you would choose for a visible door in a living room.
Build Quality
Three sensors stand clearly above the others in terms of physical build quality: Carmela ●, Junior ●, and Paulie ●. These three feel more solid in hand. The plastic housing is rigid, the magnet attachment is more secure, and the overall assembly feels like less is going to go wrong over time. The other three are not bad for what they are, but they feel like the anonymous AliExpress products they are.
Tony ● deserves a mention. As an eWelink product it has slightly better fit and finish than the anonymous Tuya clones. The housing is consistent and the LED placement is clean. It does not feel premium but it feels deliberate, which is more than you can say for some of the others.
Battery Type and Expected Battery Life
There is a persistent belief in the smart home community that AAA batteries are preferable in sensors because they are easy to find and last longer. I strongly disagree with this sentiment, at least for door sensors specifically.
A well-designed door sensor running on a single CR2032 will last a year or more under normal use. The Aqara Door and Window Sensor, widely considered the benchmark for contact sensors, runs on a single CR1632 coin cell and lasts over two years. Nowadays, CR2032 batteries are available in every supermarket, pharmacy, and corner shop on the planet. There is simply no meaningful convenience argument for stuffing AAA batteries into a door sensor, and the size penalty you pay for it is very real.
Paulie ● and Chris ● are the obvious examples here. Both use dual AAA batteries, which is why they are the bulkiest sensors in the group. Paulie ● at 70x25x20mm and Chris ● at 69.5x24x24mm are noticeably thicker and heavier than the coin cell sensors.
Junior ● frustrates me from a different angle: the DW01 has a long, almost large enough body, to actually fit AAA batteries (except thickness), but instead uses two CR2032s. That is the worst of both worlds, the bulk of a large sensor without the battery capacity to justify it.
Mounting and Trigger Distance
Trigger distance is how far the magnet can be installed from the main body and reliably detect open and close events. This number matters more than most spec sheets acknowledge, because not all door frames are created equal.
Junior ● has the most generous trigger distance of the group at 20mm, which gives you real installation flexibility. Tony ●, Carmela ●, Paulie ● and Chris ● all come in at 15mm or less. Silvio ● is the tightest at 10mm, which is worth being aware of before you install it on an unusual frame.
In my office where I mounted these, the door frame is slightly recessed, creating a 15mm drop between the frame and the door. This exposed a crucial factor: housing thickness and vertical alignment. Even though Silvio ● has the tightest horizontal trigger distance (10mm), its thicker 12.7mm body naturally brought its internal switch close enough to the magnet’s magnetic field to work perfectly. Conversely, Tony ● (at 11mm thick) and Chris ● (which has a significant depth mismatch between the chunky 24mm body and its thin magnet) both required small plastic spacers under their magnets to bring them vertically level with the sensor body before they would trigger reliably.
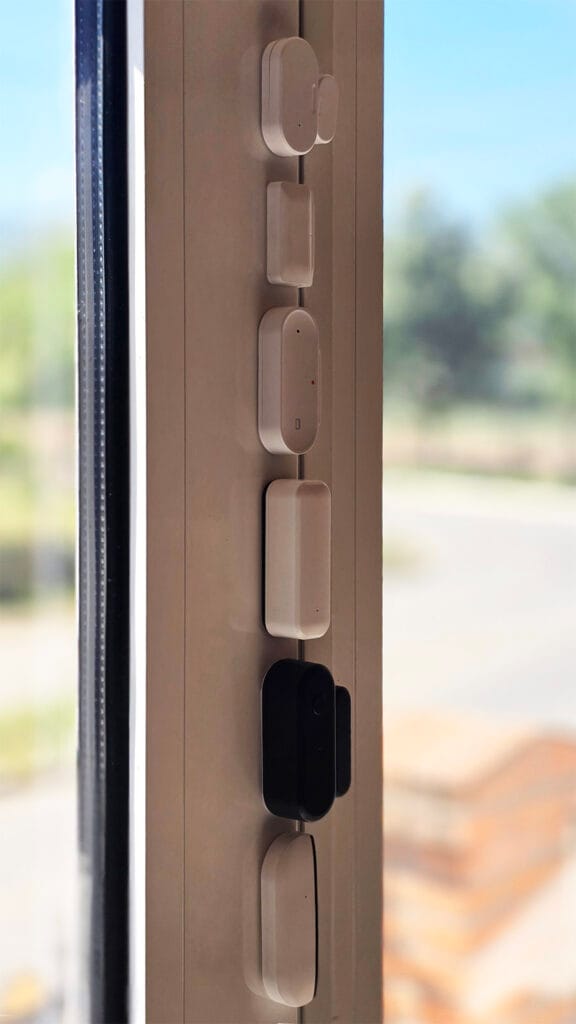
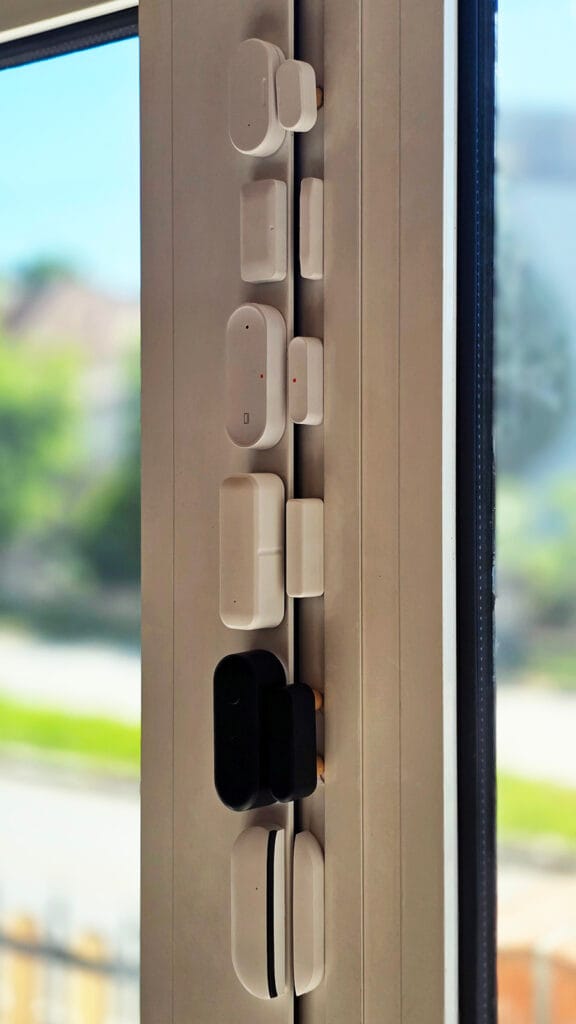
If you have older frames, unusual profiles, or any kind of recess, the physical depth alignment of Tony ● and Chris ● is a real consideration. The important takeaway is that the claimed trigger distance is accurate for each sensor, with a deviation of ±2mm on Chris ● and Junior ●, as I tested each one individually to verify.
Sensor Type and MCU
Opening up these sensors reveals another split that is worth knowing about. Four of the six use hall effect sensors, while the remaining two use reed switches. Hall effect sensors are solid state with no moving parts, generally considered more reliable and longer lasting than reed switches which rely on a physical contact that can wear over time.
- Hall-effect sensors
- Tony ●, Carmela ●, Paulie ●, and Chris ●.
- Reed switches
- Silvio ● and Junior ●
On the MCU side, three sensors run Telink chips and three run Tuya. The Tuya ZTU has become the go-to MCU for battery-powered Zigbee devices at this price point, and it performs reliably without issues. The Telink TLSR8656 is the chip found in most SONOFF devices nowadays, which gives Tony and Carmela a familiar and well-proven foundation. Here is the split:
- Telink TLSR8656 [Datasheet]
- Tony ● and Carmela ●
- TLSR8251 [Datasheet]
- Paulie ●
- Tuya ZTU [Datasheet]
- Silvio ● and Chris ●
- Tuya ZT5 [Datasheet]
- Junior ●
Tamper Detection
Almost all of these sensors expose a tamper entity in Zigbee2MQTT. But here is something worth understanding before you get excited about it: exposing a tamper entity in Z2M does not mean the device actually has a physical tamper switch. The TS0203 cluster definition includes tamper as a standard attribute, so many Z2M converters expose it by default regardless of whether the hardware supports it.
I dismantled each sensor to check. Only Silvio ● and Junior ● have a real physical tamper switch inside. The other four expose the entity in Z2M but have no physical switch, meaning that entity will always report Clear and never actually trigger under any circumstances.
Even for Silvio ● and Junior ● where the switch is real, I would not put much weight on it. You install these sensors on the inside of your door, out of reach of any potential intruder. The only realistic scenario where tamper fires is if someone physically removes the sensor from the frame while already inside your home, which is not a threat model that door sensors are designed to address. In practice, the most likely trigger is a child knocking the sensor off the frame.
Zigbee2MQTT Integration
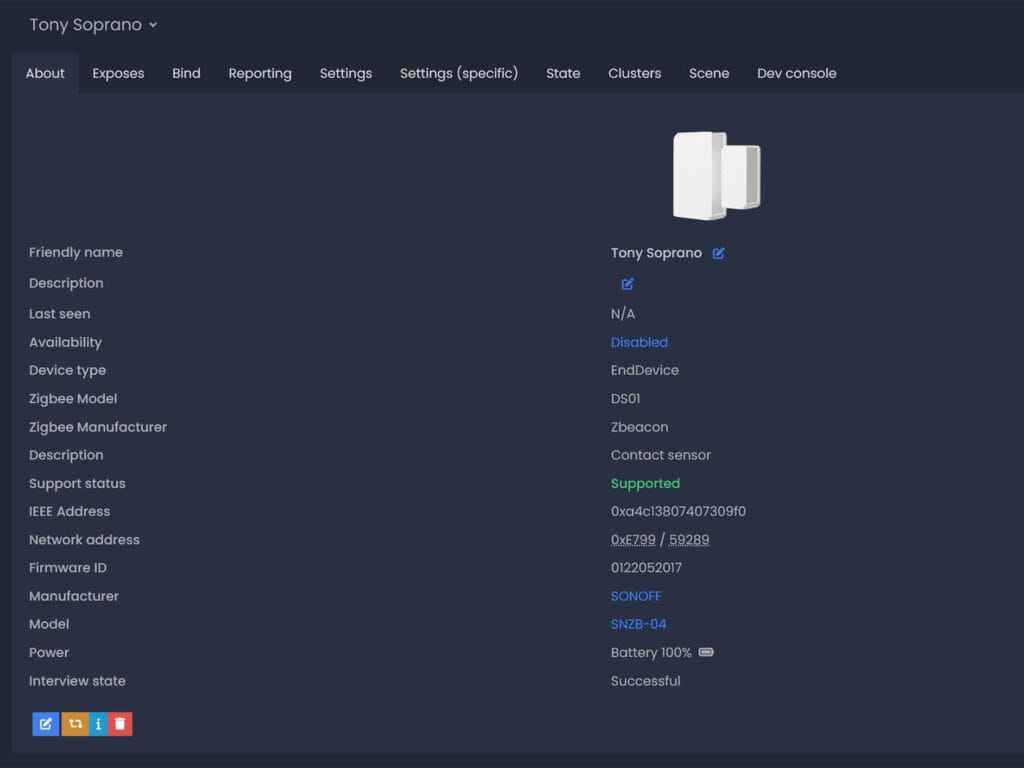
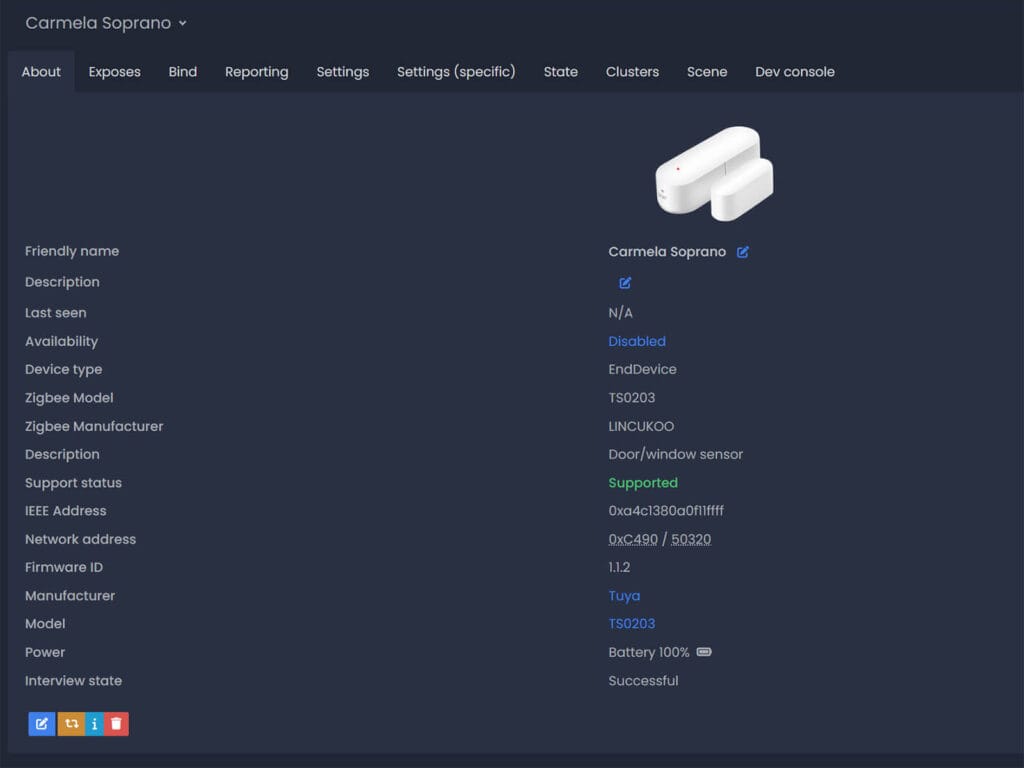
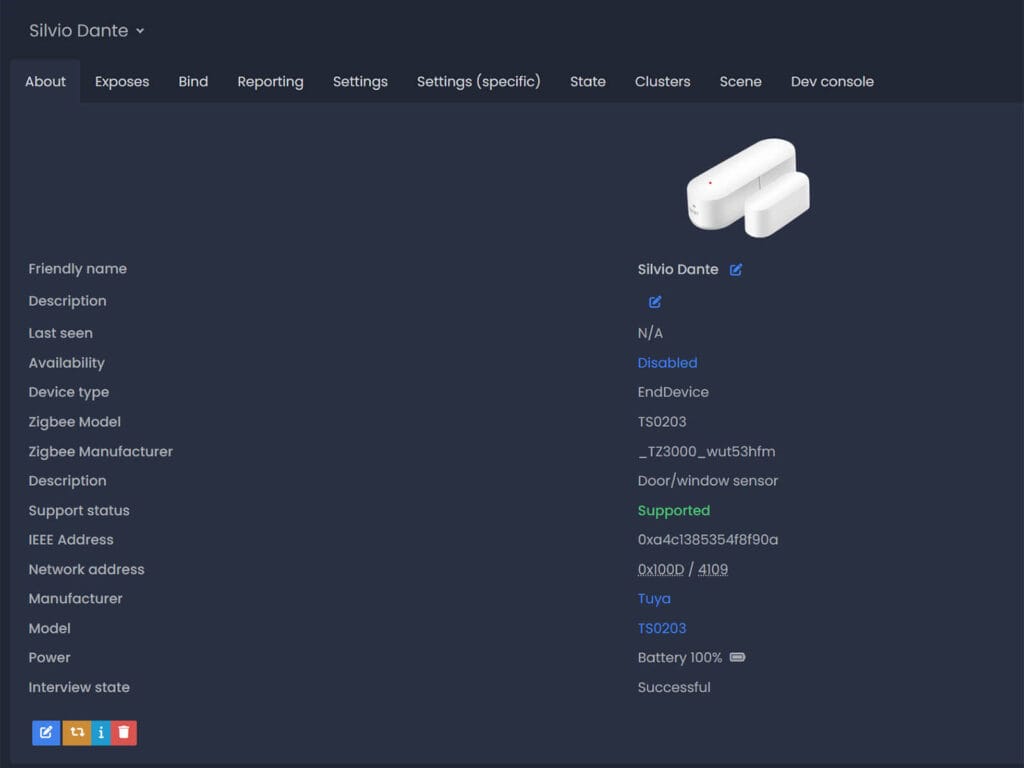
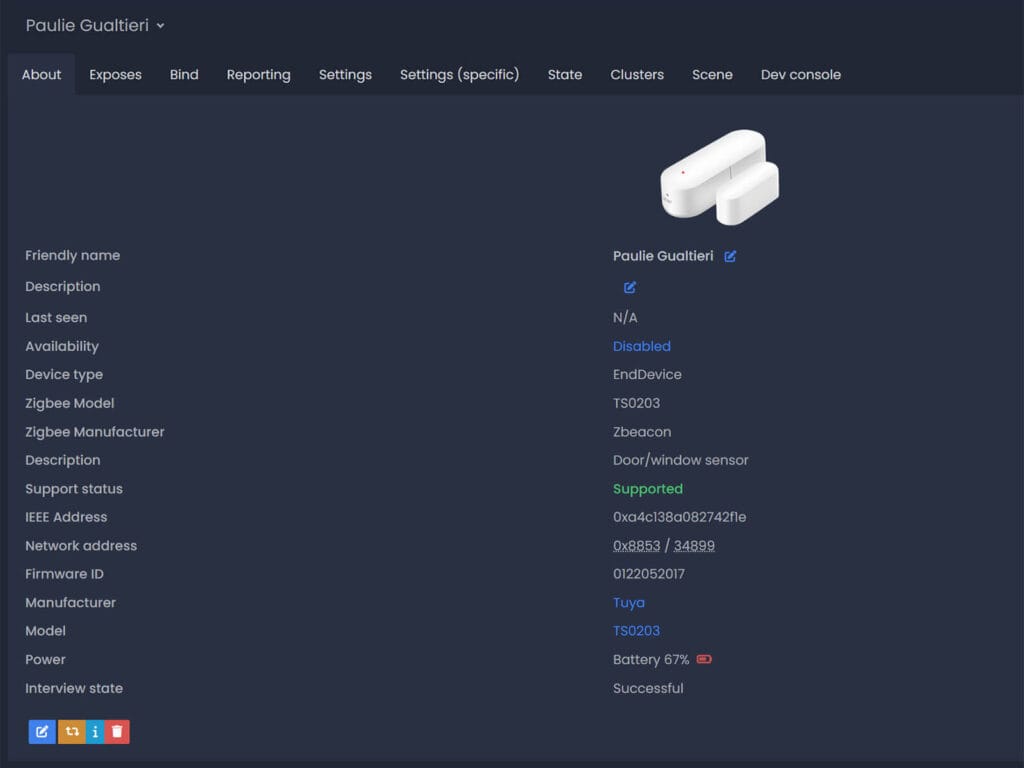
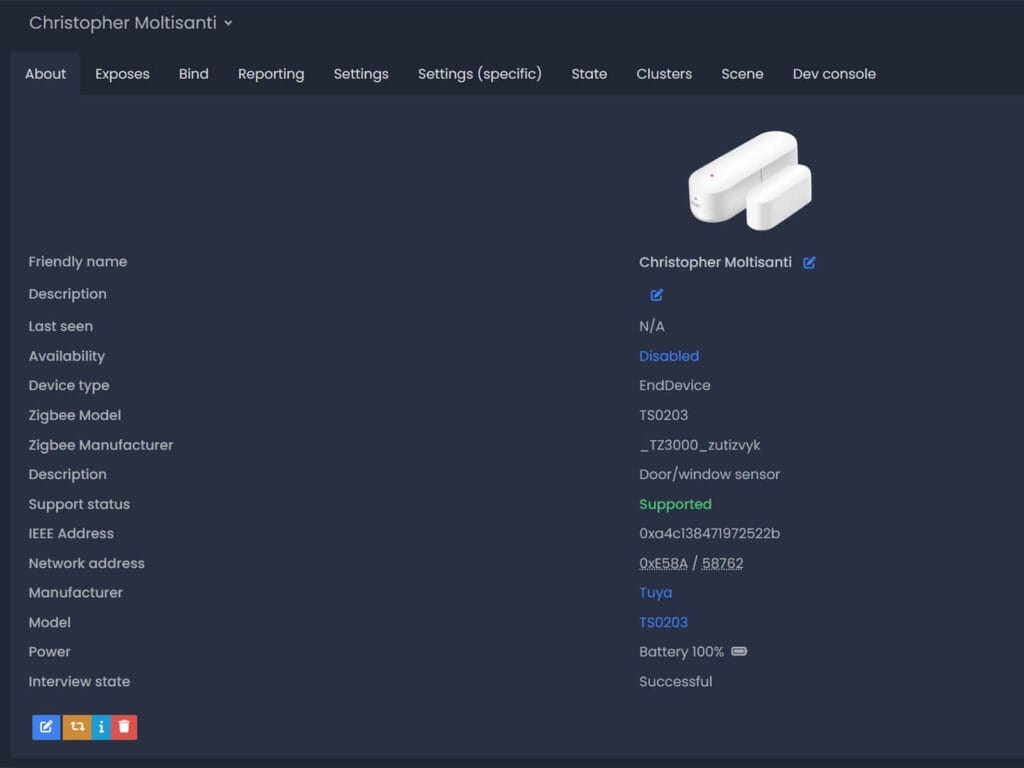
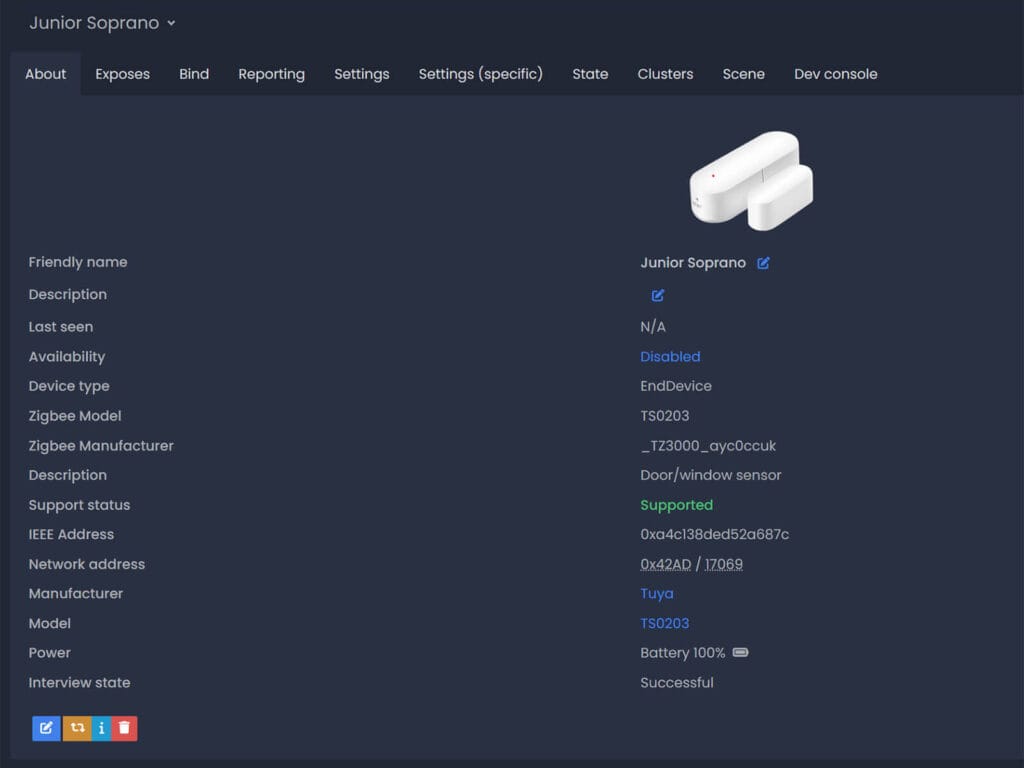
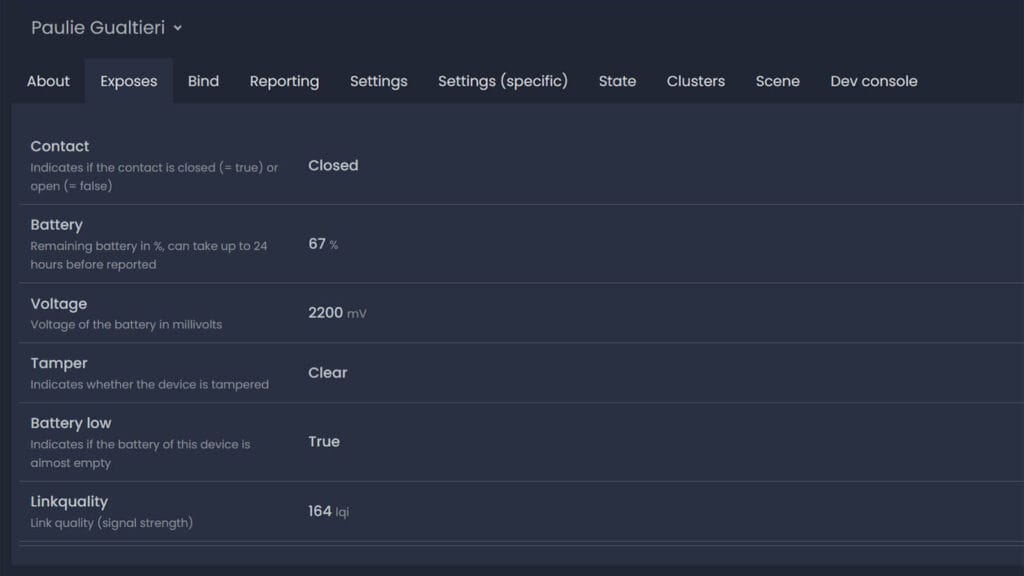
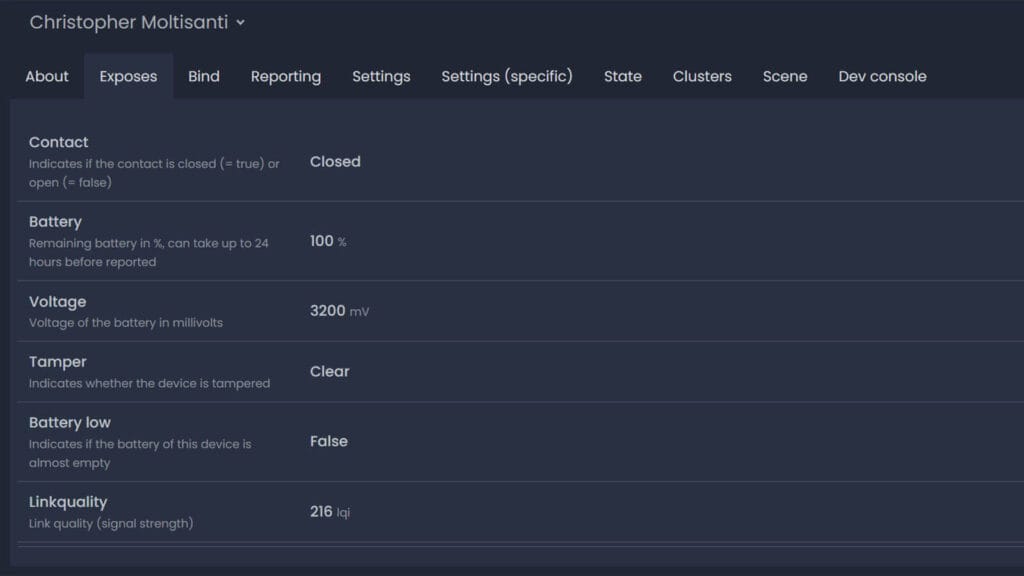
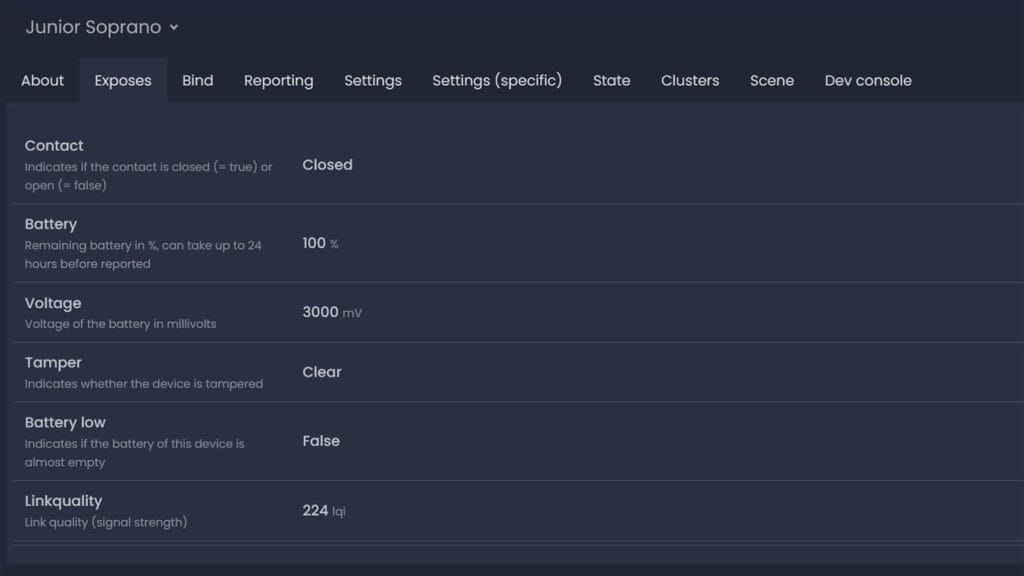
All six sensors paired to the SLZB-Ultima 3 coordinator at a distance of 3 meters with no issues whatsoever. Most entered pairing mode immediately once I inserted batteries or removed the protective film on those that shipped with batteries already installed. No failed pairings, no re-pairing attempts, no quirks of any kind across six devices. Each one blinks an LED quickly during the pairing process and then blinks faintly on open and close events during normal operation.
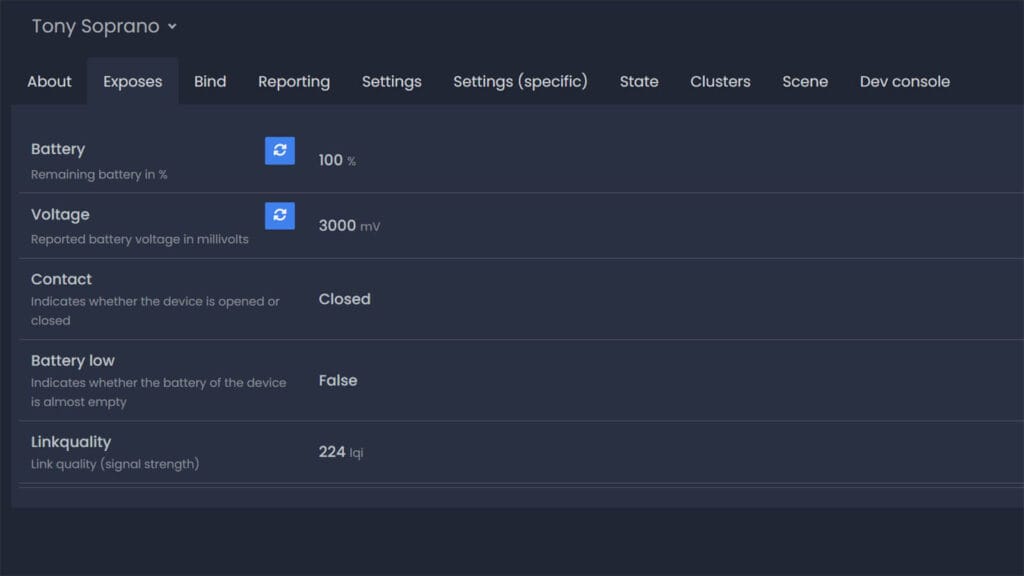
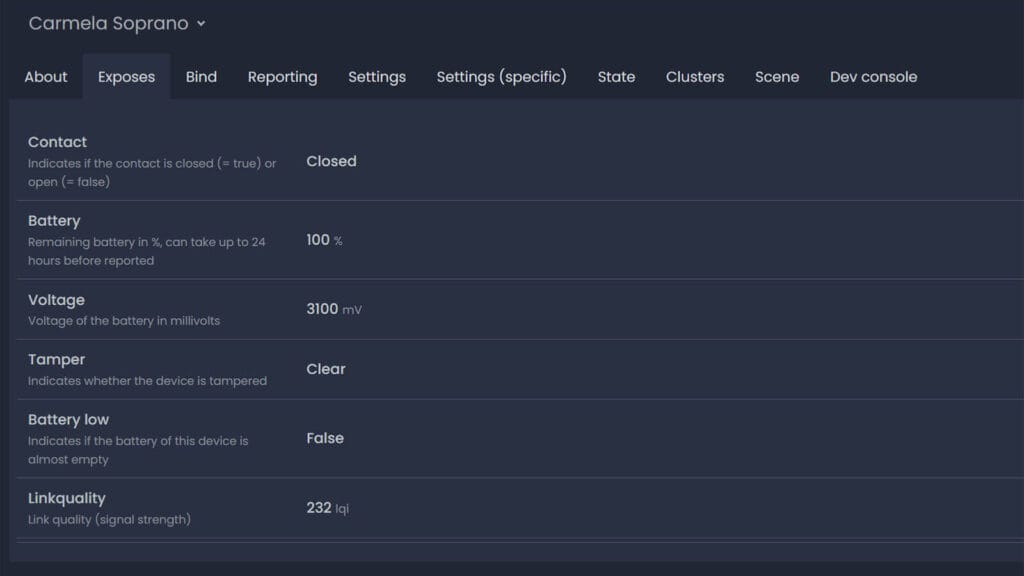
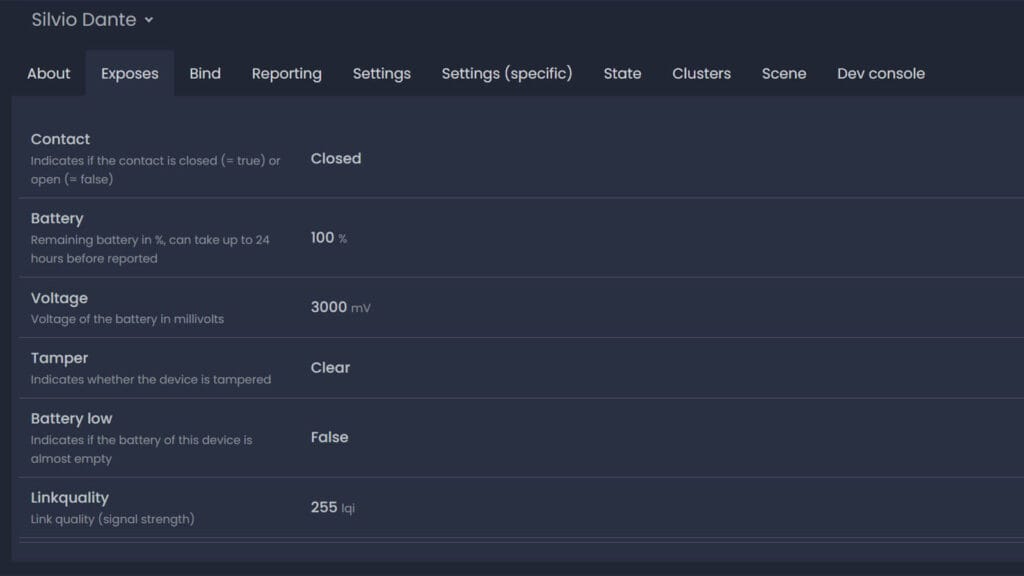
All six are listed as Supported in Zigbee2MQTT, which means they identify cleanly, expose their entities correctly, and require no manual configuration or custom converters. Here is how each sensor’s exposes tab looks in Zigbee2MQTT.
Why Two Identical Looking Sensors Can Have Different Names in Zigbee2MQTT
Two sensors can look physically identical and ship in identical packaging, but carry completely different identifiers in Zigbee2MQTT. Companies selling Tuya-based devices need to go through a separate Tuya certification process to get their brand name officially recognized. Some skip it entirely and sell uncertified devices, often marketed as Zigbee2MQTT or Home Assistant compatible. That is fine in practice since an uncertified contact sensor will work in Z2M regardless, and if it does not, a custom converter for such a simple device takes minutes to write.
The white label situation adds another layer of confusion. Brand names you see on AliExpress like Avatto, or Haozee are retailers, not manufacturers. When a retailer is large enough to have gone through certification, their name ends up in Zigbee2MQTT even though a completely different company made the hardware. The model string is the only reliable identifier, which is exactly why I gave each sensor a name for this article instead of referring to them by their Z2M strings throughout.
Trigger Latency Testing
This is where the comparison gets interesting.
All six sensors were mounted on the same door and triggered simultaneously on every open and close event. I watched the Zigbee2MQTT MQTT log in real time across more than 50 dedicated test cycles in addition to the month of natural daily use.
To get granular data, I enabled millisecond precision timestamps in Zigbee2MQTT by adding the following to configuration.yaml:
advanced:
  timestamp_format: 'YYYY-MM-DD HH:mm:ss.SSS'
This changes the log from second-level precision to millisecond precision, which is the only way to meaningfully separate sensors that are all reporting within the same second. Here are the results.
Open event:
- 300-600ms — Tony ●, Carmela ●
- 600-1000ms — Paulie ●, Silvio ●, Junior ●
- 1000-2000ms — Chris ● (sporadic)
Close event:
- 300-600ms — Tony ●, Paulie ●, Carmela ●
- 600ms-1000ms — Silvio ●, Junior ●
- 1000-2000ms — Chris ● (sporadic)
A few things worth noting here. Tony ● and Carmela ● were consistently in the first reporting group on both open and close events. Paulie ● was slightly slower on open events but matched the fastest group on close. Silvio ● and Junior ● were consistently in the 600 to 1000ms range on both events, reliable but a step behind the leaders.
Chris ● was the clear outlier. It was sporadically slow on both open and close events, sometimes hitting 2 seconds behind the trigger. That kind of inconsistency is worse than being consistently slow, because you cannot predict when it will lag. As I wanted to see if there was a possible network issue, I force-paired Chris ● through a nearby router. It just confirmed that this device is just slow.
To put it in perspective: the difference between Tony ● at 300ms and Junior ● at 900ms is half a second. In real world automation use, that is imperceptible. The difference between any of them and Chris ● at up to 2 seconds is not.
Network Connectivity and Stability
Over the course of more than a month of continuous use, none of the six sensors dropped out of the network or experienced any connectivity issues. No phantom events, no missed triggers, no devices going unavailable. All six just worked.
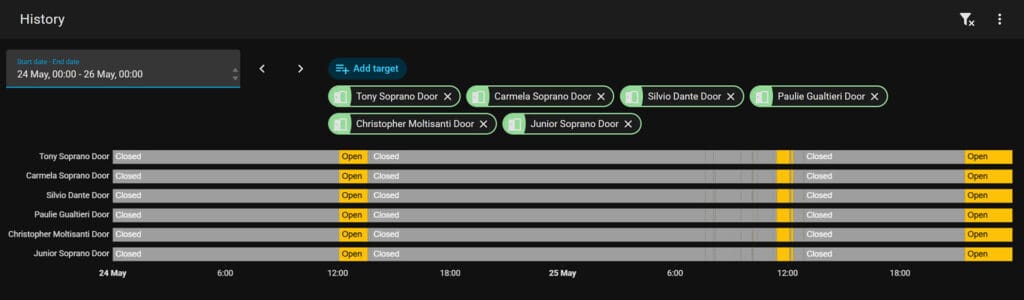
That is partly a credit to the sensors themselves, but also a reflection of the network they were running on. My Zigbee testing mesh is well built with several mains-powered routers, minimal RF interference, and the MG24-based SLZB-Ultima 3 coordinator which is about as solid a foundation as you can run a Zigbee network on.
Related: How To Build a Stable and Robust Zigbee Network
LQI values reported across the test period ranged from 136 to 255. Most sensors stayed comfortably in the 196 to 252 range throughout. Silvio ● was the standout here, reporting a consistent 245-255 LQI across virtually every single reading, which is the maximum possible value.
The only sensor worth flagging is Paulie ●, which showed the weakest and most variable link quality of the group, dropping as low as 136 in some readings while others in the same session were sitting above 200. It never dropped off the network or missed an event, but the LQI variance is worth noting if you are planning to install it at greater distances from your nearest router.
Verdict
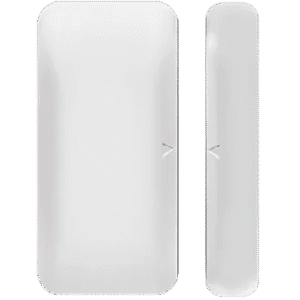
Alternatives: AliExpress 2, Amazon DE, Amazon FR.
Carmela ● is the one I would buy again without hesitation. Smallest and thinnest of the group at just 9.3mm deep, the cleanest looking sensor here by a significant margin, and performance that puts it in the fast group on both open and close events. The two CR1632 batteries keep it slim, build quality is excellent, and it works out of the box on any standard door frame. If you are buying one sensor or ten, this is the one.
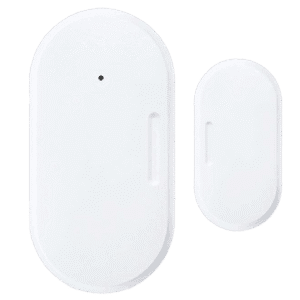
Alternatives: AliExpress 2, AliExpress 3, Amazon DE, Amazon FR.
Tony ● is the cheapest sensor of the group and among the fastest on open events. Proper Zigbee2MQTT support, single CR2032, and a compact enough form factor for most installations. The one caveat worth knowing: on my slightly recessed door frame, Tony needed a small raiser under the magnet to trigger reliably. On a flush or nearly flush standard frame it works straight out of the box.
Avoid: Chris ● (_TZ3000_zutizvyk) — $7.52
The slowest sensor in the group by a clear and consistent margin, with sporadic delays of up to 2 seconds on both open and close events. Short trigger distance that required raisers on my door frame. Bulkiest form factor due to dual AAA batteries. There is no scenario where Chris is the right choice.
The Elephants in the Room
There are two sensors I did not test here because this article is specifically about cheap Tuya Zigbee sensors from AliExpress. But if you are building a serious smart home and budget is not really a constraint, the Aqara Door Sensor and the new Sonoff SNZB-04PR2 are two devices worth considering before you buy.
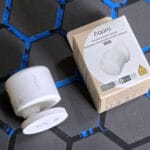
The Aqara is the benchmark everything else in this category gets compared to. It runs on a single CR1632 coin cell, measures 41x22x11mm, has a 22mm trigger distance, and lasts over two years on that one battery. It integrates cleanly with Zigbee2MQTT and ZHA, has a rock solid reputation in the Home Assistant community, and costs around $15, roughly double the cheapest sensor in this comparison.
The SNZB-04PR2 is your pick if you specifically need AAA batteries. It is surprisingly thin for an AAA powered sensor, runs on the Telink TLSR8656, and includes a real physical tamper switch. A significant step up from the first gen Sonoff, that a lot of people had problems with. The SNZB-04PR2 costs below $15.




You must live in a pretty forgiving climate. And your door/window materials/paint/coatings are adhesive friendly.
Because that is what I want the tamper switch for. The assurance that a door or window is really just open, instead of the main unit that may have fallen off. I have experience this multiple times with majority of tuya devices that give an adhesive sticker in the box, they always fall off really fast, sometimes days, sometimes weeks to a few months if you are lucky. My hot and humid all year round weather is not forgiving to weak-ish tuya adhesives for example.
There are many situations where a more stronger adhesive may not be applicable, neither does drilling holes and screw it into the door and/or frame. Rental properties where you may not want the lanlord to give you a surprise visit, and at the same time, cannot make holes in their doors or peel off their frame paint with too strong adhesives. Metal gates/grills/frames that are hollow inside, giving nothing for the screw to grip on, making them useless (I have personally tried on my own), and smooth metallic surfaces are not great with most adhesives either.
Being alerted by the tamper switch will tell you “Oh I need to fix that asap” instead of “Hmm someone left the door open longer than usual, whatever”.
This is a separate comment since this warrants a separate disccusion:
Don’t pay the tuya tax. Just buy the zigbee 3.0 devices that are mentioned to be directly compatible with zigbee2mqtt and zha. You save alot for the exact same product, just without the tuya licensing, and therefore does not work with tuya hubs, which we all don’t want to use anyway.
I got mine for the equivalent of USD ~2.20 for example. Looks and works exactly the same as Paulie model mentioned above, just not starting at 6USD, and seems to have a more stable LQI.
Yes, I mentioned on several occasions throughout my reviews that you should always get the Z2M or HA version, whenever listed. The numbers are just what I paid for these samples, as AliExpress pricing is very location dependent.
Can you share where did you get it or how did you find it please?
Personally, I love Tony, I have been it as my bathroom door sensor and it has never missed. Using the battery it came with for more than 2 years.
Aqara original door sensor keeps dropping out of my network both with Sonoff Dongle E and SLZB SM HUB essential using CC2652P1 radio.
Used Pauline and Chris as well but not extensively.
Outstanding work! I will now require all tech product reviewers to use people’s names in place of horrible unwieldy product names. Especially for monitors!
Yeah, I does make things much easier to follow.
Especially in this case, when Tuya white-label names and models are just gibberish.
Thanks for the feedback!
I enjoyed this far too much. I have recently installed some Tony’s and they are working very well.
Tony is awesome!
Glad you liked it 🙂
Great article, some remarks:
– you have 6 device which are emitting at 2,4ghz at the same time so there is interference between them which invalidates distance tests.
– Really agree about AAA batteries, happy to read someone with the same opinion as me because I’m not really happy to see door sensors becoming bigger
– May be hall sensors have lower battery life because the component requires to be powered whereas reed switches are totally passive?
– Some cheap door sensors have vibration sensor, this is interesting because stealers are sometimes breaking the window without opening it
Yes. The latency test is flawed if they were triggered simultaneously.
About aqara which are dropping from the network (I read that in the comments).
Aqara are probably the best door sensors on the market (the very first version was even better with a better/smaller form factor). But the aqara protocol doesn’t really respect the zigbee standard which is triggering these disconnections.
Door sensors are for house security so it has to be reliable, so if you want to use aqara door sensors you must use an aqara gateway. With a gateway from aqara the result is just more reliable than any sensor coupled with zigbee2mqtt (no drops over years, no fake results on quick open/close tests, no software dependency (z2m), best distance detection). Z2M has many fans, I’m also one but after years of old I know that my very old aqara gateway is more reliable than my z2m instance.
I believe you forgot to color-code the devices in the article.
Apologies. I use dark reader and I didn’t realize it makes them all the same color.
Cool article! I want to ask, why are you using the old Z2M interface? It’s no longer maintained.
FYI the Tuya modules starting with ZT (ZTU, ZT5, ZT3L etc.) are still Telink. Probably TLSR8258.
Awsome detail –
Thank you!
Thank you, great work as always! Do you have any doors or windows that you barely open and once in a while you’ll have to open it to trigger the state just in case it goes into deep sleep mode if it’s rarely been triggered? I’m paranoid so once in a while I have to test some of my basement windows to see if it’s still functional (I have mostly Tony and Paulie), thanks.
Hey, no, not really.
But it’s a good idea to create some sort of automation that would ping them, such as Zigbee2MQTT’s availability setting.
Keep in mind this can waste batteries.
I’ve been using Paulie and Tony for two years on same batteries after I had bought Aqara’s ones that constantly dropped off of network. Paulie is big and ugly, but both work without any problem. Even my Aqara sensors now work reliably since I moved to Z2M and brought them closer to my Zigbee coordinator so to not have to go through any relaying Zigbee device.
Zigbee Door Sensor Window Contact Open Close Detector With Luminosity/Vibration Detection APP Control For Alexa Google Home Z2M | -redacted-
Have you tried this one with vibration detection I haven’t used or seen one yet
No, I have not. Please don’t post spammy links.
https://www.zigbee2mqtt.io/devices/ZG-102ZM.html
I bought that, this is the sensor as shown in the Z2M.
hey, thanks a lot for the article! I bought Carmela based in your recommendation!
Sadly I’m unable to pair Carmela with ZHA, do you have any tips? I’ve even tried removing the batteries to see if that triggers something in the sensor.
thanks in advance!
Does it pair and it’s unrecognized or it doesn’t pair at all?
I didn’t realize there was a pairing button on the device cause I didn’t read the manual. 🫣
all fixed! thank you once again for the amazing article!