About Matter and ESP ZeroCode
For the past 2 months, I’ve been testing and reviewing a lot of Matter devices. As Matter is a hot topic in the smart home space right now, new releases tend to be Matter-enabled in one way or another. For example, SmartWings started offering Matter-over-Ethernet smart blinds with PoE support, the first of its kind.
Reading a lot about the tech side of Matter, I started to tinker with some off-the-shelf hardware in an effort to create my very own Matter device. Turns out, this process is much simpler than I anticipated thanks to something called ESP ZeroCode.
ESP ZeroCode is a platform by Espressif Systems that simplifies IoT device creation by offering a no-code development environment. It’s designed to be very user friendly, specializing in Matter-compliant devices and ensuring they work across different smart home systems. It also simplifies manufacturing by handling firmware pre-flashing and device-specific settings, should you decide to take that route.
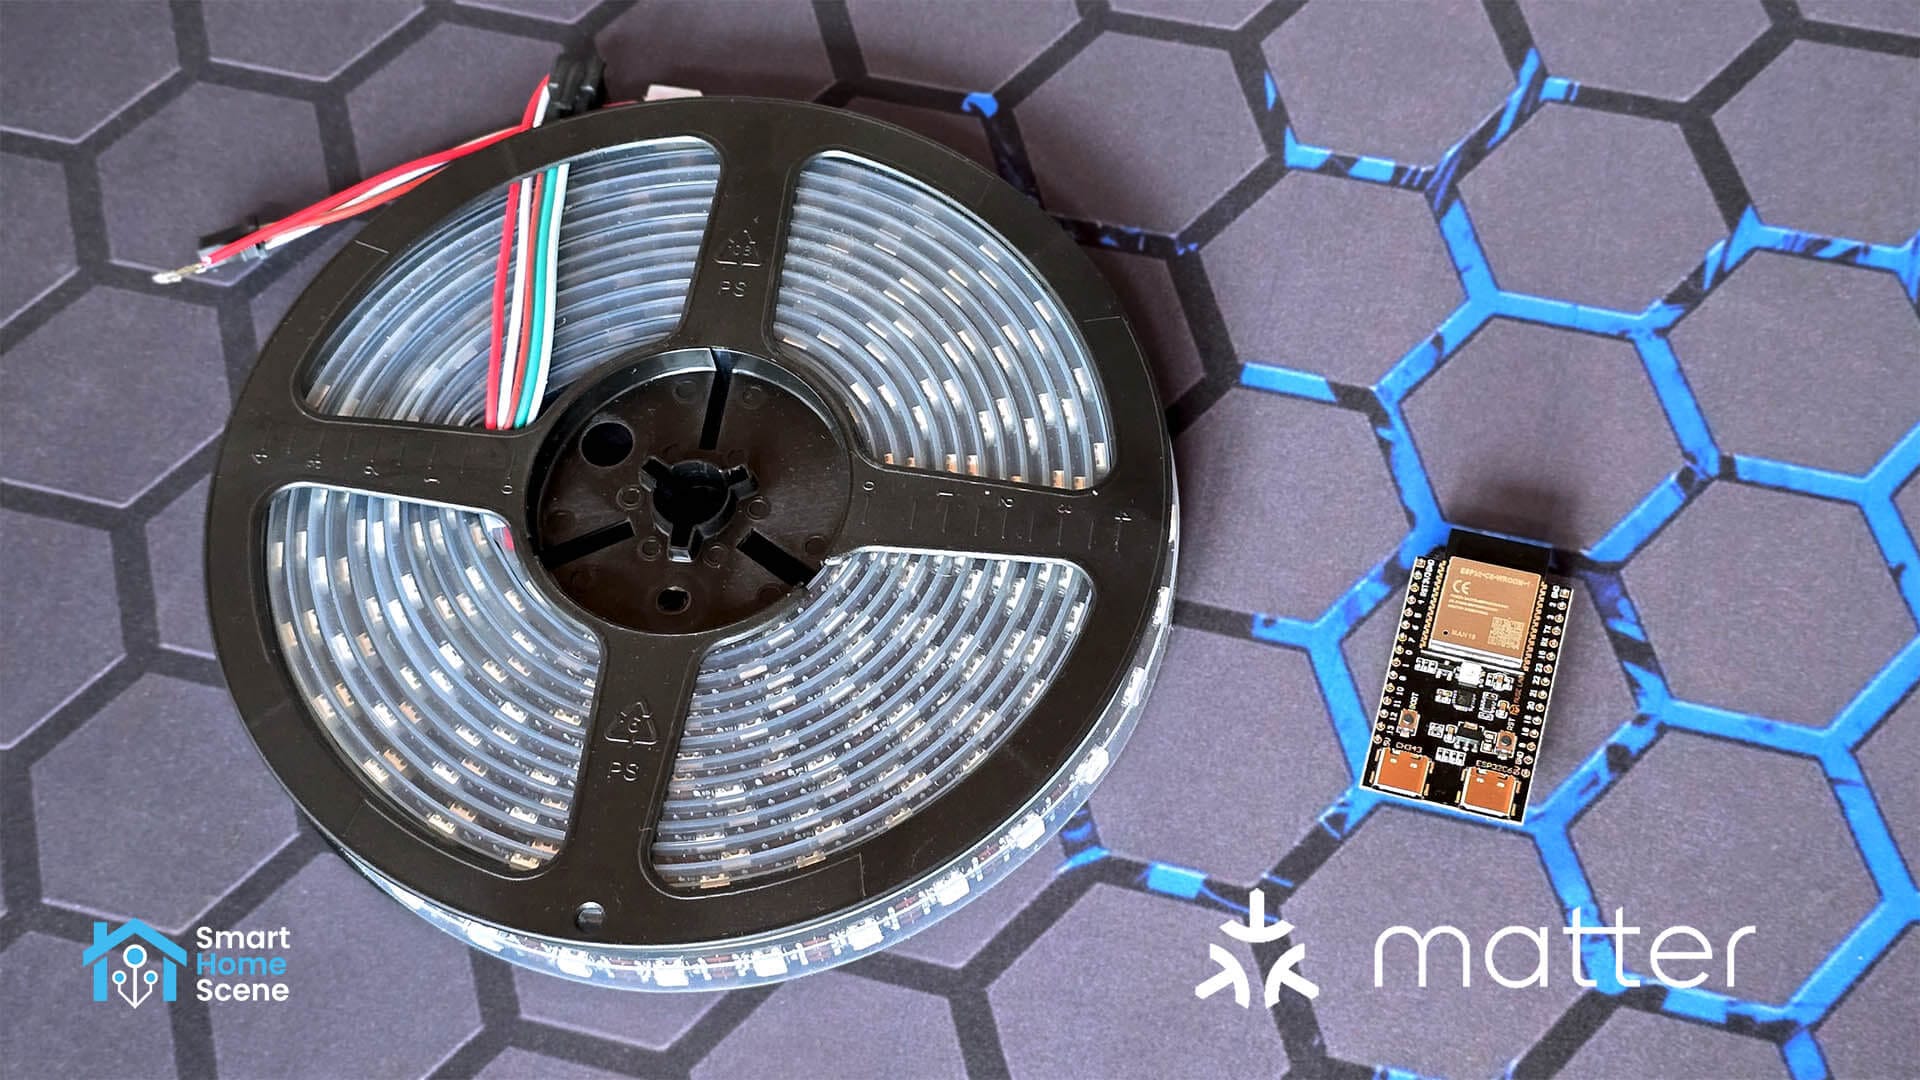
In this tutorial, I am sharing how to make your own Matter-over-Wi-Fi smart light by using an ESP32-C6 board and a WS2812B LED strip. This is the simplest device you can create with ESP ZeroCode. My intention is to deep dive this further and create a Matter-over-Thread thermostat next.
ESP ZeroCode Supported Device Types and Boards
ESP ZeroCode supports a bunch of different devices types. These can differ by the driver used, peripherals required and compatible Espressif boards. The list includes switch modules, wall switches, plugs, dimmers, lights, thermostats, LED strips, roller blinds and several others.
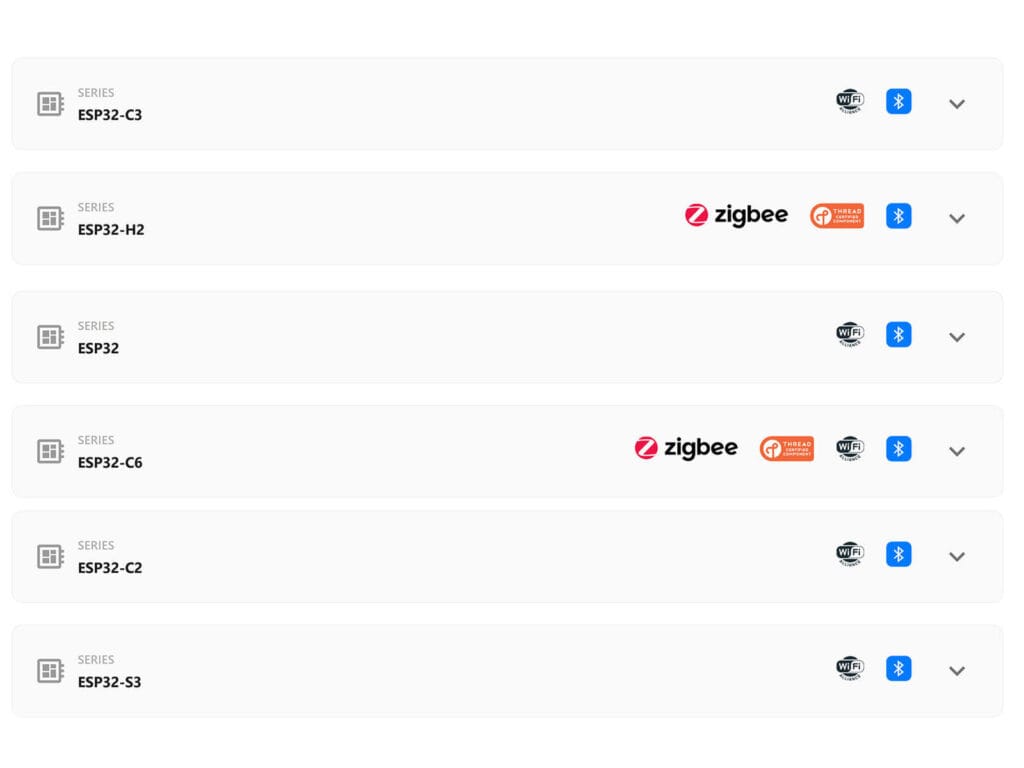
Depending on the device type you choose, ESP ZeroCode will support several different board models. However, the ESP32-C6 and ESP32-H2 are the only boards that can handle Thread. While my guide is for a Matter-over-Wi-Fi device, it’s best to get a Thread-ready board (if you don’t have one) which you can reflash at any time. It’s also worth pointing out that the H2 does not support Wi-Fi and has less flash available, which makes the C6 the better option, especially since the two are comparable in price.
Matter LED Strip Project Requirements
To follow along this project, you will need a couple of things. First, you will require a capable power supply, dependent on the length of your strip. Each RGB LED on the WS2812 consumes about 60mA or 20mA per color channel at full brightness. For density of 60LEDs per meter, this equates to 3.6A for the 1 meter variant (60 * 60mA = 3.6A) and 18A for the 5 meter variant (300 * 60mA = 18A).
I put together two separate shopping lists for different LED strip lengths. The power supply leaves a little overhead for powering the board:
🛒 1-meter version (3.2ft)
- ESP32-C6-WROOM-1
- WS2812 LED Strip (1m, 60LEDs)
- Power Supply (5V5A)
- Resistor (330 ohm)
- USB Cable (for flashing)
🛒 5-meter version (16.4ft)
- ESP32-C6-WROOM-1
- WS2812 LED Strip (5m, 300LEDs)
- Power Supply (5V20A)
- Resistor (330 ohm)
- USB Cable (for flashing)
It’s also worth noting that the WS2812 LED strip is available as a 12V variant too. However, this would require you to power the ESP board via a different 5V power supply or use a voltage converter, which is redundant. To protect the first WS2812 LED and the ESP32’s output pin from potential damage, a 220-470 ohm resistor is also required.
If you are recycling an old or questionable power supply, it’s also worth considering installing a 1000uF capacitor for an extra layer of protection against voltage spikes and dips. This will prevent potential flickering and other erratic behavior. As my power supply is well-made, I found that my DIY Matter LED strip works great without a capacitor.
Preparation and Wiring
Wiring the ESP32-C6 and the WS2812 LED strip is very simple. There are many ways this can be approached. You can use Dupont connectors and some electrical tape. The best way, obviously, is to solder the components together and minimize the risk of potential failure points. I highly suggest checking out the Kaiweets KETS02 portable soldering iron, which is perfect for the job.
I created a wiring diagram for how to connect everything:
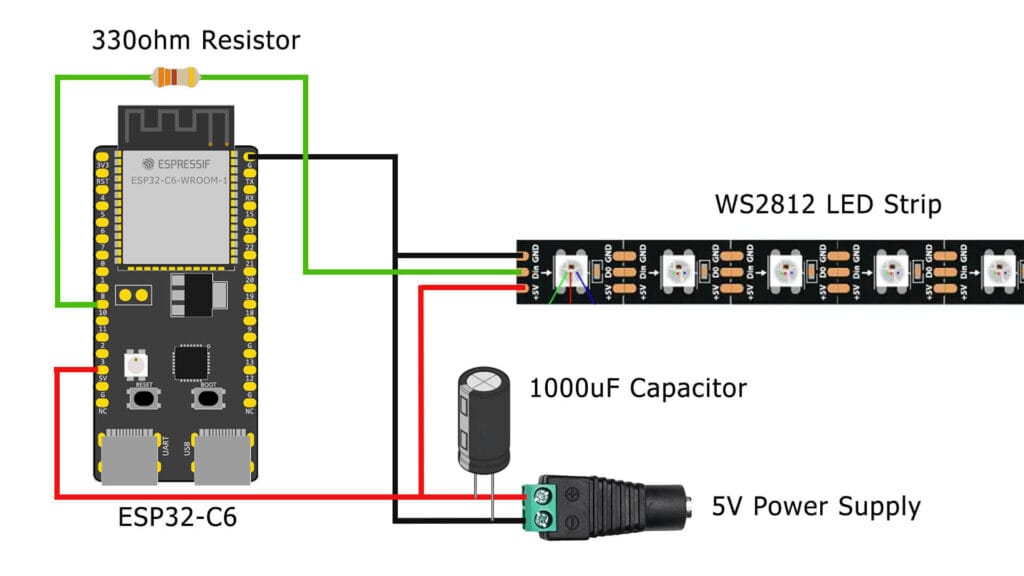
You will notice the data pin is connected to GPIO8 on the ESP32-C6 board. This can be changed to any of the available pins, but you need to note the number and select it during flashing. The 1000uF capacitor is also required if you have a questionable power supply.
ESP ZeroCode Firmware Flashing
Once the hardware is connected and prepared, you are ready to flash the ESP board with the Matter firmware. The process bellow details the steps for a LED strip, although the individual steps are nearly identical for any other device type.
- Navigate to Espressif ZeroCode
- Create an account and sign in
- The name will be displayed in Home Assistant as manufacturer
- Click Create a new product and give it a name
- The product name will displayed in Home Assistant as device name
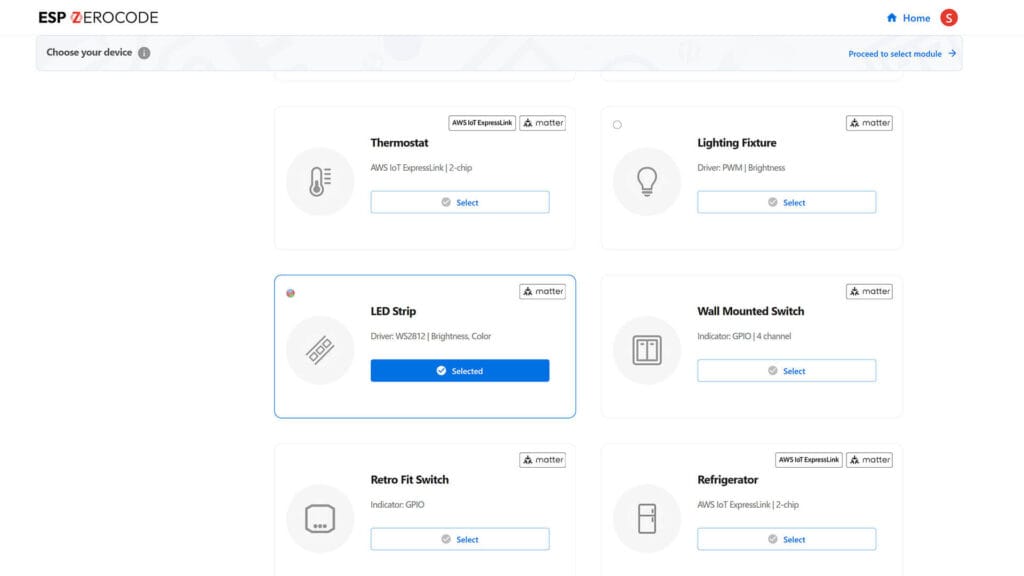
- Scroll down and select device type LED Strip
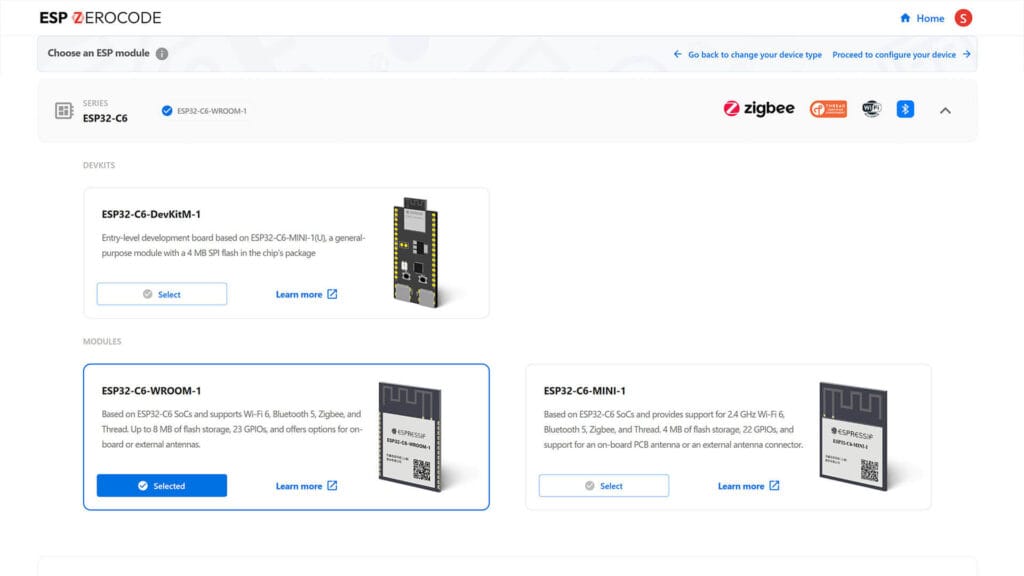
- Click Proceed to select module
- Expand the ESP32-C6 section and select the ESP32-C6-WROOM-1
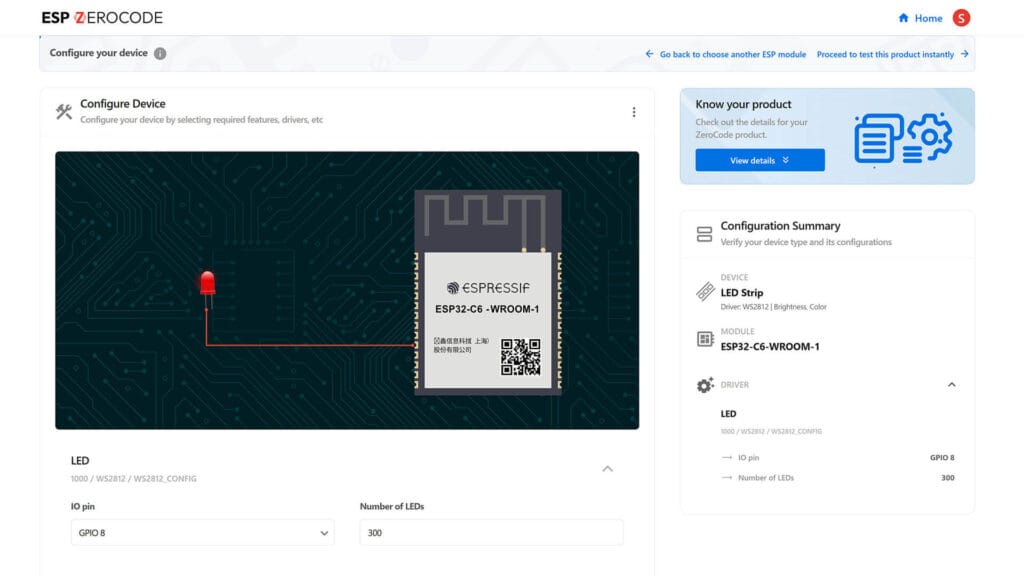
- Click Proceed to configure your device
- Select the GPIO pin number (default: GPIO8)
- Set the total number of LEDs
- Click Next Step
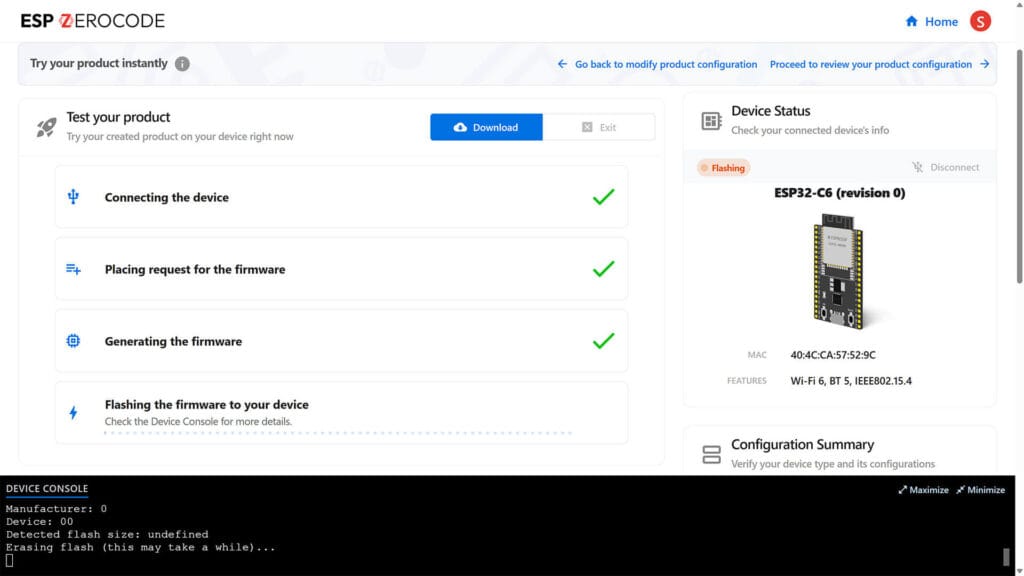
- Connect the ESP32-C6 to your PC if you haven’t already
- Click Test your product now
- Click Connect and select it from the list
- Wait for the Flashing to finish
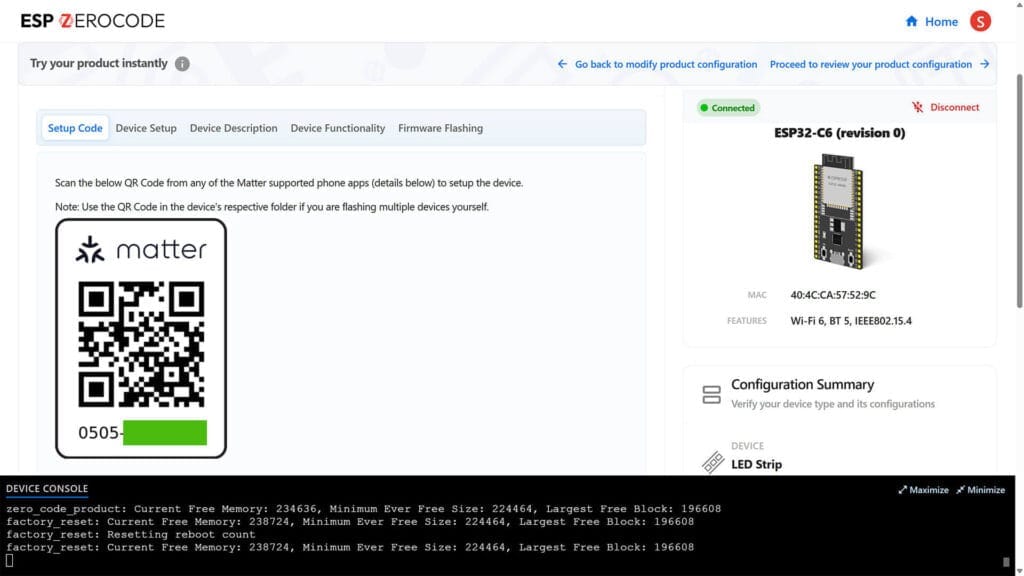
- Save the QR Code displayed on the screen
- Done!
The last two steps are reserved for when you actually want to batch order pre-flashed ESP boards of your device. This is obviously beyond the scope of this guide and not necessary for a DIY Matter device. Here’s how the entire process looks like in a few screenshots:
Pairing to Home Assistant
At the end of the flashing process, you will get a unique Matter QR pairing code that you need to scan and add the device in Home Assistant. Take a screenshot and save it somewhere temporarily, or you will have to reflash your device to obtain a new one.
Once my DIY Matter LED Strip was added to Home Assistant, here’s what was available with the default configuration in ESP ZeroCode:
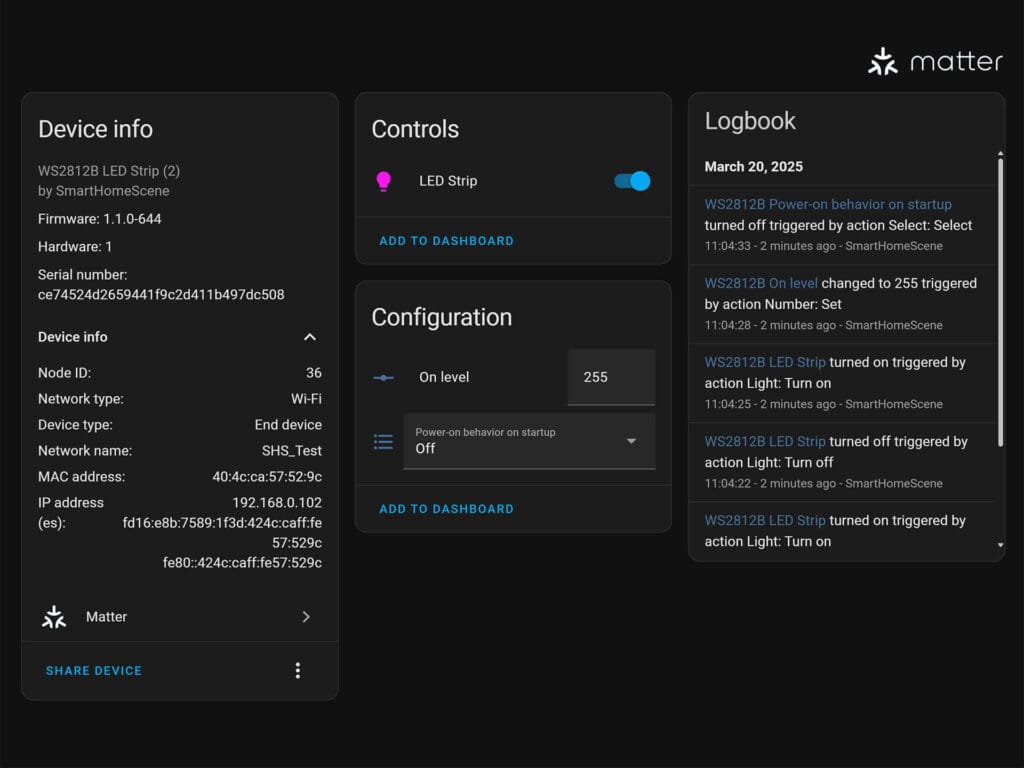
Besides the light entity for controlling the strip, two separate configuration entities are included. The default light level when the strip is turned on and the power on behavior on start up or power loss. The Matter LED strip works like it should, behaving like any other light in Home Assistant. Pairing was seamless and easy, with the board going into pairing mode immediately once powered.
If you need to re-enable pairing mode, you need to power cycle the device 3 times at 2 second intervals. This will make the on-board LED start breathing which indicates the device has entered pairing mode.
Advanced Firmware Configuration
The ESP ZeroCode web flasher allows for very basic device configuration through the UI and wizard. The platform also offers something called Text Mode (Advanced), which allows you to tweak some more things for your Matter device. All possible configuration parameters and clusters can be found at the ESP ZeroCode Product Documentation.
For example, you can change LED beads combination, adjust minimum and maximum temperature in Kelvin, enable gradients, enable low power consumption mode or disable the retain power on feature. For the WS8212 driver, not many extra features can be added, which is of course another Matter limitation.
Final Thoughts
The ESP ZeroCode platform is a nice and easy way to dip your toes in the DIY Matter world. The requirements are low and the flashing process is designed to be point and click. You do not have to be a developer to create your own Matter device.
Given the fact that ESP ZeroCode is almost a no-code environment, it’s quite flexible and powerful. You can create lights, thermostats, switches, modules with many different ESP boards. If you do not have one laying around, I highly suggest going for the ESP32-C6 as it supports Wi-Fi, Zigbee and Thread, which can be re-flashed down the line.
Now, before some of you ask why actually do this? Why create a DIY Matter LED Strip with limited features, when WLED is far superior and works great with Home Assistant? I fully understand the differences and limitations of Matter at this point in its development stage. However, I decided to share this article mainly for educational purposes.
If you follow along and create your own DIY Matter smart device, let me know in the comments what you made and any issues you encountered.


Thank you for the very interesting information!
You are welcome! Cheers!
Do you have hints how to use a seperate 12V and use a usb powersupply for the esp. I have a 12V strip and a powersupply for this.
You can power them separately of course.
Connect 12V (+-) to the LED strip.
Connect 5V (+-) to the ESP32 (5V/GND or use USB).
Connect the ground (GND) of both power supplies together. *crucial for data pin)
Connect the data pin as usual, with a resistor.
Do NOT connect the 12V to the ESP32 board.
Thx
Thanks for the detailed explanation 🙂
Purchased everything and after soldering I’m trying to connect the ESP32 to HA.
As soon as I want to add it to HA it goes well until step that it wants to connect to HA, then at the last step I get the message: something went wrong. After a few tries I tried to add it to Google Home, this succeeded but all my devices are offline. (I don’t use Google Home so don’t know how along this is all already offline, everything through HA is online and controllable). It did connect with Apple Home and was only able to change the colour of the single onboard ESP32 LED, not the LEDstrip… I have already set my network to 2.4Ghz and checked my router and given the mac address access.
Tried some AI and forum but can’t figure it out. Any help?
It’s difficult to tell what exactly the issue is from the information you give me.
It could be a whole lot of reasons, but If I had to guess, I would say HA is having trouble finding the board on your local network.
Is your phone connected to the internet when commissioning the device?
I see in the screenshot that the matter connection ended up using Wi-Fi. Is there some configuration you can apply so that you get the same led control but only via zigbee? I have a device that doesn’t have much luck connecting to Wi-Fi, but is well within reach of my zigbee mesh. curious if I could grab a C6 and since the problem easily this way.
Cheers!
Zigbee is a completely different ballgame and requires another approach to creating the firmware and flashing the device.
It’s doable, but much more involved and beyond the scope of this guide. In other words, it’s not as easy to DIY a Zigbee device.