If you’ve ever suffered from a dead SD card on your Pi, than you know what a pain it can be to setup everything again if you don’t have a backup in place. Failure can happen even if you run your Home Assistant Instance from an SSD. Even though breaking changes from updates are rarer than they used to be, they still occur occasionally. See my guide for Tracking Home Assistant Updates.
Repairing your Zigbee mesh network can be a half a day’s work, especially if you have a bunch of devices or some stubborn ones like Aqara. That’s why it’s essential you backup your instance properly.
Home Assistant has it’s own Backup integration, which works by taking a snapshot of your current setup and save it as a .tar file on your current drive. You can trigger a full or partial backup manually if you need to, selecting things you want to backup.
In this article, I’m going to share a few different backup methods for your Home Assistant server automatically on a schedule, detail how to implement them and talk about actually testing your backup as an important practice.
Before setting up a Backup Method
Before you setup a backup method, it’s crucial you optimize your database and filter your entities. Home Assistant records everything by default, purging the database every 10 days. If you have a lot of devices and entities exposed to Home Assistant, this can amount to a sizeable database file, thus increasing your backups needlessly.
You can check out my database optimization guide for a full tutorial (and switching to MariaDB and InfluxDB combo) or you can ask yourself this simple question:
Will this data will be useful to me 6 months or a year from now?
The answer will tell you whether you need recording for that particular entity in Home Assistant or not. Filter out anything you don’t need, and proceed to setup your backup method.
Home Assistant Built-In Backup
The built-in Backup Integration in HA is very capable at making a snapshot of your current setup. It’s natively baked in for Home Assistant OS and Supervised installs, although it might need to be enabled for Core and Container setups.
Creating a Backup
To manually create a backup, navigate to Settings > System > Backups and click + Create Backup:
If you choose to create a Full Backup, give it a name and an optional password protection. If you leave it empty, Home Assistant will automatically assign a timestamp as a name to your backup.
If you choose to create a Partial Backup, select any addons, integrations and folders that you want to keep, give it a name and a optional password.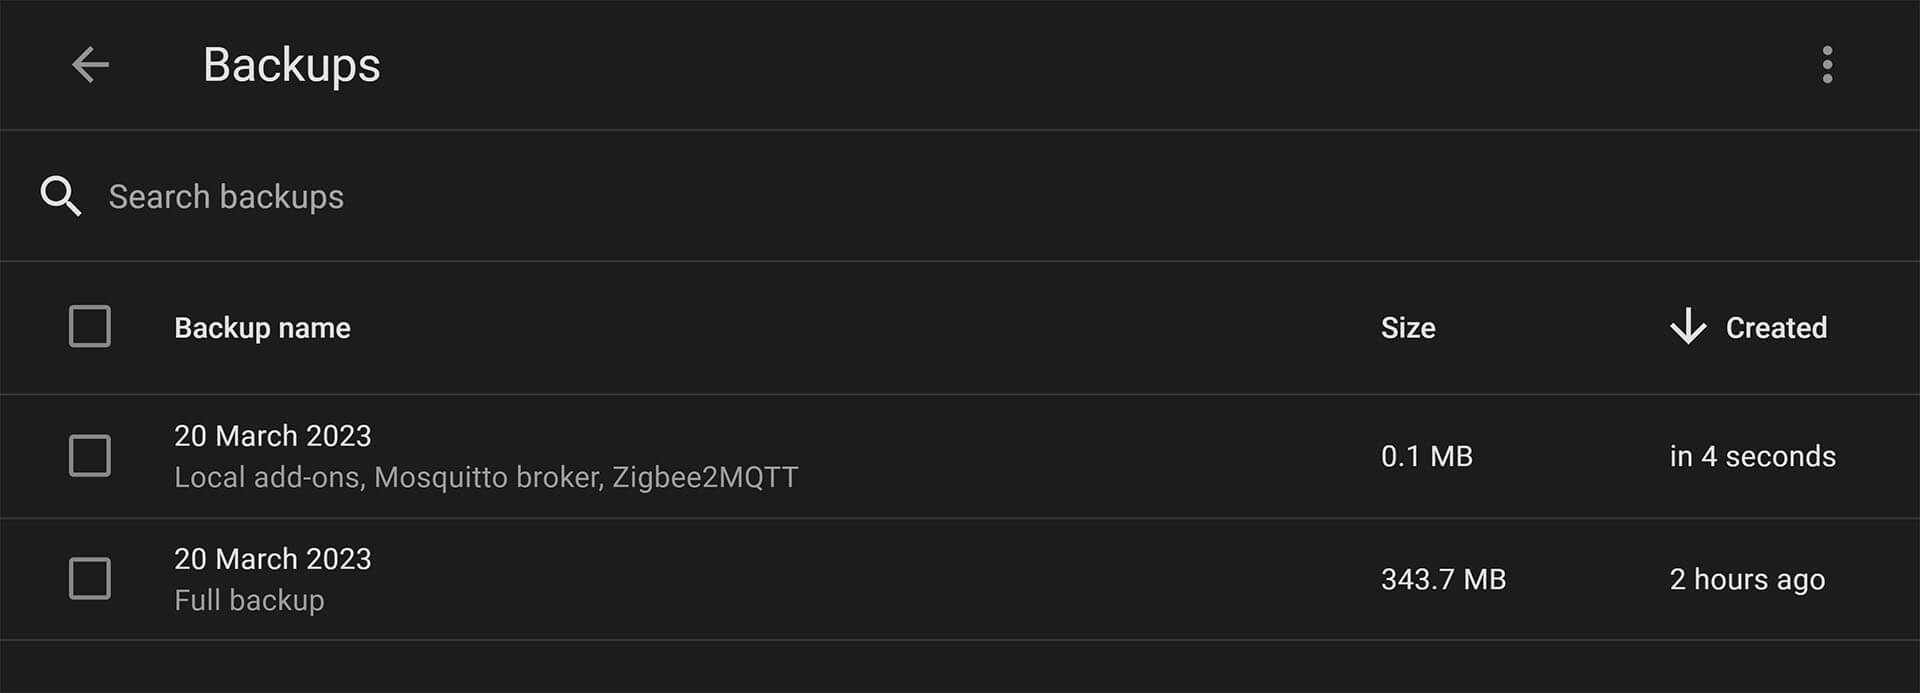
Once the backup is complete, you can download it to your PC and save it somewhere safe by selecting the backup, three dots and than Download backup.
description: "Take a Full Backup Everyday at 3AM"
mode: single
trigger:
  - platform: time
    at: "03:00:00"
condition: []
action:
  - service: hassio.backup_full
    data:
      compressed: true
Home Assistant Google Drive Backup
Although the built in Backup Integration is capable for saving your current configuration, it lacks some advanced features and automation that you would need to setup manually.
Home Assistant Google Drive Backup is a custom add-on developed by sabeechen (Stephen Beechen) which streamlines the process of creating Home Assistant snapshots and uploads them automatically to your Google Drive account.
It’s highly customizable, can create backups on a schedule, automatically upload them to GDrive, cleanup old backups and notifies you when something goes wrong so you can react in time. All with privacy and security in mind.
Installation
In your Home Assistant instance:
- Navigate to Settings > Add-ons > Add-on Store
- Click the three dots in the top right corner and select Repositories
- Add the following repo:
https://github.com/sabeechen/hassio-google-drive-backup - Click Add than Close
Scroll all the way to the bottom and you will see the Home Assistant Google Drive Backup added: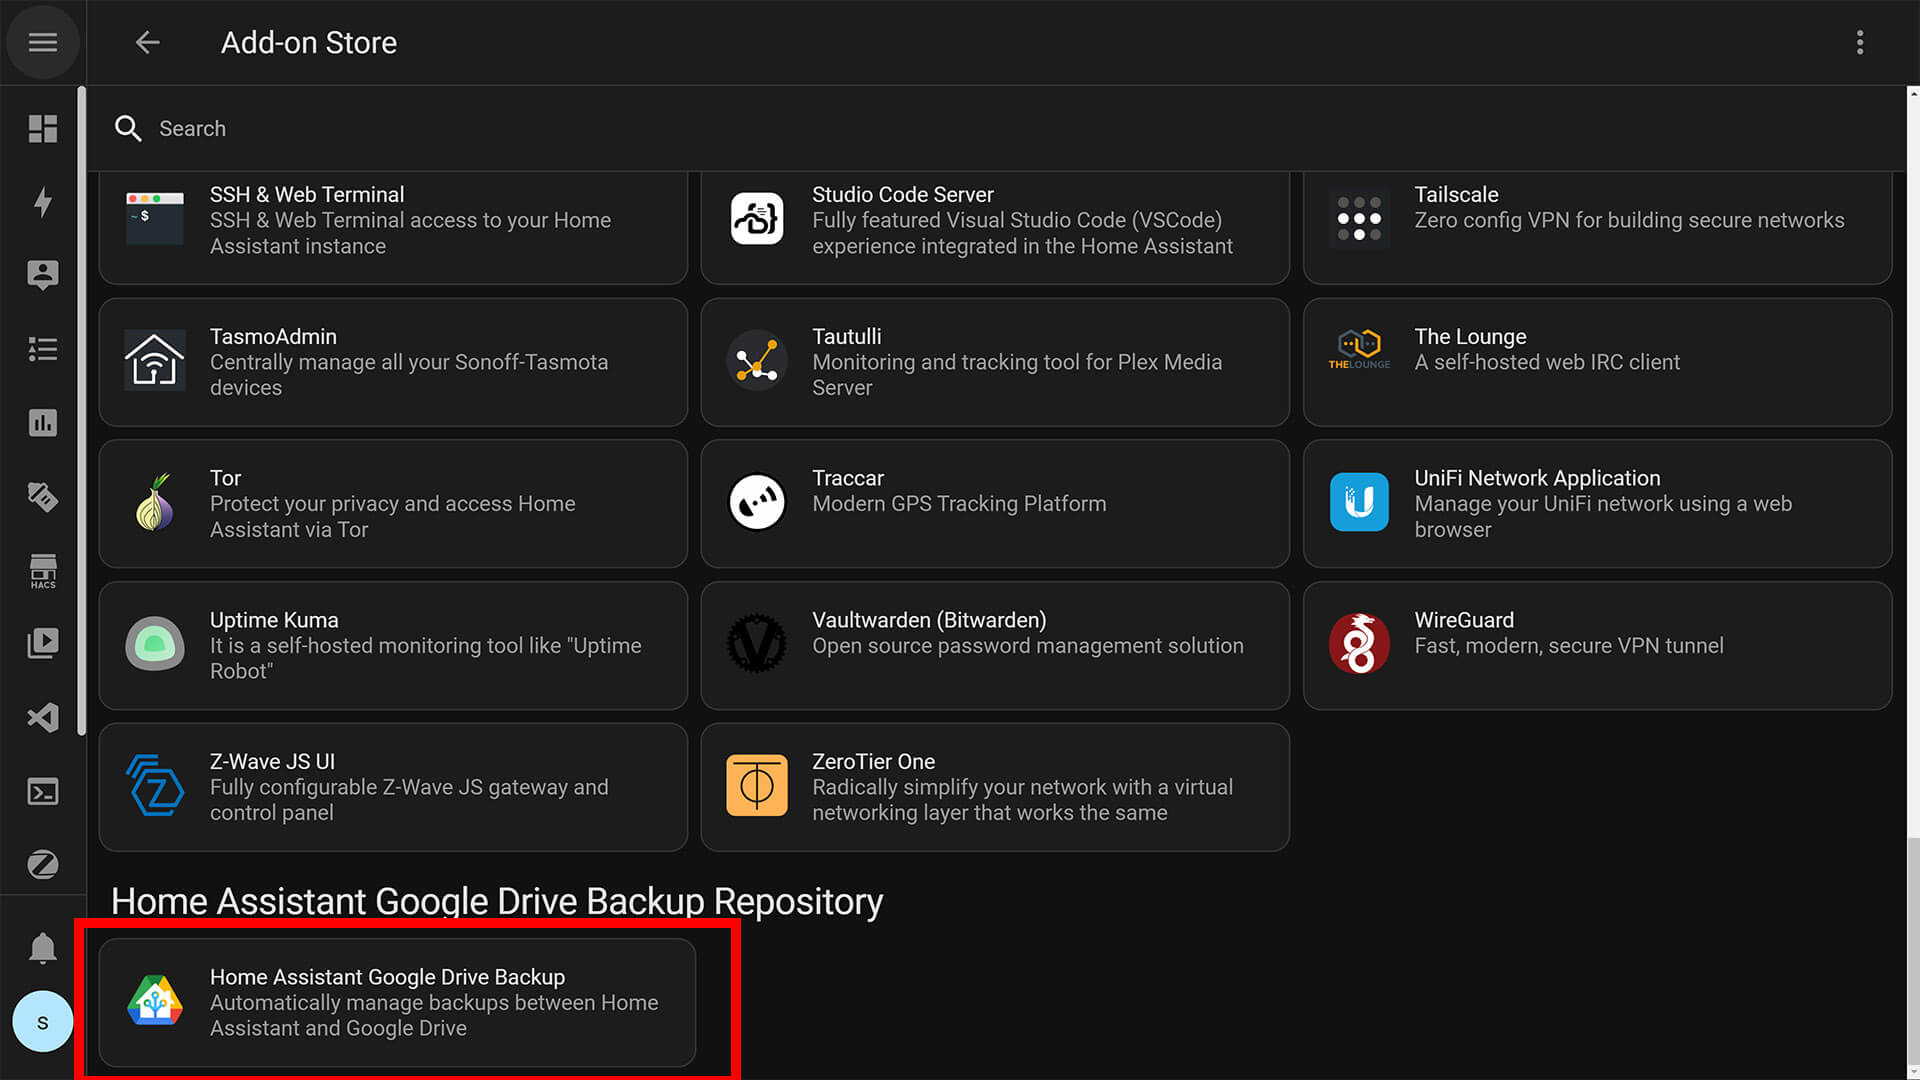
Select it and click Install. Give it a few minutes to finish and click Start. Once started, select the Start on boot, Watchdog and Show in sidebar toggles. Click Open Web UI to open the Add-on and finish setup.
Setup
Once you’ve started the Home Assistant Google Drive Backup Add-on, you will be presented with a Welcome Screen, giving you some stats about your existing backups and a big Authenticate with Google Drive button in the middle. 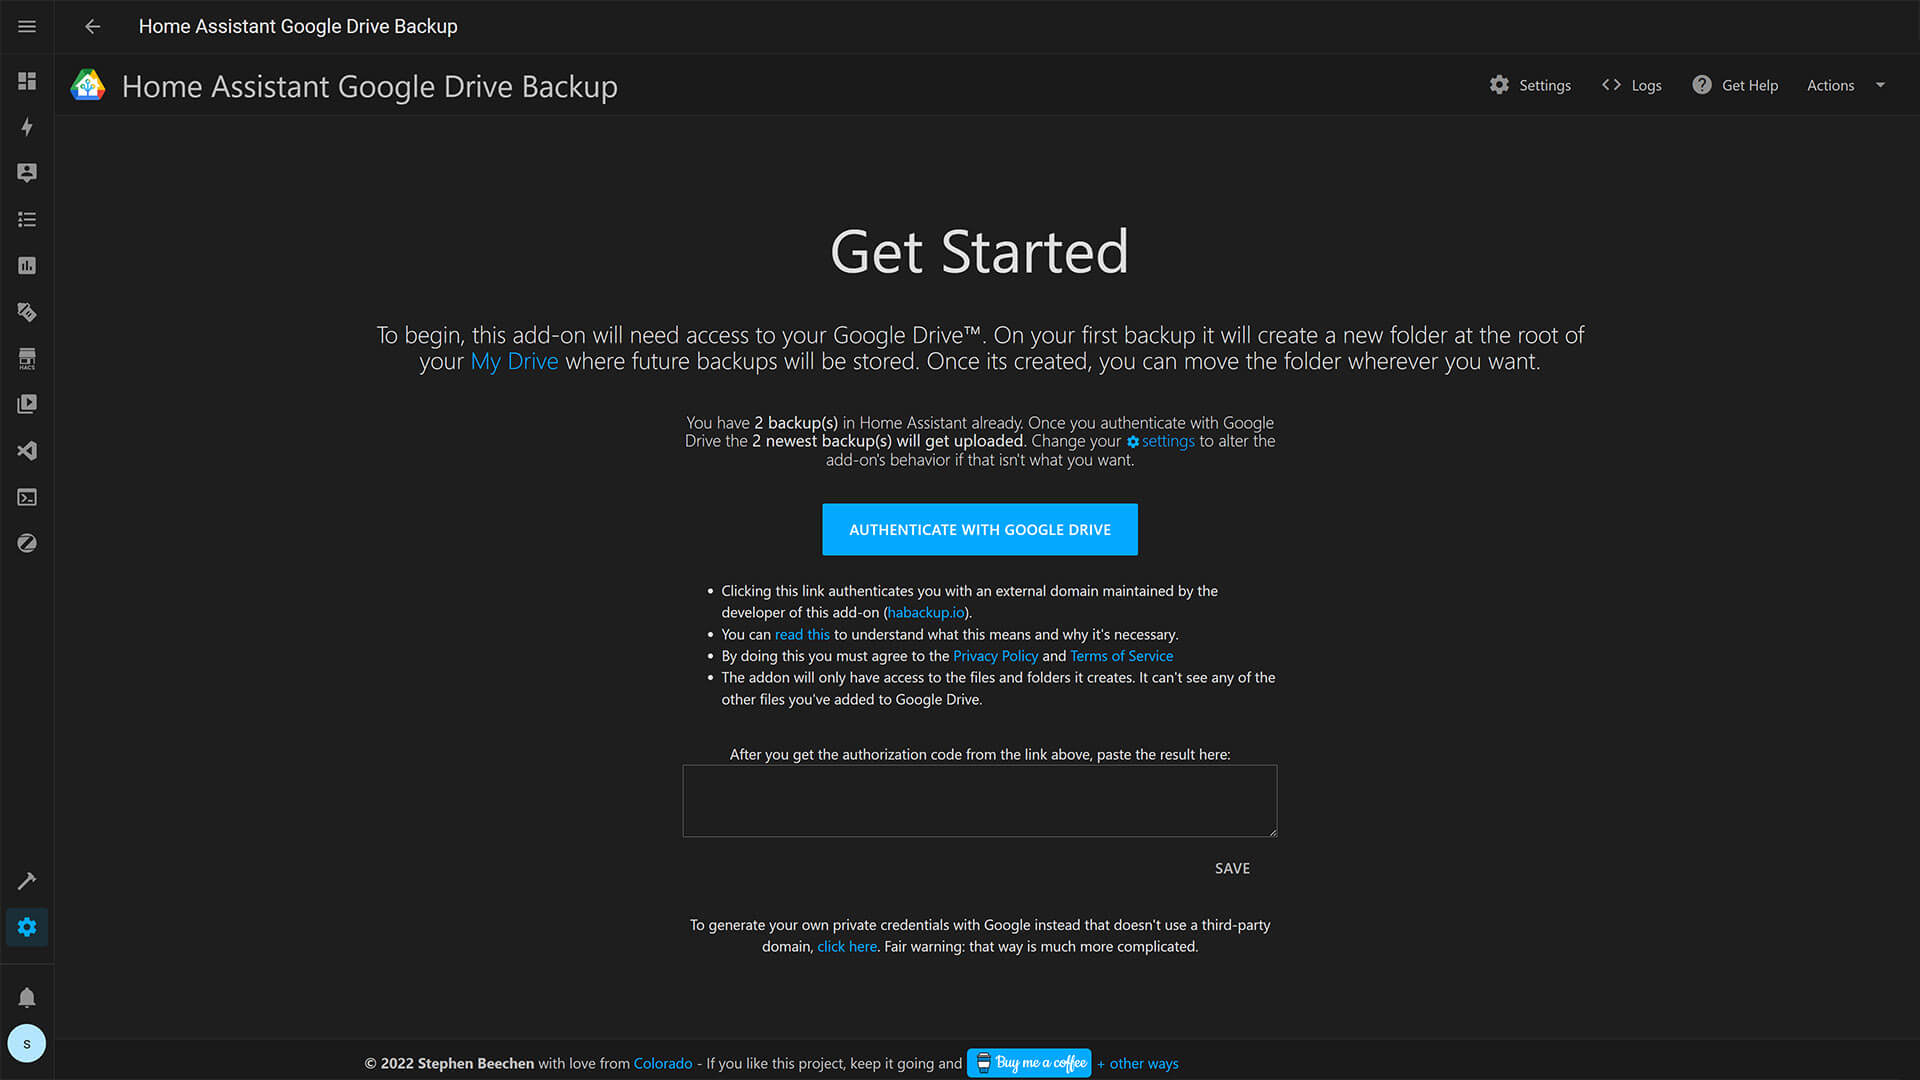
Clicking on it will take you to a new window, in which you will need provide permission to your Google Drive. Select your Account on the prompt and click Continue. You will be presented with a second screen, containing an Authorization String.

You can click SEND CREDENTIALS to automatically send the Authorization String back to the Add-on, but depending on your setup it might not work and you would get an error. So it’s best to click COPY and paste it manually in the the Add-On. Click Save and you are done with the authentication.
The Add-on will automatically start to Sync any existing backups you might already have in Home Assistant. On the left side of the screen, you can overview how many backups you have in Home Assistant and how many you have uploaded to Google Drive. 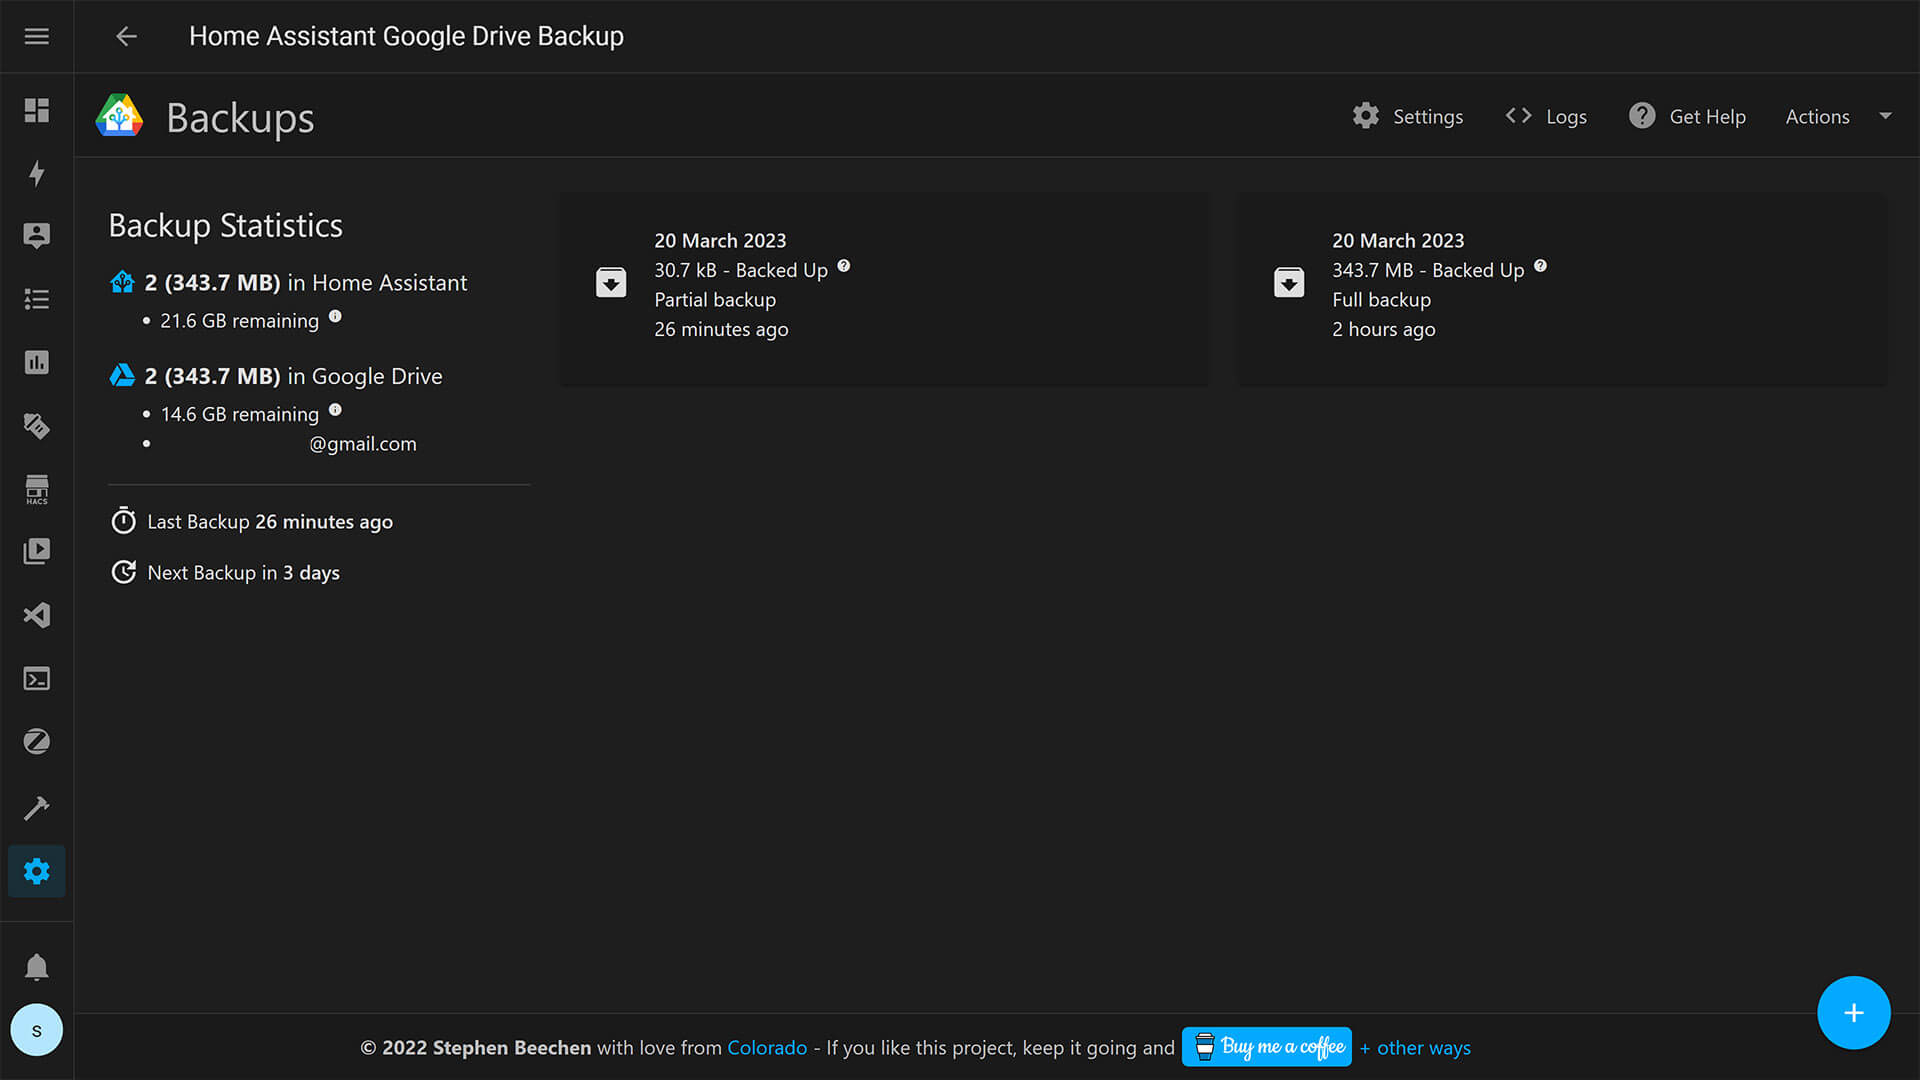
Settings
The Home Assistant Google Drive Backup Add-On has a bunch of built in settings we can tweak. Naturally, you do not want to keep the all the backups the Integration creates neither in your Home Assistant Instance or your Google Drive account.

By default, the add-on is set to keep 4 backups in Home Assistant and Google Drive. I personally like to keep only 1 on my Home Assistant server and 4 in Google Drive. I feel like there is no need for more, but you can adjust this to suit your needs.
The developer did an excellent job of explaining all the settings this backup add-on has to offer. Under each one, you will find a 2-3 sentence explanation so there is no confusion about it’s functionality. Here are a few important settings you might want to tweak:
- Delete Old Backups After Upload
- Delete backups in Home Assistant immediately after uploading them to Google Drive. This can be useful if your machine is low on space, but your backups will only be stored in the cloud. Enabling this will cause “Backups in Home Assistant” to be ignored.
- Delete Oldest Backup Before Making a New One
- Makes the addon delete the oldest backup before a new one is created in Home Assistant or uploaded to Google Drive. When turned off (the default) the oldest backup will only be deleted after a new one has been created or uploaded. Be warned that if a backup fails to be created or uploaded to Google Drive, this can make you have one fewer than the number of backups you intended to keep there.
- Ignore Other Backups
- The addon will ignore any backups it didn’t create. Ignored backups will not count toward “Backups in Home Assistant”, get deleted, or get uploaded to Google Drive unless you manually tell the addon to do so.
- Ignore “Upgrade” Backups
- The addon will ignore backups with only one addon or folder inside them. This is useful if you’d like the addon to ignore backups that Home Assistant automatically creates while updating. Ignored backups will not count toward “Backups in Home Assistant”, get deleted, or get uploaded to Google Drive up unless you manually tell the addon to do so.
- Delete Ignored Backups After: E.G. 7 Days
- Manually Specify the Backup Folder
- Specify manually which folder backups should be uploaded into in Google Drive. If disabled, the addon will automatically create a folder in your My Drive whenever its needed.
- You can leave the other settings as their defaults, such as Notification settings, backup stale entity sensor etc.
The most important one is setting the Backup Schedule. Set the number of days lapsed between backups and the actual time of day, in which the add-on will take a snapshot. Optionally, you can protect the backup with a password and change it’s default file name for easier organization.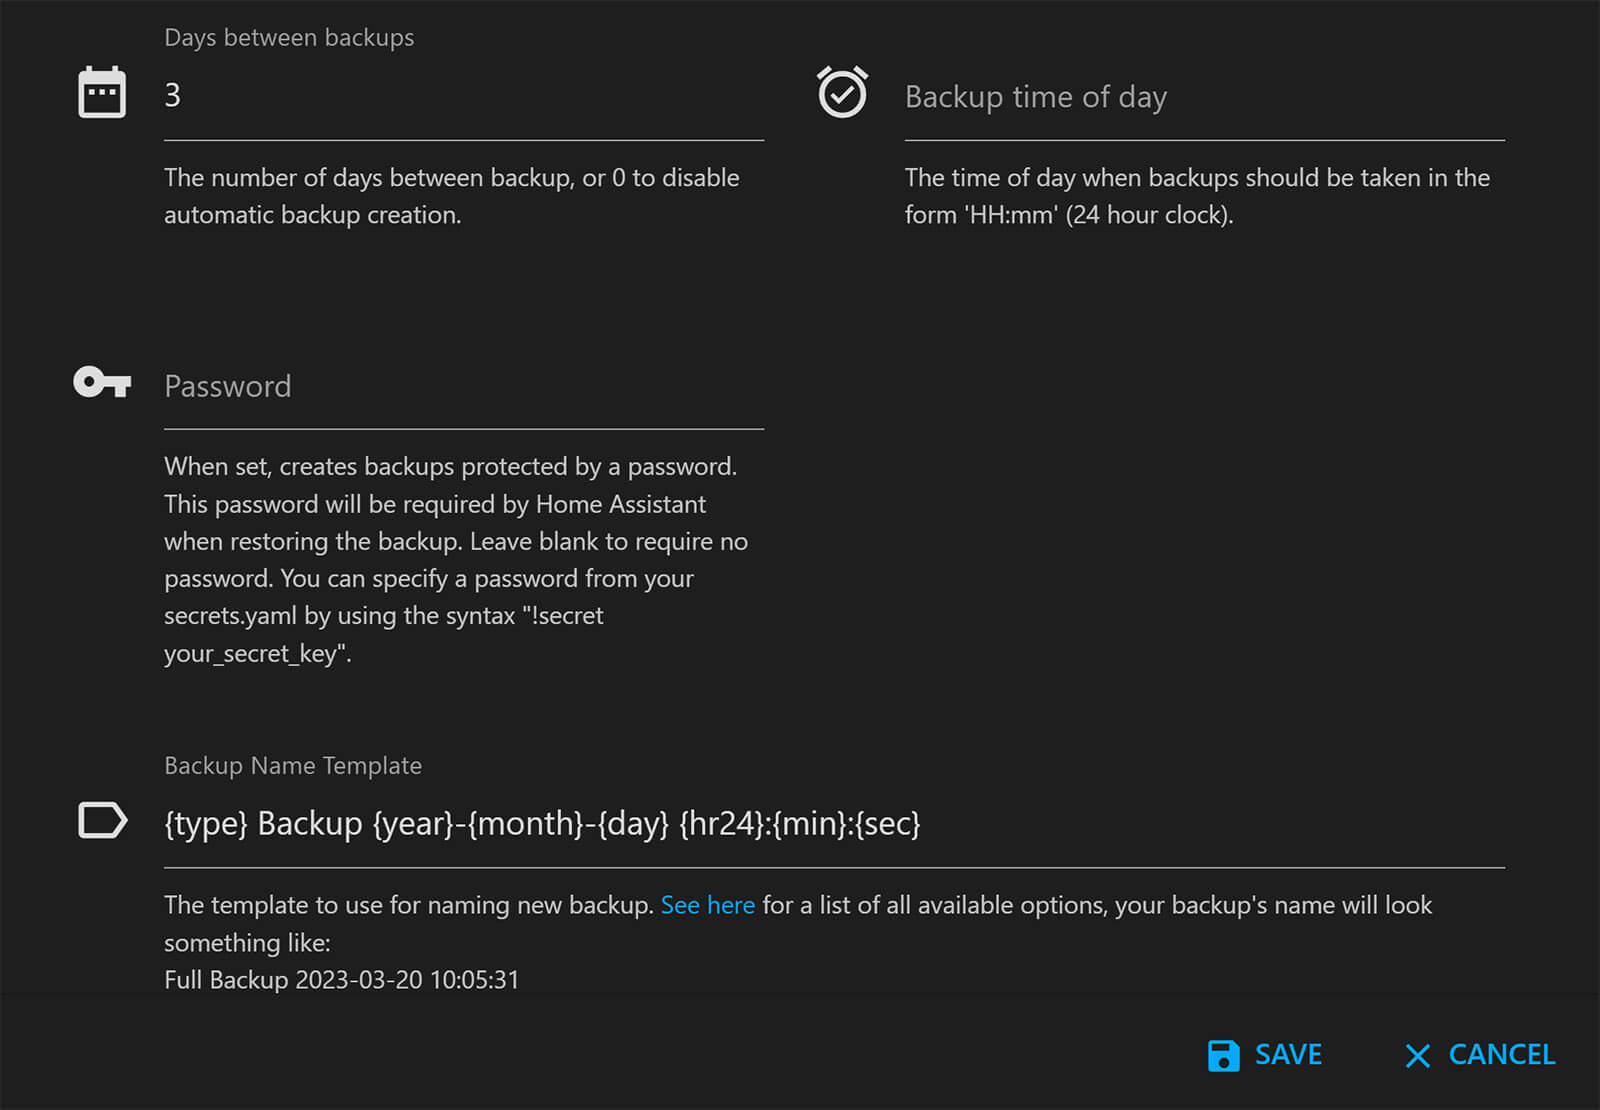
Once you’ve set your preferred settings, click Save and you are done. You can always revisit the setting menu and make additional tweaks. It is important to enable the Start on boot and Watchdog toggles. You do not want a backup add-on not starting or failing to restart if for some reason it encounters issues and crashes.
Another useful feature this add-on offers is having the ability to never delete a backup. Meaning, let’s say you set everything perfectly in your Home Assistant instance. You would like this yo be your ultimate backup, that you can revisit any time there are issues.
First, create the backup like you normally would or click the Actions menu in the corner and select + Create backup. Than, click the backup in the UI and click Never Delete in the popup: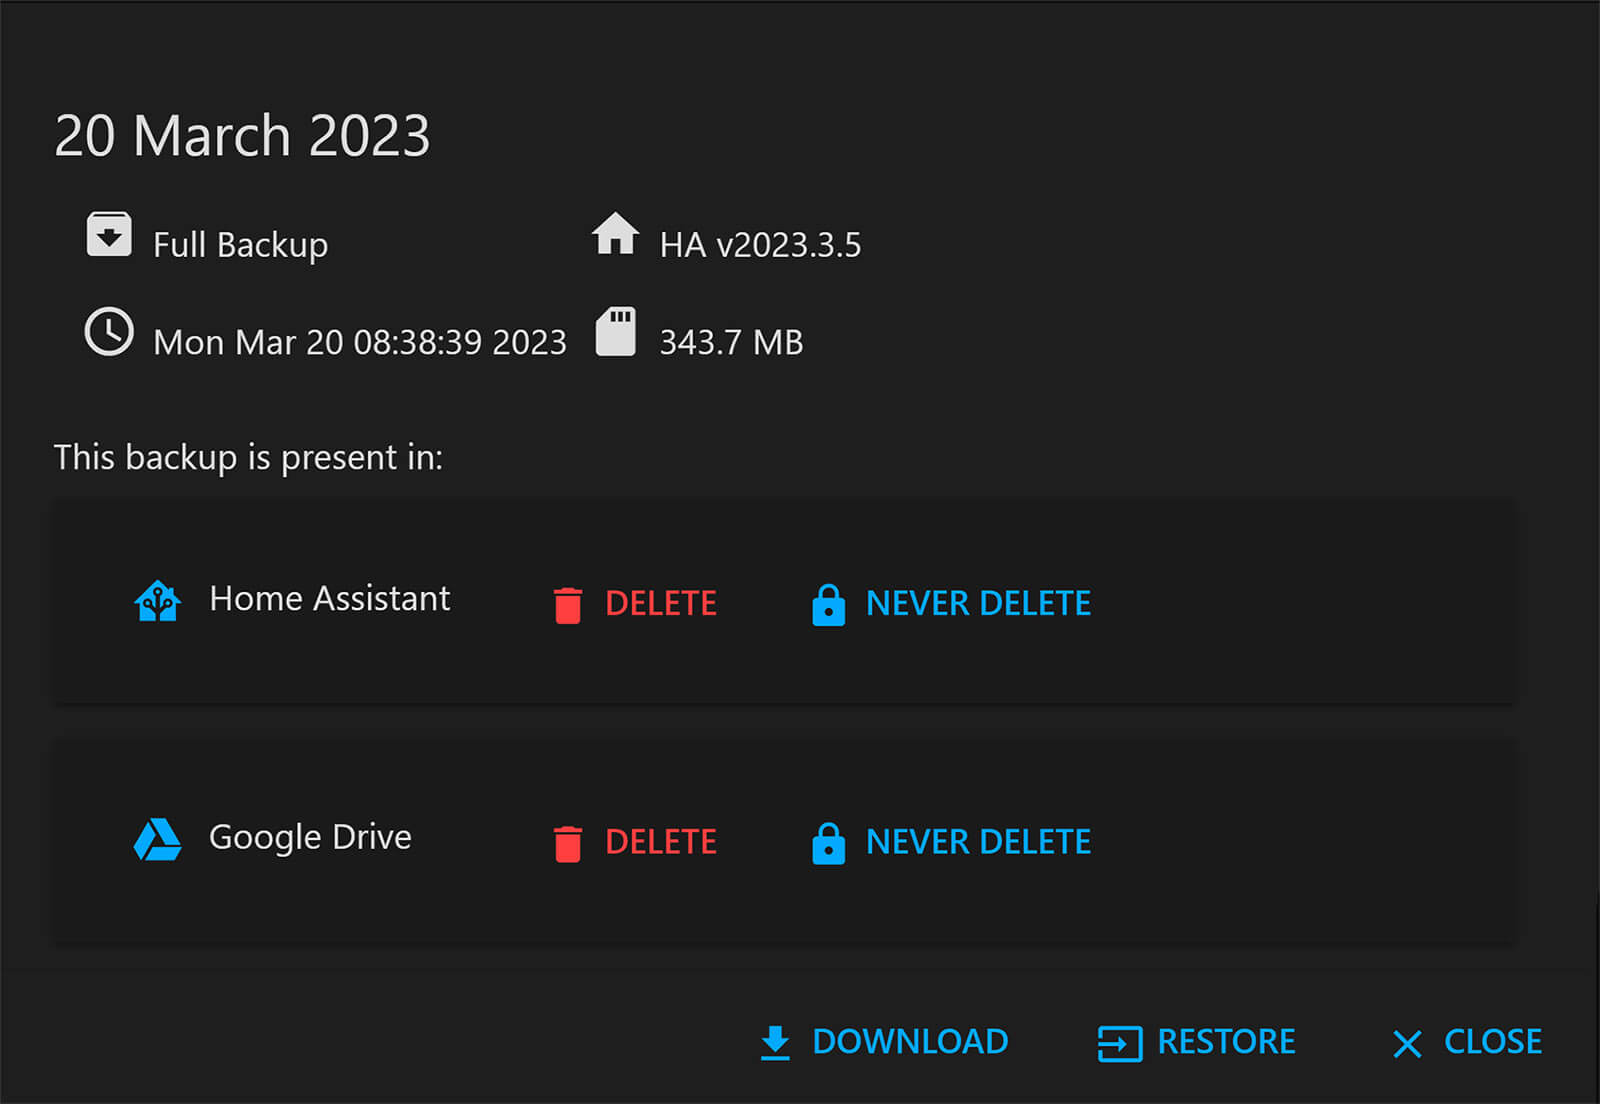
Home Assistant One Drive Backup
If you are a Microsoft guy instead of Google, you can use your One Drive account to backup your Home Assistant instance in the same way as the previous GDrive backup.
This add-on was developed by lavinir and offers similar features like the Google Drive addon in terms of schedules, notifications and customizability. Obviously, you need a Microsoft account instead of Google, follow the steps to set it up.
Installation
In your Home Assistant instance:
- Navigate to Settings > Add-ons > Add-on Store
- Click the three dots in the top right corner and select Repositories
- Add the following repo:
https://github.com/lavinir/hassio-onedrive-backup - Click Add than Close
Scroll down and you will find the One Drive Backup Added: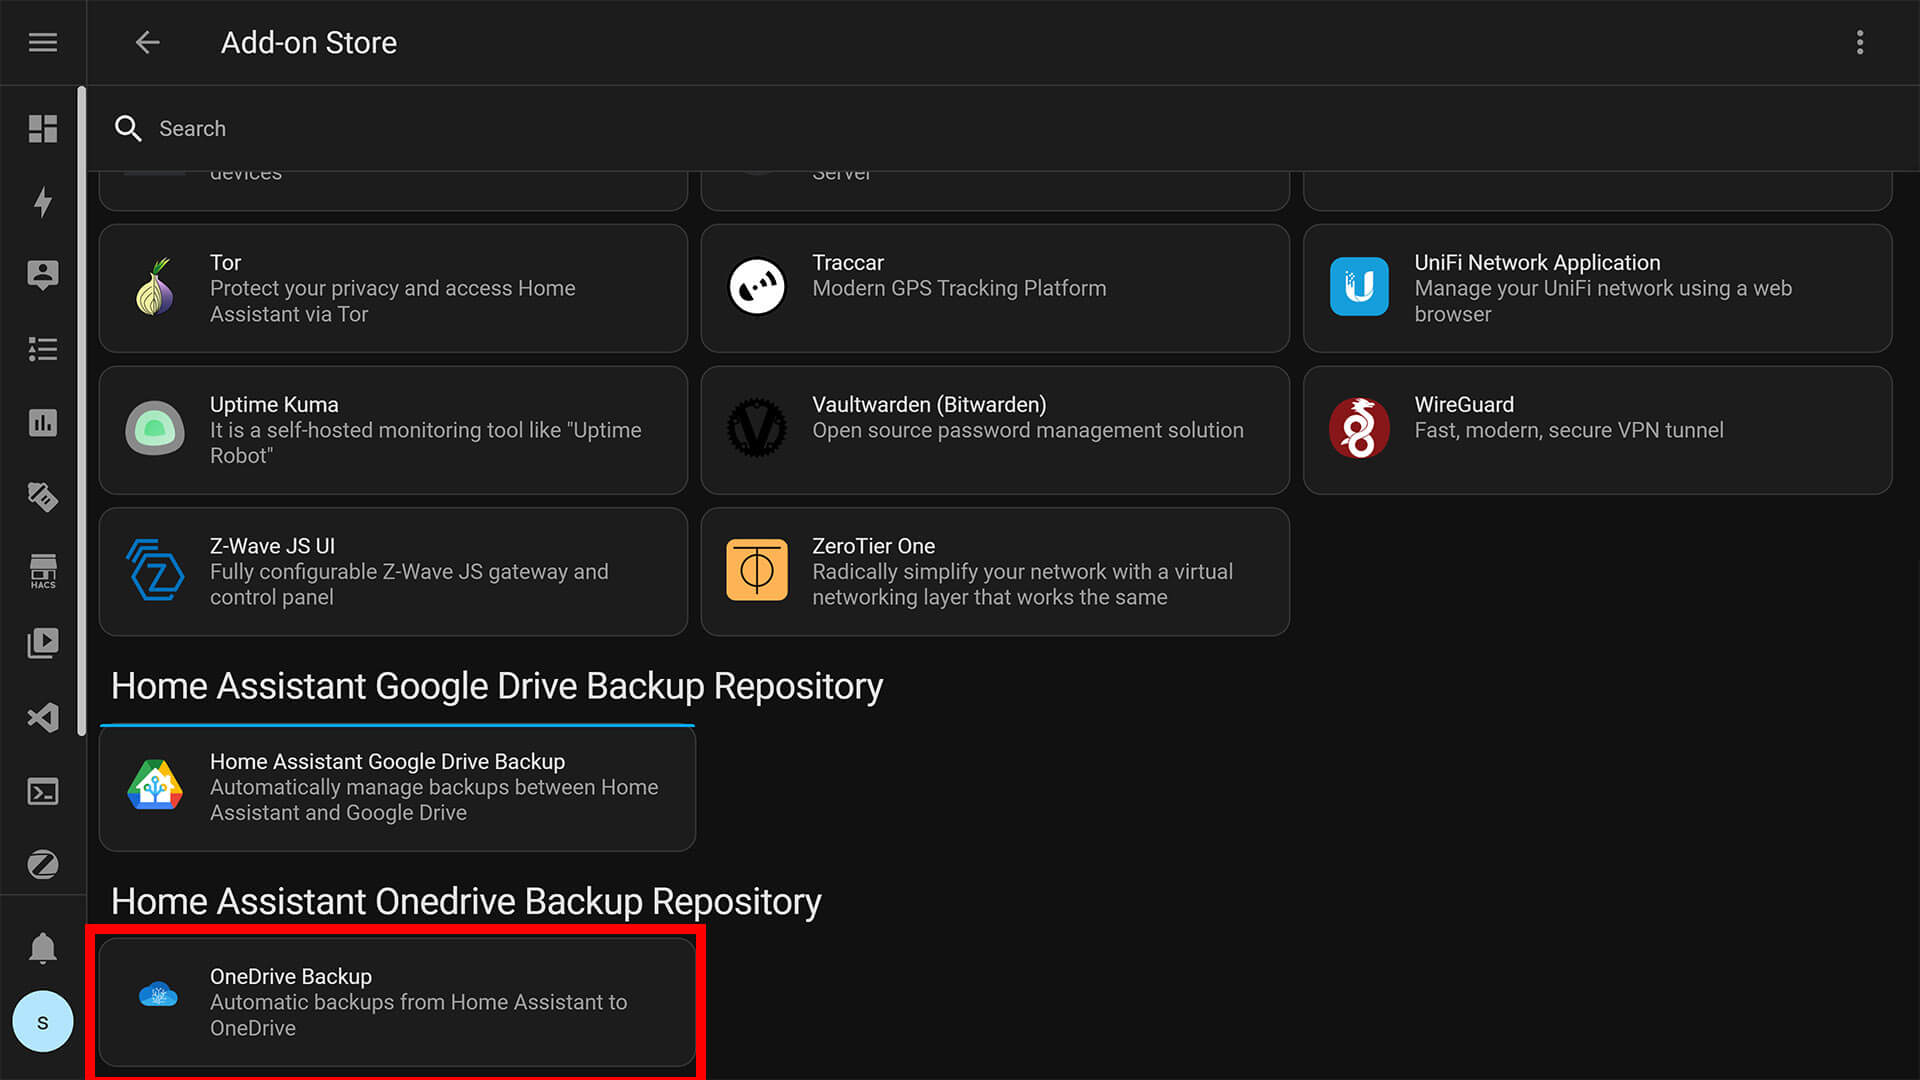
Select it and click Install. Give it a few minutes to finish and click Start. Once started, select the Start on boot, Watchdog and Show in sidebar toggles.
Setup
To authenticate with One Drive, first open the Logs in the Add-on page of One Drive Backup where you will find a code and an URL: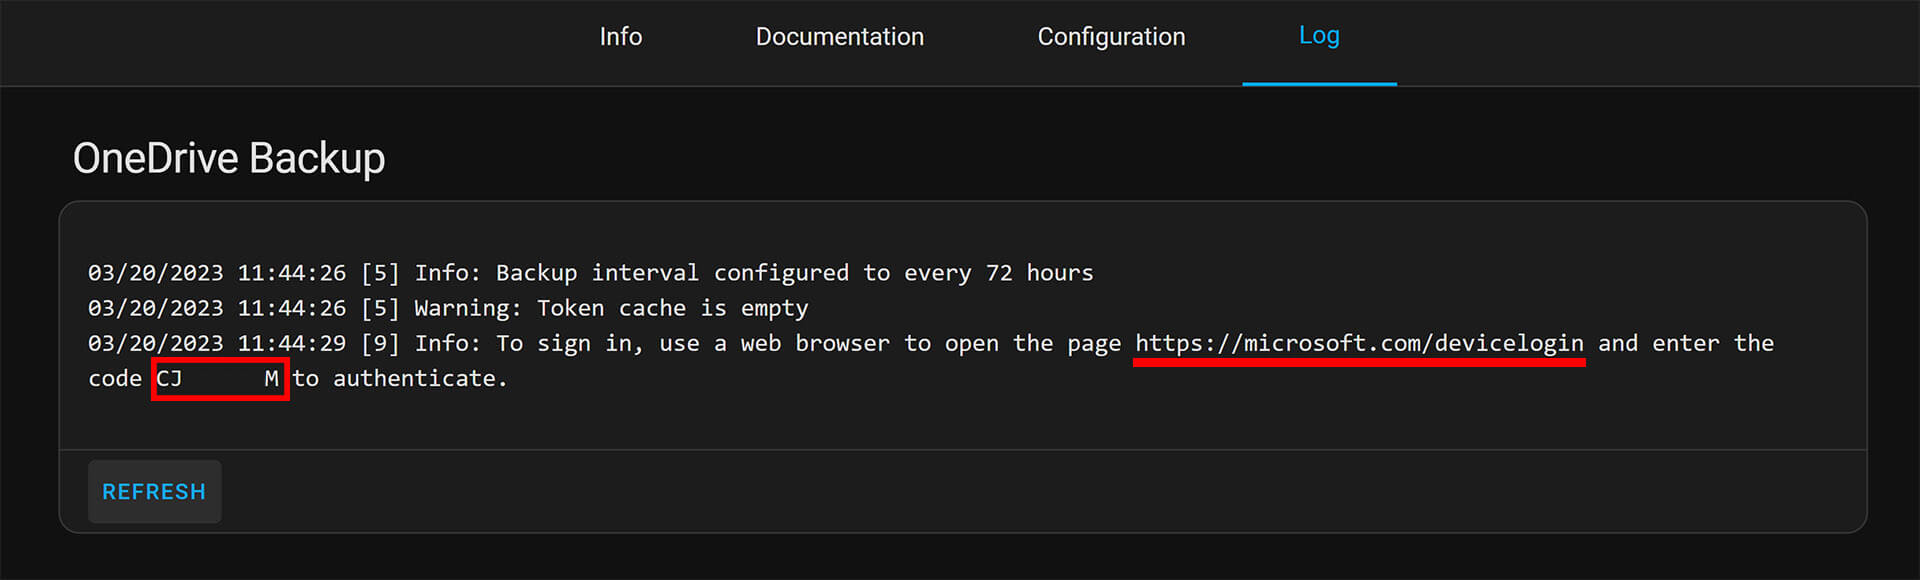
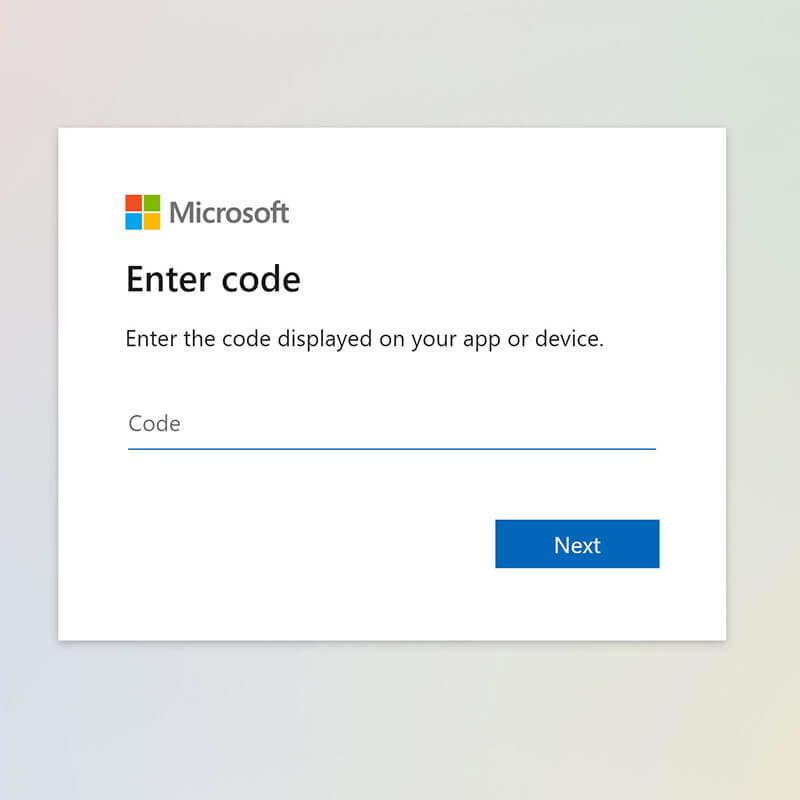
Navigate to the URL https://microsoft.com/devicelogin and enter the generated code to authenticate. Log in to your Microsoft account (hotmail, outlook) it you are not already:
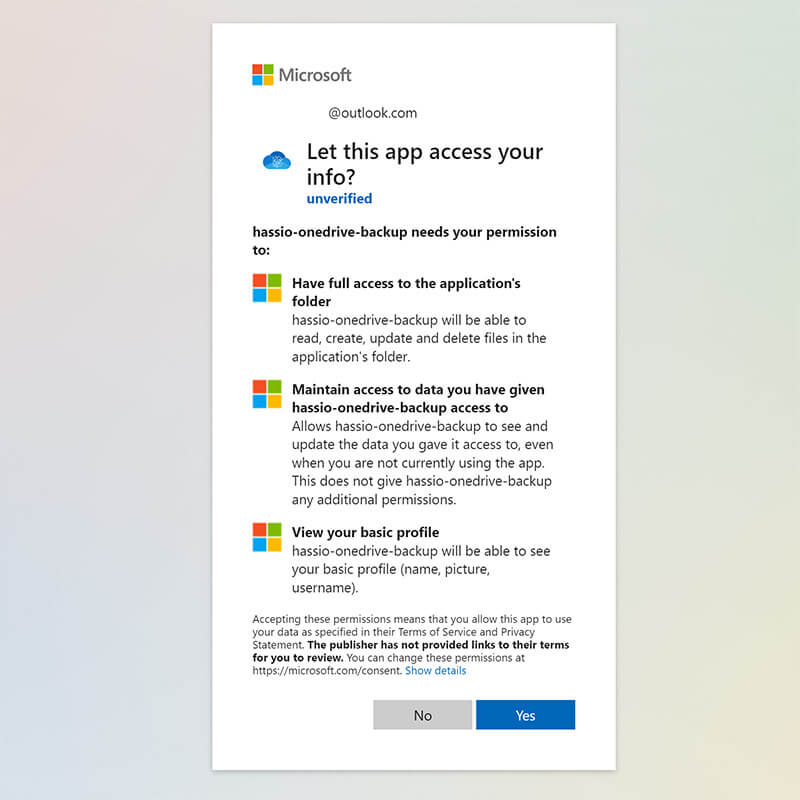
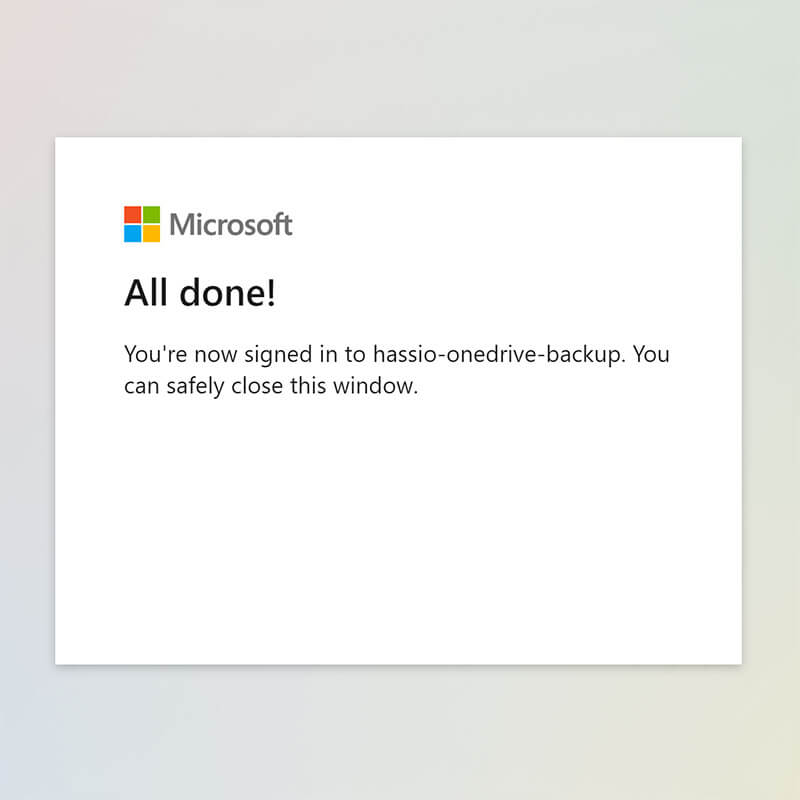
If you get the confirmation box, means your Microsoft account is connected and a full backup will automatically start within the One Drive Add-on.
Settings
Even though the Home Assistant One Drive Backup Add-on does not offer so much customization options like the Google Drive one, the most needed and essential are still there. It’s important to know, the One Drive Backup does not have a Web UI. All configuration needs to be done at the add-on page:
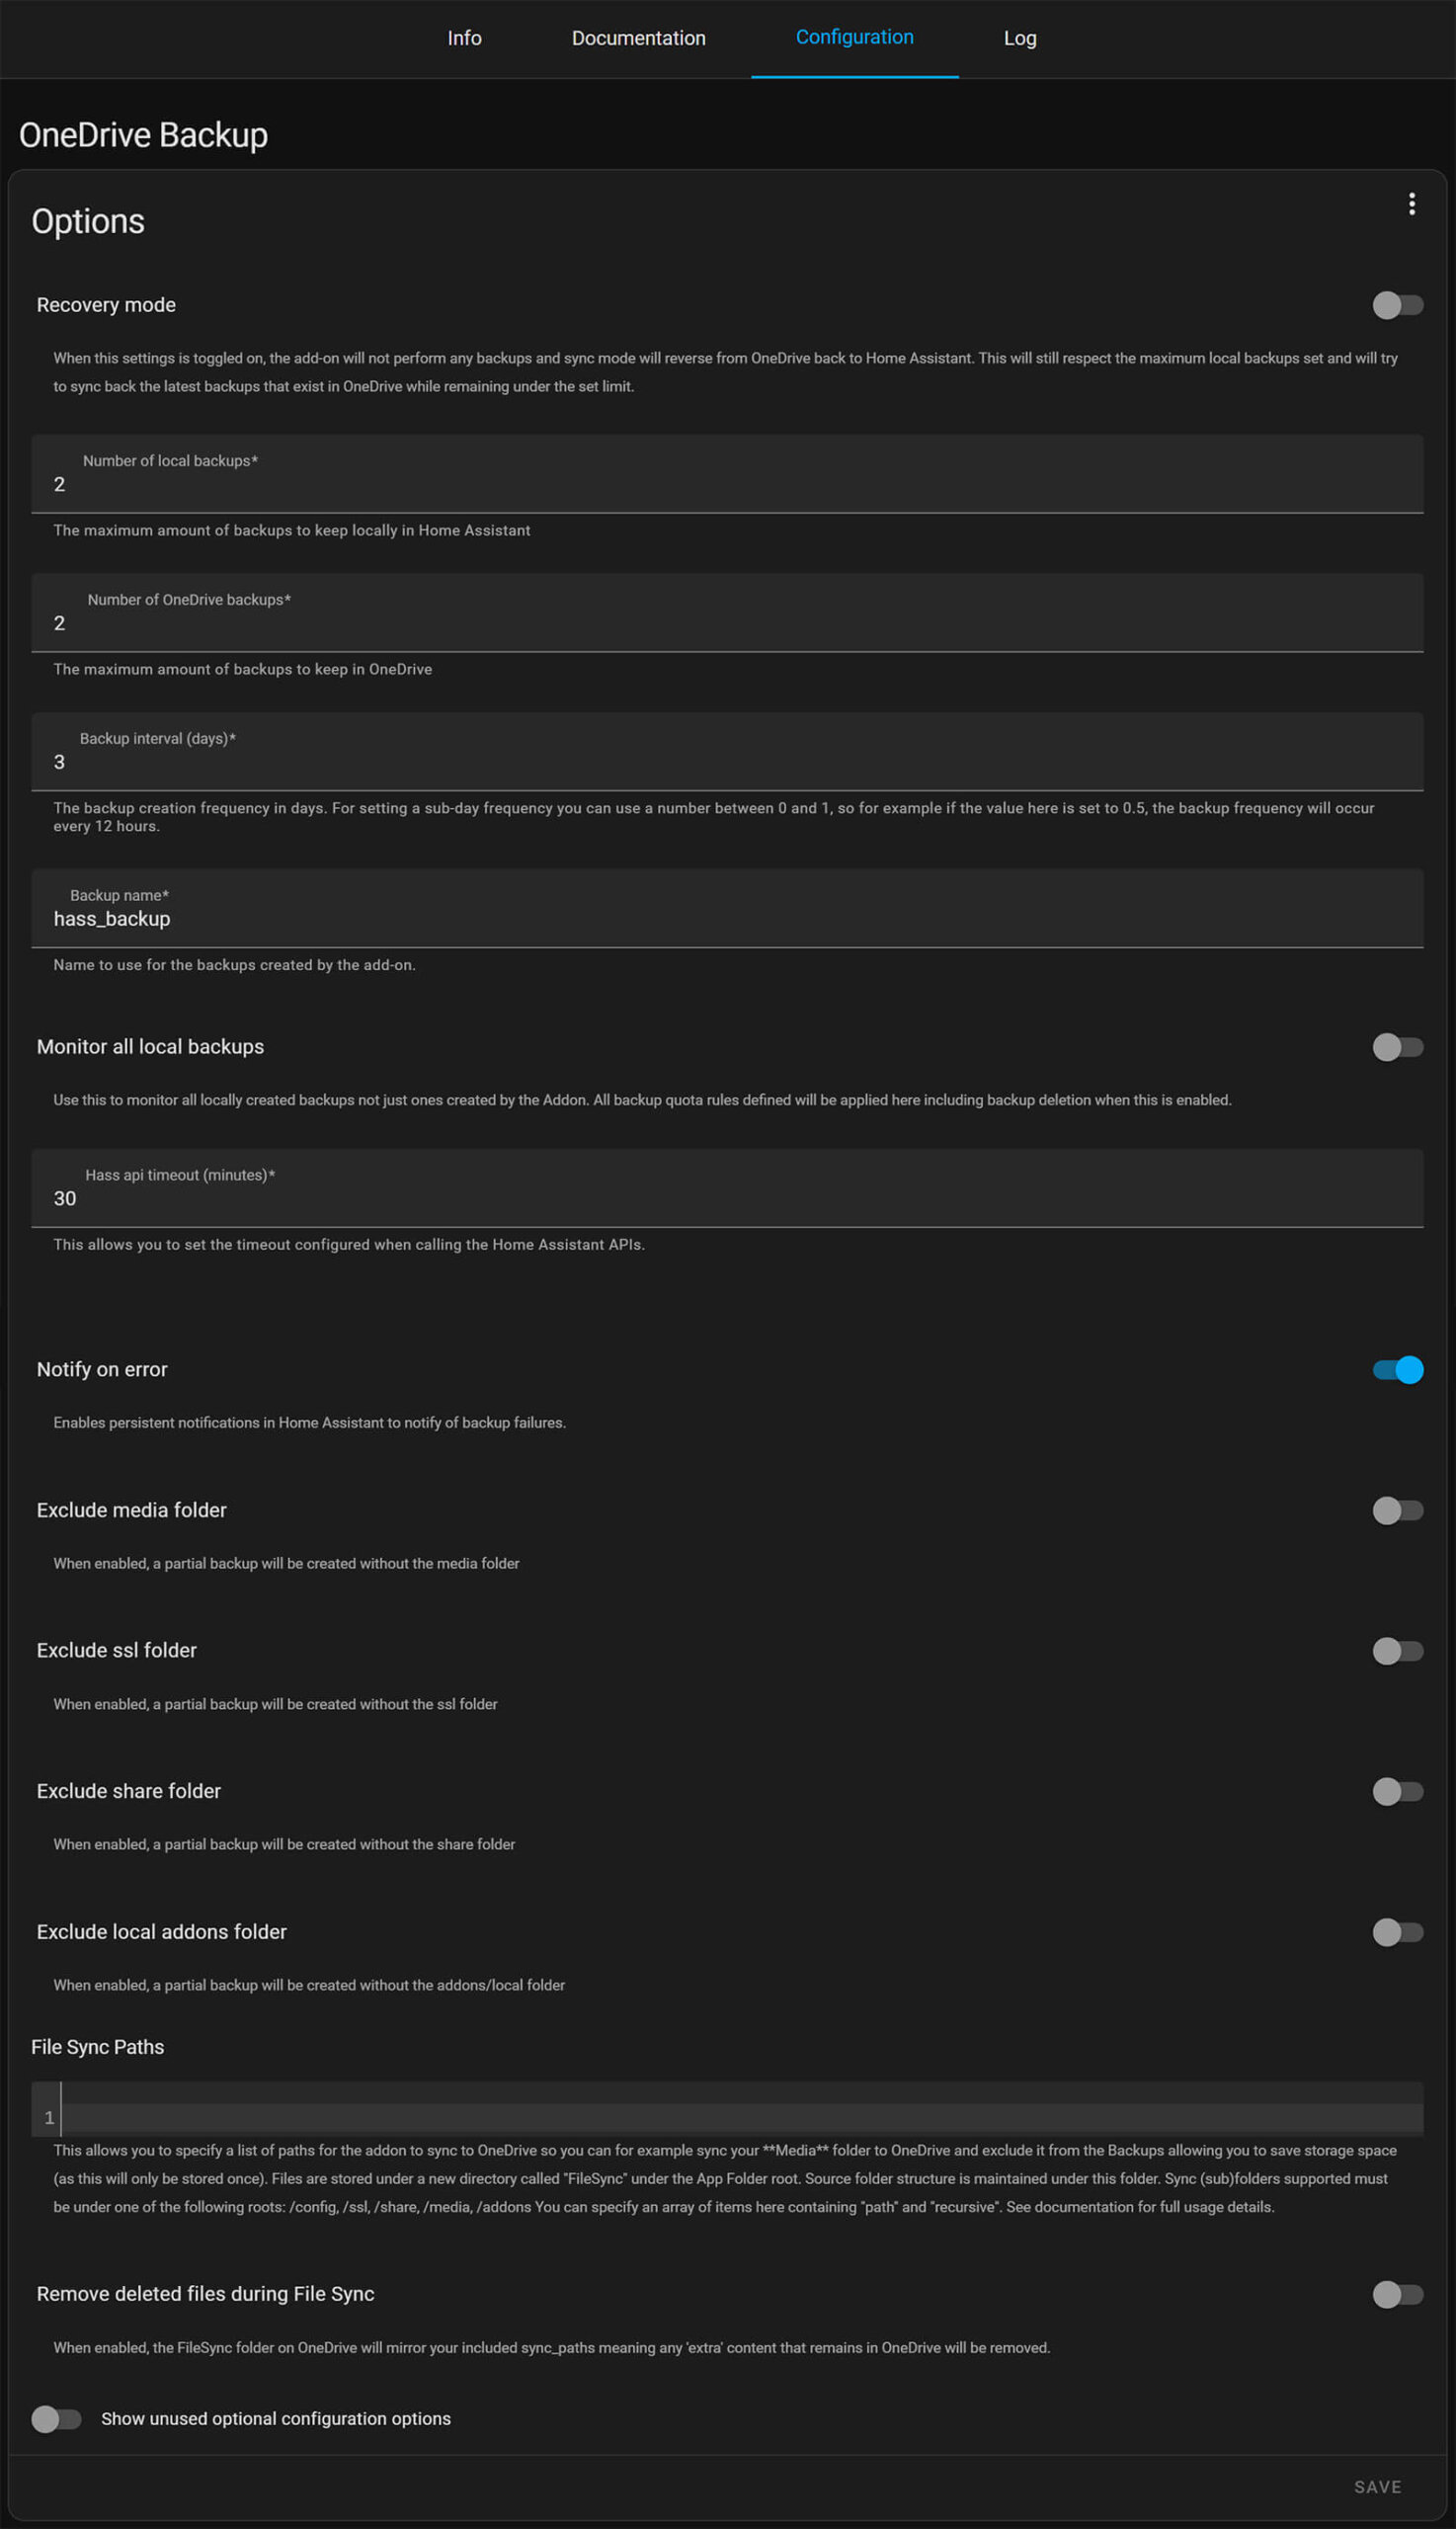
The most important settings that you would want to tweak are:
- Number of local backups:
- The number of backups you want the add-on to keep locally
- Number of OneDrive backups:
- The number of backups you want the add-on to upload
- Backup Interval:
- How many days between backups
- Exclude Toggles:
- Anything you might want excluded
If you click Show unused optional configuration options, the add-on will add two new settings in the menu. One of which is the Allowed hours when the backup should be performed (e.g. 3AM) and the other is a Backup Instance Name, used to distinguish between two different Home Assistant installations backing up to the same account.
Click Save and you are done!
Home Assistant Samba Share Backup
If you would rather save your backups locally and not depend on the cloud, you can setup the Samba Backup Add-on by thomasmauerer. This method is completely local, does not depend on an internet connection, but requires a Samba Share server deployed on your local network.
Installation
In your Home Assistant instance:
- Navigate to Settings > Add-ons > Add-on Store
- Click the three dots in the top right corner and select Repositories
- Add the following repo:
https://github.com/thomasmauerer/hassio-addons - Click Add than Close
Scroll down and you will the Samba Backup Add-on: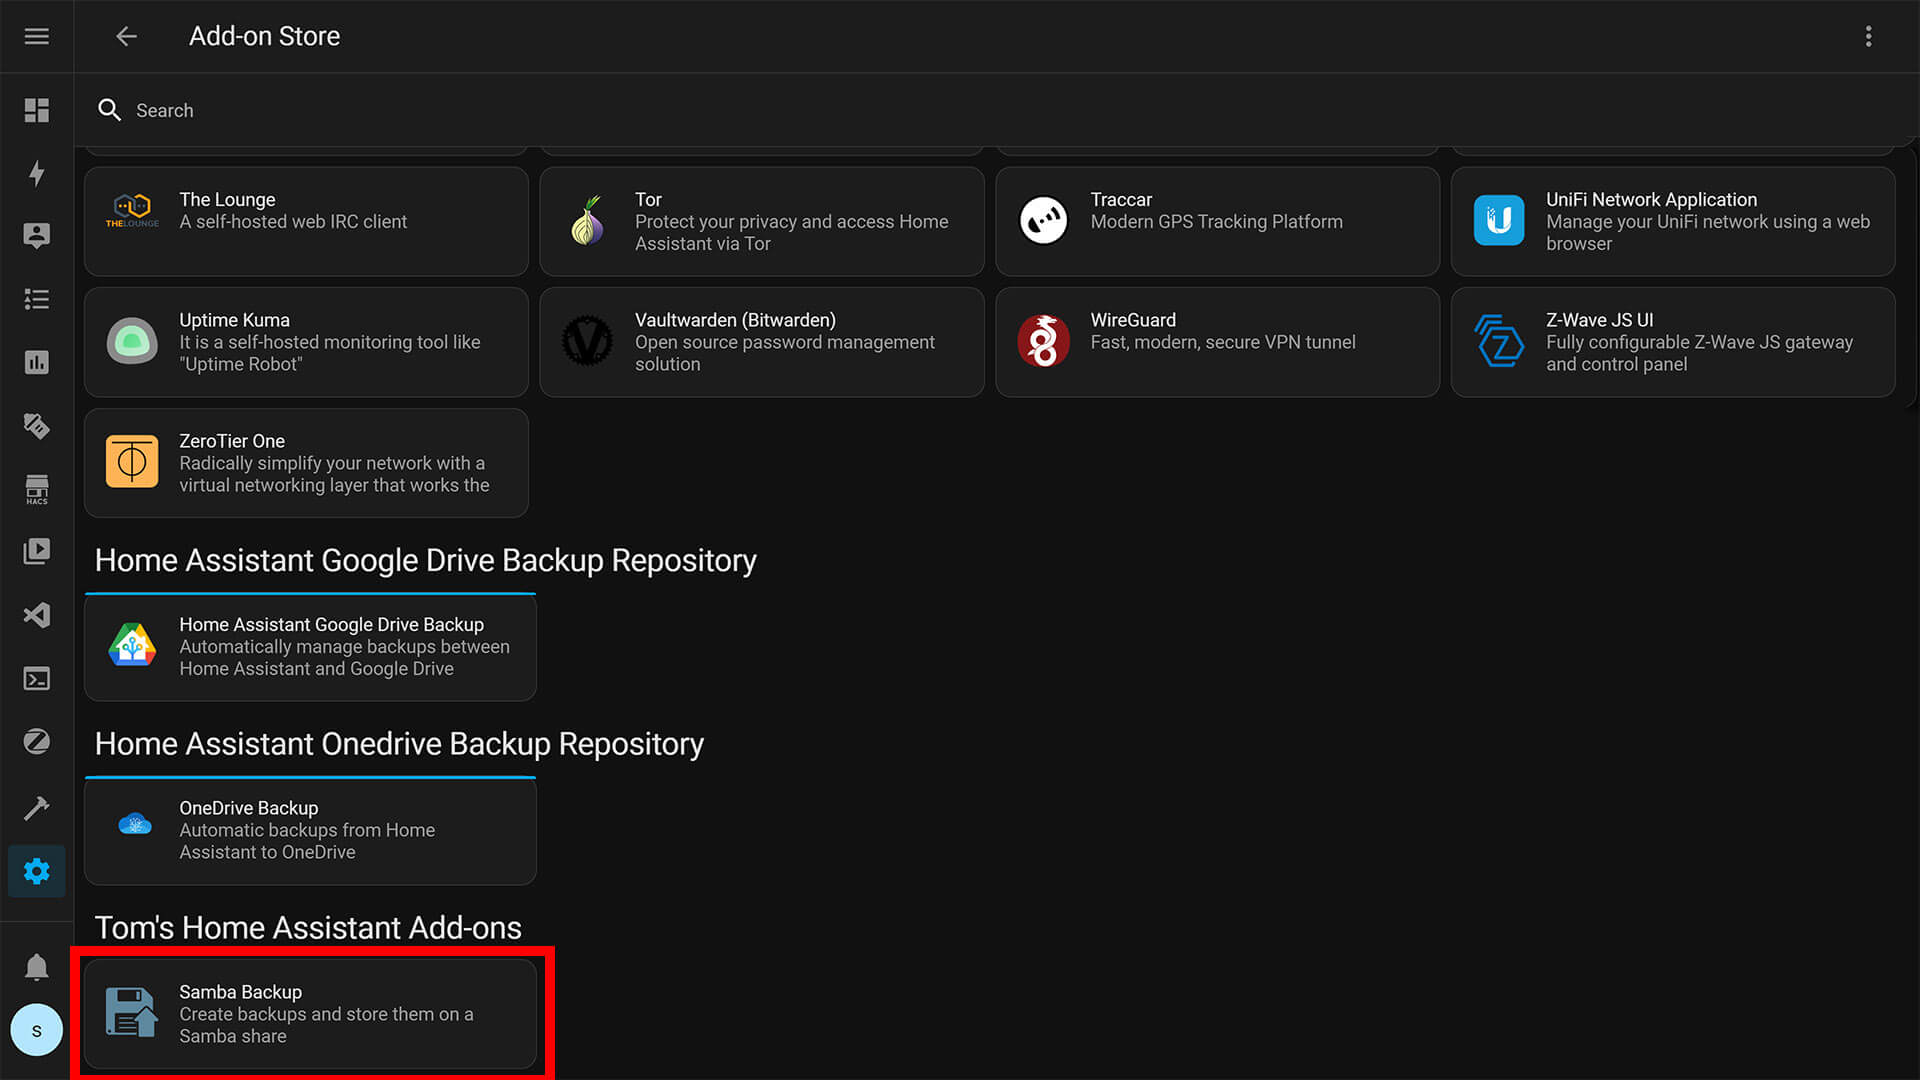
Select it and click Install. Select the Start on boot, Watchdog and Show in sidebar toggles. Don’t click Start yet.
Setup
Navigate to the Configuration tab of the Add-on and click the Three Dots in the corner > Edit in YAML. Paste the following code and adjust them to your local share server:
host: 192.168.0.30 #Change to your local Samba Share IP
share: my-samba #Change to your local Samba Share Name
target_dir: backups/ha-backups
username: my-user #Optional, remove if you don't use credentials
password: my-password #Optional, remove if you don't use credentials
keep_local: 5
keep_remote: 10
trigger_time: 04:00
trigger_days:
  - Mon
  - Wed
  - Fri
exclude_addons:
  - core_mariadb
exclude_folders:
  - media
If you do not specify any username and password, your Samba share has to be configured to allow guest access for this to work. From the settings above, feel free to adjust anything from the trigger_days and triger_time you need to. The exclude_addons and exclude_folders can be used to remove anything you don’t want saved from the backup.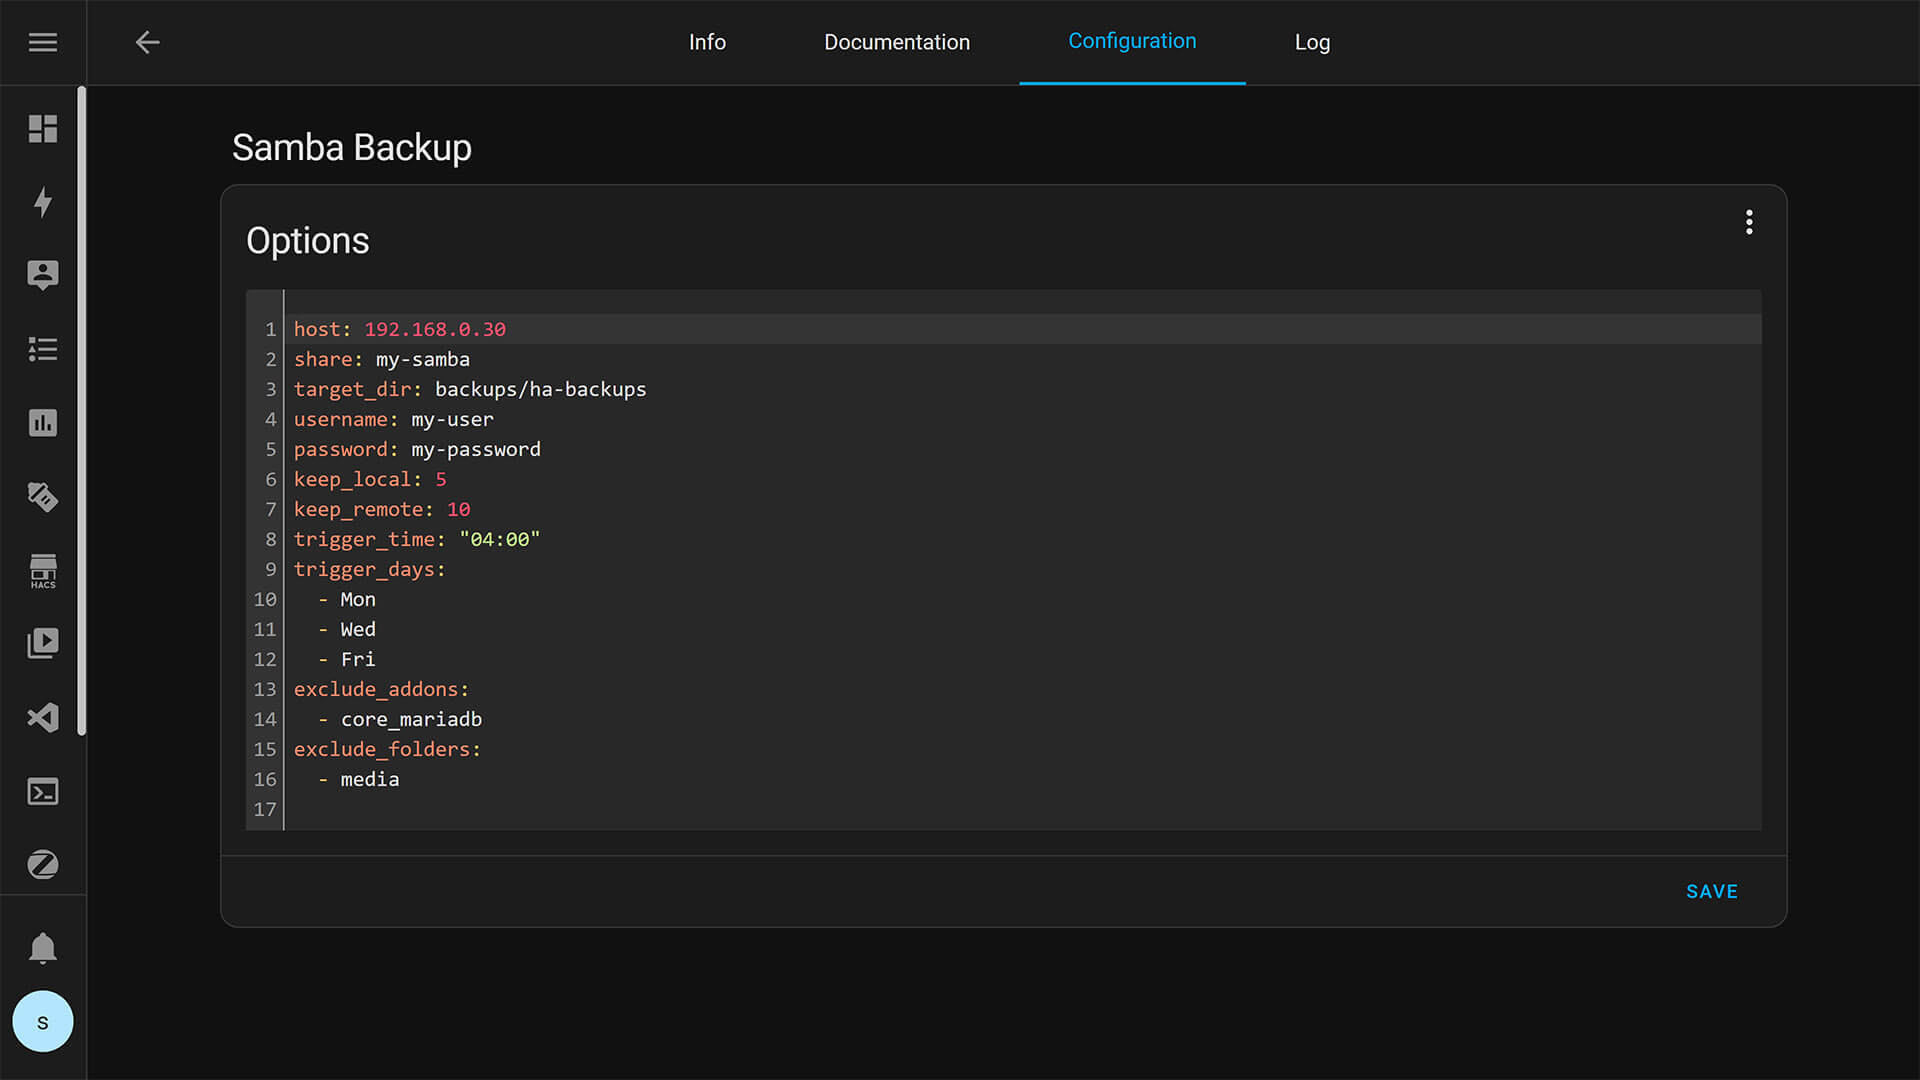
After you are finished tweaking, click Save to validate the settings. Go back to the Info tab and start the Add-on.
Settings
The Samba Backup Add-on has a few settings you can tweak from the configuration tab. You might want to tweak a few settings and adjust them to your needs:
- keep_local:
- The number of backups to be kept locally
- keep_remote:
- The number of backups to be kept on your Samba Share
- trigger_time:
- The time at which a backup will be triggered
- trigger_days:
- The days on which a backup will be triggered
- exclude_addons:
- The slugs of add-ons to exclude in the backup
- exclude_folders:
- The folders to exclude in the backup
This add-on includes a sensor for Home Assistant which reflects the current status and additionally has some useful statistics within its attributes. No configuration is necessary in order to use the sensor. The name of the sensor is sensor.samba_backup.
However, there is a known limitation that the sensor will become unavailable when you restart Home Assistant. This is caused by the way Home Assistant handles sensors which are not backed up by an entity, but instead come from an add-on or AppDaemon. You can easily fix that with the following automation:
automation:
- alias: Restore Samba Backup sensor on startup
  trigger:
  - event: start
    platform: homeassistant
  action:
  - service: hassio.addon_stdin
    data:
      addon: 15d21743_samba_backup
      input: restore-sensor
  mode: single
If you want to trigger a manual backup, you can call the service hassio.addon_stdin within an automation or a script:
service: hassio.addon_stdin
data:
  addon: 15d21743_samba_backup
  input: trigger
Restoring A Backup
To Restore a previous Backup, you can do so immediately from the Login page on a new Home Assistant Install. Follow the link at the bottom to upload your backup and restore everything.
You can also restore by navigating to Settings > System > Backups > Three Dots at the Top > Upload Backup. Once the file is uploaded, click it and click Restore. 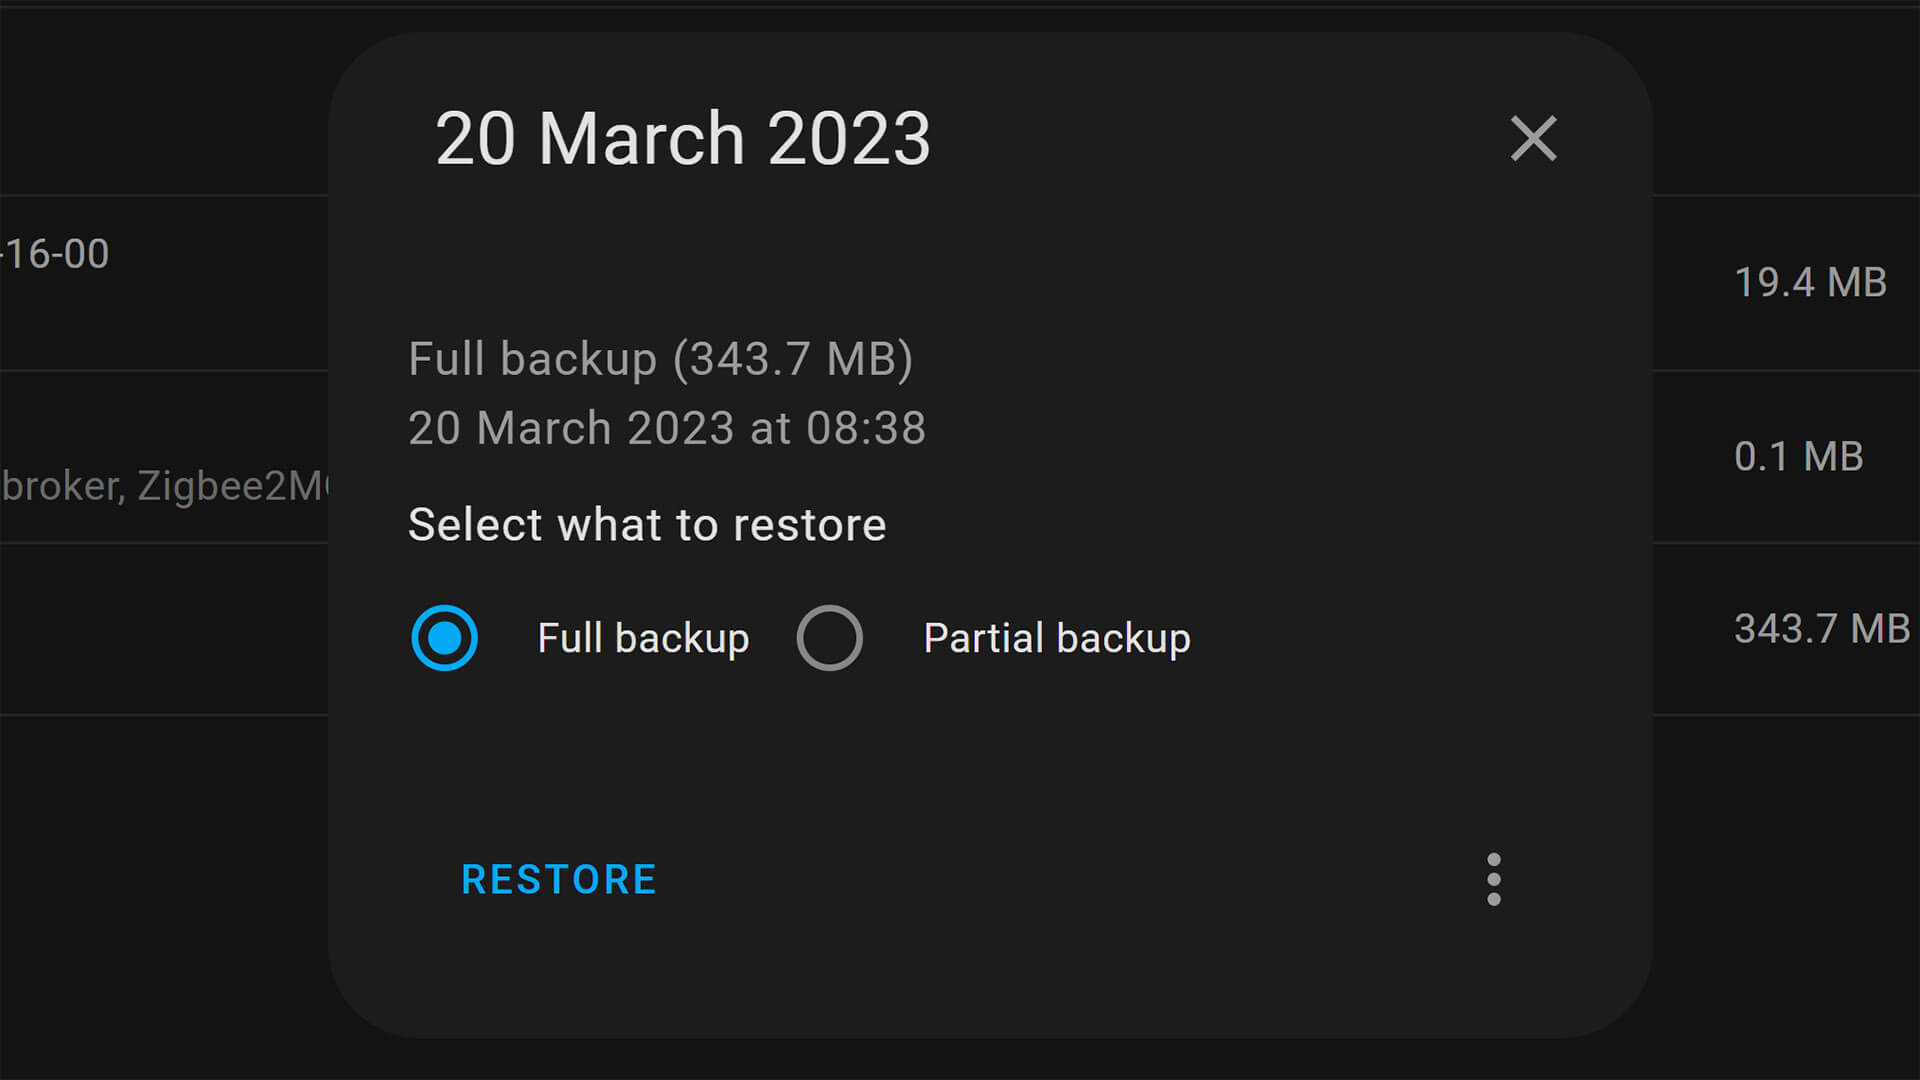
Confirm the prompt and wait for Home Assistant to complete the process. You can reach your instance by navigating to your previously set access method (Cloudflared, Local IP, DuckDNS etc). Login with your existing username and password.
Best Backup Practices
Increase Backup Frequency
One way to always stay on top of your backup game, is to update the backup frequency. “Redundancy” might be going through your head now when all is good, but it won’t be when your SD card dies.
Imagine this: You set the Backup schedule to 3 days. You spend your Saturday evening 5 hours designing your new Mushroom dashboard and in the morning your Raspberry power supply dies and takes your Home Assistant Instance with it. You are going to be beating yourself up that you don’t have a daily backup.
I like to keep 1 local backup and 4-5 remote backups just in case set to automatically upload to GDrive every night at 3AM.
Follow the 3-2-1 Rule
Wherever you look, the 3-2-1 rule is mentioned as essential practice for treating your backups. This rule says to keep 3 copies of your data on 2 different devices/mediums with 1 off-site storage solution.
Obviously, whether this is redundant again is for you to decide. Home Assistant is a hobby and a passion for most of us, and not some company’s essential data backend. However, remember that repairing all those Zigbee devices is a difficult and tedious task.
So, better to be safe than sorry.
Testing your Backups
A lot of sysadmins will tell you that it’s absolutely crucial that you actually test your backups, not just perform them. This makes sure everything is working when the day comes and you need to restore from a snapshot.
Personally, I take the following approach when creating the ultimate backup for Home Assistant:
- Setup Everything in Home Assistant
- Every automation, Zigbee network, Z-Wave network, anything that requires work
- (Optional) Optimize The Database (crucial to avoid large backup size)
- (Optional) Purge the Database before the actual backup
- Create a Full Backup using one of the mentioned methods above
- Spin up a new Home Assistant Promox Container OR
- Install Home Assistant on another Raspberry Pi or NUC
- Restore the Backup and Make sure everything works
- Save this particular backup in a couple of locations and drives and lock it
Now, in case your daily backups fail when restoring, you have a fail safe backup that will still work!
Which Backup Method is for you?
For most people, the Home Assistant Google Drive Backup Method will do perfectly fine. It’s a really refined add-on that works without any hiccups. The notification options will inform you of any issues the backup might have encountered, so you can react in time and fix it.
I’ve been using it on my main instance for almost a year now, it super stable and just works. I did optimize my database and filtered my entities from the recorder though, to keep my backups size under control. It’s a tedious process, but in my eyes it MUST be done.
If you do not like to use the cloud, than the Samba Backup method is for you. It may be a bit limited in terms of customization compared to the GDrive add-on, but saves your snapshots locally so you can access them without any internet connection or external dependencies.


Question;
What differs between a Samba share and Windows shared folder (I would like to use a Windows shared folder)?
Thanks,
Ase
Well, they both use the same SMBv1 protocol and serve the same purpose. But the add-on is specifically made for Samba shared, not a Windows shared folder.
You might be able to make it work though, I haven’t tried.
Cheers
just wonder. will these, or some of these include files i have saved in the home assistant config dir?
Yes, if you perform a full backup it will save everything.
Cheers
under proxmox, a “running backup” scheduled is fantastic. i do it to an usb hdd. another vm backup from this usb to gdrive.
case of crash, just stop VM, restore backup on new vm, and repair/recover, or run with backup in minutes.
The OneDrive Backup addon actually now has a dedicated Web Interface as well
If you are running core , life gets a little more complicated because core doesn’t have restore but the backup function still works. Your configuration is in .homeassistant and backup creates a backup in .homeassistant/backup it’s a tar file so let’s say you created a backup and upgraded to a new version of HA and somethings broke and you don’t have time to fix them. Reinstall your old version and then having moved your backup folder out of .homeassistant you can then tar -xvf your backup which gives a jsn file and a gzip tar file. The jsn basically just gives info about the backup and the version of HA backed up. The gzip tar file is pretty much your .homeassistant folder but in a folder called data. So next you can delete or move your old .homeassistant folder and then mv-R data/ .homeassistant/ restart hass and you are back where you were before the disastrous upgrade.
If you are running core, you don’t have the add on store but you will probably know these are just external programs configured to work with HA so if you are doing something like moving to a new drive and os these will need to be reinstalled and configured again. If it’s just a change of drive you can make a new img file of your old install drive and restore to your new drive. Always good to have a working drive and setup so you don’t have to fix everything at once. I am posting this since most people think restoring core isn’t possible and you can just use your backup to go to supervised or docker. Granted this is easier but I like not running a black box on my hardware.
Can I run the OneDrive and Google backup addons alongside each other? I like the incremental backups of the Google addon, but have vastly greater storage in OneDrive.
It might be overkill, but yes you can.
Cheers
What I miss in this detailed description is a backup to the SD card. This in case you have installed homeassist on an external ssd card.
Doesn’t matter which storage medium you have, these backup methods works for all.
The backup file is stored on your drive until you delete it, whether it’s and SSD or an SD Card.
The point is that I don’t know how to configure homeassist if you want to put the backup on the sd card in the raspberry.
I have put Homeassist on an external ssd and therefore have the original sd card (which is in the raspberry) available to put the backups on.
Wooww! Excellent post! I came for the add-on info and leave with a lot of new knowledge about backups.
Thanks!
Wonderful, and a big thanks to Stephen Beechen for creating this.
Great article … easy to implement 😀
But I have on issue: i use a zwave hat for my raspberry which needs a config change in /boot/config.txt which is not covered in the backup.
Any chance to backup also this?
Now i have to do the changes in the file before doing a restore.
You have to do it manually, through SSH for example.
Home Assistant backups the add-ons and configuration only.