About the Aqara FP300
The Aqara FP300 is the latest addition to the company’s lineup of human presence sensors. To backtrack, Aqara first released the FP1, which was a Zigbee 60GHz mmWave radar with zone detection, and the highly popular FP2, a 60GHz multi-target tracking radar. Both devices have their pros and cons, which the FP300 appears to aim to solve.
Unlike the FP1E and FP2, the FP300 utilizes a hybrid approach by combining a millimeter-wave radar with a passive infrared sensor to verify occupancy. This dual technology allows it to detect subtle movements like breathing, while it uses the PIR component to act as a fast motion trigger. It also packs additional sensors for temperature, humidity, and illuminance; hence the multi-sensor label.
Furthermore, the FP300 manages to achieve this on a set of two replaceable CR2450 batteries, which the company claims can last up to an incredible 3 years! It is a highly configurable sensor and offers many ways to eliminate interference and false triggers directly through Zigbee2MQTT.
In this review, I am sharing my experience with the Aqara FP300 Presence Multi-Sensor. Like other recent Aqara releases, the FP300 is also a dual-protocol sensor with Thread and Zigbee support. You can get it on Amazon or through various Aqara retailers linked at the end of this article.
Aqara FP300 vs FP2 vs FP1E
The FP300 is the third human presence sensor released by Aqara. It does most things better than it predecessors, but at cost of others. I made a detailed comparison table between the FP300, FP2 and FP1E:
Aqara FP300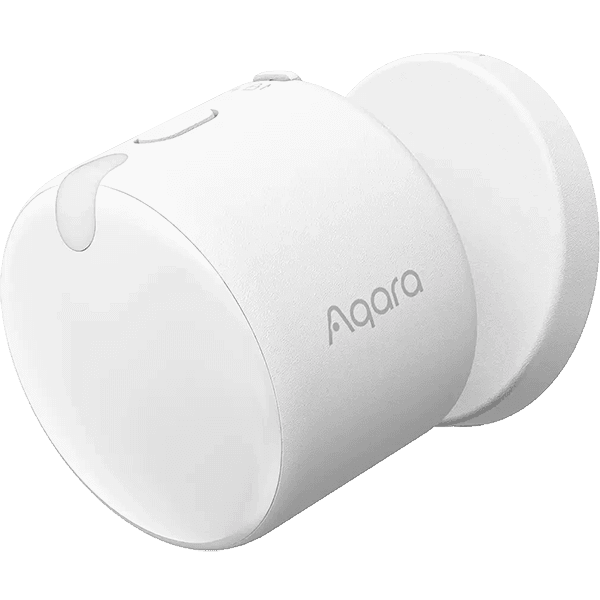 | Aqara FP2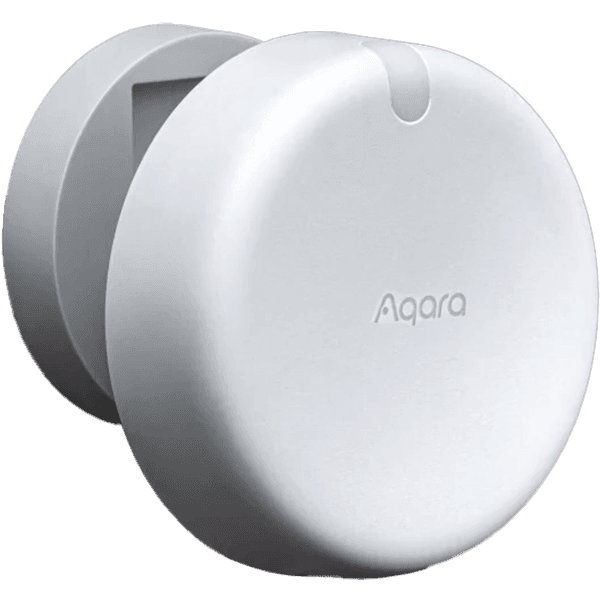 | Aqara FP1E | |
|---|---|---|---|
| Connectivity | Zigbee, Thread | Wi-Fi | Zigbee |
| Power Source | Battery (2x CR2450) | Wired 5V/1A (USB-C) | Wired 5V/1A (USB-A) |
| Battery Life | Up to 3 years | / | / |
| Presence Detection | PIR, 60GHz mmWave | 60GHz mmWave | 60GHz mmWave |
| Detection Range | Up to 6 meters | Up to 8 meters | Up to 6 meters |
| Detection Speed | Instant (PIR) | Fast | Fast |
| Field of View | 120° Horizontal | 120° Horizontal | 120° Horizontal |
| Optimization Features | AI Interference Identification AI Adaptive Sensitivity Spatial Learning | Interference Sources Manual Sensitivity Manual Zone Definition | AI Interference Identification AI Adaptive Sensitivity Spatial Learning |
| Zones | Composite Zones (Range Exclusion) | Visual Map (Up to 30 Zones) | None (Single Zone Only) |
| Multi-Target Tracking | No (Single Target) | Yes (Up to 5 People) | No (Single Target) |
| Fall Detection | No | Yes | No |
| Sleep Monitoring | No | Yes | No |
| Integrated Sensors | Presence, Light, Temp, Humidity, PIR | Presence, Light | Presence Only |
| Mounting | Magnetic Swivel Base | Magnetic Swivel Base | Magnetic Swivel Base |
| Dimensions | 42 × 42 × 50 mm | 64 × 64 × 29.5 mm | 57 × 50 × 37 mm |
| Price | $49.99 | $82.99 | $49.99 |
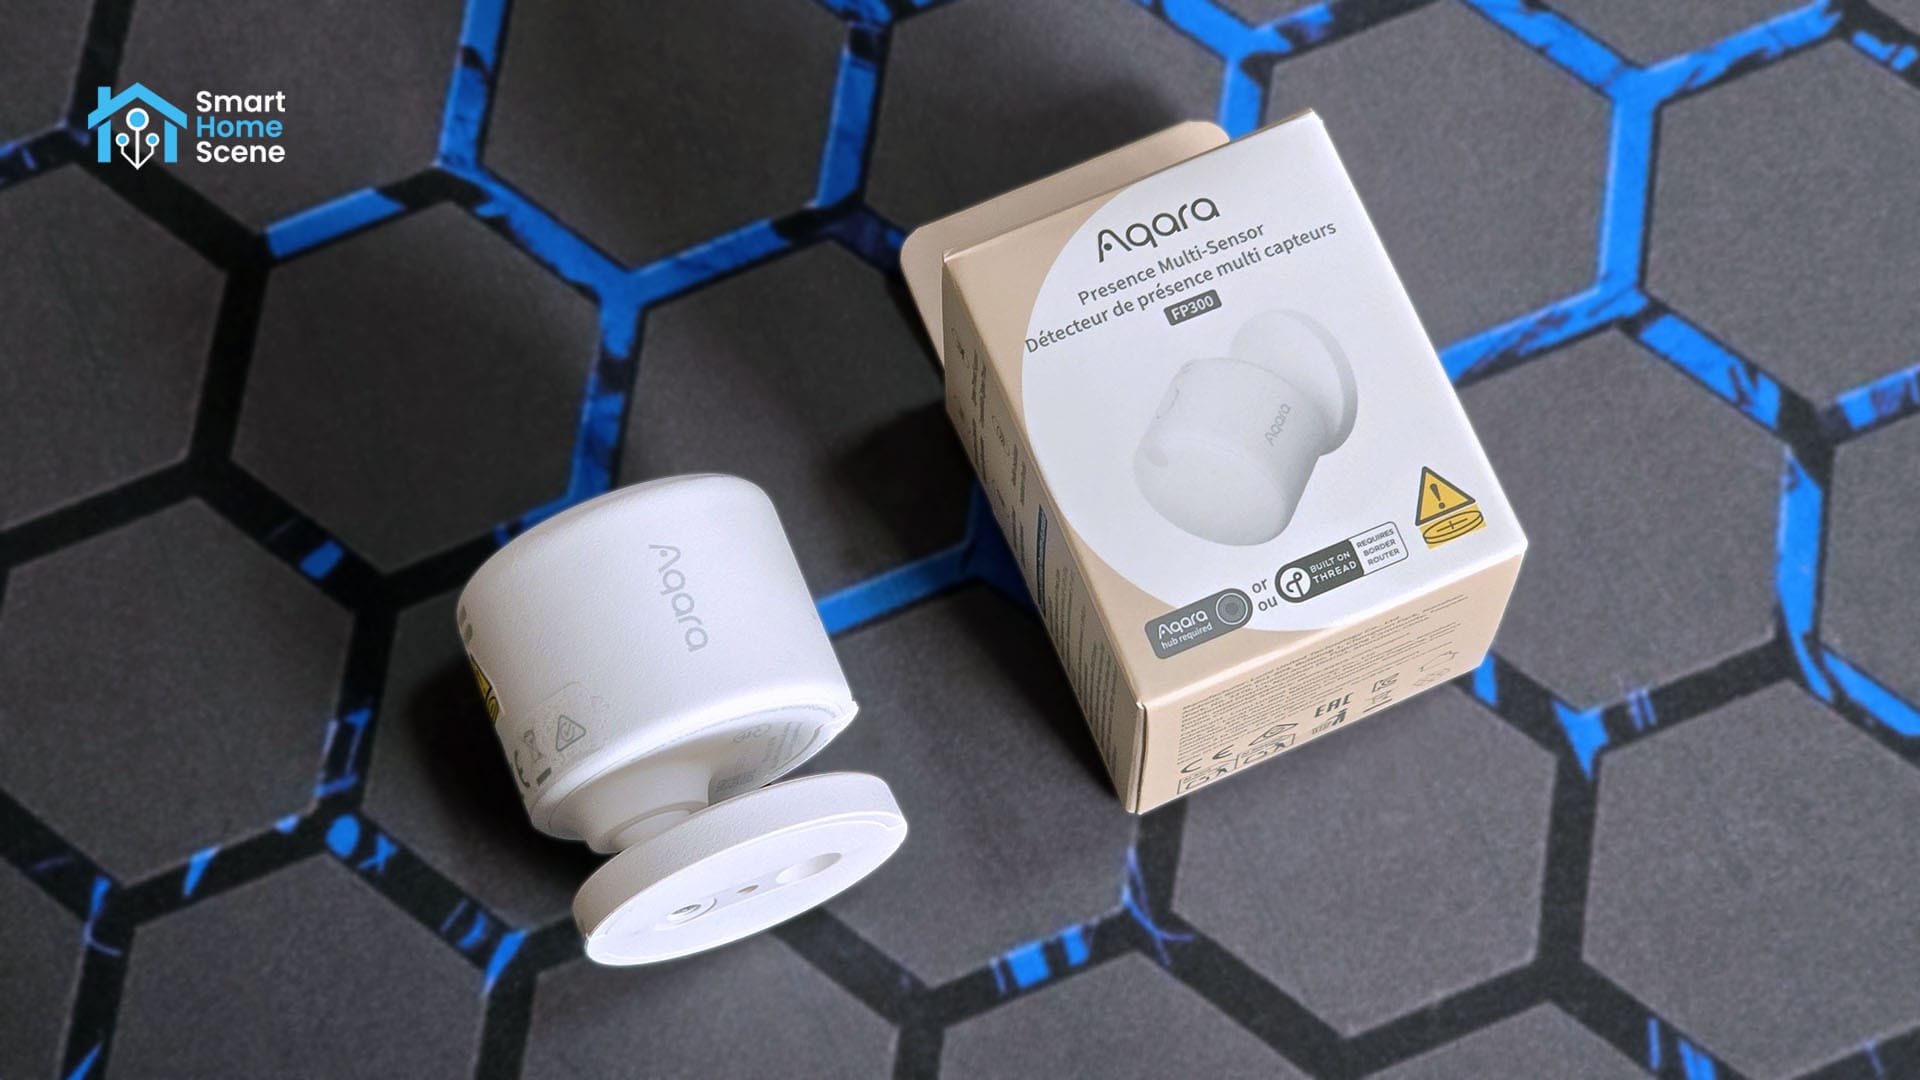
Aqara FP300 Package Contents and Device Teardown
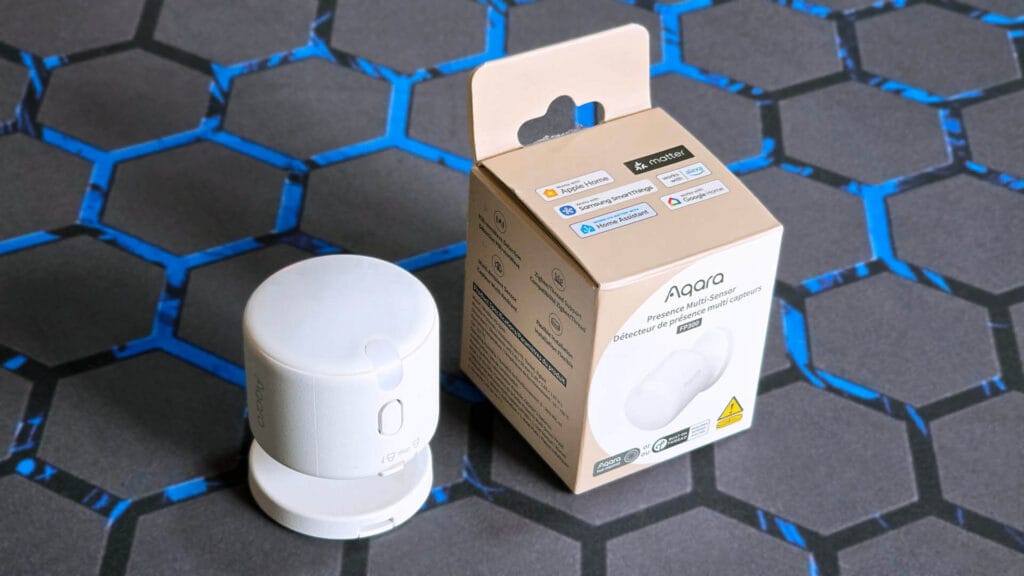
The Aqara FP300 Presence Multi-Sensor ships in a neat little box containing the device itself, a user manual, a metal mounting plate, and a screw kit. The batteries and rotating swivel are pre-installed, and you simply need to pull the plastic tape preventing contact to activate the device.

My initial impression is that the FP300 is exceptionally well-built. It feels dense and compact, giving off a distinct premium vibe rather than a hollow or rattling feel found in cheaper hardware. The integrated rotating mount is quite stiff, ensuring that once you position the sensor, it won’t drift or sag out of alignment.
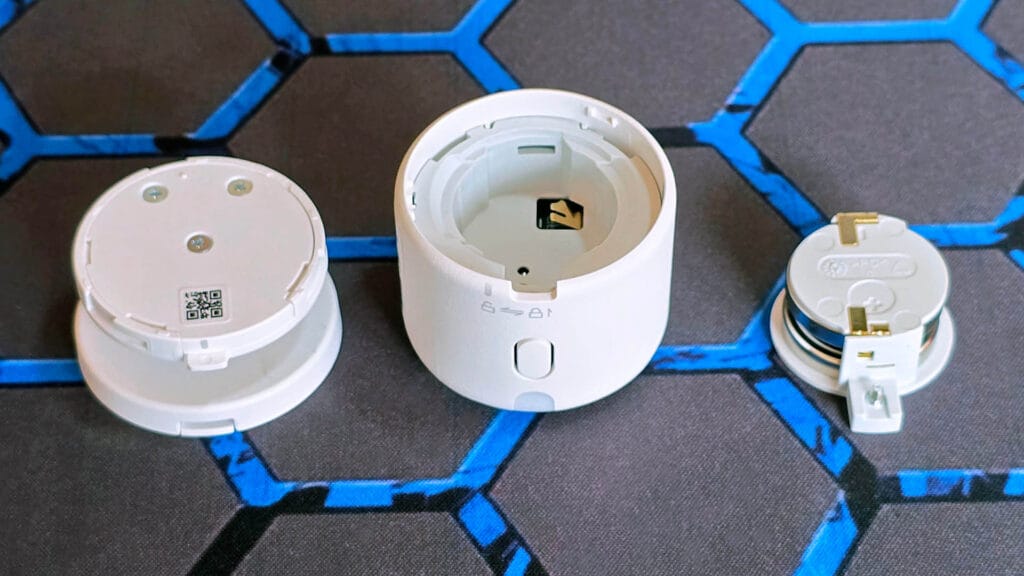
There’s a small locking mechanism on one side on the bottom of the device which unlocks the battery compartment. Simply lifting and sliding the mechanism reveals the holder for the two CR2450 batteries, which Aqara claims will power the device for up to three years.
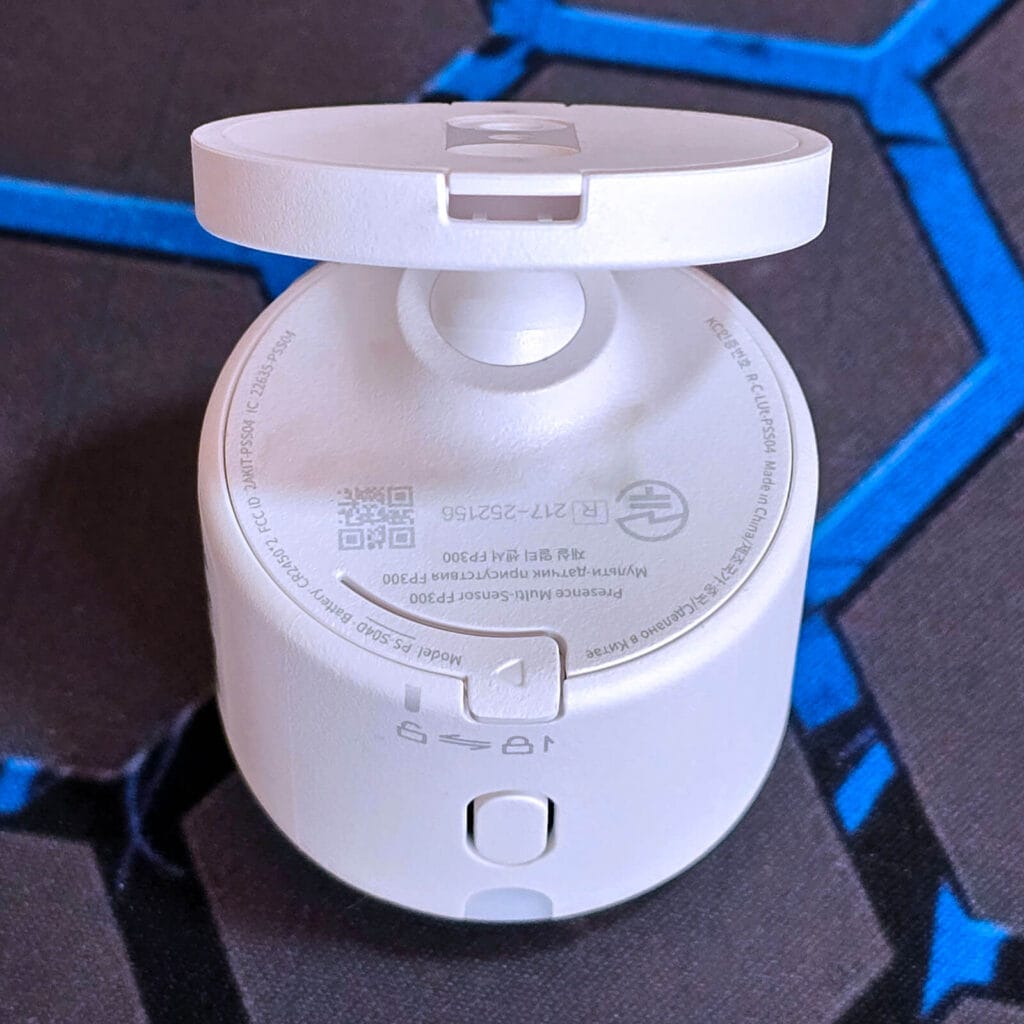
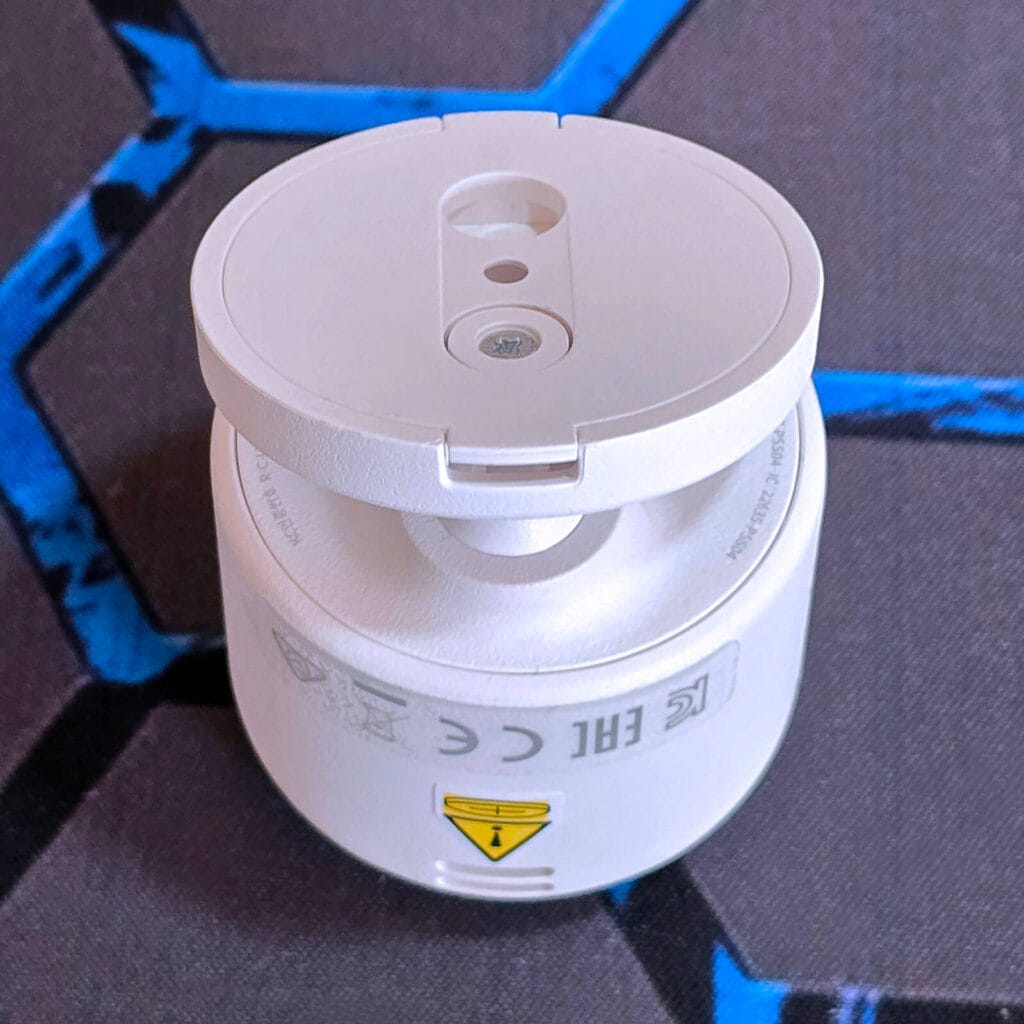
The batteries are held in this plastic holder that you insert as a single unit, rather than separately. As expected, they take up the bulk of the space inside the FP300. The device measures 42 × 42 × 50 mm, which is quite small for a presence multi-sensor packed with so many additional sensors.
I had the hardest time ever prying open the FP300. I had to use an obscene amount of force to take out the plastic shell holding the PCB inside the main case. It’s safe to say I effectively ruined a few of the plastic clips which snap and hold the case in place. In other words, the FP300 is not meant to be opened.
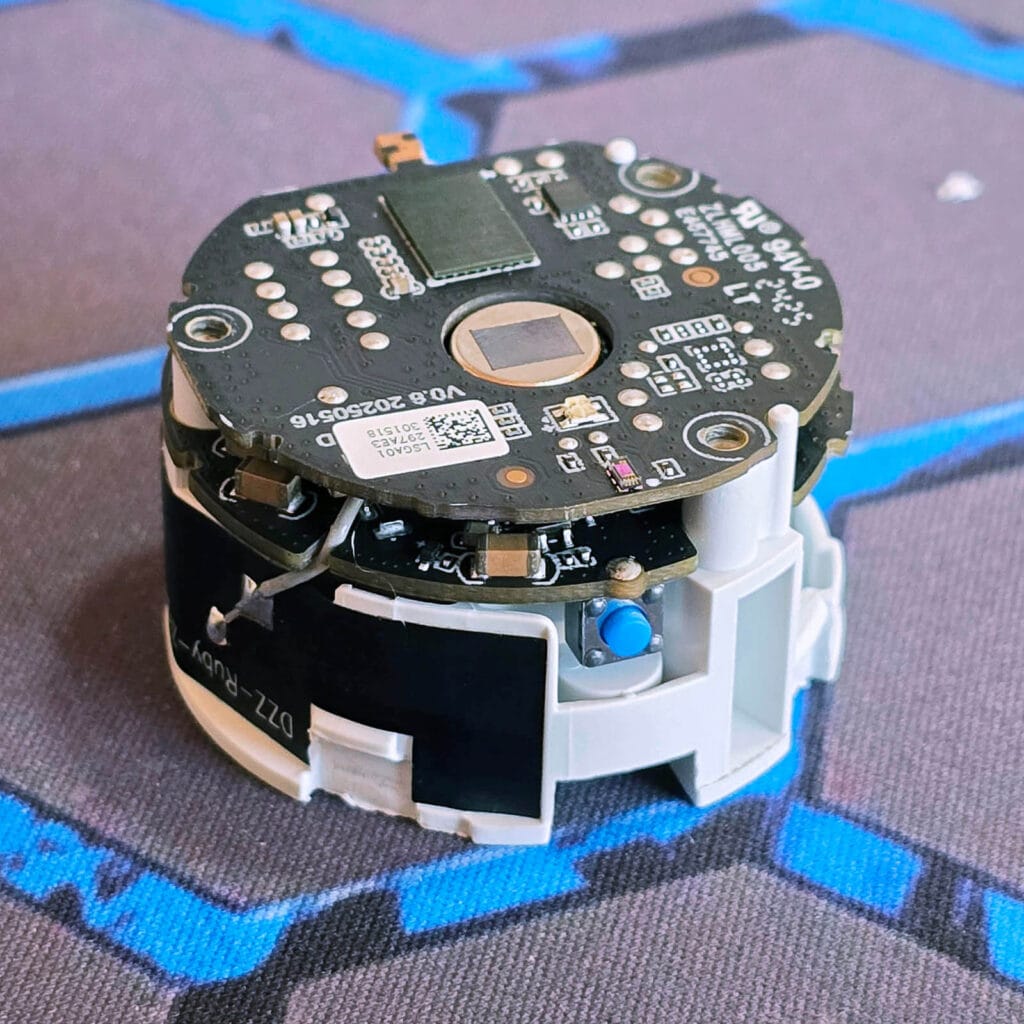
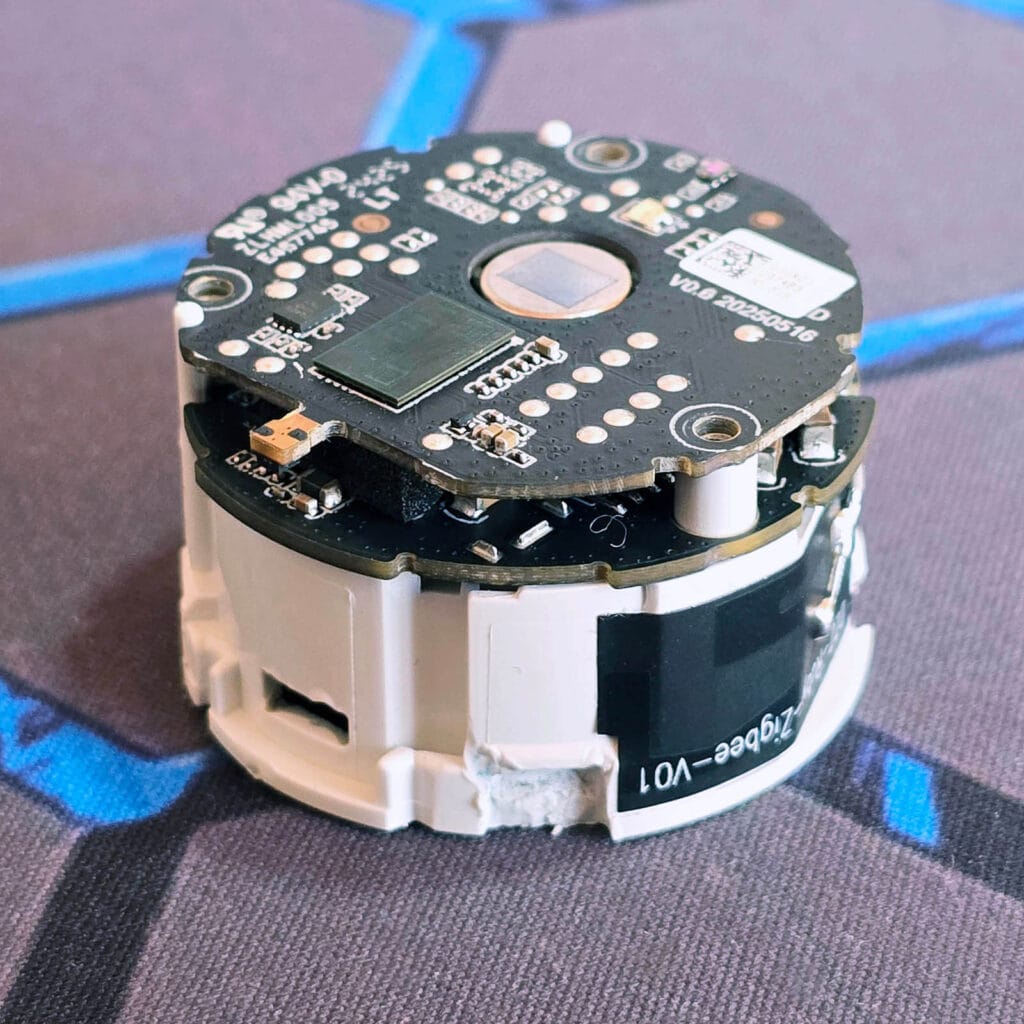
The FP300 features all-black dual PCBs, typical for Aqara devices. Everything is obviously professionally made, labeled, and arranged on each PCB. As this is a combo sensor, the PIR is mounted in the middle with the 60GHz mmWave radar right next to it. Three small screws hold these two PCBs together, one of which holds the communication module.
Aqara recognized that sandwiching the communication module between so many small electronics can and will reduce the range and performance of the radio, so they attached an external antenna to the side of the sensor. It’s connected by a tiny cable going from the side to underneath the top PCB.
The two PCBs connect to each other via an 16-pin connector which slots neatly in place. Here’s what they look like once separated:
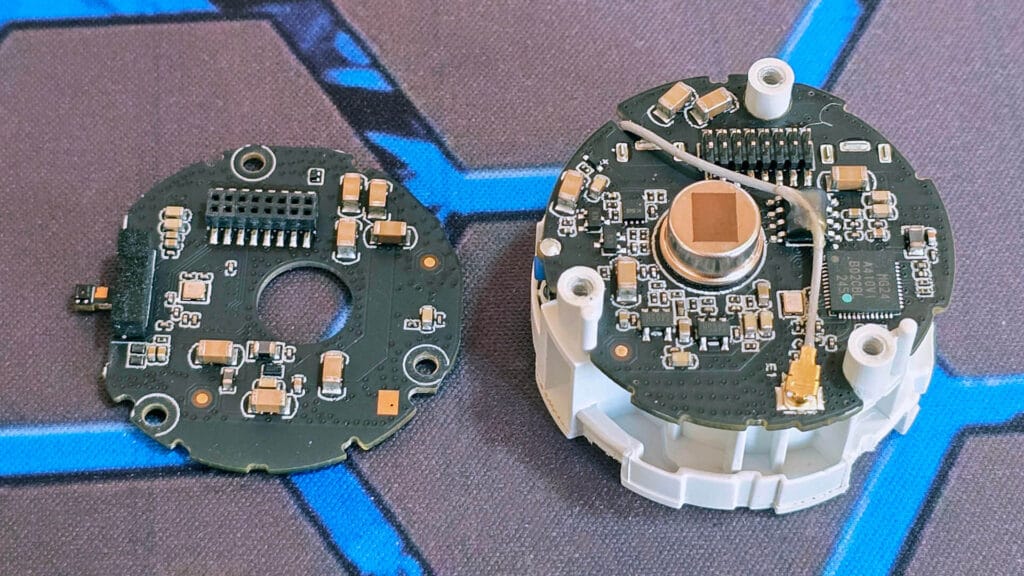
Aqara decided to stick to the big guns and use a 60GHz mmWave radar in the FP300, just like the FP2 and FP1. The Aqara FP300 uses the Possumic RS6130 [Datasheet], which is also found in the SwitchBot Presence Sensor.
The RS6130 is a single-chip 60GHz radar sensor with built-in multi-protocol wireless connectivity (BLE 5.3, 802.15.4, Thread, and Matter support). It utilizes one transmit channel and three receive channels with an Antenna-in-Package (AiP) design for 3D object detection. It’s easy to see why Aqara chose this device, as it appears to be equipped with something called EFSENS™ ultra-low power technology, enabling the sensor to remain active for more than a year on a simple button battery.
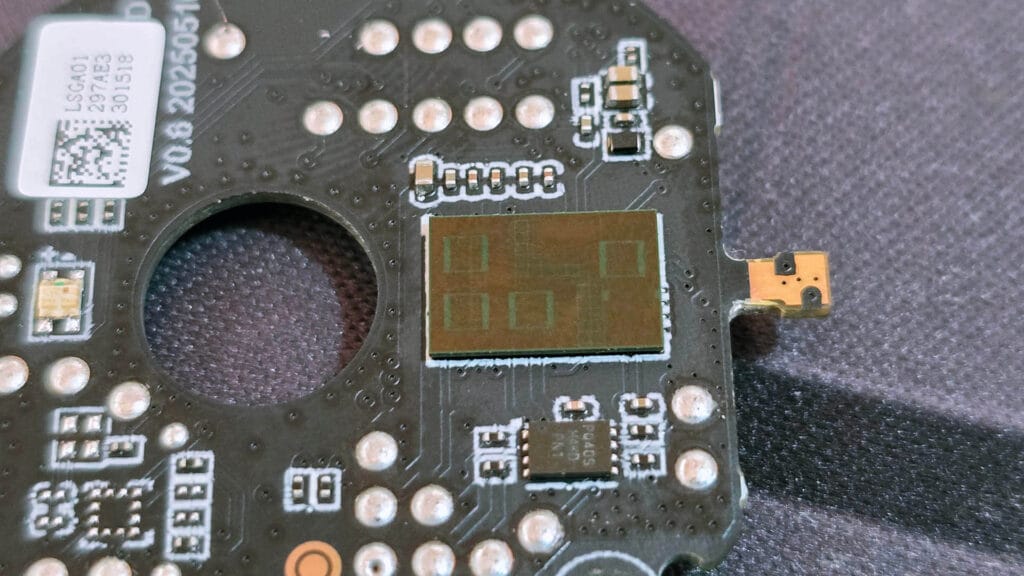
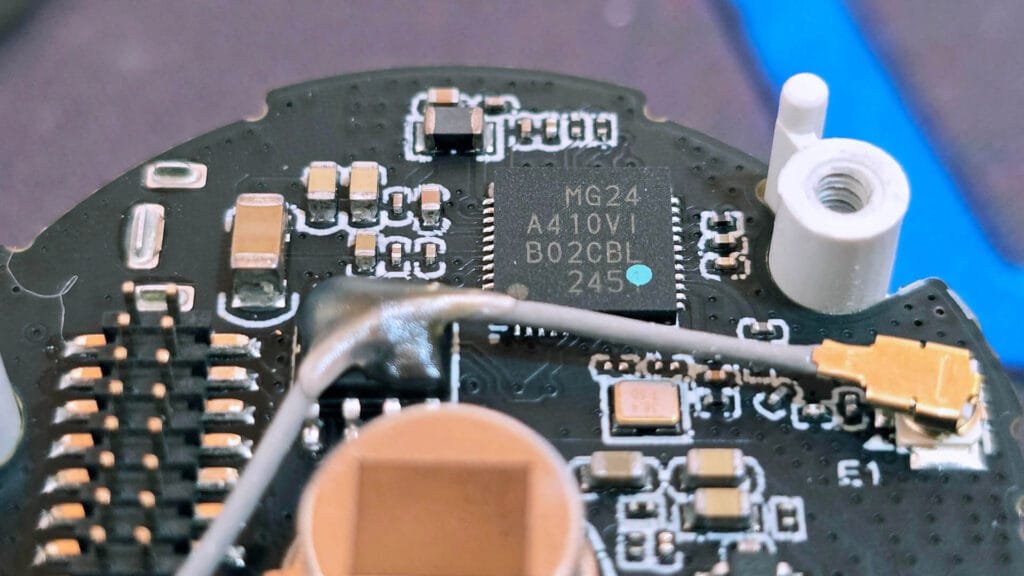
However, despite the fact that the 60GHz radar itself ships equipped with a radio for Thread/Zigbee connectivity, it is not being used in the FP300. Judging by the layout, the FP300 uses the Silicon Labs EFR32MG24 SoC as its main connection module. The MG24 is the latest and greatest chip for low-power protocols on the 2.4GHz band, being used in modern coordinators like the Home Assistant Connect ZBT-2, Sonoff Dongle Plus and the Sonoff Dongle Max.
Aqara FP300 Home Assistant Setup
Like most recent Aqara releases, the FP300 is a multi-protocol device that supports both Matter-over-Thread and Zigbee. It ships in Thread mode by default, allowing you to onboard it directly to your Matter controller and pair it with your Thread Border Router right out of the box.
Firmware Updates & Protocol Switching
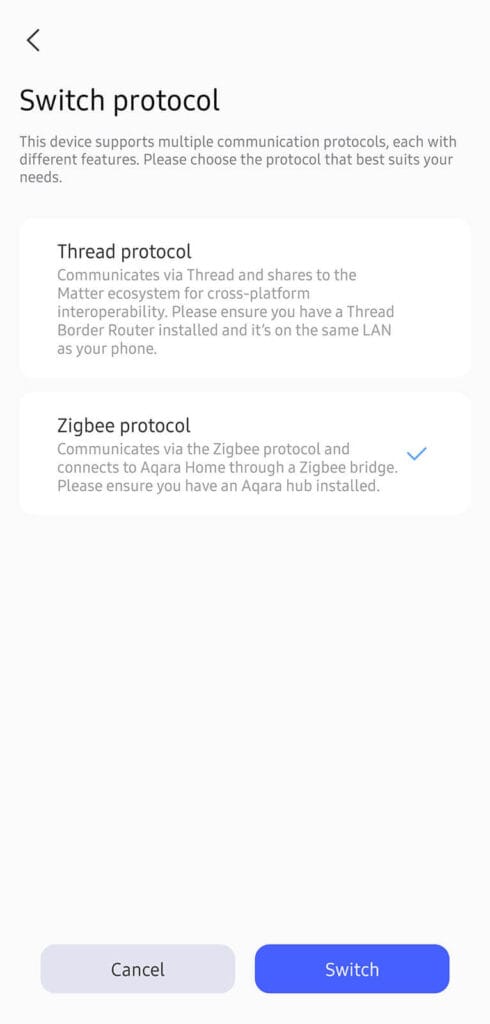
If you intend to use this sensor over Thread (which I suggest you don’t), you can onboard it directly into Home Assistant without touching the Aqara app. The good news is that you do not need an Aqara Hub to update the firmware or switch between Thread and Zigbee. Since the FP300 also communicates with your phone via Bluetooth, the app allows you to swap firmware without onboarding the device to a hub at all.
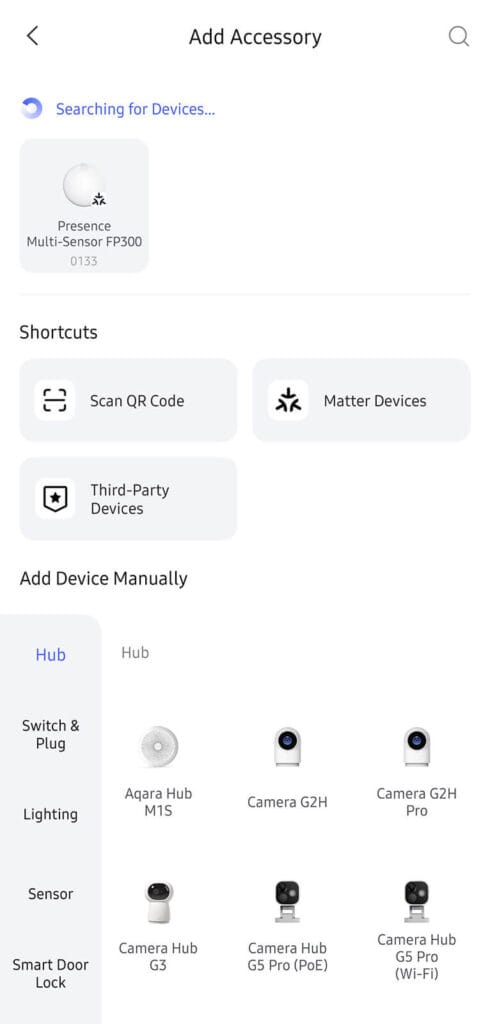
Here is how this looks in the Aqara app:


Now, this process also updates the firmware of the FP300, regardless if you have a Thread Border Router or an Aqara Zigbee hub on your network. During the flashing process, the app will complain that there isn’t a Matter controller on your network if you are swapping to Thread. But since you don’t actually care about that, you simply swap it back from Thread to Zigbee and the latest Zigbee firmware gets flashed even without a hub.
Once you get a confirmation message in the app, you simply add it to Zigbee2MQTT in HA while the device is flashing purple/blue. Done!
Matter-over-Thread Integration
The reason I suggested not using the FP300 over Thread is very simple. You are effectively butchering, limiting, and crippling the functionality of the device. This is a highly versatile multi-sensor, tweakable at the lowest levels. Functionality that is simply not supported over Matter and Thread.
Here is a screenshot from Home Assistant:
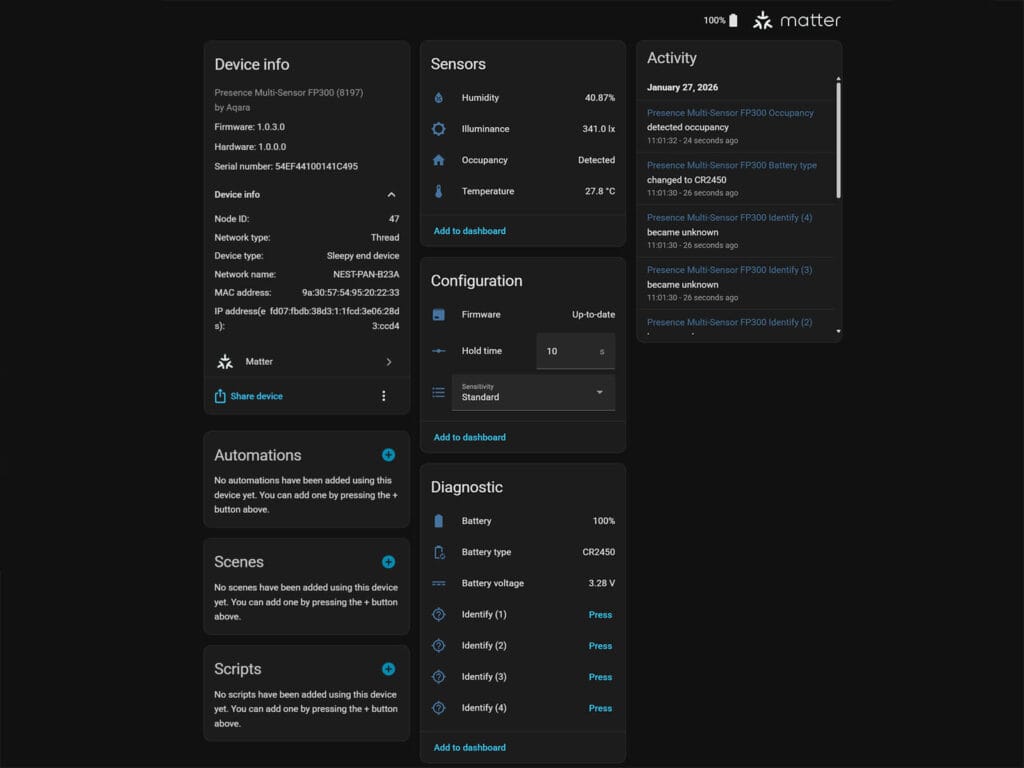
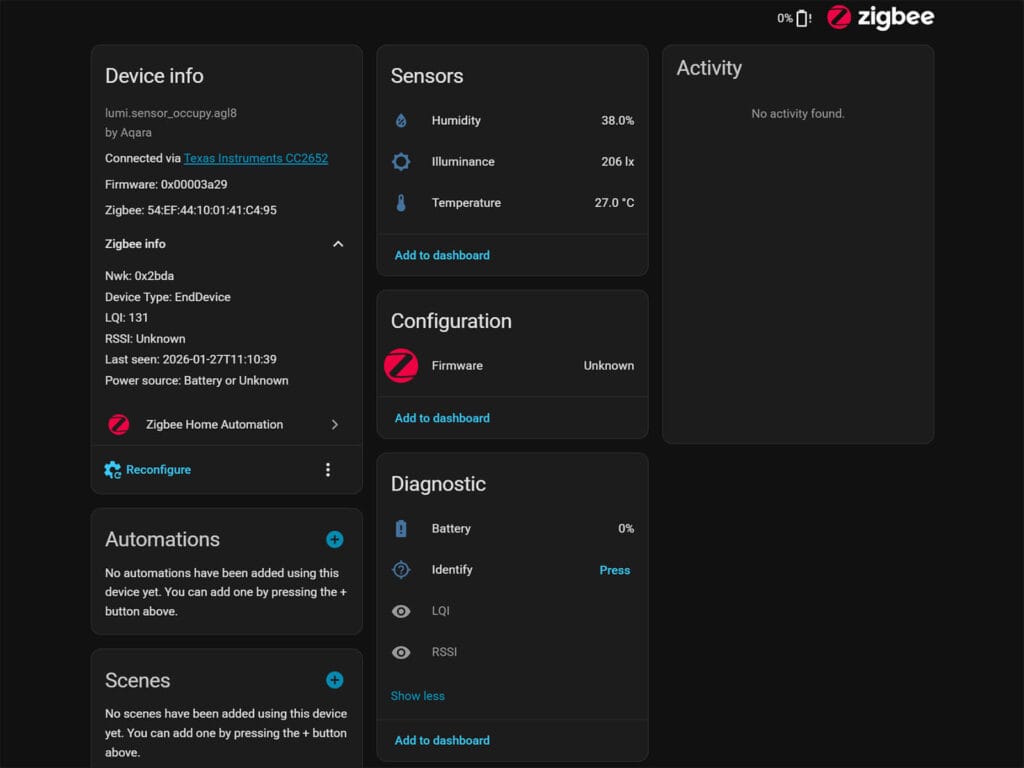
If you do onboard it via Thread, you get basic humidity, temperature, illuminance, and occupancy sensors. You can adjust the presence hold time and sensitivity, but nothing beyond that. You do get a few diagnostic entities like battery percentage and voltage, but as you will see, a whole lot is missing compared to Zigbee mode when used in Zigbee2MQTT.
ZHA Integration
Once I swapped the firmware to Zigbee, I paired the FP300 to my ZHA instance first. I wanted to see how ZHA handles a multi-sensor with custom endpoints like this one. Obviously, I knew a custom quirk is required but I expected at least some functionality to be available out of the box. Somehow, it’s even worse than Matter over Thread. Here’s a screenshot:
ZHA exposes humidity, temperature and illuminance as sensors. There isn’t an occupancy sensor or anything related to motion or presence. With this latest update, no custom quirk is added and you will have to do it manually. Here is a working custom ZHA quirk for the Aqara FP300.
Zigbee2MQTT Integration
Now, Zigbee2MQTT is a different beast altogether. The community is incredibly active, often adding support for high-profile devices even before they’ve officially been released. Some brands (e.g. ThirdReality) also develop their own custom converters so their product range works with Z2M as soon as they hit the shelves.
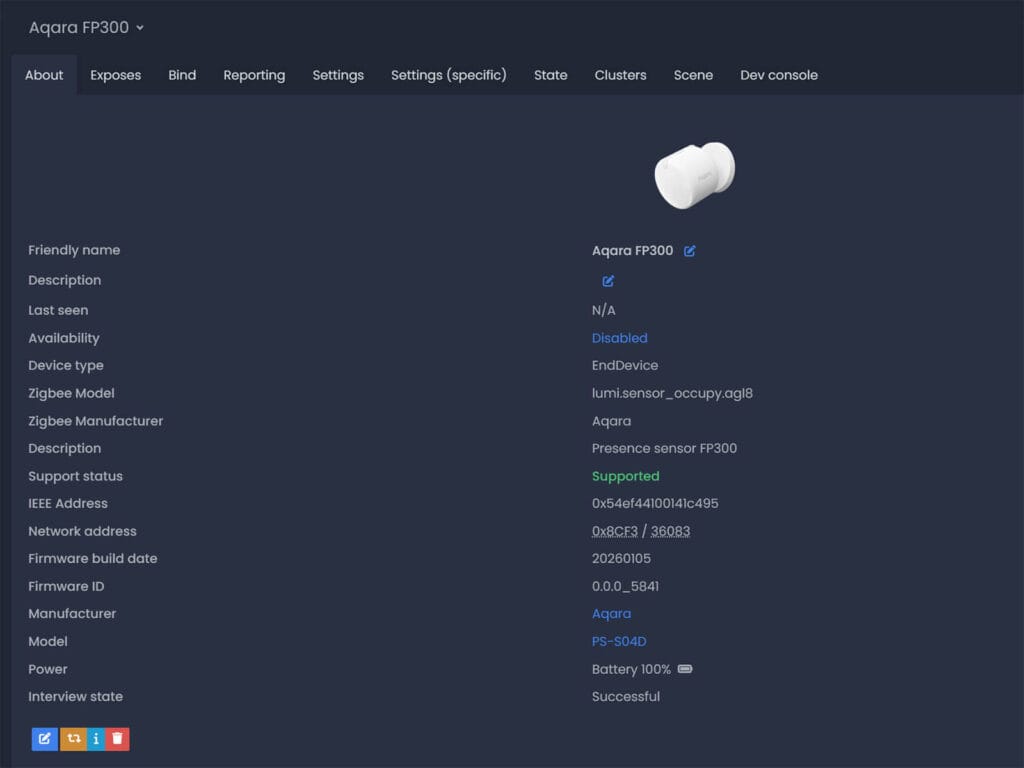
The Aqara FP300 is identified as model PS-S04D and Zigbee model lumi.sensor_occupy.agl8 by manufacturer Aqara in Zigbee2MQTT. The latest firmware (5841) is from 05.01.2026 at the time of writing this review, but I do expect to see more updates in time.
The Aqara FP300 is fully supported in Zigbee2MQTT. When I say fully, I truly mean fully. You can tweak even the smallest things down to setting the temperature and humidity sampling rate. As it exposes so many entities and configuration parameters, it’s easy to get overwhelmed.
Before I summarize what each does, here’s a HUGE screenshot from Z2M:
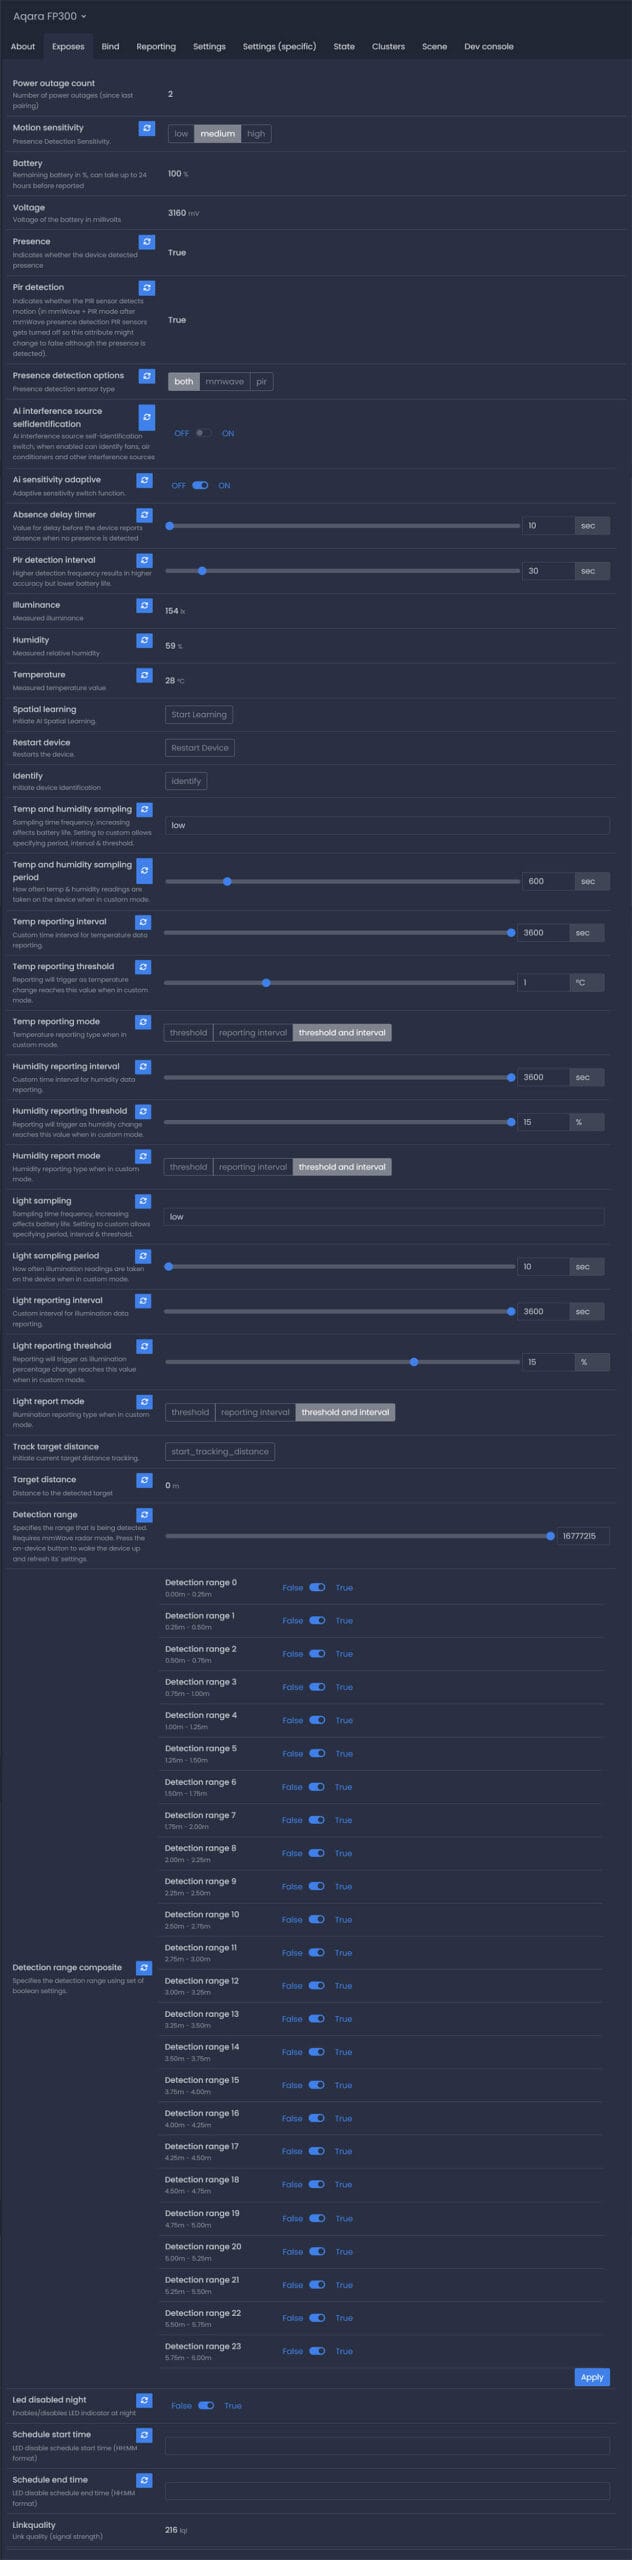
A lot of the FP300 sensors and exposes are self-explanatory. Just by looking at the entity name and state you already know what it’s about. However, there are a handful of configuration entities, specifically those controlling the hybrid presence logic, sampling rates, and interference cancellation, that require a bit more context to set up correctly. I’ve categorized each for easy reading:
Sensors & Status
presence: This is the primary binary sensor used for automations. It operates as a hybrid of the mmWave and PIR sensors. If either the mmWave or PIR sensor detects motion, this sensor will showDetected. It will only switch toClearwhen both sensors agree that no motion is present. This behavior is controllable via thepresence_detection_optionssetting.pir_detection: Indicates the raw status of the passive infrared (PIR) sensor specifically. This allows you to see if the PIR sensor is triggering even if the mmWave sensor is not, or vice-versa.illuminance: Displays the current light level measured in lux (lx). This is useful for lighting automations (e.g., “only turn on lights if illuminance is below 50 lx”).humidity: Displays the relative humidity in the room (%).temperature: Displays the ambient temperature (°C).target_distance: Shows the real-time distance (in meters) to the closest detected person or object.power_outage_count: A counter that tracks how many times the device has lost power since it was last paired.battery: The remaining battery percentage (%).voltage: The battery voltage in millivolts (mV).
Detection Configuration
presence_detection_options: Defines which sensing technologies are active. You can set this to mmWave, PIR, or Both. Setting this to “Both” enables the hybrid logic described in thepresencesensor above.motion_sensitivity: Sets the global sensitivity for motion detection (Low, Medium, or High). Higher sensitivity may detect smaller movements (breathing) but increases the risk of false positives.detection_range: Defines the maximum distance the sensor will monitor. Any motion beyond this distance is ignored.detection_range_composite: A powerful zone exclusion tool. It breaks the detection range into 24 distinct zones (0.25m increments). You can toggle individual zones tofalseto mask out specific areas where interference occurs (e.g., a fan at the 2.0m mark or a curtain at 3.5m).ai_interference_source_selfidentification: When enabled, the sensor uses AI to automatically identify and ignore repetitive non-human movement sources, such as oscillating fans, air conditioners, or robot vacuums.ai_sensitivity_adaptive: Enables an algorithm that automatically adjusts the sensitivity based on the environment to reduce false alarms without manual tweaking.absence_delay_timer: The “cool down” period (10–300s). Once motion stops, the sensor waits for this duration before changing thepresencestate toClear.pir_detection_interval: Controls how often the PIR sensor scans for motion (2–300s). A lower number means faster detection but significantly higher battery drain.track_target_distance: A trigger to initiate tracking for a specific target at the current distance.spatial_learning: A switch to trigger the AI Spatial Learning process, helping the sensor “learn” the static environment of the room.
Reporting & Sampling Settings
temp_and_humidity_sampling/light_sampling: Controls how often the device wakes up to check the sensors (Off, Low, Medium, High, or Custom). “Custom” allows you to define the exact period and thresholds below.temp_and_humidity_sampling_period/light_sampling_period: Used when the sampling mode is “Custom.” This defines the exact time (in seconds) between sensor checks.temp_reporting_interval/humidity_reporting_interval/light_reporting_interval: Controls how often the device pushes data to Home Assistant. Even if the sensor samples data every second, it might only report it every 10 minutes to save battery, unless a threshold is met.temp_reporting_threshold/humidity_reporting_threshold/light_reporting_threshold: A bypass value. If the sensor detects a change larger than this value (e.g., temp spikes by 1°C), it will ignore the reporting interval and push the new data to the hub immediately.temp_reporting_mode/humidity_report_mode/light_report_mode: Determines the logic for reporting data: strict time intervals, change thresholds, or a combination of both.
Device Management & Calibration
led_disabled_night: A toggle to automatically turn off the LED status light on the physical device during night hours to avoid light pollution in bedrooms.schedule_start_time/schedule_end_time: Defines the start and end times (HH:MM) for theled_disabled_nightfeature.restart_device: remotely reboots the sensor.identify: Makes the LED on the sensor flash, helping you locate which specific device this is in a room full of sensors.identify_timeout: Sets how long the flashing lasts during identification (1–30s).illuminance_calibration/humidity_calibration/temperature_calibration: Allows you to manually offset the sensor readings if they differ from a reference device (e.g., if the sensor reads 2°C too high, you can set an offset of -2).humidity_precision/temperature_precision: Adjusts how many decimal places are reported (0–3). Lowering this can reduce database noise in Home Assistant.
Aqara FP300 Installation, Configuration and Testing
Obviously, setting up mmWave radars and eliminating false triggers is a unique process for every home, room or space you are monitoring. There isn’t one size fits all solution, so you must adapt the device according to your needs. As the FP300 is a 5-in-1 multi-sensor, you also need to tweak the environmental sensors according to what you need tracked.
Environmental Sensors Configuration
The first thing I tweaked before getting to presence was the environmental sensors. I have a lot of temperature, humidity, air quality sensors in my office, so I do not actually need the sensors from the FP300. Therefore, to save battery, I changed the sampling and reporting mode to threshold only. This means that these sensors are only updated when there is a significant change. In Zigbee2MQTT:
- Set temperature, humidity, light sampling mode to
custom - Set temperature, humidity, light sampling period to
600seconds - Set temperature, humidity, light reporting mode to
threshold - Set temperature, humidity, light reporting threshold to
1°C,10%and40%
With this setup, time-based updates are ignored and only significant changes are updated. The sensor measures every 10 minutes and sends an update to Zigbee2MQTT. The reason for setting up light reporting to 40% in my setup is because I consider illuminance automations overrated. There’s usually a much better way to achieve the same thing if you think about it. Adjust these settings to your preference, but keep in mind that increasing the sampling and reporting frequency will shorten the FP300’s battery life.
Occupancy Sensors Configuration
The Aqara FP300 has a maximum detection range of 6 meters with a horizontal detection angle of 120°. The 60GHz radar is quite sensitive and can (and will) be falsely triggered if you don’t take the time to tweak it to your environment. Just like most mmWave presence sensors. I made an effort to configure it accordingly, and now it works flawlessly.
The great news is that Aqara offers a lot of tools to deal with both false positive and false negative triggers, including self-learning interference features. The Spatial Learning setting is a manual calibration process where the AI maps the static background of the room to understand what “empty” looks like. This is critical for eliminating ghost detections caused by furniture or walls. I suggest leaving the room and enabling this first, letting it run for a couple of minutes.
Furthermore, the next setting you should enable is AI Interference Source Self-Identification. This feature uses the mmWave radar to identify and ignore non-human “moving” targets, such as spinning fans or fluttering curtains. When enabled, the sensor analyzes the micro-movements of these objects and “masks” them out so they don’t trigger a false presence event. I found that this takes time to execute in practice. You need to let it run continuously for it to perform reliably and eliminate interference sources.
The next feature, AI Sensitivity Adaptive, adapts the sensitivity of the radar dynamically. Instead of relying on a static Low/Medium/High sensitivity threshold, this feature allows the sensor to adjust its sensitivity floor based on the room’s noise level. Over time, it learns the “quiet” state of your room and lowers its sensitivity to avoid false triggers, or raises it to catch subtle breathing when the room is truly still. However, I found that I had a few false negatives when this was enabled, so manually setting the sensitivity and range gave me better results. My tip here would be to test it thoroughly before you leave it enabled.
Unlike the FP2, which gives you a visual map, the FP300 in Z2M uses a “composite” value (basically a list of toggles) to enable or disable specific distance zones. The sensor divides its range (up to 6m) into zones of 0.25m increments. For example, you can disable the far zones to prevent the sensor from detecting movement through an open door or a hallway. My office is quite large, so I did not change anything here.
The final thing I did was disable the LED indicator completely. It’s unnecessary and simply wastes battery. I do not need it blinking during motion or presence events, so I schedule it to be off 24 hours. With presence detection set to both, the FP300 adapted to my office quite well and performed perfectly.
Testing and Comparison
Ever since I tested and reviewed the SwitchBot Presence Sensor, I’ve had it installed in my office, using it as my daily occupancy sensor. The SwitchBot is also a highly capable device, utilizing a similar 60GHz mmWave radar for detecting presence. However, the biggest bottleneck of this sensor is its Bluetooth connectivity. If you don’t have enough Bluetooth proxies or an interference-free connection, you will experience delayed triggers. Fortunately, I have excellent coverage, so it triggers quite fast and continues to detect me working in the office reliably.
Pitting them side-by-side, before I optimized the FP300, here is what I got:

Out of the box, the Aqara FP300 struggled with consistency compared to the SwitchBot (which was already optimized). While the SwitchBot maintained a solid, unbroken “Detected” status throughout my entire work session, the FP300 was prone to false negative triggers. You can see clear gaps in the timeline where the Aqara sensor dropped the occupancy state to “Clear” despite me remaining in the room, indicating it was initially too aggressive in filtering out micro-movements or had its sensitivity set too low by the adaptive AI sensitivity setting.
Once I took the time to configure the device properly, results got much better:

I adjusted the sensitivity manually and enabled the AI interference learning. The FP300 successfully held a continuous presence state that mirrored the SwitchBot almost perfectly. The “false negative” dropouts almost completely disappeared, and both sensors triggered and cleared in near-perfect sync, once properly tuned for the specific environment.
Final Thoughts
The Aqara FP300 is no doubt a highly capable presence multi-sensor. The use of dual CR2450 batteries is a smart move that makes me optimistic about the longevity of the device, although I do think it comes at the price of lower sampling and reporting rates for the environmental sensors.
What I appreciate most is the dual-protocol approach Aqara took here, just like with the H2 Wall Switch. Giving users the choice between Thread and Zigbee is a consumer-friendly move that I hope other manufacturers copy. For me, Zigbee is still king and always will be. Using this sensor over Zigbee unlocks a level of control and granularity that simply isn’t there with Matter over Thread right now. It is clearly the better choice for power users who want full access to every setting.
You do have to be willing to tinker with it to get good results. My testing showed that the out-of-the-box experience is decent, but it really shines after you spend some time tweaking the sensitivity and interference zones. It is not a magic solution immediately, but it works reliably once you dial it in, which is true for any mmWave presence sensor anyway. The false triggers disappeared completely after I tweaked the settings to match my office.
Overall, I think Aqara did a great job with the FP300. It is easily one of the best, if not the best, battery-powered presence sensors I have tested to date. It combines the accuracy of mmWave with the speed of PIR in a compact, multi-sensor package. If you are looking for a reliable presence sensor and are willing to use Zigbee to get the most out of it, then the FP300 is for you
Here’s where you can get it:

Quick Summary: Aqara FP300 Pros and Cons
✅Pros
- Hybrid Technology: Combines mmWave accuracy with PIR speed for instant detection.
- Great Battery Life: Up to 3 years on two CR2450 batteries.
- 5-in-1 Multi-Sensor: Integrated PIR, mmWave, Temperature, Humidity and Light sensors
- Dual Protocol: Supports both Zigbee 3.0 and Matter-over-Thread.
- Zigbee2MQTT Control: Excellent Zigbee2MQTT integration and support.
- Premium Build: Dense, high-quality feel with a sturdy magnetic mount.
❌Cons
- Limited Thread Features: Matter does not support important configuration features.
- Limited ZHA Integration: Requires developing and adding a custom quirk.
- Requires Tuning: Needs manual calibration (sensitivity/interference) to work perfectly.


Can wholly recommend, one of the best smarthome buys at the moment
Great review, thanks a lot. Happy to see that it works perfectly with Zigbee2MQTT, since Zigbee is dead solid and robust while Thread not only has limited capacities but also inexplicable connection issues in my home.
Thanks for the feedback, appreciate it.
And yeah, I completely agree.
Even if Thread had no issues (it does), I see no reason to replace Zigbee. At least, for now.
It looks great, I just wish it had an optional USB C input for wired power.
Well, the whole of the FP300 was to be battery-powered. You can consider the FP2/FP1E as wired sensors
Any idea if we can make the settings you specified from the app, with the sensor connected to the phone and then use it via thread in HA? Something like the xiaomi presence sensor, but via Thread
No, you can’t. You need a hub and to actually pair the device to Aqara first.
Radar of this sensor looks very similar to SwitchBot Presence Sensor https://smarthomescene.com/reviews/switchbot-presence-sensor-review-and-testing/
You are right, it turns out the SwitchBot is also using the same sensor. Not the Infineon model I initially recognized.
Thanks for the catch, fixed.
Aww man.
Recently got two Everything Presence One detector (and one of the new Pro variant), to replace some older PIR and environment sensors.
But the FP300 seems to be near perfect instead, especially since they are battery powered.
I got a FP1 in my bathroom. It’s still working fine but I dislike having a usb cable hanging about for it…
Anyway, great review! Thanks.
Well, to be honest, as great as the FP300 is, it can never beat the EP1 or EP Lite. If you can live with the cable, you made a great choice!
How does it compare to ZG-204ZH?
It’s better at absolutely everything except price
Nice review and teardown!
What exact temperature sensor have Aqara put on this?
I saw the chip on the separate extended PCB part that sticks out but could not read the numbers on you image.
It’s the Sensirion SHT40
Bought this off the back of your article. New to this HA scene but it added via zigbee2mqtt no problem about 3 days ago, but every day since it seems to just stop updating within HA until I fully remove and re add. my automation for the light stops working and then I just see messages timing out. Any idea on how to diagnose?
Start by examining the logs in Zigbee2MQTT. It sounds like a networking/interference issue to me. How’s the rest of your network?
Network seems to be grand I think. Only have some tuya soil monitors, sonoff trvs and innr smart plugs and so far no issues with them. Although I’ve just left it as is and it seems to just drop off for a few hours every day (haven’t checked if it’s a consistent time), and then comes back so maybe it is something network related. Haven’t spotted anything obvious in the logs but may need to look harder!
I just got this sensor but it confuses me as no sensor ever did.
“Target distance” sensor: How is it supposed to work? It’s always at 0 m. I think I only saw another distance value 2 times and I could not understand what triggered it to finally show a distance. “Track Target Distance” button does not seem to do anything.
“Detection range”: what does the value in the “0 to 16777215” range represents ?
And does this configuration value relates to/impacts the “Detection range composite” entity ?
I tried to change that range value and it seems it just toggled randomly the switches of “Detection range composite”.
“Presence detection options” : if I choose “Both” then “Presence” status will often drop to “Not detected”. If I choose “mmWave” presence will correctly stay at “Detected” but I then the PIR sensor seems to get disabled so I loose the PIR reactivity advantage.
And most of the time, if I try to change a configuration value for this sensor in Z2M, nothing happens. For example, trying to switch from a “Presence detection options” mode to another does not work most of the time. Same with all the other configurations. I have to try multiples times and at some point it will work.
The “Target distance” is a calibration tool that only updates when you trigger “Track target distance” to help you map which of the 24 zones (represented by the 16,777,215 bitmask value) to toggle in the composite entity. You are not supposed to use it for anything other than that, it will drain the battery super fast. I’m thinking you either have a weak mesh or you haven’t woken up the sensor before applying any settings. Because it is a battery-powered device, you must short-press the physical button on the sensor immediately before clicking “Apply” in Z2M to wake it up and receive the new configuration.
So I understand that I must not modify the “Detection range” entity, only the toggles of “Detection range composite”, which could also be automatically set by instead using the “Track Target Distance” button. But since I don’t understand how this action is supposed to work, I might just set the toggles myself manually.
Yet, any idea about the “Presence detection options” issue I have? Again, with “Both” option presence detection does not seem to work correctly, presence frequently drops even if I stand still right in front of the sensor at max 2 meters away. With “mmWave” option it works correctly but then obviously I don’t get the benefits of the PIR sensor, which is disabled in that case.
That’s weird, but It can mean the sensor hasn’t mapped your environment properly.
As an experiment, try this:
In Z2M, ensure the room is completely empty and trigger the AI Spatial Learning.
The sensor needs about 5-10 minutes of “quiet time” to understand the static reflections in your room.
Without this, it’s possible the mmWave treats a human standing still as part of the background (though it shouldn’t).
Next, if the PIR resets too quickly before the mmWave confirms presence, the state will flicker. Try increasing the PIR timeout or detection interval settings.
Disable adaptive sensitivity while you’re are it and let me know.