UPDATE: A detailed head-to-head comparison of the top three mmWave presence sensors available currently on the market: Aqara FP1, Tuya ZY-M100 and Tuya PS-HPS.
UPDATE2: Aqara FP1 Tips, Tricks and Automation Examples
UPDATE3: Regions are now support in Zigbee2MQTT!
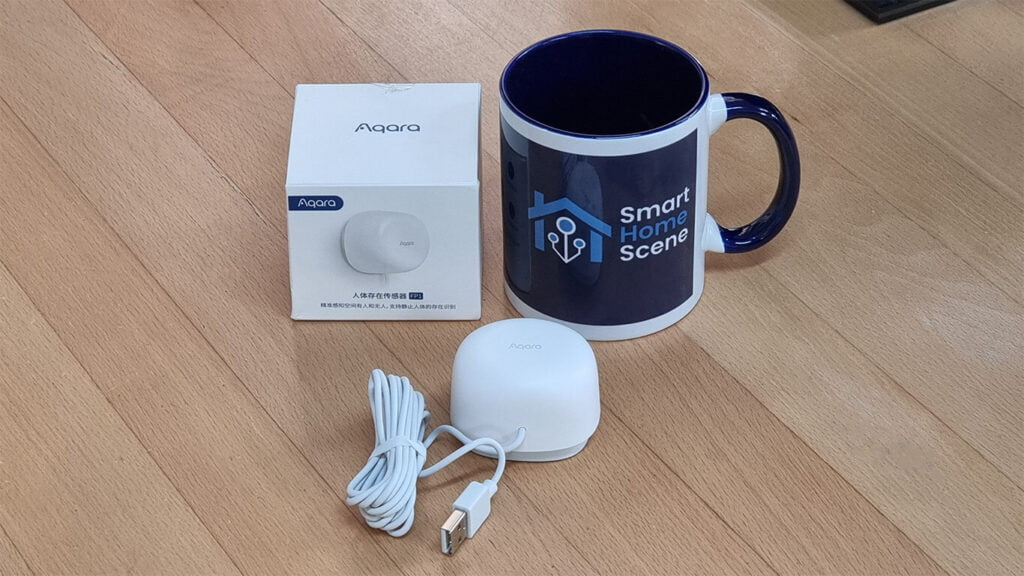
One of the most anticipated and discussed smart home gadgets in the past year is definitely the Aqara FP1 Human Presence Sensor (RTCZCGQ11LM). This device handles motion and presence with electromagnetic waves, called millimetre waves.
While traditional motion detection devices utilize a PIR (Passive Infrared) sensor, the FP1 is built around an mmWave radar sensor. Although it is not the first of its kind, with the Aqara FP1 comes a subtle promise of quality, support and durability.
In this review, we are going to explain the differences between the two sensors, disassemble the Aqara FP1 to see what’s inside and integrate it into Home Assistant.
The Aqara FP1 can be currently bought for ~$49.99 only on AliExpress [Link 1, Link 2, Link 3].
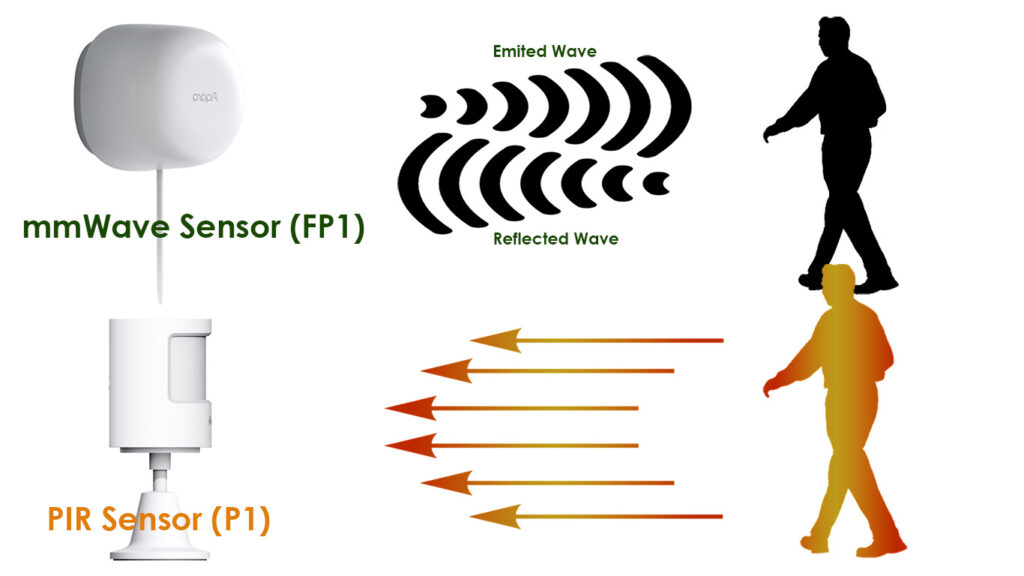
PIR sensor vs mmWave Sensor
Even though both PIR and mmWave are used to detect motion, there are some major differences between the two:
A PIR (Passive Infrared) motion sensor has a pair of pyroelectric sensors used to detect heat energy from the surrounding environment. It helps generate an electrical signal when they are heated or cooled, and the sensor is triggered.
An mmWave (Millimeter Waves) motion sensor emits electromagnetic waves with the help of a transmitter that is then reflected back to the sensor, known as the echo time. The receiver in the sensor then analyses the waves that are bounced back and the sensor is triggered. One holds some advantages over the other and visa versa, what you need will largely depends on your use case.
| PIR | mmWave | |
|---|---|---|
| Type: | Passive Infrared Sensor | Active Radar Sensor |
| Wave: | Infrared | Radar (Millimeter Wave) |
| Sensitivity: | Limited | Higher than PIR |
| Range: | Limited | Higher than PIR |
| Detection: | Movement (Major Motion) | Breathing (Fine Motion) |
| Data Type: | Binary (Motion) | Varied: (Zones, Angle, Distance) |
| Timing: | Instant | ~5-10sec |
| Power: | Low, Battery Powered | Higher, Adapter Powered |
| Cost: | Low | More Expensive |
NOTE: This table is a generalization between the two technologies, PIR and mmWave. Most of the variables vary in real-life conditions and largely depend on the model you are utilizing. While PIR is an established technology, mmWave is the new kid on the block in the Smart Home industry, promising much finer utilization of Home Automation. For Smart Home enthusiasts, this can be summarized with these two bullet points:
- A PIR sensor is better for quick-detection of human motion, e.g.
- “Turn on the lights when I walk in the room.”
- “Turn on the fan when I walk through the door”
- An mmWave is better for continuous human detection, e.g.
- “Keep the lights on while I’m in the room.”
- “Keep the fan off while I’m in my chair”
Technical Specification
- Model: RTCZCGQ11LM
- Connectivity: ZigBee 3.0
- Device Type: End Device
- Adapter Input: 100- 240VAC, 50/60Hz, 0.2A
- Adapter Output: 5V1A
- Adapter Cable Length: 2m
- Adapter Cable Type: USB A
- Working Temperature: -10~40 degrees C
- Working Humidity: 0~95% RH, no condensation
- Detection Angle: 120°
- Detection Range: 5m
- Montage: Magnet or Sticker with Swivel
What’s inside?
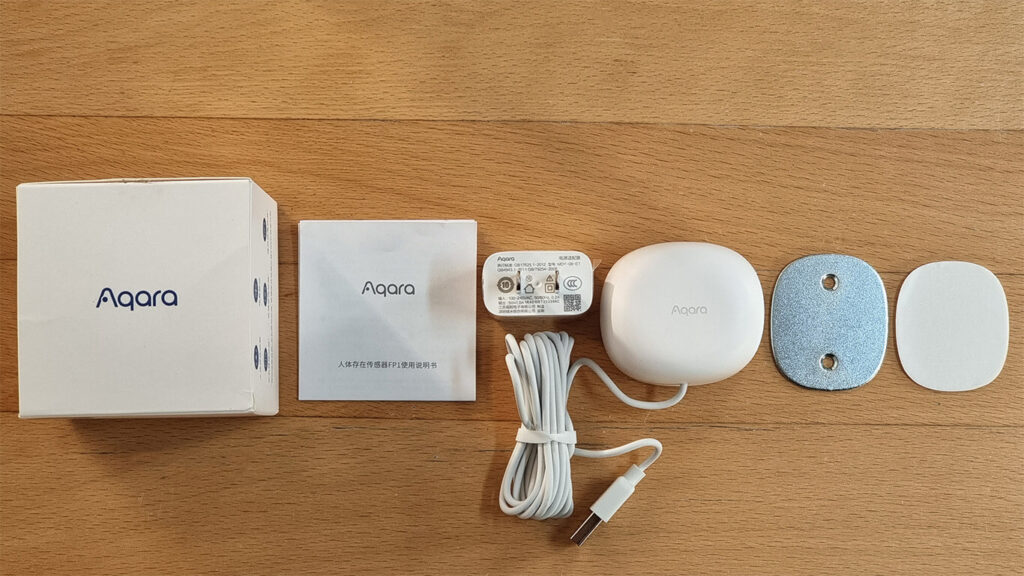
The Aqara FP1 Human Presence Sensor is currently being officially sold only in Asian markets. That means, the packaging is not adjusted for western markets, and the box and labeling are all in Chinese.
The box contains the sensor, an adapter, a manual and a metal plate with a sticker for mounting the device.
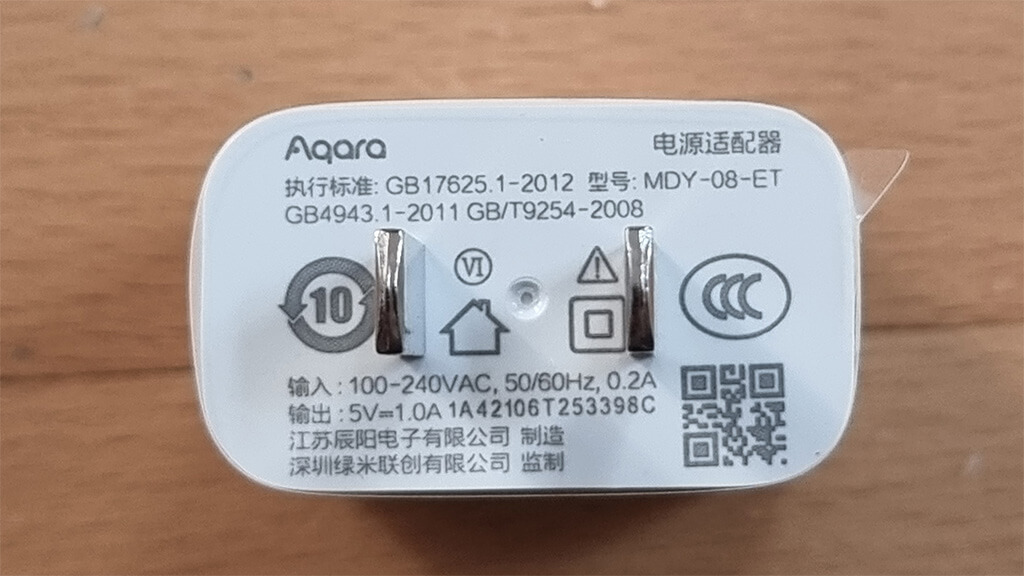
The power supply is an official Aqara adapter rated for Input = 100-240VAC, 50/60Hz and Output = 5V1.0A. The plug is the US version, but depending on the seller, an adapter converter is sent to you for EU or UK plugs.
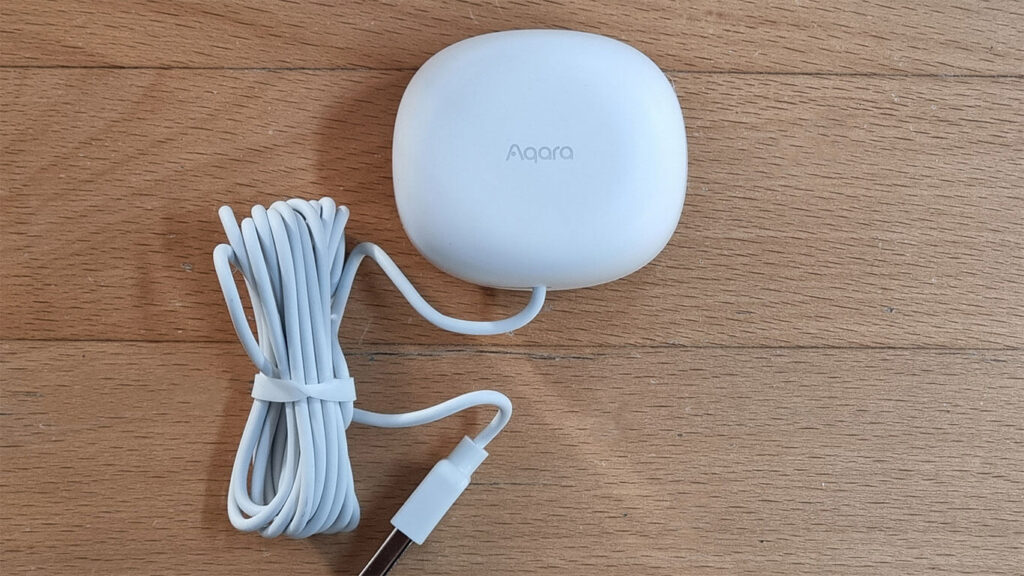
The sensor is shelled in a very neat and good looking plastic body, which feels premium to touch. The cable length is about 2 meters or 6.5 feet which connect with USB-A to the power supply.
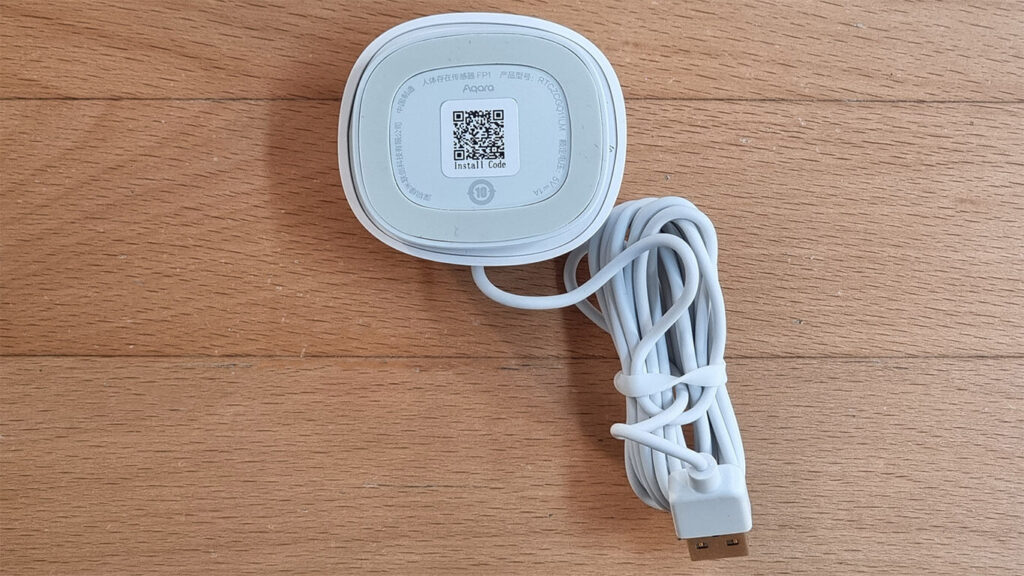
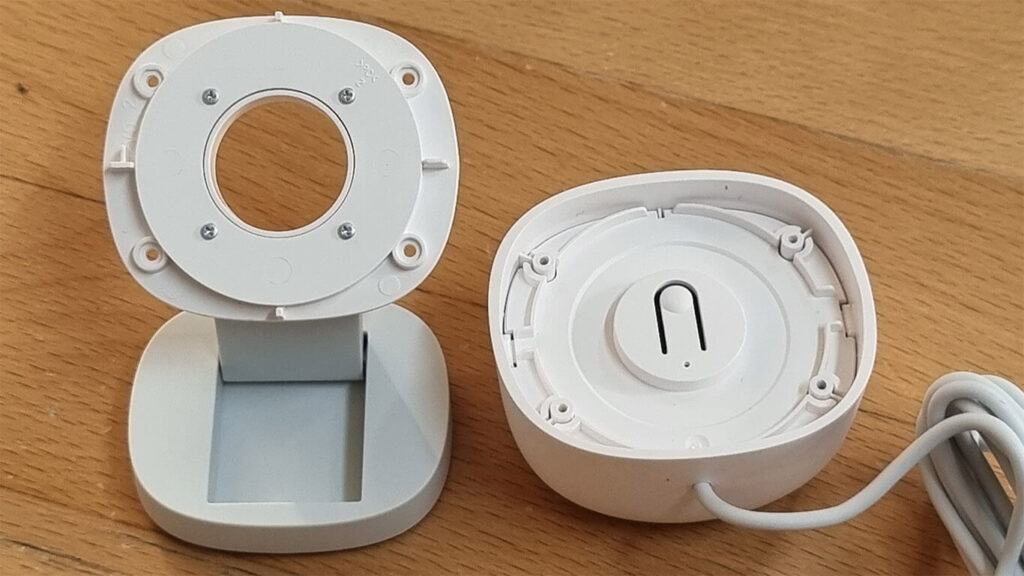
On the backside, a QR sticker is placed on the mounting swivel which takes you to the store to install their official app. We are not doing that of course, as the FP1 is going straight to Home Assistant. The back plate is a powerful magnet by itself, which can be mounted to any metal surface without any accessories.
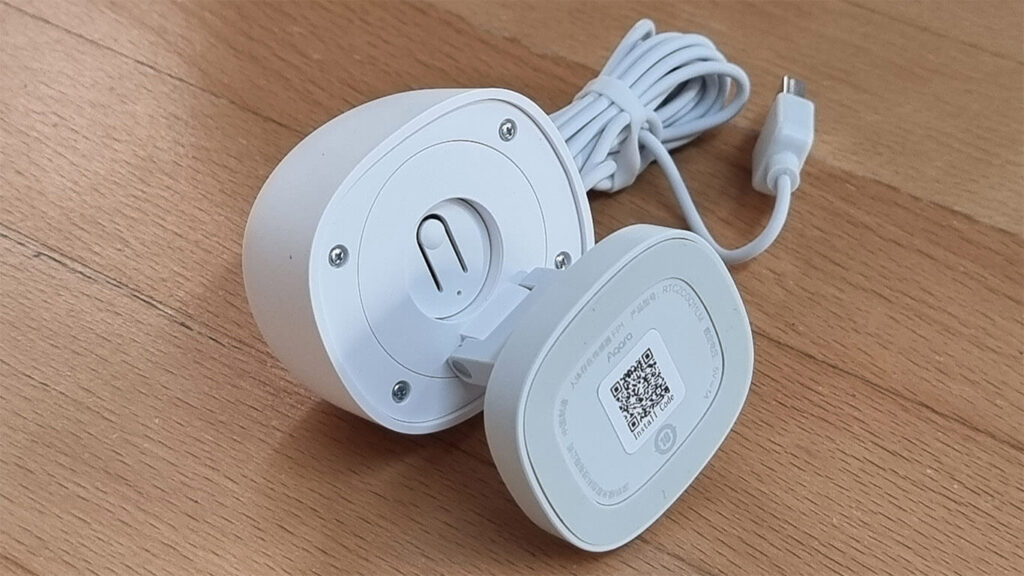
Under the swivel, four screws hold the main shell together. They are cleverly placed so they are out of sight at all times. The pairing button is in the middle as well as a small LED indicator.
The swivel can be rotated 360 degrees, and tilted to fine tune its observing angle. You can adjust it anyway you like, and the Aqara logo will always be straight as well as the cable will always be on the bottom. If for some reason you want it coming from the top, you can do that too.
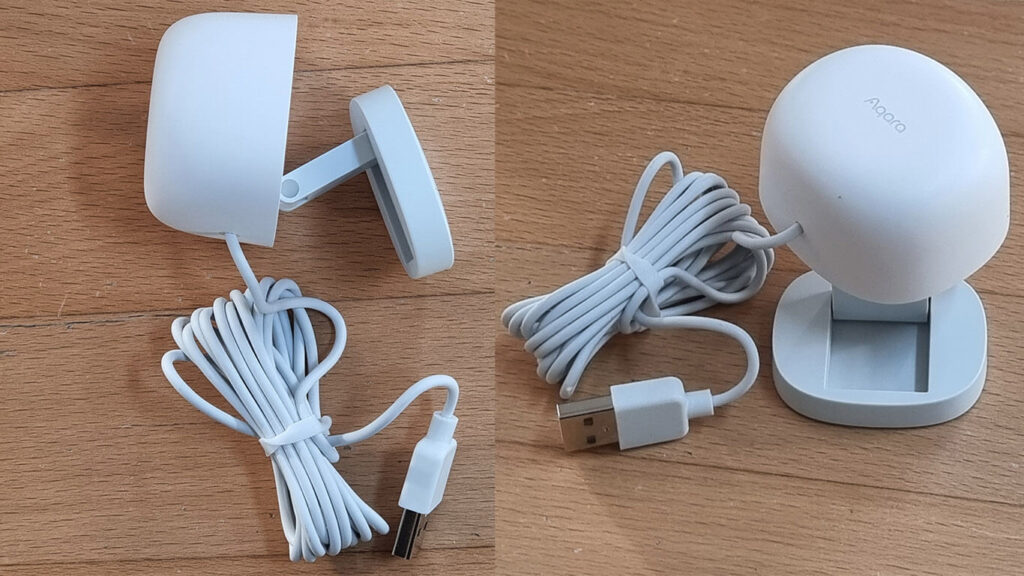
Once you remove the swivel completely, a protective cap remains in the main shell. The swivel makes up for most of the sensor weight, because of the heavy magnet inside it.
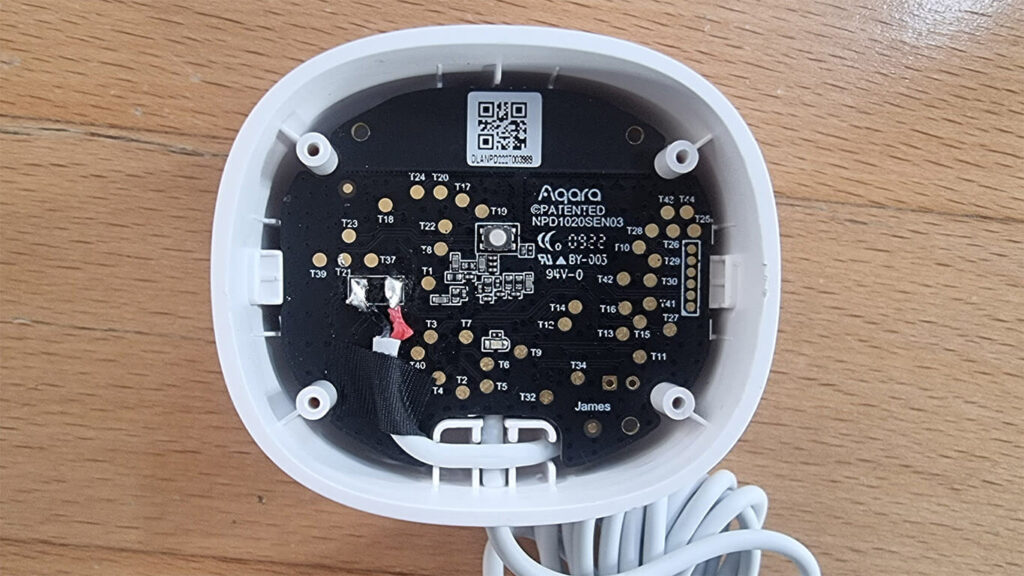
Under the protective cap, the main PCB is tightly placed. Aqara uses black PCBs for its gadgets and devices, which look better and more premium than traditional green PCBs. This is absolutely not important, just an observation.
What’s a little disappointing is the cable being soldered directly on the PCB. Unfortunately, this means if you want to extend it you would either have to use an USB extension cord or solder a longer cable directly by disassembling the device.
On the inside of the PCB, the ZigBee communications module, the mmWave sensor as well as some resistors and diodes are soldered. This is the complete device, which is tiny, compared to its outer shell.
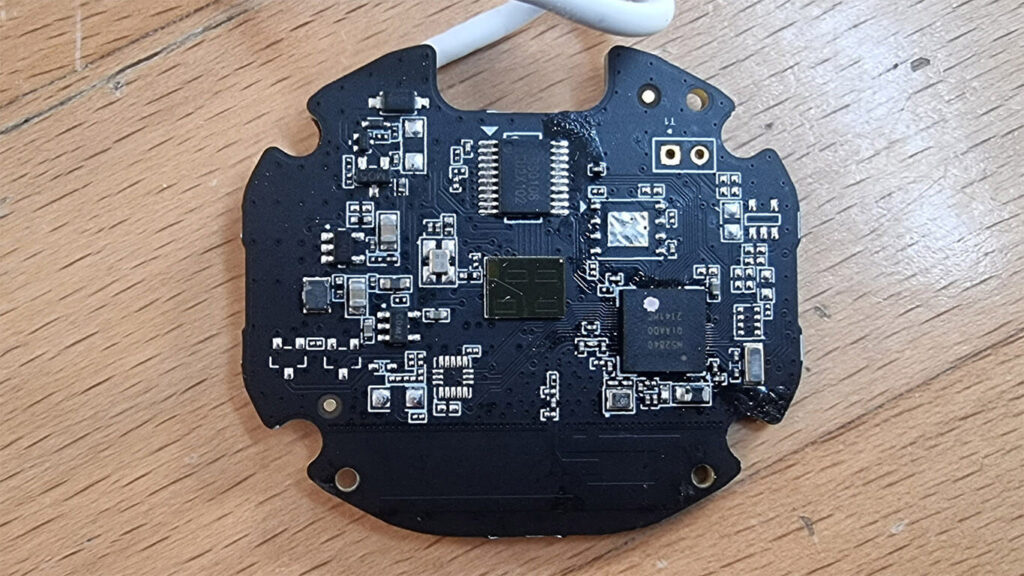
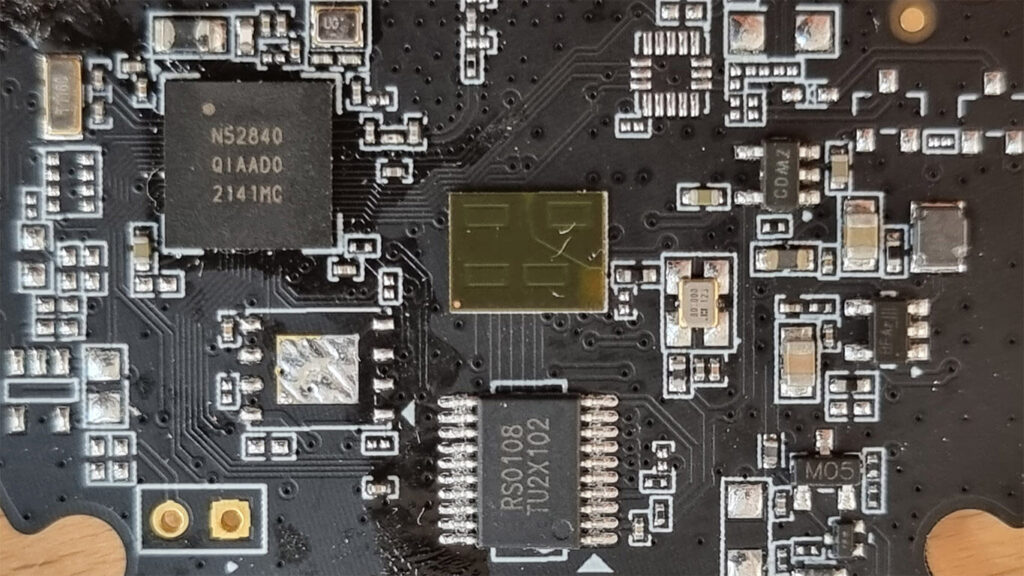
The communications module is nRF52840 Multiprotocol chip, supporting BLE, NFC, ZigBee and Thread! The nRF52840 is built around the 32-bit ARM® Cortex™-M4 CPU with floating point unit running at 64 MHz. It’s developed by company Nordic Semiconductors, based out of Trondheim, Norway. This company specializes in wireless communication technology that powers Internet of Things (IoT) devices.
The mmWave sensor itself is model XENSIV™ BGT60TR13C 60GHz Radar Sensor, developed by company Infineon from Neubiberg, Germany in partnership with Aqara. The BGT60TR13C MMIC is a 60GHz radar sensor with integrated antennas and comes with one transmitting and three receiving antennas.
Its’ main key features advertised by the company are extremely high sensitivity (sub-millimeter), extremely low power consumption (<5mW), detection of people up to 15m in front. Infineon characterizes their product as “the smallest 60Hz radar sensor on the market”.
The RS0108 in the picture is just a bidirectional voltage-level translator and regulator.
Integration Compatibility
The Aqara FP1 Human Presence Sensor is compatible with all three major Home Assistant Integrations: ZHA, ZigBee2MQTT and Deconz. However, to utilize each quirk this sensor has to offer, we suggest using ZigBee2MQTT. It supports OTA updates, and most of the available settings the sensor publishes are available. Regions are currently NOT supported in any integration, but they are most likely to come to ZigBee2MQTT first.
ZigBee Coordinator Update
Before we talk about the integrations themselves, you need to make sure your ZigBee coordinator is compatible with the Aqara FP1. In order for this sensor to work with your setup, you most likely need to update the firmware of the ZigBee stick. Refer to this table for firmware links and tutorials:
| Module | Firmware |
|---|---|
| CC2530/CC2531 | 20211115 |
| CC1352/CC2652: (Sonoff ZBDongle-P) | 20211114 |
| CC2538: | 20211222 |
| Conbee II: | 0x26720700 |
| EFR32MG21: (Sonoff ZBDongle-E) | 6.10.3.x |
If you are looking to replace your existing ZigBee stick, we suggest going for one of the Sonoff sticks, specifically Sonoff ZBDongle-E version. This model uses the Silicon Labs EFR32MG21 chip, which supports Thread and will be rendered Matter compatible in the near future with a firmware update.
Even though it’s still listed as an “Experimental” in ZigBee2MQTT, users are reporting it works great and its’ range is improved significantly. Consider using our affiliate links for ordering, it helps us maintain this blog:
Sonoff ZB 3.0 Dongle-E
AliExpress 1 | AliExpress 2 | Amazon.com
Sonoff ZB 3.0 Dongle-P
AliExpress | Amazon.com
Another alternative is to get the Home Assistant SkyConnect stick, which is currently on preorder. This stick is also based on the Silabs EFR32MG21, supports ZigBee and Thread (Matter). It requires zero setup (plug & play), and is updatable via Home Assistant.
ZHA
The Aqara FP1 Human Presence Sensor does NOT work on ZigBee channels 21-24, so you may have to change the channel to successfully pair this device. Unfortunately, this means repairing all your existing devices.
To pair the FP1 to your coordinator, press and hold the button under the magnetic base for ~5 seconds until the blue LED starts blinking. The device enters pairing mode and will join your network. If you are having issues, try short-pressing the button while it’s being added.
When added to ZHA, the FP1 exposes the following entities to Home Assistant:
- binary_sensor:
- presence: ON – True, OFF – False
- select:
- approach_distance: near, medium, far
- monitoring_mode: undirected, left_right
- motion_sensitivity: low, medium, high
- button:
- reset_nopresence_status: resets presence status
- identify: manually trigger a sensor update
- sensor:
- device_temperature: device temp in °C
- presence_event: enter, leave, left_enter, right_leave, right_enter, left_leave, approach, away
- linkquality: signal quality in LQI
Regions are NOT supported in ZHA, as well as OTA updates. Those are only possible through Zigbee2MQTT.
ZigBee2MQTT

Once successfully paired to ZigBee2MQTT, it exposes the following entities to Home Assistant:
- binary_sensor:
- presence: ON – True, OFF – False
- update_available: ON – True, OFF – False
- select:
- approach_distance: near, medium, far
- monitoring_mode: undirected, left_right
- motion_sensitivity: low, medium, high
- reset_nopresence_status: resets presence status
- sensor:
- device_temperature: device temp in °C
- power_outage_count: how many times did device lose power
- presence_event: enter, leave, left_enter, right_leave, right_enter, left_leave, approach, away
- linkquality: signal quality in LQI
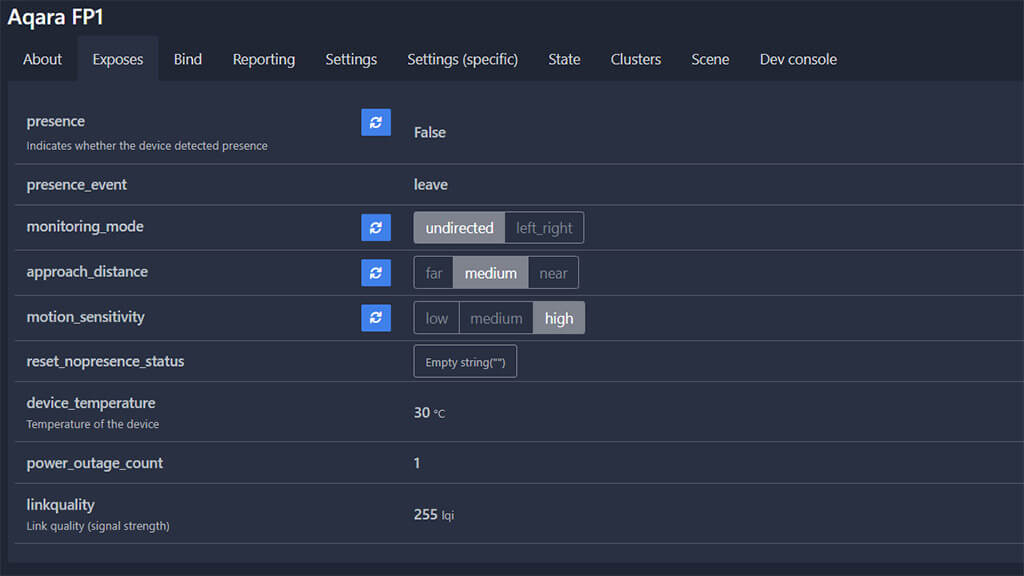
UPDATE: Regions have been added in Zigbee2MQTT!
Deconz
The FP1 sensor is officially supported in Deconz, you can check their API HERE.
- state/presence
- binary sensor for detecting presence, default is false
- config/triggerdistance:
- measures the distance when someone is approaching: near, medium and far
- config/resetpresence:
- used to reset the sensor value, as apparently it can get stuck in a detected state
- state/presenceevent:
- published a presence event: enter, leave, approach etc.
- config/devicemode:
- two device modes are available: undirected, left_right
- config/sensitivity:
- used to set sensor sensitivity: low, medium, high
Note: The minimum version of Deconz needed for the Aqara FP1 is 2.15.1, so make sure you update. Regions are NOT supported.
Usage
Integrating the Aqara FP1 Human Presence Sensor in Home Assistant, opens a whole new spectrum for Home Automation. No longer will your lights will be turning off while you are on the toilet, you will not have to wave your hands like a baboon.
The functionality it provides through its’ entities, allows for variable customization and automation fine-tuning. The only thing missing is Regions, but that is only a matter of time before it gets introduced in the top 3 ZigBee integrations, probably starting with ZigBee2MQTT.
Positioning
Correctly positioning the Aqara FP1 is the most important thing you need to tackle. The sensor is incredibly sensitive and will trigger a false positive at the slightest movement. For optimum performance, it’s best placing the FP1 high in a room corner. This can prove a challenge for various reasons:
- Cable may need to be extended to reach the power supply
- Cable will dangle from the ceiling down, can be tricky to cover up
- You are opening its’ field of view, which means more false positives
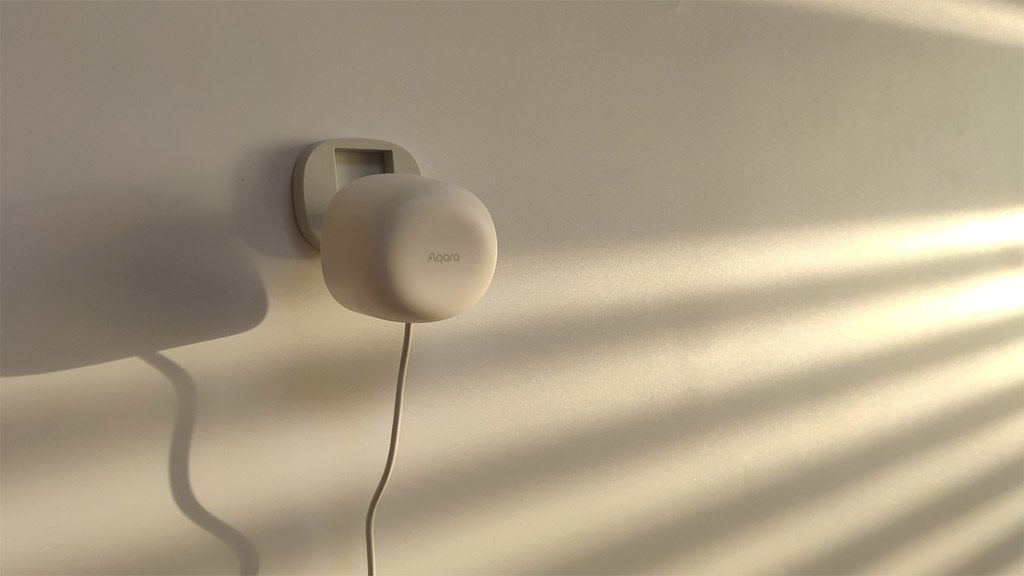
If you decide to install the Aqara FP1, be prepared for a session of trial and error. You will possibly have to move the sensor around a couple of times, fiddle with its swivel and try out different sensitivity settings. Remember, the goal is to avoid as many false positives as possible. Some common false triggers users have reported so far:
- Ceiling fans
- Wind moving shades
- Objects detected through open windows
- PC fans
- Speaker vibrations
- Robot vacuums
Testing
We tested the configuration variables of the Aqara FP1, in an effort what each of them means exactly and how they change the performance. This was the setup:
- Mounted in a room corner (magnet on a curtain rod)
- HA OS + ZigBee2MQTT + Conbee II Stick, running latest versions
- Motion sensitivity:
- When set to high, the sensor would detect breathing at ~5m (breathing)
- When set to medium, the sensor would detect turning your head at ~5m
- When set to low, the sensor would detect waving your hand at ~5m
- Approach distance:
- When set to near, the sensor would detect movement at ~1m
- When set to medium, the sensor would detect movement at ~3m
- When set to far, the sensor would detect movement at ~5m
- Monitoring mode:
- When set to undirected, the sensor would not consider the approaching sides and just inherit one of the following states: leave, enter, approach, away
- When set to left_right, the sensor would consider the approaching sides, and inherit the following states: left_enter, left_leave, right_enter, right_leave
All of these variables can be used to fine tune the sensor capabilities and create more complex automations. You could trigger an automation based on the approach event (eg. left_enter). In our case, this turned out to be not that accurate when you were moving through the room. The approach distance and motion sensitivity should be used to limit the false positives the FP1 can generate, such as pets or animals movement. This requires a bit of tinkering and trial and error, you will not set it up correctly on your first try.
Ss far as detection speed goes, the sensor changes its state to “on” within 5 seconds of detecting movement. Inversely, it changed the state to “off” within 10 seconds of the room being empty.
SPEED DETECTION HACK: While the main binary_sensor will take around 5 seconds to change its state to ON (Home), the presence event sensor entity updates its state (enter, leave) much faster! You could use this event in an automation for a much faster motion detection trigger.
Automation Logic
The FP1 supercharges your automations by default. The binary_sensor entity state, will not inherent an “off” state until the room is completely clear. Traditional PIR sensor, will quickly revert to “off” after their cooldown expires and no movement is detected. For optimum performance and minimal false positives, we suggest implementing both types of sensors:
Example 1: Using Only a PIR sensor
description: "Turn ON light when I walk in the Living Room"
mode: single
trigger:
  - platform: state
    entity_id:
      - binary_sensor.living_room_pir
    to: "on"
condition: []
action:
  - service: light.turn_on
    data: {}
    target:
      entity_id: light.living_room
This simple automation will turn on the living room light as soon as you walk through the door. When to turn off the lights, is where PIR motion sensors fall behind. So, lets assume you are already in the room watching TV. If you setup this simple automation in reverse (eg. turn off the lights when I leave the living room), it will result in a lights off while you are sitting at the TV. Because you are not moving, movement has been cleared for the PIR sensor detection window (detection cooldown), inheriting a state “off” of the binary_sensor entity. Thus, triggering the lights to turn off.
Example 2: Using Only a mmWave sensor (FP1)
description: "Turn ON light when I walk in the Living Room"
mode: single
trigger:
  - platform: state
    entity_id:
      - binary_sensor.living_room_fp1
    to: "on"
condition: []
action:
  - service: light.turn_on
    data: {}
    target:
      entity_id: light.living_room
If you setup the same automation again, using the mmWave sensor as a trigger, the lights will not turn on instantly when you enter the room. mmWave sensors have a delay by design, ~5sec for the Aqara FP1, which is unacceptable for quick toggling lights. In those 5 sec, you will bang your little pinky in every piece of furniture on your way to the TV recliner. But, for keeping the lights on, an mmWave does a great job. You can setup the automation again:
description: "Turn OFF light when I leave the Living Room"
mode: single
trigger:
  - platform: state
    entity_id:
      - binary_sensor.living_room_fp1
    to: "off"
condition: []
action:
  - service: light.turn_off
    data: {}
    target:
      entity_id: light.living_room
With this automation, lights will be kept off because the mmWave sensor (FP1) will continuously detect motion.
Example 3: Using BOTH sensors in combination
The optimal scenario, is to use BOTH sensors. The logic is simple:
- Quick toggle the lights using the PIR motion sensor
- Keep the lights on using the mmWave motion sensor
- Turn off the lights using the mmWave motion sensor
This gives you the best of both worlds, will completely avoid false positives from the mmWaves’ sensor sensitivity (because you are not relying on it to turn on lights, only to turn them off) and lights will be instantly turned on by the PIR sensor when motion is detected (no delay like with the mmWave).
Verdict
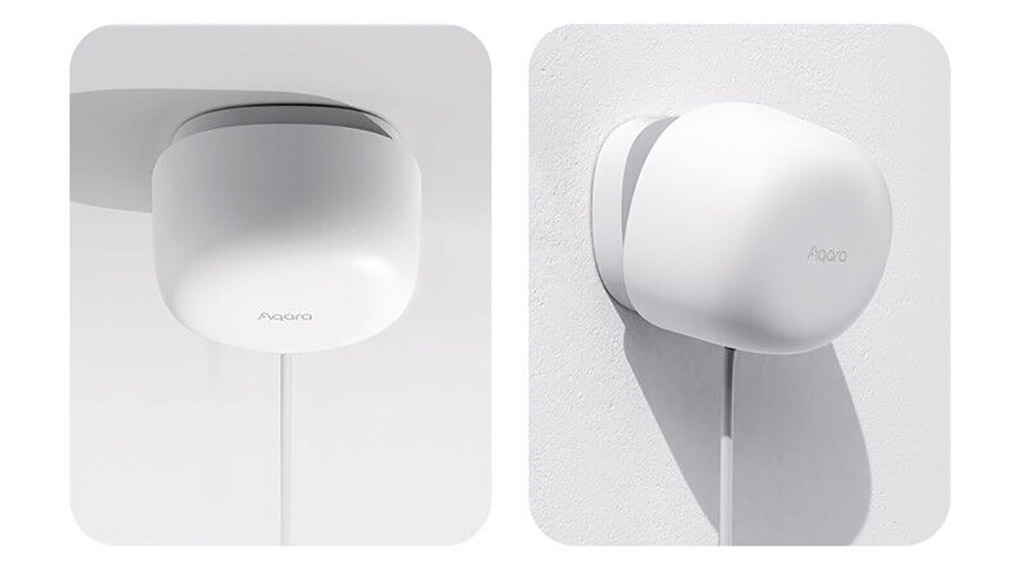
The Aqara FP1 is an innovative device when it comes to Home Automation. Even though mmWave technology is nothing new, it certainly was news for the majority of the Smart Home community in the past 12 months. Aqara jumped at the opportunity to pioneer this kind of device, and so far so good! If implemented correctly, the sensor works flawlessly in a smart home environment.
Any blemishes or shortfalls it has are probably going to get ironed out in the near future. Our only grudge is the sensor being detected as an EndDevice and not a router, even though is powered by an adapter and not a battery. The question is not whether this is a quality gadget, because it is. The question is do you need it for your smart home?
Well, you need to answer a few simple questions:
- Do I need an entity (eg. light) to stay turned on while I’m in the room and turned off when I leave?
- If the answer is yes, then you probably want an mmWave sensor.
- Do I need an entity (eg. light) to quick toggle when I enter a room?
- If the answer is yes, then you probably want a PIR sensor.
These bullet points are merely used to point you in the right direction and ease your decision. The main point considered here is cost, PIR sensors are much cheaper than mmWave sensors (Cheapest ZigBee PIR Motion Sensor). In reality, there are many advantages an mmWave sensor offers over a PIR sensor (accuracy, range, sensitivity, zones) so you would rarely need to go for a PIR sensor instead of an mmWave sensor, such as the Aqara FP1. The ideal scenario would be to utilize both types of sensors.
If you do decide to purchase the Aqara FP1 Human Presence Sensor, consider using one of our affiliate links bellow.
![]()
AliExpress | AliExpress | AliExpress | AliExpress![]()
Amazon.com | Amazon.co.uk | Amazon.de
Amazon.ca | Amazon.nl | Amazon.es
Amazon.it | Amazon.fr
*If links fail to open, try disabling your AdBlocker.
UPDATE: We’ve made a detailed head-to-head comparison of the top three mmWave presence sensors available currently on the market: Aqara FP1, Tuya ZY-M100 and Tuya PS-HPS. Read the full article.


Hi, I m interested in ur Web Site featuring Smart Products. Tqvm.
Hi I was wonder if you help in understanding your automation. I am able to get the automation to turn on with the PIR , which as you know turns off after no detection, After a couple of tries i have been able to keep the light on for a while but i am unable to get it it turn off on leaving. I have a group entity with the Aqara PI and Aqara FPI presence . My question is to turn off did use the entity Aqara FPI presence event , if so this does not seem to be working for me and the light stays on. I am using Node Red for automation. I have tried to use your examples above but without success.Any ideas advise would be appreciated please.
Hello Mike,
The automation is fairly simple. When the state of the entity changes to off (no motion), turn off the lights.
In the example, there are no conditions or other triggers. In your example, maybe you are calling a sequence of both entities (Aqara PIR and FP1), so the automation never triggers. I would have to look at your flow to know.
Consider creating the automation only with the FP1’s entity and see how it goes.
Cheers,
SHS
I habe a cc2531 and the FP1 the Software on the cc2531 ist this: https://github.com/Koenkk/Z-Stack-firmware/tree/Z-Stack_Home_1.2_20211115/20211116/coordinator/Z-Stack_Home_1.2/bin/source_routing
I can see the FP1 at home assistant but I have this message: 2023-01-15 09:08:55: Received message from unsupported device with Zigbee model ‘lumi.motion.ac01’ and manufacturer name ‘aqara’ so I can’t use the FP1. The hole sytem from Home assistant is on the newest Version. Can you help me to fix the Problem?
Hi,
From the link you gave me, seems like you have flashed the router firmware.
You need to flash the coordinator firmware: https://github.com/Koenkk/Z-Stack-firmware/tree/Z-Stack_Home_1.2_20211115/20211116/coordinator/Z-Stack_Home_1.2/bin/default
This is probably your cause.
Are u using it with ZHA or Z2M? What channel is your coordinator on?
Cheers
Hi, thank you for your answer. I have installed this Software: https://github.com/Koenkk/Z-Stack-firmware/blob/Z-Stack_Home_1.2_20211115/20211116/coordinator/Z-Stack_Home_1.2/bin/default/CC2531_DEFAULT_20211115.zip
The coordinator Channel is 15 and I am using Home Assistent with zigbee2mqtt.
Hello Volker,
Seems like your coordinator is the issue. Please see this:
I’m using a CC2530 or CC2531, which firmware should I use?
This depends:
Zigbee 3.0 firmwares are not recommended for the CC2530 and CC2531 (since those are not powerful enough)
If you have a network of 1 – 15 devices, the Z-Stack_Home_1.2 default firmware is recommended.
If you have a network of 15+ devices, the Z-Stack_Home_1.2 source routing firmware is recommended.
Note that the source routing firmware only supports 5 direct children, therefore you need to have routers in range of the coordinator.
Is it possible you have many devices and not enough routers? The CC2531 is very weak, it can’t handle the bandwith.
I would suggest going for a Sonoff ZBDongle-E or Home Assistant Sky Connect (EFR32MG21).
Awesome review! Thank you.
I try to get more informations about the T-Points on the pcb.
What I know so far:
===GND_USB===
-BLACK-USB-CABLE
-The 4th PIN on the “Connector Port”, this one with 6 nameless points, start count from -usb-cbl to qr-code sticker
-T32
-The 2 from 4 pins of the button, wich show to the qr-code
===5V_VIN_USB===
-T33
It would be really nice to find a kind of UART….