The new Aqara G5 Pro Camera Hub is generating a lot of buzz in the smart home space – and rightfully so. This device is a full-featured beast of a camera with built-in Matter and Zigbee hubs. It can be used to control any Zigbee or Thread device within the Aqara ecosystem, eliminating the need to use other hubs for their own devices.

In this article, I am sharing my experience with the new Aqara G5 Pro Camera Hub. I tested in detail what it offers and how it works in the Aqara app, in Home Assistant over HomeKit and finally in Frigate. The Aqara G5 Pro supports local RTSP streaming which is a very welcome feature!
Aqara G5 Pro Camera Models
The Aqara G5 Pro Camera Hub is available in Wi-Fi and PoE variants. While there are no differences between the two in their core specifications, they differ in the main connectivity protocol. If you have Power over Ethernet (PoE) at the intended location you plan on installing the Aqara G5 Pro camera, it’s always best to go wired.


| Aqara G5 Pro (PoE) | Aqara G5 Pro (Wi-Fi) | |||
|---|---|---|---|---|
| Model | CH-C03E/CH-C03D | CH-C07E/CH-C07D | ||
| Resolution | Quad HD 2688×1520 | Quad HD 2688×1520 | ||
| Image Sensor Size | 133° (Diagonal) | 133° (Diagonal) | ||
| Aperture | f/1.0 | f/1.0 | ||
| Focal Length | 4.2 mm | 4.2 mm | ||
| Power Input | USB-C: 5V 2A / PoE: 48V 0.27A | USB-C: 5V 2A | ||
| PIR Detection Angle | Horizontal 100°, Vertical 65° | Horizontal 100°, Vertical 65° | ||
| Spotlight | Rated Power: 3W, Beam Angle: 120° Color Temperature: 3000K | Rated Power: 3W, Beam Angle: 120° Color Temperature: 3000K | ||
| Communication Protocols | Ethernet IEEE 802.3af, Zigbee&Thread IEEE 802.15.4, Bluetooth | Wi-Fi IEEE 802.11 b/g/n/ac 2.4-5 GHz, Zigbee&Thread IEEE 802.15.4, Bluetooth | ||
| Dimensions | 70.5×70.5×89 mm (2.78×2.78×3.50 in.) stand not included | 70.5×70.5×89 mm (2.78×2.78×3.50 in.) stand not included | ||
| Operating Temperature | -30°C ~ +50°C (-22°F ~ 122°F) | -30°C ~ +50°C (-22°F ~ 122°F) | ||
| Operating Humidity | 0 ~ 95% RH, No Condensation | 0 ~ 95% RH, No Condensation | ||
Overview and Package Contents
The Aqara G5 Pro Camera Hub ships in a nice, branded box containing the device itself, a USB-C cable, a mounting bracket, some screws for installation and a user manual. Everything is neatly packaged and protected from shipping and mishandling damage.
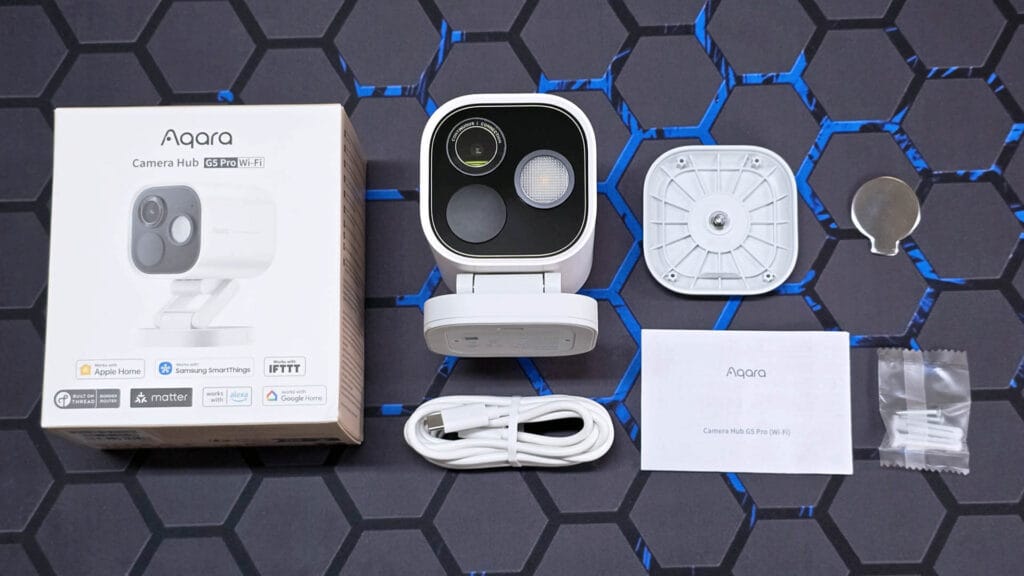
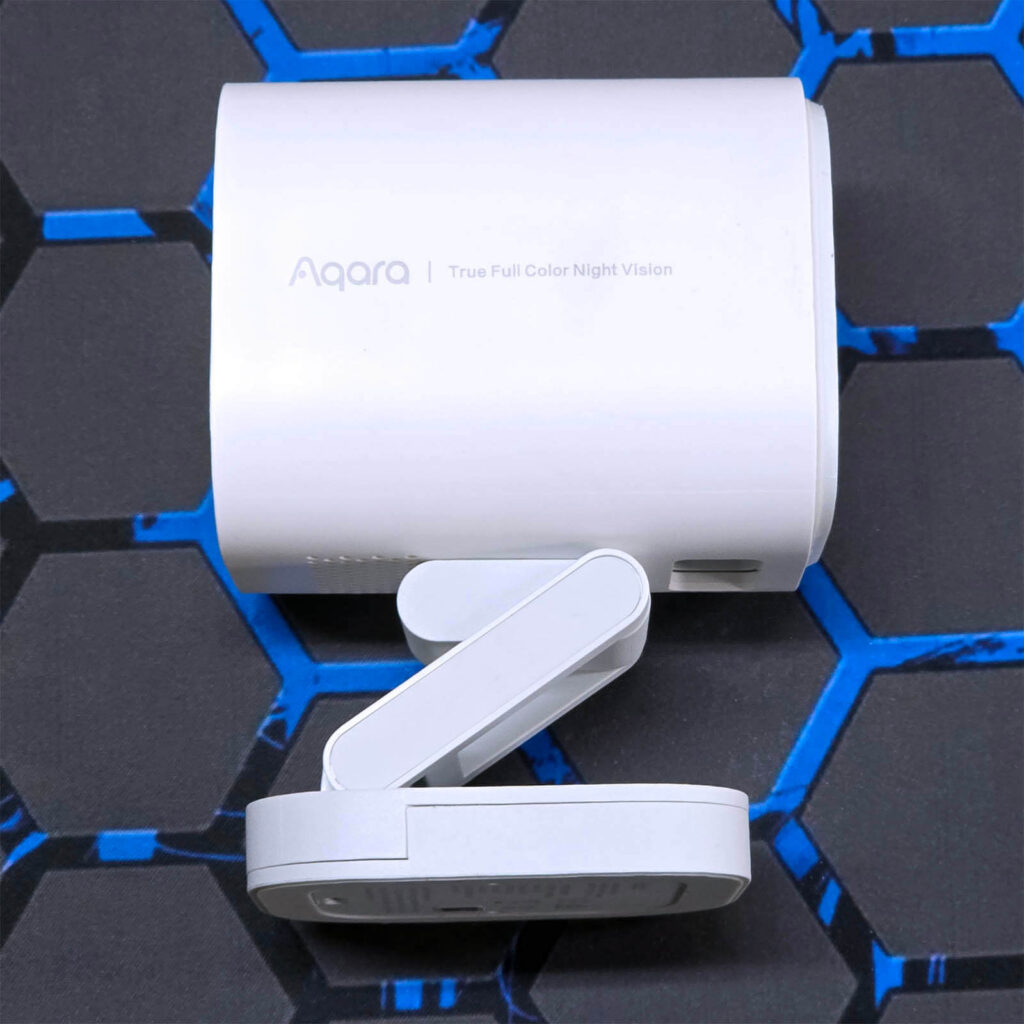
My first impression of the Aqara G5 Pro is how heavy and robust it feels. The main body is very compact, and nothing wiggles inside. I’ve never handled a similar camera, perhaps because I’ve never owned one of this quality and price range. The main lens has an aperture of f/1.0, which is quite large. This allows more light to enter the lens, producing better video and image quality. There’s also a large LED spotlight for full-color night video.
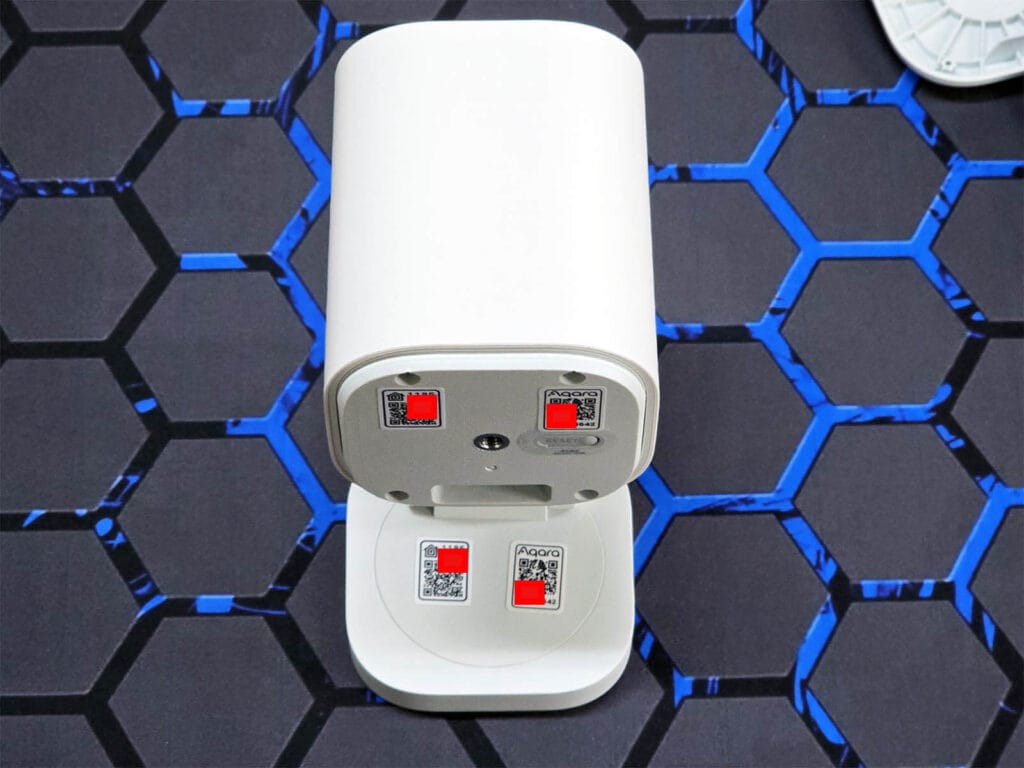
The Aqara and HomeKit pairing codes are printed on the back of the camera for safe keeping. The device reset and pairing button is placed on the back as well, and covered with a “do not tear” sticker. This falls inline with the IP65 rating of the G5 Pro, which is dust and water resistant. It can also withstand temperatures of -30°C and +50°C, suitable for use in extreme environments.


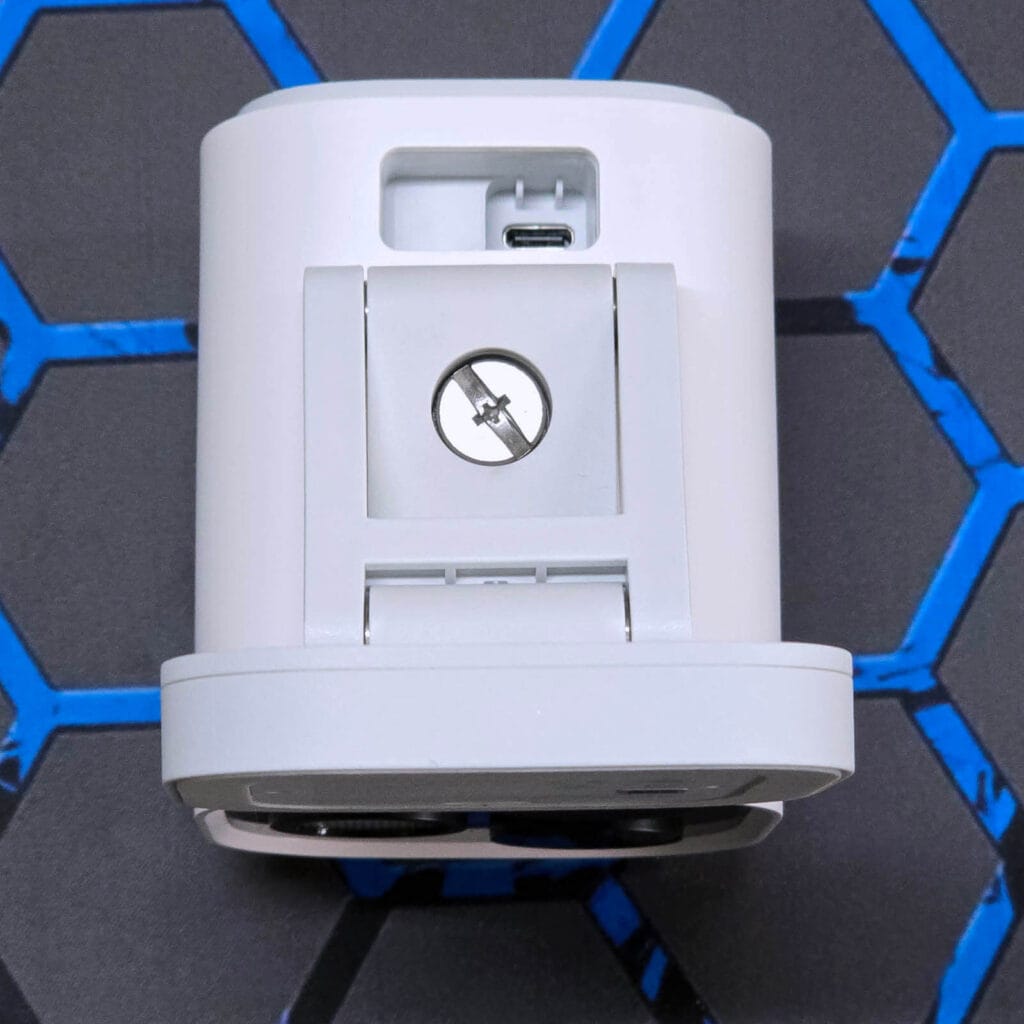
The G5 Pro uses an USB-C connector for power, which requires a 5V2A power supply. The adapter is not included in the box. The PoE version of the G5 Pro has a female RJ45 connector attached here as well, which can be used for powering the device.
The mounting bracket on the Aqara G5 Pro is quite strong and well made. It remains in whatever position you set it to, not moving even a millimeter. The base rotates 360 degrees and it swivels back and forth completely, which allows for much greater installation flexibility. If you need to, you can also remove it by unscrewing the large screw holding it in place.
The QR pairing codes are also dual printed on the back of the camera. The base mounting bracket is held together by a single screw that needs to be removed before the camera can mounted. The screw is covered by a rubber slit to keep it concealed and prevent it from corroding.
Aqara G5 Pro App Pairing and Setup
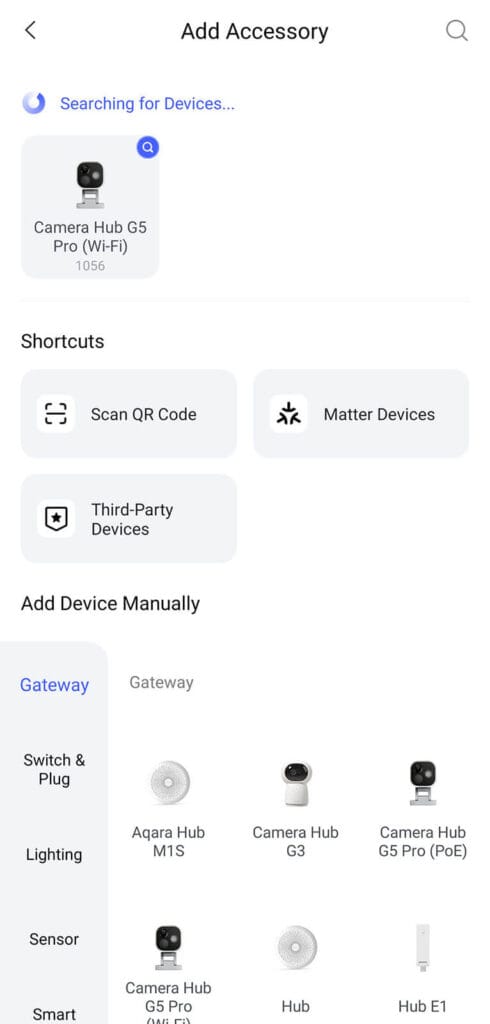
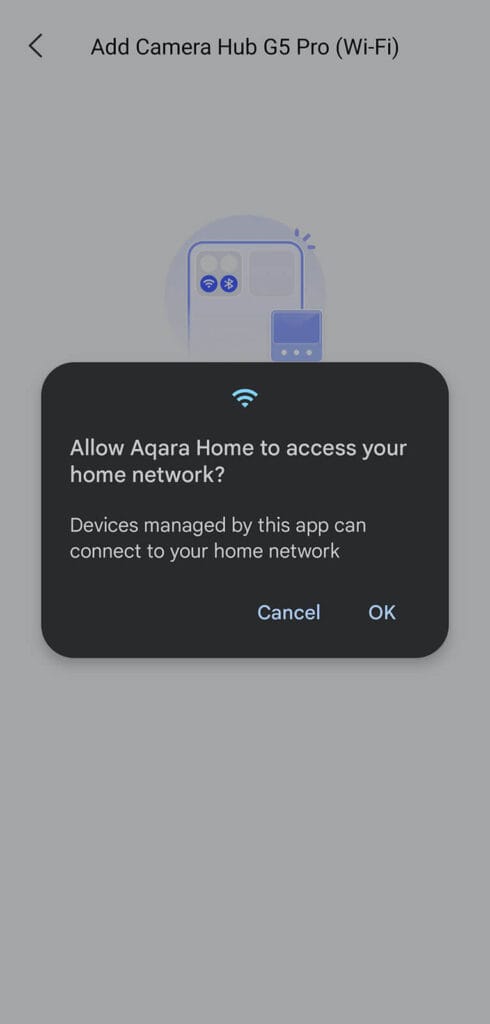
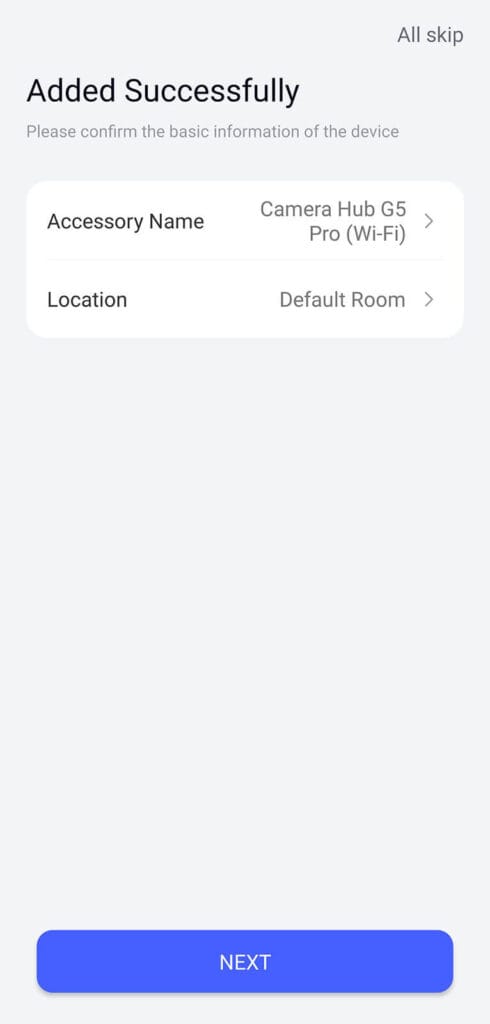
The Aqara G5 Pro Camera is a multi-protocol hub, which makes pairing very easy. With Bluetooth enabled, it’s immediately detected and identified in the Aqara app. This feature is what Aqara refers to as “magic pair”. The app must be used for onboarding the camera and configuring some basic settings, before being used in third-party hubs. Here’s what the pairing process looks like:

Once the camera was up and running in the app, I went through all settings one by one and tweaked some things. The first thing I did was check for a firmware update. The camera went through two firmware updates: one for the main firmware and another called algorithm update, which are the AI detection features of the G5 Pro.
The main camera setting menu includes controls for the indicator light, time lapse video, privacy mode and some basic video settings. This sub-menu allows you to add a watermark to the frame, choose the display format, and control the spotlight behavior.
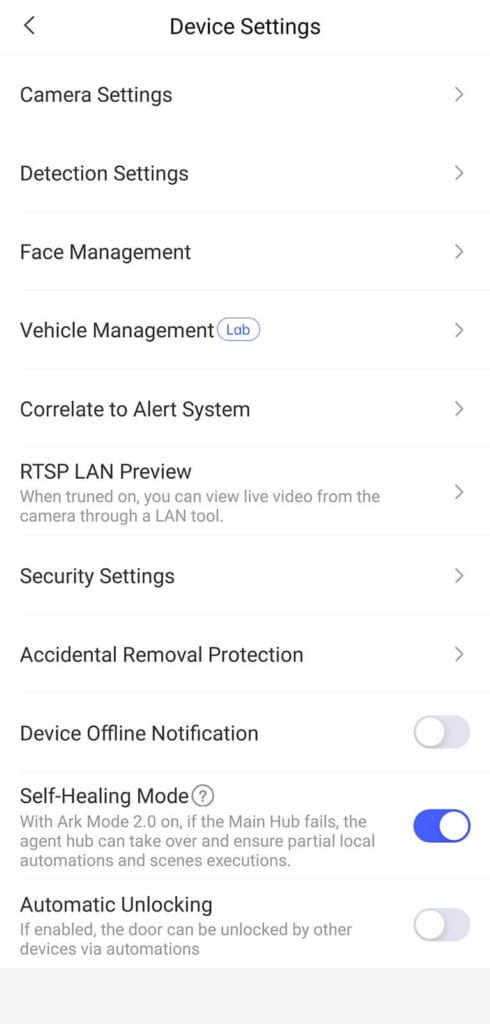
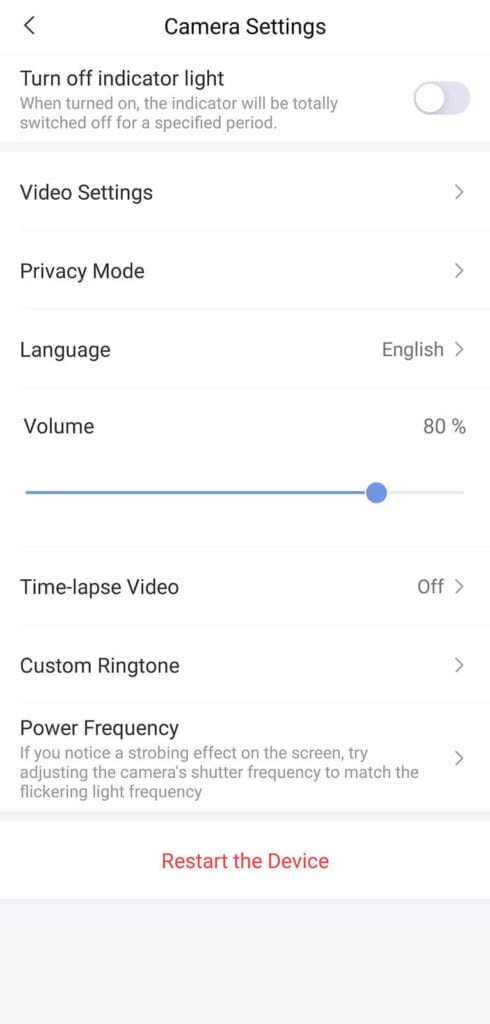


In the main device settings menu, you can enable something called self-healing mode. This is an operation mode only used in the Aqara ecosystem, which allows automatic main hub swapping if one fails. The accidental removal protection setting matches the camera to your account permanently, preventing someone from using it if it gets stolen. Almost every feature of the G5 Pro can be configured and set up in the Aqara app, although the menus could be clearer and more intuitive.
The next thing I examined were the AI detection features of the Aqara G5 Pro. This camera is a powerhouse, capable of detecting and tracking people, packages, vehicles, animals, sounds and can even differentiate between faces. Each of these features has its own submenu which allows you to fine-tune and configure the way they are used.
As all of these AI detection features can be done with Frigate locally, they are not something I intend to use in Aqara’s ecosystem. I consider this type of data very private and sensitive, so it needs to remain completely unhooked from any cloud or app dependency.
Aqara G5 Pro Home Assistant Integration (HomeKit)
The Aqara G5 Pro camera is automatically detected in Home Assistant through the HomeKit Device integration, once it’s initially connected to your home network. It exposes some basic entities for controlling and viewing the video feed. It appears the video quality defaults to 360p, which is not really useful as this camera goes up to 1520p.

However, you can control the night light and mute the microphone via the HomeKit integration. There’s also an alarm control panel entity exposed, which appears to be part of this camera’s security alarm feature. This is useful to test if things are working initially, but since the G5 Pro is RTSP-enabled, the best way is to configure and use it in Frigate.
Aqara G5 Pro Frigate Setup (RTSP)
The Aqara G5 Pro Camera supports local RTSP video streaming. The app allows you to enable and access the feed locally through apps like Frigate, Blue Iris or other NVR software. However, the app does not explain how to access the video stream with different parameters or access the audio stream, which I had to figure out on my own. Let’s break it down.
Enabling the RTSP stream
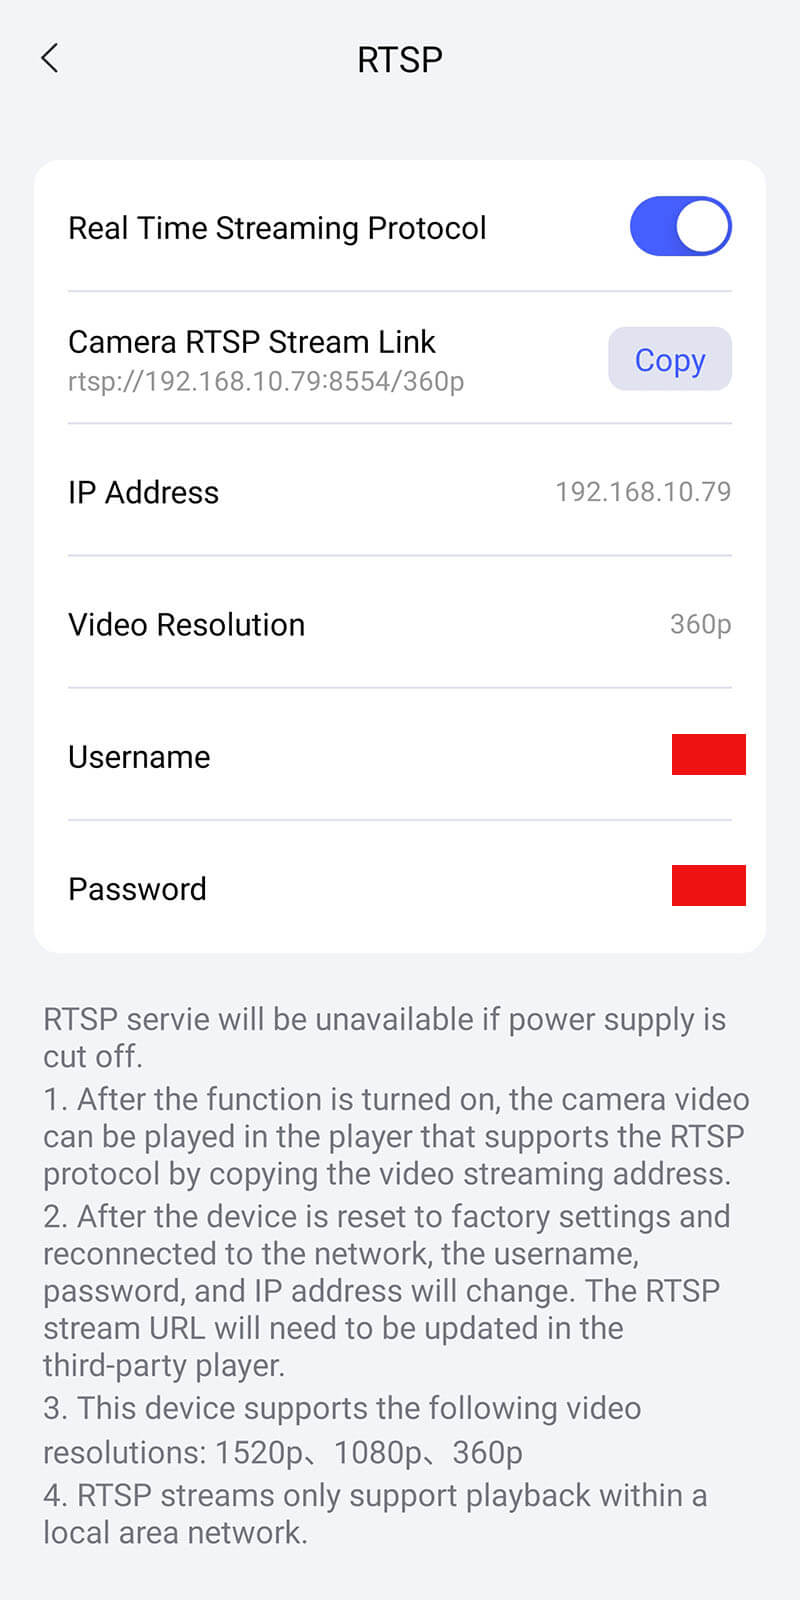
The first thing to note is that the app generates a 3-character username and password combo for accessing the Aqara G5 Pro over RTSP.
At the bottom, you will notice it says that these are regenerated when the camera is reset. Weirdly enough, this did not happen during my tests, as the camera retained the same username and password when it was reset. There is no way to manually change the username and password.
The first thing you need to do is set a static IP address for the camera in your router. This is a crucial step that makes sure the G5 Pro is always accessible at the same IP. Frigate needs to be able to access this IP at all times, otherwise it will produce an error, obviously.
The Aqara G5 Pro Camera supports RTSP streaming with 1520p, 1080p and 360p video resolutions. These three resolutions are more than enough to create a main and sub stream in Frigate. However, the actual performance depends on your hardware capability and whether or not you are using a TPU, such as the Google Coral.
Format for accessing the Aqara G5 Pro RTSP streams (123 = Username, 456 = Password):
#360p resolution
rtsp://123:456@192.168.10.79:8554/360p

#1080p resolution
rtsp://123:456@192.168.10.79:8554/1080p

#1520p resolution
rtsp://123:456@192.168.10.79:8554/1520p
Before you add this to your Frigate config and tweak it even more, it’s best to test whether the stream works properly. This can be done in VLC by clicking Media > Open Network Stream. If you get a feed successfully, you can move on to configure the camera in Frigate.
Video feed restreaming with go2rtc
With the RTSP URL now usable, you can add the G5 Pro to Frigate like any other camera. The simplest, most basic configuration for accessing the feed will look something like this:
mqtt:
  enabled: false
cameras:
  aqara_g5_pro:
    enabled: true
    ffmpeg:
      inputs:
        - path: rtsp://123:456@192.168.10.79:8554/1520p
          roles:
            - record
.....
If you are using Home Assistant, the best approach is to configure Frigate to restream the video feed. This allows you to use a video feed for detection in Frigate and Home Assistant live view at the same time, without having to make two separate connections to the camera. The video feed is copied from the original video feed directly to avoid re-encoding.
Now, Frigate uses go2rtc to provide its restream and MSE/WebRTC capabilities. go2rtc is built-in within Frigate, so you do not need to install it separately. You only need to configure the go2rtc stream and allow Frigate to read it locally. Here’s a very basic config of how this looks like:
mqtt:
  enabled: false
go2rtc:
  streams:
    aqara_g5_pro:
      - rtsp://123:456@192.168.10.79:8554/1520p
cameras:
  aqara_g5_pro:
    enabled: true
    ffmpeg:
      inputs:
        - path: rtsp://127.0.0.1:8554/aqara_g5_pro
          input_args: preset-rtsp-restream
          roles:
            - record
....
This basic config will allow you to view the feed in the Frigate UI and prep the restream to be accessed in Home Assistant’s dashboards or cards without latency. The RTSP restream preset is important here, as it allows Frigate to handle things correctly.
Adding the audio stream
The next step is to add the audio stream to the config. The audio stream quality is quite good, although some arguments can be passed to make it even better. I am still experimenting with this and trying to find the perfect config. Also, two-way talk does not work at the moment and I’m still trying to figure out why. For now, this is how you can enable audio feed for the Aqara G5 Pro camera in Frigate:
go2rtc:
  streams:
    aqara_g5_pro:
      - rtsp://123:456@192.168.10.79:8554/1520p
      - "ffmpeg:aqara_g5_pro#audio=aac#audio=opus#async"
cameras:
  aqara_g5_pro:
    enabled: true
    ffmpeg:
      inputs:
        - path: rtsp://127.0.0.1:8554/aqara_g5_pro
          input_args: preset-rtsp-restream
          roles:
            - record
.....
Frigate prioritizes Opus audio for its real-time WebRTC streams, which are used in Home Assistant. However, to guarantee that recorded footage and live streams (especially via MSE) play correctly across a diverse range of devices and media players, it also encodes the audio with AAC. This is why it’s best to use both. When async is enabled, go2rtc simply instructs ffmpeg to process the audio stream independently, without waiting for it to complete.
Creating dual streams
With Frigate, it’s wise to create two video streams: one for recording and another for detection. Both feeds are restreamed using go2rtc to prevent duplicate trips and connections to the Aqara G5 Pro camera. For now, I decided to use the 1520p stream for recording and the 360p stream for detection. For the sub stream, the audio can be disabled unless you decide to use audio for detection too. In this case, the audio role needs to be added as well.
mqtt:
  enabled: false

go2rtc:
  streams:
    aqara_g5_pro:
      - rtsp://123:456@192.168.10.79:8554/1520p
      - "ffmpeg:aqara_g5_pro#audio=aac#audio=opus#async"
    aqara_g5_pro_sub:
      - rtsp://123:456@192.168.10.79:8554/360p
      - "ffmpeg:aqara_g5_pro_sub#audio=aac#audio=opus#async"
cameras:
  aqara_g5_pro:
    enabled: true
    ffmpeg:
      output_args:
        record: preset-record-generic-audio-copy
      inputs:
        - path: rtsp://127.0.0.1:8554/aqara_g5_pro
          input_args: preset-rtsp-restream
          roles:
            - record
        - path: rtsp://127.0.0.1:8554/aqara_g5_pro_sub
          input_args: preset-rtsp-restream
          roles:
            - detect
    live:
      stream_name: aqara_g5_pro
.....
When creating dual streams, it’s also important to configure which stream will be used for live viewing in the Frigate web UI. This is done by defining the stream under the live parameter in the config. It comes down to personal preference, of course, but I use the main stream for recording and the low-quality sub stream for detection.
Once you have the streams ready, you can configure Frigate for detection like you normally would for any other camera. This is beyond the scope of this setup guide, as object detection is very specific to your needs and use case. Check out the official Frigate documentation for a reference guide.
Frigate Integration in Home Assistant
The last thing that remains is to actually add the Frigate integration in Home Assistant, if you haven not already. The Frigate integration requires the mqtt integration to be installed and manually configured first. In addition, MQTT must be enabled in your Frigate configuration file and Frigate must be connected to the same MQTT server as Home Assistant for many of the entities created by the integration to function.
Here’s a sample MQTT configuration to add at the top of the Frigate configuration:
mqtt:
  host: 192.168.10.79
  port: 1883
  topic_prefix: frigate
  client_id: frigate
  user: mqtt_username
  password: mqtt_password
  stats_interval: 60
Once Frigate reboots, it will start to push detection events data to Home Assistant via the integration.
The main video feed is restreamed to Home Assistant with buttery smooth FPS and crystal clear picture. This is the camera entity that you actually use in your dashboard to display the feed. I highly suggest configuring the new and overhauled Advanced Camera Card (previously known as the Frigate card) to set up and configure your dashboard. This is the final piece of the Frigate RTSP setup that makes the Aqara G5 Pro camera work with Home Assistant perfectly. In the most basic configuration, here’s how the card configuration looks like:
type: custom:advanced-camera-card
cameras:
  - camera_entity: camera.aqara_g5_pro
    live_provider: go2rtc
    go2rtc:
      modes:
        - webrtc
.....
Removing Internet and App Dependency
With the Aqara G5 Pro added and working in Home Assistant and Frigate, I don’t really see a need to use it with the Aqara app. Everything the app offers can be configured in Frigate, and then some. Detection zones, object tracking, event recording and even continuous recording can be setup and used without issues.
This is why I wanted to find out if the G5 Pro is usable once the app and cloud dependencies are eliminated.
The first thing I did was remove the Aqara G5 Pro from the app. Once everything was configured and setup in the app, including the RTSP stream, I simply removed the camera from the Aqara Home app. The camera continued to operate in Frigate and Home Assistant without issues.
The next thing I did was cut the internet access of the camera completely, detaching it from the cloud. I did this by setting a firewall rule which blocked the G5 Pro from accessing the web. Again, the camera continued to operate correctly without internet access in Frigate and Home Assistant. To make sure my rule was applied, I also unhooked my WAN port temporarily, which confirmed the camera could work without internet access in Frigate and Home Assistant.
Final Thoughts
I highly appreciate the fact Aqara decided to wake up and unlock their ecosystem by allowing the camera to be accessed over RTSP. This feature is highly underappreciated by manufacturers, along with the entire open source home automation space.
Once I managed to set it up properly in Frigate via RTSP, the Aqara G5 Pro operated properly even without an internet connection. Removing the camera from the Aqara app also makes no difference, as it continues to run as it should without being paired in the app. Put simply, the Aqara G5 Pro can operate completely locally with Home Assistant. It’s worth noting that RTSP is disabled by default, so you do need to use the app initially and enable the stream.
Further, the Aqara G5 Pro camera produces high quality video and audio feed and has a very impressive detection feature set. As my review is focused on Frigate and Home Assistant, I highly suggest you check out this video review by Brian from Automate your Life if you need more information on the quality and AI features it offers.
Lastly, it’s worth noting that the Aqara G5 Pro is quite a pricey camera. The reason for this is that it’s not only a camera. It’s a multi-protocol smart home hub, designed to control Zigbee and Thread devices from the Aqara ecosystem. It also functions as a Matter hub, which can be used to bridge the gap between Aqara devices and third-party Matter controllers.
If you are hunting for a really well built, high quality camera with local streaming, the Aqara G5 Pro is worth considering. Whether or not it’s worth the price tag is a personal decision, of course, I’m just saying the G5 pro delivers what it promises. Here’s where you can get it:


Can you use it as zigbee repeater or similar?
If not, you are paing a lot for only a good camera.
You pay for not used hardware inside the camera.
You can, but only in the Aqara ecosystem. So yes, it’s essentially a multi-protocol hub which costs a lot for only a camera.
Great post!
Exactly what I wanted to know, but you reference that it’s necessary to use the Aqara app to include the camera before it’s possible to add it to Home Assistant.
I assume to get the latest updates, right?
And there’s another question that’s not really related to the camera, but to Aqara Zigbee devices.
I have a couple of thermostats and climate sensors from Aqara. I just added them via Zigbee in HomeAssistant.
I don’t think I can update them via HA, I have to use the Aqara app which I didn’t want to install.
Does it break anything if I use the app after adding the devices to HA?
And maybe just to update them, or can I do that through HA as well?
You need to use the app to enable the RTSP stream, as it’s disabled by default.
And no, firmware updates should not brake anything for Aqara Zigbee devices.
And they never have, in my experience.
Some models can be updated from Zigbee2QMTT directly
That’s great to hear.
Well, I use ZHA and not Zigbee2MQTT.
So, I guess it makes sense to install Zigbee2MQTT and enable my devices step by step, including switching automations room by room.
And once this is done, I think about moving on with the G5 Pro Camera.
What I have seen in the Aqara App is that I need a Hub, which is the camera, but if I want to add my other devices already, I can’t.
So, I need to check Zigbee2MQTT.
How can i use the g5 pro with ffmpeg?
You can encode the stream by adding ffmpeg before rtsp, but in my tests it added a delay in Frigate
Thank you so much for such a detailed review! I finally bought it and it’s a fantastic camera!
Two days ago they released a new fw that adds ONVIF functionality. But before you got crazy… ONVIF port is 5000 , user and pass same one as rtsp.
The entities are disabled and unavailable. What am I missing ?
Good day,
I just installed my G5 (Wifi version) in my workshop for testing, and have been following your guide.
But as i#m not forwarding to HA i#m just running straight RTSP no restreaming.
But I can not get any video in Frigate.
Any Idea on below config:
Aqara_G5:
enabled: true
ffmpeg:
inputs:
– path: rtsp://###:###@192.168.1.106:8554/1520p
roles:
– record
– path: rtsp://###:###@192.168.1.106:8554/720p
roles:
– detect
detect:
enabled: true
The logs are telling me the camera is giving 404 Stream not found, so I’m guessing there is some thing wrong on the camera firmware side.
The app is enabling RTSP and user/password is correct according to the app.
404 usually points to a network issue, your camera is not accessible to Frigate on your local network.
Try to access the stream in VLC player directly, just to see it its streaming over RTSP fist and go from there.
Forgive my newbie question. I am an experienced dev in the Microsoft space, but just retired and trying to get to grips with home automation with HA. I’ve got HAOS running on a Raspberry Pi and working well. I want to get the G5 Pro camera (and others) working as described in this excellent article. I understand all the words, but have some confusion on the details. I understand that I need to get MQTT and Frigate working. I’m assuming that they won’t all run on the existing Raspberry Pi? So, should I set up another Pi to run MQTT and Frigate, maybe with a Coral co-processor? Or can it all be done on one box? Basically do I need 1, 2 or 3 boxes to achieve all this? Basic advice on the physical setup would be very much appreciated.
Hello Andy!
No need to ask for forgiveness for noob questions, we were all noobs at some point!
You can absolutely run everything on a single Raspberry Pi with Home Assistant OS, MQTT, and even Frigate, but the experience really depends on the Pi model and what you expect performance wise.
HAOS (which I assume you have installed), is an operating system and you can install add-ons like Frigate, Zigbee2MQTT, and loads of others without issues.
Frigate, ideally, requires a TPU (see online for Google Coral TPU) to unload processing from the main CPU. With a Pi, this is a must if you intend to do camera detection.
Everything else can be run safely on the Pi.
I would recommend investing in a more powerful mini PC (N150 based one) so you don’t experience bottle necks in performance. Whatever you decide, do not use the Pi with an SD card.
Attach an SSD drive and run HAOS from it.
Let me know if you have other questions.
Cheers!
Hi 🙂
Thank you so much for this helpful and speedy response. As you suggest, I am running the Raspberry Pi with a PoE and M2 SSD HAT, so yes, HAOS is running off a 256GB Gen3 SSD, so that seems a good start. The Pi is only 4Gb, so I guess that may be the limiting factor. However, unless you suggest otherwise I think I will add a USB Google Coral TPU to the Raspberry Pi, and see if I can get HAOS, MQTT and Frigate all up and running on the same box. If performance is unacceptable, then I think Plan B would be to leave HAOS and MQTT on the Pi, and as you suggest, set up a separate N150 mini PC for Frigate. Would that make sense?
Cheers,
Andy
Yes, that’s a great start!
I think the Pi will be able to handle what you are describing without issues.
If you plan to expand later, it would be very easy to migrate.
HAOS has a very robust and bulletproof backup/restore system, regardless of which hardware you use.
So you are good for now.
Cheers!
Hi, and thanks for the article.
I tried to integrate my Aqara G5 Pro into Home Assistant through the HomeKit Device integration as described, but it never shows up. I always get the message: “No unpaired devices could be found.”
The camera is already on my Wi-Fi network and working in the Aqara app, but Home Assistant doesn’t detect it at all.
Is there anything specific to enable on the G5 Pro, or any known limitation that might block HomeKit pairing?
Thanks in advance for the help.
You can use ONVIF/RTSP to add it to Home Assistant. Simply enable the option in the app and use the local user/pass combo to add it via the streaming link provided