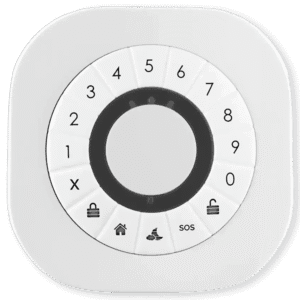

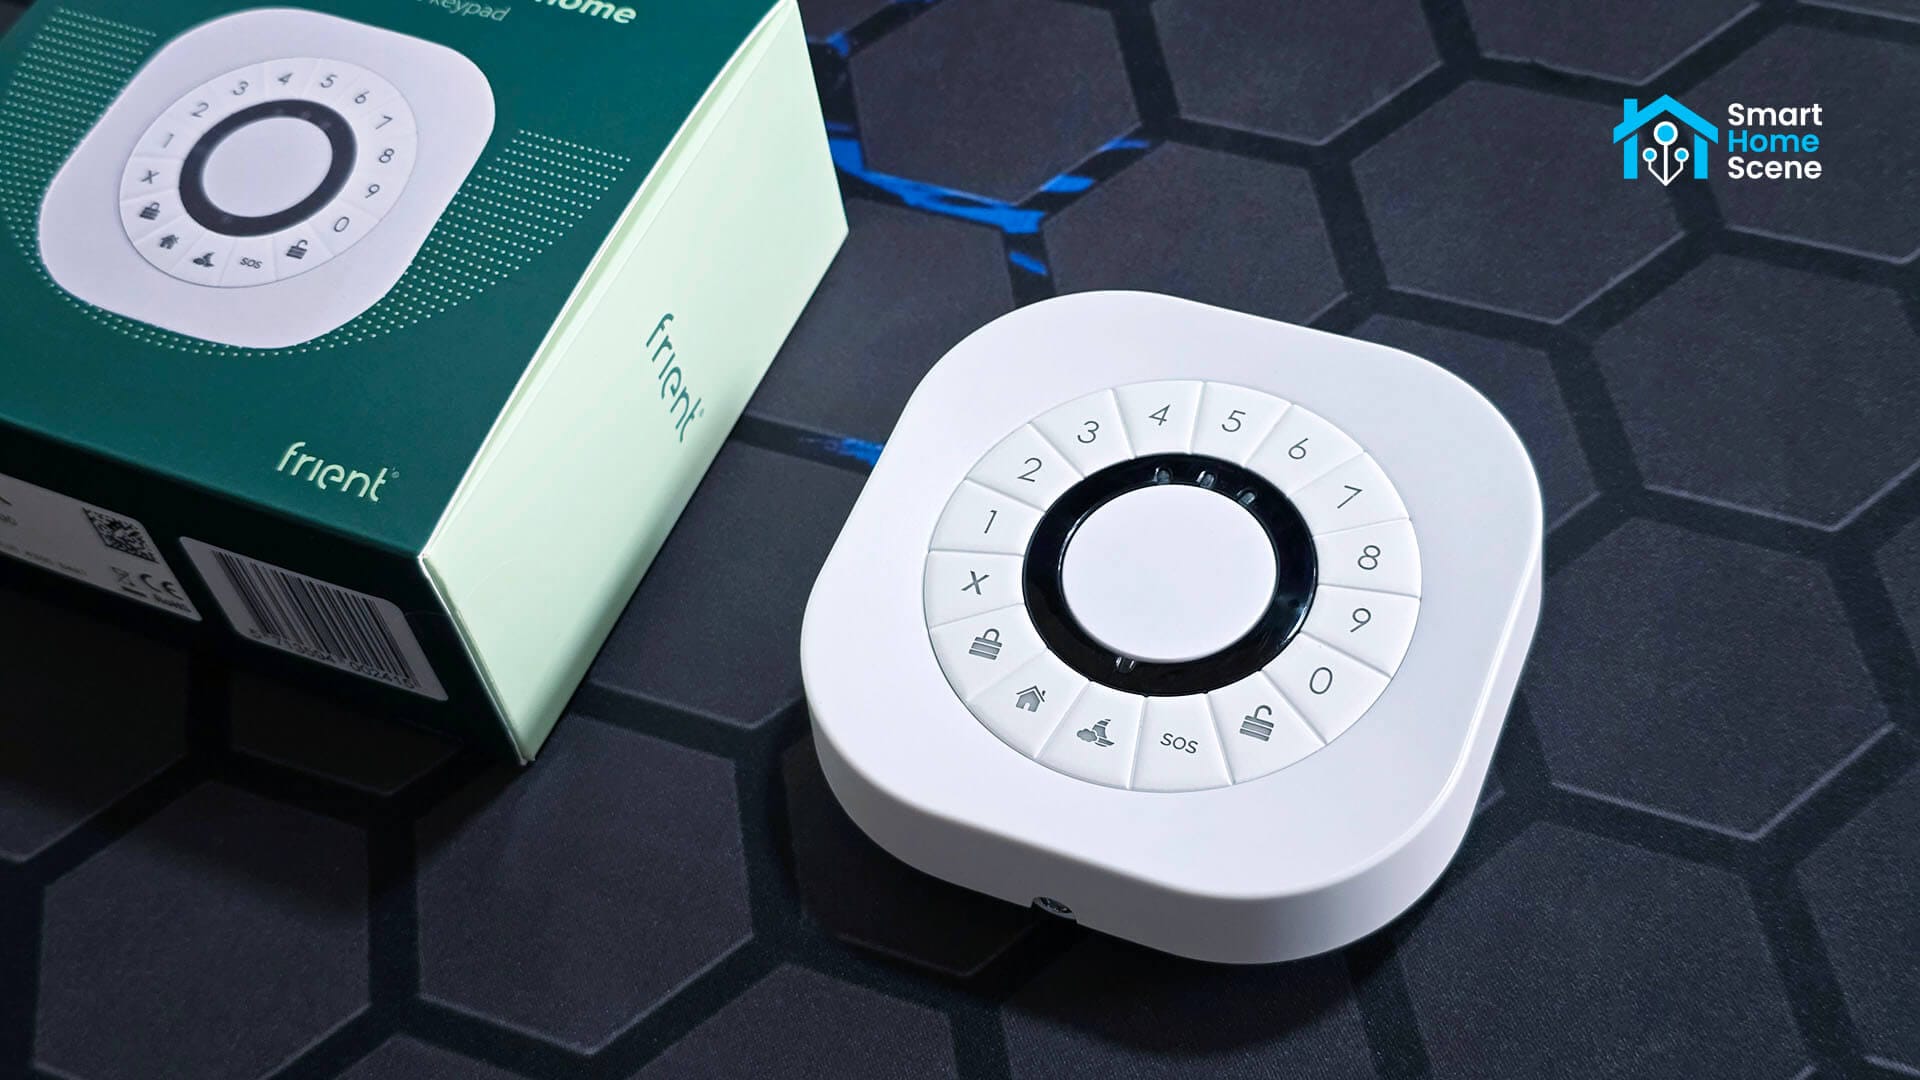
The frient Intelligent Keypad is a Zigbee controlled smart keypad built for people who want keyless entry and alarm control without relying on proprietary hardware. It is designed for both indoor and outdoor mounting, and combines a numeric code pad with an RFID tag reader so you can arm, disarm, or unlock a connected smart lock or alarm system with either a PIN or a tag.
For those who do not know, frient is the consumer brand of Onics, a Danish manufacturer of smart home devices and hardware formerly known as Develco. They offers various Zigbee smart devices like door and window sensors, motion sensors, vibration sensors, smart sirens, smoke detectors, smart buttons, electricity meters, and other gear. Almost their entire portfolio uses Zigbee, which is a win by itself in my book.
I bought the frient Intelligent Keypad to review and test it in Home Assistant. As this is not really a new product, the real question is not whether it integrates with Home Assistant. It does. The question is how it works, what you get once it is integrated into your setup, and how much work you need to put in yourself to make arming, disarming, and feedback actually function the way the box implies.
You can get the frient Intelligent Keypad on Amazon US, Amazon CA, Amazon DE, Amazon UK, Amazon NL, Amazon FR, Amazon IT and Domadoo.
Teardown and Package Contents
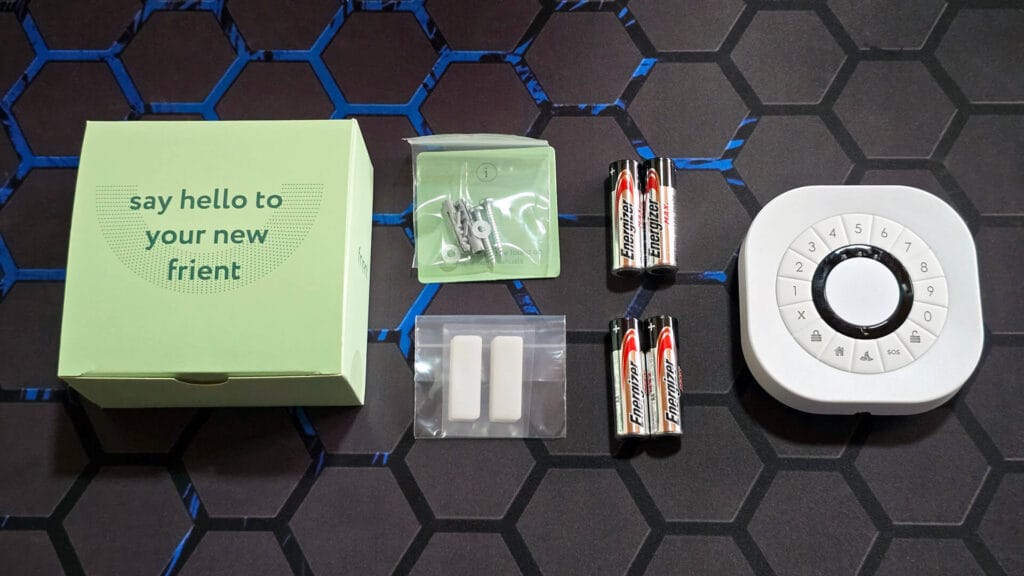
The frient Intelligent Keypad ships in a box containing the device itself, four AA batteries, a set of stickers and screws for installation, and a QR code for the user manual. The keypad is neatly packaged and slotted into the case to prevent shipping damage and mishandling.
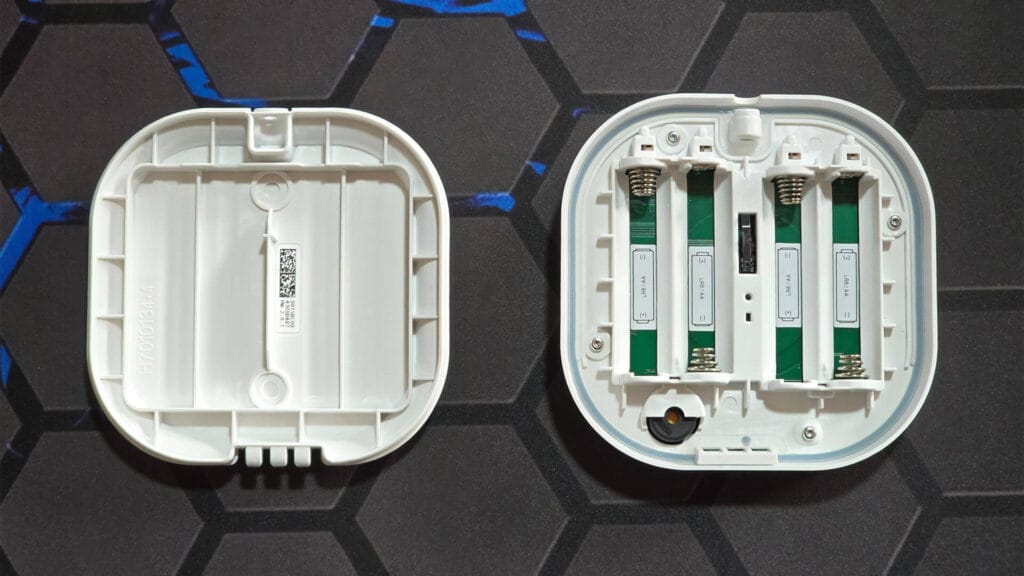
The keypad operates on four AA batteries, which should give it plenty of power for at least a year or two. Between the two sets of AA batteries, there is a very interesting tamper switch design. Since the cover is held in place by only a single screw, the idea is that if someone rips this off the wall while it is screwed in place, the back cover separates from the keypad and triggers the tamper switch, alerting you immediately.
Beneath the tamper switch there is a small hairpin hole for the pairing button. You can hold this to reset and re-pair the keypad. On the left side, there is a small speaker for audible feedback when pressing the buttons and operating the keypad.
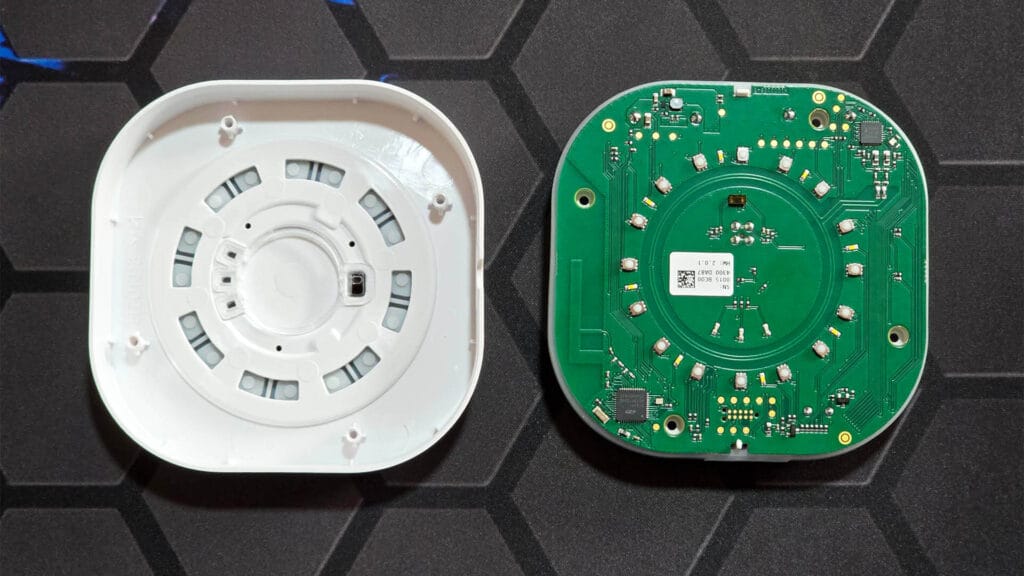
Once I removed the front cover, I was able to inspect the internals. The keypad has 16 buttons going around the middle ring, which is actually the RFID reader. The reader is positioned exactly in the middle, and you can use it with Home Assistant, more on this later. Just above the RFID reader, closer to the frient logo at the top of the board, there is a row of indicator LEDs, which handle general status feedback for the keypad.
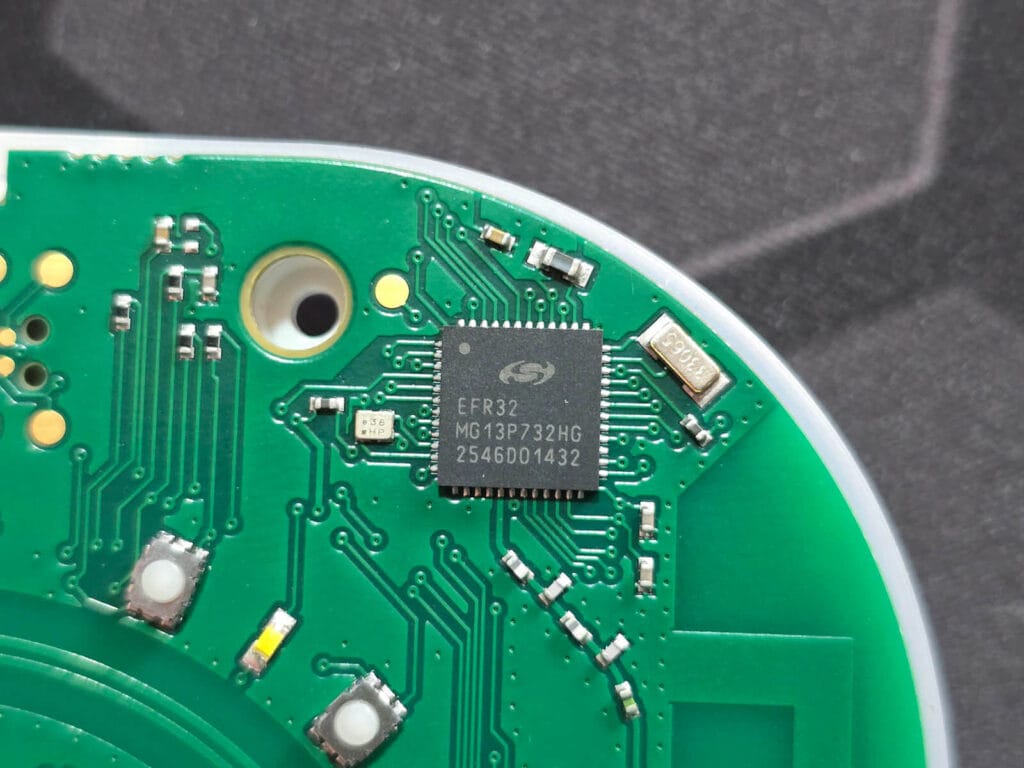
The main MCU is the Silicon Labs EFR32MG13 [Datasheet], a multiprotocol wireless SoC built around a 32-bit ARM Cortex-M4 core running at up to 40 MHz. It packs 512 KB of flash and 64 KB of RAM, and it is Zigbee and Thread capable, which lines up with frient using the same silicon platform across its Zigbee lineup.
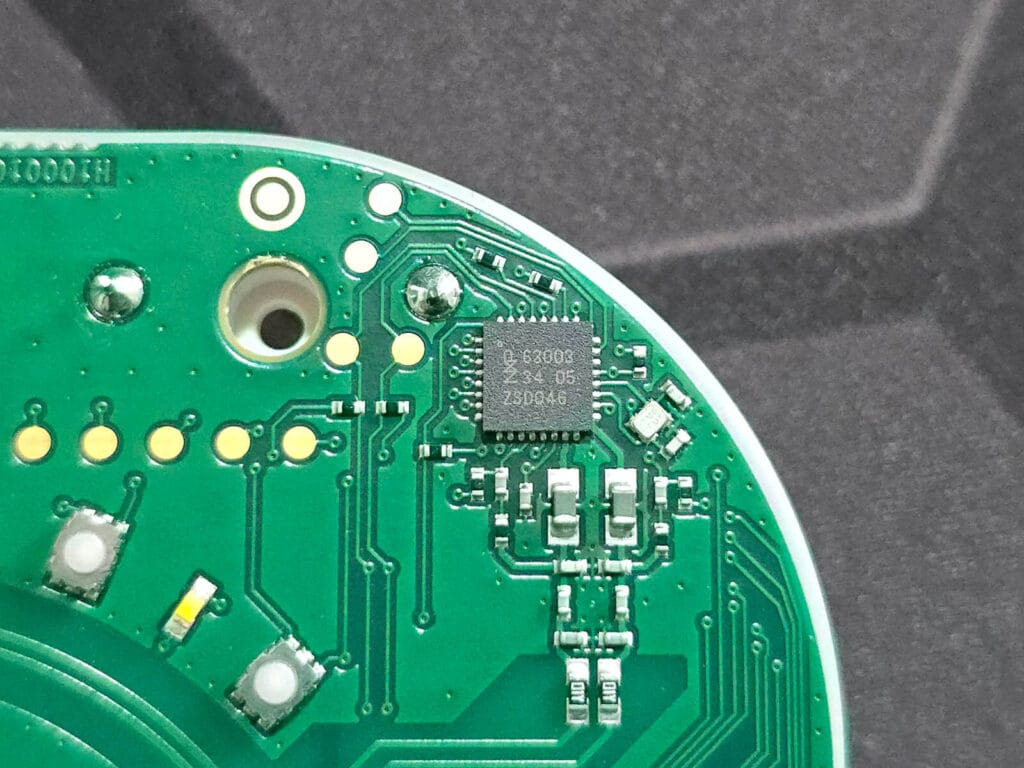
The second chip is an NXP MFRC630 [Datasheet]. This is a dedicated 13.56 MHz NFC frontend built for reading MIFARE and NTAG tags, which is the brains behind the RFID functionality of the keypad. It sits separate from the EFR32 and talks to it over SPI, handling all the actual tag reading work while the EFR32 focuses on Zigbee connectivity.
Battery Life and Tamper Detection
The frient Intelligent Keypad runs on 4 AA batteries, and mine reported 100% on both Zigbee2MQTT and ZHA right after pairing. Z2M also shows a voltage reading of 6400 mV. I have not had it running long enough yet for a real battery life test, but my educated guess tells me this can go 1-2 years without a battery change without issues. I will update this section once I have weeks of runtime data instead of a single reading.
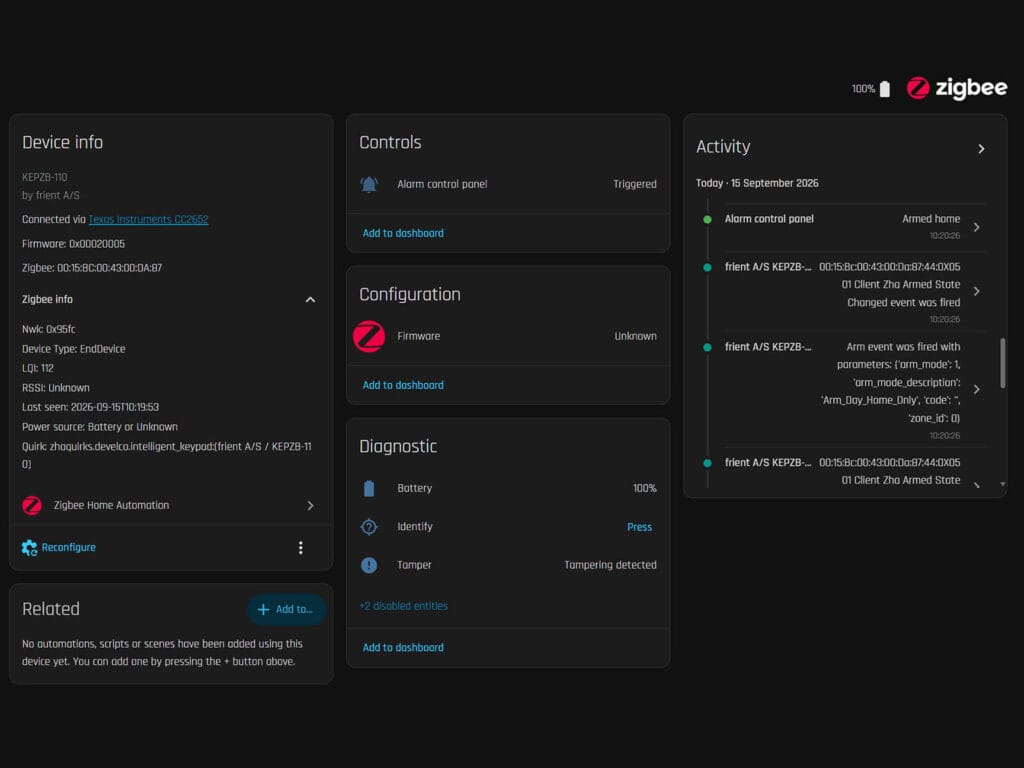
As I mentioned above, the tamper switch sits between the backplate and the keypad body, held together by that single screw. The idea is that if someone tries to remove the keypad by unscrewing that bottom screw, the backplate separates from the body and the tamper switch triggers immediately, alerting you before they ever get the unit off the wall. I confirmed this myself, in both the Zigbee2MQTT tamper attribute and the Home Assistant diagnostic panel on ZHA.
It’s worth noting the box also includes adhesive stickers as a mounting option instead of screws. If you mount it that way, the backplate is not secured by anything the tamper switch would catch, so someone could pull the whole unit off in one motion without ever triggering it. For that reason, if tamper detection actually matters to you, screwing the backplate down is the mounting method that makes it worth having.
Home Assistant Integration
The frient Intelligent Keypad is supported in both ZHA and Zigbee2MQTT, but the two integrations handle it in different ways once it is paired. Pairing itself is the easy part either way. Once I installed the 4 AA batteries, the keypad enters pairing mode automatically and joins the network on its own. If you ever need to re-pair it later, hold the button under the cover with a hairpin for about 15 seconds to reset it.
Frient Intelligent Keypad in ZHA
ZHA picks up the keypad through a dedicated quirk, labelled as zhaquirks.develco.intelligent_keypad. This is what gives you a proper Alarm control panel entity out of the box, instead of raw events you have to build logic around yourself. Alongside the panel, ZHA also exposes battery, identify, and tamper as diagnostic entities.
Frient Intelligent Keypad in Zigbee2MQTT
The frient Intelligent Keypad is identified as Zigbee model KEPZB-110 by manufacturer Develco in Zigbee2MQTT. It operates as an EndDevice and supports OTA firmware updates.
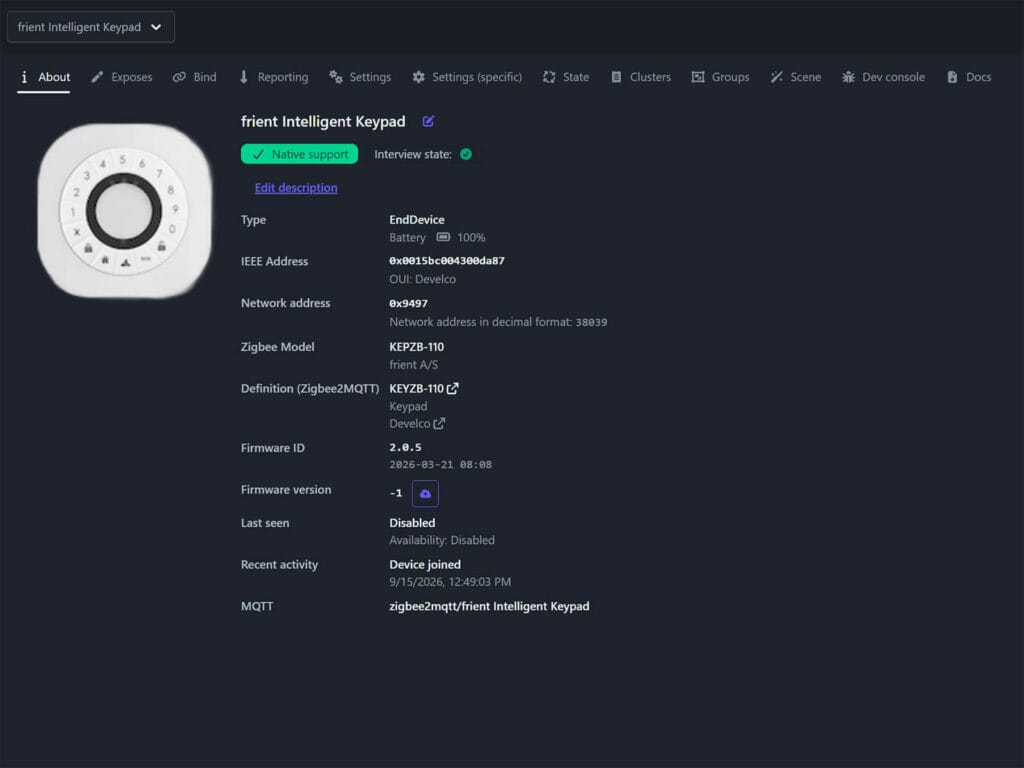
Zigbee2MQTT does not build an alarm panel entity for this device. What you get instead is a set of exposed attributes on the device topic, including action, action_code, action_zone, and action_transaction, along with battery, battery_low, tamper, and voltage. Every key press or tag scan publishes one of these action events, and it is up to your own automation to read the transaction number and respond to it.
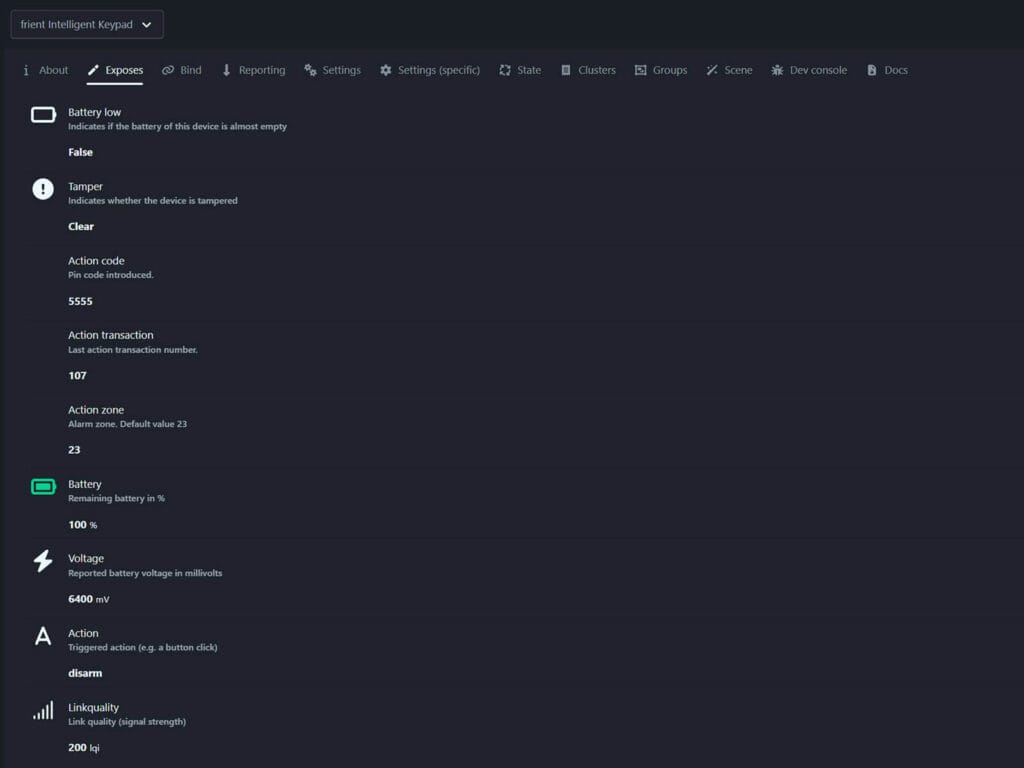
The transaction number is what ties a request to its response. Every time you press a mode button or scan a tag, the keypad increments this number and includes it in the action event it publishes. If you want the keypad to give any feedback, an LED, a beep, anything, your automation has to publish an arm_mode confirmation back to the device set topic carrying that exact same transaction number.
Without a matching transaction number, the keypad has no way to know which of its own requests you are responding to, so it simply ignores the confirmation. It’s worth clarifying that this feedback behavior is not critical for automations to function, and is merely a way to receive visual and audible feedback on the keypad itself.
How to Use The Frient Intelligent Keypad in Home Assistant
The frient Intelligent Keypad gives you more than a single button that arms or disarms. Between PIN codes, RFID tags, and four distinct modes on the keypad itself, you have several ways to control your alarm from Home Assistant, and just as many ways to trigger anything else you can think of using the exact same code or tag.
Arming and Disarming from Home Assistant
On ZHA, the alarm panel entity works like any other alarm_control_panel in Home Assistant. I can call alarm_control_panel.alarm_arm_away, alarm_arm_home, alarm_arm_night, or alarm_disarm on it directly from an automation, a script, or a dashboard card, and ZHA handles the translation back to the keypad. ZHA also lets me set a master code in the integration options under Configure, Alarm Control Panel Options, which is used for disarming from the Home Assistant side.
On Zigbee2MQTT there is no built in panel entity, so arming from the Home Assistant side means publishing directly to the device set topic. To arm all zones, I publish arm_mode with mode set to arm_all_zones to zigbee2mqtt/FRIENDLY_NAME/set. The same pattern applies for arm_day_zones, arm_night_zones, and disarm. For instance:
service: mqtt.publish
data:
  topic: zigbee2mqtt/FRIENDLY_NAME/set
  payload: '{"arm_mode":{"mode":"arm_all_zones"}}'
If I wanted to disarm the keypad remotely, I would simply publish:
service: mqtt.publish
data:
  topic: zigbee2mqtt/FRIENDLY_NAME/set
  payload: '{"arm_mode":{"mode":"disarm"}}'
Arming and Disarming from the Keypad
The keypad itself has dedicated icons for each mode. The lock icon arms all zones, the house icon arms day zones, and the moon icon arms night zones. The unlock icon simply disarms. Entering a PIN or scanning an RFID tag followed by pressing one of these icons, sends the corresponding action along with the code and a transaction number to whichever integration you are running.
The SOS function works a bit differently. A long press on the SOS button triggers an emergency action instead of going through the normal arm or disarm flow, and on ZHA this shows up as the alarm panel entity transitioning straight to triggered.
Creating PIN-based Automations
Since every action event carries the code that was entered, you are not limited to just arming or disarming. You can run any automation based on which code was used, regardless of which button was pressed alongside it. For instance:
For instance, I can arm the home alarm from Home Assistant once code 5555 is entered followed by a arm_day_zones command:
alias: Keypad Code 5555 Arms Home
trigger:
  - platform: mqtt
    topic: zigbee2mqtt/frient Intelligent Keypad
condition:
  - condition: template
    value_template: >
      {{ trigger.payload_json.action_code == '5555' and
         trigger.payload_json.action == 'arm_day_zones' }}
action:
  - service: alarm_control_panel.alarm_arm_home
    target:
      entity_id: alarm_control_panel.house_alarm
Or, I can disarm the home alarm whenever code 6666 is entered followed by a disarm command:
alias: Keypad Code 6666 Disarms
trigger:
  - platform: mqtt
    topic: zigbee2mqtt/frient Intelligent Keypad
condition:
  - condition: template
    value_template: >
      {{ trigger.payload_json.action_code == '6666' and
         trigger.payload_json.action == 'disarm' }}
action:
  - service: alarm_control_panel.alarm_disarm
    target:
      entity_id: alarm_control_panel.house_alarm
With this logic, you can give each household member their own PIN and trigger a notification naming who armed or disarmed the system. Or you can tie a specific code to unlocking a connected smart lock at the same time as disarming, so one entry covers both the alarm and the door.
This is the real value of a code based keypad over a simple button. Every code you define can trigger a completely different automation, arming, disarming, a light scene, a notification, anything Home Assistant can do. You are not limited to the four modes printed on the keypad itself, you are limited only by how many codes you are willing to manage.
Creating RFID-based Automations
The RFID reader on the keypad is always on, unlike the numeric pad which only responds when you are actively pressing buttons. Hold a tag near the keypad and it reads instantly, no need to wake it up first.
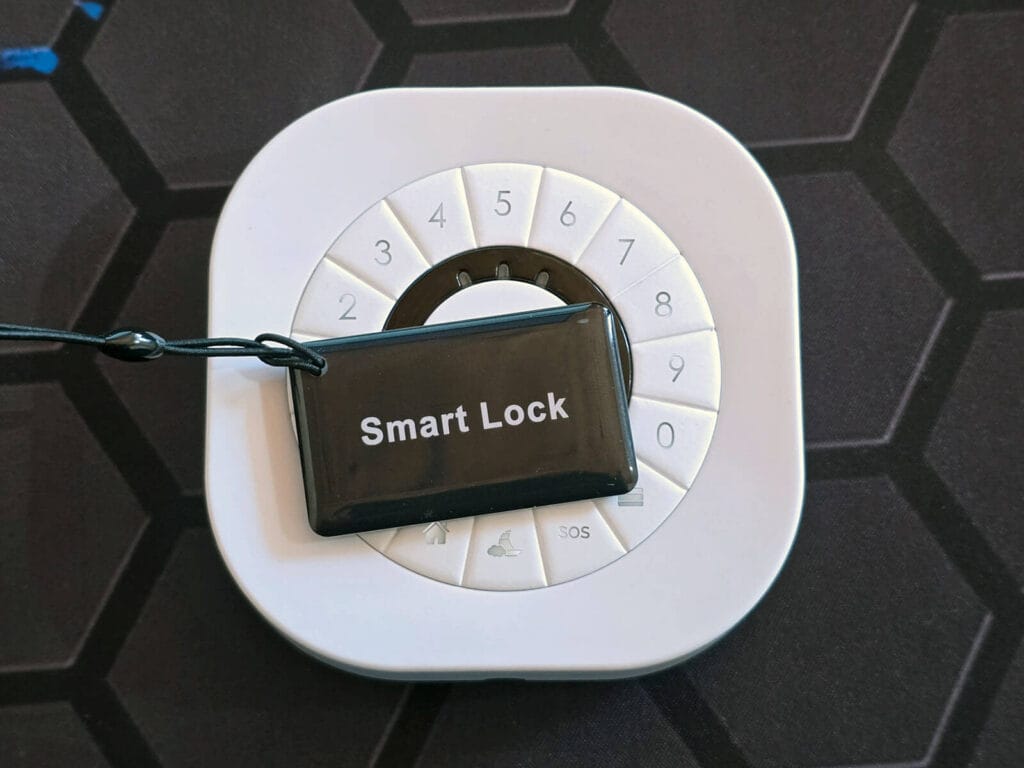
When you scan a tag, the keypad publishes the tag’s unique code to the action_code field, exactly like it does with a PIN, except now the code is the tag’s identifier instead of something you typed. To get that code the first time, scan the tag against the keypad and press the disarm button. This publishes the tag’s code to the action topic, which you can read directly in the Zigbee2MQTT logs or the MQTT explorer in Home Assistant and copy into your automation.
Once you have the tag’s code, the automation looks exactly like the PIN based one, just with the tag’s code in place of a typed PIN:
alias: RFID Tag Disarms
trigger:
  - platform: mqtt
    topic: zigbee2mqtt/frient Intelligent Keypad
condition:
  - condition: template
    value_template: >
      {{ trigger.payload_json.action_code == '+40CC995C' and
         trigger.payload_json.action == 'disarm' }}
action:
  - service: alarm_control_panel.alarm_disarm
    target:
      entity_id: alarm_control_panel.house_alarm
Integration with Alarmo
Alarmo integrates well with this keypad, and it is the option I have seen recommended most consistently across the Home Assistant community for anyone using the frient keypad as a real alarm interface rather than just a couple of standalone automations.
Several community built blueprints exist for both Zigbee2MQTT and ZHA that sync state bidirectionally between the keypad and an Alarmo alarm_control_panel entity, including Bygood91’s frient_keypad_alarmo which ships separate Z2M and ZHA versions and e7d’s KEPZB-110-for-Alarmo blueprint for ZHA. Arming and disarming from the keypad updates Alarmo, and arming or disarming Alarmo from elsewhere, like the app or a dashboard, updates the keypad back, including its LEDs and buzzer during entry and exit delay.
Verdict
The frient Intelligent Keypad is one of the better pieces of Zigbee hardware I have tested this year, and a big part of that comes down to it being Zigbee in the first place. No cloud dependency, no proprietary hubs, no subscriptions, no encryption, just a nice keypad that talks directly to ZHA and Zigbee2MQTT in Home Assistant. For me, that alone puts it ahead of most consumer keypads on the market.
I also highly appreciate how flexible it actually is once you dig into it. As the events are exposed in Home Assistant, you can build almost anything around specific PIN codes and RFID tags and trigger any automation in your setup. It is a smart keypad that gets out of your way and lets Home Assistant do the rest.
The button layout is unconventional, which some might not prefer. Instead of the classic grid you get on almost every other keypad, the buttons wrap around the central RFID ring in a circle. To me, it looks great, and once you get used to where each function sits it works just as well, if not better, than a grid layout does. If you go in expecting a traditional numeric pad, it might throw you off for the first few uses, but that is a minor adjustment, not a real functional drawback.
Here’s where you can get the frient Intelligent Keypad: