Recently, I wrote an article explaining the differences between all SMLight coordinator models. SMLight has so many models out there that it’s very confusing to keep track of all options, let alone decide which one is best for a particular use case.
With the current release of the SMHUB Nano MG24 (and the SMHub Premium) came a new beast, the SLZB-Ultima. As the name implies, this is the “ultimate smart coordinator” from SMLight, a powerhouse which can run almost every smart protocol out there.
DISCLOSURE: The SLZB-Ultima and its addons were sent to me by SMLight for the purpose of a review. This will in no way affect, sway or influence my opinion of their products and will be just my honest review as usual. I underlined this in the first e-mail I sent to their PR person, highlighting my review principles and guidelines to which they agreed and had no problems with.
What’s the SLZB-Ultima?
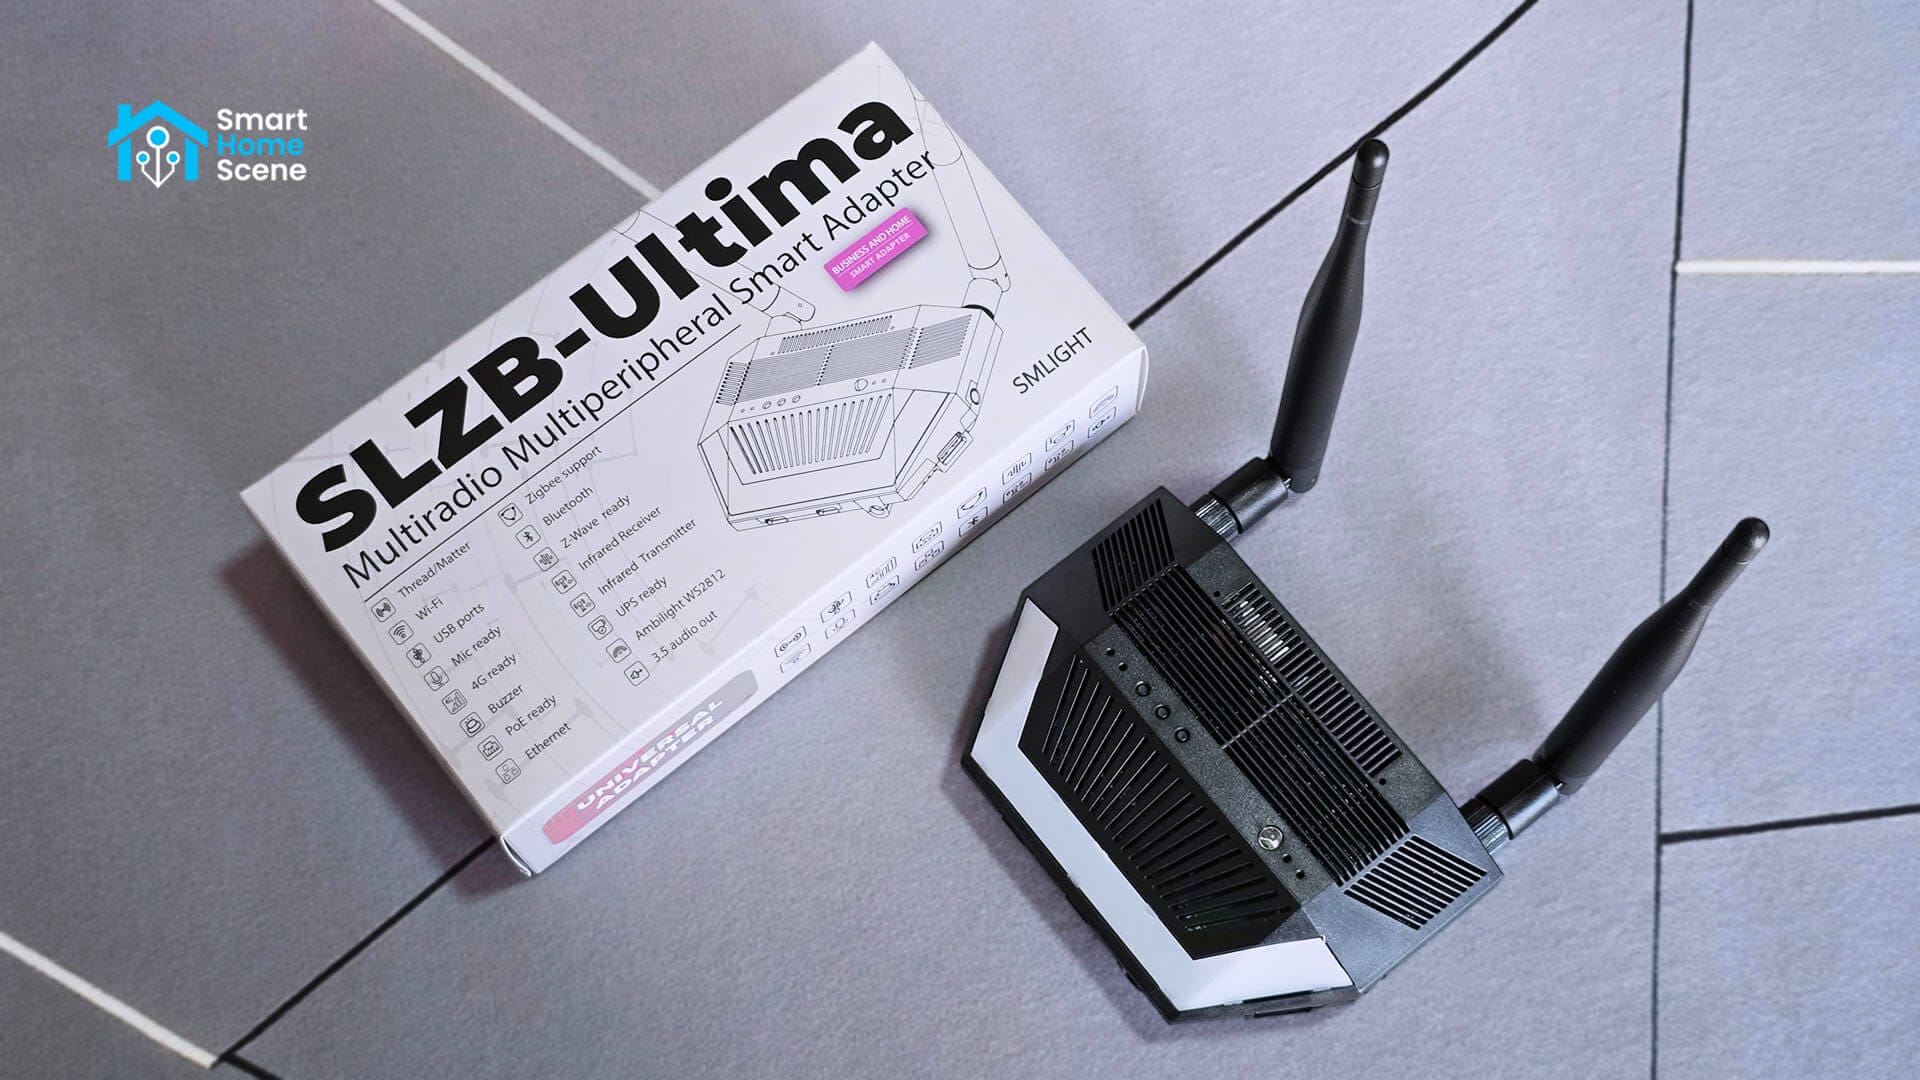
The SMLight SLZB-Ultima [Amazon, Domadoo] is a modular multiprotocol coordinator designed to manage Zigbee, Z-Wave, and Thread networks. It supports power delivery via USB-C or Power over Ethernet (PoE) and network connectivity through Ethernet, dual-band Wi-Fi, or optional 4G LTE. The device also includes an integrated infrared (IR) blaster for controlling legacy equipment and a Bluetooth radio for capturing BLE packets.
Unlike the Nano MG24 which runs SMHUB OS, the SLZB-Ultima uses the standard SLZB core firmware found in the SLZB-06 and SLZB-MR series. This firmware allows the device to function as a remote coordinator for platforms like Home Assistant, Zigbee2MQTT, and Z-Wave JS.
Who’s the SLZB-Ultima for?
While most features of the Ultima are found throughout the rest of the SMLight range, there are major differences between other models compared to the Ultima. The core features being modularity, expandability and setup flexibility.
First and foremost, the SLZB-Ultima is designed for power users and system integrators who want to consolidate their network into a single, high-performance unit. It is the ideal choice for those running complex Home Assistant or Zigbee2MQTT setups who have outgrown standard USB dongles. By providing dedicated radios for Zigbee and Thread alongside modular slots for Z-Wave and 4G LTE, it eliminates the need for multiple separate bridges.
This coordinator is also a top-tier solution for users requiring professional-grade reliability and flexible hardware placement. Support for Power over Ethernet (PoE) allows you to install the device centrally for maximum coverage while keeping your server in a rack or basement. The 4G LTE backup makes it uniquely suited for remote installations or mission-critical security setups where maintaining control during an outage is non-negotiable.
What’s inside the SLZB-Ultima?
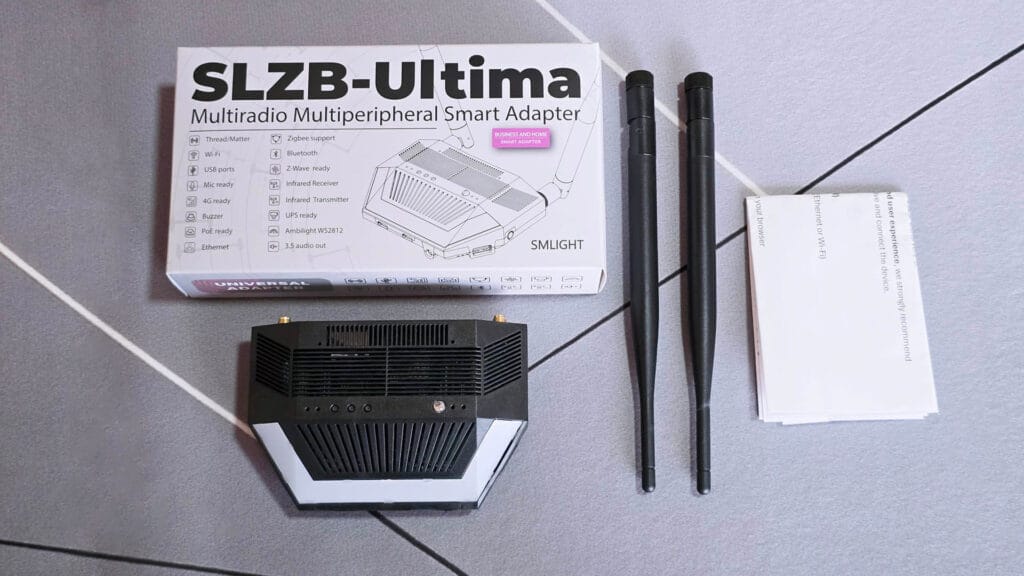
The base model of the SLZB-Ultima ships in a SMLight branded box containing the device itself, two large antennas and a user manual. Additional modules like a Z-Wave radio, 4G antenna or PoE are purchased separately and can come preinstalled if you select one during purchase.
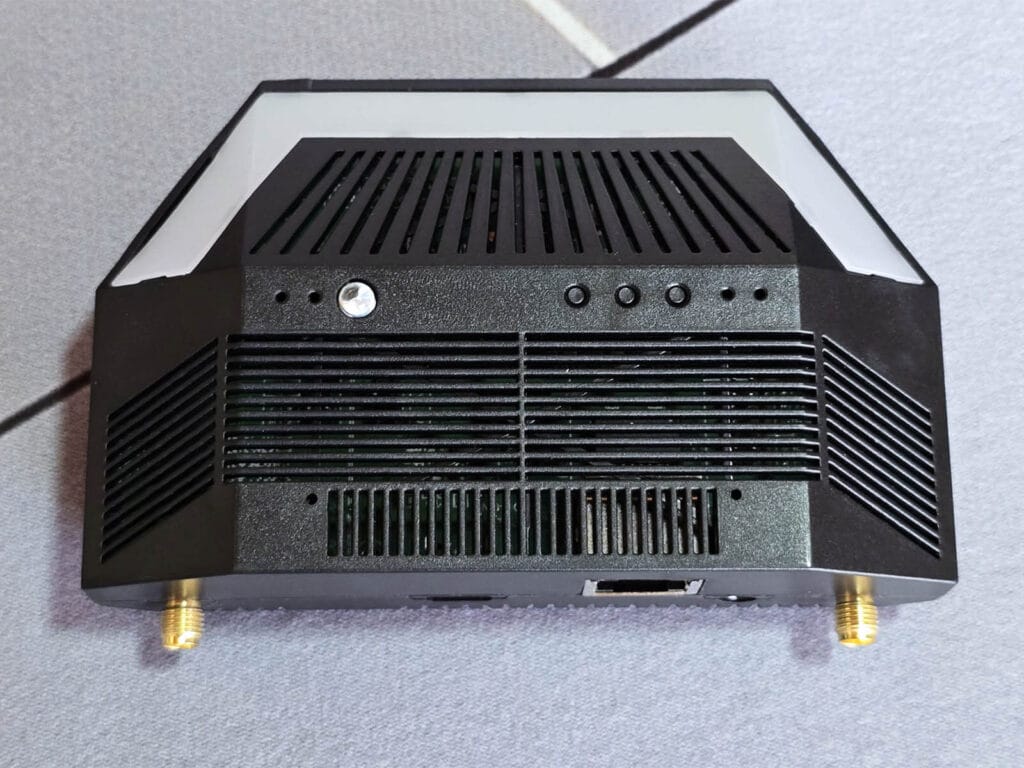
The top of the SLZB-Ultima is heavily ribbed and ventilated, which is done to dissipate heat build-up from all the chips. The three small dots on the left side are physical buttons for controlling various settings like the status LEDs and changing the operating mode. The row of additional dots to the right are the service LEDs, showing the system status of the Ultima.
The shiny white LED you see in the image is the built-in Infrared blaster of the Ultima, something new that none of the previous models had. It can clone IR codes and transmit them on demand. The white strip going around the front of the coordinator is a small WS2812B LED strip, which can be used as a visual indicator or an ambient light.
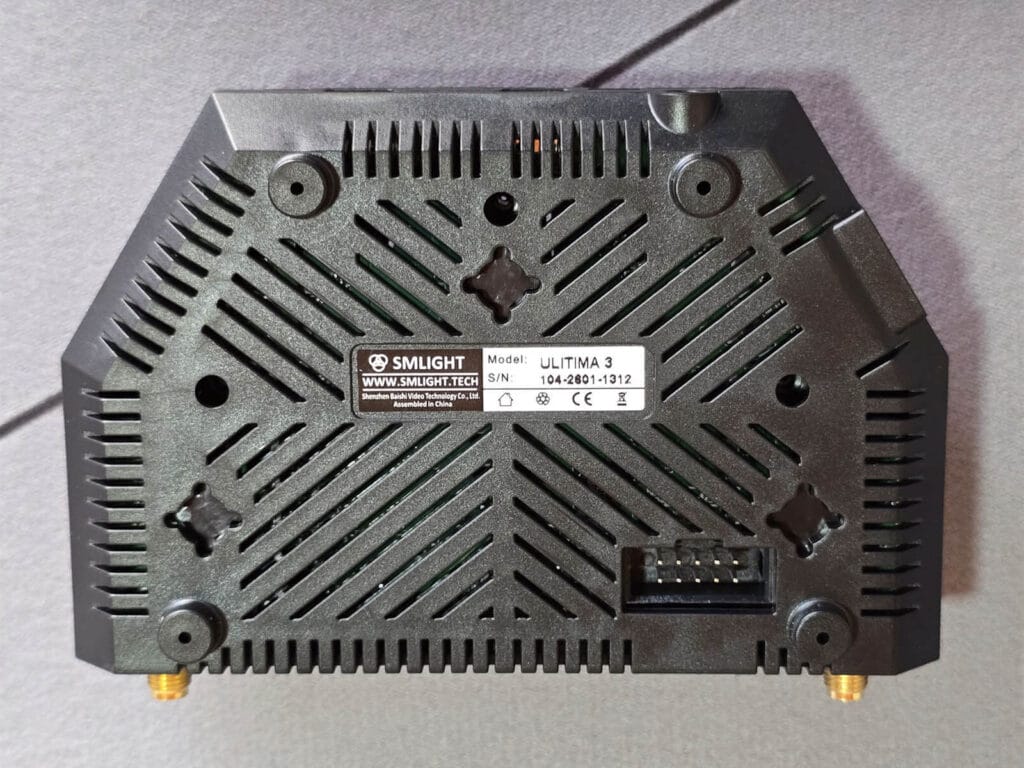
The bottom continues with the same ribbed ventilation pattern, keeping airflow consistent across the entire enclosure. A connector on one edge exposes the GPIO and I²C header for real DIY hardware expansion. There are three hook holes you can use to attach the SLZB-Ultima to a wall for better coverage. The official name of this model is the SLZB-Ultima 3.
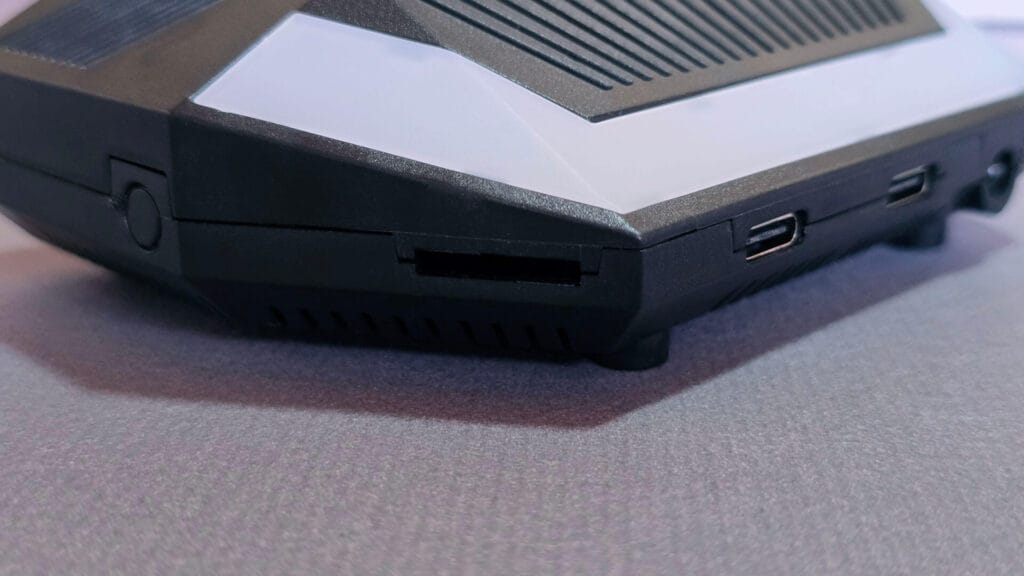
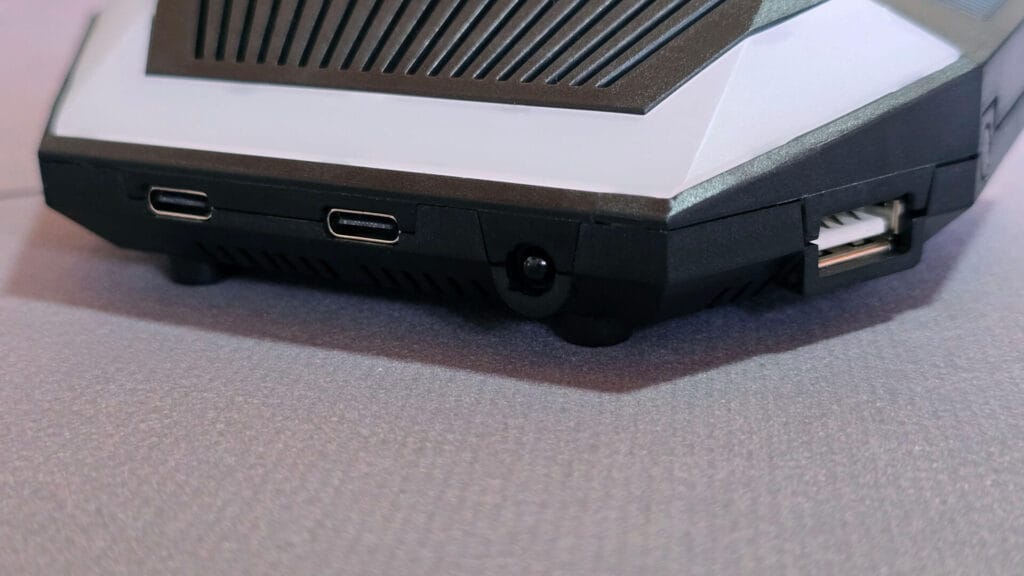
The front of the SLZB-Ultima has two USB-C downstream ports, one USB-A host port, and the IR receiver. The IR transmitter sits on the top of the device rather than alongside the receiver, and this split placement gives better coverage when pointing remotes at the device from different angles. If you opt for the microphone add-on, it installs on the left side of the enclosure.
The back is where you find the RJ45 Ethernet jack and a USB-C upstream port sitting next to it. Out of the box the Ethernet port is standard 100 Mbps only. Adding the optional PoE module upgrades it to Power over Ethernet, letting you run a single cable for both data and power.
Opening up the SLZB-Ultima was easier than I imagined:
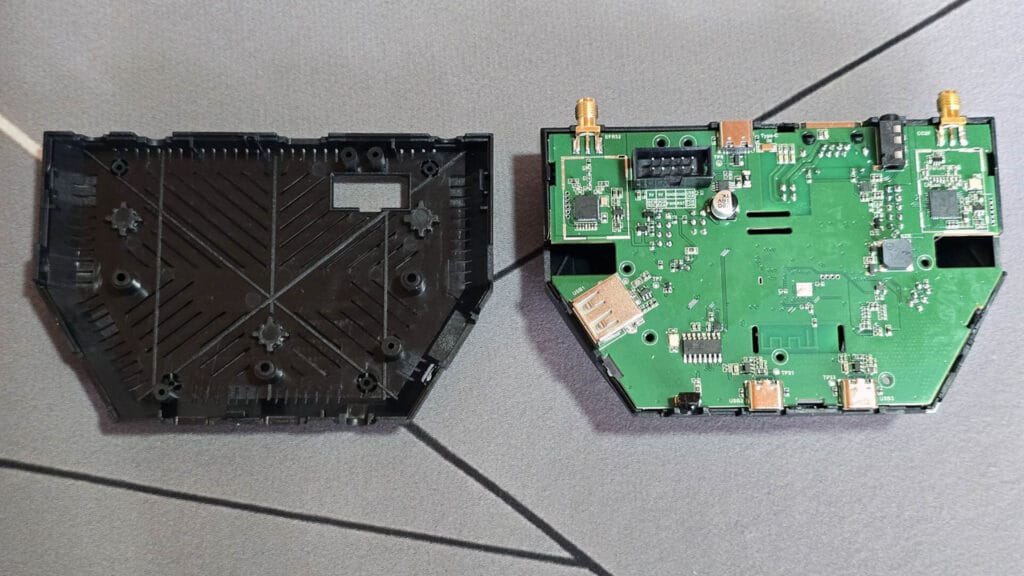
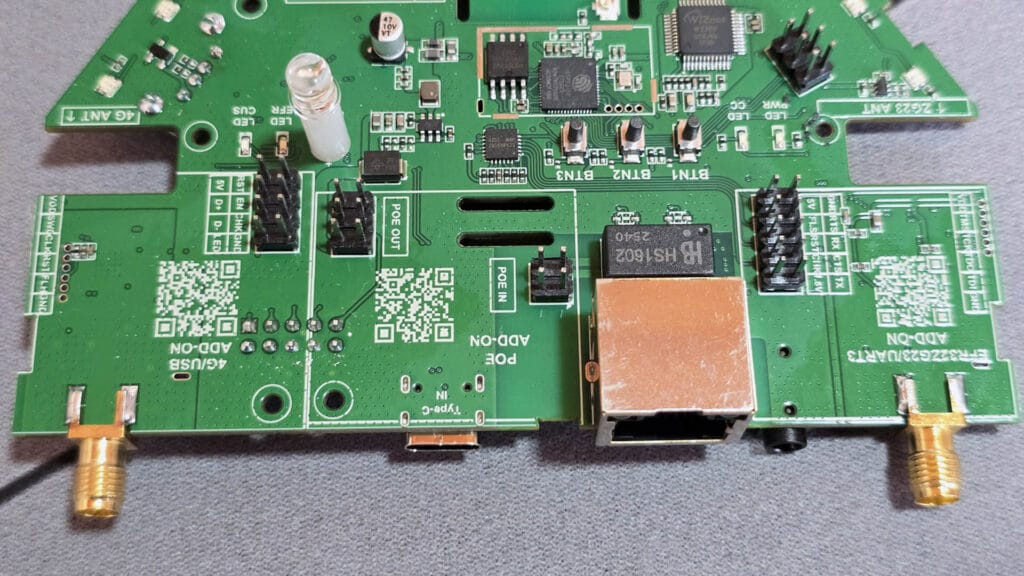
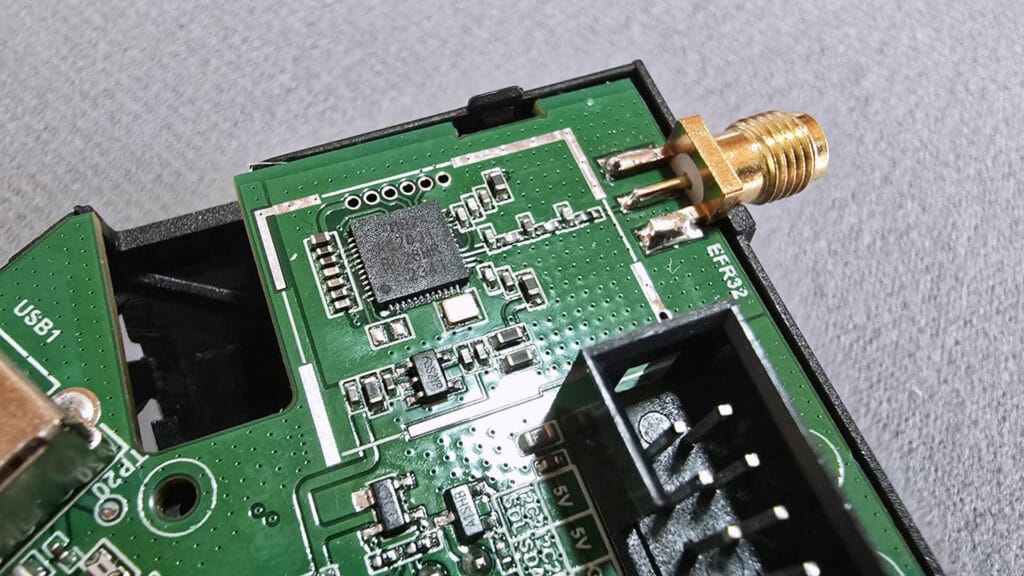
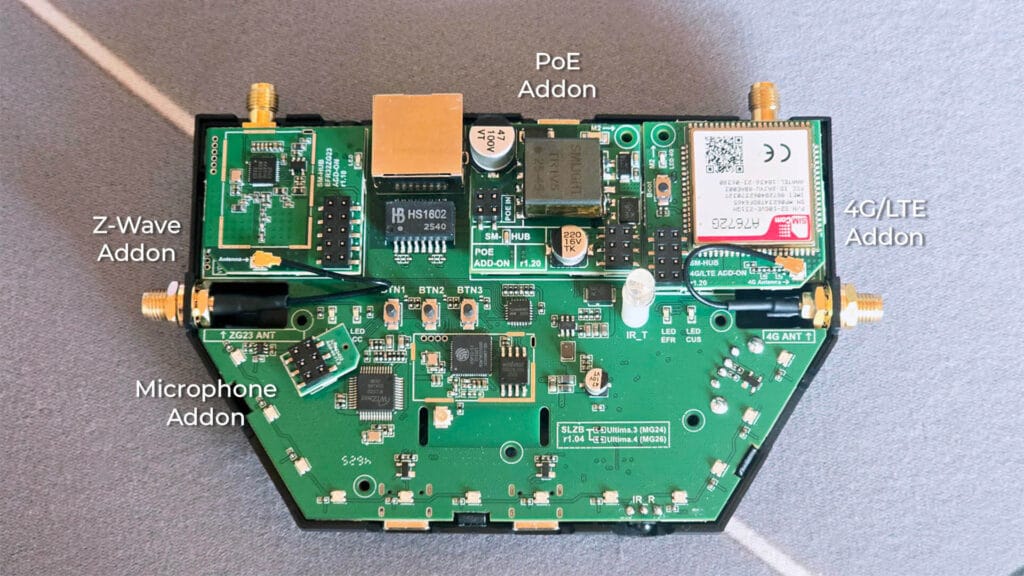
The PCB of the SLZB-Ultima is very neatly designed and labelled. As this is a modular device, SMLight made it easy for users who want to attach addons themselves. Here’s what it looks like on the top and bottom:
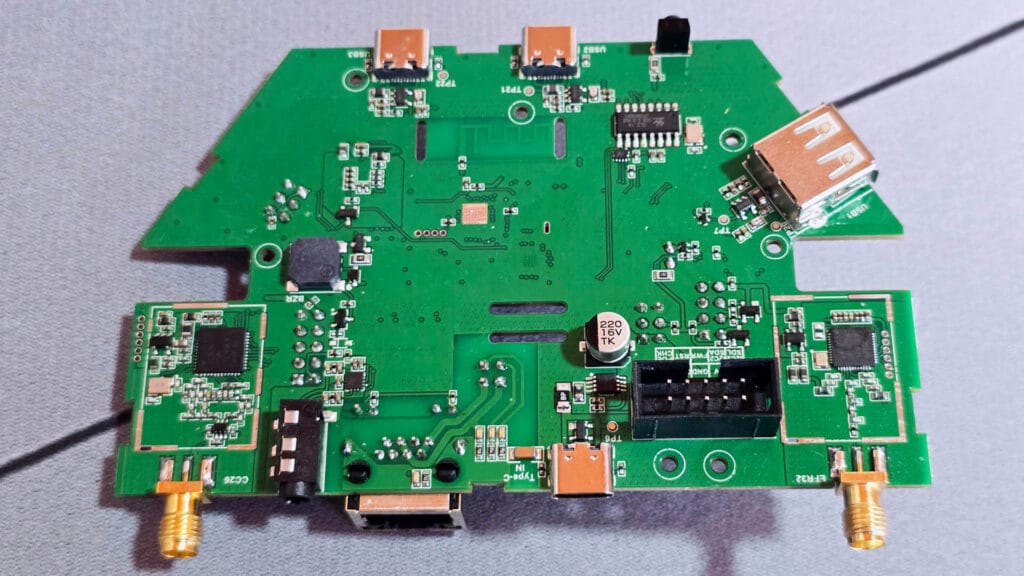
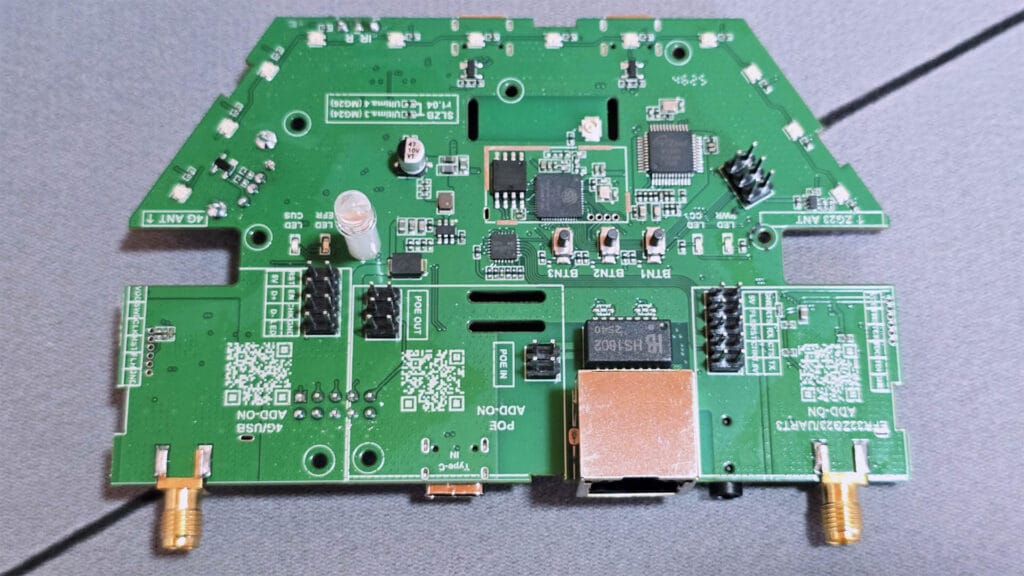
The ESP32-S3 sits at the center of the main PCB and acts as the brain of the entire device. It manages Wi-Fi, Bluetooth, USB passthrough, the web interface, and all communication between the radio chips and the network. The Ethernet jack is mounted on the rear edge of the board with its own dedicated controller, and the PoE add-on slot sits directly adjacent to it, ready to accept the optional module.
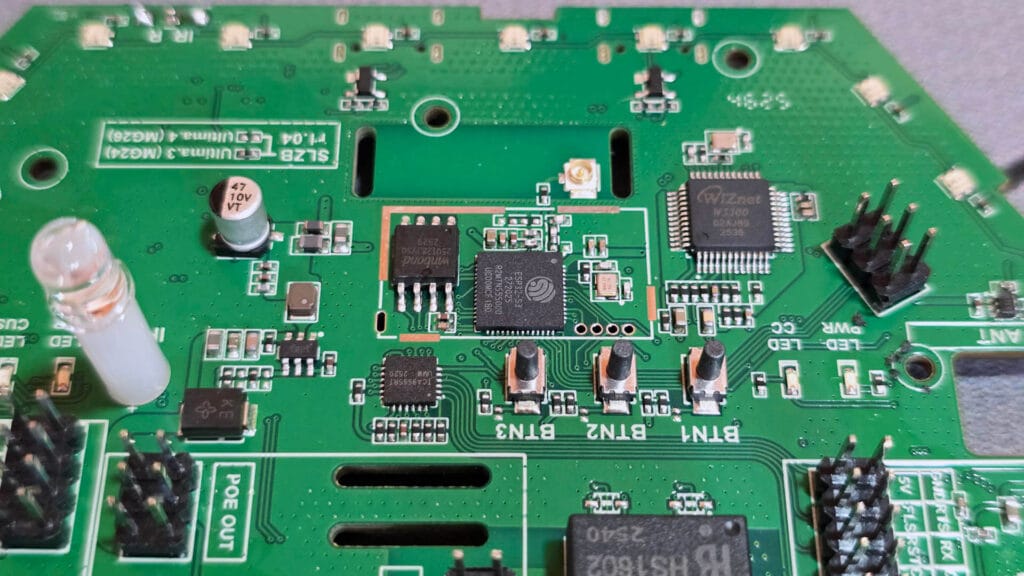
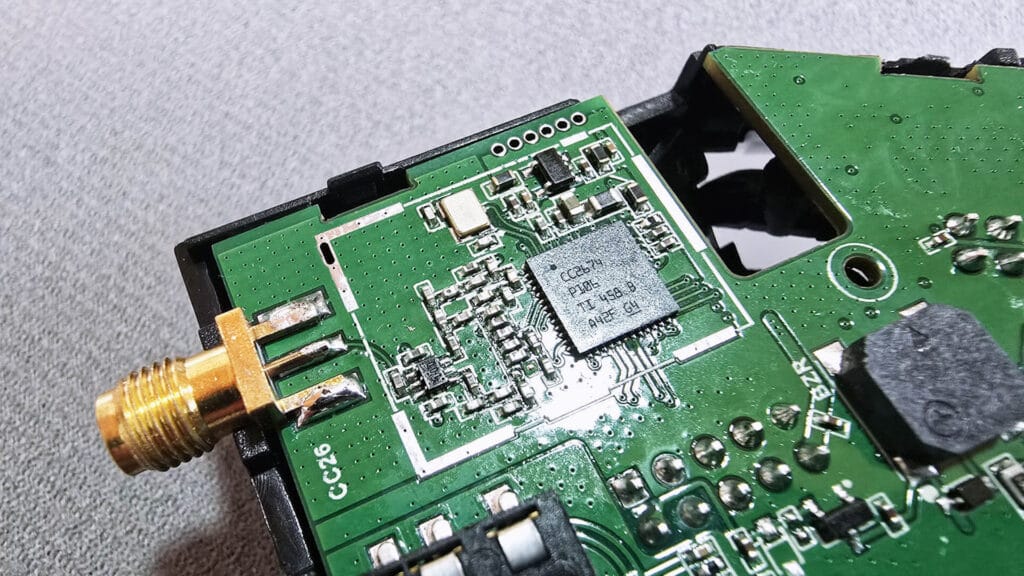
The CC2674P10 and EFR32MG24 radios for Zigbee and Thread are installed on the edges of the main PCB, physically separated from each other and from the ESP32-S3. Each chip connects to its own dedicated SMA antenna connector, which is why both networks run at full capacity with no interference. The small square underneath the CC2674 chip in the image is a Piezo buzzer, which can be used as an audible indicator from Home Assistant.
Installing Additional Modules on the SLZB-Ultima
Installing additional modules on the Ultima is very straightforward. Everything is clearly labelled on the PCB and each module slots in only one direction, so there is no guesswork involved. The microphone module is the only one that can be inserted incorrectly, so double-check its orientation before pressing it down.
If you are adding the Z-Wave or 4G/LTE modules, start by removing the small circular plastic covers from the SMA connector openings on the enclosure. Fit the SMA connectors through those openings and tighten them down before installing the modules themselves and connecting the antennas. I found this order matters because the main PCB becomes difficult to install if you try to do it all at once. I installed Z-Wave, 4G/LTE, PoE and the mic addon that SMLight sent me, here’s what everything should look like:
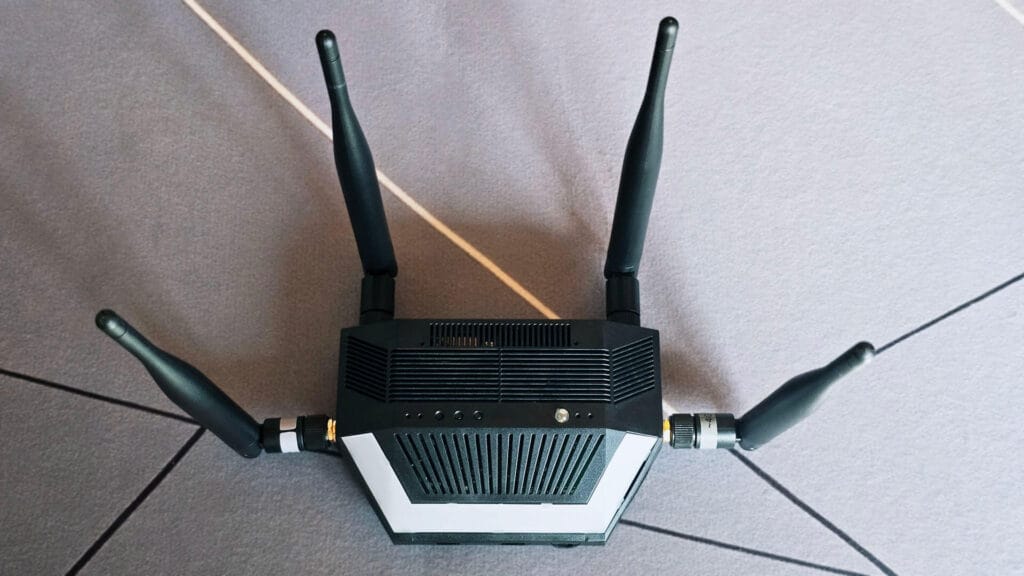
Once everything is in place, you can assemble the case and install the antennas. Another pic of the SLZB-Ultima with all antennas:
SLZB-Ultima Configuration and Setup
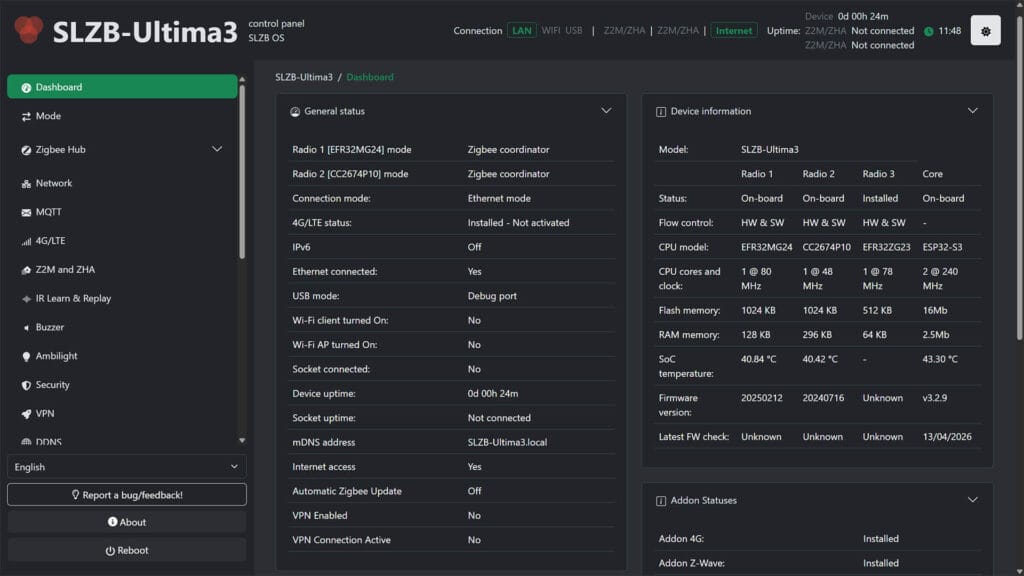
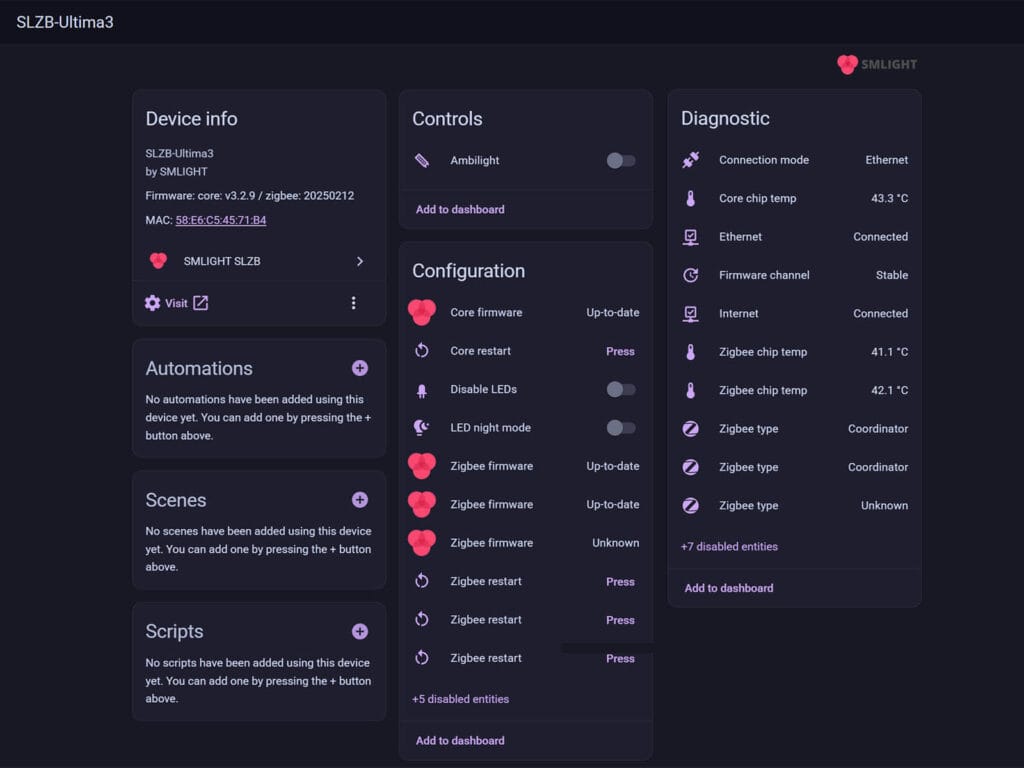
Since the SLZB-Ultima runs SLZB-OS and not SMHUB-OS, the web dashboard will feel immediately familiar if you have used any other SMLIGHT coordinator before. The general layout and navigation remain the same as on the SLZB-06 and MR range. The additional settings are there when you need them, covering the extra hardware like Infrared, 4G, Z-Wave, and Ambilight.
In the “Mode” menu is where the initial configuration starts. You can change the operating mode of the 2.4GHz radios (EFR32MG24 & CC2674P10), enable or disable the Z-Wave module and set the default connection mode of the device to Ethernet, Wi-Fi or USB. There is also an additional feature at the bottom called Ethernet to Wi-Fi bridge, which turns the Ultima into a lightweight wireless access point that forwards IoT device traffic over Ethernet, useful for spots in your home where Ethernet is available but Wi-Fi coverage is not.
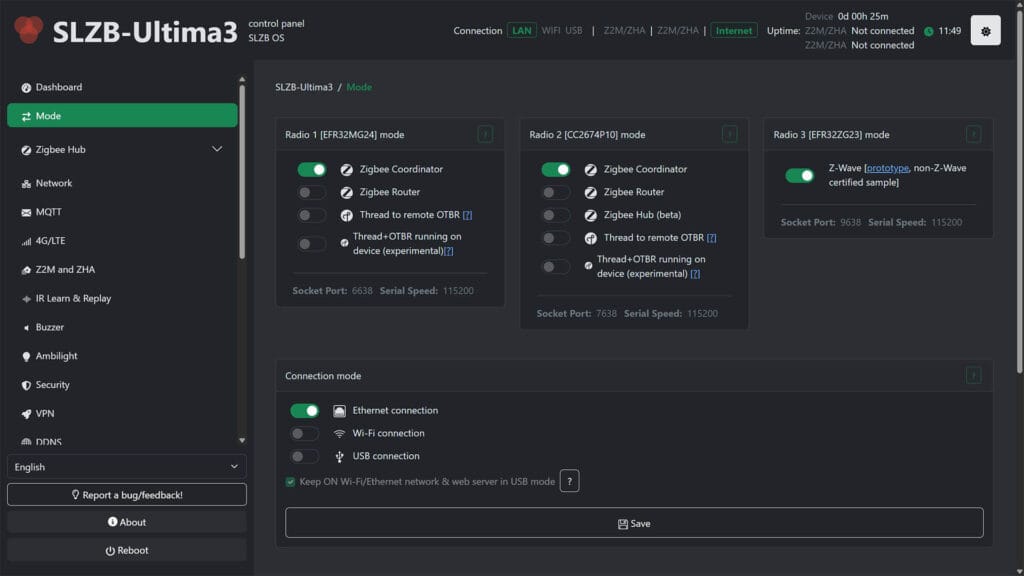
Furthermore, while the main radios can be used in Zigbee Coordinator and Zigbee Router mode as usual on the Ultima, Thread got an interesting update. Recently, SMLight released an experimental method of running Thread and connecting it to Home Assistant. Basically, you have two options:
- Thread to remote OTBR
In this mode the Ultima acts as a Thread RCP, providing the radio layer only, while the OpenThread Border Router software runs on Home Assistant via the OTBR app. - Thread and OTBR running on device
In this mode the OpenThread Border Router app runs directly on the Ultima itself, and Home Assistant connects to it remotely via the REST API. This option works well for setups where you want the Thread infrastructure to operate independently of Home Assistant.
For reference, the SMHUB Nano MG24 is already capable of running OTBR on its own, but this feature was not available on SLZB-OS devices like the 06 and MR coordinator range until now.
Running OpenThread Border Router Directly on the SLZB-Ultima
Since I have tested Zigbee and Thread extensively on every SMLIGHT coordinator that has passed through my testing bench, I saw no reason to deep dive the standard connection modes on the Ultima. I enabled Thread to remote OTBR on the EFR32MG24 and Zigbee coordinator on the CC2674P10, connected both to Home Assistant without issues, and moved on. They work, and they work well.
What I was more interested in testing was the new “Thread and OTBR running on device” mode, which lets you run the OpenThread Border Router directly on the Ultima itself without installing the OTBR app in Home Assistant.
Why is this important? When you run the OTBR app on Home Assistant and connect it to the Ultima over the network, Thread is essentially operating over a serial-over-IP connection. Thread and the OpenThread Border Router were designed with the expectation of a direct, low-latency serial link between the host and the radio chip. Running that link over TCP introduces additional latency and potential instability that a native serial connection would not have.
Running OTBR directly on the Ultima eliminates that entirely. The radio and the Border Router software are on the same device, communicating locally, and Home Assistant simply connects to the OTBR via the REST API to manage the Thread network. The result is a more stable and reliable Thread network that does not depend on the quality of your TCP connection between Home Assistant and the coordinator.
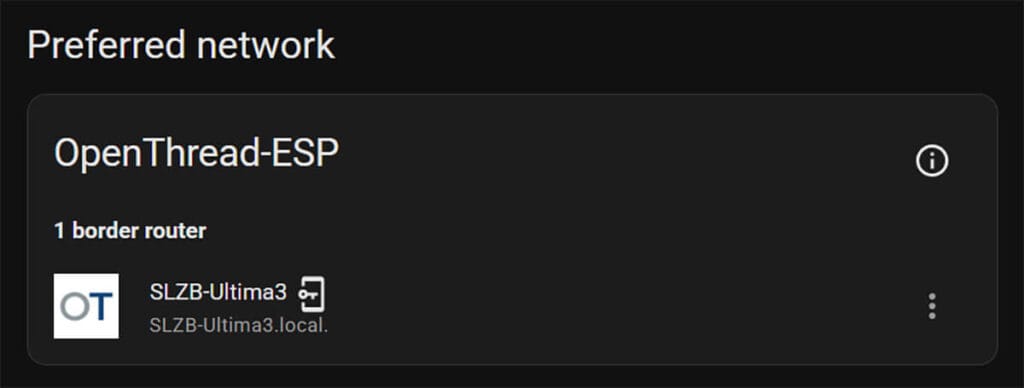
When you enable this mode, you get a warning that it’s experimental and that other features of the Ultima become unavailable when OTBR is used like this. Once the firmware flashes, the Ultima will reboot and you can set up Thread in Home Assistant directly.
To set up the integrations in Home Assistant, you need to do the following:
- Go to
Settings>Devices & Services. - Click
Add integrationand search forMatter. - Keep
Use the official Matter Server Supervisor add-onenabled and clickSubmit. - Wait until Matter Integration and Matter Server add-on are installed.
- Go to
Settings>Add-ons>Matter Serverand clickStart. - Go to
Settings>Devices & Servicesagain - Add (or confirm autodiscovery) of
ThreadandOpenThreadBorder Routerintegration - In the OpenThreadBorderRouter URL field enter:
<device-ip>:8080
- Click Submit
- Done
Setting Up the 4G/LTE Module
The optional 4G/LTE add-on module lets you connect the Ultima to the internet over a mobile network. You simply insert a nano-SIM card, slot the module into the header on the PCB, and the device gains an independent internet connection that requires no Wi-Fi or Ethernet. This makes the Ultima self-contained for remote installations or as a fallback connection if your main network goes down.
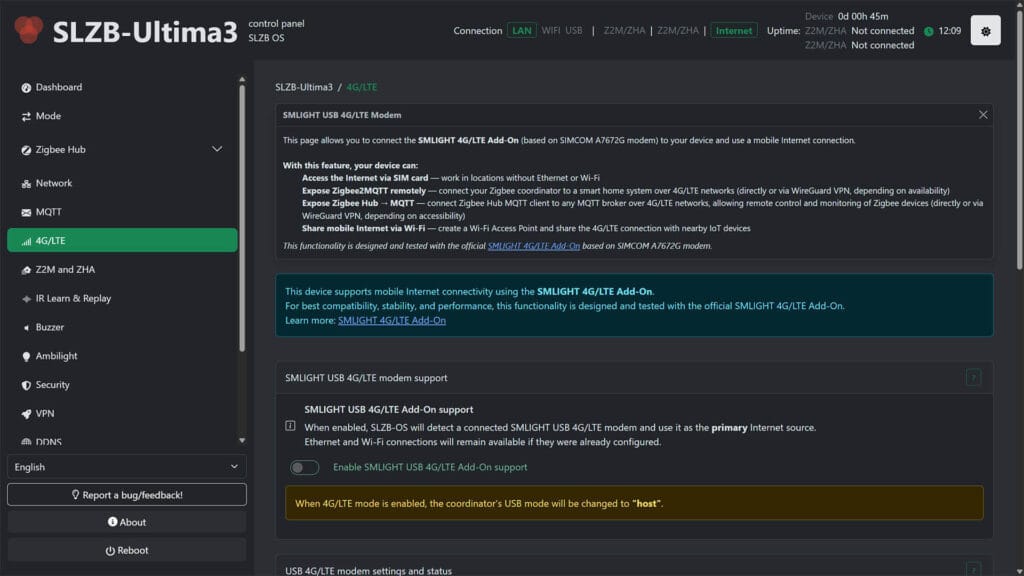
The module supports major LTE bands worldwide and connects internally over USB, which is also why it occupies the USB host slot and prevents you from using an external USB dongle at the same time. I tested the 4G module with my local carrier and it works great, although I had to change the APN to match my carrier’s as it wasn’t automatically detected. There’s a dedicated field in the dashboard for configuring APN.
Setting Up the Z-Wave Module
The optional Z-Wave add-on is based on the Silicon Labs EFR32ZG23 chip and brings Z-Wave 800 series support to the Ultima. It connects over Ethernet to Home Assistant and works with both Z-Wave JS and Z-Wave JS UI, giving you a full Z-Wave network without needing a separate USB stick or controller.
After installing the module, you need to enable it under Mode > Radio 3 [EFR32ZG23] > Turn on. In Z-Wave JS or Z-Wave JS UI, set the serial port to tcp://<device-ip>:9638 where <device-ip> is the local IP address of your Ultima.
One thing worth clarifying is the “non-certified” label you will see in the SLZB-OS interface. This refers to the official Z-Wave certification process, which SMLIGHT is still working through. It has no impact on functionality. In practice the add-on behaves like any other Z-Wave 800 controller and you can pair and control any Z-Wave device you would normally use with a certified stick. Certification is a regulatory milestone, not a measure of whether the hardware actually works.
Learning and Transmitting IR Codes with Home Assistant
The built-in infrared blaster is very handy and works quite well. I cloned the on/off button of my office AC to test it out. You simply point your IR remote to the Ultima, press a button and the Last received IR code gets automatically populated with your code. You can then transmit this code on-demand via automations, scripts, or REST API. Obviously, you need line of sight to use Infrared, so keep in mind that the Ultima needs proper placement.
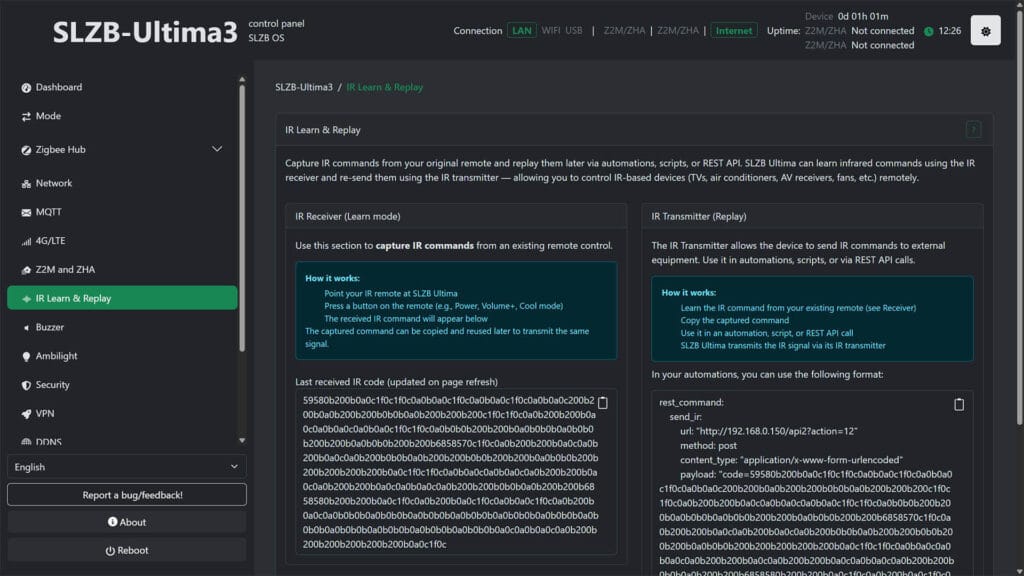
To use the learned IR codes in Home Assistant, you need to add each one as a rest_command in your configuration.yaml file. This creates a callable action for each code, which you can then trigger from any automation or script. The RESTful Command integration does not have a UI configuration wizard yet, so manual editing of configuration.yaml is required. Here is an example:
rest_command:
    send_ir:
        url: "http://192.168.0.150/api2?action=12"
        method: post
        content_type: "application/x-www-form-urlencoded"
        payload: "code=XXXXXXXXXXXXXX"
Playing RTTTL on the Buzzer through Home Assistant
The Ultima’s built-in buzzer plays RTTTL melodies and can be triggered via HTTP requests from Home Assistant, Node-RED, or any other system that can send an HTTP call. RTTTL is a simple text-based format for defining melodies, and there are plenty of ready-made RTTTL strings available online if you do not want to write your own. It is a small but useful feature for adding audible feedback to automations, whether that is a confirmation beep, an alert, or a notification sound.
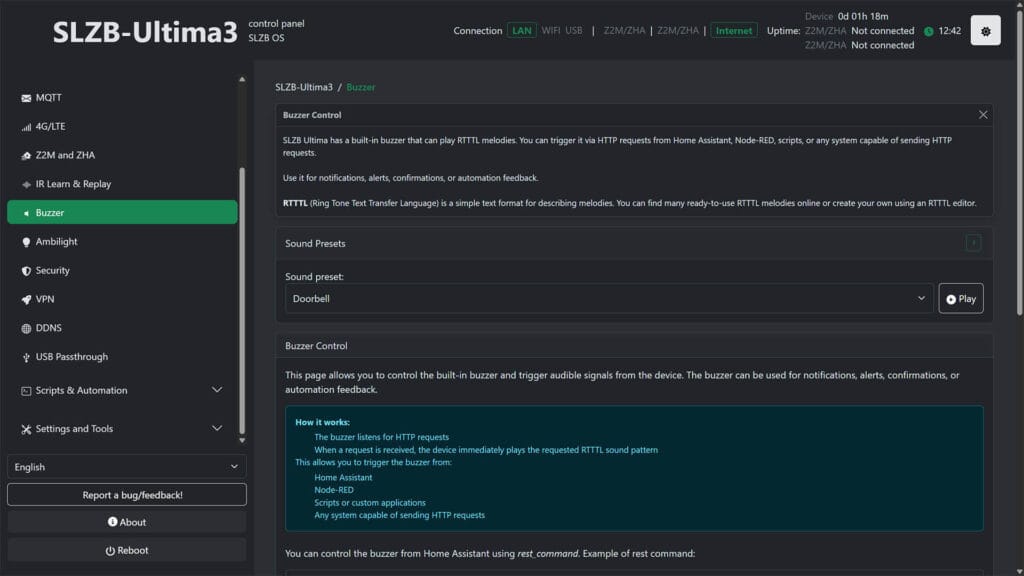
You can control the buzzer on the Ultima from Home Assistant using rest_command, just like transmitting an IR code. For example, this code adds an action that plays the Tetris tune:
rest_command:
    buzzer_play:
        url: "http://192.168.0.150/api2?action=13"
        method: post
        content_type: "application/x-www-form-urlencoded"
        payload: "code=tetris:d=4,o=5,b=160:e6,8b,8c6,8d6,16e6,16d6,8c6,8b,a,8a,8c6,e6,8d6,8c6,b,8b,8c6,d6,e6,c6,a,2a,8p,d6,8f6,a6,8g6,8f6,e6,8e6,8c6,e6,8d6,8c6,b,8b,8c6,d6,e6,c6,a,a"
Additional Settings and Features
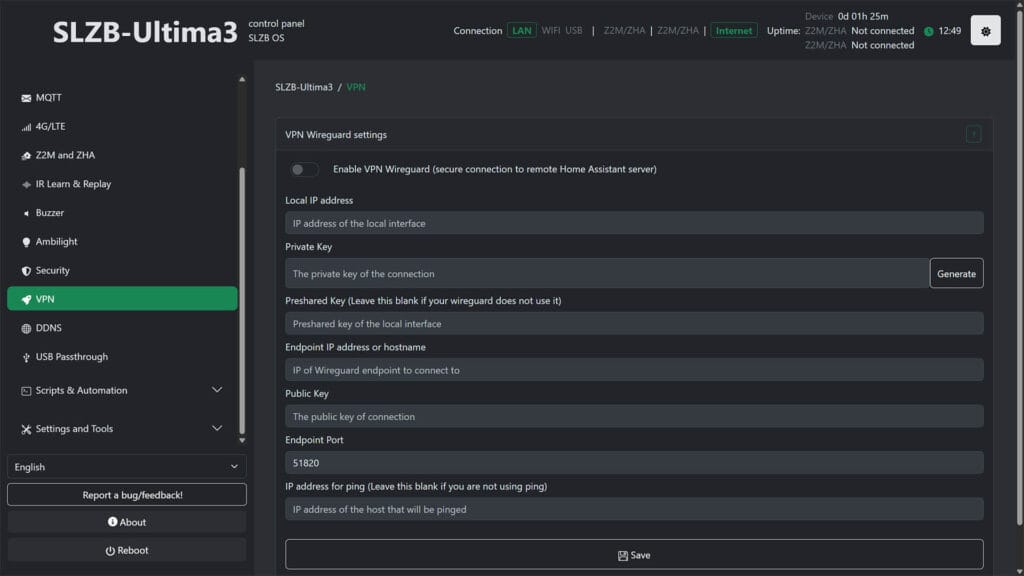
Just like the 06 and MR range, the Ultima has built-in WireGuard VPN support, which lets you establish a secure encrypted tunnel between the device and a remote Home Assistant instance. You configure it directly in SLZB-OS by entering your local IP address, private key, public key, endpoint address, and port.
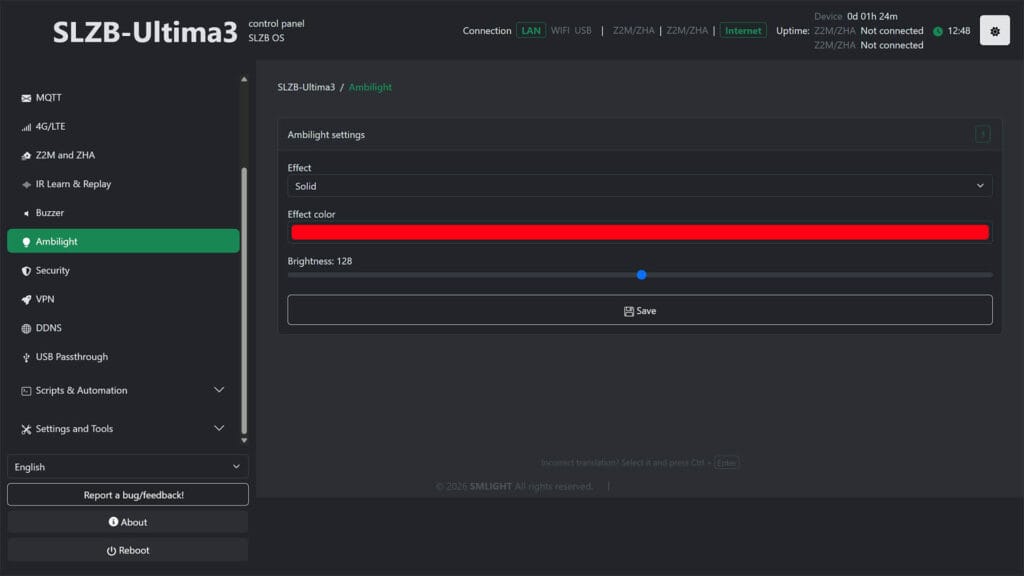
The Ambilight page controls the 12 WS2812B RGB LEDs on the front of the device. You can select an effect, set the color, and adjust brightness with a slider. Once the Ultima is integrated in Home Assistant, this is exposed as a light entity, and you don’t have to use it through the web dashboard.
The DDNS client keeps the Ultima reachable at a consistent address even when your ISP changes your public IP. You point it at your DDNS provider’s update URL and set how often it should check and update the record. The minimum update interval is 10 seconds and the maximum is 65535 seconds.
The Security page covers the essential access controls for the web interface. You can enable login authentication with a custom username and password, restrict access to specific IP addresses via the IP whitelist, disable the web server entirely when a socket connection is active, and set a password for the fallback Wi-Fi access point that the device creates if it cannot connect to your network.

The MQTT page connects the Ultima to an external MQTT broker, which unlocks control of the IR receiver, IR transmitter, buzzer, and WS2812B LEDs via MQTT topics alongside the existing HTTP API. You enter your broker host, port, credentials, and base topic. This is particularly useful if your smart home is already built around MQTT and you want the Ultima’s peripherals to participate in that same message bus.
The USB passthrough mode exposes a USB device connected to the Ultima’s USB-A port over the network as a TCP socket. This means you can plug in an additional USB Zigbee, Thread, or Z-Wave dongle and use it remotely over Ethernet as if it were a native network adapter. You select the device, set the serial speed, and note the socket port, then point your software at tcp://<device-ip>:<port> to connect. It is the same mechanism used for the Z-Wave add-on, just applied to any supported USB dongle.

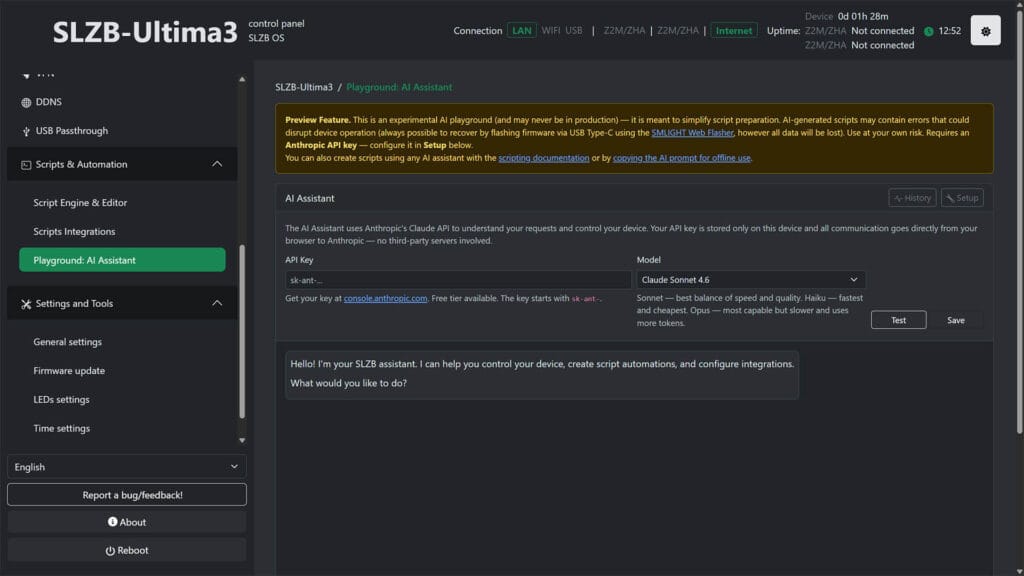
Finally, SLZB-OS includes an experimental AI Assistant powered by Anthropic’s Claude API. You connect it using your own Anthropic API key and it helps you write automation scripts for the device directly from the web interface. SMLIGHT is clear that this is a preview feature and recommends using it with caution, as AI-generated scripts could potentially break things. My personal take on this is that yes, it highlights the capability of the Ultima, but it’s not really needed. Must everything be AI these days?
Home Assistant Integration
The SMLight SLZB-Ultima is officially supported in the official SMLight integration, where you get several diagnostic and control entities. You can track chip temperature, firmware updates, connection mode, and enable additional sensors like RAM usage and Wi-Fi status. The Ambilight is fully controllable as a real LED from Home Assistant as well, which can be used in automations or scripts.
Final Thoughts
The SLZB-Ultima is unlike anything else SMLIGHT has released before. It is not just another coordinator revision with a newer radio chip. It is a genuine attempt at building a single device that covers every protocol and use case a serious smart home enthusiast could need, and for the most part it delivers on that promise.
Pros
- Dual independent radios running simultaneously without MultiPAN compromises
- Physically separated from each other to minimize interference
- Modular add-on system for PoE, Z-Wave 800, 4G/LTE, and microphone without soldering
- Built-in IR receiver and transmitter removes the need for a separate IR blaster
- Built-in Piezo buzzer and WS2812B LED strip for audible and visual notifications
- SLZB-OS is very mature and feature-rich at this stage, with WireGuard VPN, DDNS, local automations, standalone Zigbee Hub mode, MQTT API, and OTA updates for all radios
Cons
- Z-Wave add-on is not yet officially certified, which may matter in professional deployments
- The sheer depth of features and options makes this a poor fit for beginners
- While experimental and completely optional, AI features are not something I want to see in a local-first device like this one
If you are running a serious smart home setup and you want one device that handles Zigbee, Thread, Z-Wave, IR, Bluetooth, and more without compromise, the Ultima is the easiest recommendation I can make at this price point. There is nothing else on the market right now that offers this combination of hardware expandability, protocol coverage, and software depth. If you are a Home Assistant power user who has outgrown a single coordinator, this is the next step for you.

Also available on Amazon DE, Amazon UK, Amazon NL, AliExpress, AliExpress 2.


“other features of the Ultima become unavailable when OTBR is used like this”,
Does that mean it cant be in OTBR mode and also act as zigbee coordinator?
No, you can’t use some edge features like the Ethernet to Wi-Fi bridge function.
U can use Zigbee/Thread however u like, even with OTBR on-device.
Thanks for your review in the SLZB-Utilma. Is there a convenient way to migrate my current ZigBee devices paired using SLZB-06M to the SLZB-Ultima? What’s the maximum number of child it supports directly?
Read this:
https://smarthomescene.com/guides/how-to-migrate-your-zigbee-network-to-a-new-coordinator/
It supports up to 200 directly connected devices
I am wondering when they will fix the SLZB-OS representation for the Z-Wave module. It doesn’t show up when looking for firmware updates and in some pages of the UI it shows up as a Zigbee radio.
SMLIGHT should make some work of polishing the UI.