SwitchBot is one of my favorite brands to test and review. Almost all SwitchBot devices use Bluetooth or Bluetooth Low Energy (BLE), have very low battery consumption and are designed very sleek and minimalistic. I’ve also mentioned on a couple of occasions that their app is among the best, if not, the best proprietary smart home apps that you can use.
In this review, I’m taking a look at the SwitchBot Lock Pro, their first Matter (over Bridge) smart lock. I’m installing this smart lock on my main entrance door, taking a look at it’s features and integrating it Home Assistant. You can get the base model for $119.99 on their Webstore or Amazon.
SwitchBot Lock Pro Technical Specification
- Model: SwitchBot Lock Pro
- Connectivity: Bluetooth Low Energy (BLE)
- Cylinder Compatibility:
- US Mortise lock
- US Single Cylinder deadbolt
- Euro Profile Cylinder
- UK Oval Cylinder
- Swiss Round Cylinder
- Knob Cylinder
- Night latches
- Multipoint locks
- Battery: 4xAA (1.5V)
- Battery Life: 6-9 months
- Power Supply Mode: Standard: dry batteries. Optional: Lithium Battery Packs.
- Operating Temperature: 10°C to 45°C.
- Operating Humidity: 10% to 90% RH
- Shell Material: Aluminium–magnesium alloys, PC + ABS
- Lock/Unlock Methods:
- Remote unlock
- Fingerprints, timed fingerprints
- Passcode, timed passcode, one-time passcode, passcode sharing
- NFC cards, NFC tags
- Apple watch, iOS widgets
- Physical key
- Voice control
- Quick Lock Button: Mechanical button
- Buzzer: Supported
- Temperature Sensor: Low temperature reminder
- Auto-Lock: Supported
- Minimum Detection Angle: 10°
Overview and Package Contents

The SwitchBot Lock Pro ships in black box that gives of a very premium look and feel. The box contains a bunch of attachments and mounting brackets, part of the set for fitting this smart lock on your door. A user manual is also included along with the necessary hex keys and screws.
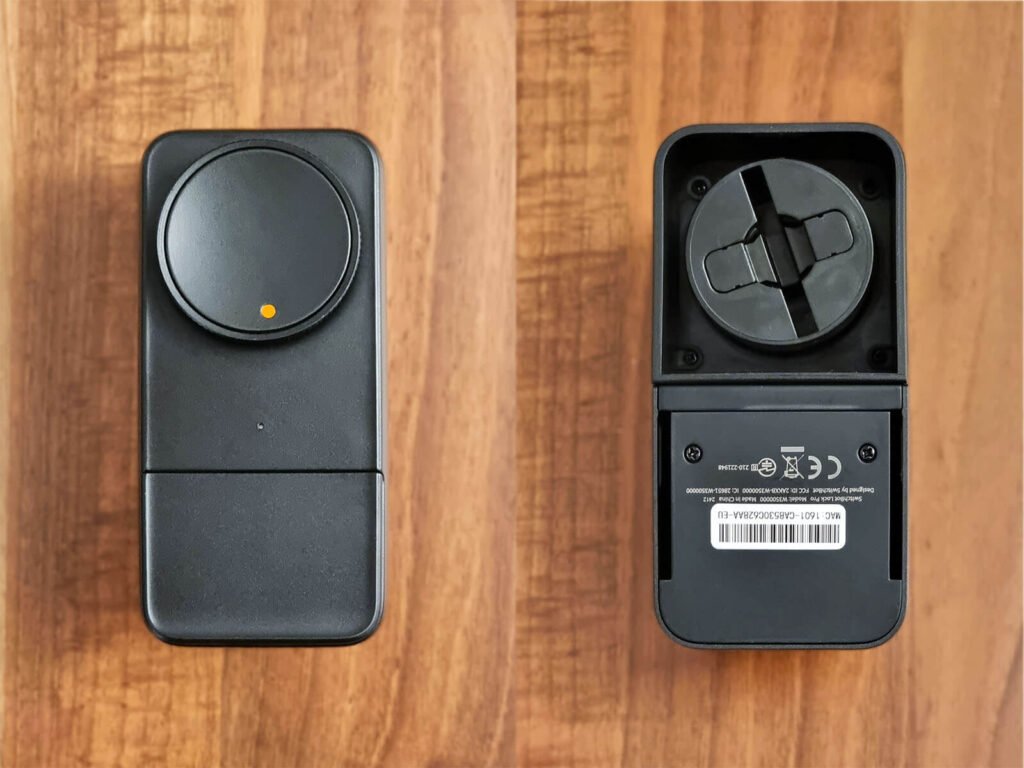
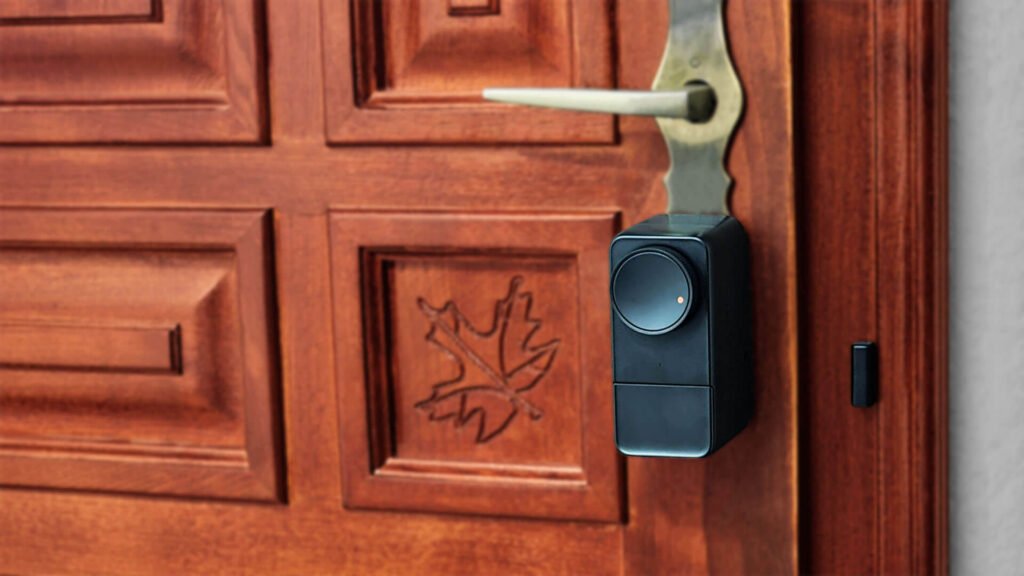
The Lock Pro has an all metal enclosure, making it sturdier and more durable than the previous smart lock by the company. The knob on the front can be easily turned for manual locking/unlocking and it also doubles as a button called Quick Key. This feature allows you to simply press the knob like a button which automatically turns the cylinder. You can set this to single or double tap.
The backside of the lock holds the key turning groove, which needs to be mounted onto your physical key. This knob simply turns your key and locks/unlocks your door. The range of motion is calibrated with the SwitchBot app and can be set to operate multi-point locks too.
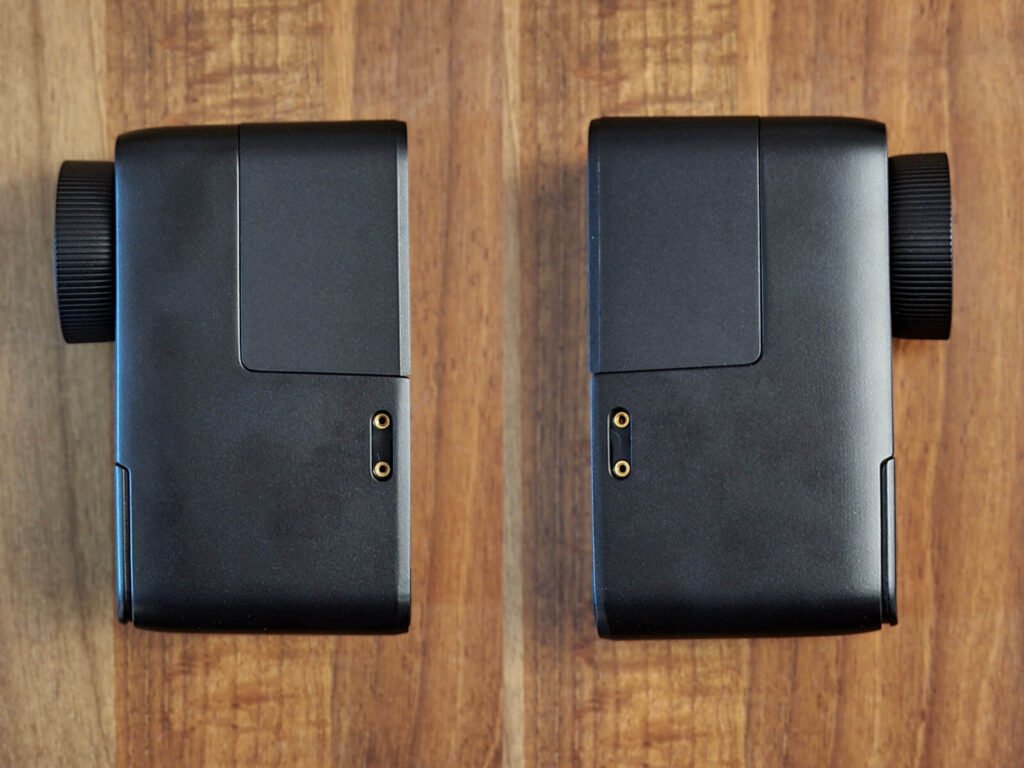
The Lock Pro is symmetrical on both the left and right sides. I would have preferred it to be of slimmer design, leaving a smaller footprint on my door. But, after mounting it securely on my wooden door, I found I don’t mind it all. It’s there and just does it’s job.
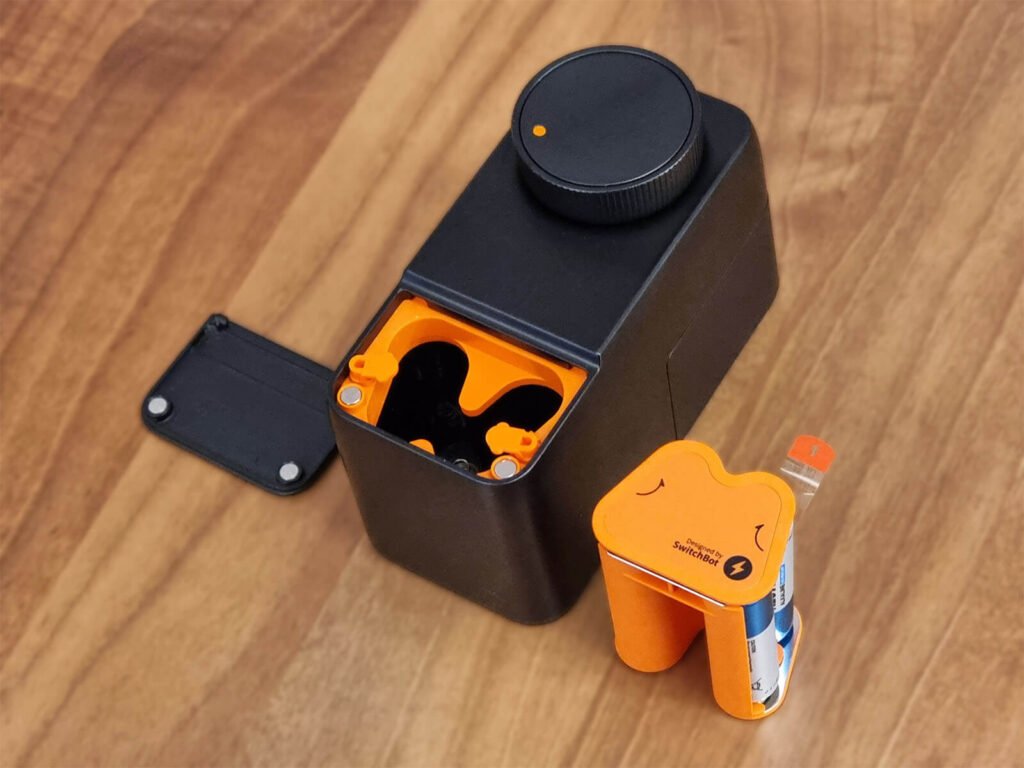
The battery lid is held in place by a set of small magnets, easily removed with a little tug an pull but not easy enough to fall out on its own. The battery compartment holds 4xAA batteries which need to be replaced every 6-9 months. These stats were lab tested with locking/unlocking the Lock Pro 10 times a day.
SwitchBot does offer a battery expansion pack which you can use to boost the battery life to 12 months. It’s available on their online webstore.
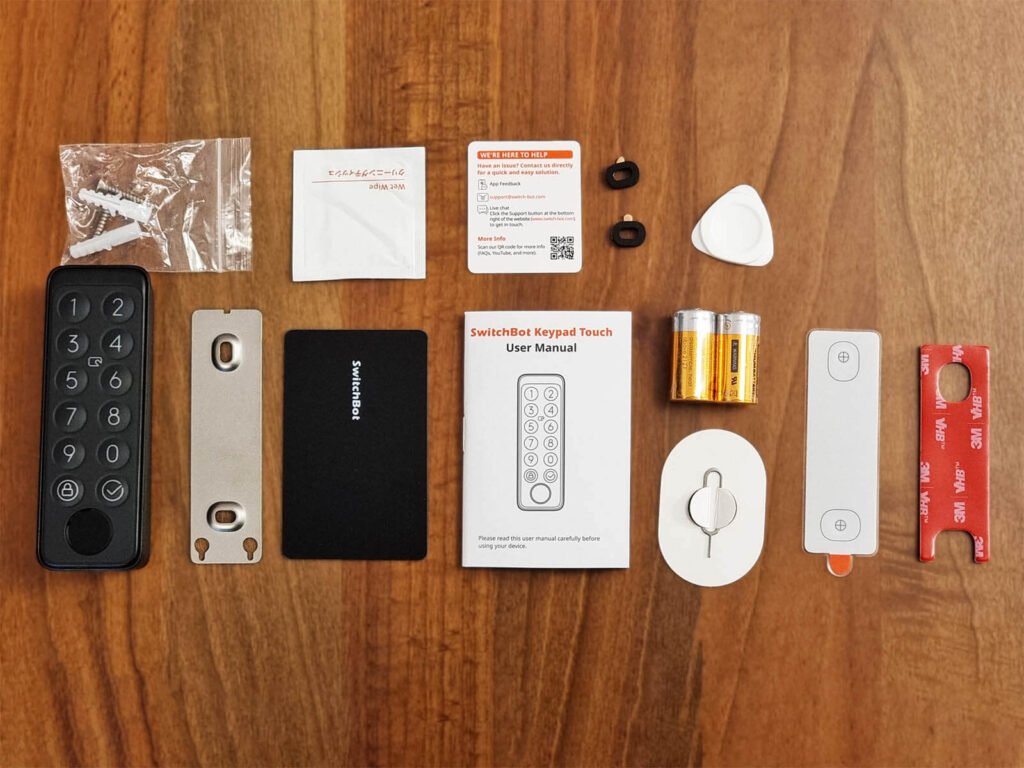
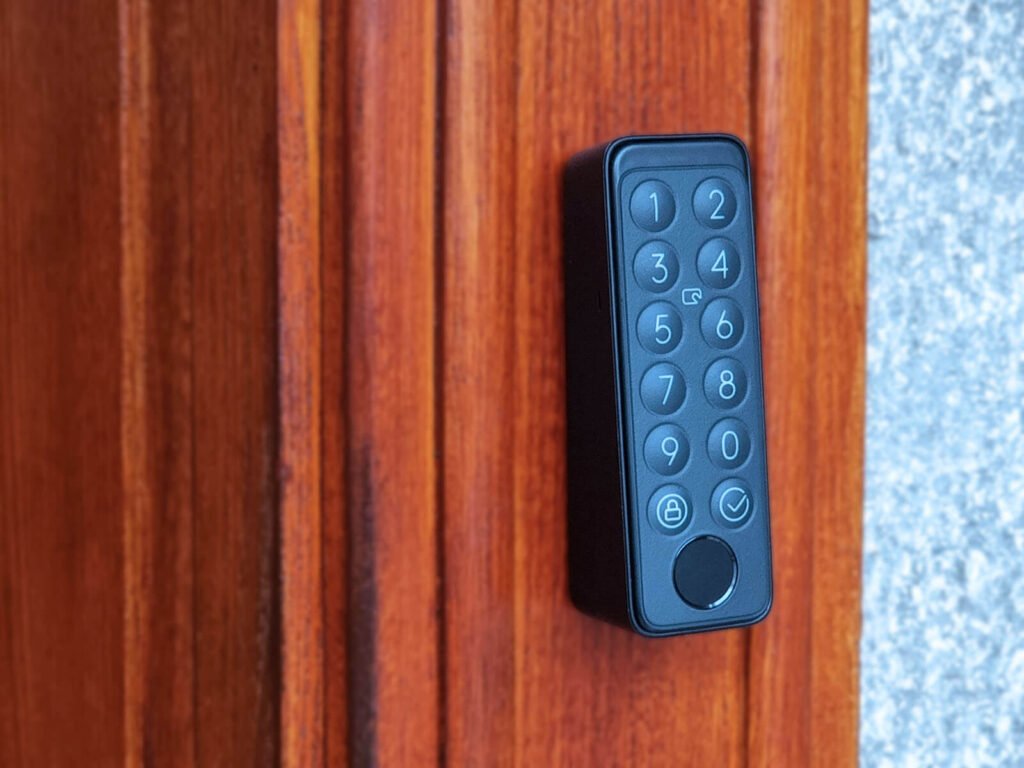
The Keypad that came with the Lock Pro contains a bunch of things needed for its own installation on the outside of your door. It includes a user manual, mounting bracket, a sticker, some screws, prying tool, batteries, pairing pin and a SwitchBot NFC card for opening the door.
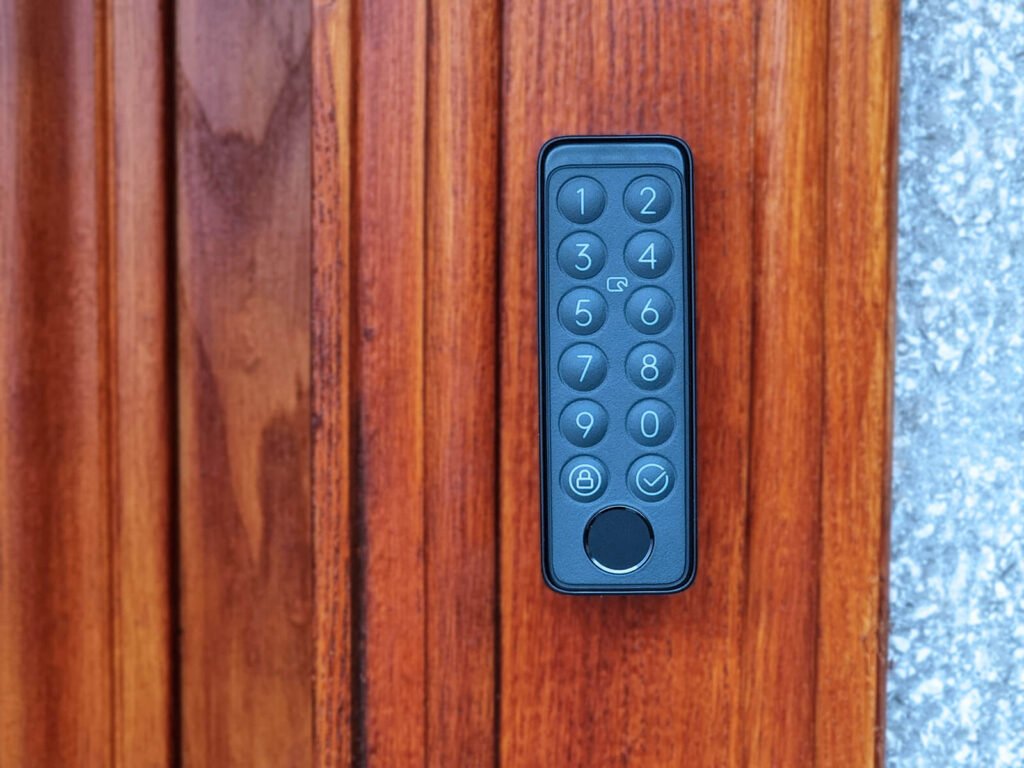
What I love about this keypad is that it’s equipped with an anti-tamper mechanism. A magnetic reed switch most likely, which triggers the sensor and alerts you when someone tries to remove the keypad from the mounting bracket.
SwitchBot Lock Pro Installation
I decided to install and test the SwitchBot Lock Pro on my house’s main door. Don’t allow yourself to be intimidated by the many attachments and mounting brackets, I found out the lock is very easy to retrofit. I do suggest you go over the manual before starting, as it will help you identify the correct mounting bracket you need to use (A or B).
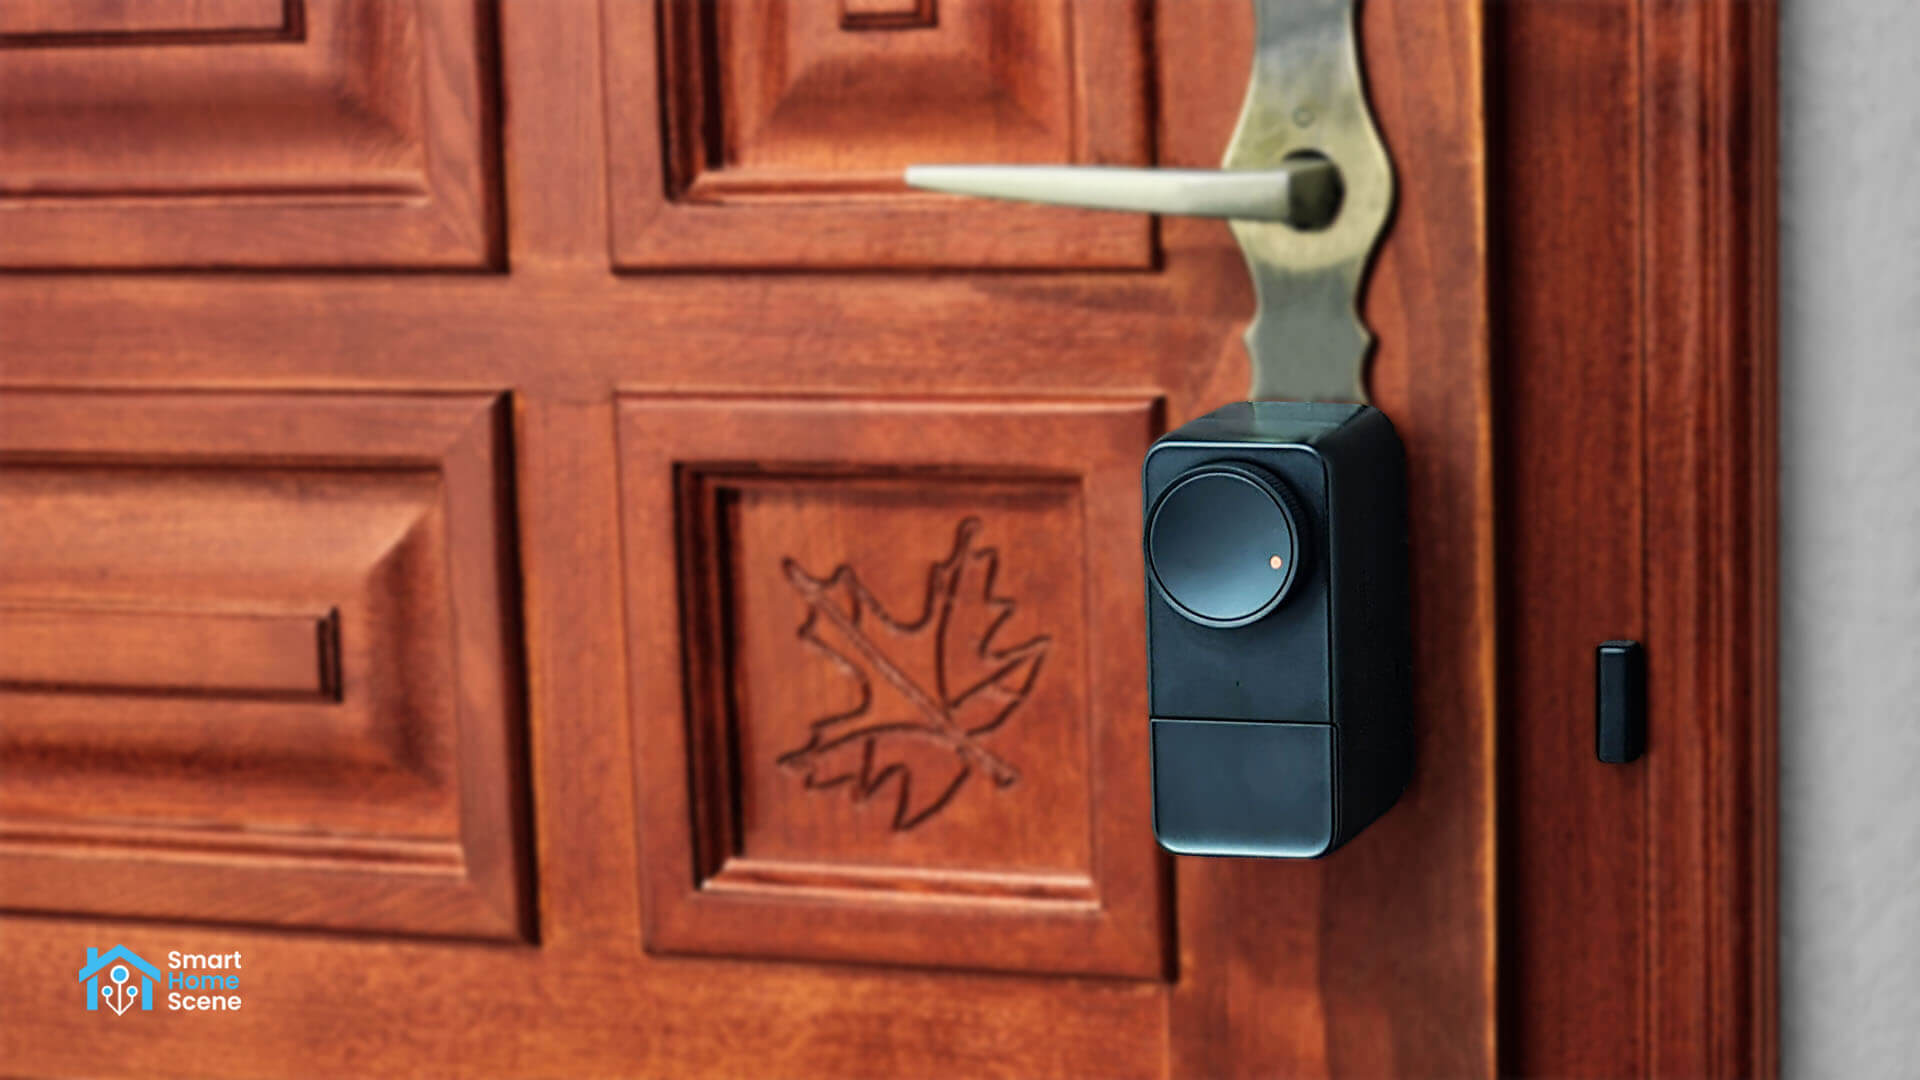
My lock cylinder was suitable for using mounting bracket B. I decided to simply install it with the powerful 3M sticker and not use screws. I simply cleaned up the surface with the included adhesion primer in the package, centered the bracket and slapped it onto my door. It took about 5 minutes to set firmly so I could attach the Lock Pro. I centered the groove to my key and 10 minutes later, I had it installed on my rustic cherry entrance door:
The magnet included acts as any door & window sensor, triggering a reed switch inside the lock so it knows if its open or closed. The great thing about it that it’s really powerful and can be installed at a distance of maximum 10 centimeters. Once I made sure the lock was secured tightly, I could install the keypad on the outside of my door.
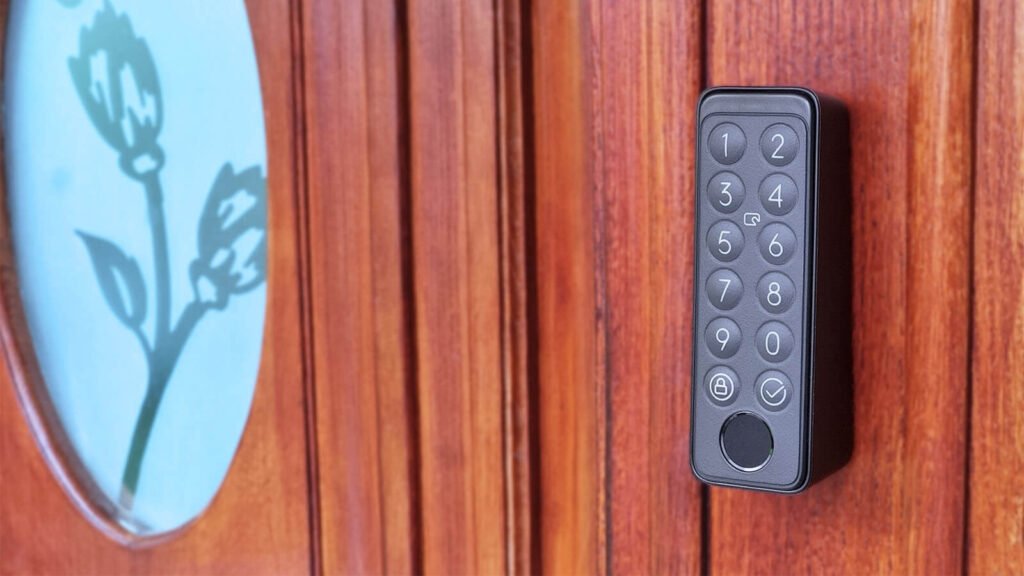
Like the Lock, I used the sticker to mount the Keypad. I centered the metal bracket to the slabs of my door and simply slid it on top. This bracket acts as a magnetic sensor which triggers the anti-tamper mechanism and notifies you when someone tries to remove it.
I would say even the most inexperienced users can install this device without much trouble. SwitchBot makes it very easy to install the Lock Pro on your own by visualizing every step of the way in the user manual or the SwitchBot app.
SwitchBot App Setup
Once the Lock Pro and Keypad were installed, I continued to onboard the smart lock to the SwitchBot app. The app is absolutely necessary to onboard, configure and prime the lock for Matter. It is also the only way to add fingerprints, NFC tags, passcodes and pair the keypad to the lock.
Since the Lock Pro is a Bluetooth device, one of SwitchBot hubs (e.g. Hub Mini or Hub 2) is needed to bridge the gap between the lock and any Matter controller (e.g. Home Assistant).
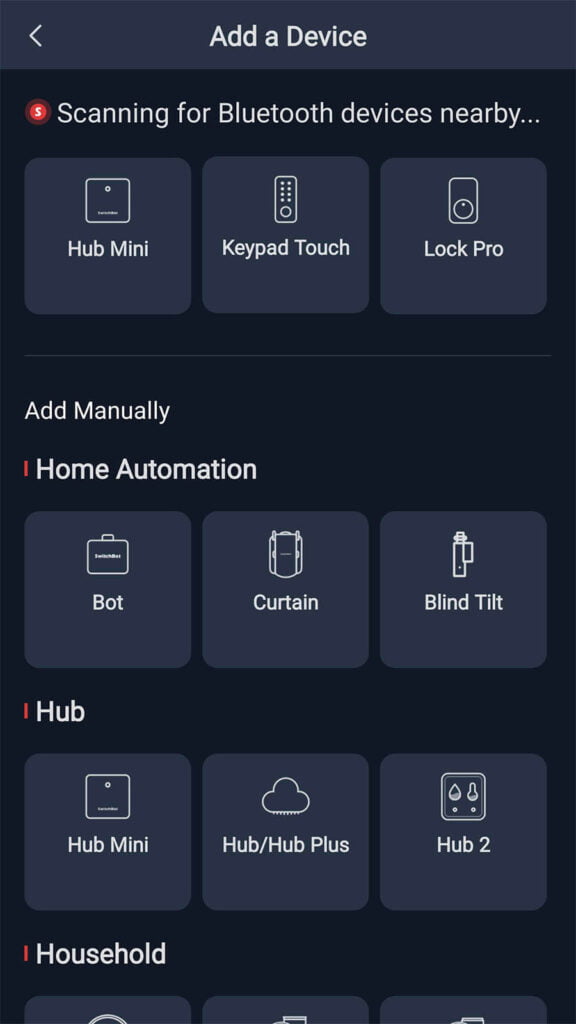
All three need to be paired to the SwitchBot app before they can be configured and used properly. Simply press the + button in the app and follow the pairing process for each. If you are already done with installation, you can press Skip at the mounting screen.
I suggest starting with the Hub Mini or Hub 2 before you onboard the lock and keypad. The Hub pairs very quickly without any additional setup. Once you get to adding the lock, the guide will ask you to calibrate its operation. Basically, it involves:
- Turning the knob to the locked position
- Turning the knob to the unlocked position
- Testing the contact/sensor at 10cm
- Testing the lock/unlock travel distance
Now, this is where you need to be mindful of the calibration. If you have a multi-point lock, turn the knob to unlock your door, but not completely. Leave some travel distance to allow for manual operation of the knob. Do the same for the locked position. When the app prompts you to test the lock, follow the instructions, and that’s it.
Pairing SwitchBot Keypad to Lock Pro
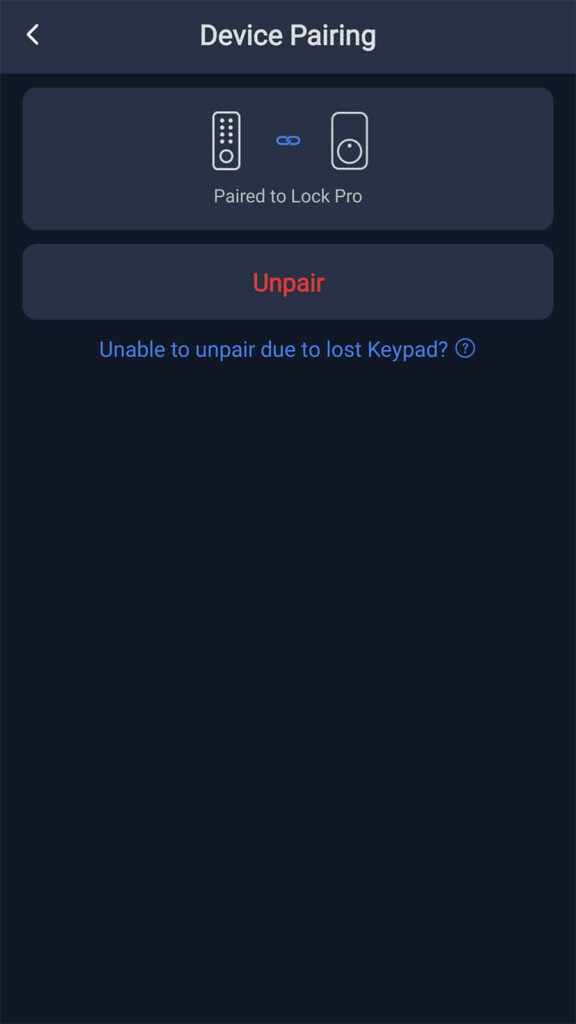
Once the Lock is setup, pair the Keypad to the app. It will guide you through a similar process and ask if you need mounting guidance. If you’ve already mounted the Keypad, you can also press Skip at this screen.
Open the Keypad settings and click Device pairing. Select the Lock Pro and match the Keypad to the Lock. At this point, you can add fingerprints and PIN codes for each user of your family. The Keypad can hold 100 individual fingerprints and passwords (PIN), which makes this a suitable device for offices and access systems.
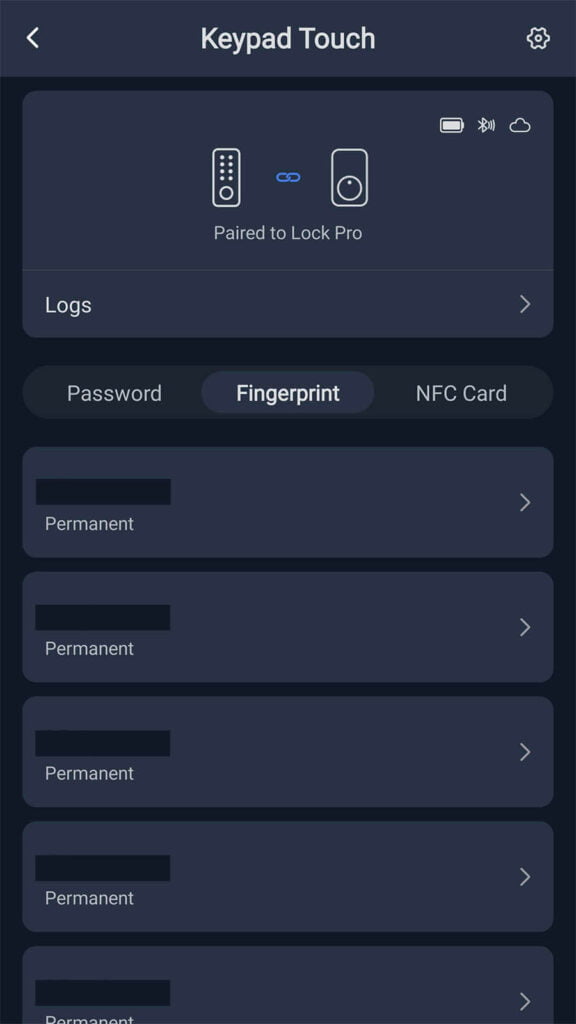
To test the Keypad, I added 5 fingerprints for family members. After the initial adding of a fingerprint, the app allows to you use a so-called Fingerprint enhancement feature. This further improves the already accurate and fast fingerprint reader. I had no issues with the reader whatsoever, I’m actually quite impressed by it’s speed. I especially appreciate the anti-tamper feature, which is a nice addition to a lock of this type.
Pairing SwitchBot Lock Pro and Keypad to Hub
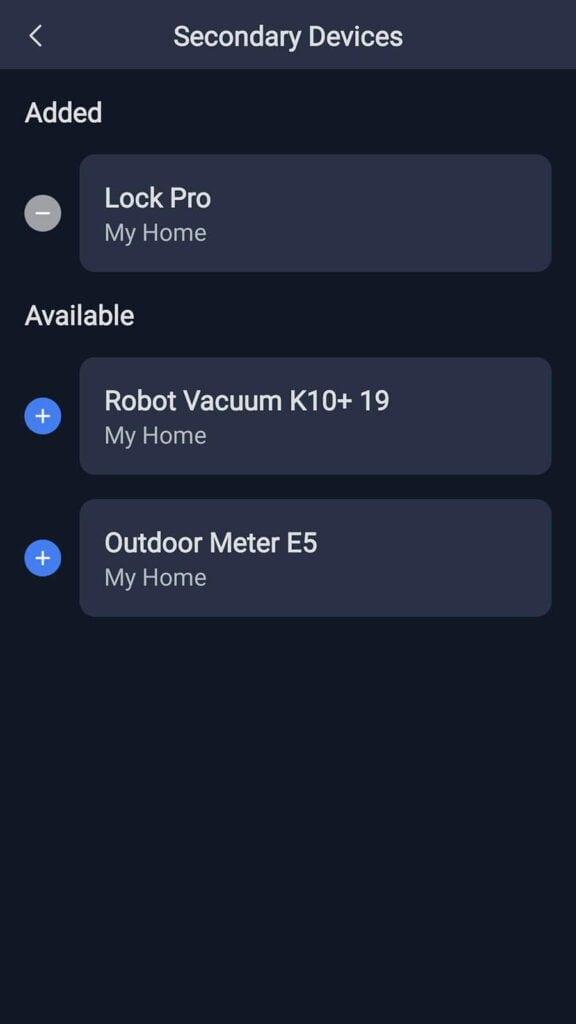
Before the Lock Pro and Keypad can be accessed remotely, they need to be paired to one of SwitchBot’s hubs. By opening the Settings screen of each, the app will allow you to enable remote access for both. The setting for the Lock Pro is found under Cloud Services, while for the Keypad its labelled simply as Connect to hub. Enable this feature for both and select your SwitchBot Hub. Now both devices are paired to the hub and can be exposed as Matter sub-devices.
Lock Pro in Home Assistant over Matter
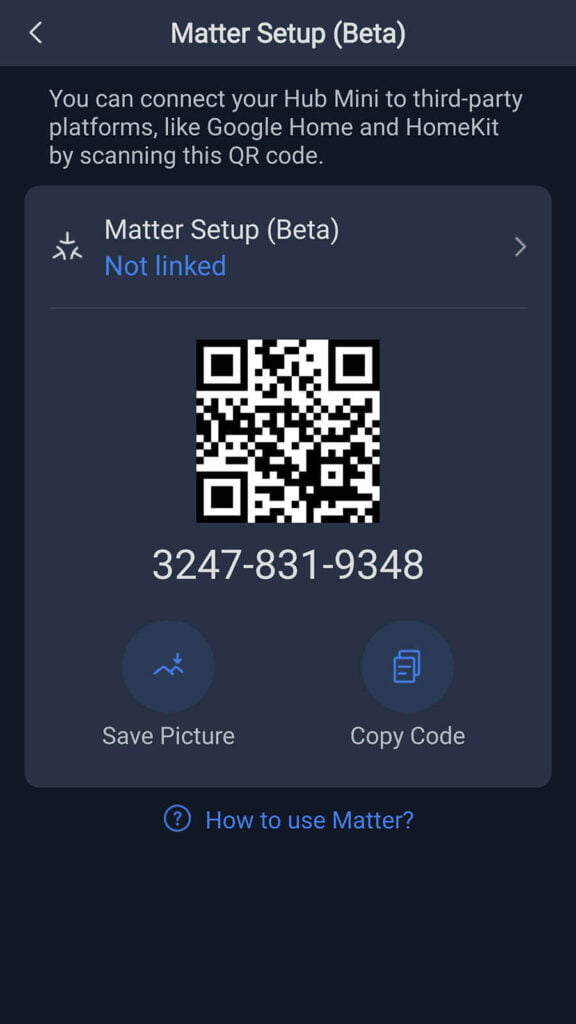
To add the Lock Pro over Matter in Home Assistant, the SwitchBot Hub needs to be paired as a Matter device first and the lock added as a sub-device. This feature can be found by clicking the Hub Mini or Hub 2 in the app, clicking the Settings icon and selecting Matter Setup (Beta). Copy the code from the SwitchBot App or save the image for pairing with Home Assistant.
In Home Assistant, navigate to Settings > Devices & Services > Add Integration > Add Matter Device. If the Matter server add-on is already setup and running, you can continue to pair the Hub just like any other Matter device. If it is not, Home Assistant will prompt you to setup the Matter add-on first, which is a two-click job. Once the Lock is added as a sub-device, here’s what it looks like in Home Assistant:
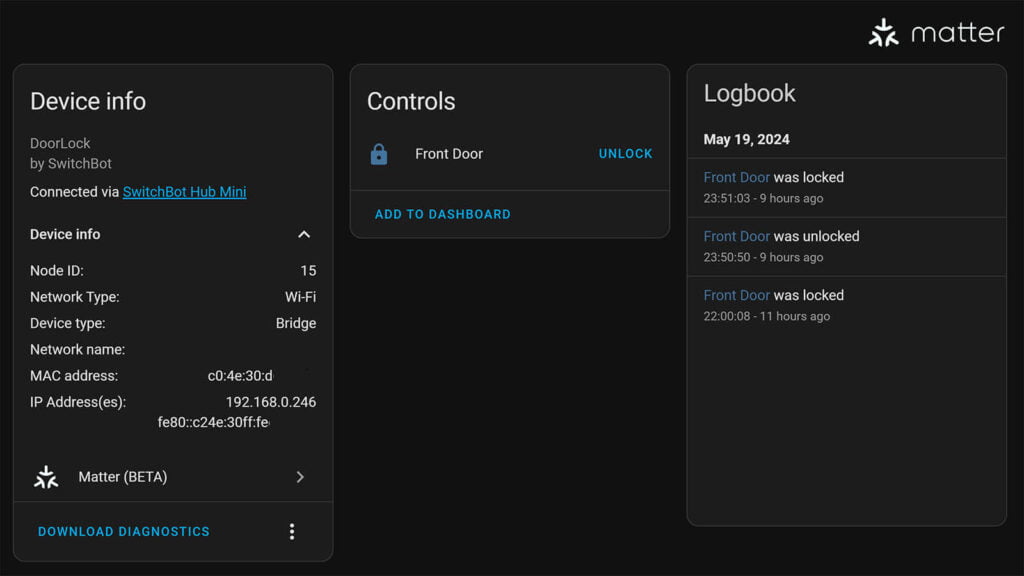
Even though no configuration and setup parameters are exposed, the SwitchBot Lock Pro is fully controllable and usable with Home Assistant. You can create automations and monitor log events, which are recorded in HA just like the SwitchBot app.
Pairing an NFC ring to the SwitchBot Lock Pro
A special NFC card ships with the Lock Pro, which can be paired to the Keypad and used through your wallet as an additional access method. I’ve had an NFC smart ring in my arsenal for a while now and this is the perfect opportunity to test it out!
Browsing through the NFC FAQ on SwitchBot’s website, I found out that the Keypad can work with third-party NFC cards, notably the Mifare Classic 1k. MIFARE is a series of integrated circuit (IC) chips used in contactless smart cards and proximity cards. Scanning my JAKCOM R5 Smart Ring with the NFC Tools app revealed that the ring does use the Mifare Classic 1k, so I simply paired it to the Keypad and low and behold – it opens my door lock super fast! What a flex.
Side note: JAKCOM also makes this NFC nail tag that can be used with this smart lock. Imagine giving your lock the bird and having it unlock. Good way to impress people around the office or workshop.
Final Thoughts
The SwitchBot Lock Pro is a capable door lock, no doubt about it. It offers so many access methods that its easy to lose track of what’s possible. The all-metal enclosure is very sturdy and robust, I don’t see a way to easily damage or disable it.
Even though it does not expose any additional entities, it operates very well paired over Matter to Home Assistant. After everything was setup in the SwitchBot app, you can control the lock through HA without issues.
If you are on the market for a capable door lock and don’t mind the app dependency, I honestly don’t think there are better alternatives at this price tag. Here are some buying links for the Lock Pro and Keypad + Hub combo:
SwitchBot Lock Pro, Keypad, Hub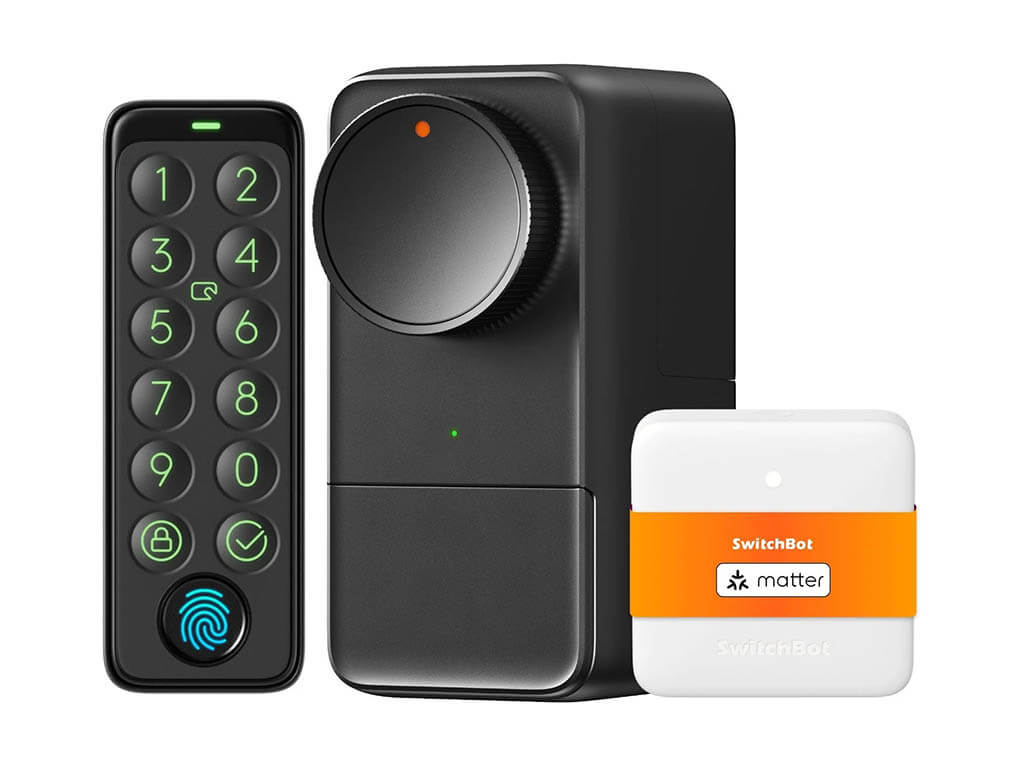
SwitchBot Webstore
Lock Pro | Lock Pro + Keypad
Lock Pro + Keypad + Hub![]()
United States | Canada | United Kingdom
Germany | Netherlands | Sweden
Spain | France | Italy
*If links fail to open, try disabling your AdBlocker.
DISCLAIMER: SwitchBot sent me the Lock Pro as a testing sample for the purpose of a review. This will in no way influence, sway or affect my opinion of the device and will just be my usual observations and unbiased testing approach. I shared my guidelines and principles for collaboration with their PR person, to which they fully agreed.


Operating temperature is rather from “- 10 °C” (minus ten). I discover that the day I receive my Switchbot Lock Pro, and I’m from Canada… Not good. I did not see that indicated on their Amazon listing.