If you’ve been following my reviews channel for a while, you will notice I frequently recommend Apollo Automation smart devices. Their products are very reliable, include many sensors and peripherals and are completely open-source – something that I have great respect for.
I have yet to find a better mmWave occupancy sensor for Home Assistant than the Apollo MSR-2, the smallest presence sensor ever made. It’s affordable, it’s tiny, it’s packed with features and can be tweaked to infinity. I highly suggest reading the review if you are on the market for one.
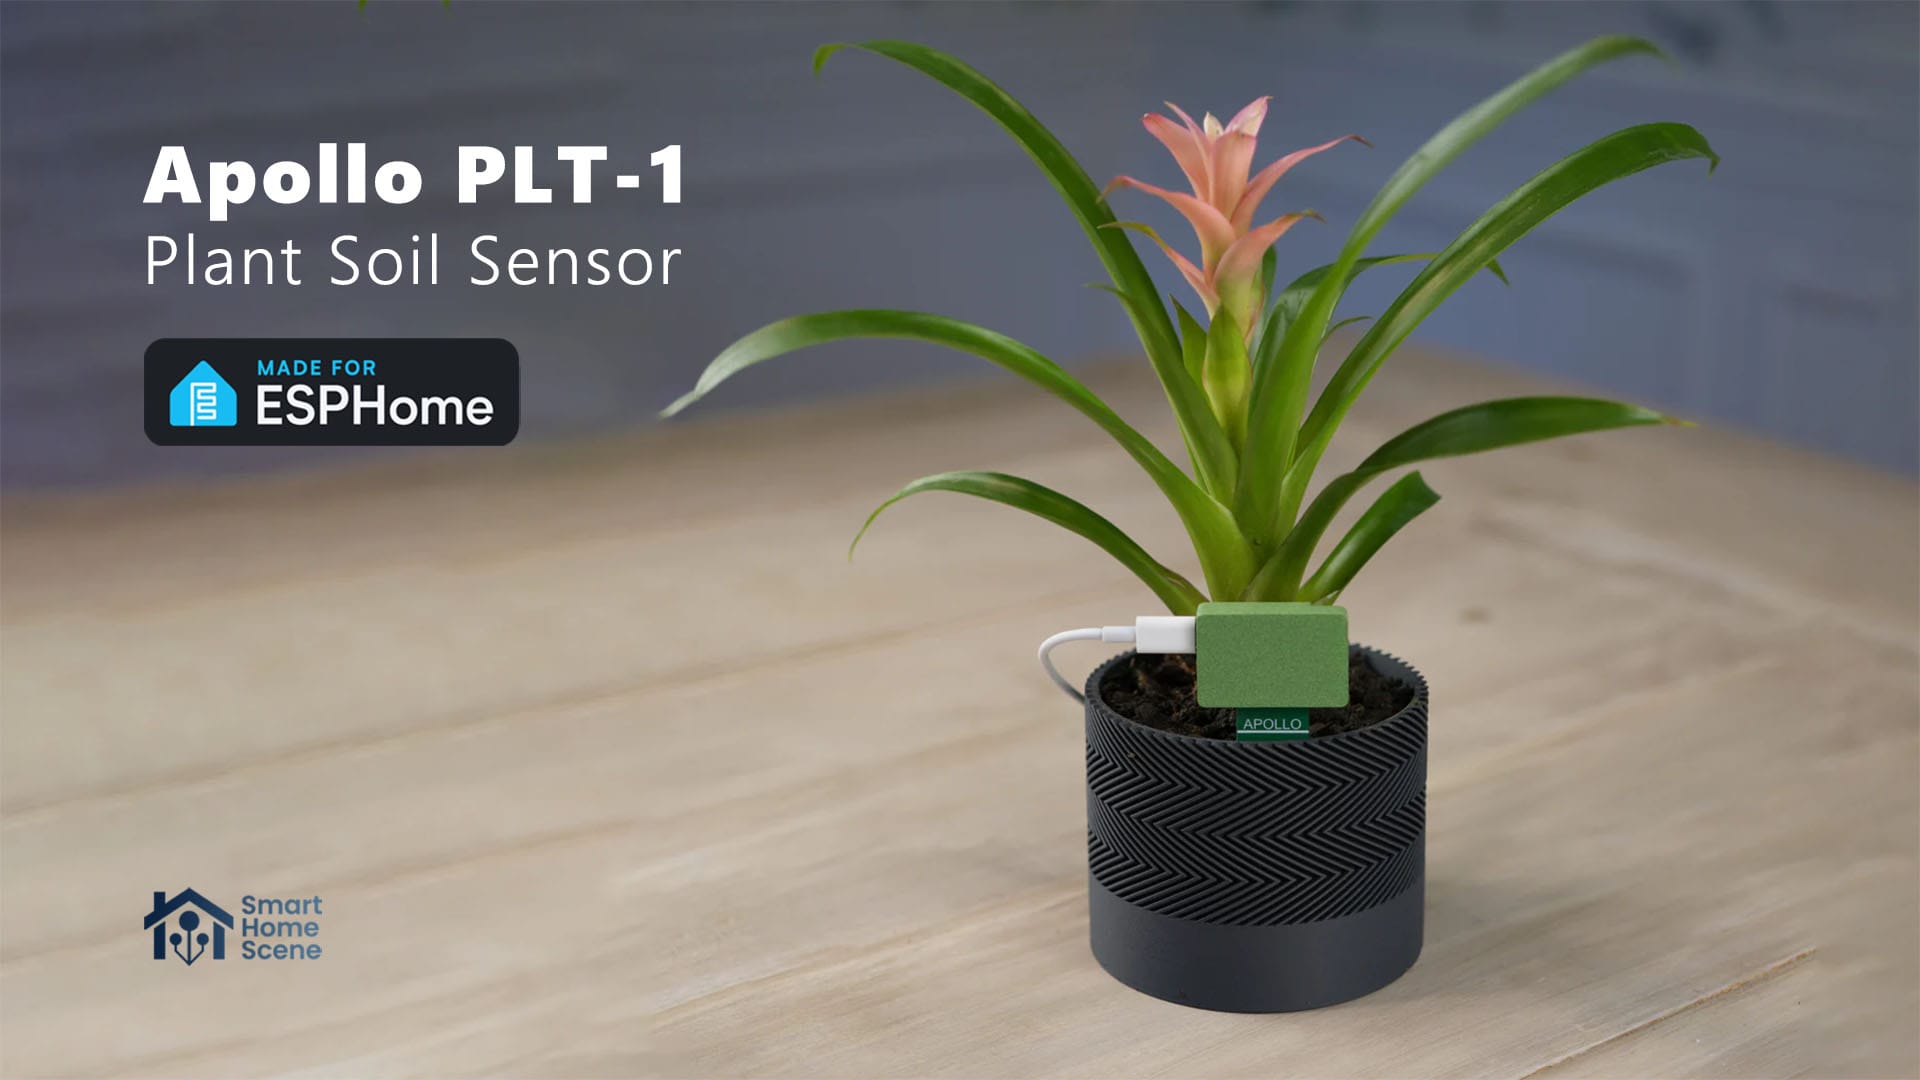
In this article, I am writing about my experience with the new Apollo PLT-1 Plant Soil Sensor. This device measures soil moisture, air temperature, humidity, illuminance, UV rating and is equipped with an addressable LED and their trademark piezo buzzer.
Technical Specification PLT-1
- Model: Apollo PLT-1 Plant Sensor
- Dimensions: 41x26x14mm (77mm stake)
- Soil Moisture: Capacitive Sensor
- Temperature & Humidity: Asair AHT20-F
- Illuminance and UV: Liteon LTR390
- Peripherals: RGB LED, Piezo Buzzer
- Optional DS18B20 Probe
- Optional 18650 Battery
- Availability: Apollo Website (US), OpenCircuit (EU)
- Price: $27.99
Device Overview PLT-1
The Apollo PLT-1 plant sensor is available in two versions: a battery powered version (PLT-1B) and a USB-C powered version (PLT-1). Apollo claims a 6 months battery life if a quality 18650 battery is used, with the default sleep/wake settings. The battery variant is obviously bigger and bulkier, but does offer a level of convenience as it does not require cabling. In this article, I am reviewing the USB-C version.
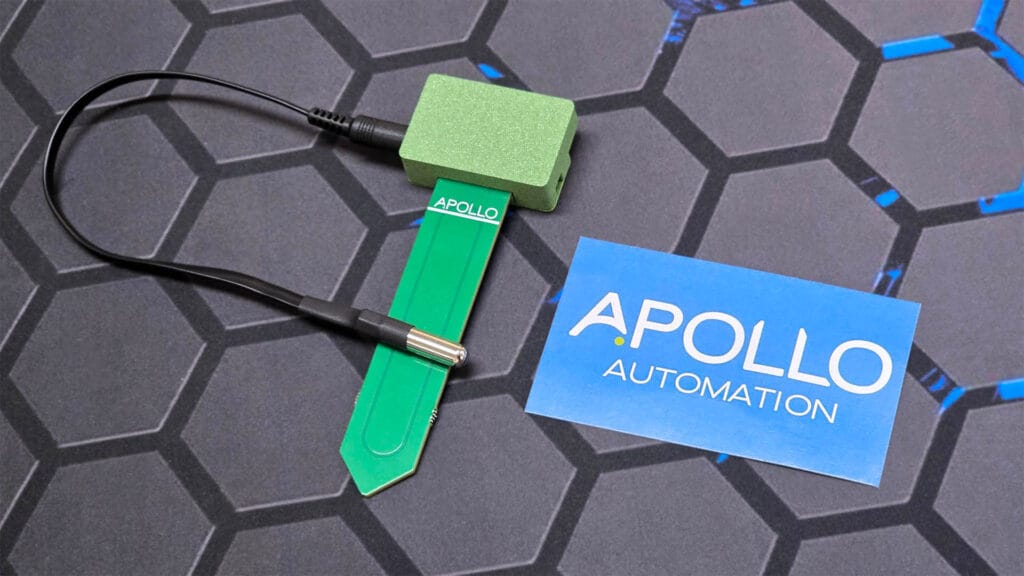
Before you read further, it’s important to note that the PLT-1 is an indoor plant sensor, it’s not waterproof and cannot be used outdoors. The case does not protect the internals from any of the elements, so even when used indoors you need to be careful with how you water your plants. Pouring water over this device would effectively ruin it.
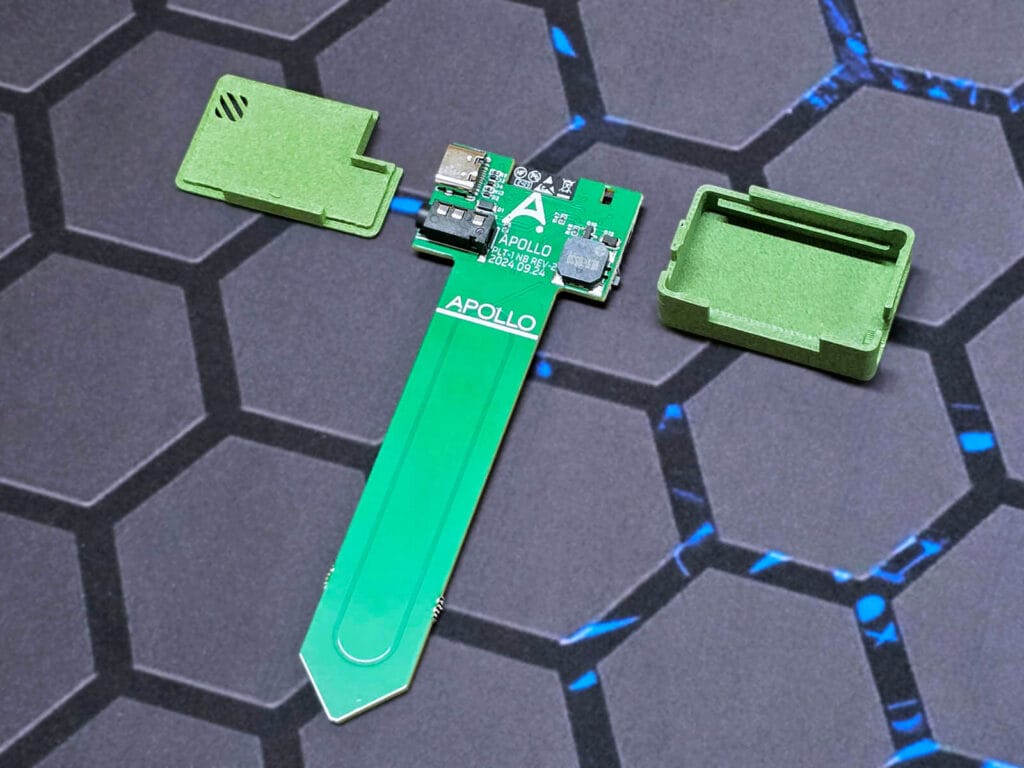
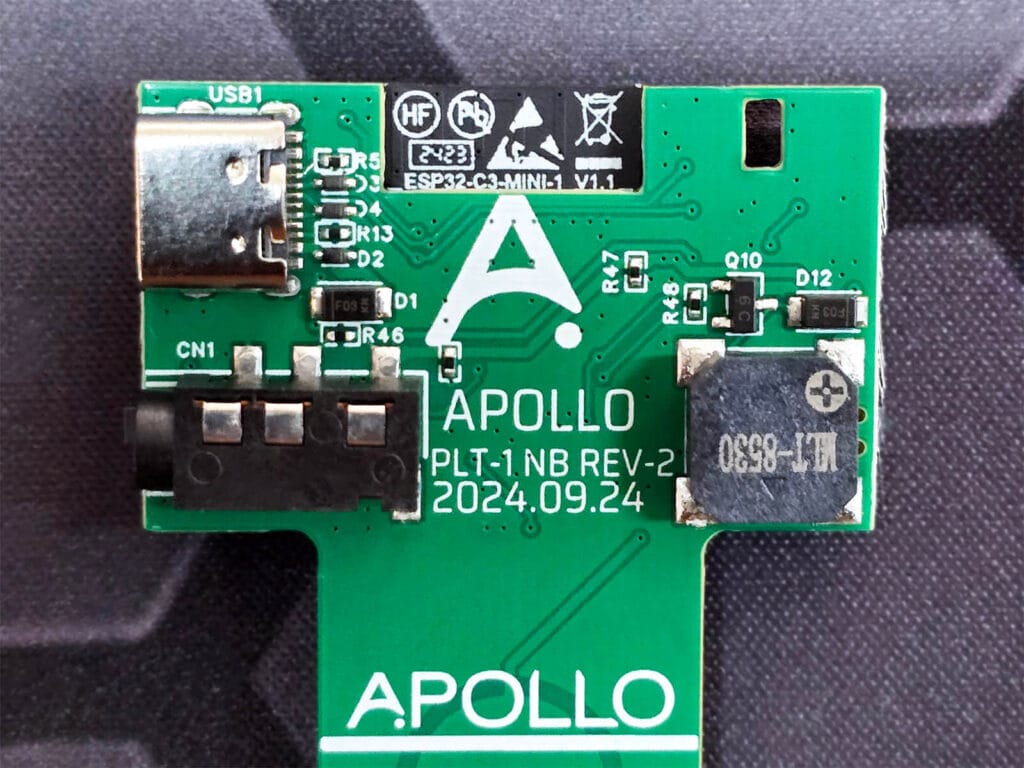
The PLT-1 is powered by the ESP32-C3-MINI-1 [Datasheet] dev board. This SoC is equipped with an on-board antenna, has 4MB flash, 15 GPIO pins and a 160MHz single-core processor. It supports Wi-Fi and Bluetooth, which means the PLT-1 can be configured to work only with BLE advertisements. This is especially useful when used with a battery, as Bluetooth uses less power then Wi-Fi.
The temperature and illuminance sensors are located in the top left corner, while the onboard addressable RGB LED is placed the top right corner. This LED can be used as a visual indicator for the status of the plant soil or the plant itself, if you create some clever automations. The boot and reset buttons are also easily accessible on the sides of the PCB.
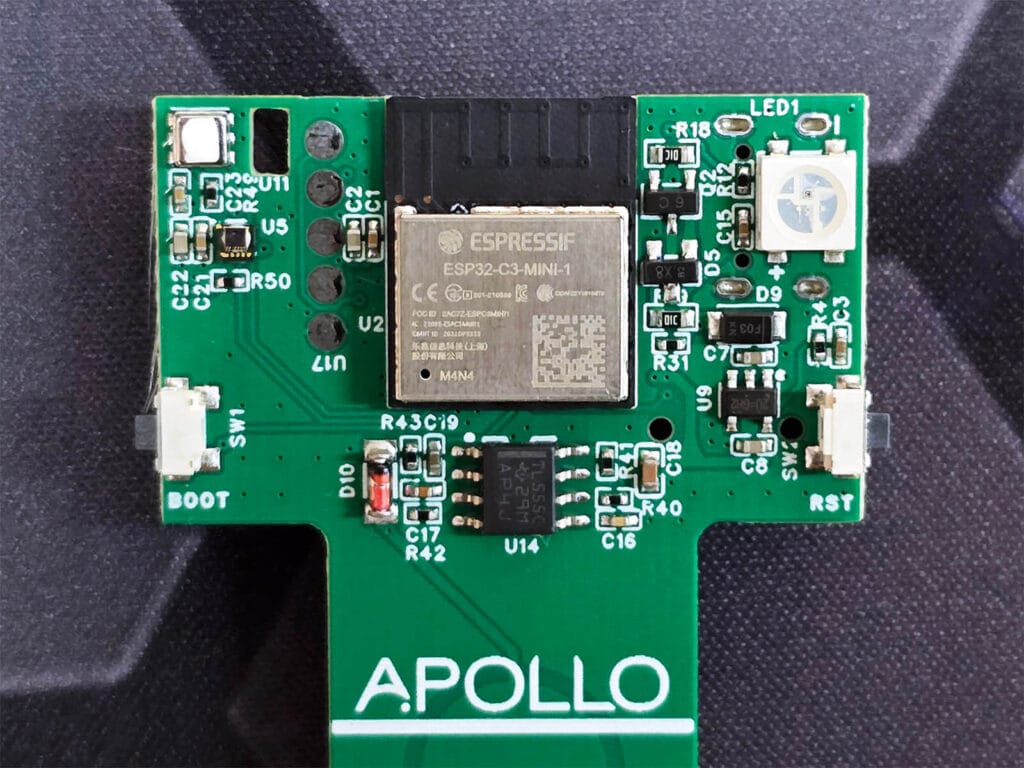
On the other side of the PCB, the USB-C connector is placed on the left side, above the external soil temperature probe. This probe is a Dallas DS18B20 [Datasheet] model and is a good addition for plants that are very sensitive to temperature. The DS18B20 is waterproof can withstand temperatures of up to 125°C.
On the right side of the PCB, lies the Piezo Buzzer. Apollo adds this buzzer to all their devices, almost like a trademark peripheral. The buzzer can be used to create sounds or ringtones as an audible indicator in your automations. You can check out this video of me playing Mission Impossible with this buzzer on the MSR-2.
Home Assistant Integration PLT-1
Like all other Apollo devices, the PLT-1 uses custom ESPHome firmware developed by their team, which can obviously be integrated natively in Home Assistant. You can examine the code by visiting the PLT-1 repo on GitHub.
As the device comes pre-flashed, all you have to do is connect to the fallback hotpot with your phone, input your Wi-Fi credentials and connect the PLT-1 to your network. Home Assistant will auto-discover the device and you can add it by simply pressing the confirm bottom.
Here’s how the entities look like once added in Home Assistant via ESPHome:
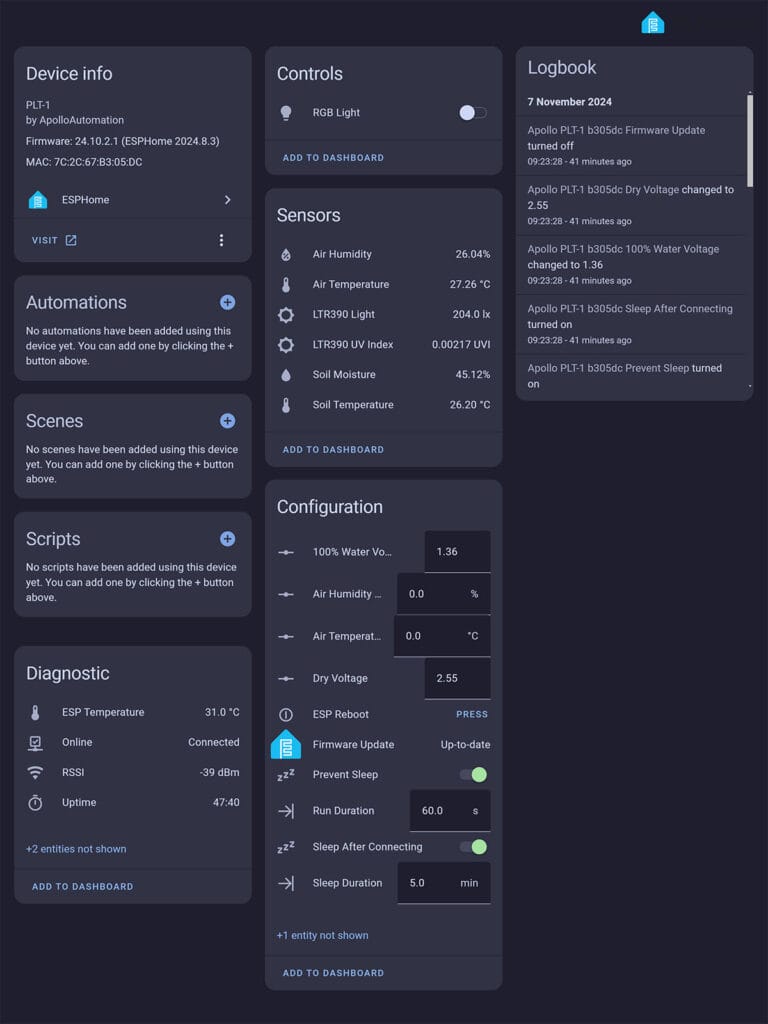
First, the PLT-1 exposes a single control entity for the on-board RGB LED. This entity is from the light domain, allowing you to control it just like any other light in Home Assistant: toggle, change color, set brightness etc. Next, it exposes several sensors including air humidity, air temperature, illuminance level, UV index, soil moisture and optionally, soil temperature obtained by the Dallas probe. These are pretty straightforward and require no further explanation.
Under the configuration tab, you will find several device sensors and configuration fields. The important thing to note here is the wet and dry voltage fields.
- The wet voltage setting specifies the voltage corresponding to 100% soil saturation (completely wet soil). A threshold of 1.5V is used to indicate fully moist soil, but you can adjust this based on your plant’s specific needs. This helps ensure accurate alerts and automations for low soil moisture.
- The dry voltage setting, on the other hand, defines the threshold at which the soil is considered dry. For example, a dry voltage of 2.7V signals that the plant needs watering. You can set up automations to notify you when the voltage reaches this level, indicating that it’s time to water your plant.
- The run duration setting defines how long the sensor stays active after establishing a connection. A run duration of 60 seconds is typically sufficient to transmit all sensor data and updates before switching to sleep mode to conserve energy.
- The sleep duration setting determines how long the PLT-1 remains in sleep mode between connection intervals. A 5-minute sleep duration strikes a good balance between preserving battery life and maintaining an optimal update frequency. You can adjust these values based on how frequently you want the sensor to wake and send new data.
And finally, the Sleep after connecting and Prevent Sleep toggles control the wake/sleep behavior of the device. The first one makes the PLT-1 enter sleep mode after it has finished sending data during each connection. The latter prevent the PLT-1 from going into sleep mode and allows it to operate continuously.
Calibrating the PLT-1 Soil Moisture Sensor
While the PLT-1 soil sensor comes pre-calibrated, you may want to calibrate the probe manually in some instances or to make your own adjustments. Here’s how to calibrate the reading of the probe:
- Remove the PLT-1 from the soil and clean the probe thoroughly to remove all dirt and residue.
- Place the probe in the air or on a dry, non-conductive surface, while the device is plugged in.
- Open Settings in your Home Assistant interface and click Devices & Services
- Select the ESPHome Integration and select the PLT-1 Sensor
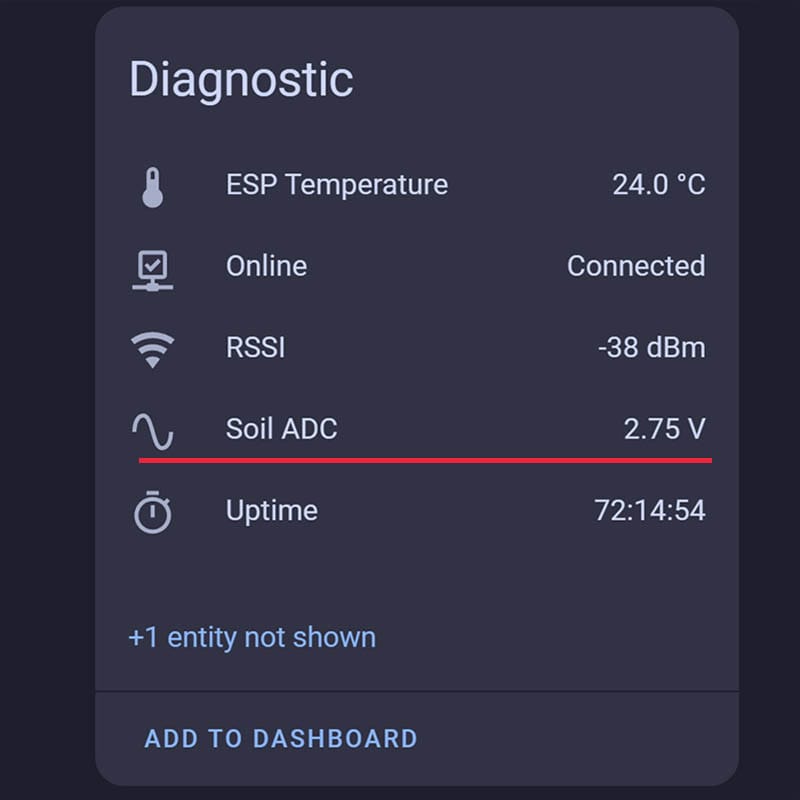
- Scroll to the Diagnostics section and choose Entity Not Shown.
- Select the hidden entity named Soil ADC and enable it
- Wait about a minute for the Soil ADC value to populate.

- Once the Soil ADC value appears, record it and enter it into the Dry Voltage field.
- Now, submerge the probe portion of the PLT-1 into a cup of water (Bellow the Apollo line)
- Record the new Soil ADC value and input it into the 100% Water Voltage field.
- Done, reinsert the PLT-1 into the plant soil.
Using the Open Plant Book with the PLT-1
If you are a plant and gardening lover while also being a Home Assistant enthusiast, you must have heard of the Open Plant Book Database. This project is a free resource for plant data gathered from its users. The live service allows you to fetch data from the database with a custom integration without registering. However, if you register you can upload plant data, search plants within Home Assistant and make the project even better. Registering is completely free.
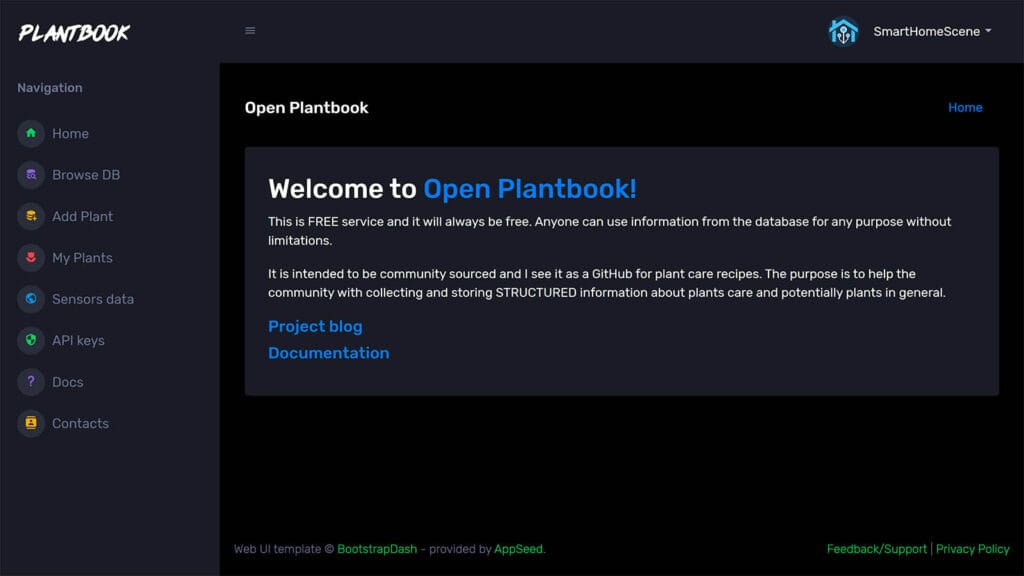
This custom component is an alternative and better approach to adding plants in Home Assistant. It’s not yet available in HACS, so the repo needs to be added before it can be used. To do this, open HACS, click the three dots in the corner and click Custom repositories:
- Add the repo: https://github.com/Olen/homeassistant-plant
- Choose Integration in the Type dropdown and click Add
- In HACS, search for Home Assistant Plant and download it
- Restart Home Assistant
- Once Home Assistant boots up, navigate to Settings > Devices & Services > + Add Integration
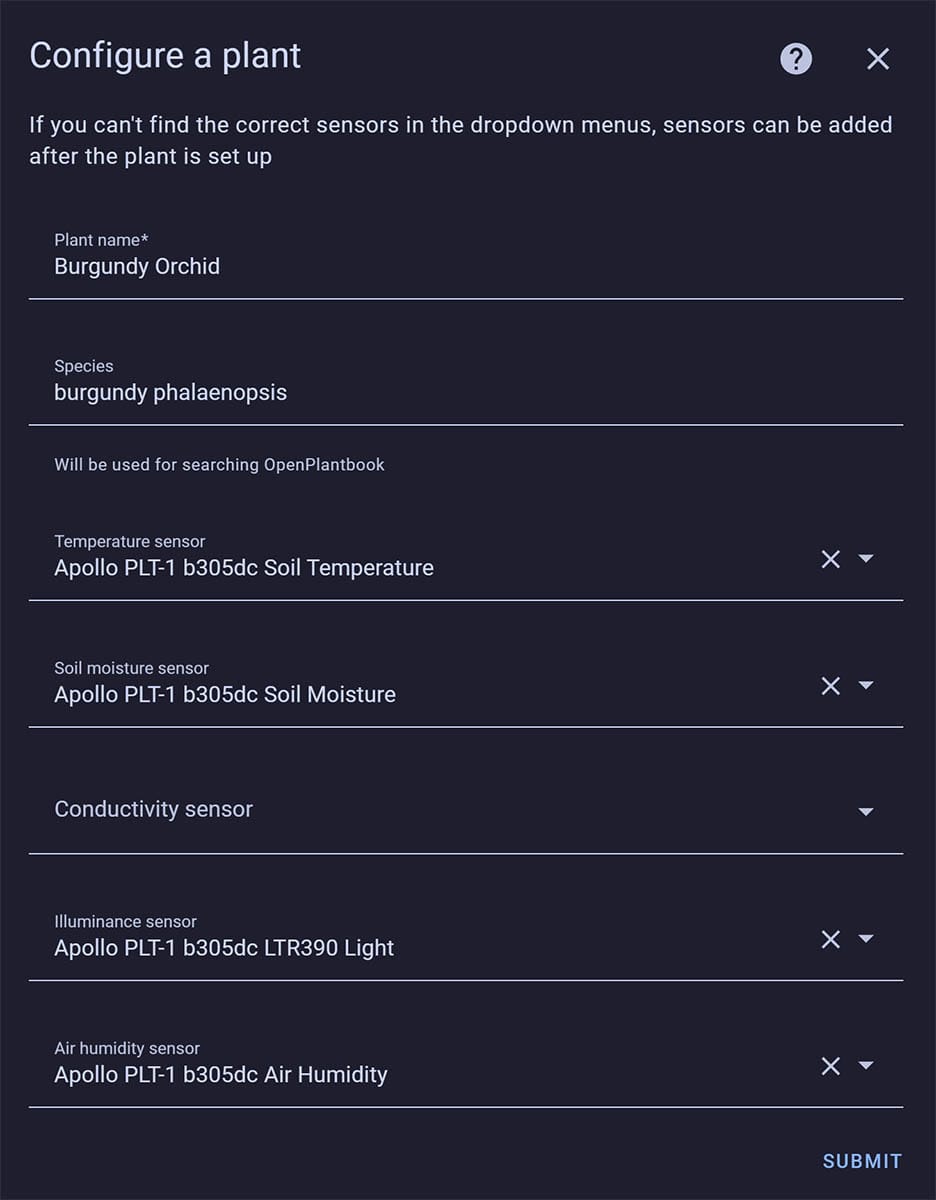
- Populate the popup window with data for your plant and input sensors:
- Name: User-friendly plant name (e.g. Burgundy Orchid)
- Species: The correct species name, which you can find on https://open.plantbook.io/browse-db/
- Sensors from the Apollo PLT-1
- Click Submit

If you navigate to Settings > States, you will find an entity from the plant domain following by the plant name. In my example, this entity is set as plant.burgundy_phalaenopsis and populated with all info about this particular plant as attributes, including an image URL.
Creating a Plant Dashboard for the PLT-1
To turn this data into a neat and beautiful dashboard, I’m going to use the Flower Card from the same developer. This card gives you beautiful overview of your plants, including all sensors attached to the plant you are tracking.
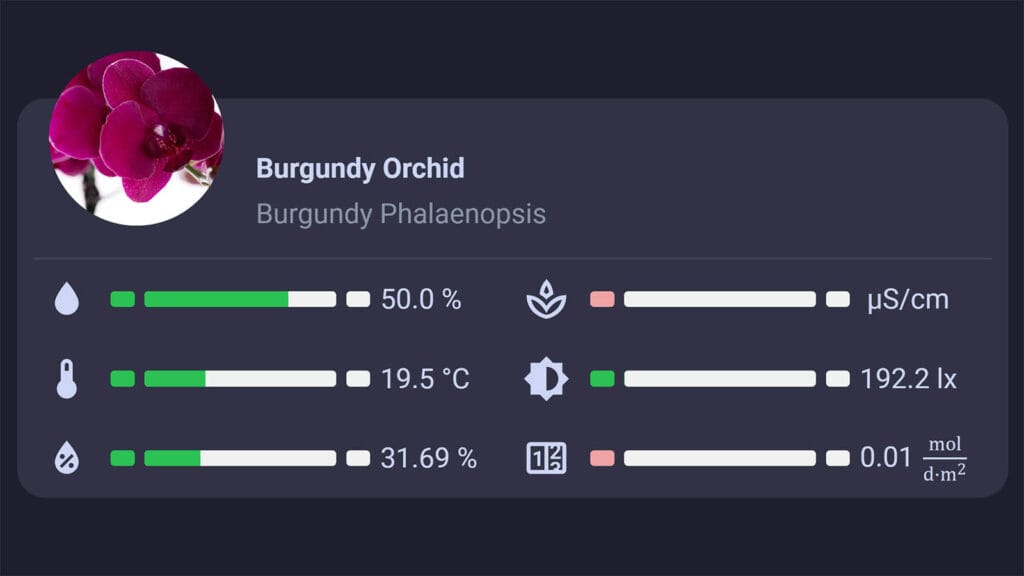
Open HACS, click the three dots again and add the following custom repository as a source:
https://github.com/Olen/lovelace-flower-cardSearch for the Flower Card in HACS and download it, reloading the resources when prompted. Navigate to one of your dashboards and add a new card. Paste the following code and edit it to match your entities. If you are using the battery version of the PLT-1, make sure to add the battery entity too, in order to track battery status.
type: custom:flower-card
entity: plant.burgundy_phalaenopsis
battery_sensor: sensor.myflower_battery #Optional
show_bars:
  - moisture
  - conductivity
  - temperature
  - illuminance
  - humidity
  - dli
Measuring Soil Moisture with the PLT-1
Using the Apollo PLT-1 for a few days, I captured some data in Home Assistant and graphed it with the Plotly card. I was mostly interested in the soil moisture value, as the other sensors are pretty generic and I expected them to be accurate, which did turn out to be the case.
I already have a new Tuya Zigbee Soil Sensor in this plant that I’ve yet to review, so I compared the moisture values of the two. The Tuya is a battery-powered Zigbee model, which has a much more slower reporting rate compared to the Apollo PLT-1. This is expected, especially for battery powered devices. There was a difference in the reported values with an average offset of ~6%, which meant the Tuya needs to be calibrated with a template sensor as I already calibrated the probe on the PLT-1.
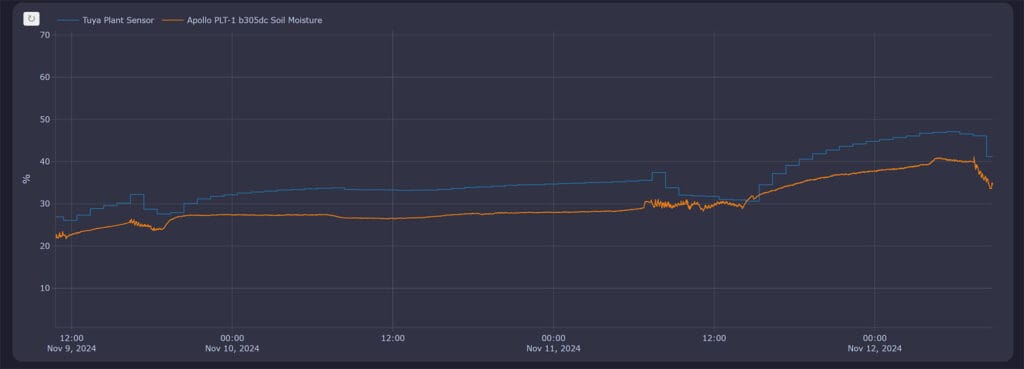
This particular orchid requires an optimal soil moisture of around 20-30% so I tried to keep it at that level, only adding slow drips to keep it healthy. I tested pouring water in another pot, which made the reading spike up to around 60-70% and slowly start to drop as the water evaporated. The wired version of the PLT-1 I’m using updates very frequently, which is useful for sensitive plants and flowers.
Final Thoughts
The Apollo PLT-1 is an awesome device for plant lovers, accurately measuring air humidity and temperature, as well as soil moisture and temperature. It uses a capacitive moisture probe to measure the water content in the soil by detecting changes in the dielectric permittivity of the soil. This probe is more durable than resistive sensors because it doesn’t corrode and is protected with a conformal coating.
I highly suggest you use the Apollo PLT-1 with the Open Plant Book Integration, as the database appears to be well-maintained and up to date. You can create a very reliable plant monitor with the PLT-1 and this custom integration. The Flower Card is a great way to display all this data neatly in your Home Assistant dashboard.
With that said, there are two considerations that you need to keep in mind about the Apollo PLT-1 Plant Sensor.
First, the device is not waterproof. It is meant to be used indoors only and managed very carefully. I expect accidentally pouring water over it would effectively ruin it. Second, it does not measure soil conductivity. This means it cannot provide insights into nutrient levels or soil salinity, which can be important for optimizing plant health and prevent issues like over-fertilization or salt buildup.
Here’s where you can get the Apollo PLT-1 Plant Sensor if you find it suitable for your use case:
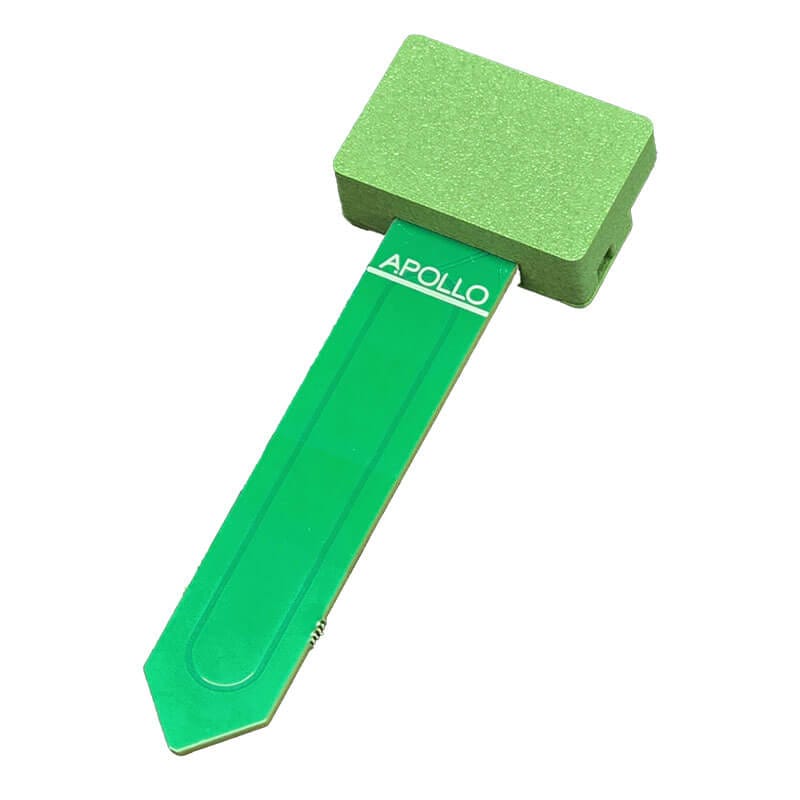
- Apollo PLT-1 (Wired)
- Apollo Webstore (Global)
- OpenCircuit (Europe, no stock yet)
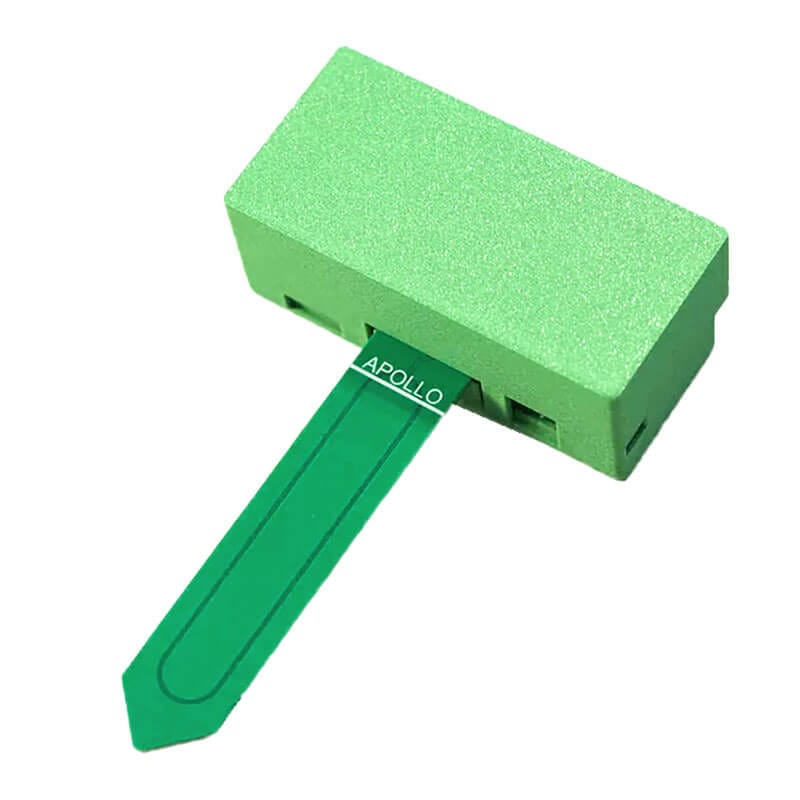
- Apollo PLT-1B (Battery)
- Apollo Webstore (Global)
- OpenCircuit (Europe, no stock yet)


So I actually just set this up, then saw you posted this 🤣 I used this https://youtu.be/a5fveRFQho4?si=RVGwMg6Y7P3RIB7b and I noticed you didn’t include the plant monitor integration, or at least I don’t think you did!
Is this needed or shall I change to your method?
Registering and using that integration is optional, read my comment:
“The live service allows you to fetch data from the database with a custom integration without registering. However, if you register you can upload plant data, search plants within Home Assistant and make the project even better. Registering is completely free.”
Those soil moisture sensors are widely known in online, unfortunately they’re a consumable. By nature the metal sensing strips can’t be too separated from the soil and on top of that the edge of the PCB itself isn’t sealed. This means they’re basically guaranteed to degrade and rust with time as moisture works its way inside.
Apollo should have made the sensors a separate part attached with a standard connector. As it stands this might last a few months to a year before turning into a new $30 paperweight.
Thanks for, again, a great Review! Excited when I saw it, disappointed after reading. No IP rating is for Plants a no go. And having significantly more Plants, for me the Pricetag would need to be in the Range for Motion/Contact/Temp Sensors.
A non waterproof Plant Sensor is useless, no matter how many sensors
I don’t think it’s so hard to achieve IP-65, which would be enough for light rain or regular watering indoors, though I’d personally would aim at IP-67.
I kept thinking about it. They sell the (wired) base unit for around 28€, and the sensor for 5€.
If they’d make a modular device, where you can just add as many sensors you like (or let’s say up to 10) with 2-3m wires, and the sensors are truly sealed (even on the edges), I would be really tempted. The base unit, centralized places, could still measure temp, humidity, maybe light.
then I would have waterproof sensors, and for 10 Plants it would be around 80 euros. I would be really tempted.
Fair enough, I like that you have an idea of what you want.
I would contact them directly, those are guys are very receptive to community feedback. They are a pair of home automation enthusiasts, just like you and me.