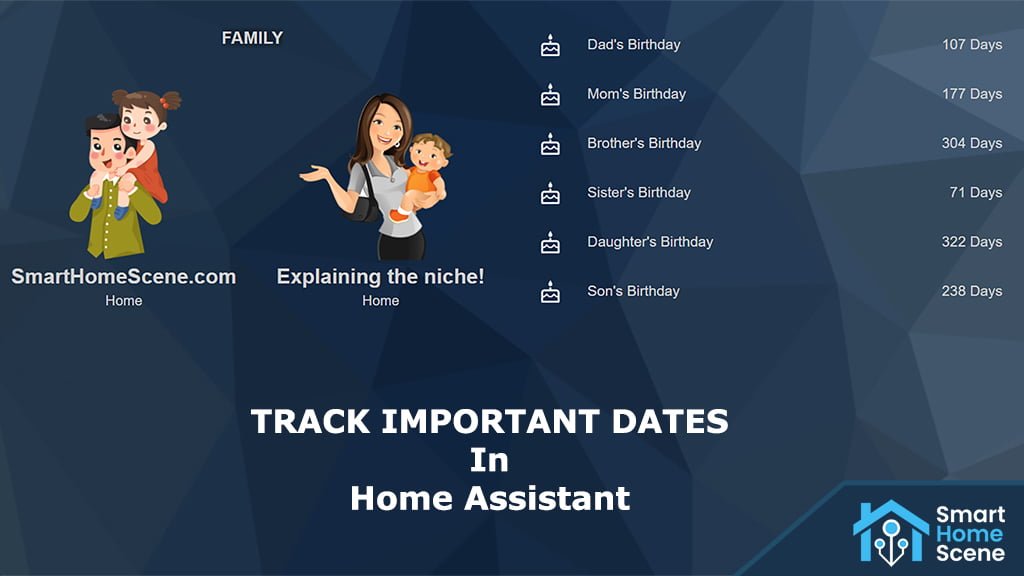
Important Dates in Home Assistant can be tracked by creating template sensors and automations based around them. This can be a bit tedious and tricky, especially if you have a hard time understanding the Jinja2 templating engine that HA uses.
Dev pinkywafer streamlines this process with an ‘Anniversaries’ integration, which is easily setup, can be configured both via the UI and configuration.yaml and allows a few customization options. Let’s have a look.

Installation
Manual Installation
- Download the anniversaries.zip file from the latest release.
- Unpack the release and copy the custom_components/anniversaries directory into the custom_components directory of your Home Assistant installation.
- Configure the anniversaries sensor.
- Restart Home Assistant.
HACS Installation
Anniversaries is also available in HACS.
- Search for Anniversaries in HACS
- Click Download this Repository with HACS
- Configure the anniversaries sensor
- Restart Home Assistant
Configuration
There are two ways you can setup an Anniversaries sensor: via the UI or via YAML by editing configuration.yaml
Using the UI
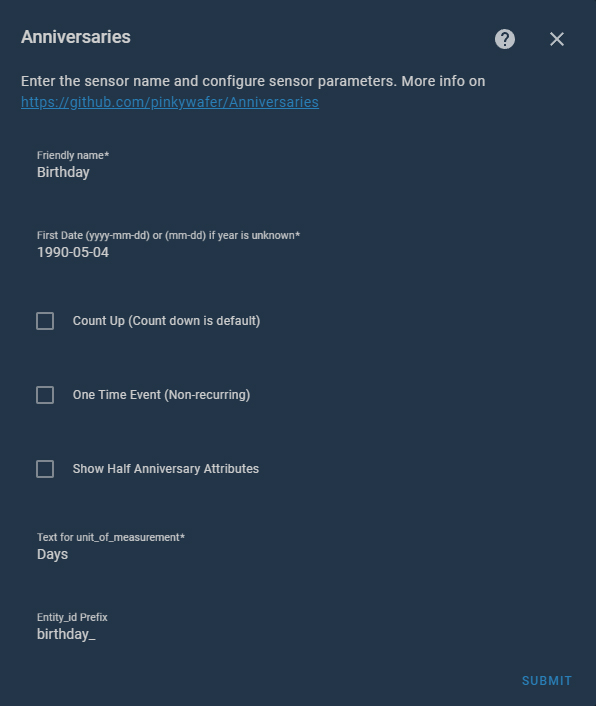
Navigate to Settings > Devices & Services and click + Add Integration. Search for Anniversaries and click it. You will be presented with a pretty self-explanatory dialog window:

Give your sensor a friendly name, a starting date in format ‘YY-MM-DD’ or ‘MM-DD’ if year is unknown and a prefix for its entity id. You could also select to count the days up (count down is the default option) and make it a one time event.
As a unit of measurement, the sensor always returns Days, but this option allows you to express this in the language of your choice without needing customization. If you select ‘Show Half Anniversaries Attributes’, the sensor will create additional attributes such as days_until_half_anniversary. Once you click submit, you will be taken to the next dialog window.

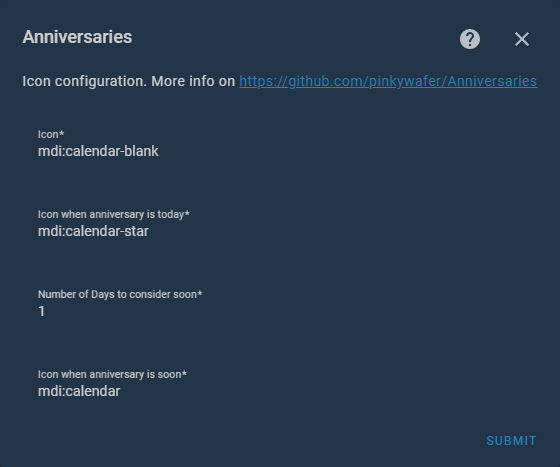
On this window, you configure different icons for the anniversary sensor. An important option here is ‘Number of Days to consider soon’. This tells the sensor when to consider the anniversary ‘Soon’ (1 week, 1 month, 1 day…). Once you are finished, click Submit again and than Finish. You have successfully created an important date sensor in Home Assistant.
Using YAML
You can configure the same sensor in yaml mode as well. This offers a bit more flexibility when managing more sensors and you can edit them using your favorite text editor addon (eg. Studio Code Server).
Add this to your configuration.yaml file:
anniversaries:
  sensors:
    - name: SmartHomeScene.com Birthday
      date: "1990-05-04"
      id_prefix: birthday_
      icon_normal: mdi:cake-variant-outline
      icon_today: mdi:cake
      icon_soon: mdi:cake-variant
      days_as_soon: 7
    - name: SmartHomeScene.com Birthday
      date: ...
Add each subsequent sensor as a list under the sensors: variable. If you want a cleaner configuration, feel free to use !include
Sensor State and Attributes
Once created, the sensor acquires a few attributes from the given date with It’s main state beeing Days (counted up or down).

State
- The number of days remaining to the next occurrence. (or days since last occurrence if you have chosen the count up option)
Attributes
- years at next anniversary: number of years that will have passed at the next occurrence (NOT displayed if year is unknown)
- current years: number of years have passed since the first occurrence (ie, current age) (NOT displayed if year is unknown)
- date: The date of the first occurrence (or the date of the next occurrence if year is unknown)
- weeks_remaining: The number of weeks until the anniversary
- unit_of_measurement: ‘Days’ By default, this is displayed after the state. this is NOT translate-able. See below for work-around
- half_anniversary_date: The date of the next half anniversary (if enabled by show_half_anniversary)
- days_until_half_anniversary: The number of days until the next half anniversary
Automation Examples
From your newly created important date sensor, you can create all kinds of automations to continuously remind you that the date is upcoming soon. For example:
alias: 'Birthday Reminder: SmartHomeScene.com'
description: Notify me for days remaining to SmartHomeScene.com's birthday
trigger:
  - platform: time
    at: '08:00'
condition:
  - condition: numeric_state
    entity_id: sensor.birthday_smarthomescene
    below: '7'
action:
  - service: notify.mobile_app_s21ultra
    data:
      message: SmartHomeScene.com's Birthday is in {{ states("sensor.birthday_smarthomescene") }} days!
mode: single
Explained: This automation will send a notification to your phone every morning at 08:00 AM reminding you of your birthday. It will only trigger if the birthday is in 7 Days or less!
alias: 'Halloween Reminder'
description: Notify me that tommorow is Halloween!
trigger:
  - platform: time
    at: '08:00'
condition:
  - condition: numeric_state
    entity_id: sensor.date_halloween
    below: '1'
action:
  - service: notify.mobile_app_s21ultra
    data:
      message: Tommorow is Halloween!
mode: single
Explained: This sensor will remind you that ‘Tomorrow is Halloween’. You can change the below variable to 0 and set the message to: Today is Halloween!
Summary
You can use the Anniversaries integration to create all kinds of important dates sensors. Birthdays, wedding anniversaries, relationship anniversaries, vacation reminders or national holidays.
If you think outside the box, you can use it to track ‘unimportant dates’. Personally, I use it as a reminder for the winter season start/end in my country. This sensor reminds me to change winter/summer tires and draw statistics for my home heating system. Thanks for reading!


