Before moving to my current home, I lived in an apartment that had a 4m long kitchen, spanning across the entire room. I had a simple white-only LED strip attached under the cabinets, controlled through a Tasmota-flashed Sonoff Basic R2. The wife loved that thing, and even though I offered to replace it with something better she told me not to touch it.
When we moved, she asked me to install some lights under the cabinets again, as it was really useful when cooking. It was an opportunity to find something good looking, cheap and of course local.
I came up with these pretty neat Zigbee-based aluminum puck lights that attach under your kitchen cabinets on a sticker, are connected in series and whose color, brightness and temperature you can control. I bought them for $27 of AliExpress with a coupon and some coins discount, for the 9pcs CCT version.
Technical Specification
Puck Lights
- LEDs per puck: 9PCS 5050 CCT SMD LEDs
- Power: 2-2.5W per puck
- Lumens: 200lm per puck
- CRI: >80
- Size: ø58x8mm
Controller
- Model: YSR-MINI-Z01
- Power: DC5V-24V
- Output: Max. 3A/Channel
- Size: 28x24x11.5mm
- Operating Temperature: -20-60
Disassembly
These puck lights are sold individually, from a single puck up to 9 in a package. I bought the 9 pcs version, to cover the length of my kitchen. They came stuffed in a cardboard box, along with the Zigbee controller, a 12V3A adapter, some stickers and screws for installation.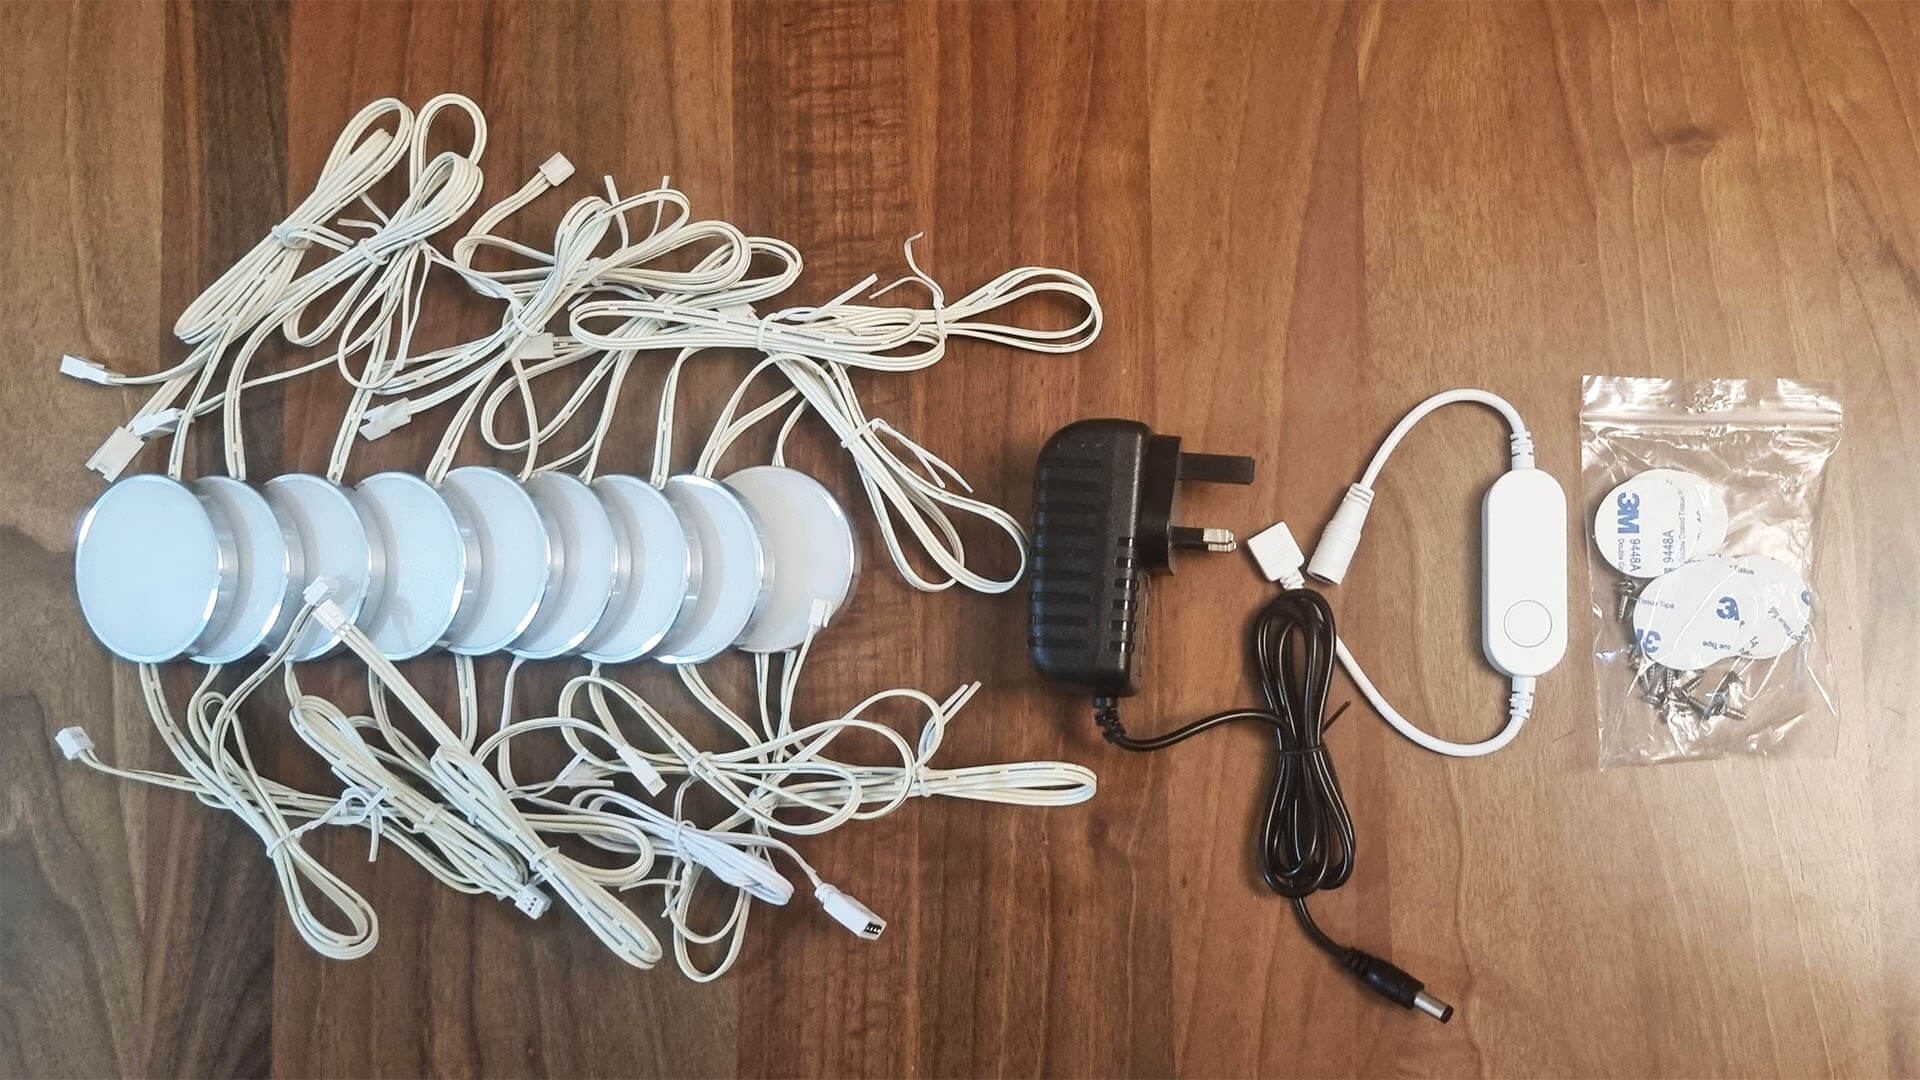
The case of each puck is made from nicely machined aluminum, making it very smooth and lightweight. There are two holes on the bottom of the shell, if you decide to install them using the included screws. I would advice not too though, as they are very light and the stickers are more than enough to hold them in place.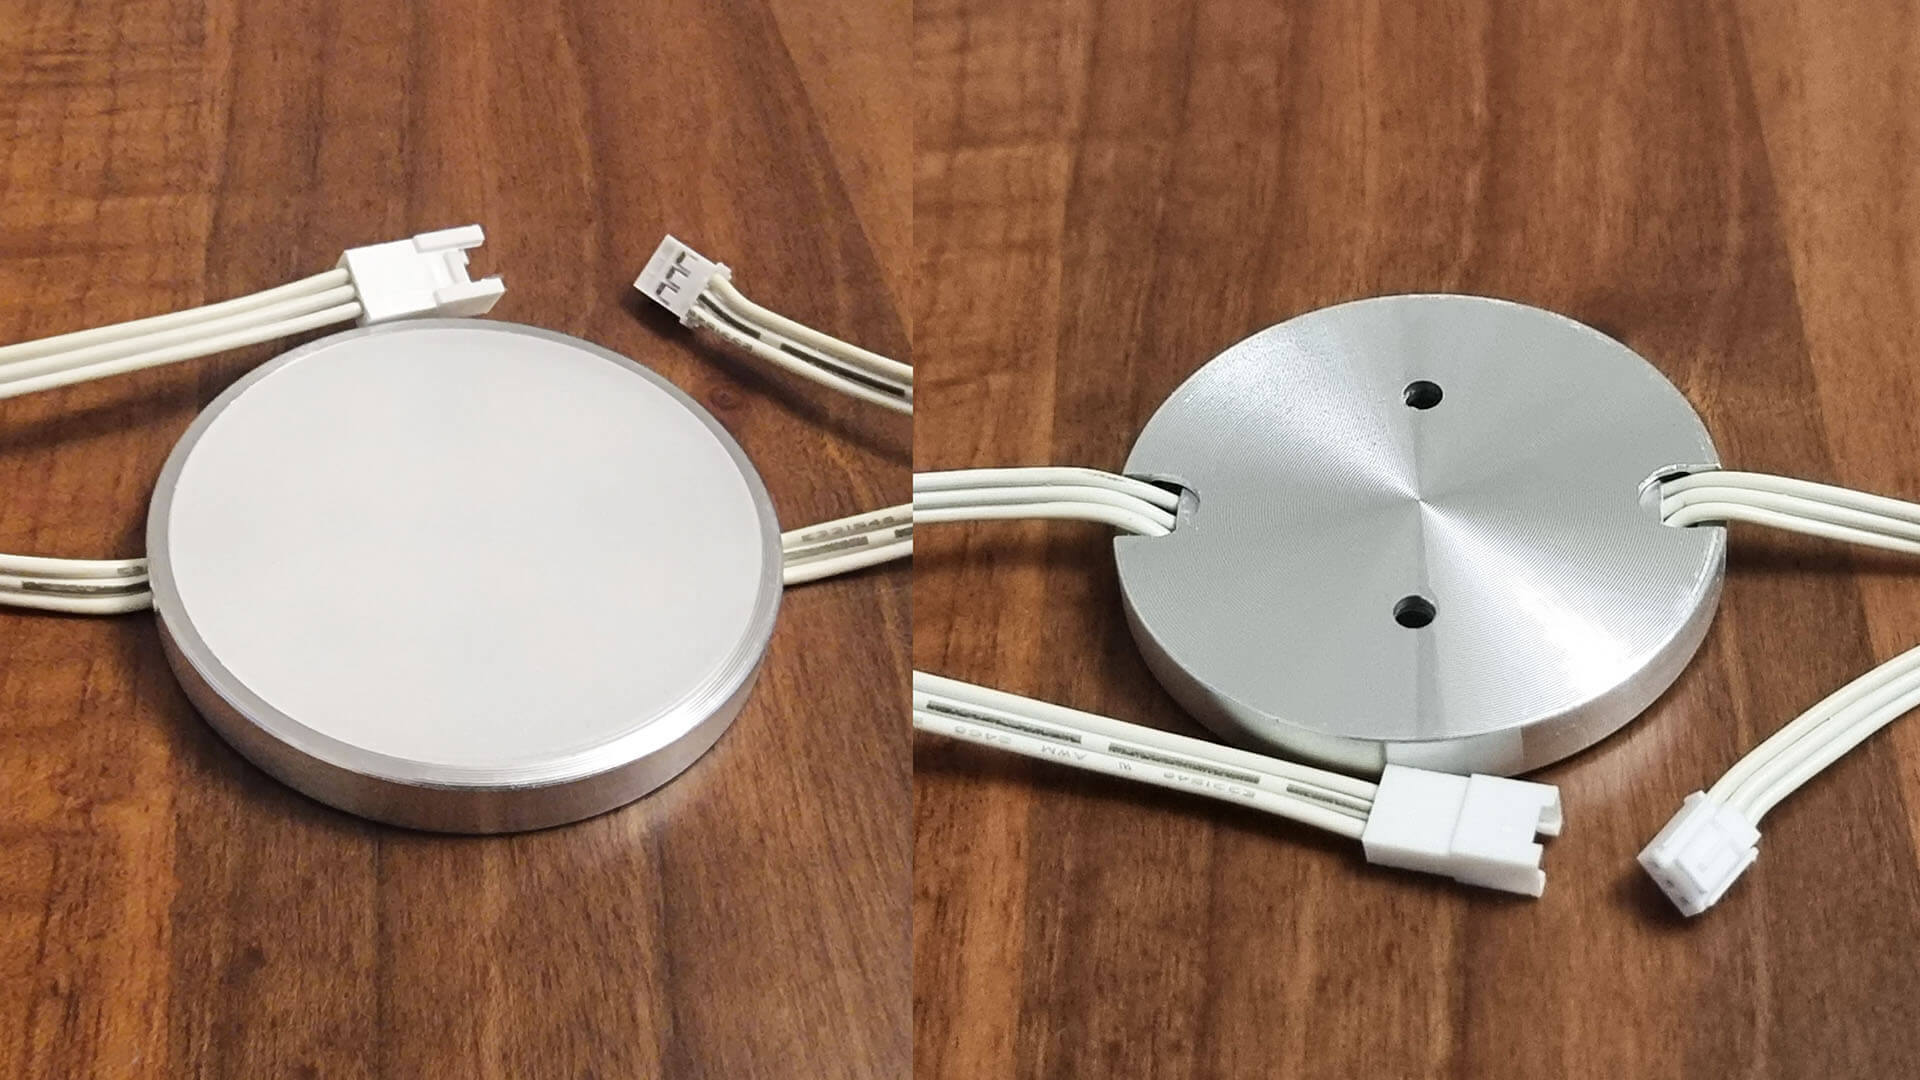
Inside the puck, the LEDs are scattered in a circular layout. There are no RGB LEDs on this one, because I ordered the temperature and brightness version only. Color was not needed in my case.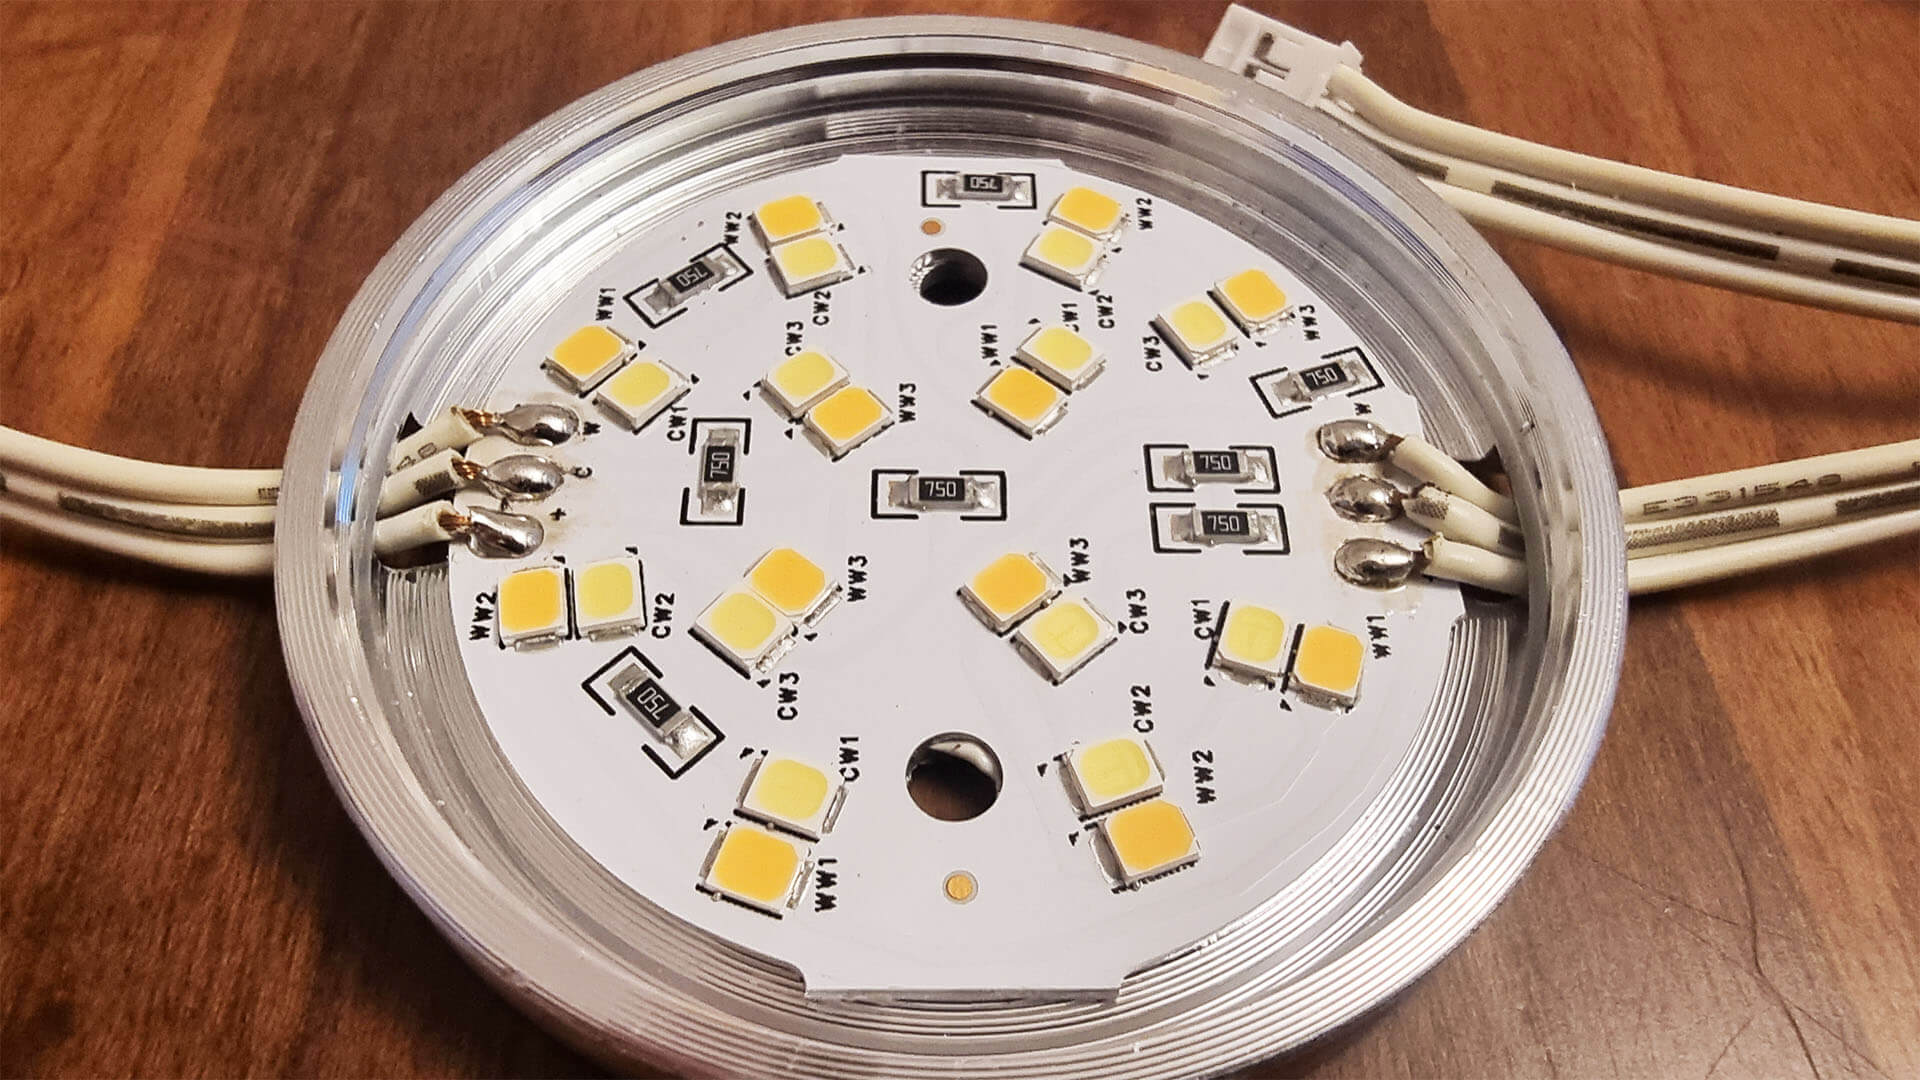
The controller is labelled as model YSR-MINI-01, and from the back of the case you can see it comes both in Wi-Fi and Zigbee versions. For color, DW, C+W, RGB, RGBW and RGBCW options are available. The button is used to toggle the LEDs and put the device in pairing mode.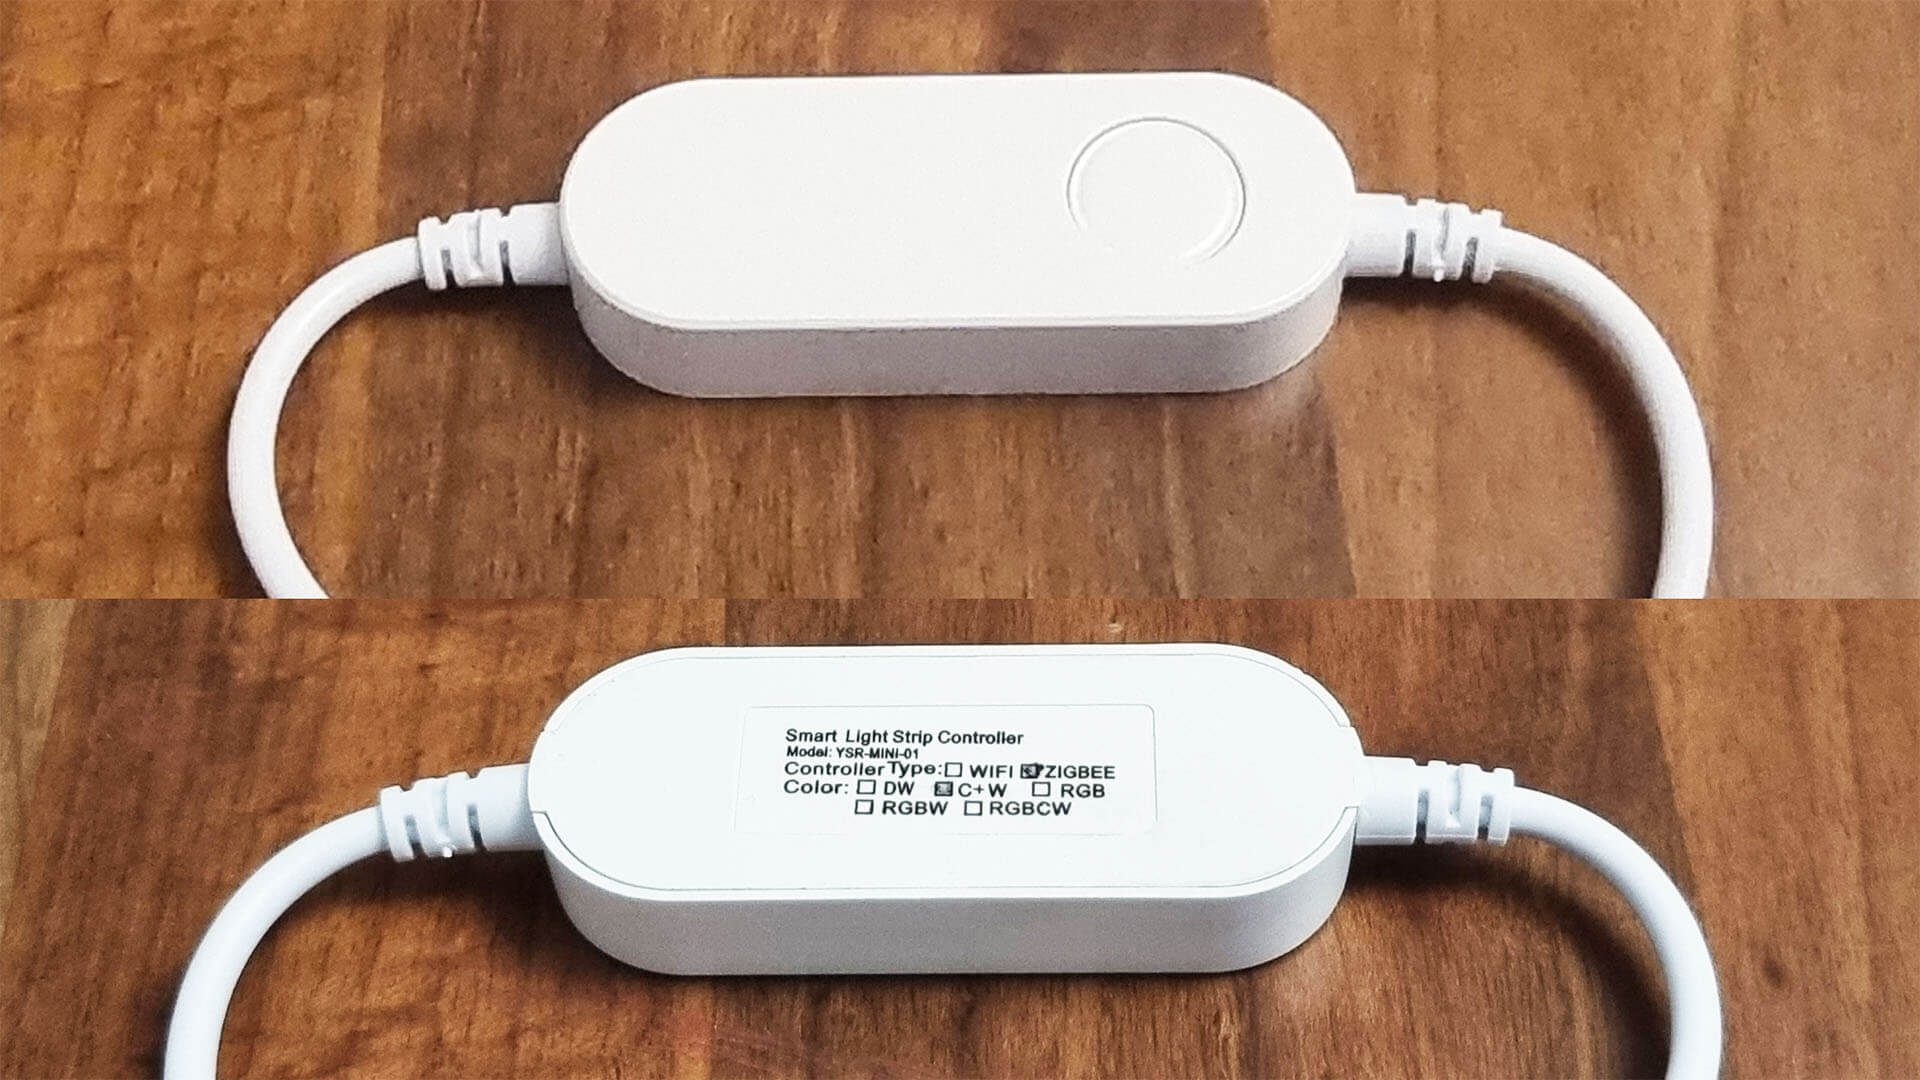
Opening the controlled reveals it’s powered by a ZYZB010 eWeLight Module, compatible with ZHA and Zigbee2MQTT and identified as a router device type. This module is based on the Telink TLSR8258 [Datasheet], which is a BLE + Zigbee IEEE802.15.4 multi-standard wireless SoC.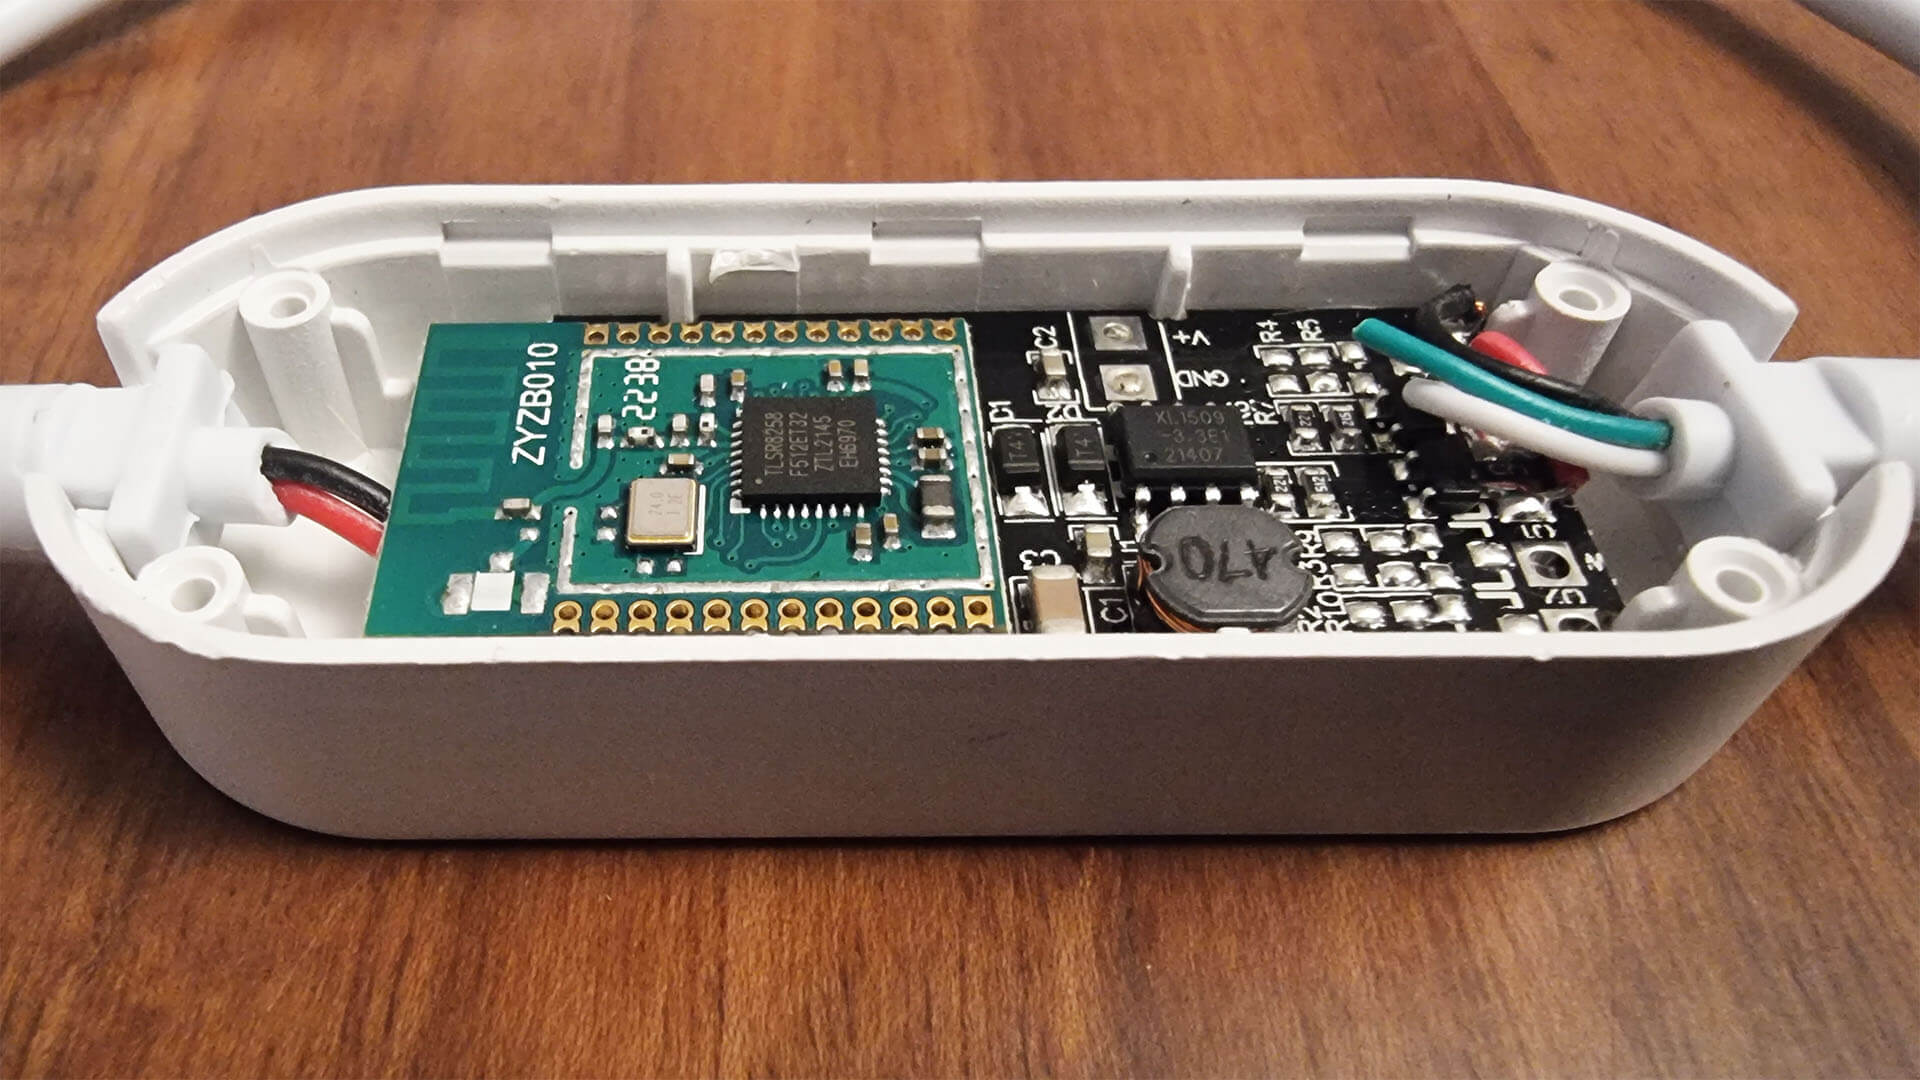
Installation
Installing these kitchen under cabinet lights was fairly easy. I measured the length of my kitchen before ordering, and decided on the 9 pcs version. I spaced them to around 45cm, to have one light under approximately every kitchen cabinet.
Each puck has about 50cm cable length on each side, so connecting two gives you about 1m to work with. They are connected in series and the last one goes in the Zigbee controller.
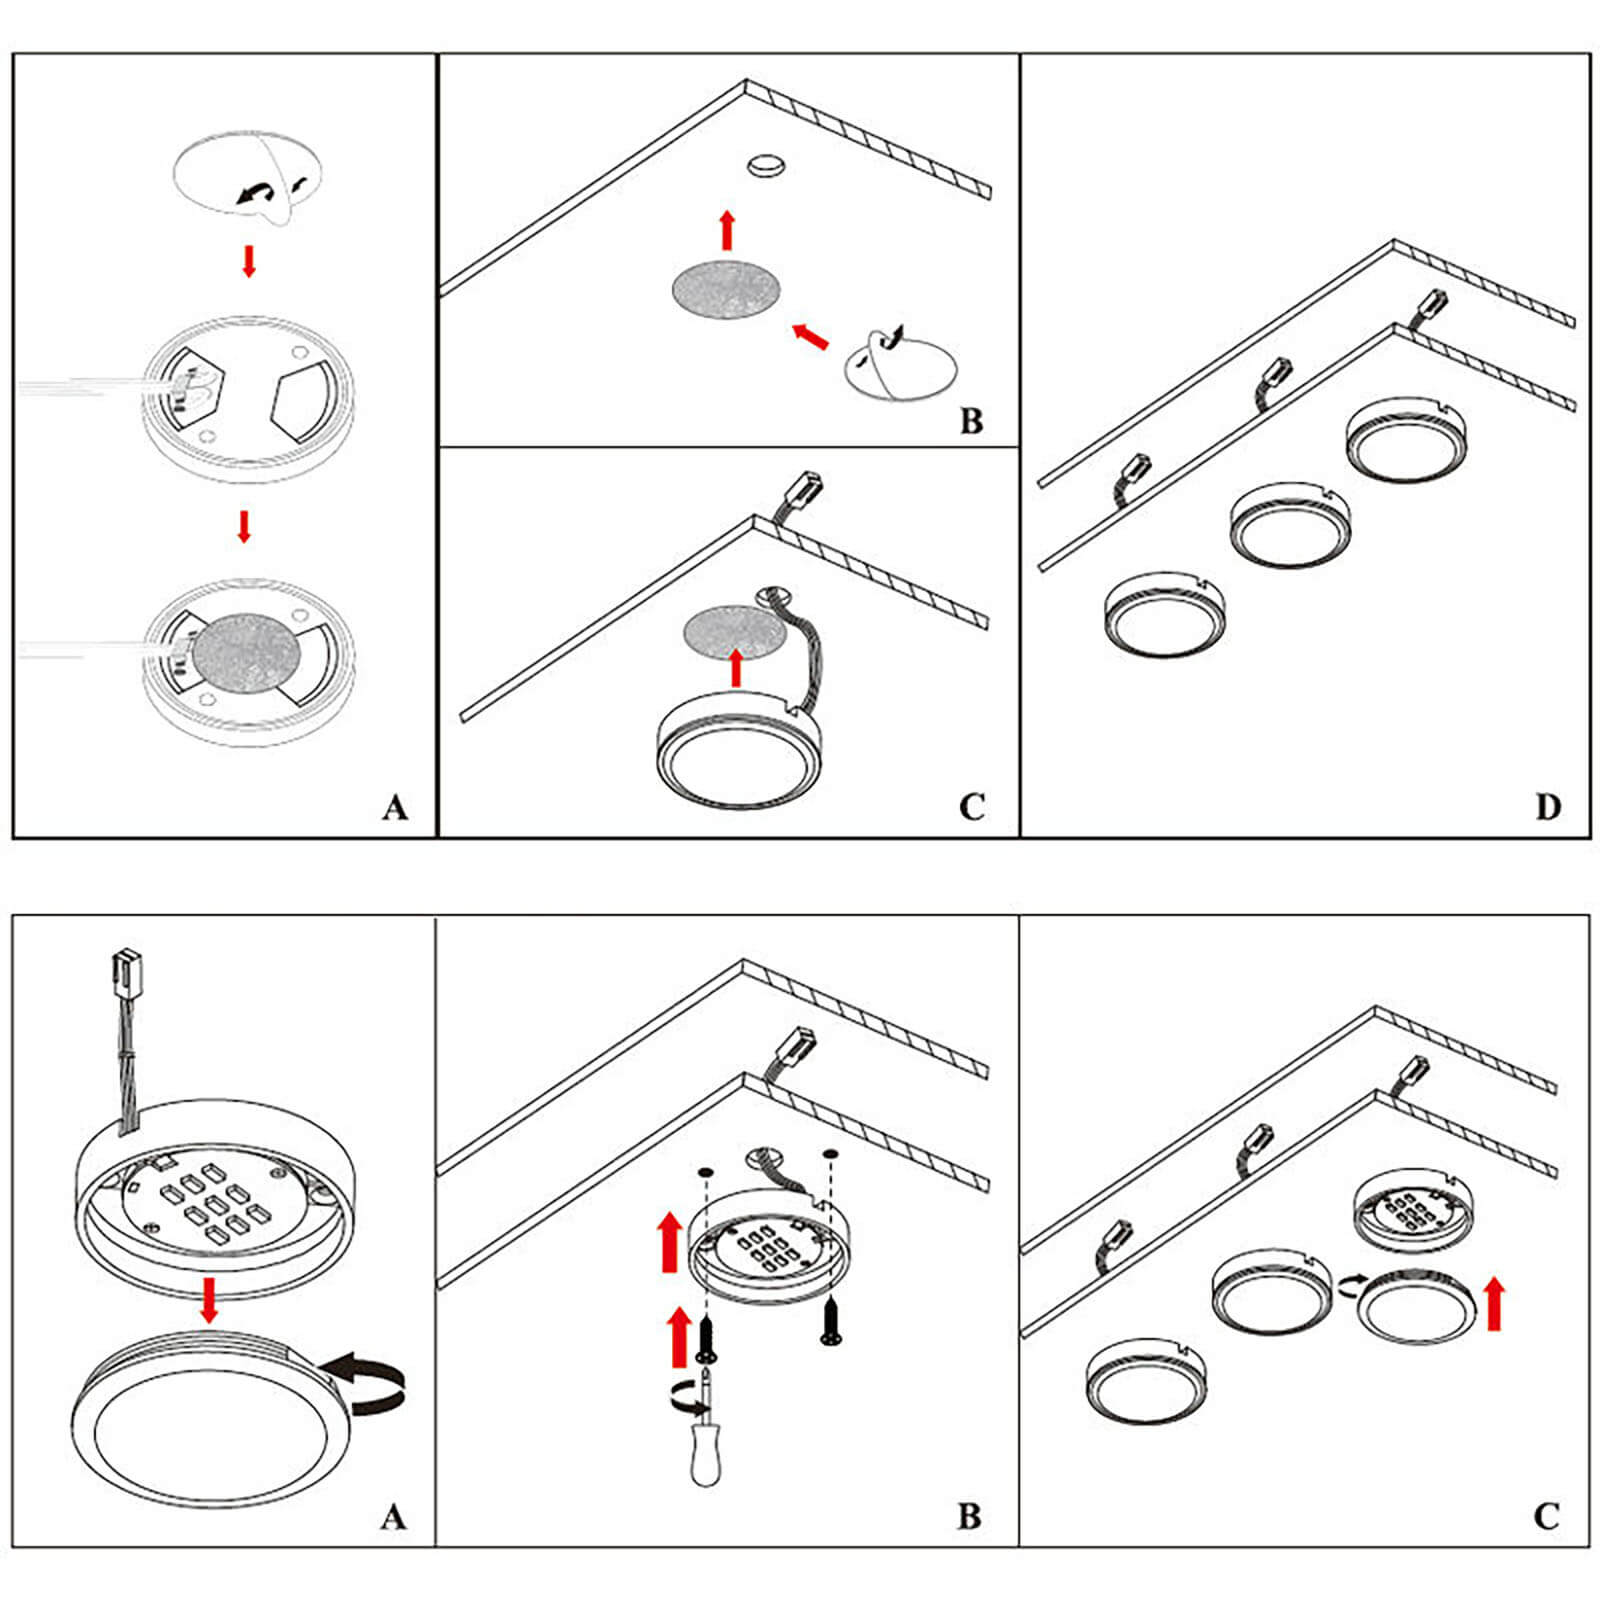
The instructions manual suggests drilling a hole for the cable to go up inside the cabinet. I would highly advise against doing this though, as it’s not necessary. I tucked the cable behind the cabinets themselves, by using a large screwdriver to slightly lift them off the wall.
It’s important to note, my version came with cables sticking out of both ends of the puck light. I could have opened each puck and steer the cable to come out only on one end, which would have made the installation a bit easier and cables more hidden. But I decided it was not necessary, as they cannot be seen anyway unless you bend down.
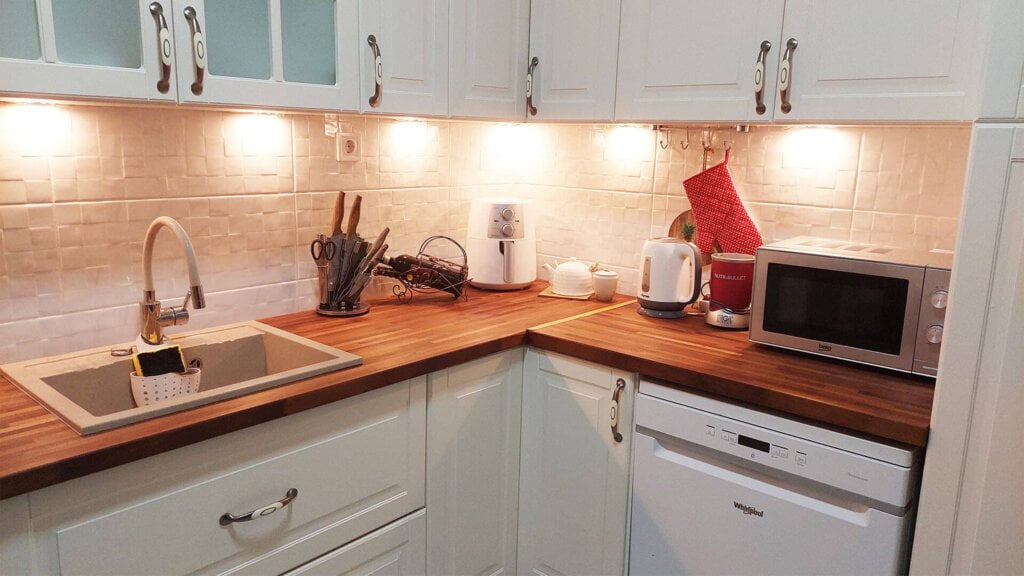
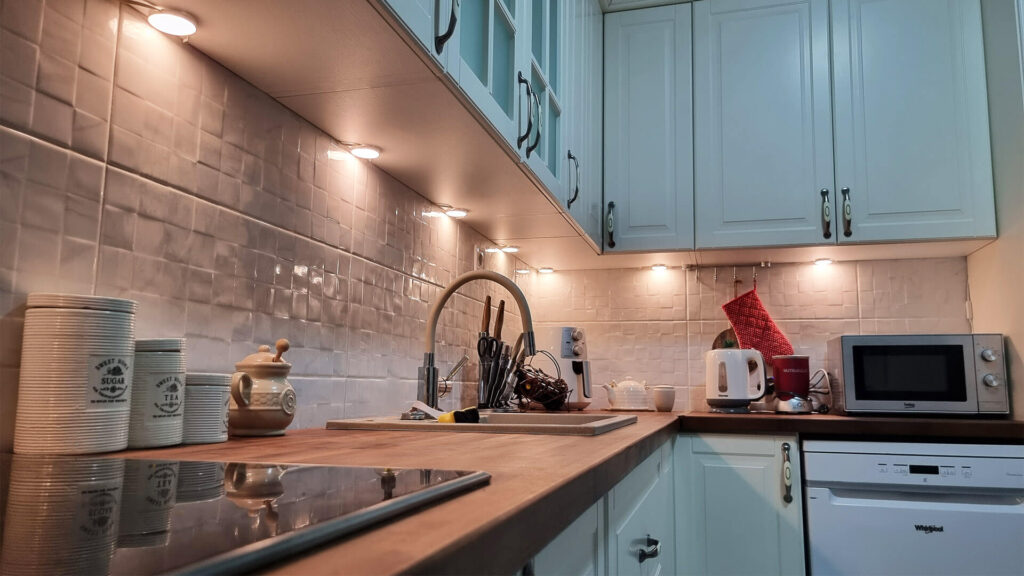
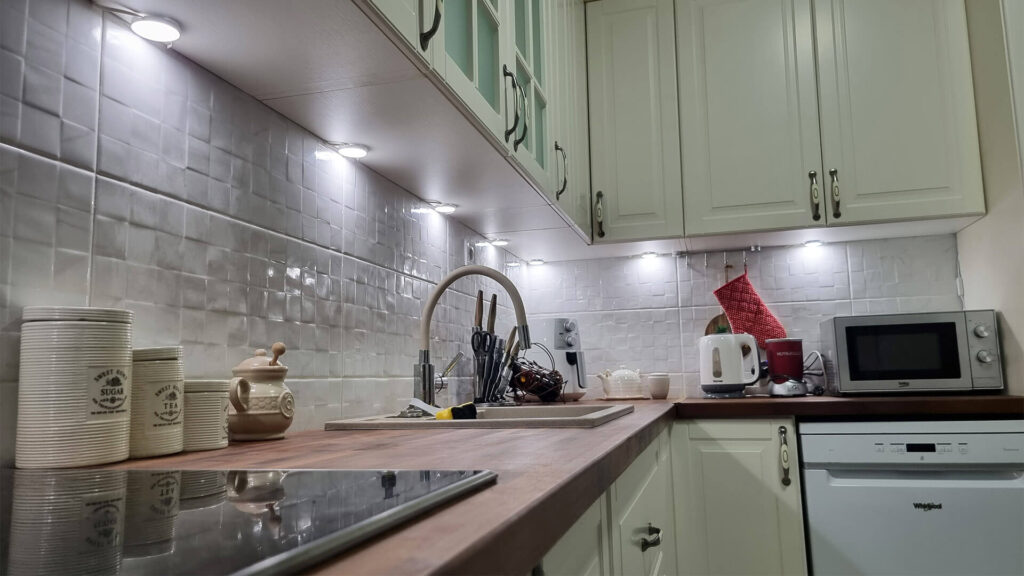
The end result was pretty great:
Home Assistant Integration
The Zigbee controller which operates these puck lights is compatible with ZHA and Zigbee2MQTT. To pair it, press and hold the button for ~5 seconds until it gets discovered and added to your network.
Zigbee2MQTT
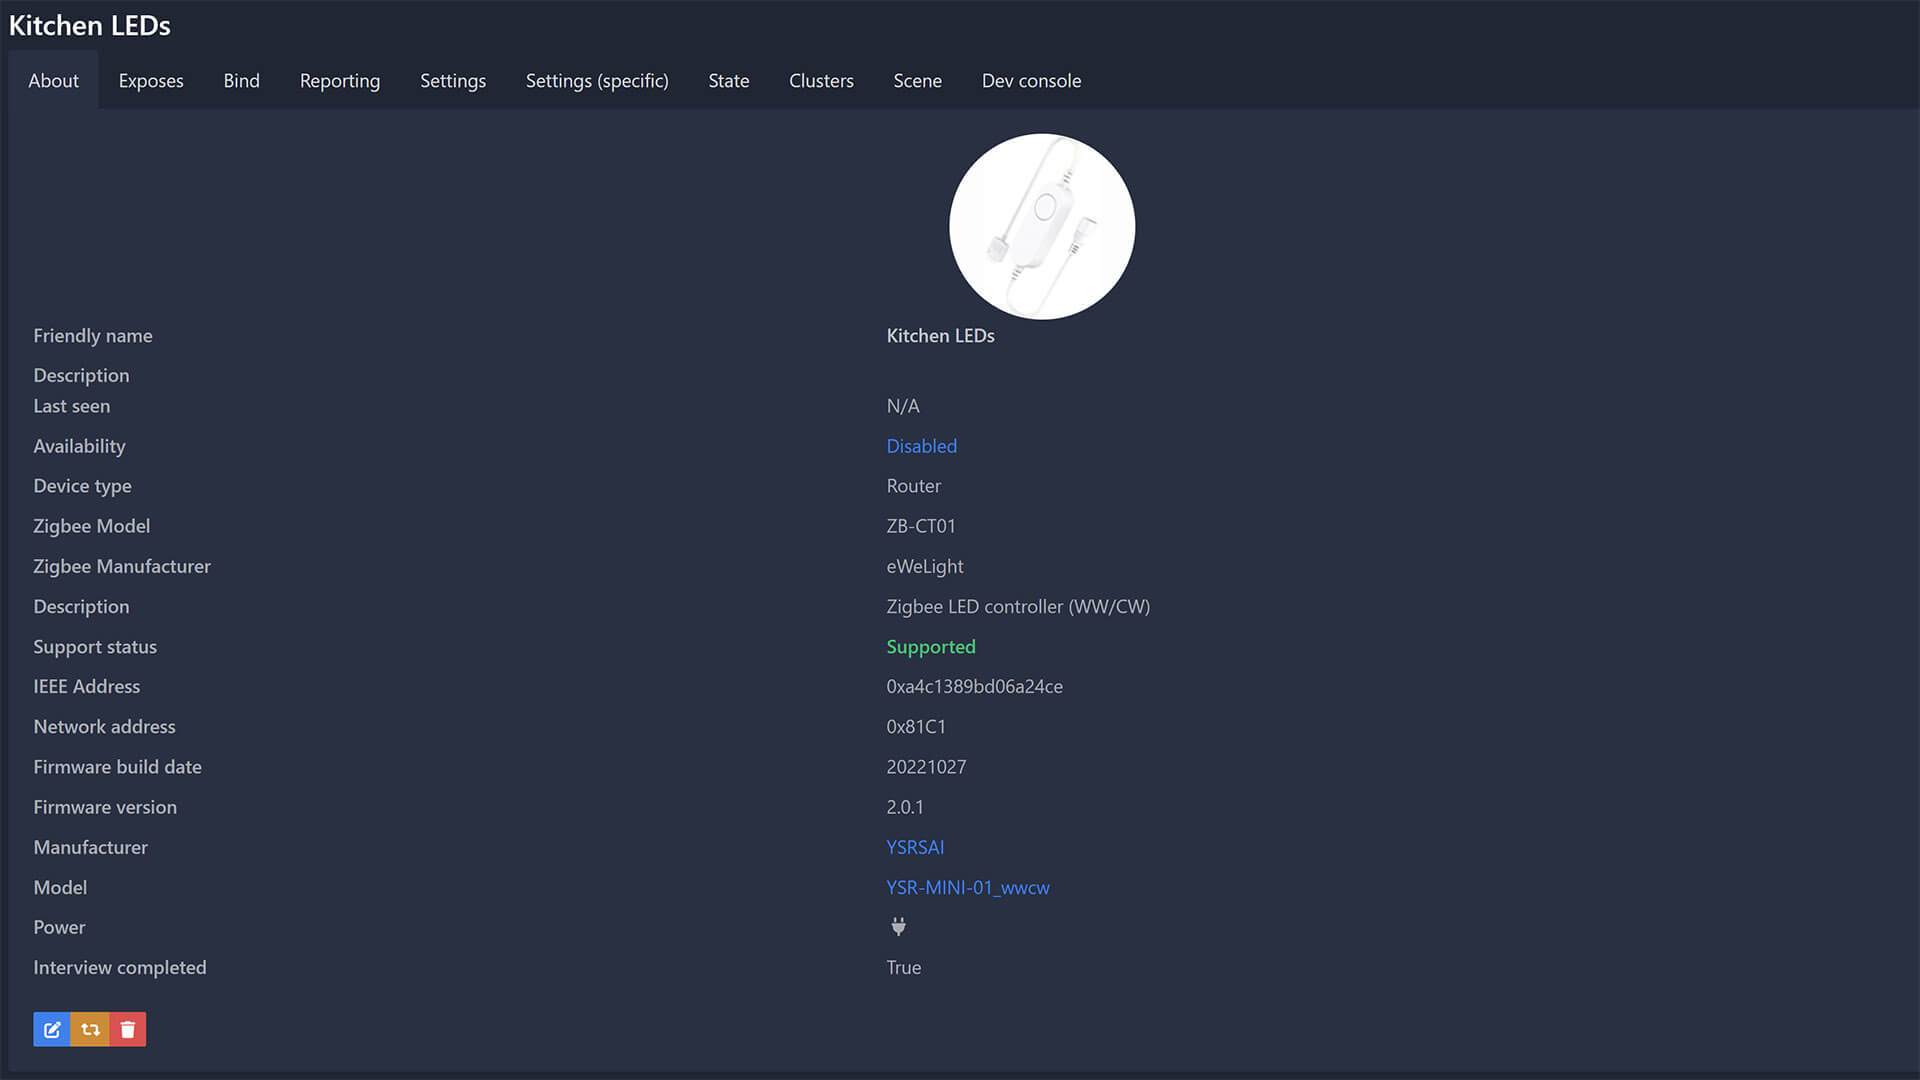
Once added in Zigbee2MQTT, the controller is identified as Zigbee Model ZB-CT01 by manufacturer eWeLight. The device is also a router, capable of relaying Zigbee mesh traffic.
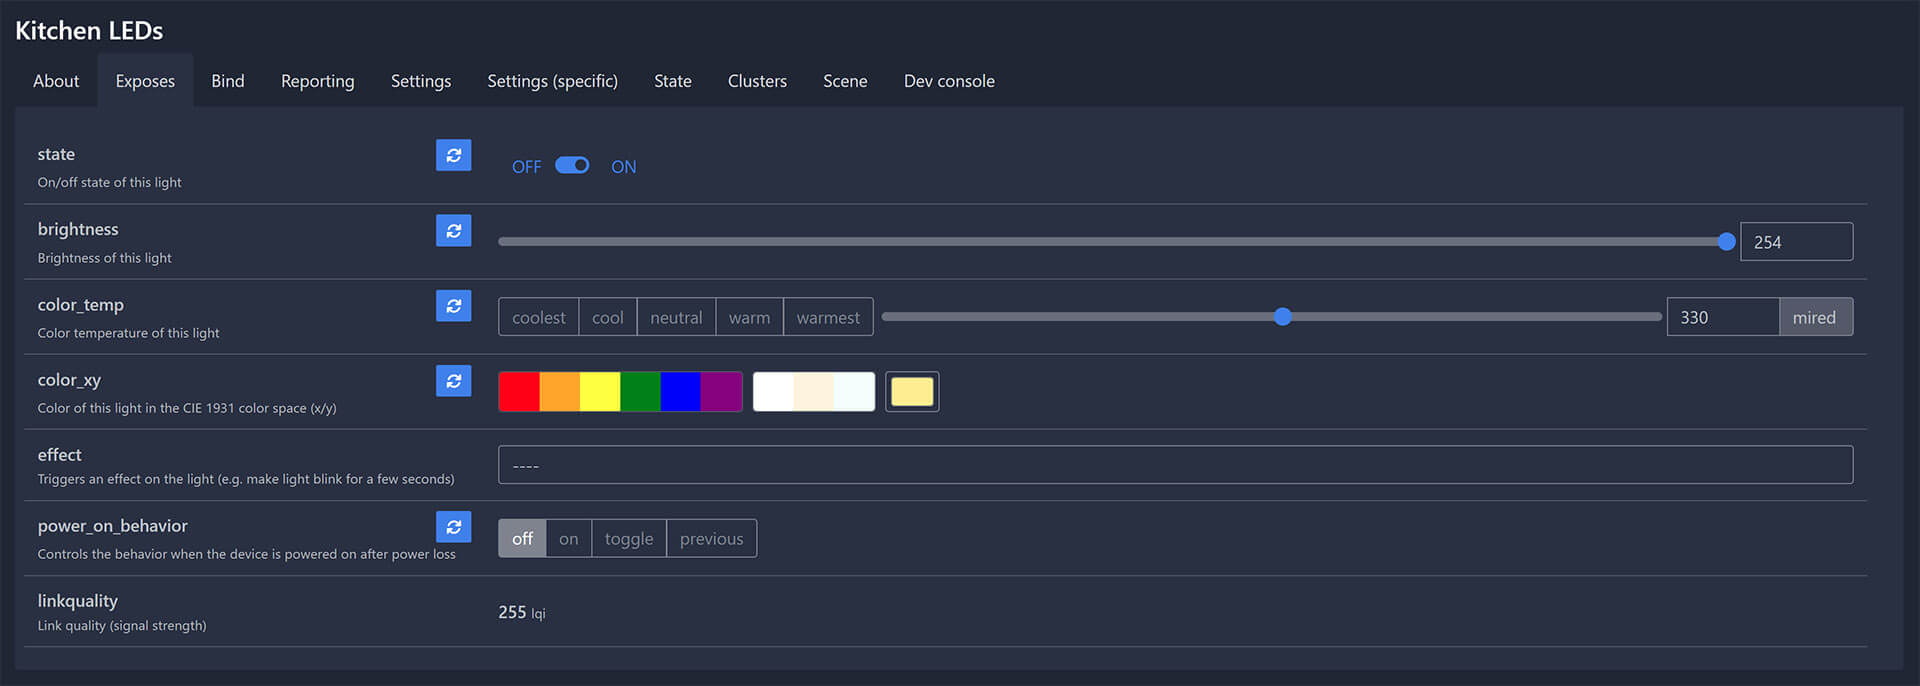
It exposes the following entities for light control in Home Assistant through Zigbee2MQTT:
- state: Toggles the lights On/Off
- brightness: Adjust brightness level 0-255
- color_temp: Adjust temperature presets coolest, cool, neutral warm, warmest or on mired scale 150-500
- color_xy: Adjust color, if RGB LEDs are installed
- effect: LEDs lightning effect blink, breathe, okay, channel_change, finish_effect, stop_effect
- power_on_behavior: Off/On/Toggle/Previous
- linkquality: Signal quality in LQI
ZHA
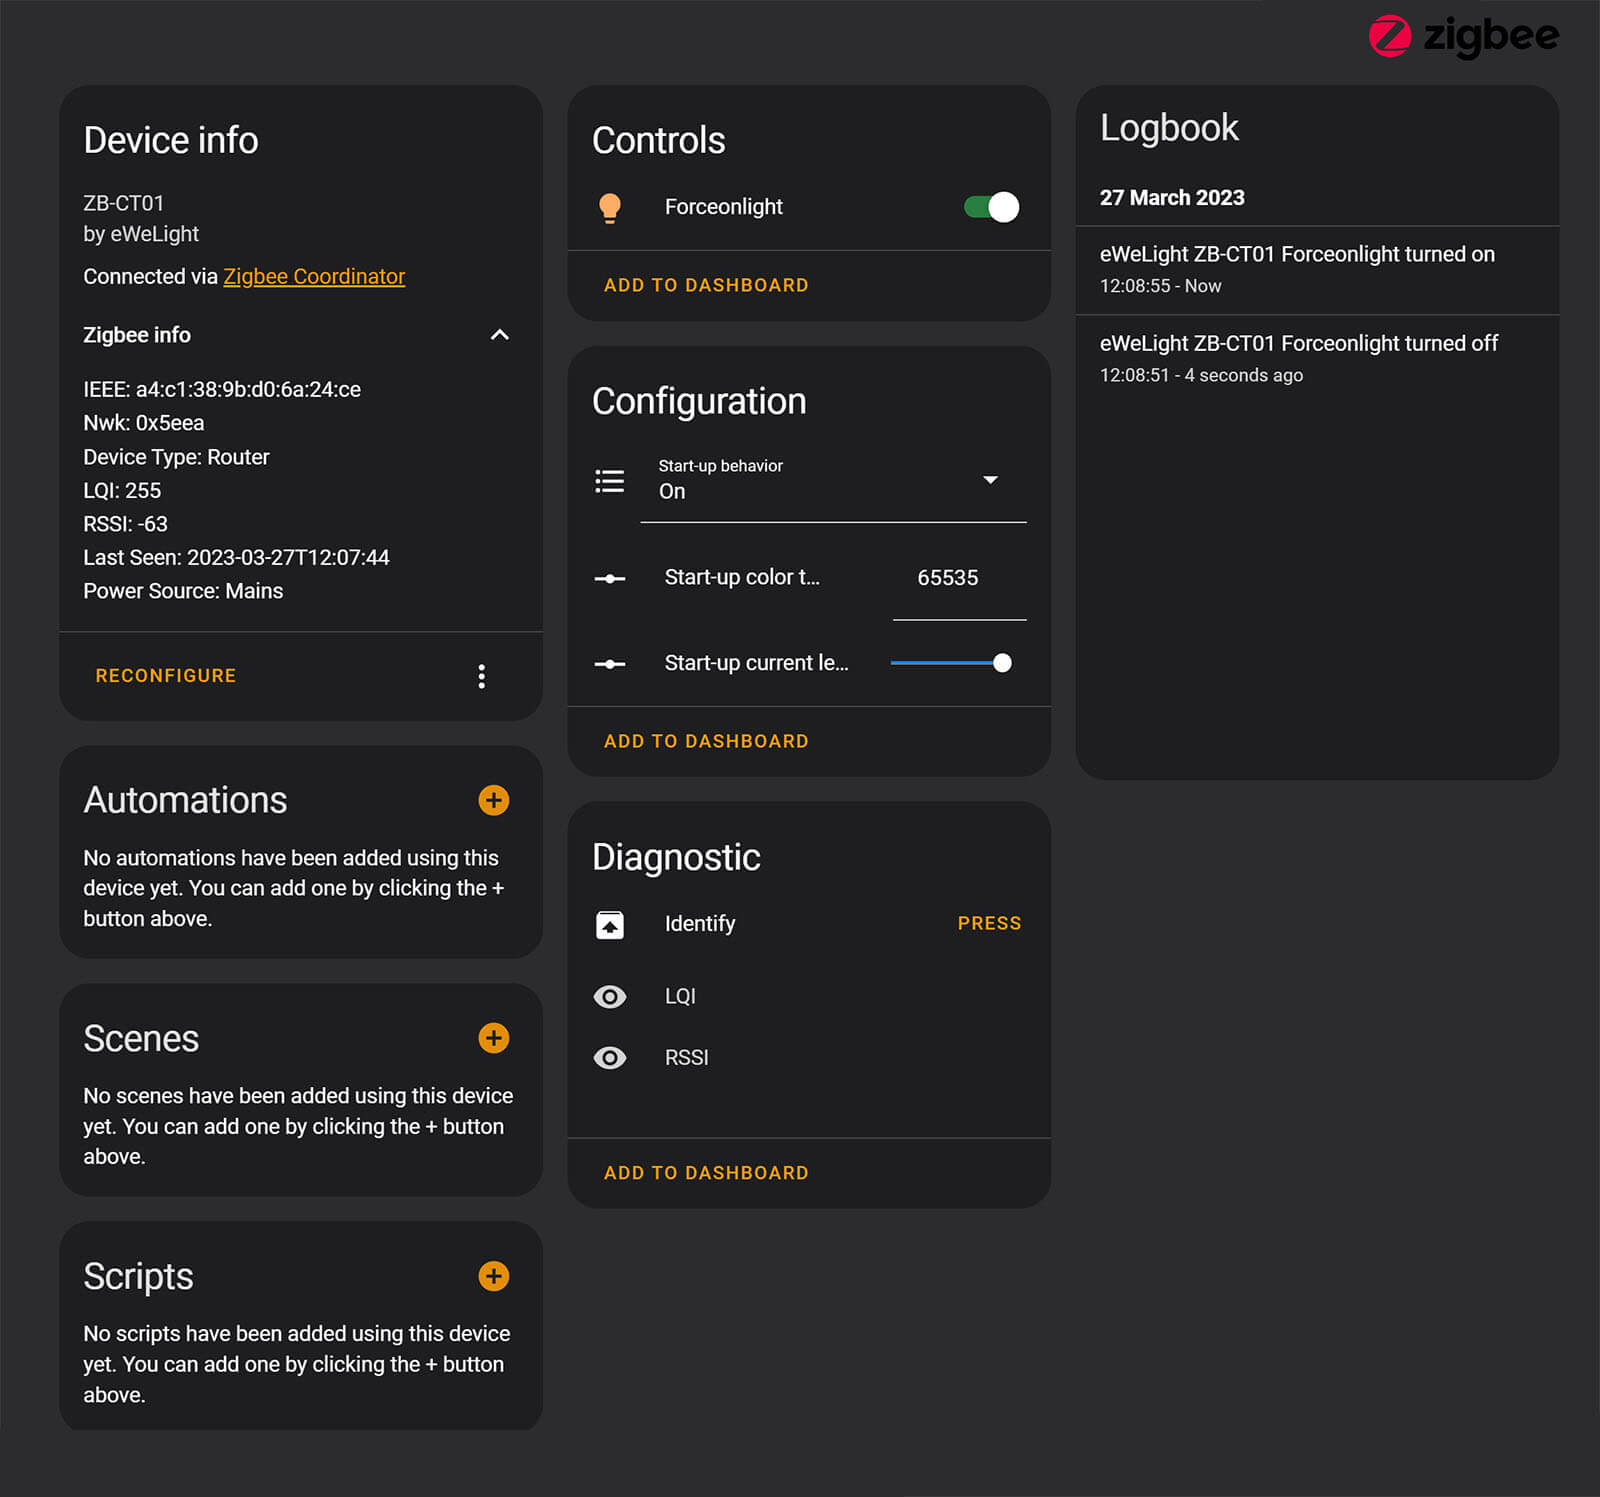
Once paired to ZHA, the device is identified as model ZB-CT01 by manufacturer eWeLight. Just like Zigbee2MQTT, it’s also a router when paired in ZHA.
The exposed entities are identical as with Zigbee2MQTT:
- brightness control
- temperature control
- color control (if applicable)
- start up behavior
Summary
These puck lights seemed really interesting and had an attractive price. Installation was easy with the included stickers, although some cable management is needed. Depending on your kitchen type and layout you might have to think out of the box to hide the cables completely out of sight.
When I started to google around for kitchen under cabinet lights, I decided it had to meet a couple of requirements:
- Must be Zigbee for local control
- Must be cheap. I wanted to see if this is a product that doesn’t have to be expensive
- Must have Brightness Control
- Must have Temperature Control
- No RGB
- Easy Installation
Zigbee performance was good, reporting a signal quality from 220-255 lqi at all times, even when hidden behind the cabinet. Dimming and changing the temperature was instant and gave me no flickering. The effects in Zigbee2MQTT are somewhat of a gimmick and I find no use for them. In summary:
Pros
- Cheap
- Brightness controllable 1-100%
- Temperature control with presets
- Easy installation
- Lightweight aluminum body
Cons
- Cable management needed
- Might need to open each puck and steer the cable through only one end instead of both
What I especially like about these puck lights, when I set the brightness to 1%, they emit just enough light to create a sleeping atmosphere. I am thinking about ordering a second set for a bookcase in my living room and use it just for this purpose.
Bottom line is, wife is happy, so I’m good.
Buy
I bought these Zigbee puck lights for $27 with a coupon and some coins discount, they cost $33 for the 9pcs Kit. If you decide you like them and like to try them out, here are some affl links which help us maintain this blog when you purchase something through them.
The first link is my version, where the pucks are wired in a string. The 2nd & 3rd links are a splitter option, more suitable when you need to bring wires to one location e.g. bookcase. 4th link is an RGB version.
Zigbee Kitchen Under Cabinet Puck Lights ~ $14-$33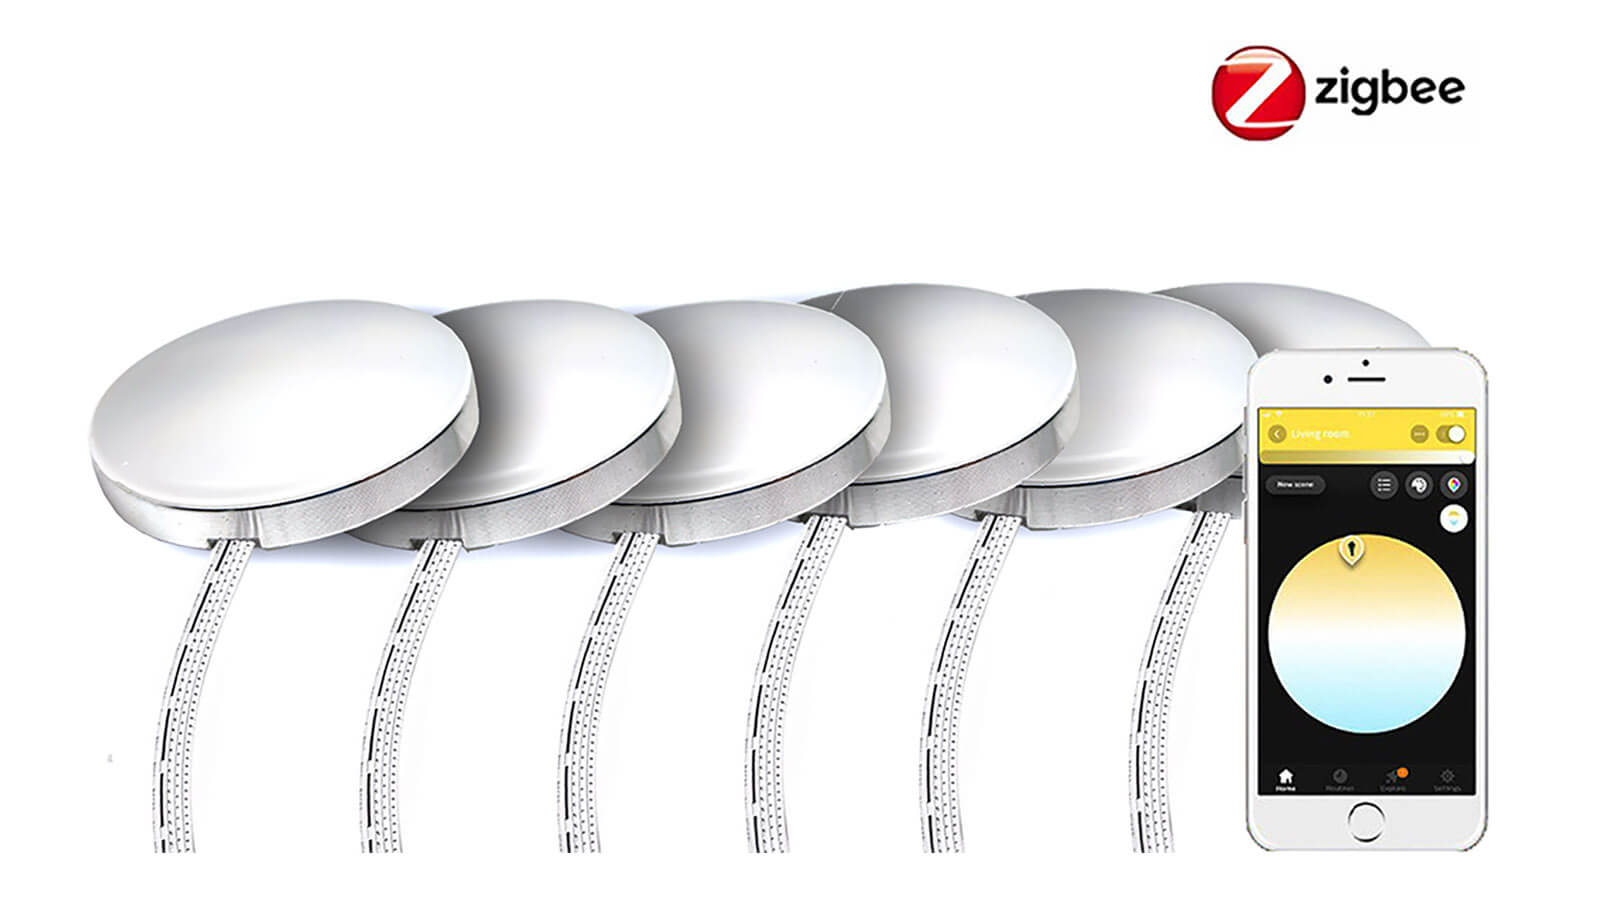
![]()
AliExpress | AliExpress | AliExpress | AliExpress (RGB)![]()
United States | Canada | United Kingdom
Germany | Netherlands | Sweden | Spain
France | Italy | Poland | Australia
*Carefully read the Amazon Description, it might redirect you to the wrong item!


Is there a manual switch for it as well, for my analog wife?
Yes, the pairing button is used as a toggle also. You can see it in the right corner of my image.
Alternatively, you can pair it with a wireless smart button and place it wherever convenient.
Cheers
How did you connect the lights to the YSR-MINI-01 controller? Both ends are female in my kit as well as what you have pictured. Thanks
Hey steve,
Yes, that was no issue for me as I cut both ends and soldered a longer cable to make the button more accessible for manual operation. What you can do though, is use one of these to avoid soldering:
https://amzn.to/42DCGf4
Wrap the connection in tape for good measure.
Cheers.
Hi
I’m not able to find the products following the link https://s.click.aliexpress.com/e/_DCPIqtL
Do you have direct link to products?
Thanks
Try:
https://s.click.aliexpress.com/e/_DDOgZ0N
https://s.click.aliexpress.com/e/_DECHbgN
https://s.click.aliexpress.com/e/_DkHLaZj
Cheers
Any led strip with diffuser alternatives?
hey there. i got this product, it arrived quite fast and seemed decent quality, but i’ve had a few headaches. it doesnt turn off. either via controller button, via smartlife or ZHA, nothing works. i openened a dispute, the seller asked for 10 cents to send the replacement and I accepted… now it is already 2 weeks late and no answer from the seller… guess I got burned