The biggest challenge when installing smart modules in a switchbox is fitting everything neatly inside of it. Depending on your location, switchboxes have different sizes and shapes so it might be very difficult to install a smart module behind your existing wall switch.
Single gang modules and switchboxes are easier to work with, but with 2 and 3 gangs you are entering the danger zone. Crumpling all those wires without causing a short circuit can be next to impossible. Shelly has acknowledged this and took a step towards addressing the issue.
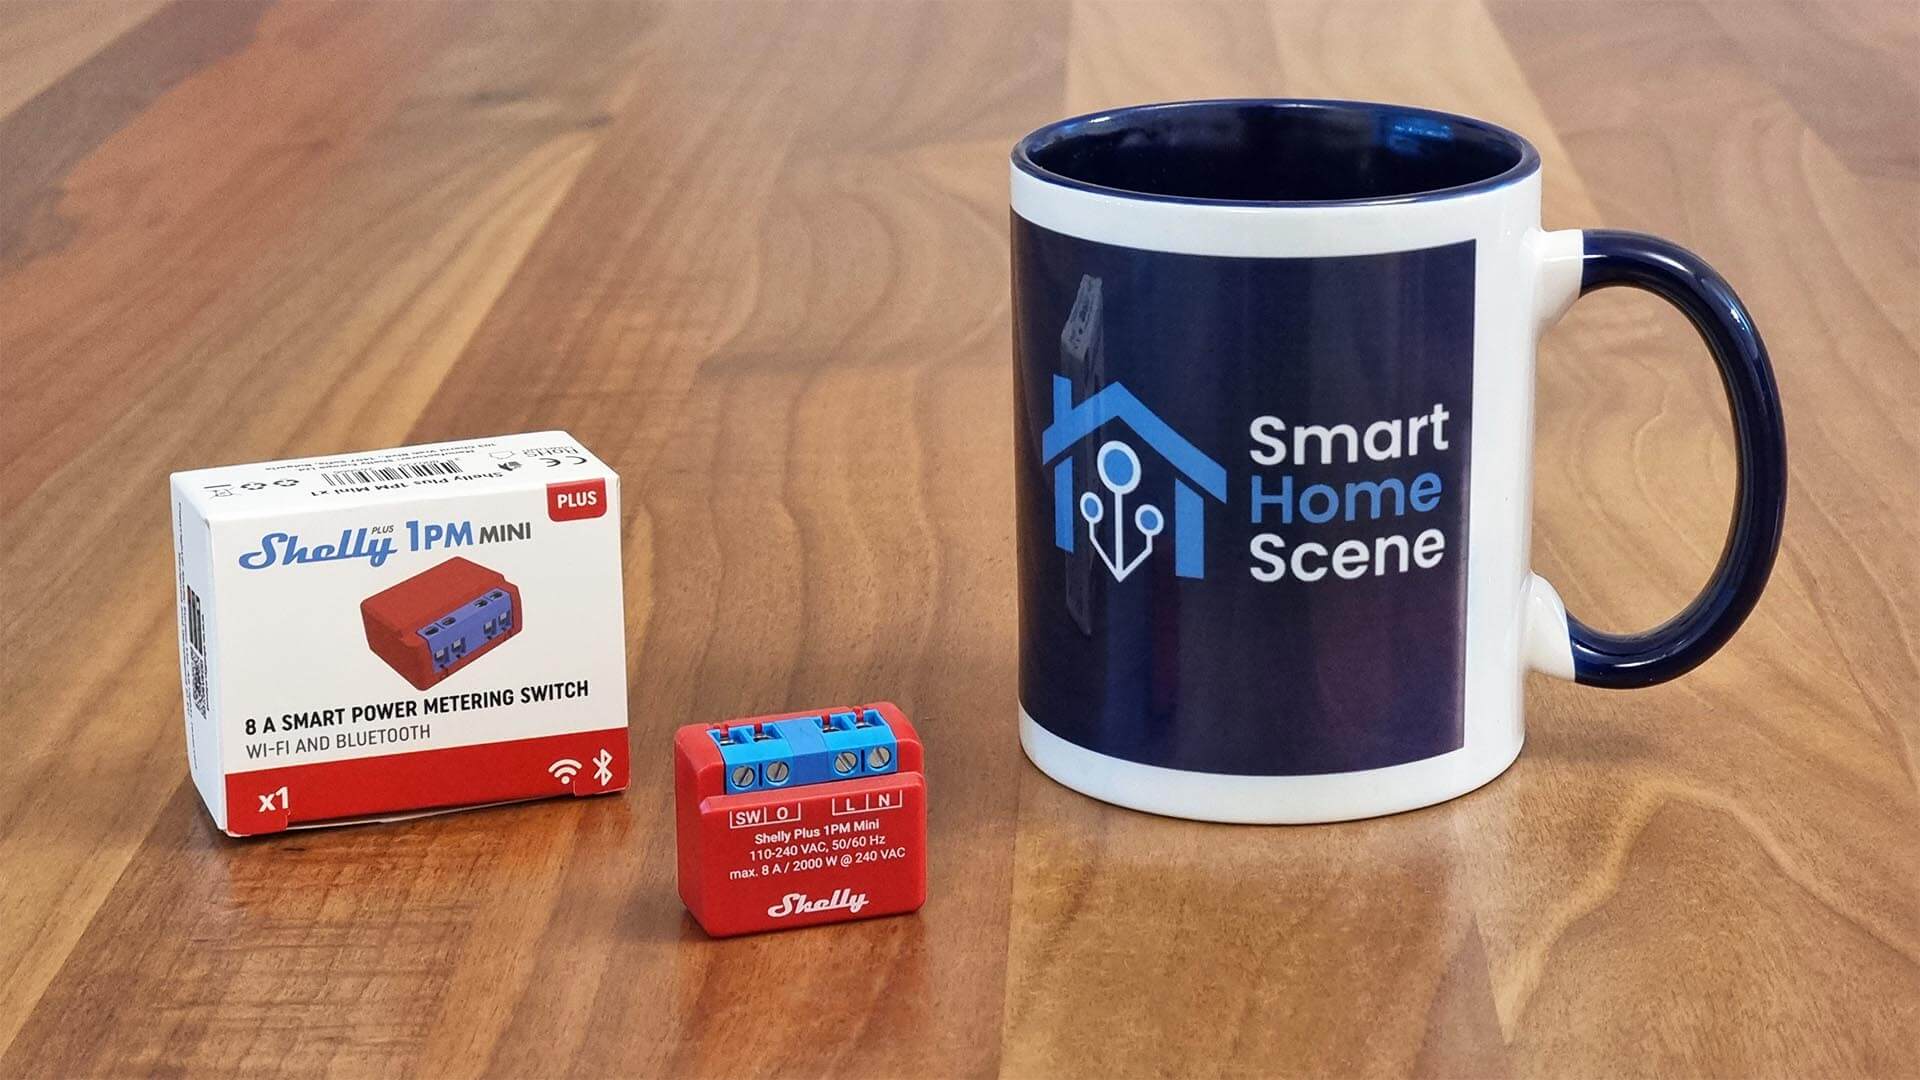
In this article I’m taking a deep dive in the new Shelly Plus Mini Series of smart switches and power metering modules, particularly the 1PM Mini. This is, to my knowledge, the smallest smart module to date – a little bigger than a 2 EUR coin.
You can get the Shelly Plus Mini products on their Official Webstore, Amazon or AliExpress, although depending on your location some products might be out of stock. I will leave additional links bellow.
Technical Specification
- Device Name: Shelly Plus 1PM Mini
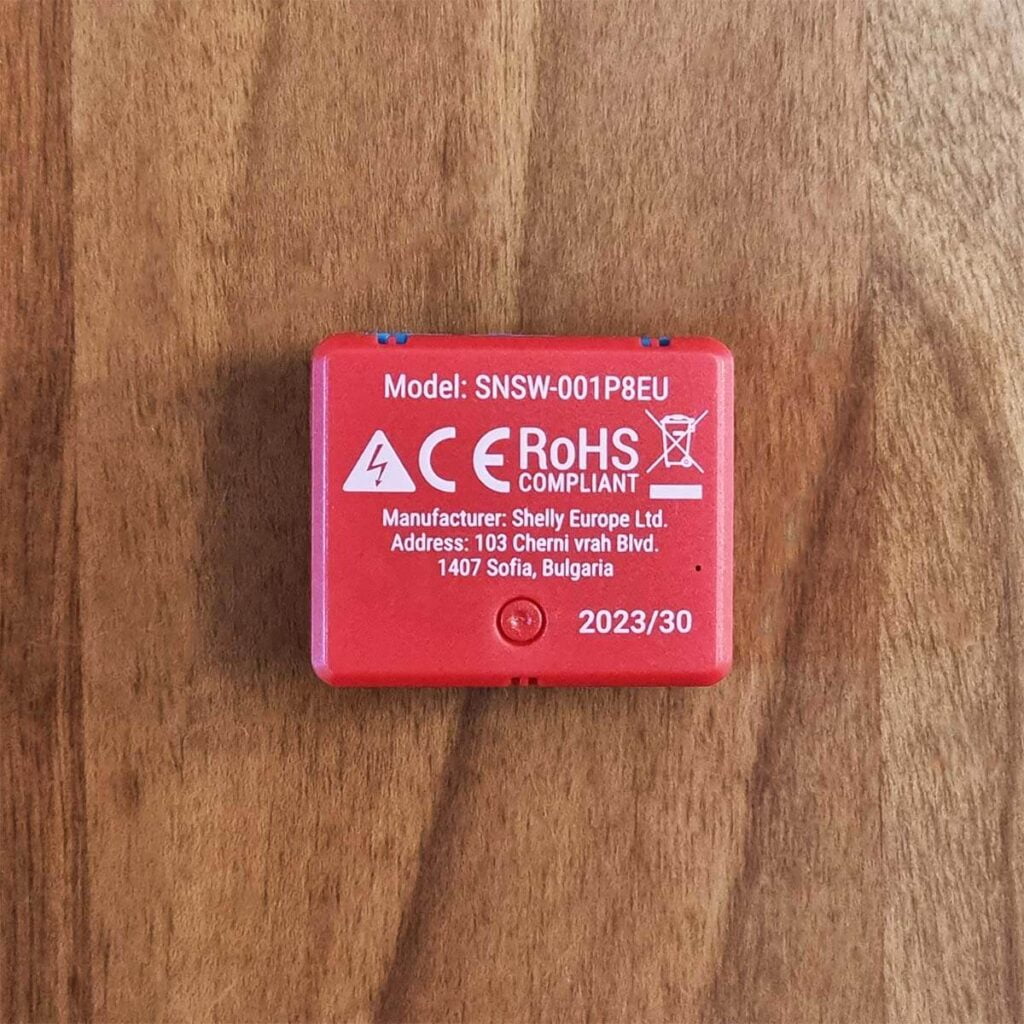
- Device Model: SNSW-001P8EU
- Size (HxWxD): 29x35x16mm / 1.11×1.35×0.63in
- Weight: 18g / 0.63oz
- Power Supply: 110 – 240 VAC
- Power Consumption: <1.2 W
- Max Voltage: 240V
- Max Current: 8A
- Max Power: 2000W
- Connectivity: Wi-Fi 2.4GHz, 802.11 b/g/n, Bluetooth 4.2
- Operating Temperature: -20°C to 40°C / -5°F to 105°F
- Operating Humidity: 30% to 70% RH
Disassembly
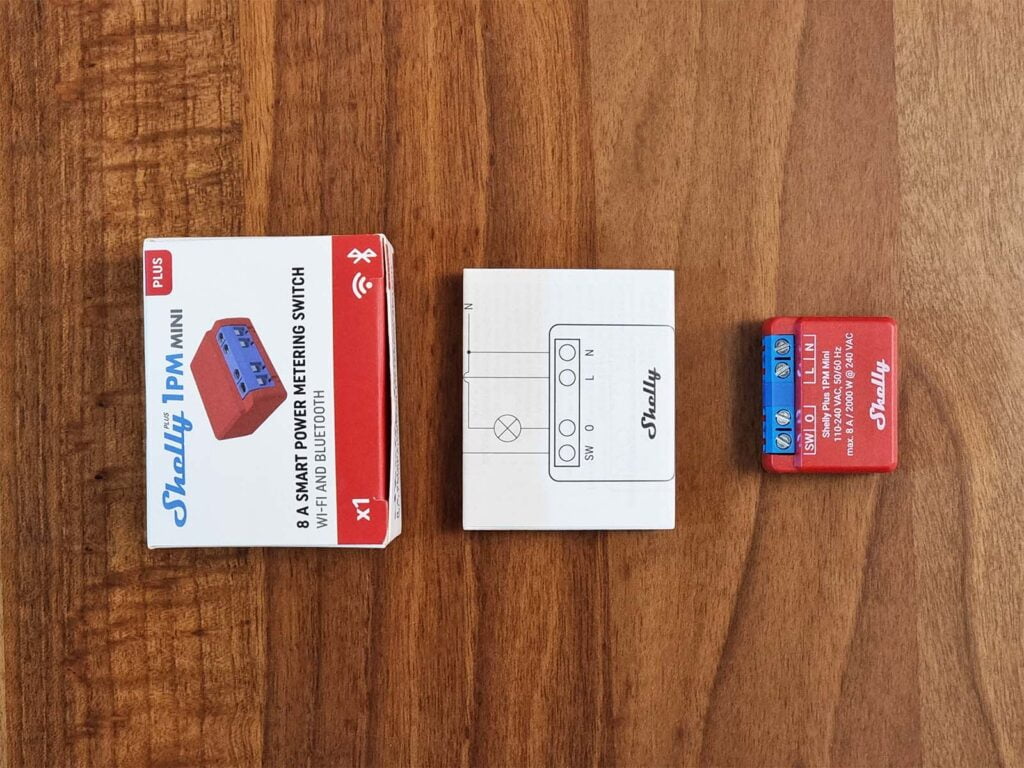
Just like the size of the Shelly 1PM, the packaging box is also very small. It includes the module and a user manual, nothing else. The device is cushioned inside the box though, to prevent shipping damage.
Like a mentioned at the beginning of the article, the Shelly Plus Mini modules are not much larger than a 2EUR coin. The diameter of a 2 EUR coin is 25.75mm while the Shelly is 29mm in height. Here’s a photo to get a sense of it’s true size:
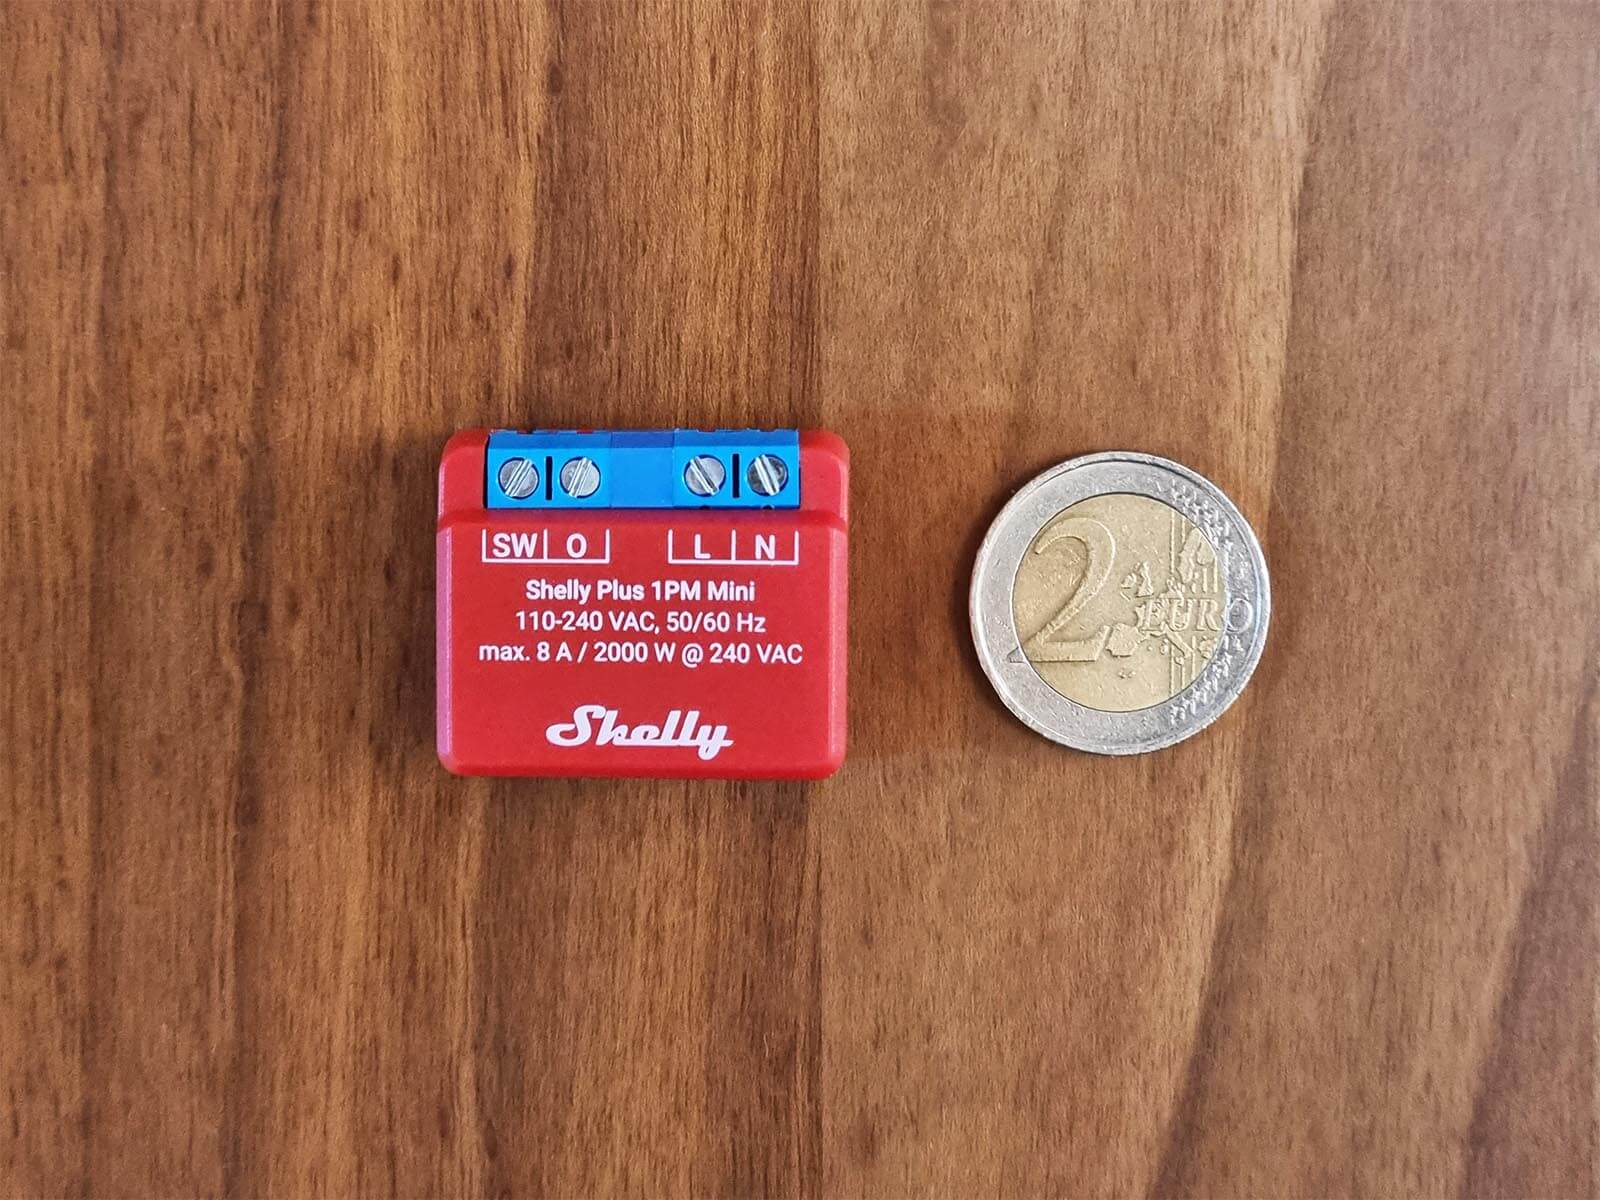
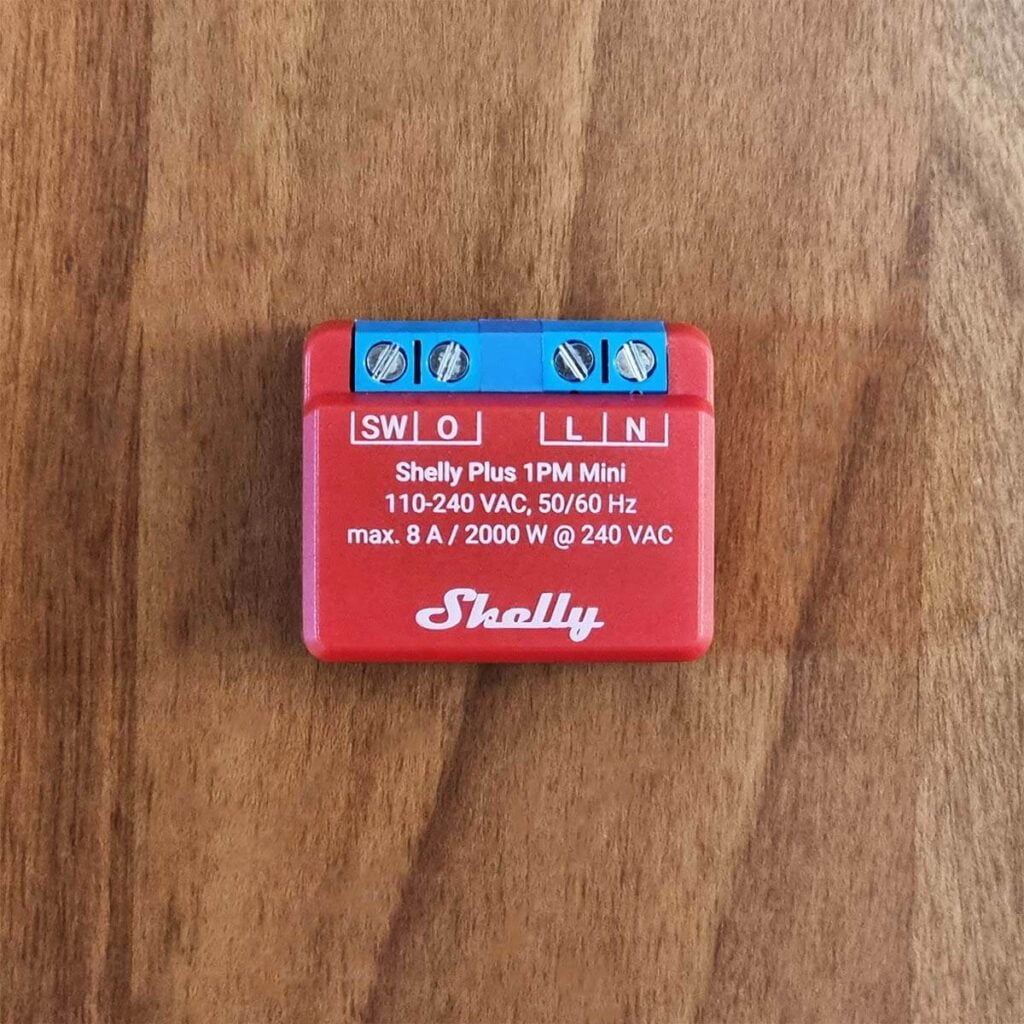
The module is labelled both front and back, with the name, input voltage and max current printed on the front while the exact model and manufacturer info on the back. There is a pairing/reset button on the back which does two things:
- Press and hold for 5 seconds: Enable device access point and Bluetooth
- Press and hold for 10 seconds: Reset the device to factory settings
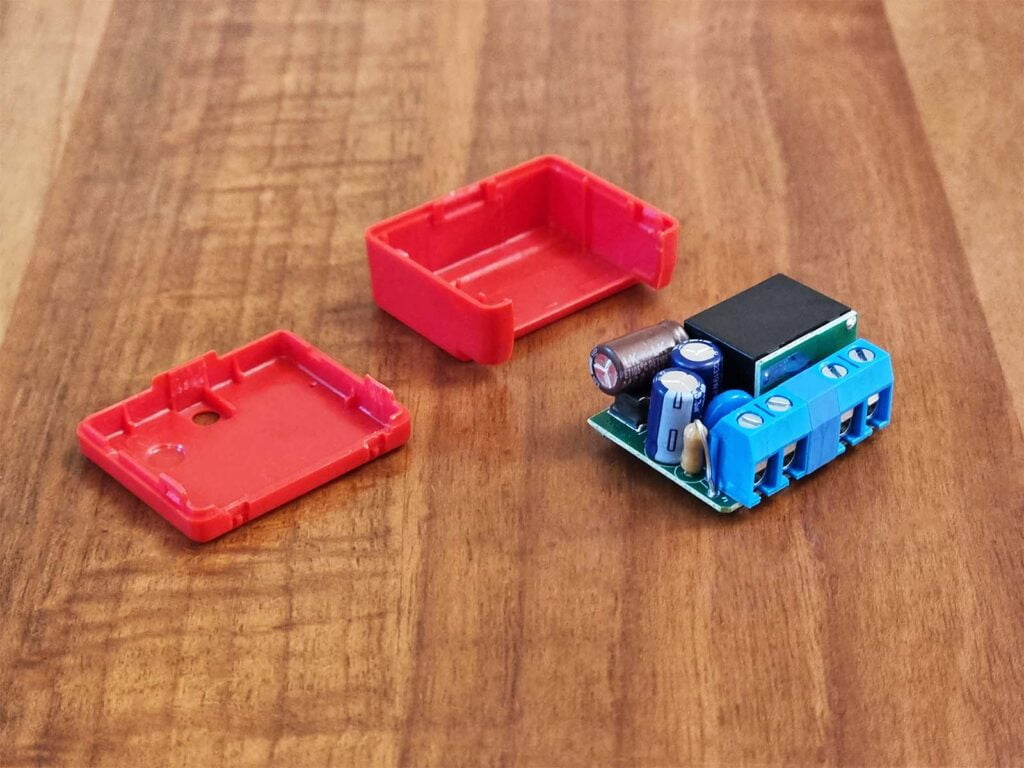
Cracking open the Shelly was a dauting task… No not really, it came apart easy once I pried it with a small screwdriver. I imagined everything was going to be packed close together considering the size, but man… This is some good engineering. Shelly specs sheet says ambient temperature should not exceed 40°C, otherwise device can overheat.
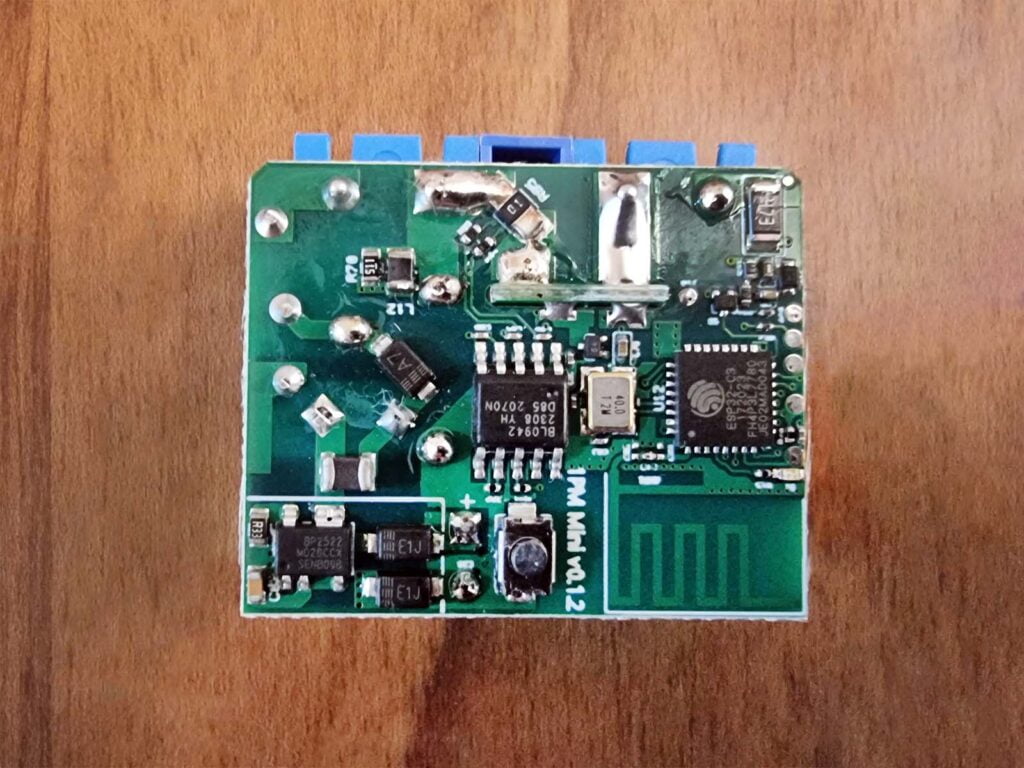
The Shelly Plus 1 Mini is based on the ESP32-C3 [Datasheet] (Single core, 160MHz, 4MB embedded flash) which can easily be flashed with custom firmware like Tasmota or ESPHome.
Power metering is enabled by the calibration-free IC module BL0942 [Datasheet], manufactured by Shanghai Belling in China. Even though Shelly does not state this, this chip is capable of measuring current from 10mA ~ 30A with an error margin of less than 0.1% in active energy measurement.
Installation and Wiring
Even though wiring the Shelly Plus Mini 1PM module is simple in terms of know how, it can be a challenging task to jam everything inside a wall switchbox. In any case, the Shelly Mini Line-up is the smallest one on the market right now, so it does make things easier compared to other modules.
When installing a module inside a switchbox, it’s always better to use wago connectors to help you organize the wires better. Wago blocks also prevent any strays from causing a problem:
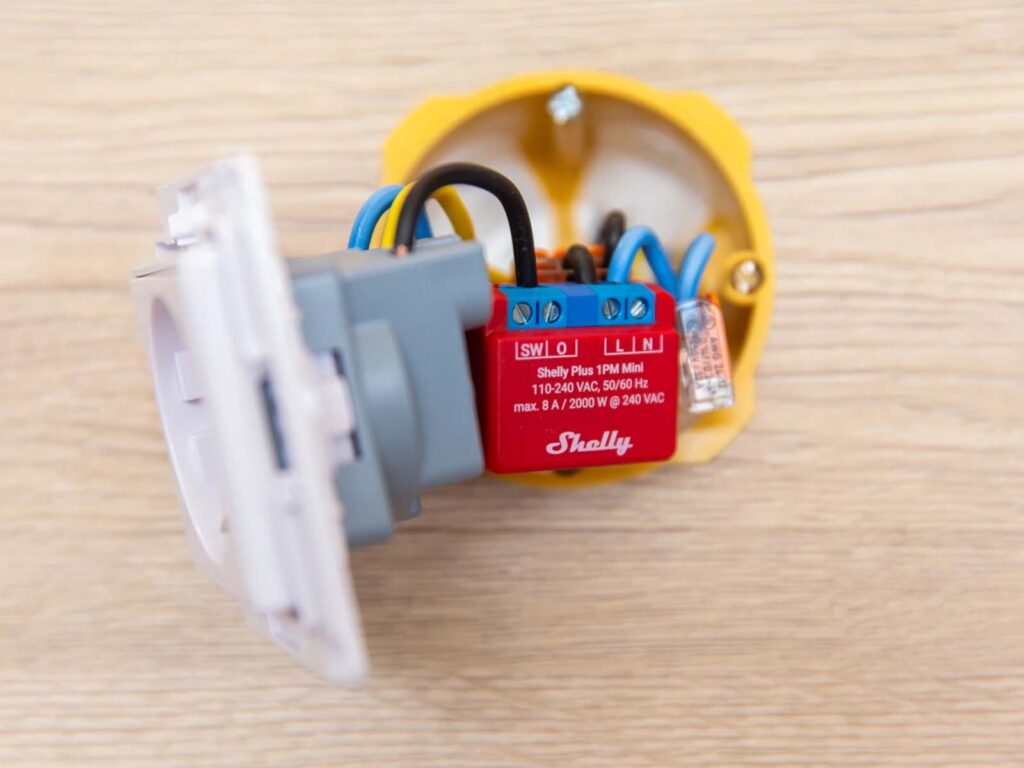
Let’s assume you are attaching the Shelly behind a wall outlet:
- Attach the N-Neutral coming off the wall to a Wago connector
- Connect the Wago with a short wire to the N-Terminal on the Shelly
- Connect the Wago with a short wire to the N-Terminal on the Wall Outlet
- Attach the L-Live coming of the wall to the L-Terminal on the Shelly
- Connect the O (Output) Terminal on the Shelly to the L-Terminal on the Wall Outlet
- Attach the Ground directly to the Wall Outlet
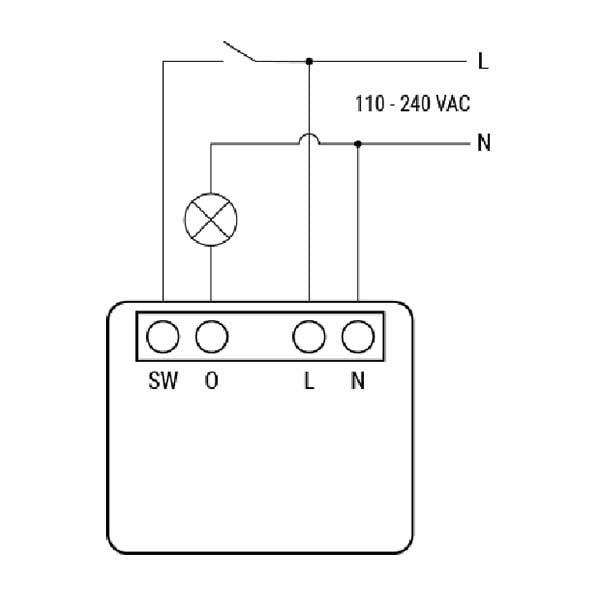
When you wire a light switch and you want to keep the traditional switch too, you need to use the the SW terminal on the Shelly. Using wago connectors is better in this case too, here’s the official wiring diagram:
Accessing the Shelly Web UI
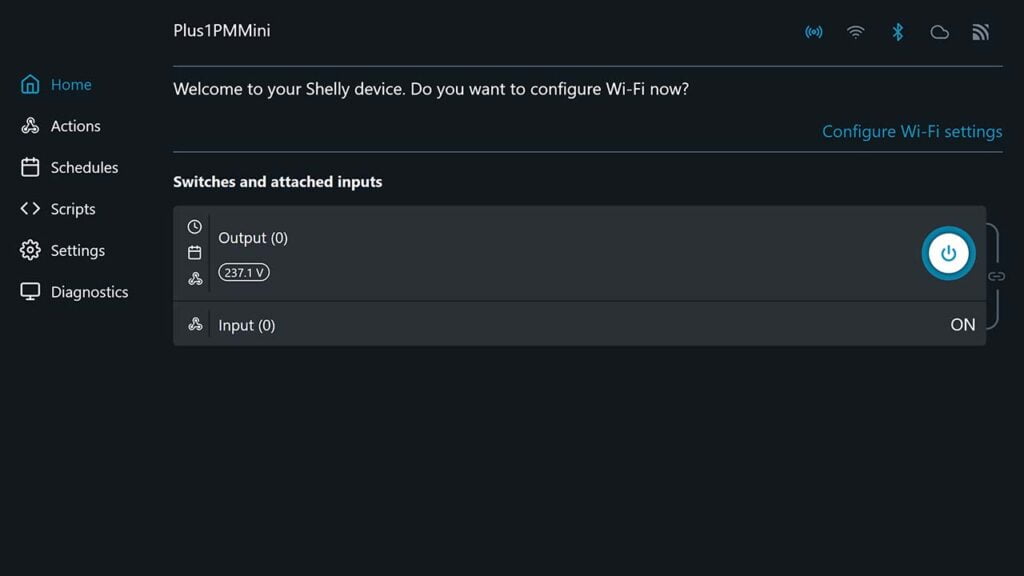
Every Shelly Mini will broadcast a wireless access point which you can connect to and configure the device. For example the 1PM Mini broadcasts the Shelly1PMMini-XXX AP which is unprotected. After I connected to the AP, I can access the Shelly Mini Web UI at 192.168.33.1 which opens up the following screen:
From here, I configured my Wi-Fi settings and allowed the Shelly 1PM Mini to join my network. I set a static IP address that I knew was free, so I don’t have to rely on DHCP. I also reserved the IP address later in my router settings. Now the Shelly was accessible on the new IP Address, 192.168.0.11 and I could continue to configure things.
The first I did was update the firmware on the Shelly 1PM Mini. My sample shipped with 1.0.0-beta5 and I bumped it to 1.0.3-stable release. You can find this in Settings > Firmware on the web dashboard.
Depending on the model, the dashboard can be used to setup and configure a bunch of different things like Wi-Fi access points, Bluetooth settings, MQTT connection, Cloud, Websockets as well as some basic things like Location and Time and Authentication.
If you click the Home tab on the left and select the Output card in the middle of the screen, some additional options become available. Perhaps the most useful adjustments can be made here in the Settings tab.
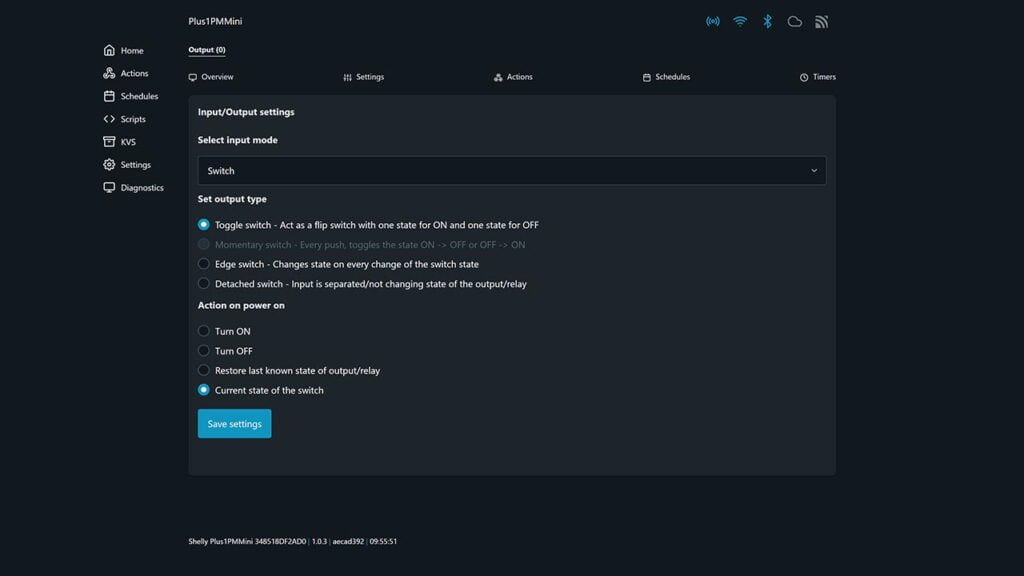
For starters, you can change the default input mode of the Shelly 1PM Mini from a switch to a button. Depending on your intended use case, these setting change the main behavior of the Shelly 1PM:
- Switch:
- Toggle switch – Act as a flip switch with one state for ON and one state for OFF
- Edge switch – Changes state on every change of the switch state
- Detached switch – Input is separated/not changing state of the output/relay
- Button:
- Momentary switch – Every push, toggles the state ON -> OFF or OFF -> ON
- Detached switch – Input is separated/not changing state of the output/relay
I talked about dry contact relays and their use cases in a recent review, so having the option to turn the Shelly 1PM Mini into one is very useful.
This menu also control the power on behavior of the Shelly 1PM Mini module, which can be set to turn on, off or restore last known state of output/relay.
Shelly Home Assistant Integration
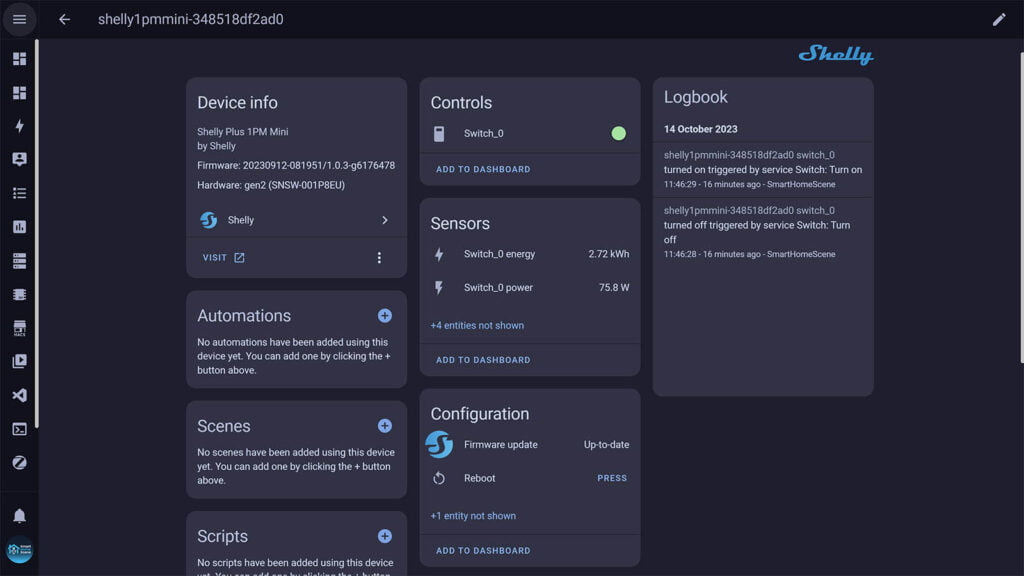
Once I was done tinkering with the Shelly 1PM Mini, I opened my Home Assistant instance and found the device was auto-discovered:

I simply clicked the configure button which prompted a dialog window for confirmation and the Shelly was added to Home Assistant. Initially, it enables the following entities:
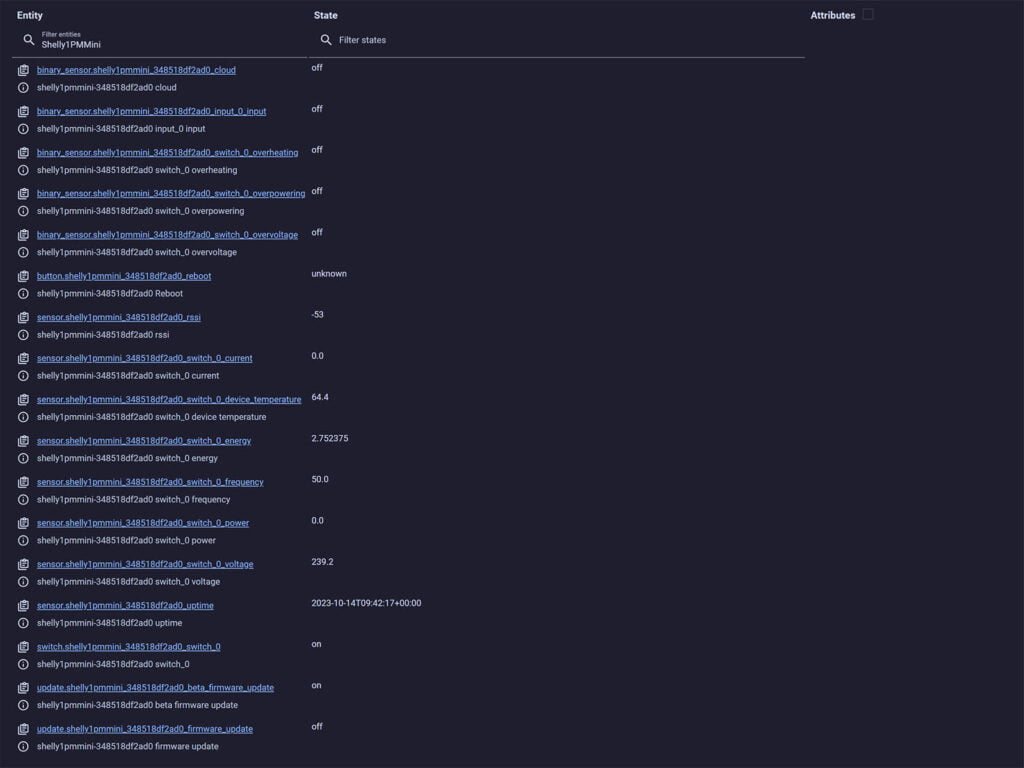
A bunch of entities are disabled by default, but you can enable them if you need to. Whether or not all of these provide useful information is debatable, but it’s good to know they are there. Here’s what becomes available in HA after enabling everything the 1PM Mini has to offer:
Since I haven’t enabled the Cloud, the responsiveness of the ESP32-C3 module is instant on my local network and there is no delay even with the stock Shelly firmware. Even though energy metering data is updated live in Home Assistant, it’s clocked once every 5 minutes in the database.
The diagnostic entities exposed by the Shelly 1PM are useful for getting a sense of the overall state of the module. The internal temperature should float around 60°C when under load, and a bit lower when idle. If the temperature rises significantly, the overheating binary sensor will trigger and notify you.
The overpower, overcurrent and overvoltage entities can be individually configured in the dashboard of the Shelly Web Interface. These are preset to 2240W, 8A and 280V respectively, so I suggest you leave them as they are. Going above the threshold will also trigger the binary sensor entities, so you are always aware of potential issues.
Custom Firmware Options
The Shelly Plus 1PM Mini can be flashed OTA with custom firmware like Tasmota or ESPHome to get rid of any Shelly firmware dependency. However, it’s fair to note that Shelly is one of the few manufacturers that make the cloud optional for their devices.
You do not have to create an account, login or use their app. You can use their devices just as they are directly with Home Assistant and even block internet access with your firewall. They will function as intended without any hiccups whatsoever. Props to Shelly for this respecting their end users privacy and security.
Here you can find the sample code of ESPHome for the Shelly Plus 1PM Mini and Shelly Plus 1 Mini.
Summary
If size is a significant factor for you, than look no further. The Shelly Plus Mini line-up are the smallest modules available on the market today. So far, there are three versions of Shelly Minis:
- Shelly Plus 1 Mini
- Wi-Fi Smart Switch, 8A, No energy metering
- Shelly Plus PM Mini
- Wi-Fi Power Meter, 16A, No switching
- Shelly Plus 1PM Mini
- Wi-Fi Smart Switch, 8A, With energy metering
Considering the Cloud is completely optional and not shoved down our throats, the Shellys are top notch. It’s important to clarify that the Cloud is needed to be able to control the Shellys remotely from their app.
Ultimately, they are a highly versatile and configurable set of smart devices operating on the ESP32-C3 boards, which can be flashed with custom firmware if you need to.
If you prefer Zigbee, than the upcoming Aeotec Pico line-up are also very small and can fit great behind a switchbox, just like the Shelly. You will have to pre-order those though, as they are not yet available.
Pricing and Availability
The Shelly Plus Mini Line-up is available on their Official Webstore, Amazon and AliExpress. The devices are jumping in and out of stock and frequently price gouged on Amazon, so be careful. Here are the official links:


It’s absolutely amazing how they could make it that small!
Would the Shelly Plus PM Mini be suitable for measuring heat pump consumption? The heat pump is a 5kW unit, that will be installed on a 16A fuse in the consumer unit and should optimistically draw less than 10A.
Or should I stick with a Shelly EM with 50A clamp?
No, I would not install the 1PM mini on a 5Kw heat pump.
Then can peak more than 10A, even though it will stay bellow 10 most of the time.
If you want a relay that can control the pump, I suggest looking into the Colorock 30A Smart Relay with Energy Metering (actual relay inside is 40A!).
More here: https://smarthomescene.com/reviews/zigbee-relay-with-energy-monitoring-for-high-power-appliances/
Hello,
thank you for your explanation.
What excatly do you mean with the following?
“Shelly Plus PM Mini
Wi-Fi Power Meter, 16A, No switching”
What do you mean with No switching?
Thank you.
It’s simply a power metering device, there is no relay inside for switching the connected load On/Off.
Cheers
That is not correct. There is no input to connect an external switch but the device can switch on/off any connected load through for example the Shelly app
He asked about the PM Mini, and I’m 100% correct.
https://www.shelly.com/en/products/shop/shelly-plus-pm-mini
Quote from website: This is only a power meter. There is no relay inside.