In these past couple of months, I’ve tested and reviewed a lot of different SwitchBot devices. The company has released a lot of new things for the smart home, focusing on improving their existing product lineup while also aiming things more towards Matter.
For example, the new SwitchBot Lock Ultra and Keypad Vision are quite a powerful security combo. The performance of the lock is impressive and leaves very little to be desired. It’s been my daily driver ever since I deployed it for testing and I don’t think I’m replacing it any time soon.
However, what I appreciate most about SwitchBot is their recent commitment to Home Assistant and the fact that SwitchBot joined the Works with Home Assistant program. This is a nod to the open-source, local smart home and can only bring good things to the community.
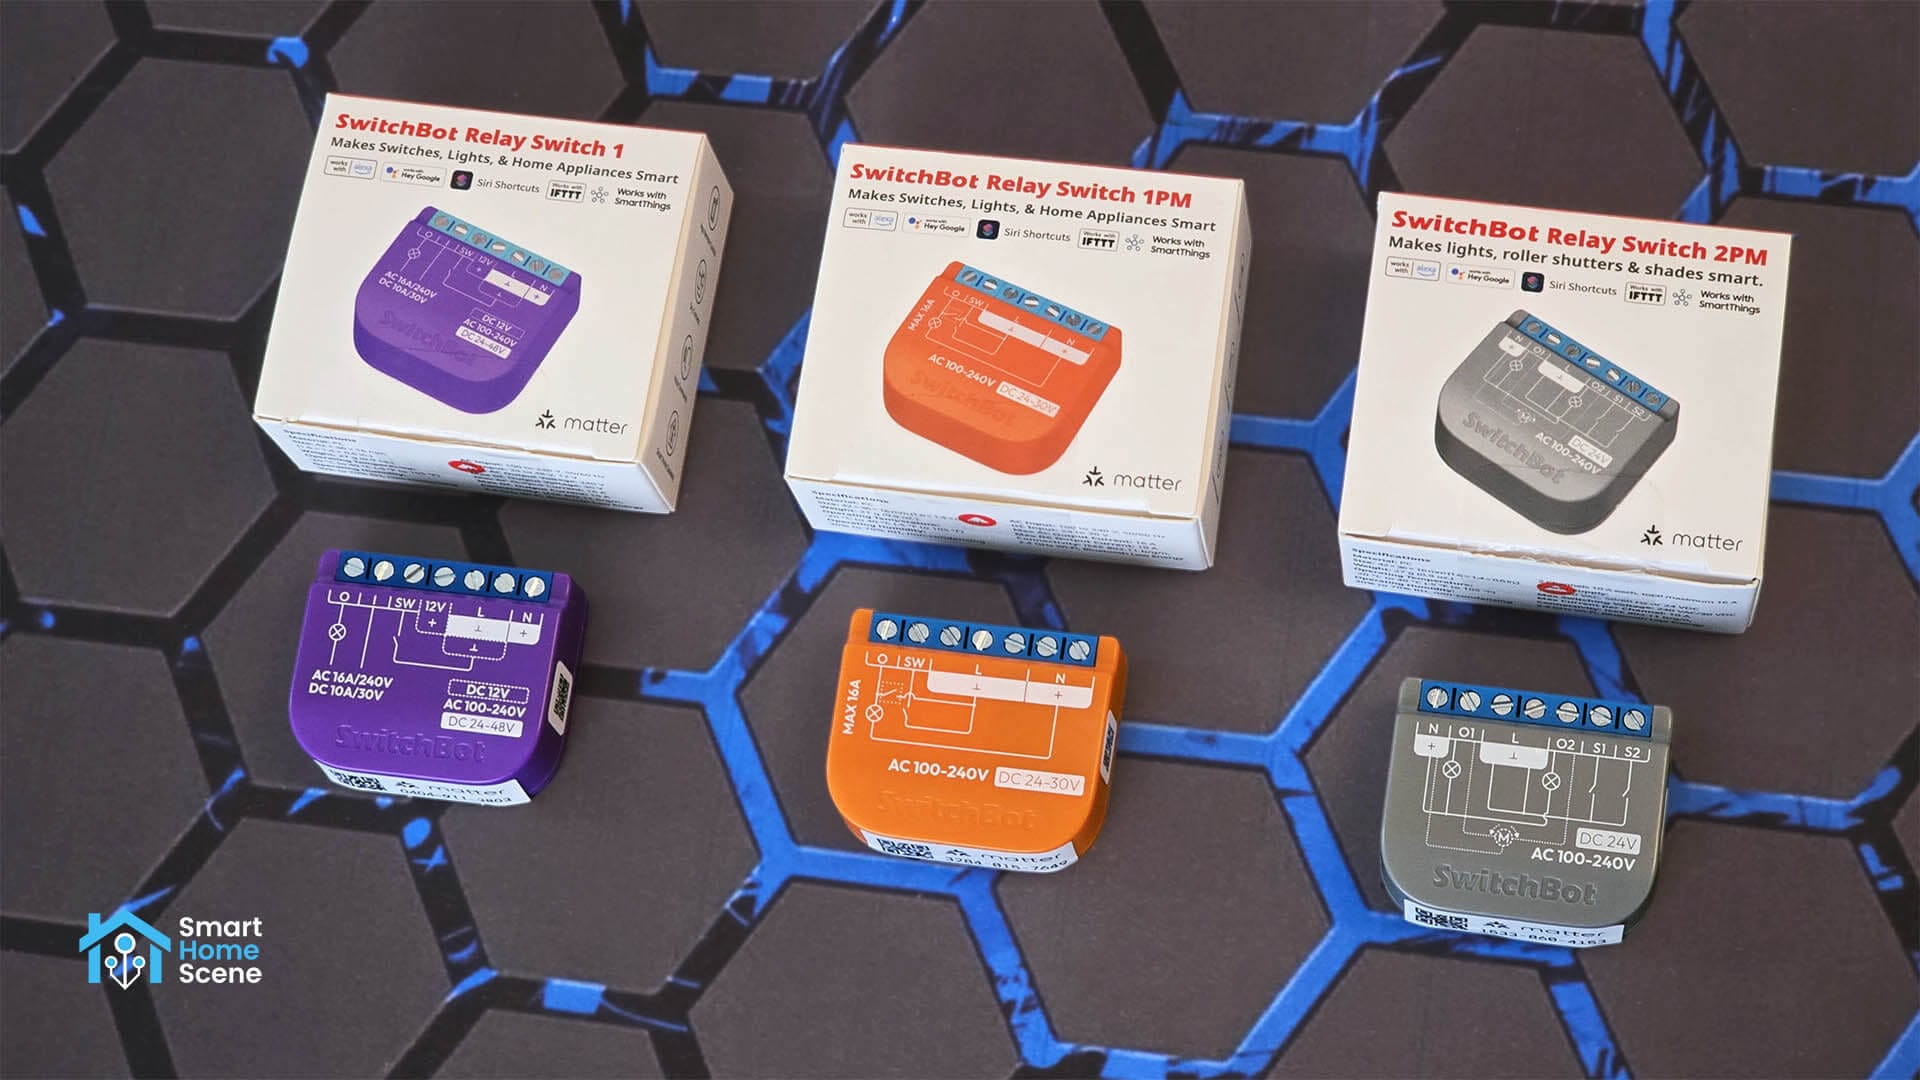
In this article, I’m testing and reviewing the new SwitchBot Relay Switches, models 1, 1PM and 2PM. These switch modules are very small and quite versatile, designed to cover a bunch of different use cases and needs. They support Matter out of the box while utilizing BLE for onboarding and pairing to the SwitchBot app.
Differences and Technical Specs
At the same time, SwitchBot released models 1, 1PM and 2PM relay switch modules. While they appear similar, they have differences that make each suitable (or not suitable) for a specific use case. I compiled all technical specifications and differences between them:
 Relay Switch 1 | 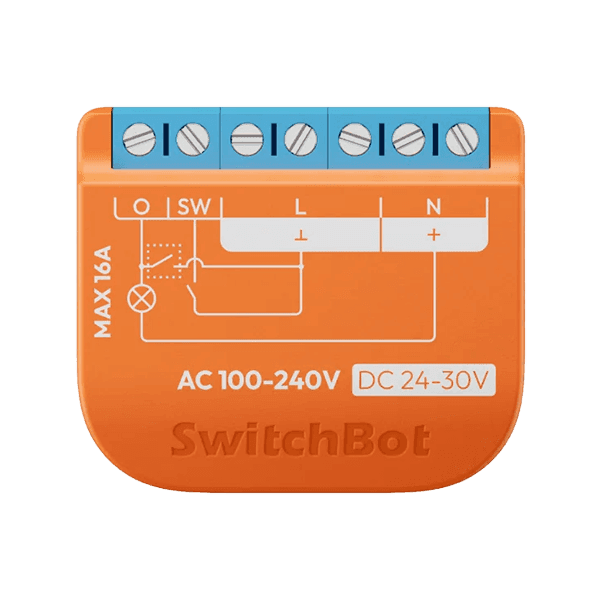 Relay Switch 1PM | 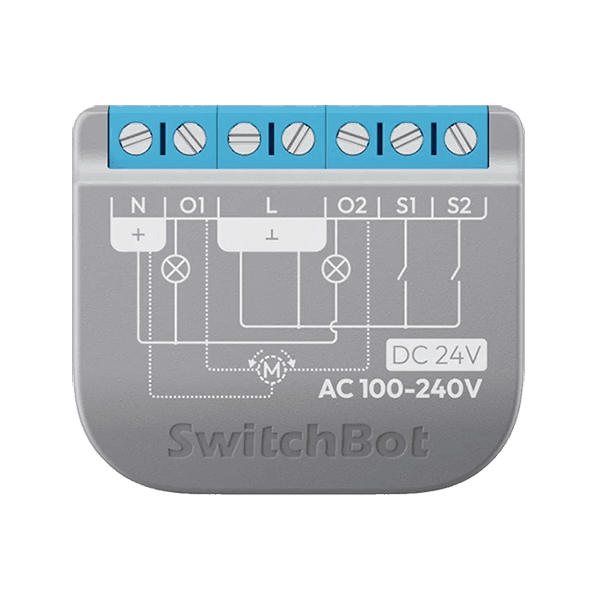 Relay Switch 2PM | |
|---|---|---|---|
| Number of Channels | 1 | 1 | 2 |
| Energy Monitoring | × | ✓ | ✓ |
| Dry Contacts | ✓ | × | × |
| Bluetooth Repeater | ✓ | ✓ | ✓ |
| Wi-Fi | ✓ | ✓ | ✓ |
| Matter | ✓ | ✓ | ✓ |
| Over Temperature Protection | ✓ | ✓ | ✓ |
| Overload Protection | × | ✓ | ✓ |
| Power Supply | AC: 100-240V DC: 12V, 24V-48V | AC: 100-240V DC: 24V-30V | AC: 100-240V DC: 24V-30V |
| Maximum Load | AC: up to 16A DC: up to 10A | AC: up to 16A DC: up to 10A | AC: up to 16A (2x10A) DC: up to 10A |
| Child Devices | 10 | 10 | 10 |
| Dimensions | 42x36x16mm | 42x36x16mm | 42x36x16mm |
| Weight | 27g | 27g | 27g |
| Price | €19.99 | €21.99 | €28.99 |
| Availability | SwitchBot | Amazon | SwitchBot | Amazon | SwitchBot | Amazon |
Device Disassembly
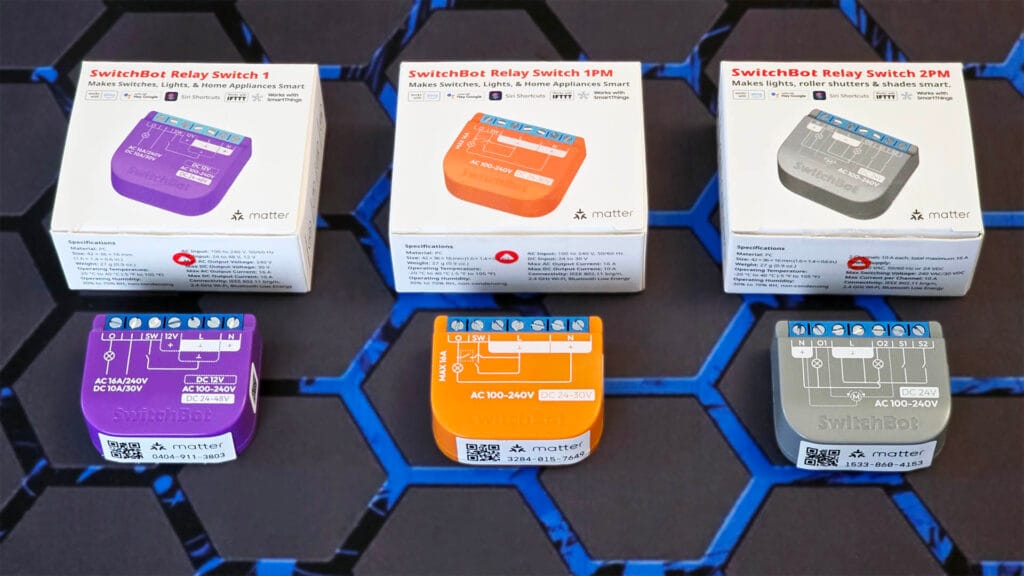
SwitchBot’s new Matter relay switches come packed in small boxes containing the devices themselves, user manuals and safety and regulatory leaflets. There’s a small card inside the box that contains the Matter QR pairing code for each switch, which is also printed on the side of the switches.
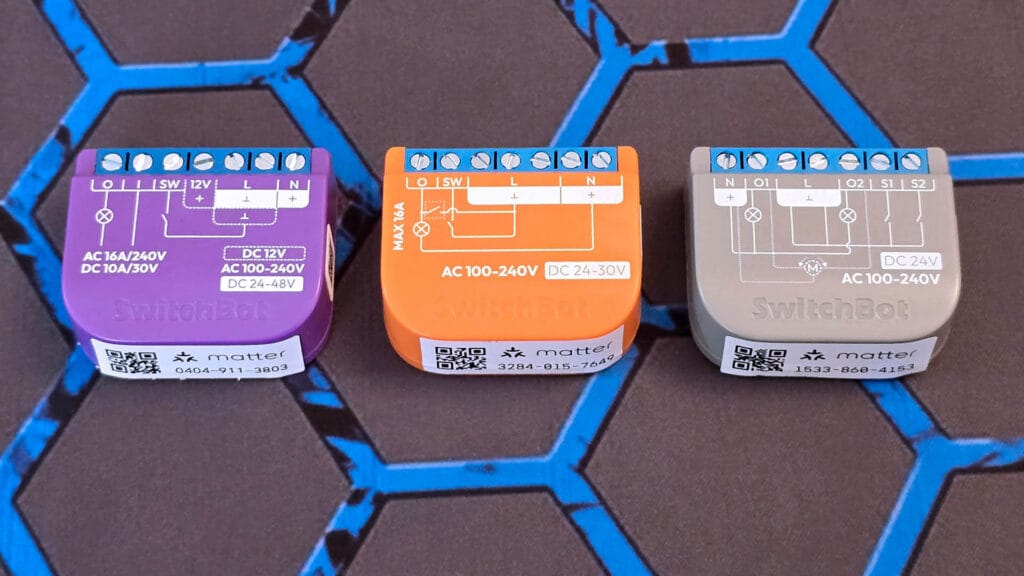
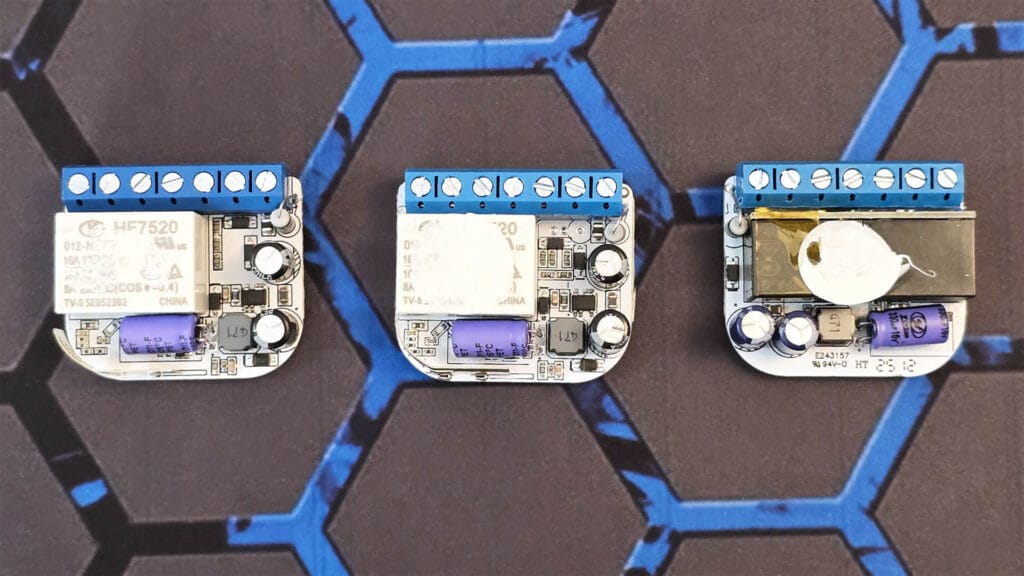
At first glance, besides the color, there is very little difference between the SwitchBot Matter Relay Switches. The shape, size and number of terminals are identical across all three (1, 1PM and 2PM). However, the positioning and markings of the terminals, as well as their internal wiring diagrams, differ from one another. The 1 and 1PM have the Neutral and Live terminals on their right, while the 2PM module features its Neutral terminal on the left and the Live terminal positioned in the middle of its left-side connections.
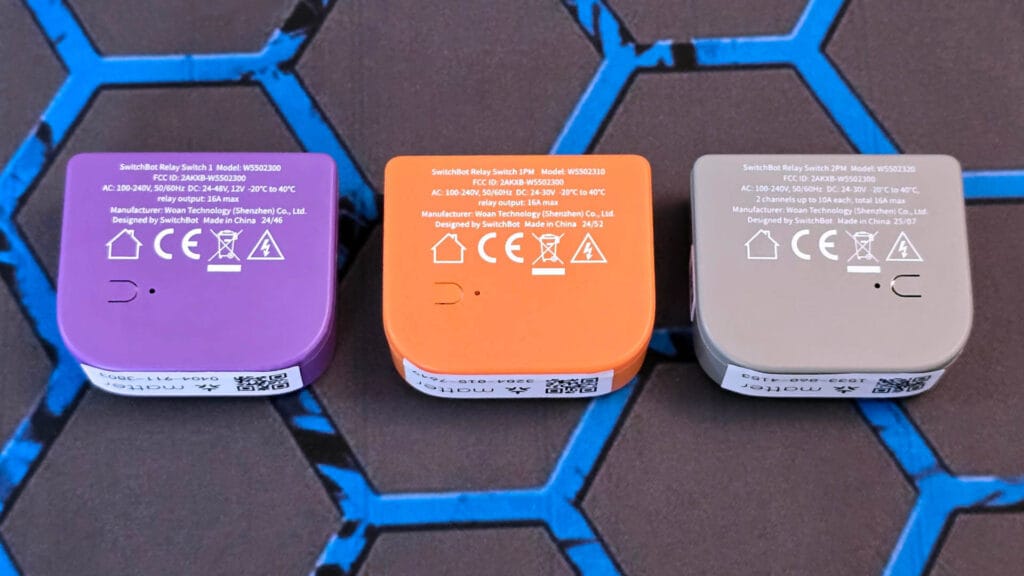
On the backside of each switch, there is a small pairing button along with an indicator LED. Some basic information is printed on each device, including model name, model number, maximum load and AC and DC loads. The most important difference here is that the 1 and 1PM models can handle a maximum load of 16A, while the 2PM has 2 channels of 10A each.
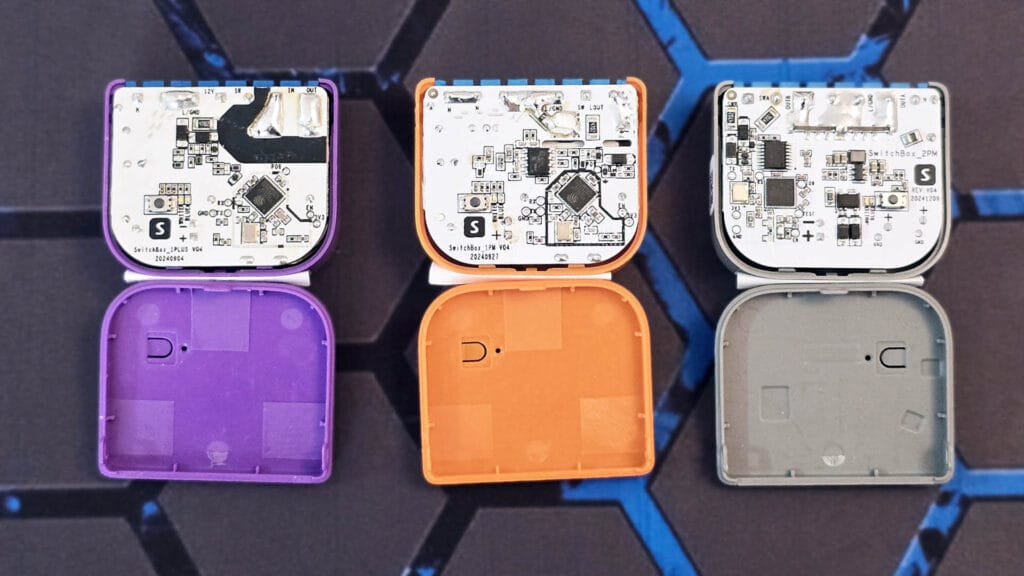
I managed to pry open these smart switches quite easily, using a small flathead screwdriver. While all three SwitchBot Matter Relay switches share a similar overall PCB footprint and a central integrated circuit, a closer look reveals distinct differences in their internal layouts and components.
As expected, the SwitchBot Relay Switch 1 (left) features the most streamlined design, with a relatively uncluttered arrangement of surrounding circuitry. Moving to the SwitchBot 1PM (middle), and the components gets noticeably denser to accommodate the energy monitoring capability of the switch. These two have a fairly similar layout to one another, all things considered.
However, the 2PM has a completely different layout of its internals. The main communication module is placed on the left and pairing button is moved to the right. As the 2PM carries two relays instead of one, it’s redesigned to be able to fit everything inside this small device.
Obviously, this pattern of similarity continues once I took the switches out of their cases to take a look at their relays. The SwitchBot 1 and 1PM use a 16A relay made by Hongfa, model HF7520 [Datasheet]. This is a high-power relay, capable of safely switching substantial electrical loads, making these modules suitable for controlling demanding appliances or lighting circuits.
The SwitchBot Relay Switch 2PM, on the other hand, uses two 10A relays, again made by Hongfa, model HF32FA-G [Datasheet]. While this relay can’t handle such high loads, it’s more than enough for controlling small appliances, lights, garage doors and other devices.
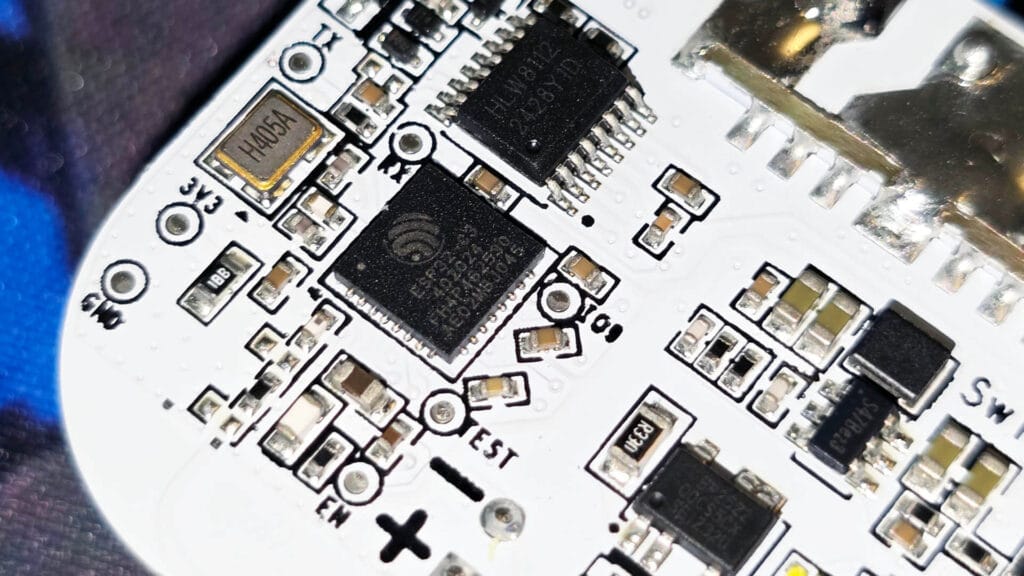
It’s also worth noting that all three SwitchBot Matter Relay Switches use the ESP32-C3 [Datasheet] as their main communications module. Because these switches are Matter-over-Wi-Fi enabled, they leverage Wi-Fi for connectivity instead of Bluetooth, with the ESP32-C3 specifically chosen to accommodate Matter’s requirements. This same versatile module can also be found powering the SwitchBot Hub 2.
Installation and Wiring
Wiring these relay switches is fairly simple in terms of know-how, but does require some skill. Switchboxes can get quite cramped, making wire management difficult. It’s highly recommended to use Wago blocks for these types of situations, preventing shorts and making things easier.
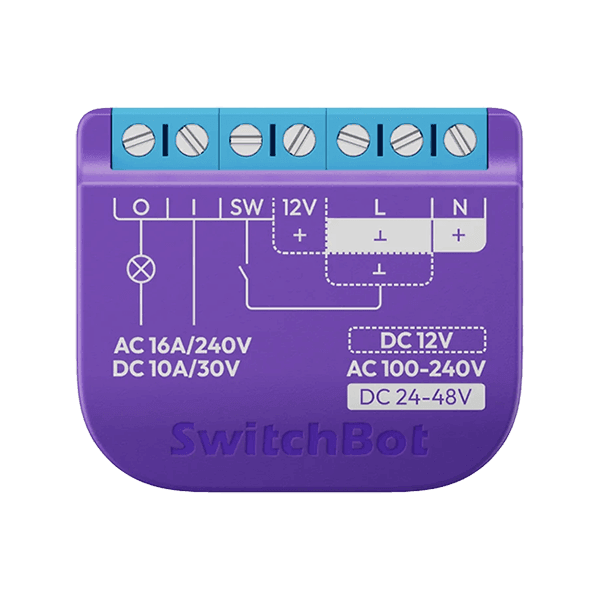
SwitchBot Relay Switch 1 Wiring
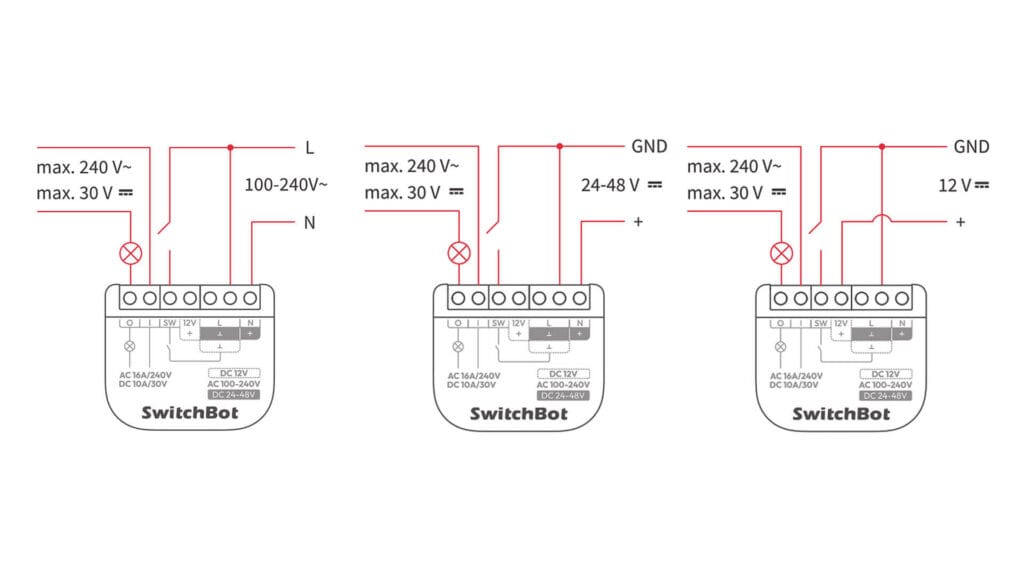
AC Power Supply (100-240V):
- Connect the main live wire to the L terminal and the neutral wire to the N terminal to power the relay.
- For the internal switch to receive power, install a jumper wire from the L terminal to the I (Input) terminal.
- Connect the load output wire for your appliance or light to the O (Output) terminal.
DC Power Supply (12V, 24V-48V):
- Connect the positive wire from your DC power source to the + terminal.
- Connect the negative/ground wire from your DC power source to the – terminal.
- This model supports multiple DC voltage ranges, including 12V and 24V-48V.
Dry Contact Mode:
- This mode allows the relay to control a separate circuit without passing any voltage to it.
- Power the Relay 1 module independently by connecting a power source to its AC (L and N) or DC (+ and –) terminals.
- Connect the two wires from the separate device you wish to control to the I and O terminals. The relay will act as a simple switch, closing or opening the connection between these two terminals.
SwitchBot Relay Switch 1PM Wiring
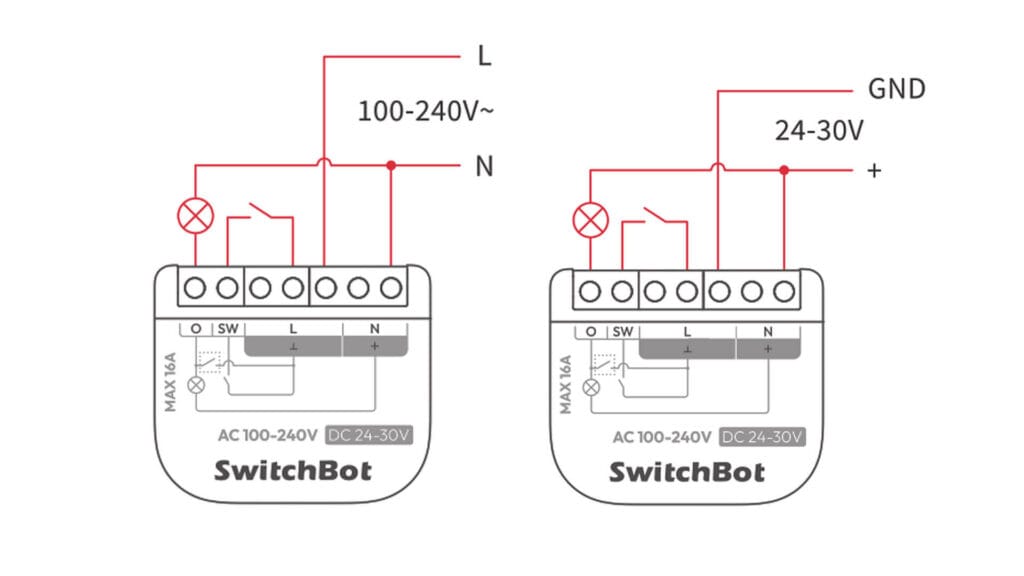
AC Power Supply (100-240V):
- Connect the neutral wire from the power source to the N terminal of the relay switch.
- Connect the live wire from the power source to the L terminal.
- Connect the load output wire for the appliance to the O terminal.
- To use an external wall switch, connect its control wire to the SW terminal and its common (live) wire to the L terminal.
DC Power Supply (24-30V):
- Connect the positive DC wire to the + terminal.
- Connect the GND (ground) wire to the – terminal.
- Connect the load output wire to the O terminal of the relay switch.
- For an external switch in a DC setup, connect its common (positive) wire to the + terminal and its control wire to the SW terminal.
SwitchBot Relay Switch 2PM Wiring
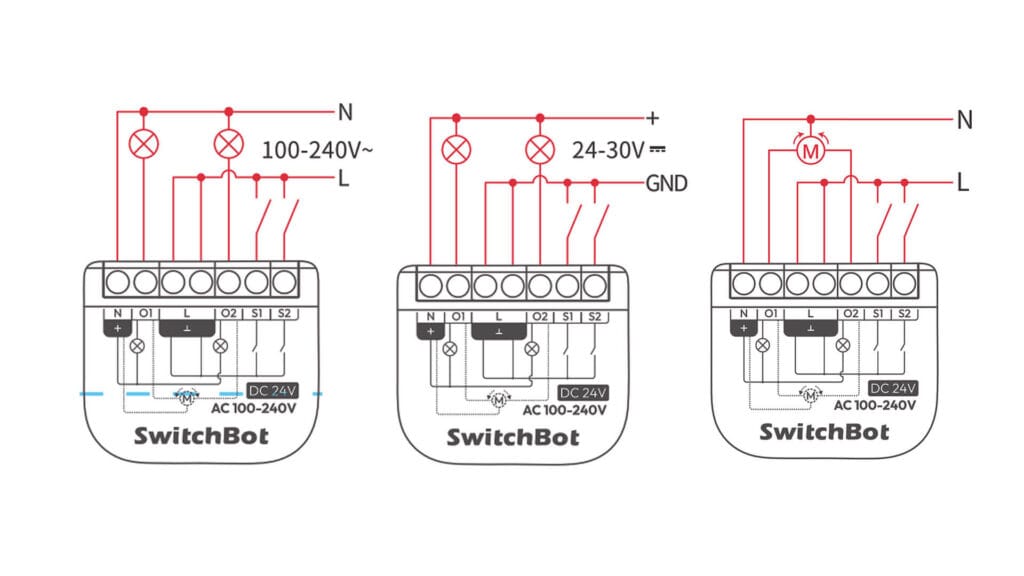
AC Power Supply (100-240V):
- Connect the main live wire to the L terminal and the main neutral wire to the N terminal.
- For the internal switches to receive power, you must install two jumper wires: one from the L terminal to the I1 terminal and another from L to I2.
- Connect the load output wire for your first appliance to the O1 terminal and the second appliance to the O2 terminal.
- To use external wall switches, connect the first switch between the L and S1 terminals and the second switch between the L and S2 terminals.
DC Power Supply (24-30V):
- Connect the positive wire from your DC power source to the + terminal.
- Connect the negative/ground wire from your DC power source to the – terminal.
- For the internal switches to receive power, you must install two jumper wires: one from the + terminal to the I1 terminal and another from + to the I2.
- Connect the load output wire for your first appliance to the O1 terminal and the second appliance to the O2 terminal.
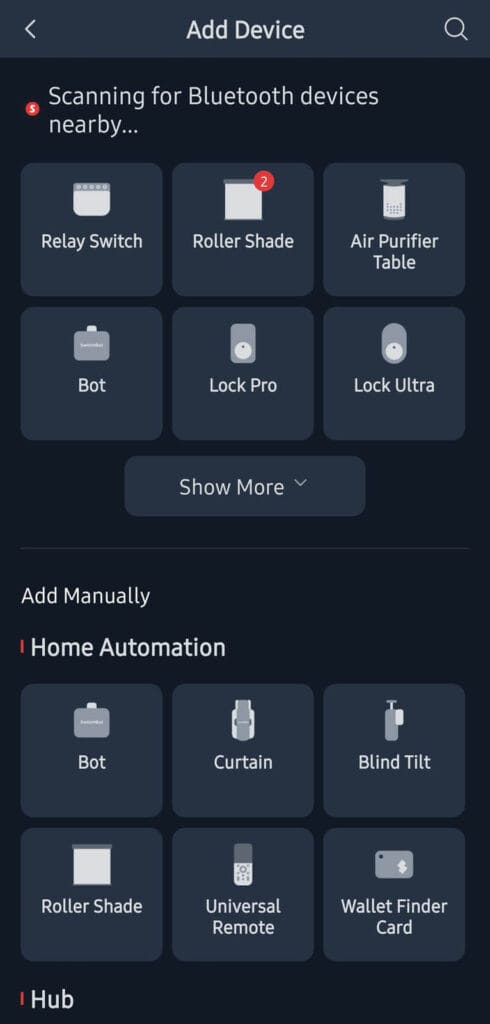
Pairing with the SwitchBot App
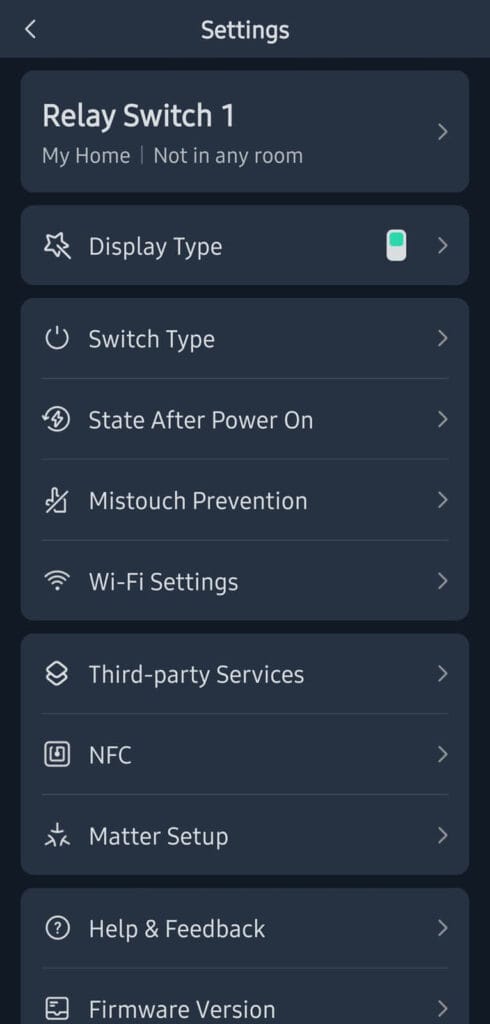
Pairing these relay switches to the SwitchBot app is not necessary before you onboard them to Home Assistant. However, you might want to do so anyway for several reasons. For example, Matter does not support configuring all parameters for each device, so some things will be missing in Home Assistant. Furthermore, power monitoring is not yet enabled via Matter for these switches, I’m told this functionality is coming in a future firmware update.
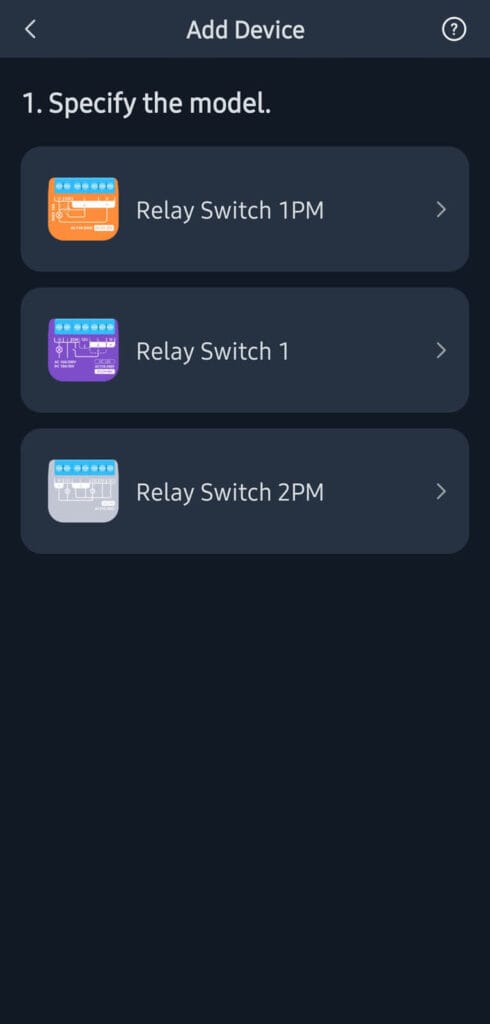
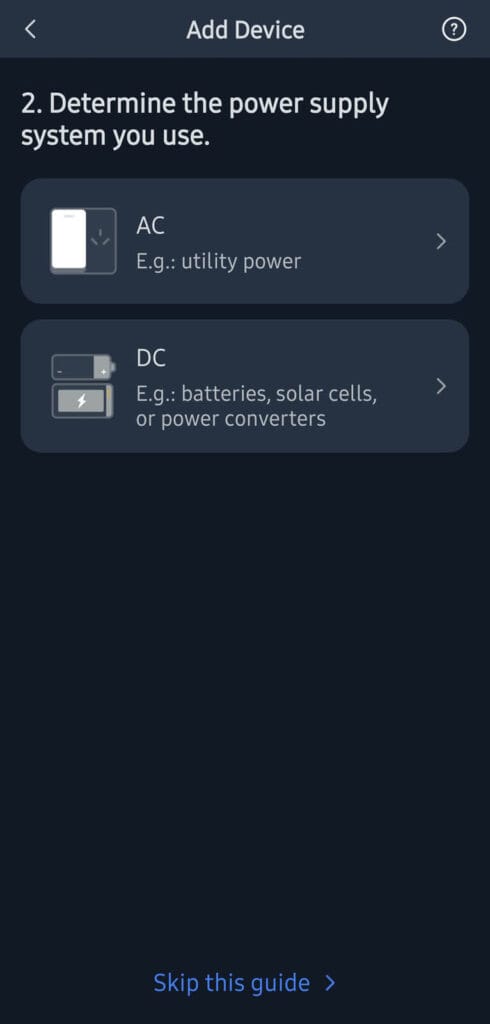
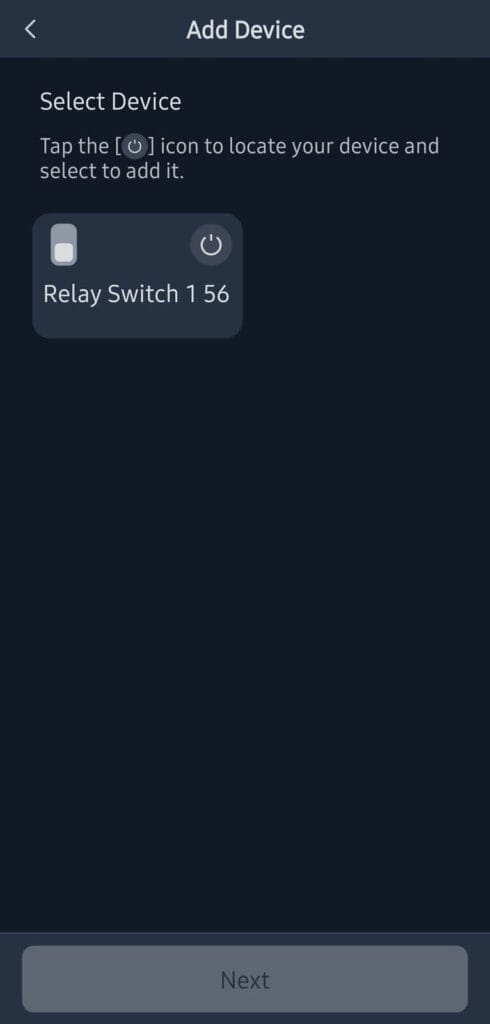
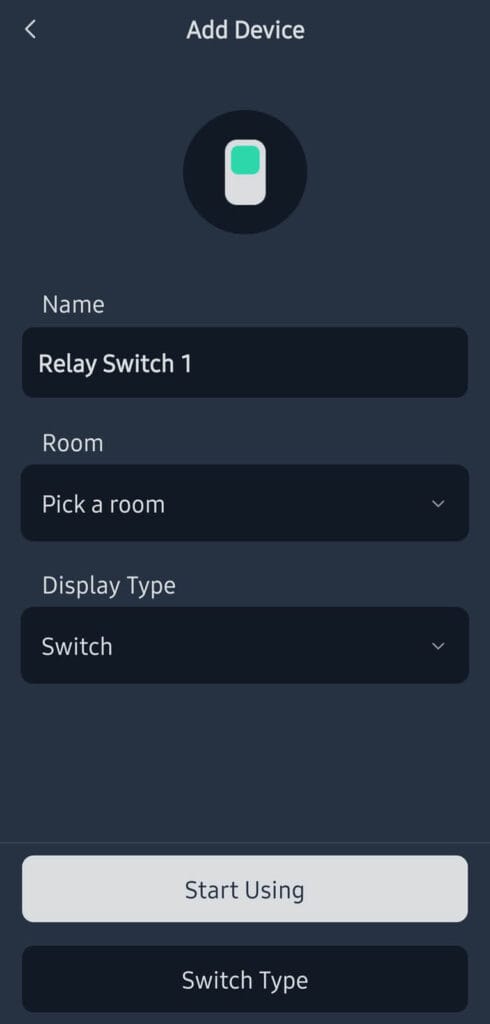
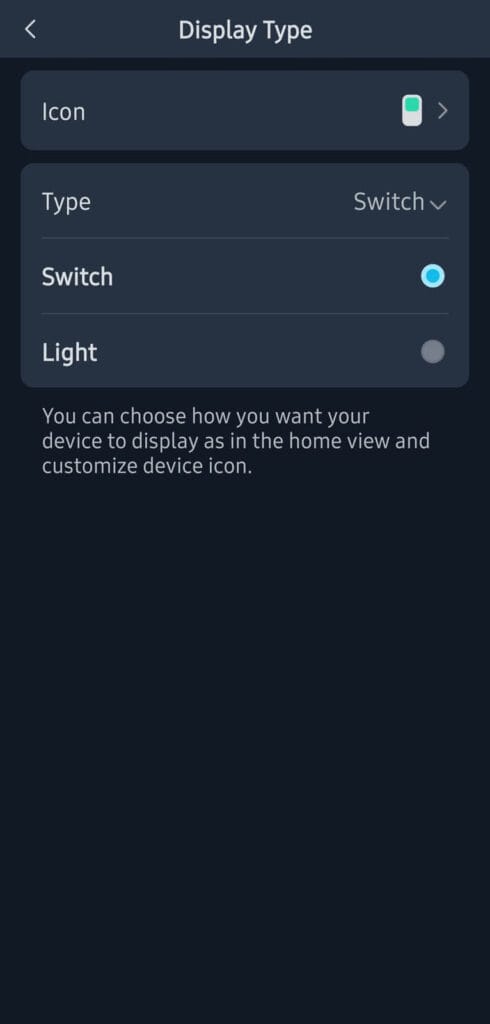
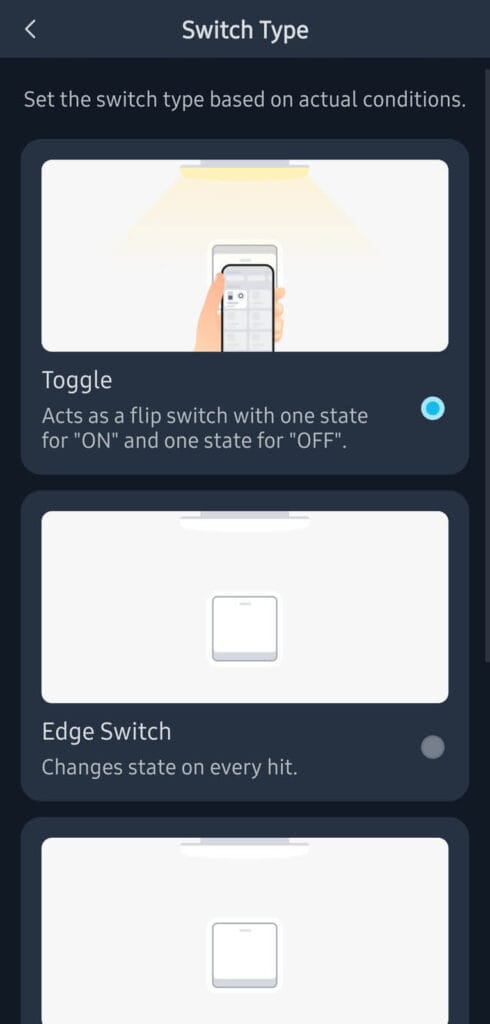
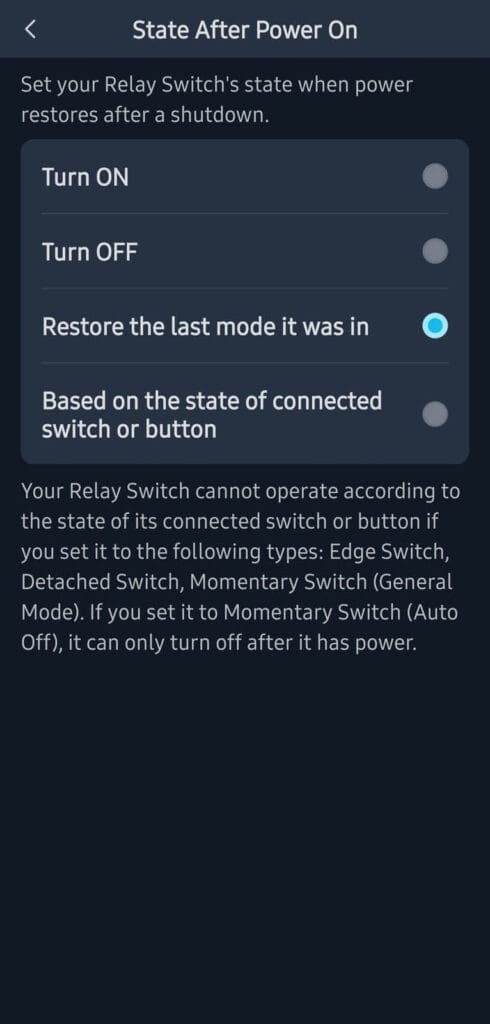
As with most SwitchBot devices, the pairing process is seamless. During pairing, you are asked to choose the type of power supply (AC/DC) your switch is connected to. This pre-determines the rest of the setup flow, allowing you to choose switch type and relay output behavior.
Here’s what it looks like in a few screenshots:


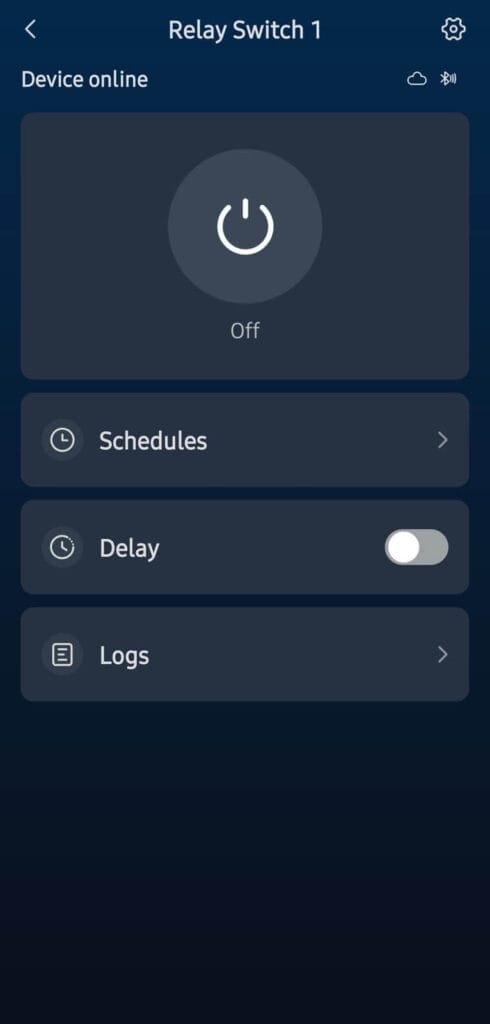
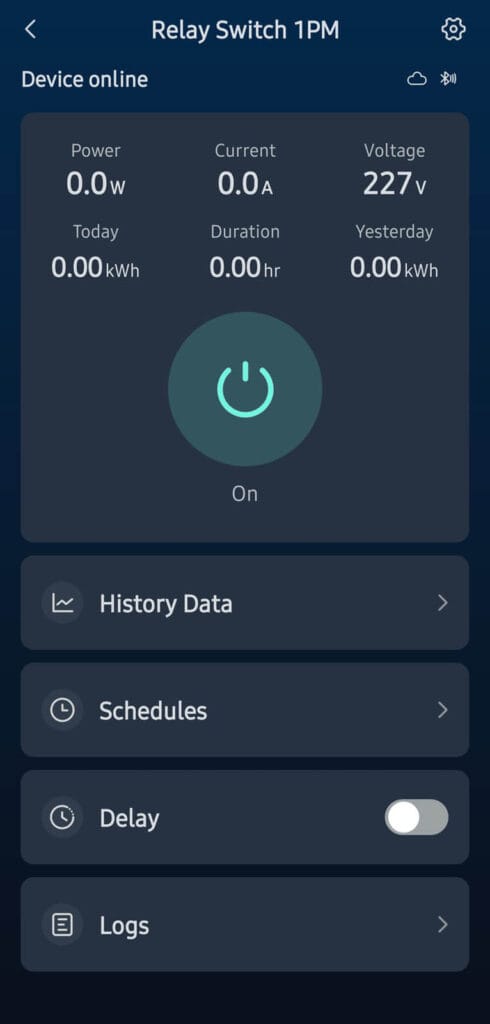
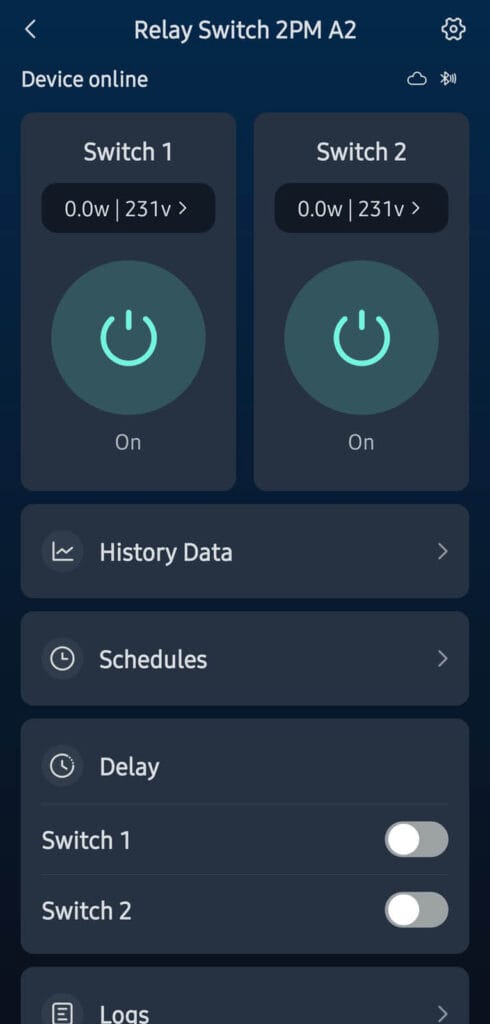
Once added, each of the switches gets their own unique control screen. Since the 1PM and 2PM also support energy monitoring, you can also browse historical energy use in the app. Furthermore, the 2PM relay switch supports individual energy monitoring per channel, as opposed to a total of both.
Here’s what each control screen looks like:
Home Assistant Integration via Matter
At this point in development, Home Assistant has excellent support for smart devices of this type. As HA is ahead of most ecosystems when it comes to Matter, any feature a device supports via Matter will be available in Home Assistant. However, SwitchBot’s firmware for these relay switches does not support energy metering via Matter yet.
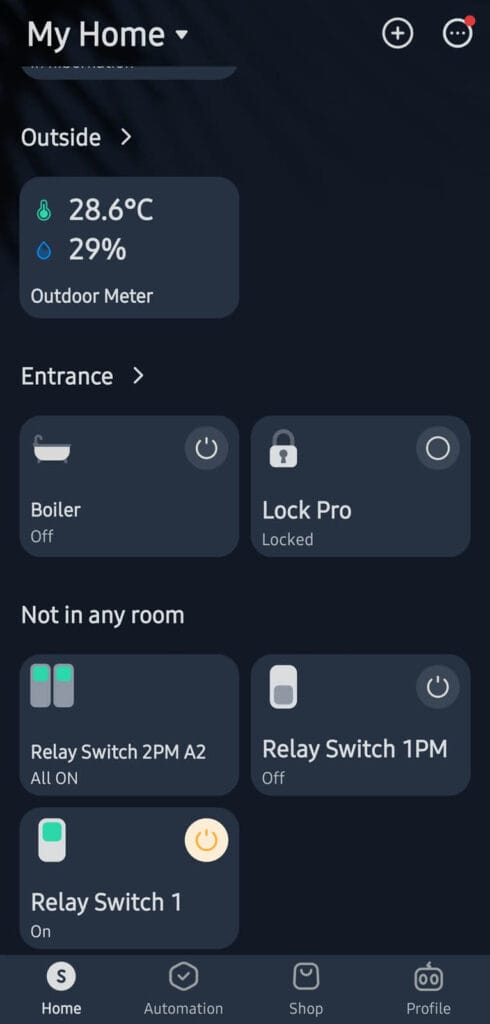
I paired all three switches directly in Home Assistant via Matter and this is what I got:
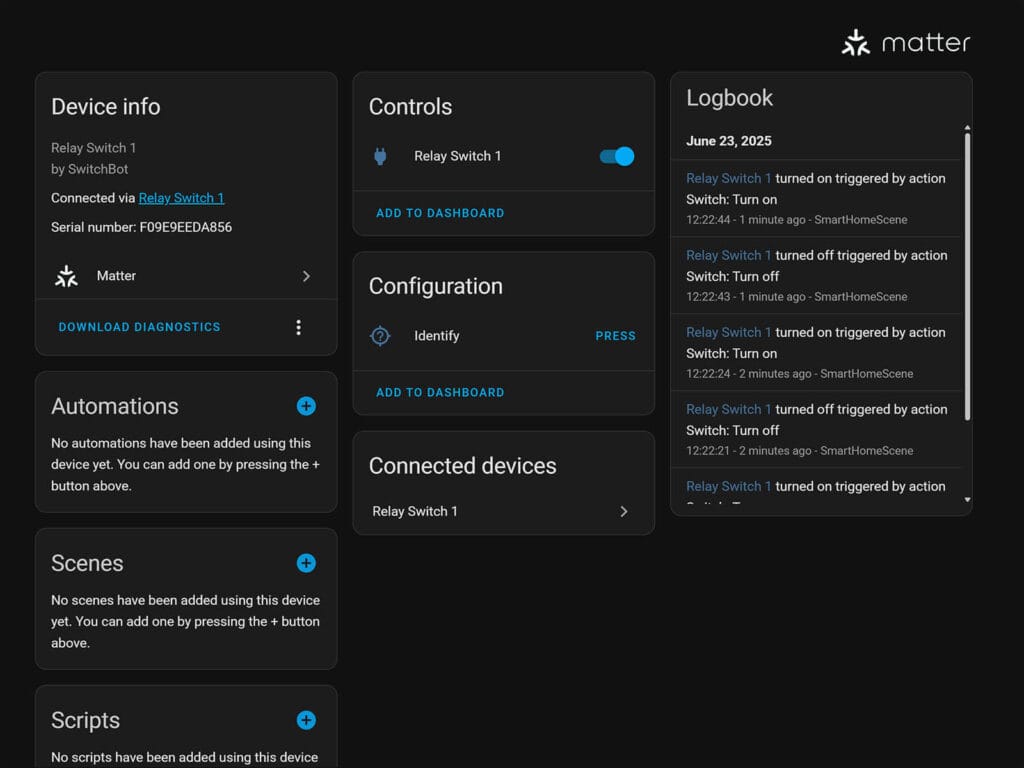
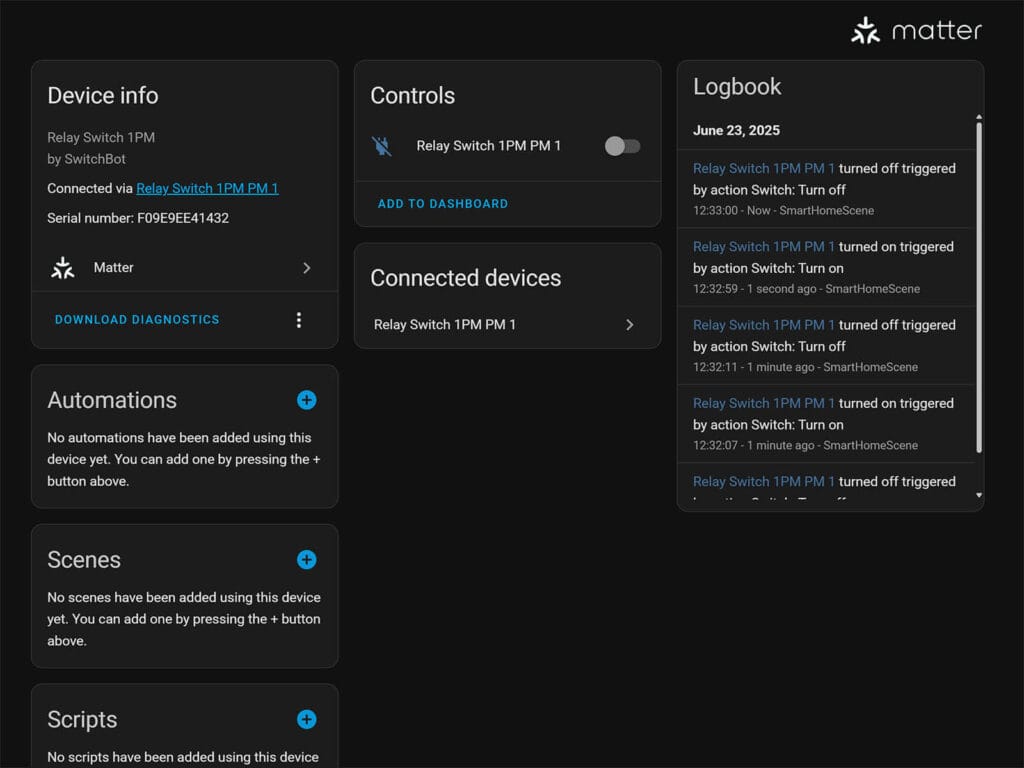
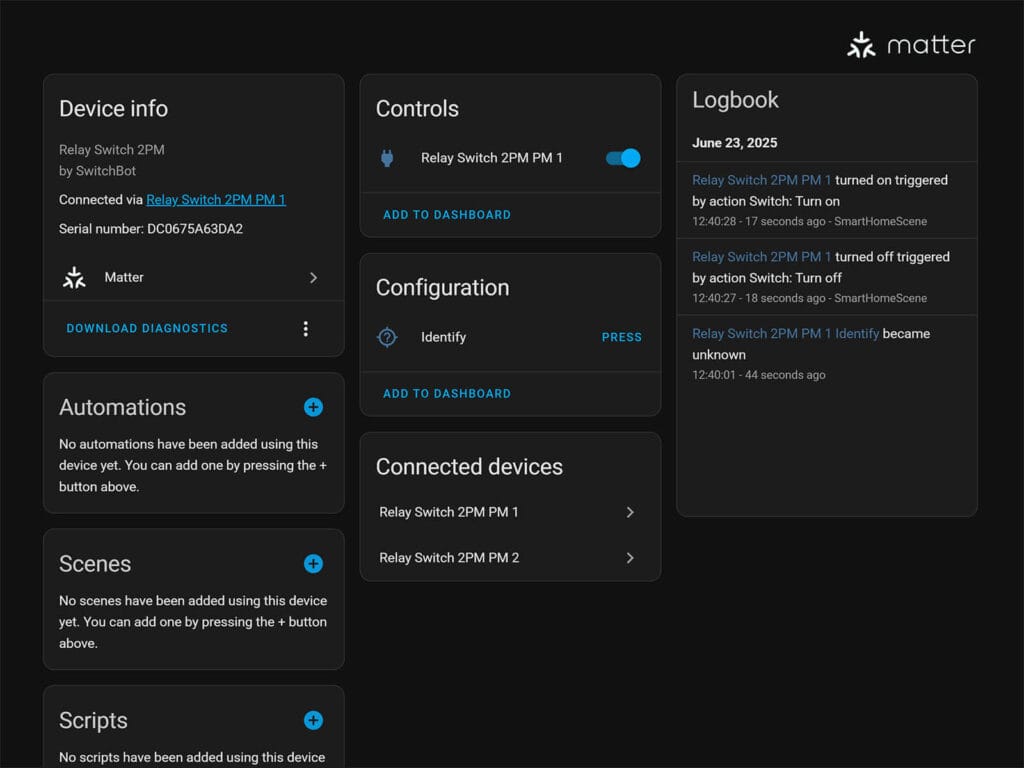
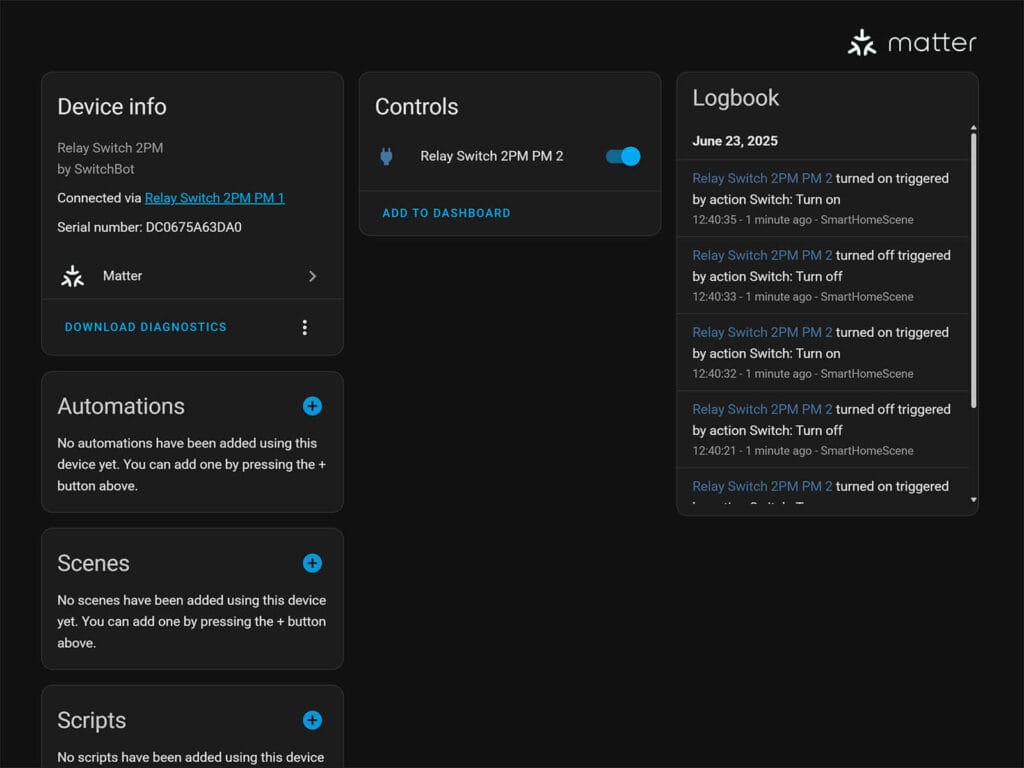
Interestingly, you will notice that the Relay Switch 2PM exposes two individual Matter devices with single switches instead of one device with dual switch entities. I could not figure out why this is handled like it is, but it does not really matter.
Once toggled, all switches respond instantly. Commands are sent locally and there are no delays.
Final Thoughts
The SwitchBot Relay Switches are small, affordable and well-made switch modules with a rich feature set. With these three, you can cover any use case you can think of, including dry contact switching and DC circuit control.
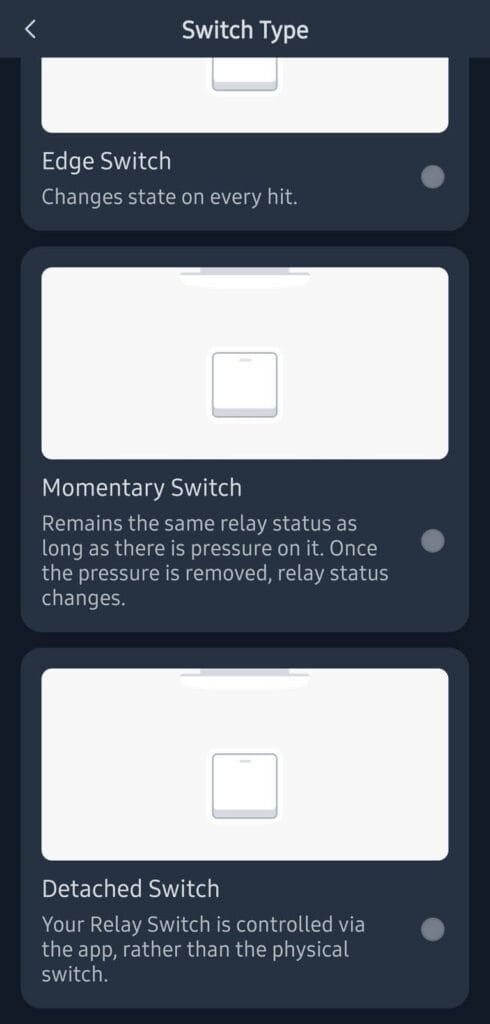
A key aspect of their versatility is the support for different types of physical wall switches. This includes Toggle Switch mode, which works with traditional switches that have distinct ‘on’ and ‘off’ positions. For spring-loaded buttons, Momentary Switch mode changes the relay state with each press, making it suitable for doorbells or access control. Similarly, Edge Switch mode toggles the state on every press, ensuring a change regardless of the switch’s prior state. Finally, Detached Switch mode allows the physical switch to operate independently of the relay’s state, perfect for controlling smart lights that require constant power while the switch is used as a smart trigger.
They support Matter out of the box and can be integrated in any smart ecosystem, including Home Assistant. What’s very interesting is that these switches act as a mini-bridge, capable of exposing up to two secondary SwitchBot Bluetooth devices over Matter to other smart ecosystems. It’s important to note that energy metering is not available over Matter yet, it’s a feature coming in a future firmware update.
In terms of size, they are not the smallest switch modules out there, that title belongs to the Shelly Plus 1PM Mini. Nor are they bulky like the Aqara T2 Switch Module. They are small enough to fit behind most wall switchboxes, along with the needed wiring
If you are considering adding switch modules to your smart home, I can comfortably recommend the new SwitchBot Relay Switches. Here is where you can get them:


They look so similar to Shelly’s relays and also they appear to be a little bit more expensive.
I think I’ll keep going with the Shellys
All of them are repackaged previous-generation Shelly devices with higher prices. You can’t even set them to Zigbee mode.