Ever since SwitchBot announced they are making the jump to Matter with their Hub 2 release, I tested some of their products, ecosystem and app. I was pleasantly surprised by the build quality of their devices, especially the Blind Tilt which I am currently using to control my office’s Venetian blinds.
If you want to read more about SwitchBot’s Ecosystem and their Integration in Home Assistant, here are some links of my previous articles:
- SwitchBot Smart Home Ecosystem Review And Home Assistant Integration
- SwitchBot Blind Tilt Teardown Review And Home Assistant Integration
This is setup and review article of the SwitchBot Hub 2, their latest Matter-enabled product which will be used to bridge existing devices to Matter controllers such as Amazon Alexa, Apple HomeKit and Google Home.
The Hub 2 can be bough on SwitchBot’s Official Webstore and Amazon. You can use discount code 10HOMESCENE for 10% off.
Technical Specification
Hub 2 (Matter) Specs
- Model: W3202100
- Color: White
- Material: ABS
- Size: 80x70x23mm (3.1×2.8×0.9 in.)
- Weight: 63g (2.2oz.)
- Power Supply: 5V2A, USB-C
- Operating Temperature: -20°C to 4°C (4°F to 104°F)
- Operating Humidity: 0% to 90% RH
- Connectivity: Wi-Fi 2.4GHz, Bluetooth Low Energy
Hub 2 Temperature and Humidity Sensor Specs
- Resolution: 0.1°C / 0.1°F, 1% RH
- Temperature Range: -20°C to 80°C (-4°F to 176°F)
- Humidity Range: 0-99% RH
- Temperature Accuracy:
- -20°C to 0°C (±0.4°C)
- 0°C to 65°C (±0.2°C)
- 65°C to 80°C (±0.3°C)
- Humidity Accuracy:
- 0 to 10% (±3% RH)
- 10 to 90% (±2% RH)
- 90 to 99% (±3% RH)
SwitchBot Hub 2 Vs SwitchBot Hub Mini
If you currently own SwitchBot devices, you might be wondering what’s the difference between their two hubs. Besides the obvious, which is Matter support, there are few other distinctions between the two products. Here’s a table summarizing all their characteristics:
| Product | SwitchBot Hub 2 | SwitchBot Hub Mini |
|---|---|---|
 |  | |
| Price | $69.99 | Amazon | SwitchBot Store 15% Off XM15HUB2 | $39 | Amazon | SwitchBot Store |
| Description | A High-performance 4-in-1 smart home hub. Matter hub, thermo-hygrometer, infrared remote control, smart buttons, and other functions, bringing you the ultimate smart home hub experience. | A cost-effective smart home hub. This smart hub is a smart remote control that easily makes certain appliances in your home smart, works with the SwitchBot series, and enables a variety of scenes. |
| Temperature & Humidity Sensor | Yes | No |
| Temperature & Humidity Alerts | Yes | No |
| Illuminance Sensor | Yes | No |
| Smart Buttons | Yes | No |
| Matter Support | Yes | No |
| Remote Control | Yes | Yes |
| LAN Control | IR Blaster Only | No |
| Automation | Schedules Geo-fencing (GPS) Temperature Humidity Lighting | Schedules Geo-fencing (GPS) |
| Third-Party Services | Amazon Alexa, Google Assistant, Apple HomeKit, Samsung SmartThings, Siri Shortcuts, IFTTT | Amazon Alexa, Google Assistant, Samsung SmartThings, Siri Shortcuts, IFTTT |
| Other | Can display outdoor Temperature & Humidity after adding SwitchBot Outdoor Thermo-Hygrometer to Account | / |
Disassembly
The SwitchBot Hub 2 came packaged in their recognizable white-red boxes, containing the hub itself, a user manual, a 5V2A adapter, a two meter USB-A to USB-C cable with a Temperature and Humidity sensor and some stickers for installation.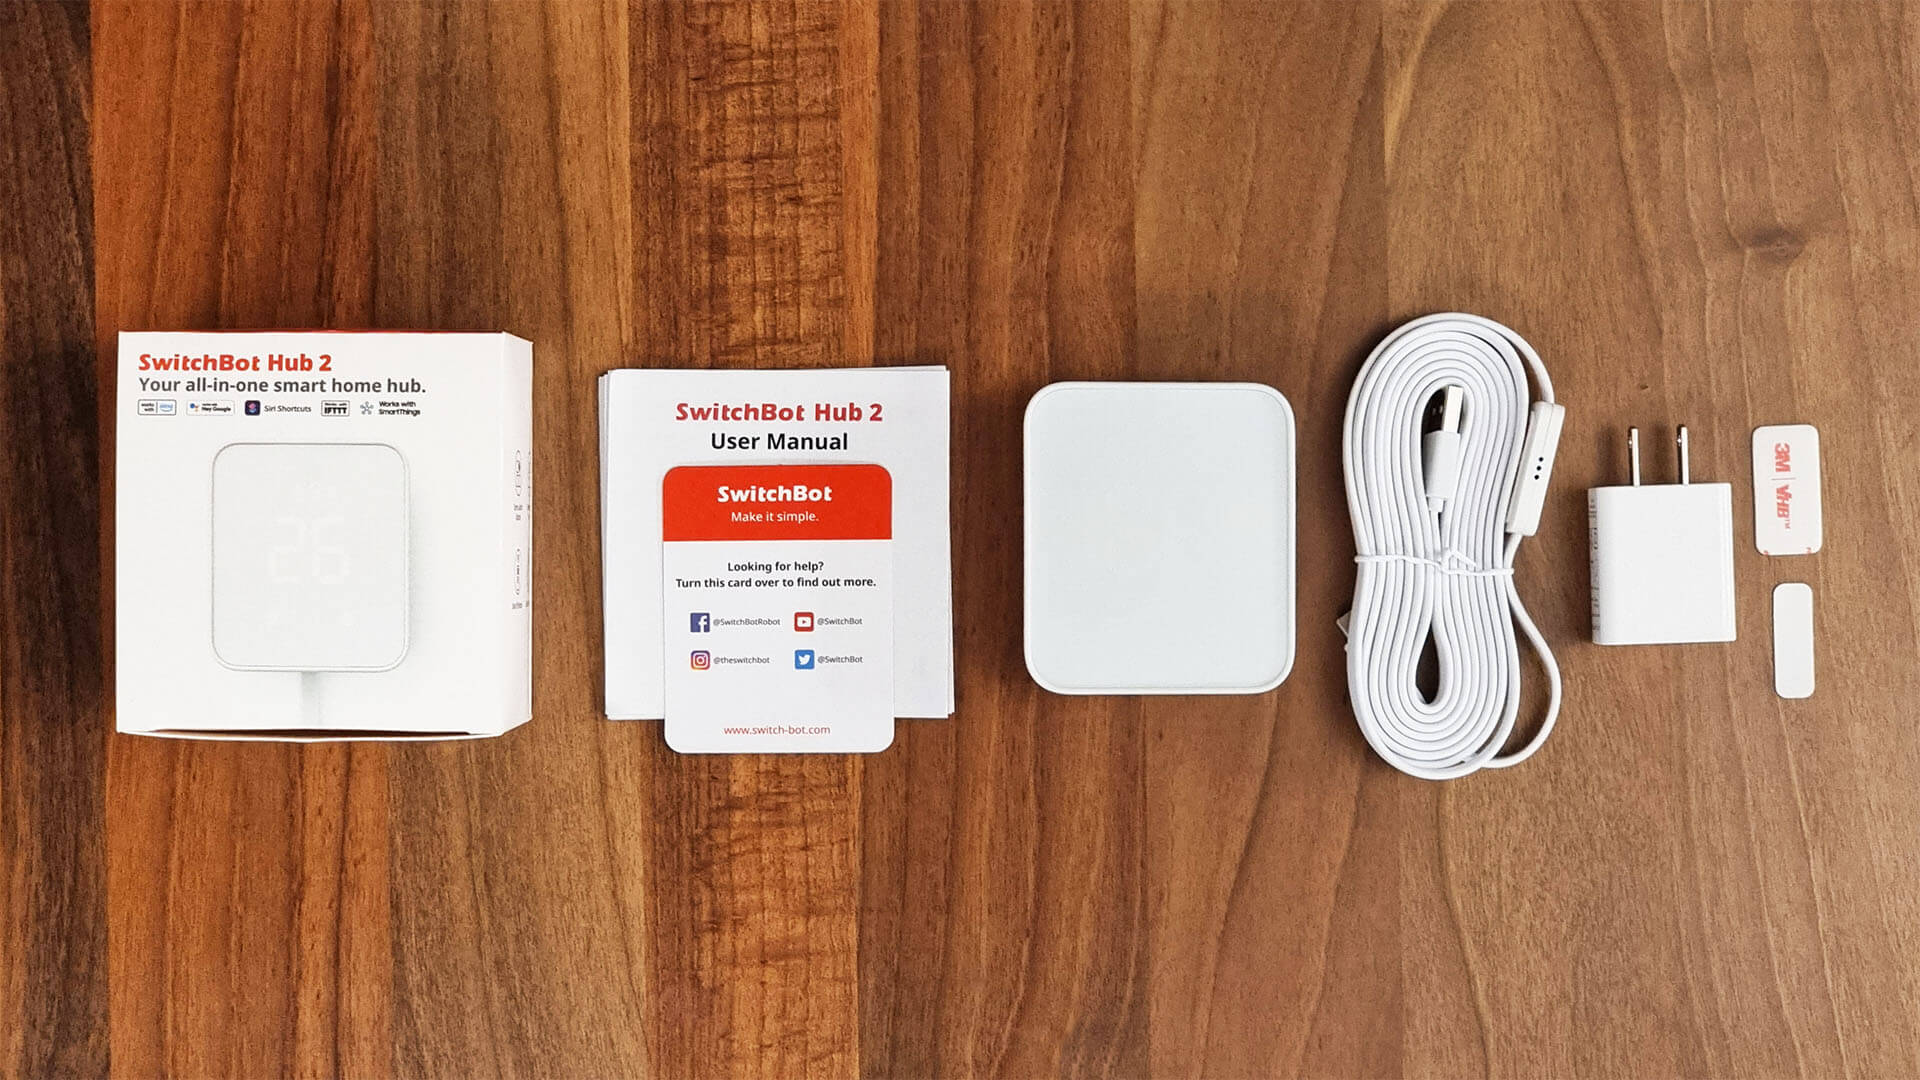
The device has a very sleek and unanimous body, which feels smooth to touch. It’s not heavy at all, but it does have a no-slip rubber on the stand on the bottom so it doesn’t tip over or slide.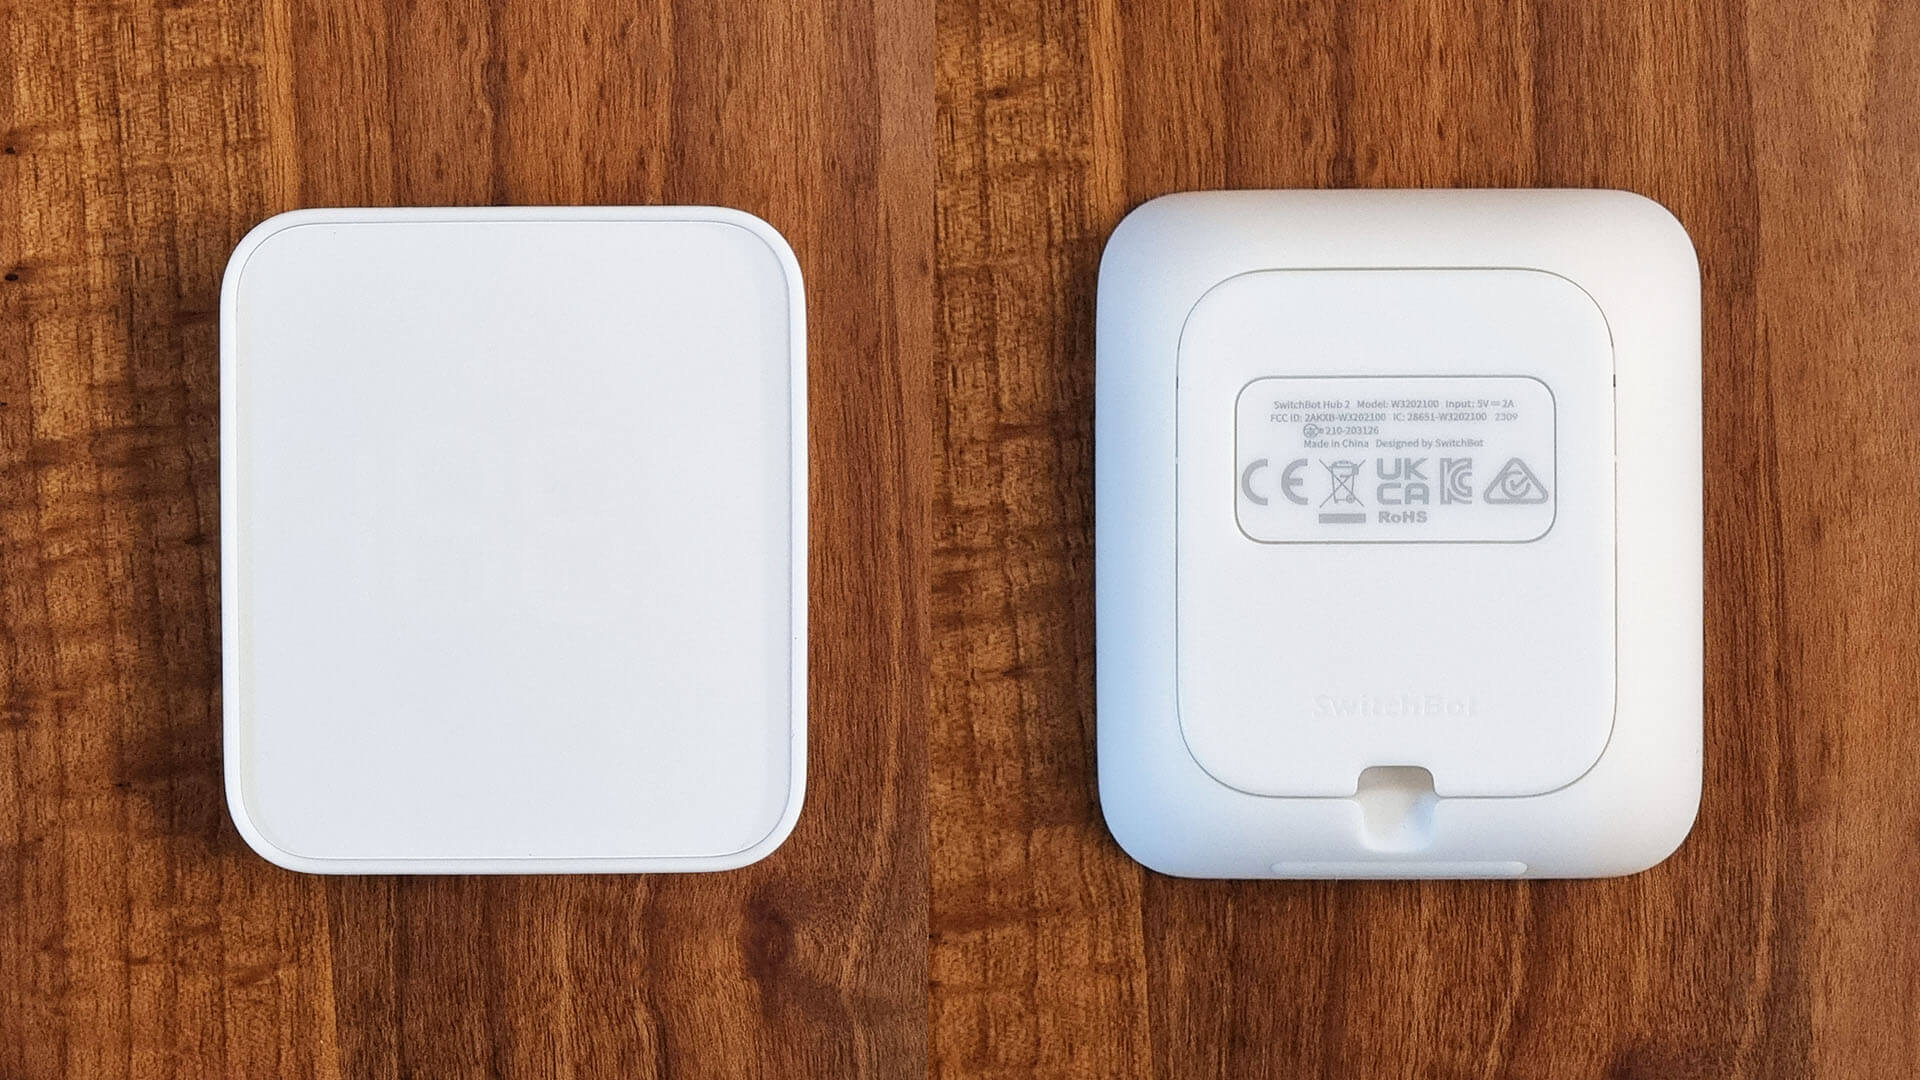
Under the cap on the back which is used as a leg stand, you can see the USB-C port. There is a small sticker manual telling you how to bend the cable before inserting it, so it doesn’t pull the device and stand. The cable is flat and designed to neatly come out of the small hole on the bottom of the stand.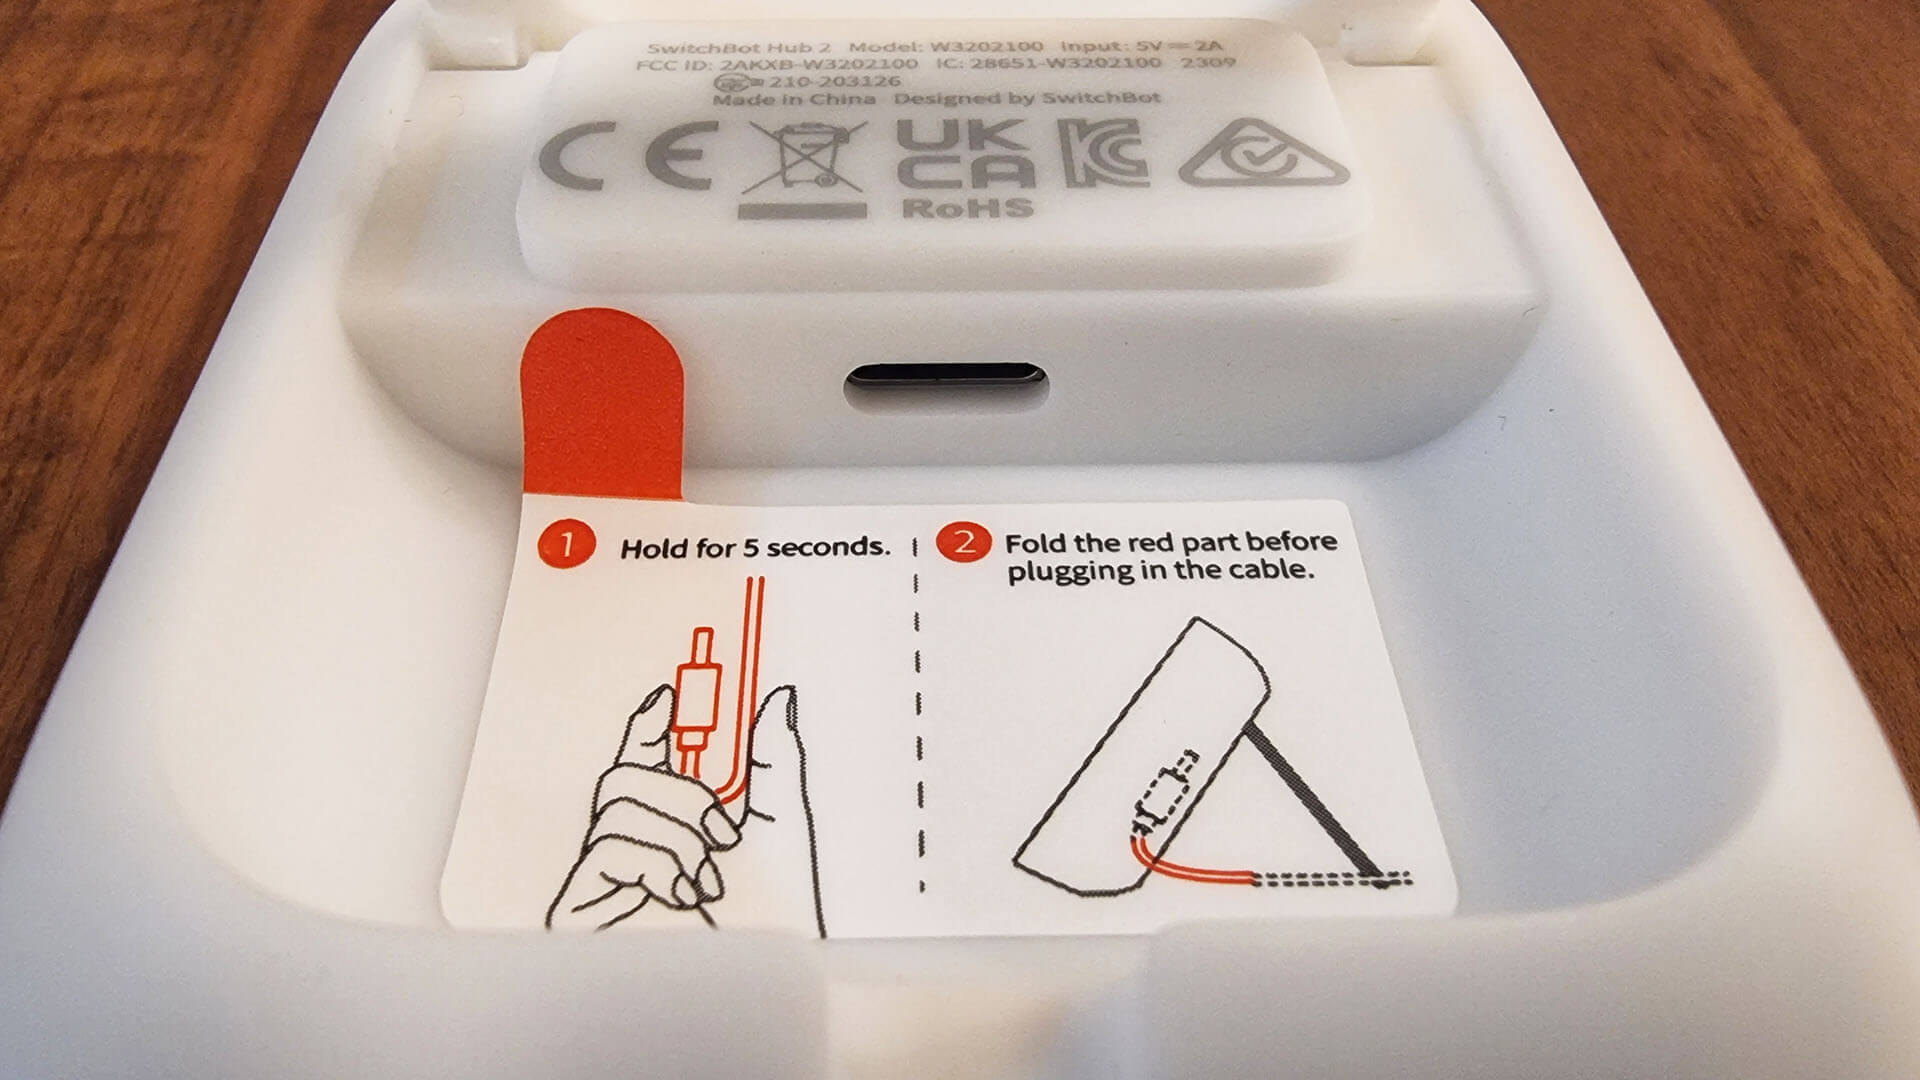
Opening up the device was no easy task, I had no idea there would be three small screws underneath the screen cover sticker. A couple of head scratches later, I was taking a peak inside my first Matter hub.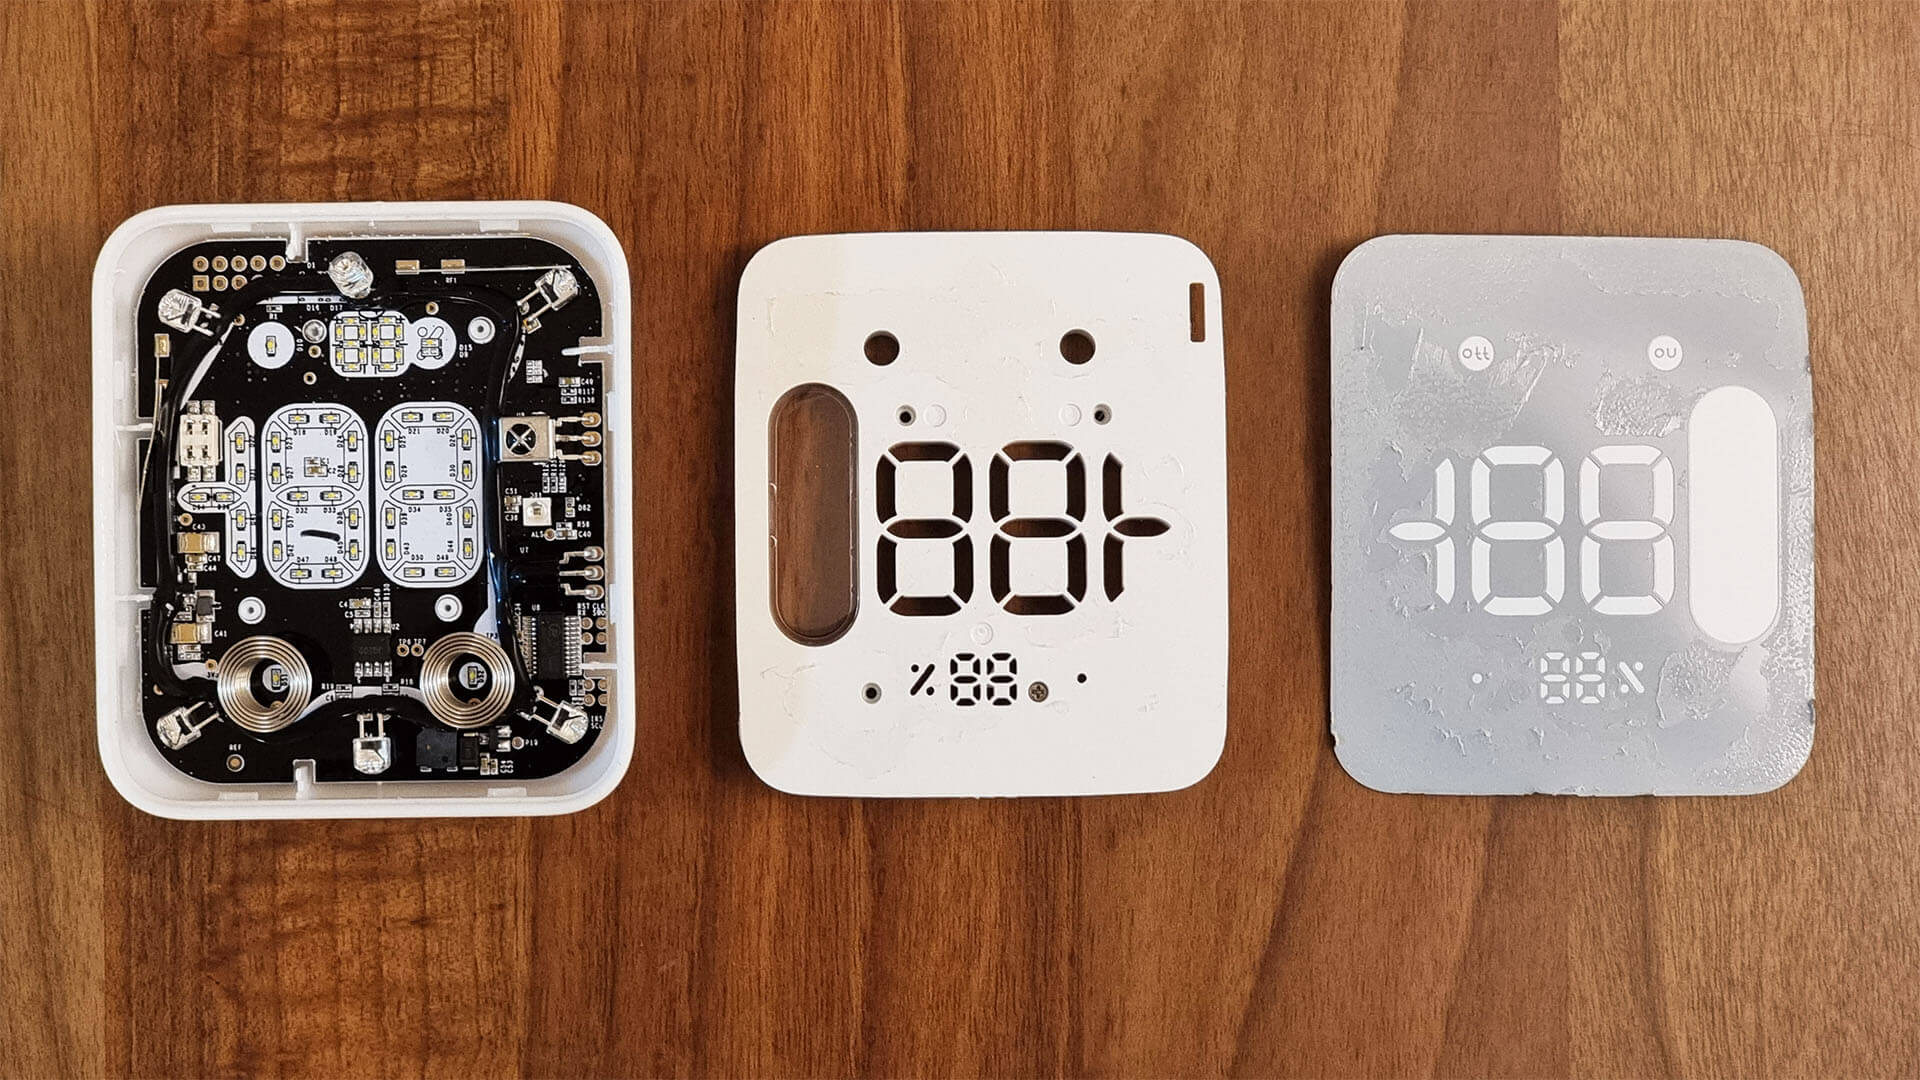
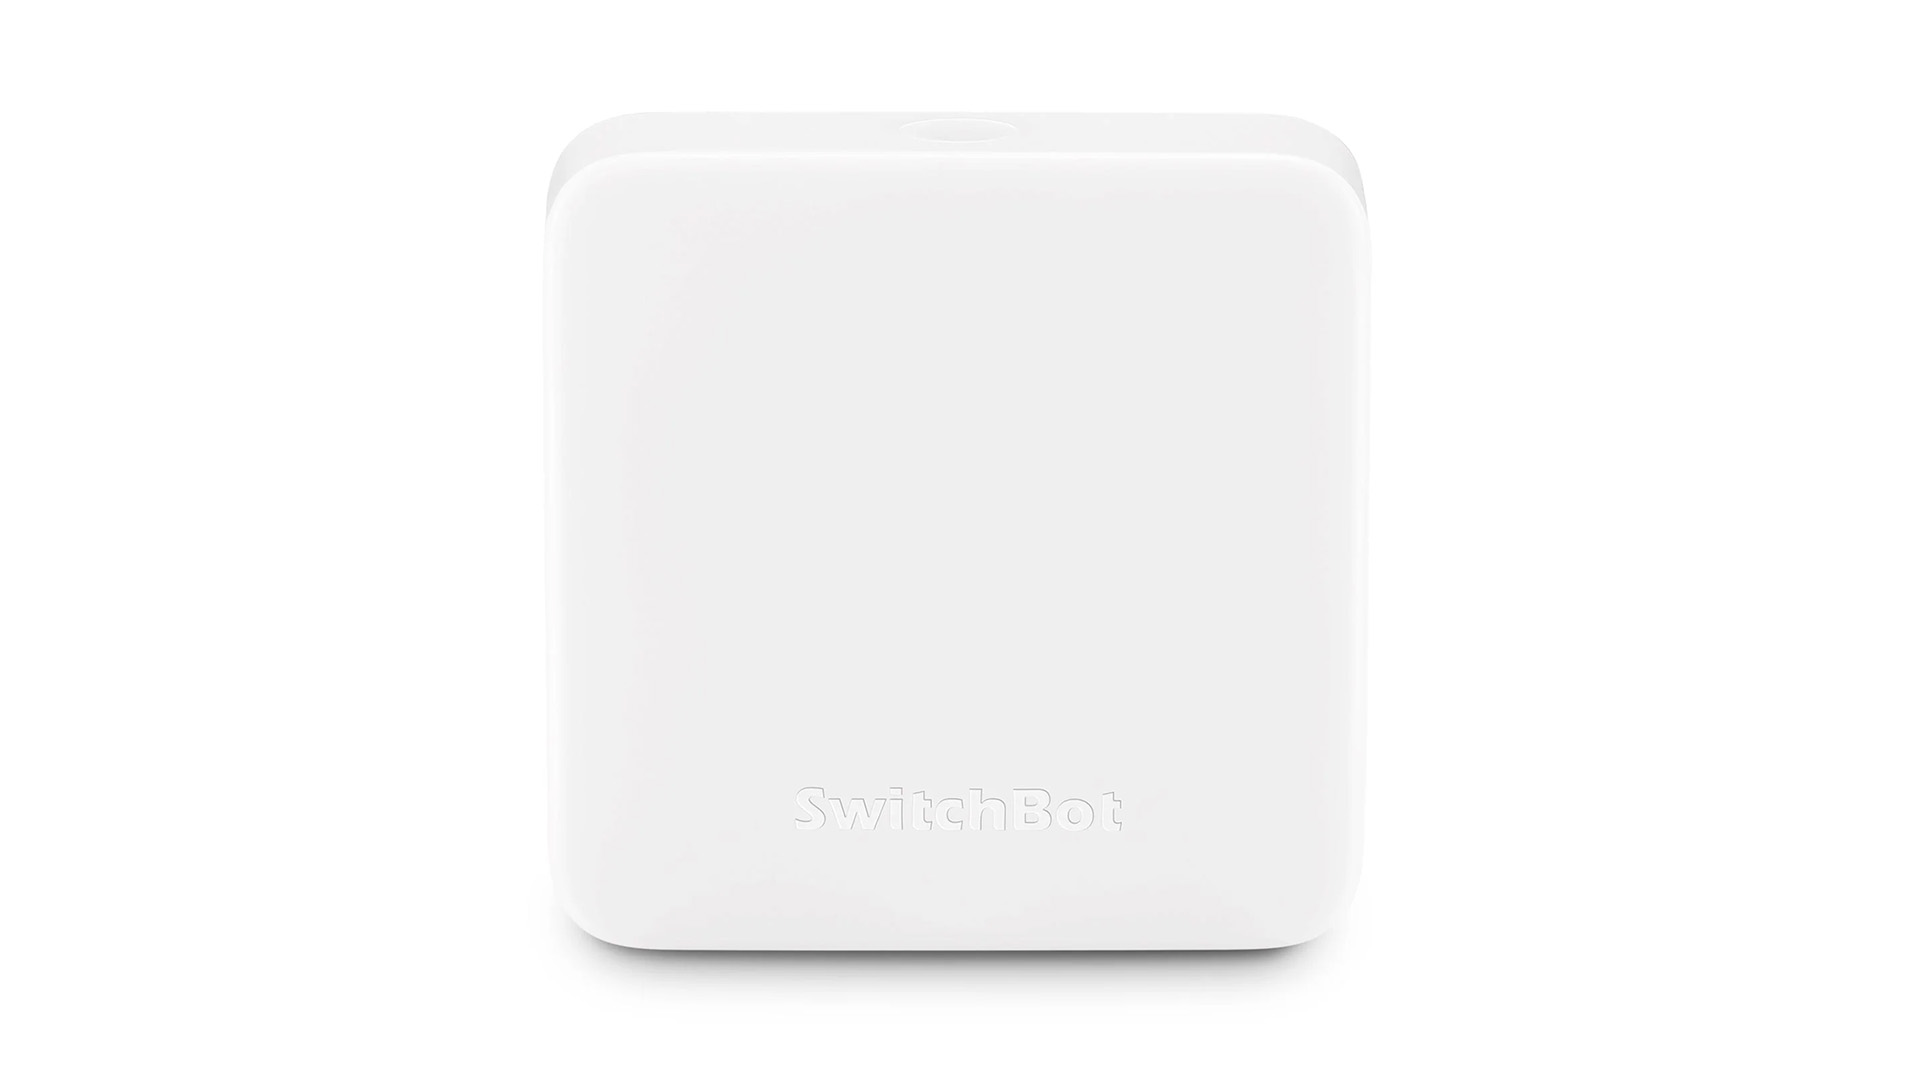
Once open, you can see 6 LED diodes surrounding the main PCB. These are IR blaster diodes, meaning you can use the Hub 2 to clone your dumb IR remotes and execute their commands via the app, just like it’s predecessor the Hub 2 Mini.
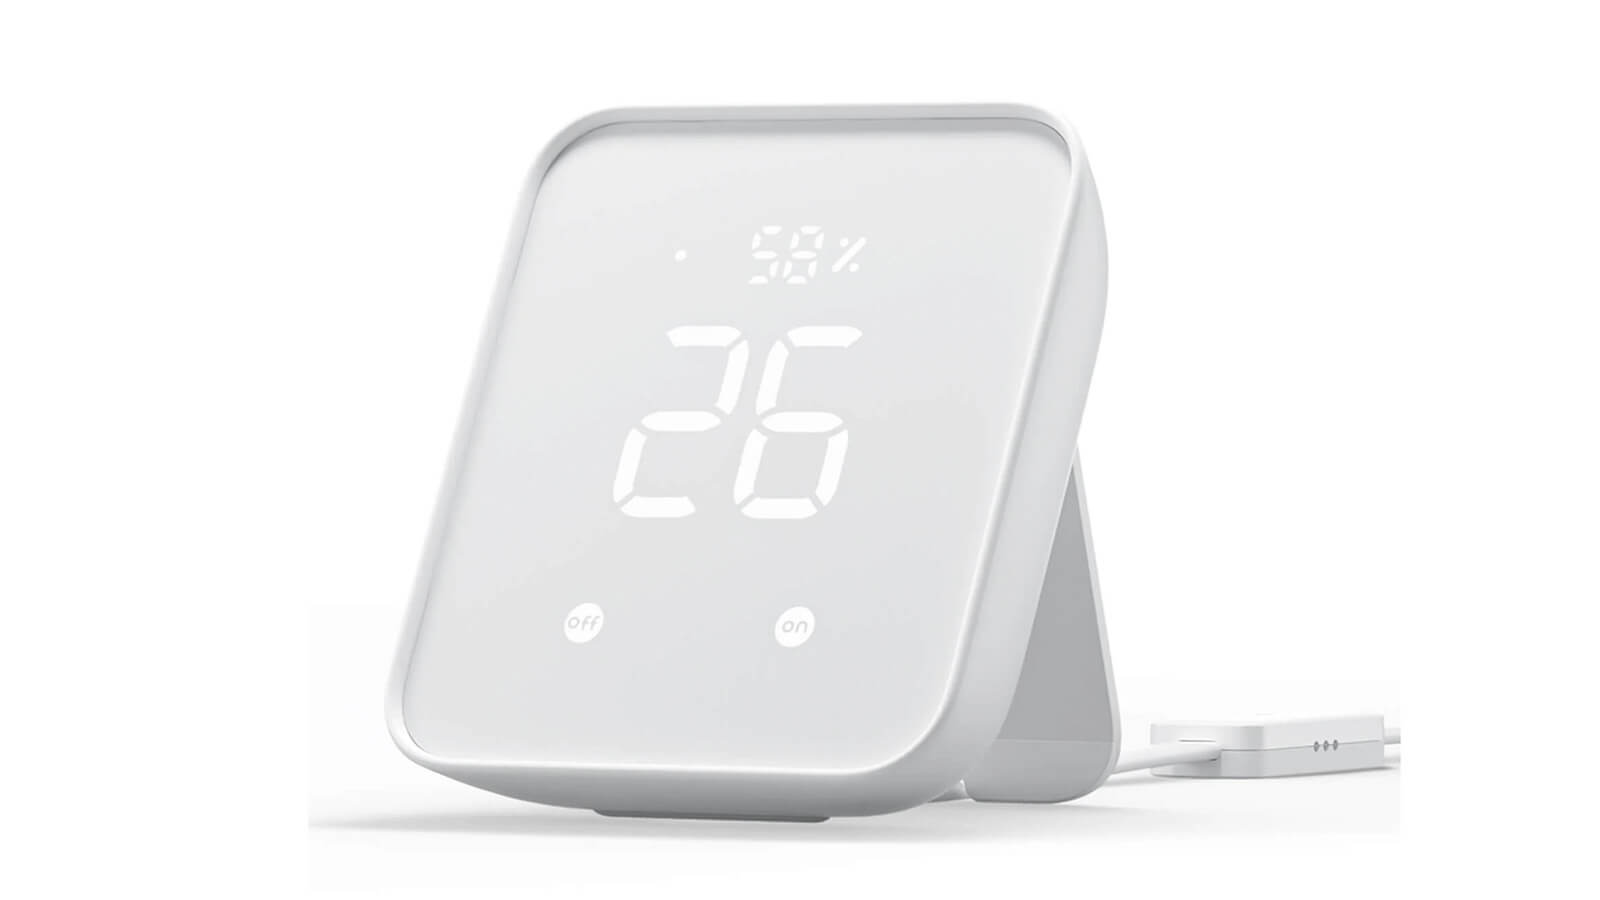
The temperature and humidity reading on the front of the panel are illuminated by LEDs in the middle of the PCB. They light up only the section needed to display a certain number. This is not a display, but in my opinion looks way better than an LCD.
An illumination sensor is also attached to the main PCB, which is used for Auto-Brightness feature in the SwitchBot App.
The two springs on the bottom are used as capacitive triggers for the On/Off buttons on the bottom, which can be used to toggle the screen or set a custom trigger for a scene within the app.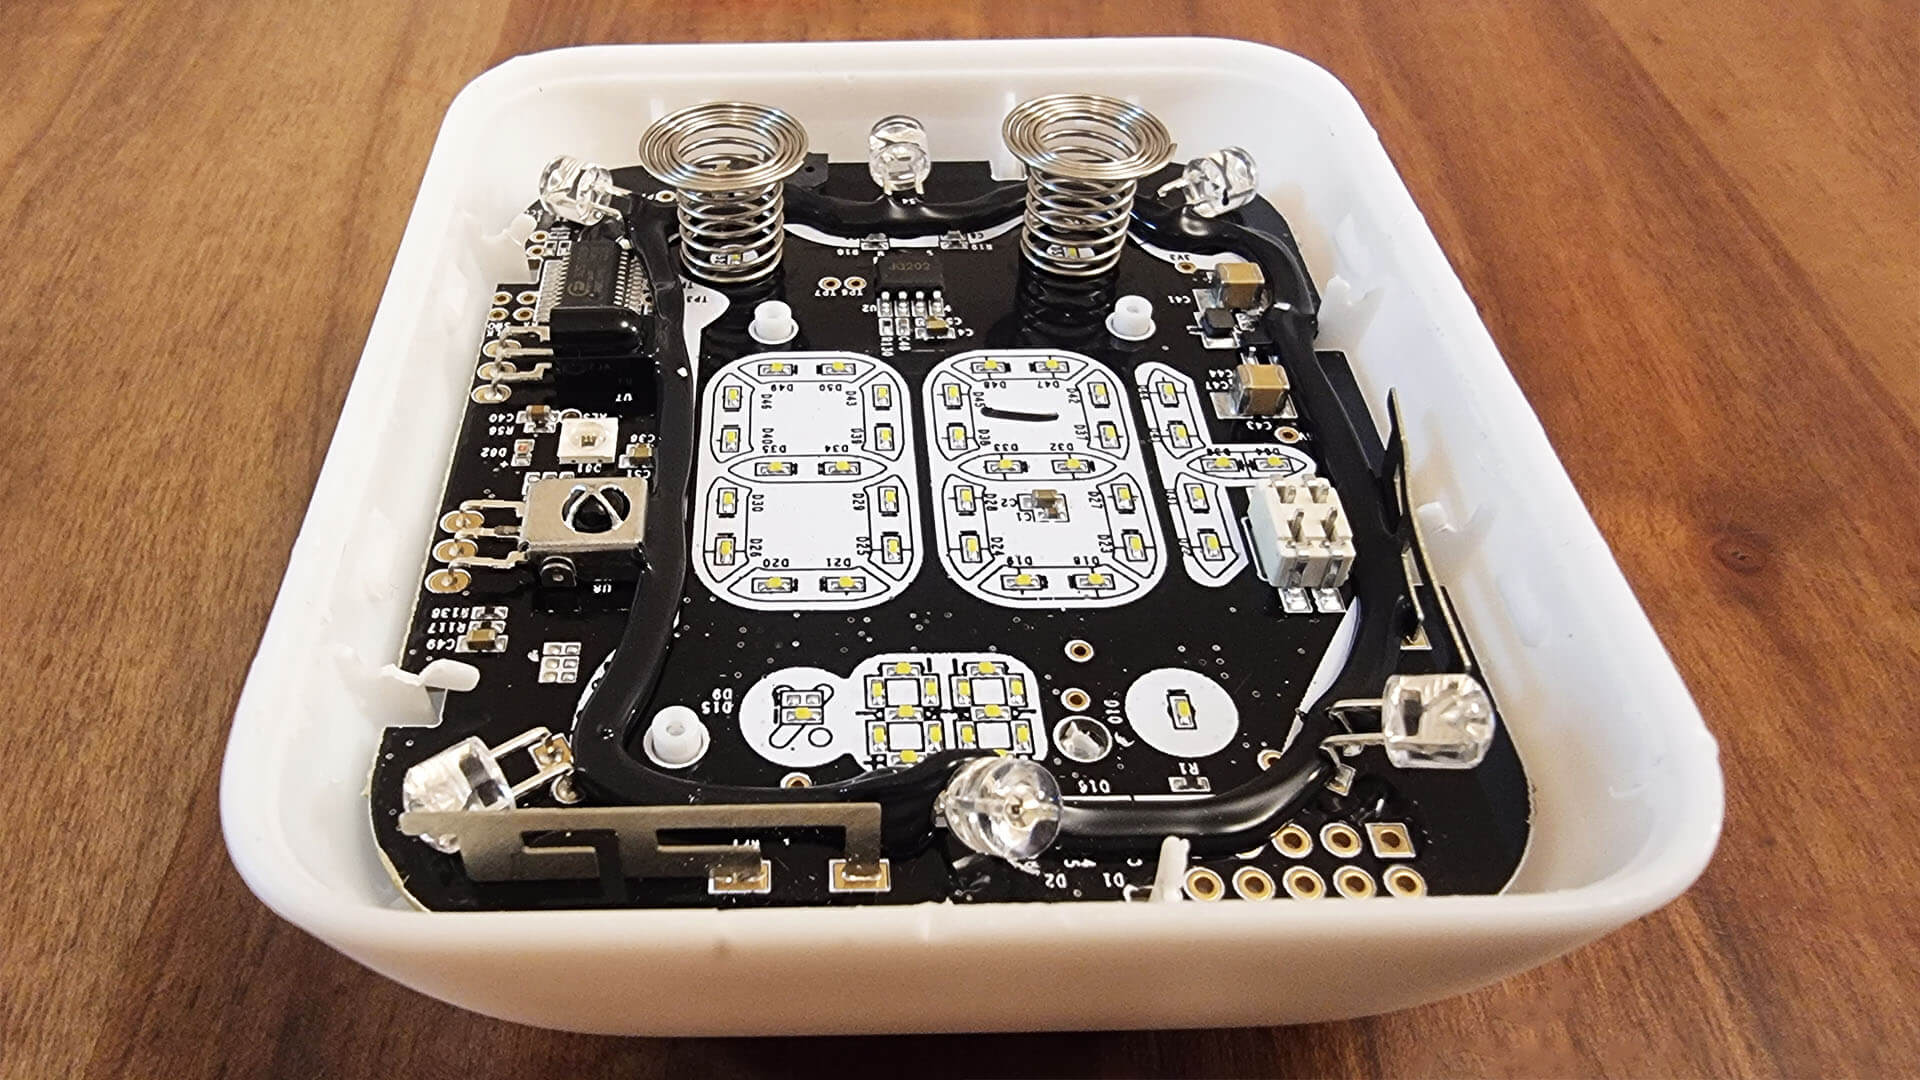
Flipping over the PCB reveals a smaller power PCB attached to the back of the case, which connect by a 4-pin connector to the main one. This PCB holds the USB-C port used to power the device.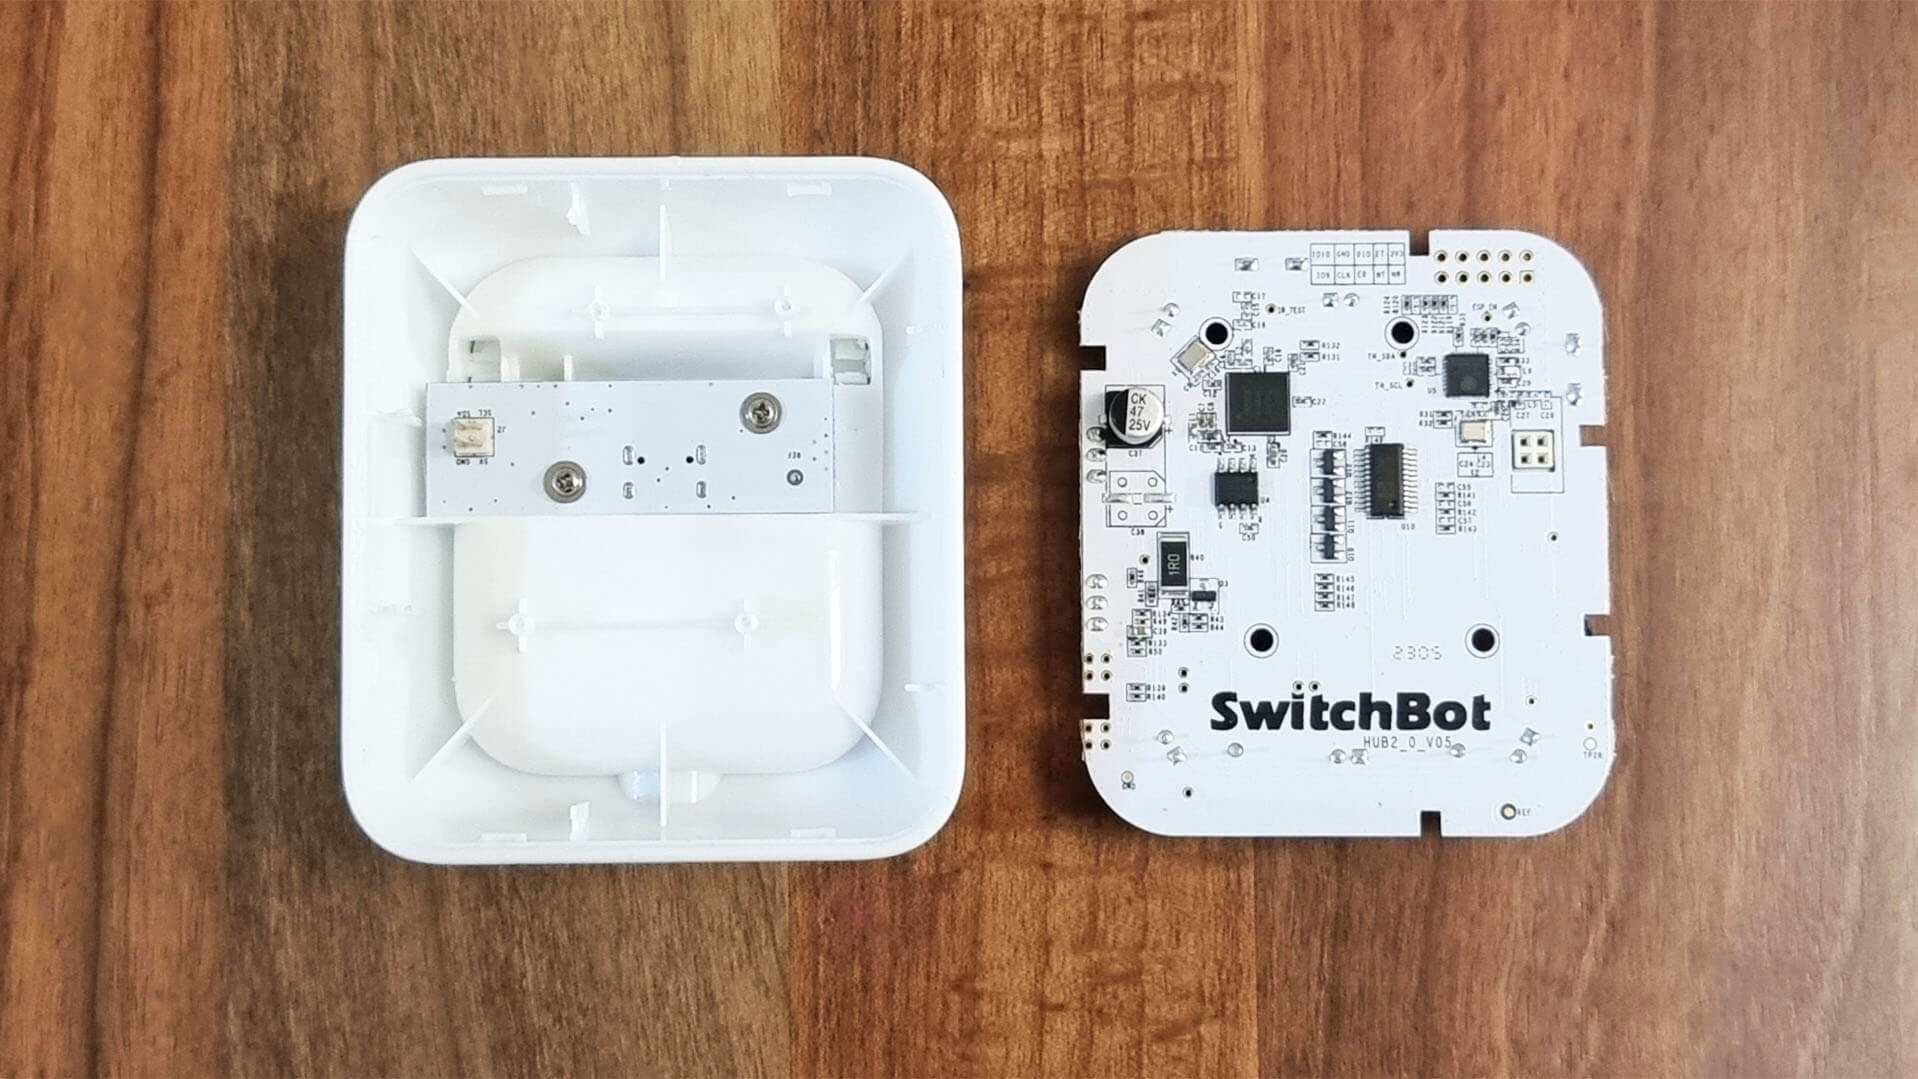
Moving in for a closer look, a 25V capacitor is also attached to this PCB, used to temporarily store electrical energy to cover a potential difference.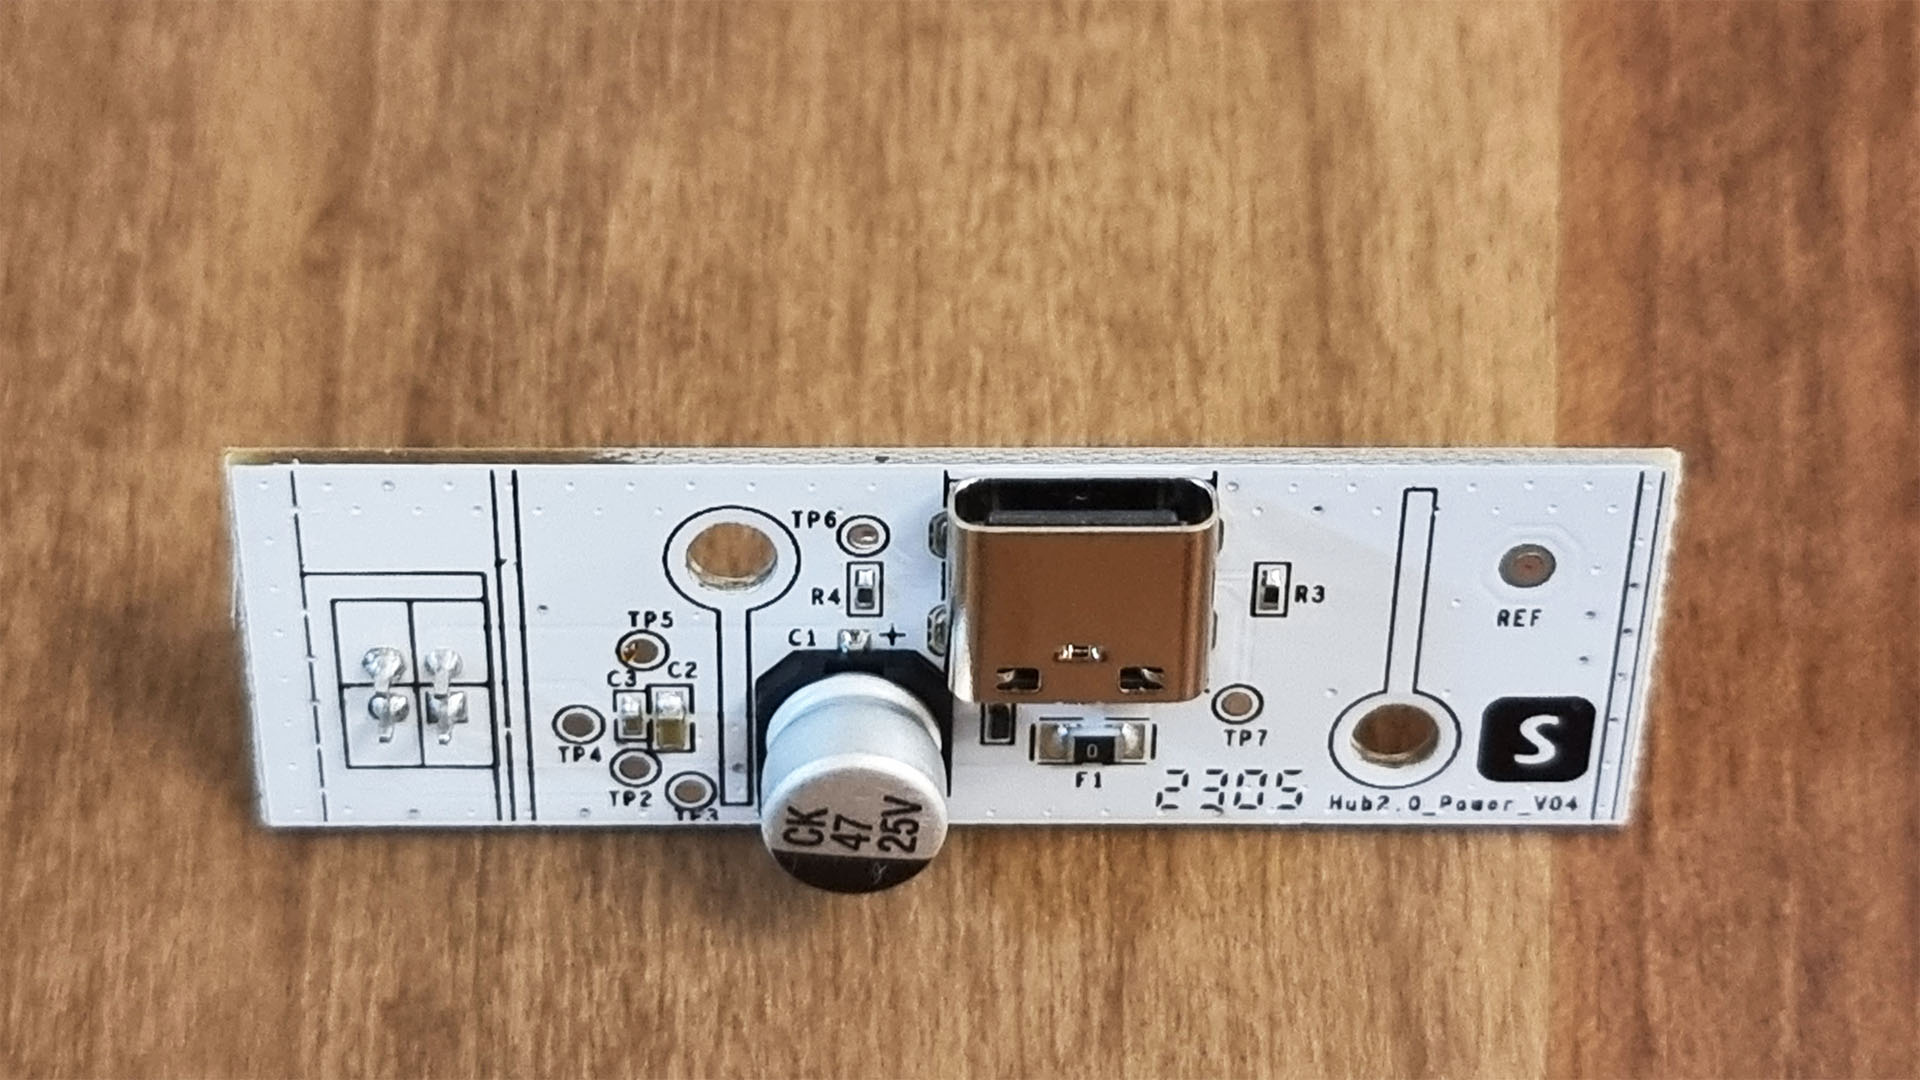
The Hub 2 communication is handled by an ESP32-C3 [Datasheet] module, an ultra-low-power and highly-integrated MCU-based solution that supports 2.4 GHz Wi-Fi and Bluetooth Low Energy (BLE). This is the module that provides Matter over Wi-Fi support to the hub and it’s child devices.
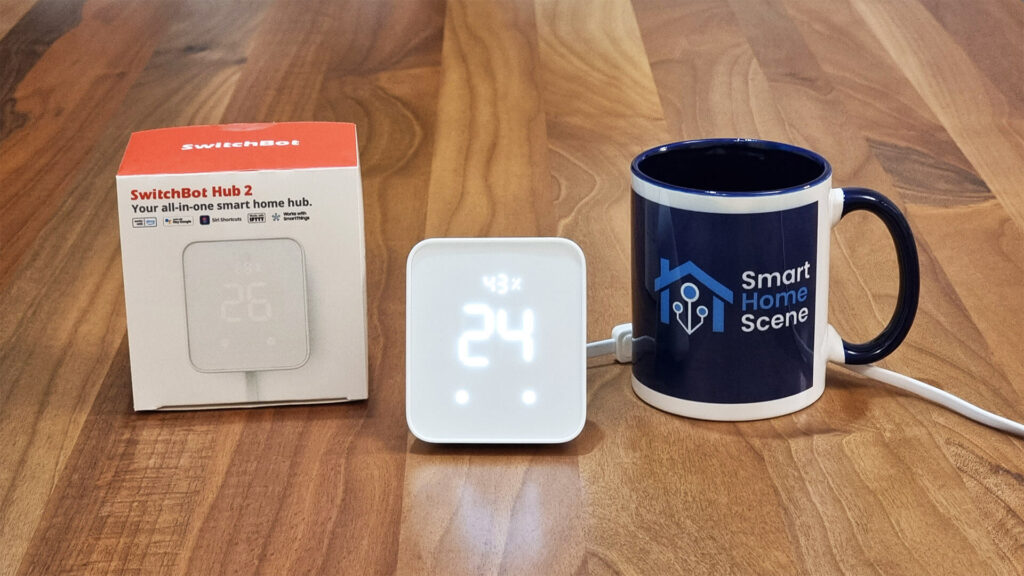
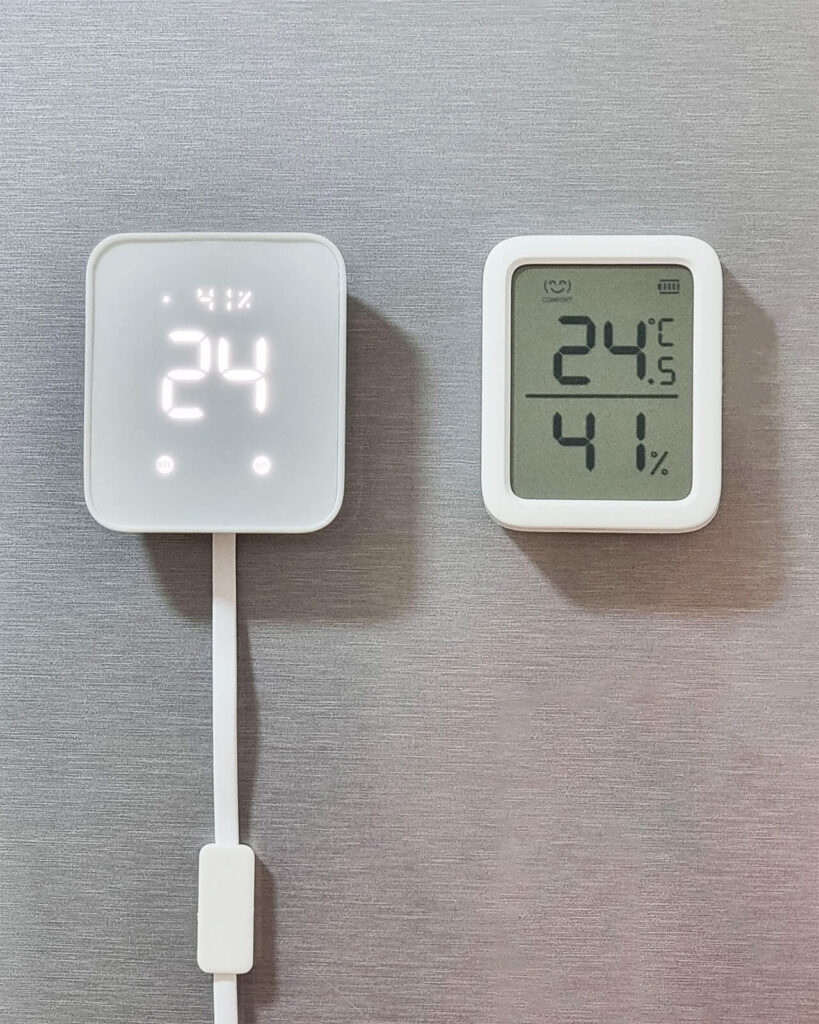
Here’s a photo of the Hub 2 next to the Meter Plus, and even though the Hub doesn’t display decimals on the screen, readings were identical in the app.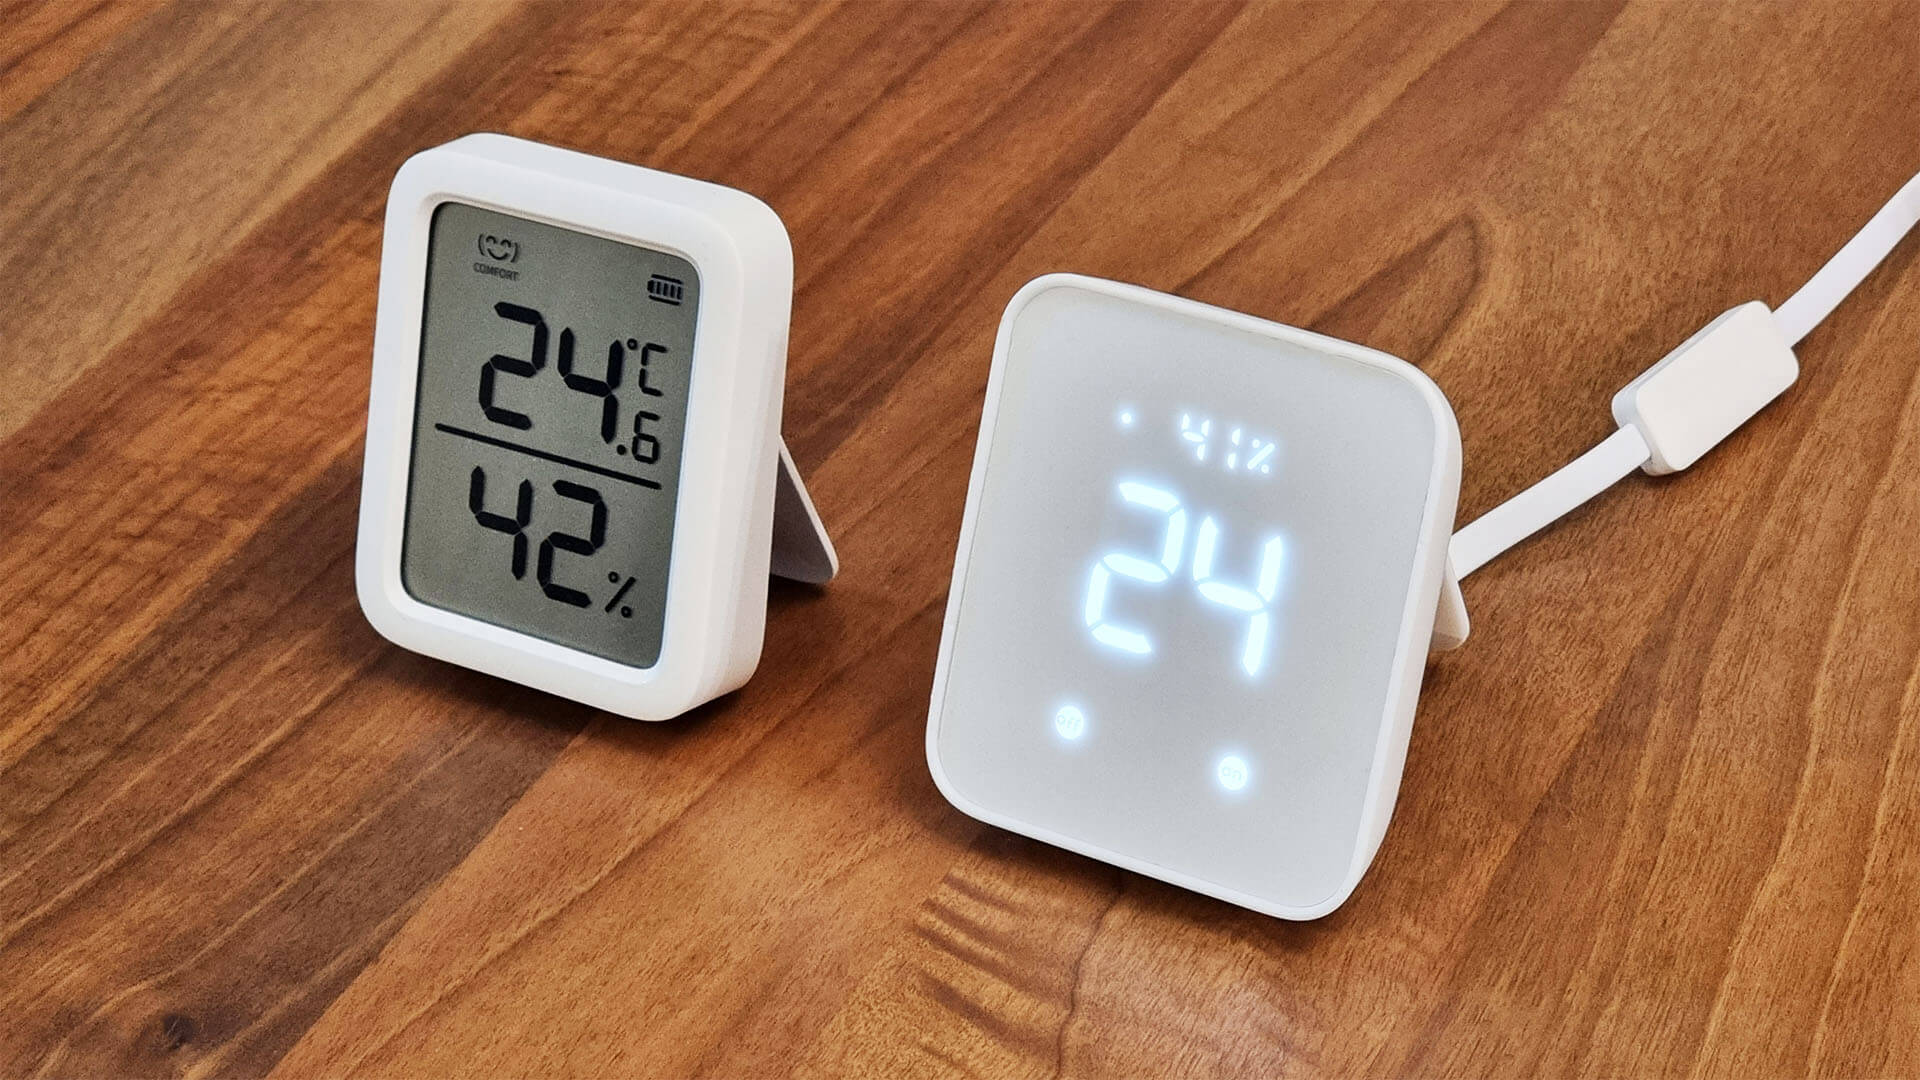
Adding the Hub 2 to the SwitchBot App
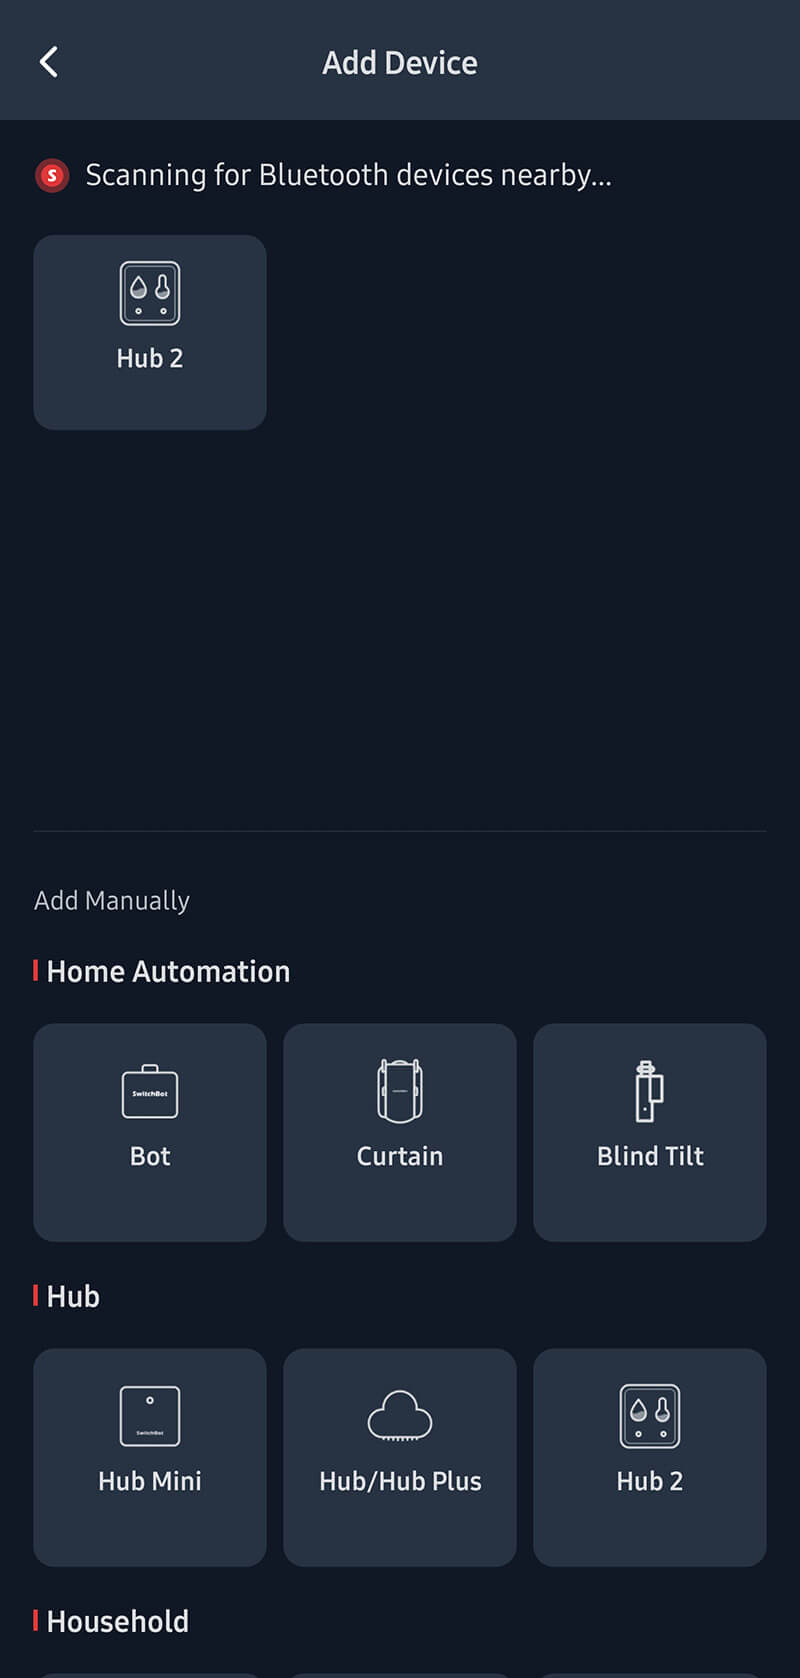
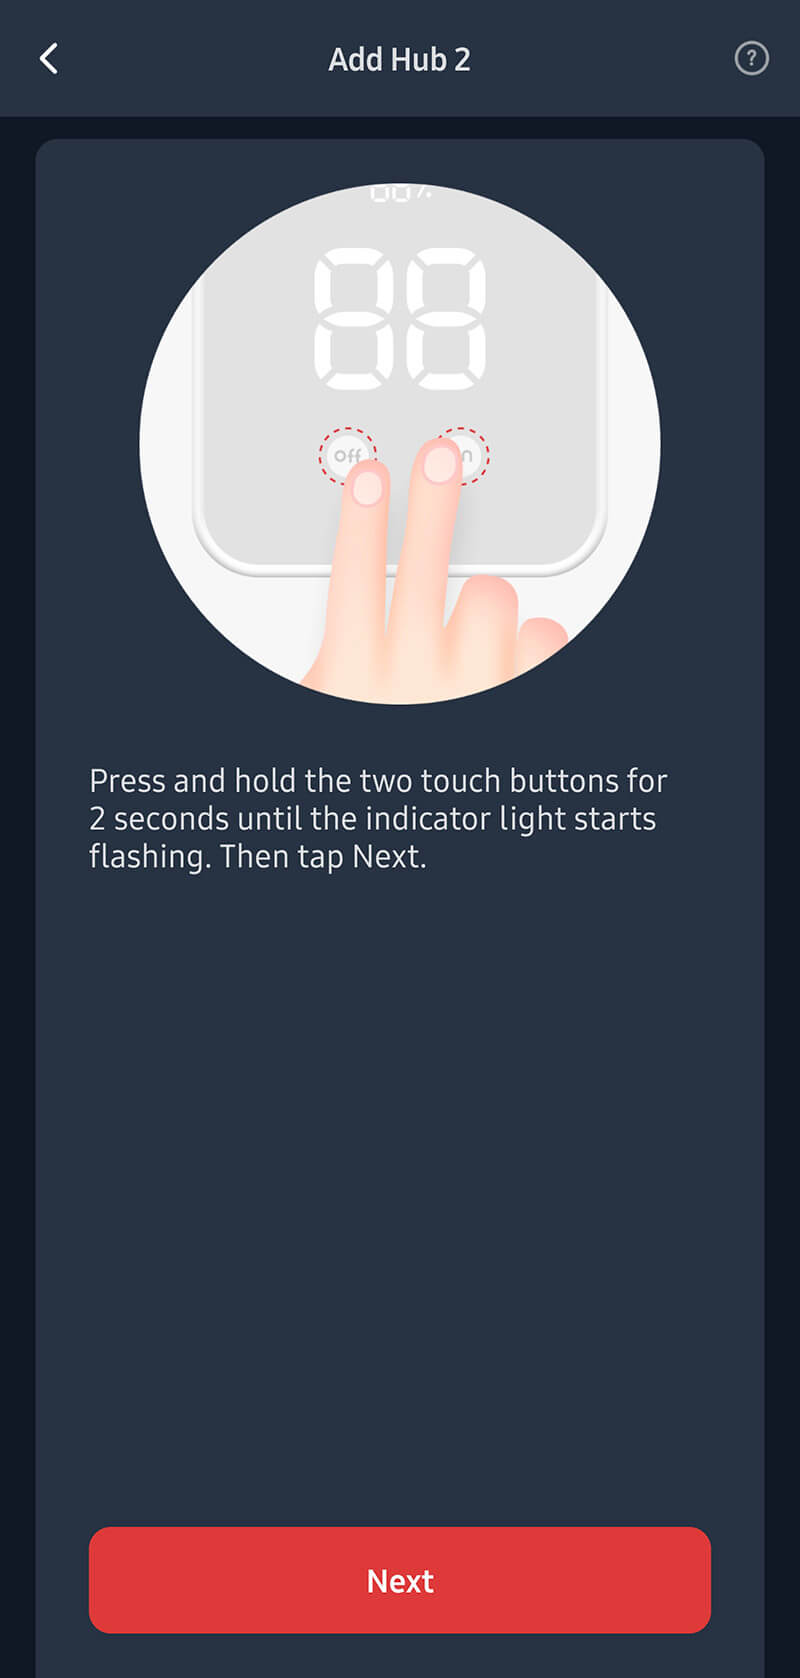
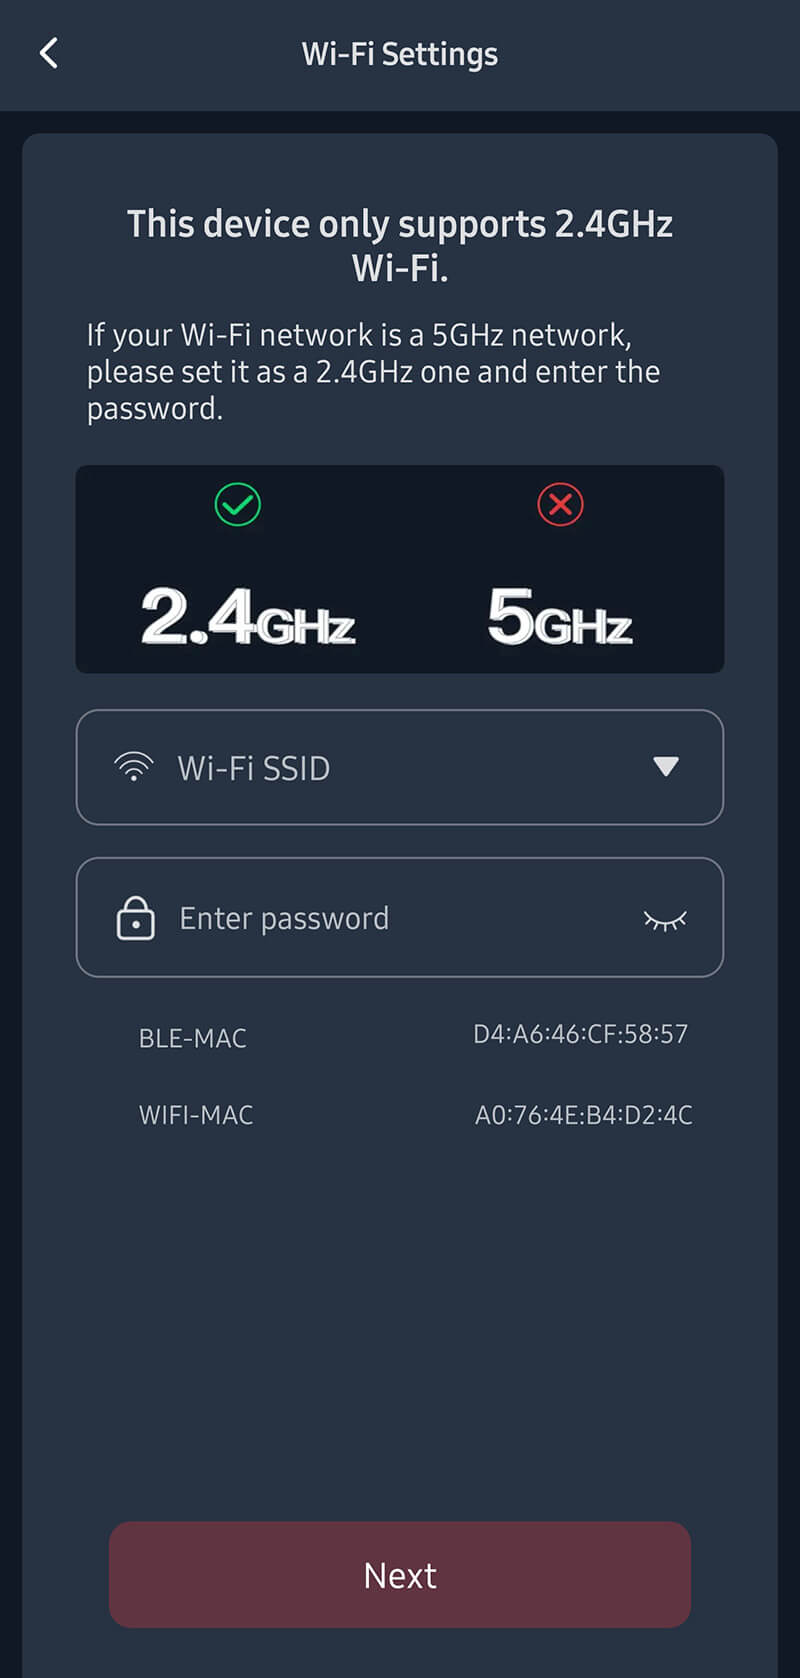
Setting the SwitchBot Hub 2 in the App is necessary for initializing the device, after which you can use it to add Matter devices to your controller. Open the SwitchBot app and follow the onscreen instructions:

Hub 2 App Settings
I’ve mentioned in my previous review of the SwitchBot Ecosystem that I find their app incredibly easy and user friendly. There are no confusing menu layouts, bad designs and everything is right where you expect it to be.
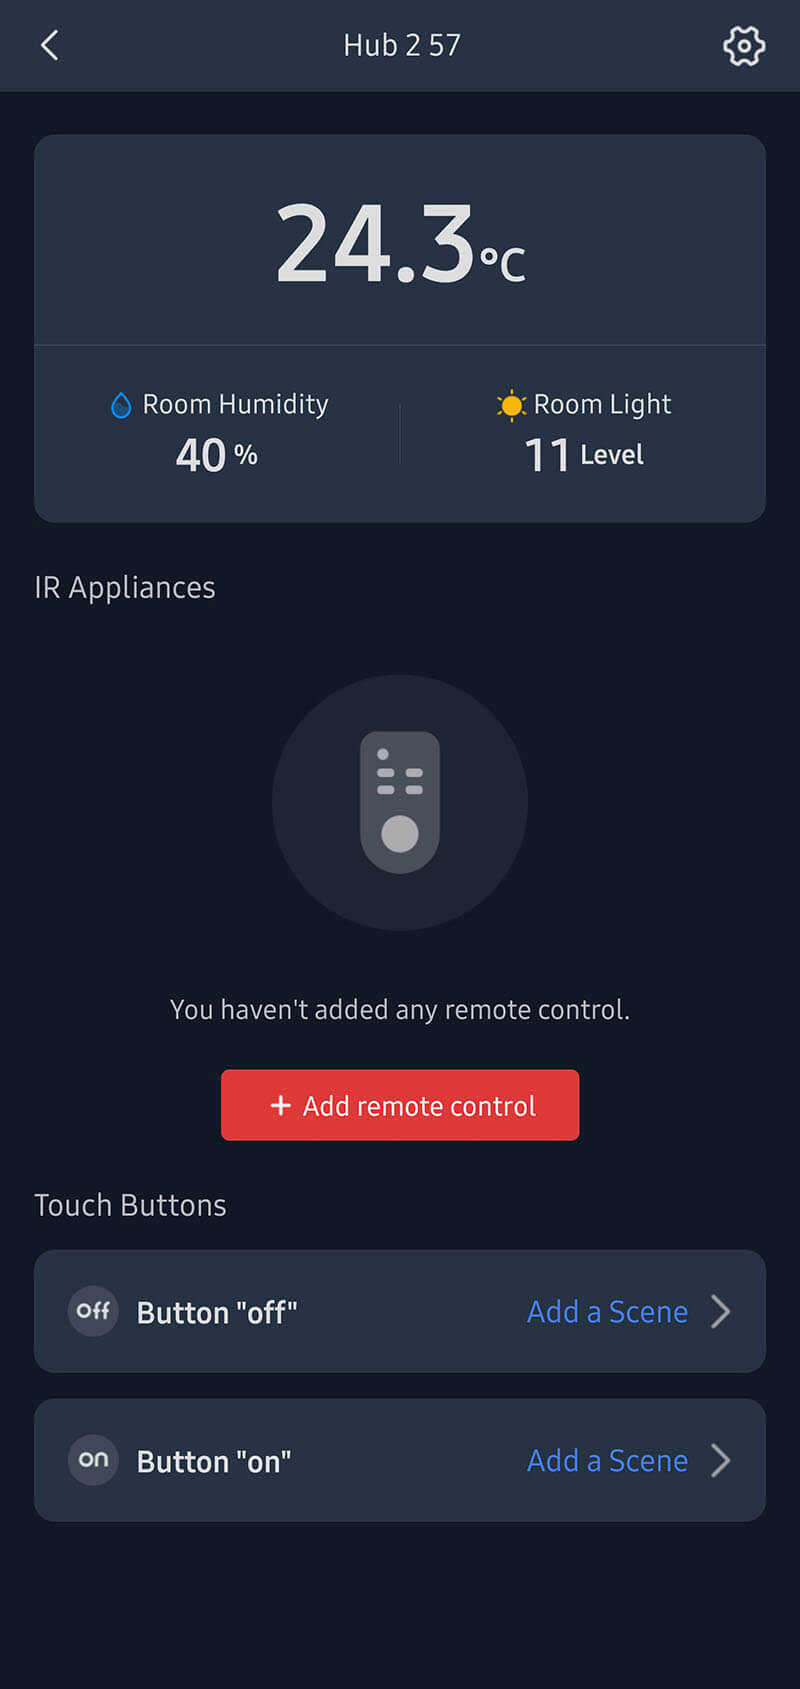
If you click the Hub on the main screen, you will be presented with a screen containing the current temperature & humidity reading and two sub menus: IR Appliances and Touch Buttons.
Because the Hub 2 doubles as an IR blaster, you can use it to add a dumb IR remote control and control your non-smart devices such as ACs, TVs, Sound Bars and much more.
Note: I recently wrote a review on a pretty cheap but capable Zigbee-based IR Blaster, Tuya ZS06.
The Touch Buttons menu allows to you assign custom actions and triggers to the ON/OFF buttons on the front of the Hub 2 display. The default actions on these buttons are set to turn on/off the screen of the Hub 2.
You can add here a custom scene that you can trigger, but naturally it must be from within the SwitchBot Ecosystem. E.G. Turn on Night light when I press the ON button.
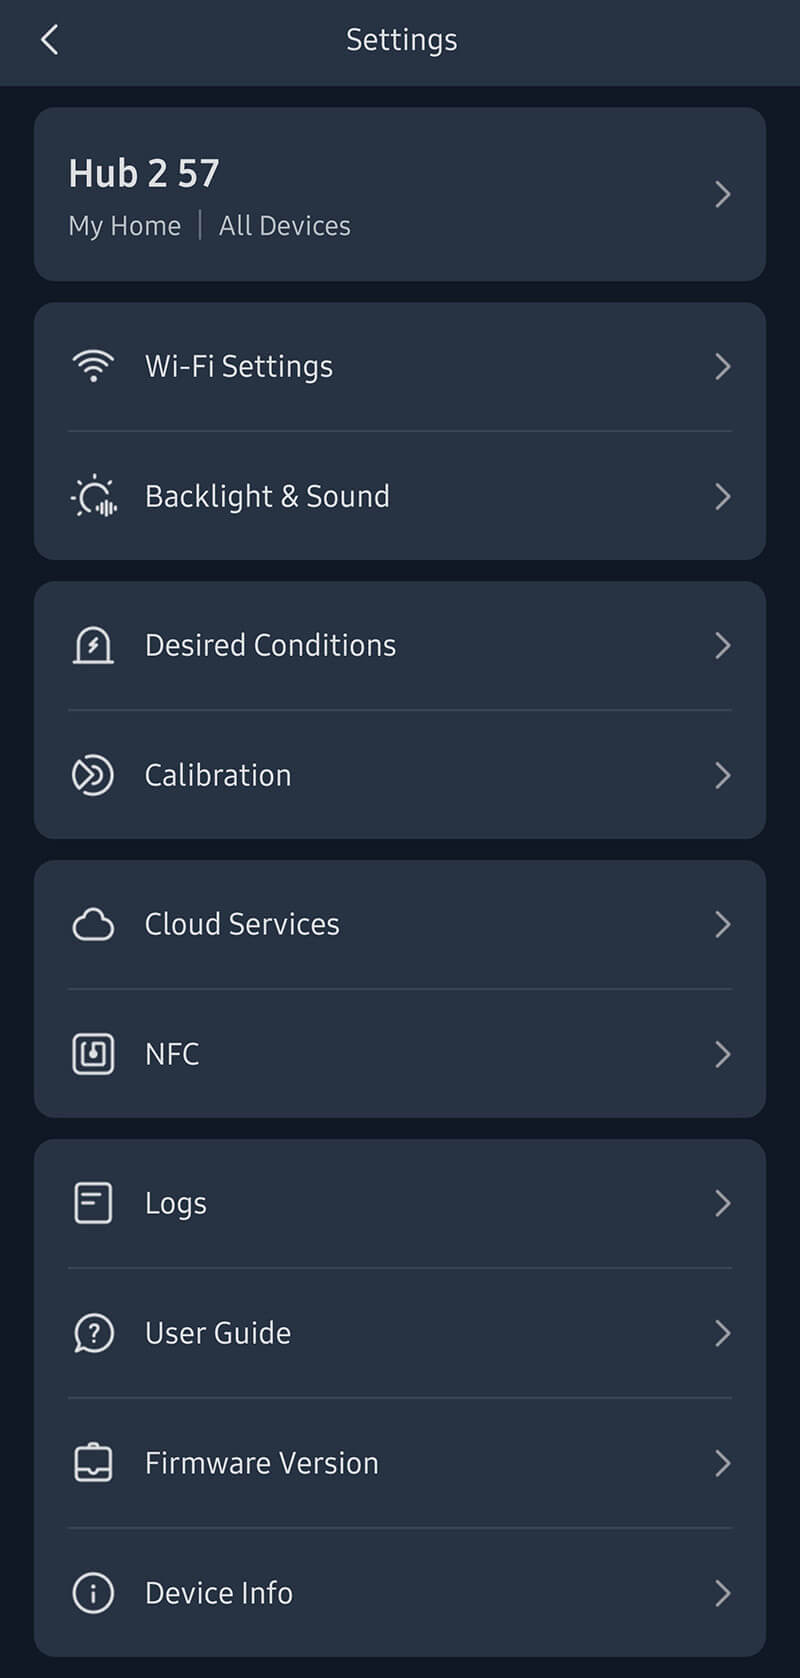
The Cog Wheel in the corner is used to enter the Settings Menu for the Hub 2.
In the settings menu, you can adjust your Wi-Fi credentials by clicking the first item. The second menu is used for setting the Backlight & Sound behavior. You can turn of the small indicator dot in the corner, or have it light up only when the Hub is controlled.
You can turn off the temperature, humidity and touch button lights during the night, because the backlight LEDs can be bright in a dark environment. Or you can set the brightness to auto-adjust, which I found to be pretty accurate because of the built in illumination sensor. It will dim the display when there isn’t sufficient light.
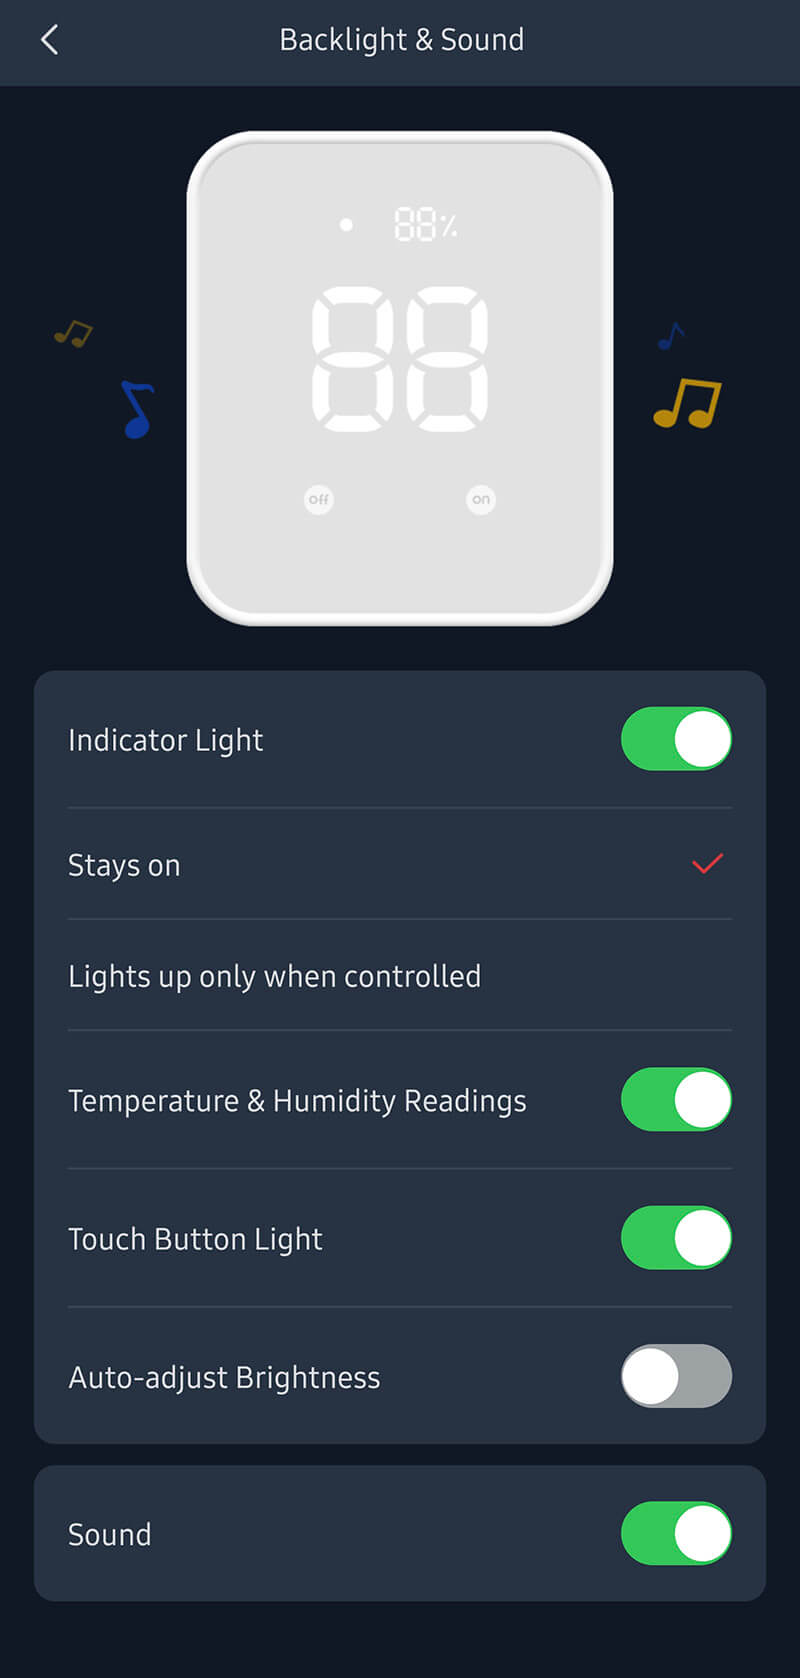

The sound can also be toggled off, which I did because I find it annoying. To me, it’s only useful for putting the device in pairing mode. The same beep can be used like an Alarm when setting the desired conditions in the menu. What this means, is that the Hub 2 will alert you whenever the temperature or humidity reading will pass a preset threshold.
Going further, other settings in the menu are pretty self explanatory. The cloud services menu allows you to connect the Hub 2 and any devices added under it to a smart controller like Google Home, Amazon Alexa, Apple HomeKit.
The NFC tags menu, allows using NFCs to trigger scenes, lights or finger bots. SwitchBot sells its own NFC tags, which are supported both by Android 5.0 and above and iOS 13 and above.
Further down, firmware version and device info can be checked for the Wi-Fi and BLE MAC addresses.
Adding an IR Remote
The procedure for cloning an IR remote is the same as their previous Hub Mini. Click the + Add remote control button in the middle of the screen:
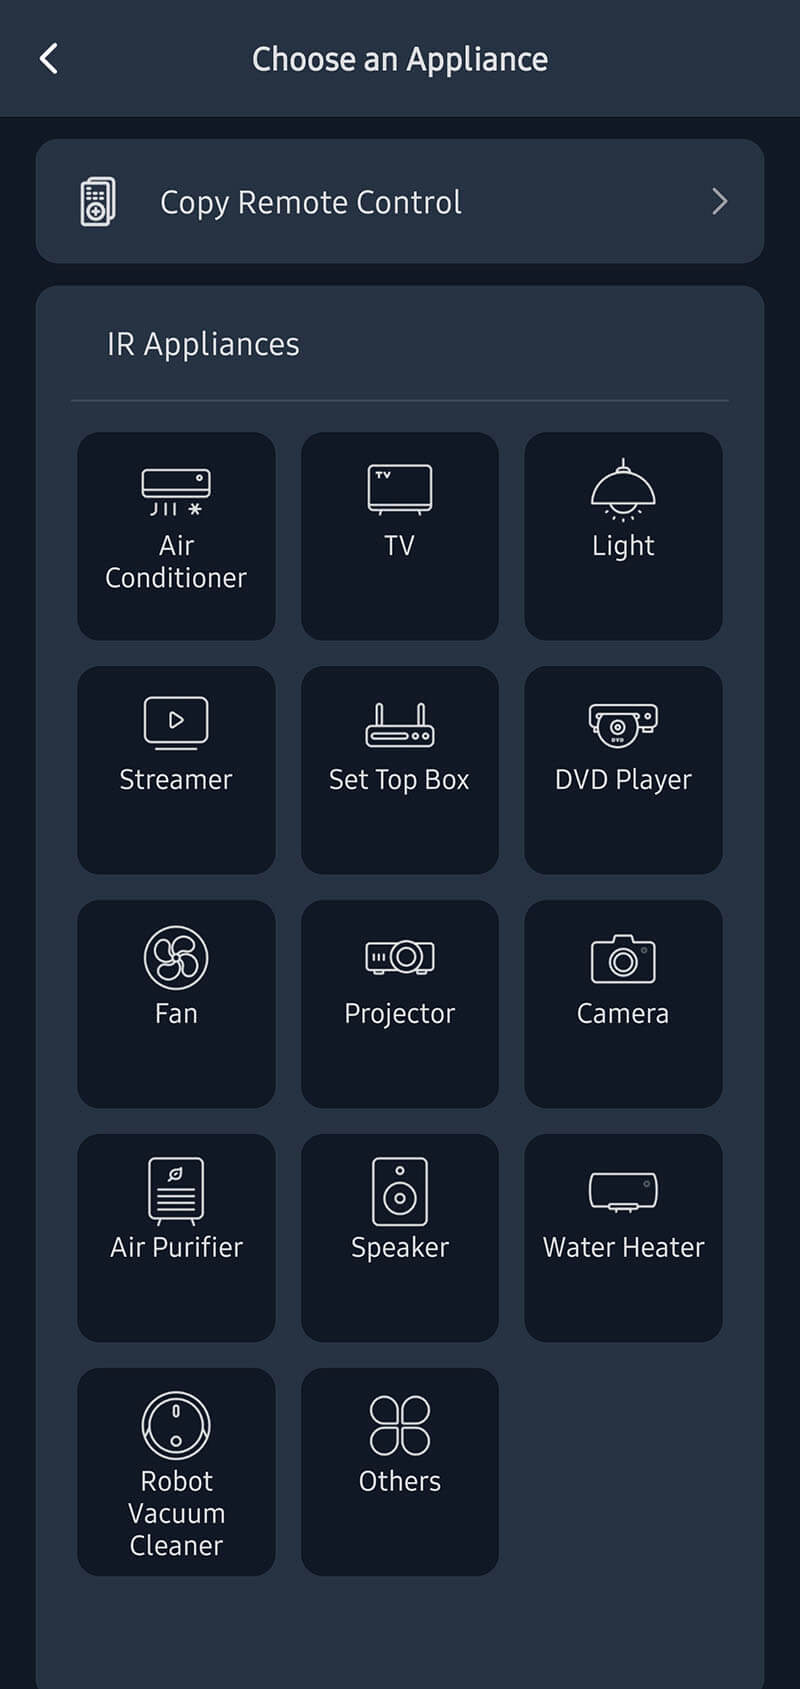

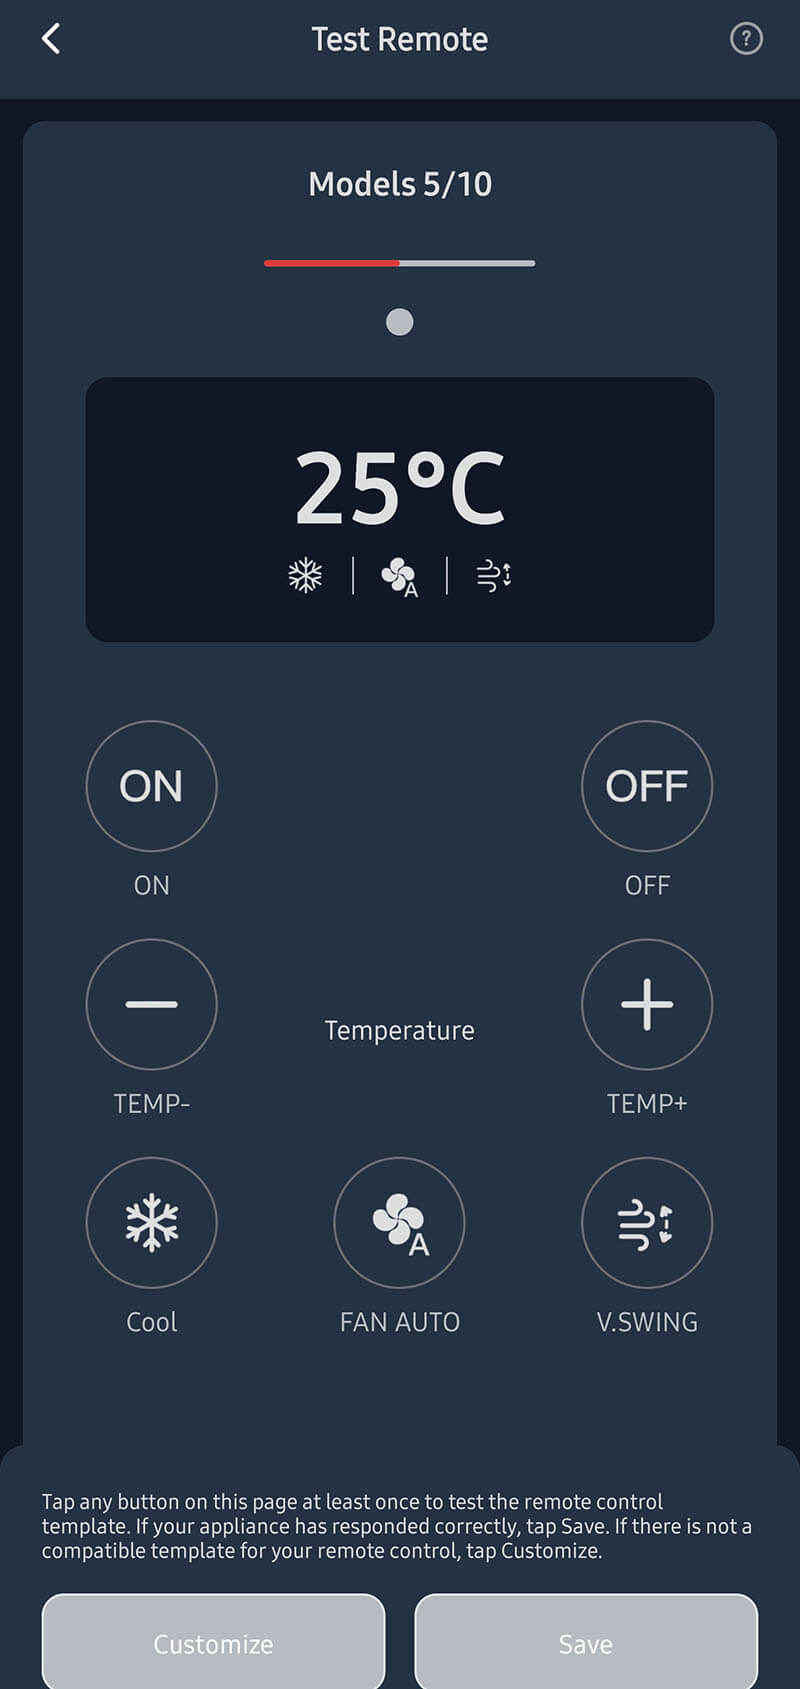

The app will give templates for any device type that you are trying to add. Swipe through and test each button for your remote, save the configuration when you find the one that works. In my case, this was an AC remote and only one button cloning was needed before every other button was loaded from a preset and worked.
Calibrating the Temperature & Humidity
SwitchBot does an excellent job of explaining the calibration process, both for the temperature and humidity sensor. I found this is not necessary, the Hub 2 comes calibrated out of the box, but if you have to, follow the process from the calibration menu:
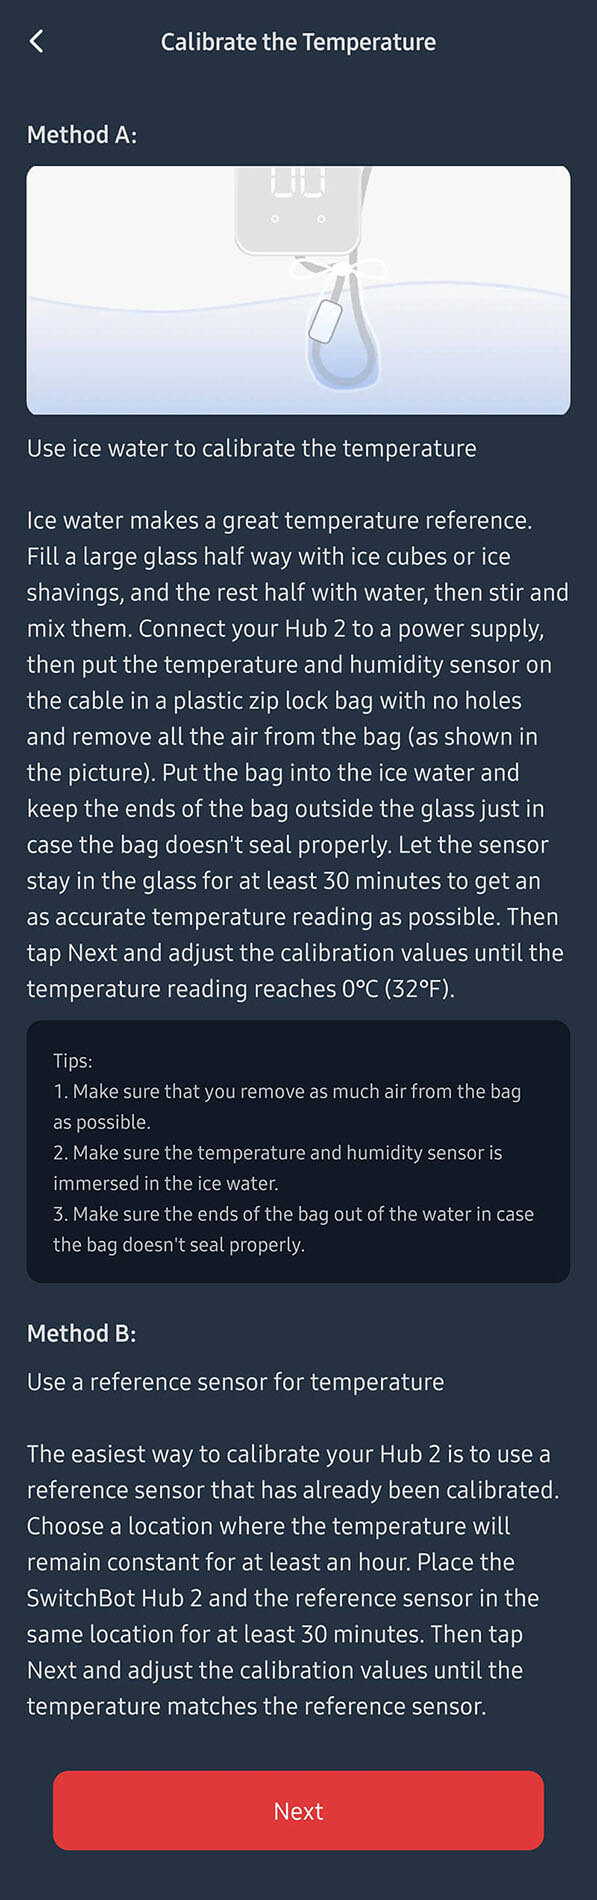
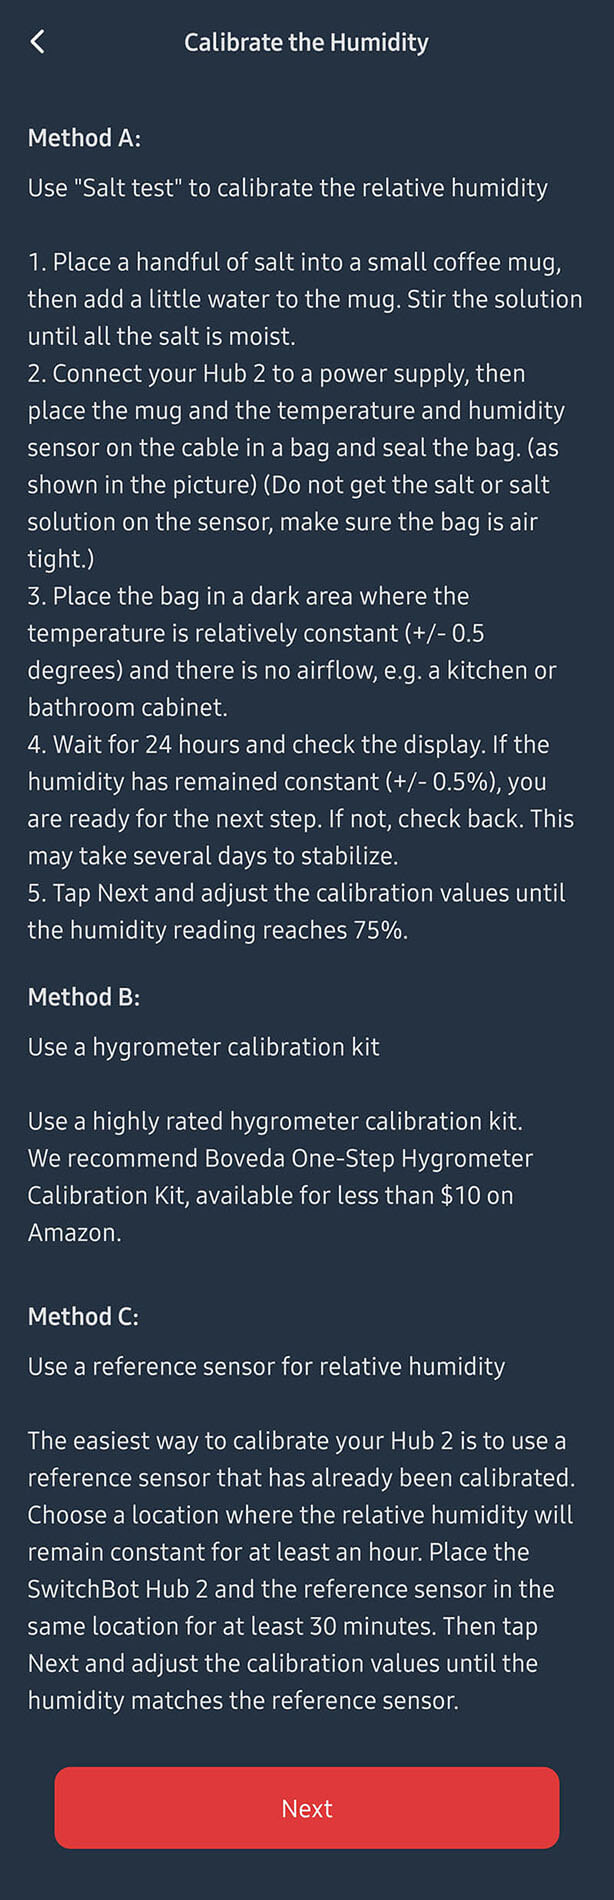
If you happen to have a calibrated temperature sensor, I suggest you use that as a reference point. If not, you can try the Ice Water method. Be mindful, as that one involves putting the sensor in a zip lock back, if water gets inside it will ruin the sensor.
The same applies for humidity, it’s best to use a calibrated humidity sensor that you already own. The salt test is similar as the Ice test, as it involves putting the sensor in a zip bag and sealing it up.
Good news is, you most likely will not need to calibrate the sensor, as it’s already pretty accurate.
SwitchBot Matter Hub 2 in Google Home
Before we can add the Hub 2 as a Matter device in Google Home, few important conditions need to be met:
- SwitchBot Matter Development is still in beta, bugs may be expected
- SwitchBot App With Matter Support v6.25.1 or above is needed
- Google Home Version 2.65.1.6 and above OR
- Google Nest 47.9.4 and above
- SwitchBot Hub 2 Firmware (version 0.6-0.4)
- All devices need to be on the same 2.4GHz Wi-Fi network
After you’ve downloaded the SwitchBot Matter (Beta) apk on your android device, a prompt will ask you to update the existing SwitchBot app, click update to confirm. Open the app, select the Hub 2 and navigate to the Settings menu. A new option, labelled Matter Configuration (Beta) will appear: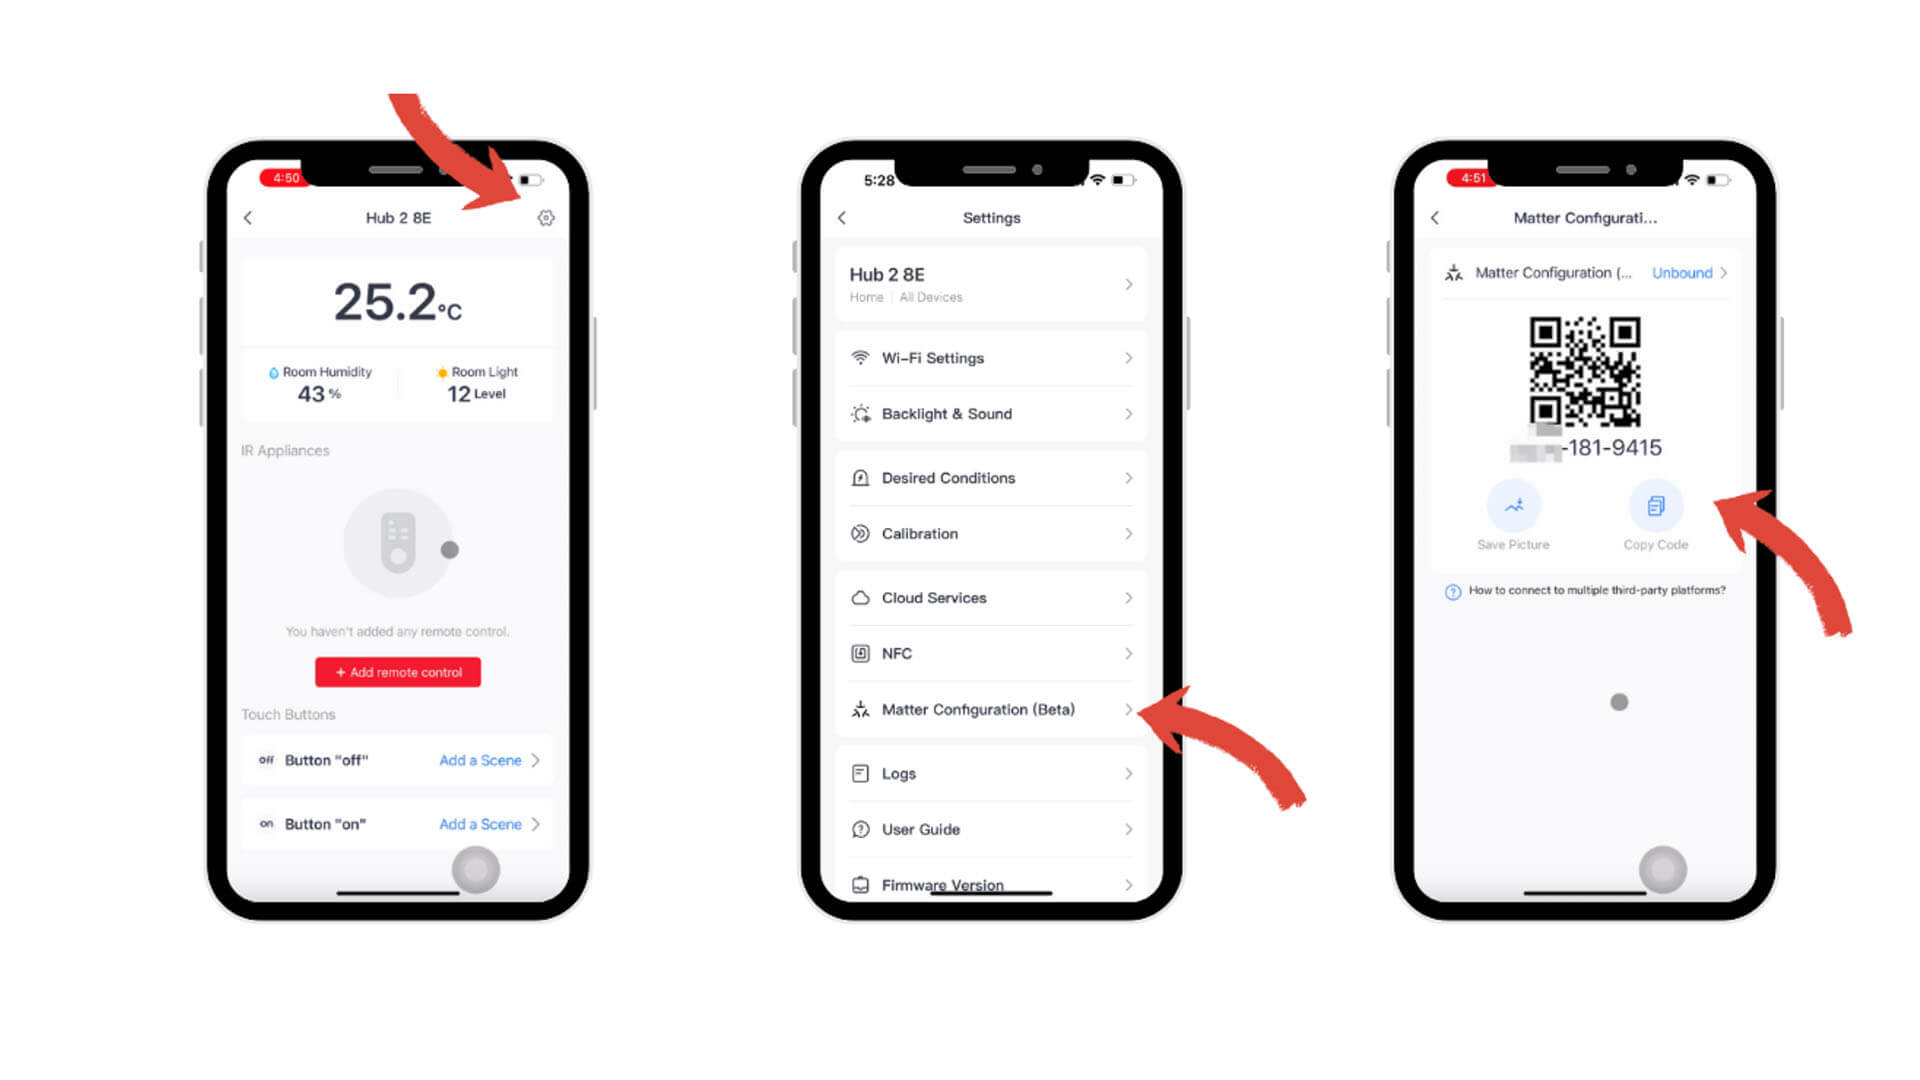
The app will ask you to perform a firmware update on your Hub 2, confirm the prompt. Once you are done, you will be presented with a Matter Configuration screen containing a unique QR and pairing code, click copy.
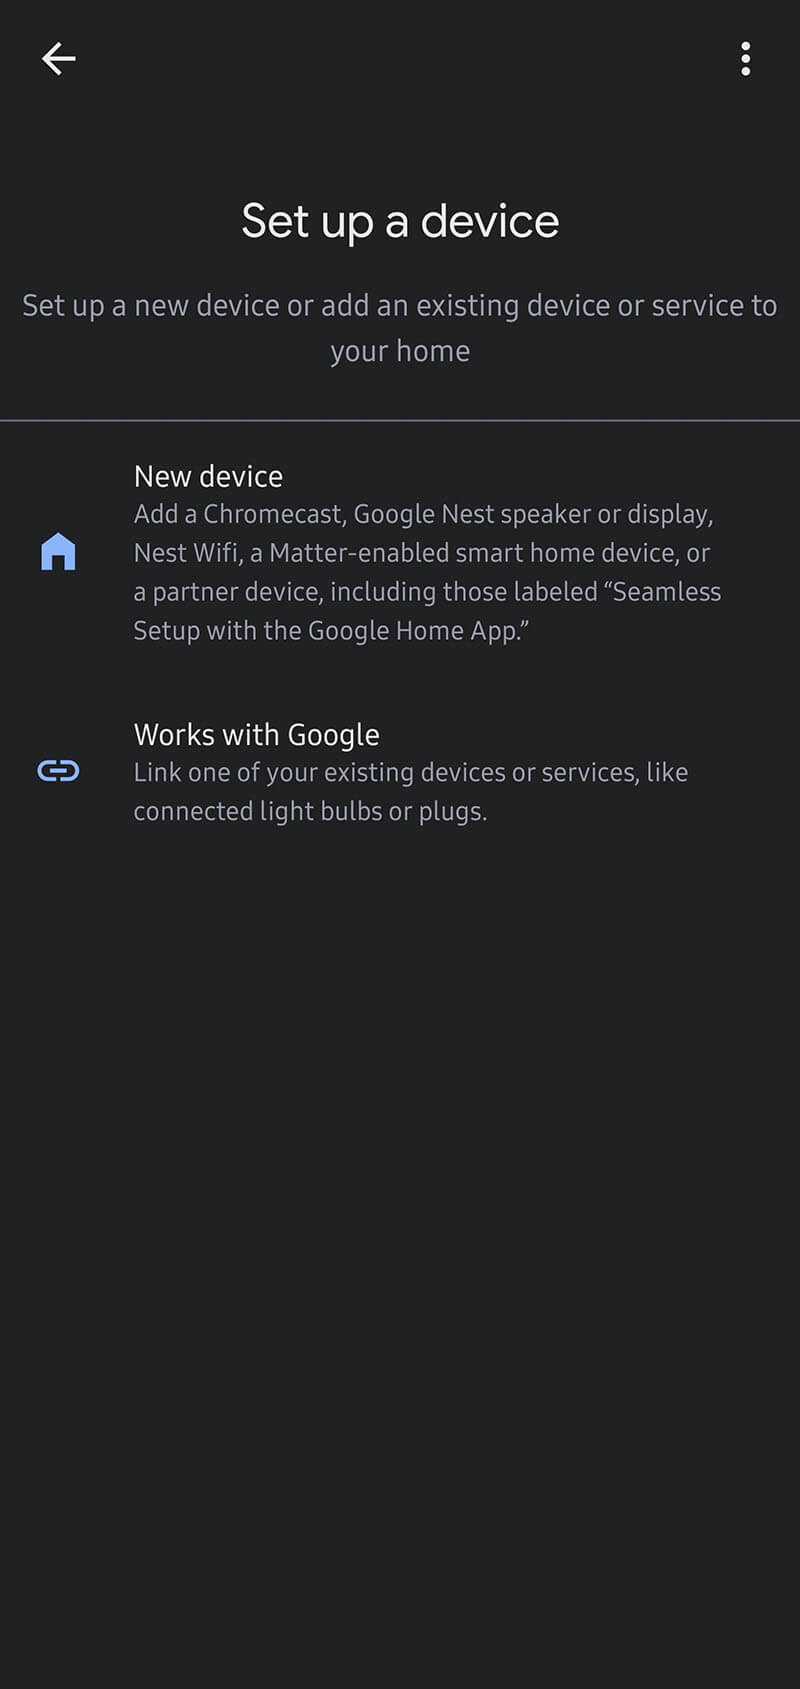
Before you can pair the Hub 2 to Google Home, you need to put the device in Matter Pairing Mode. Hold the On/Off buttons for 15 seconds. The screen will turn off, than turn on and you will hear a beep, that’s your cue that Matter pairing mode is enabled. Open the Google Home app to proceed:
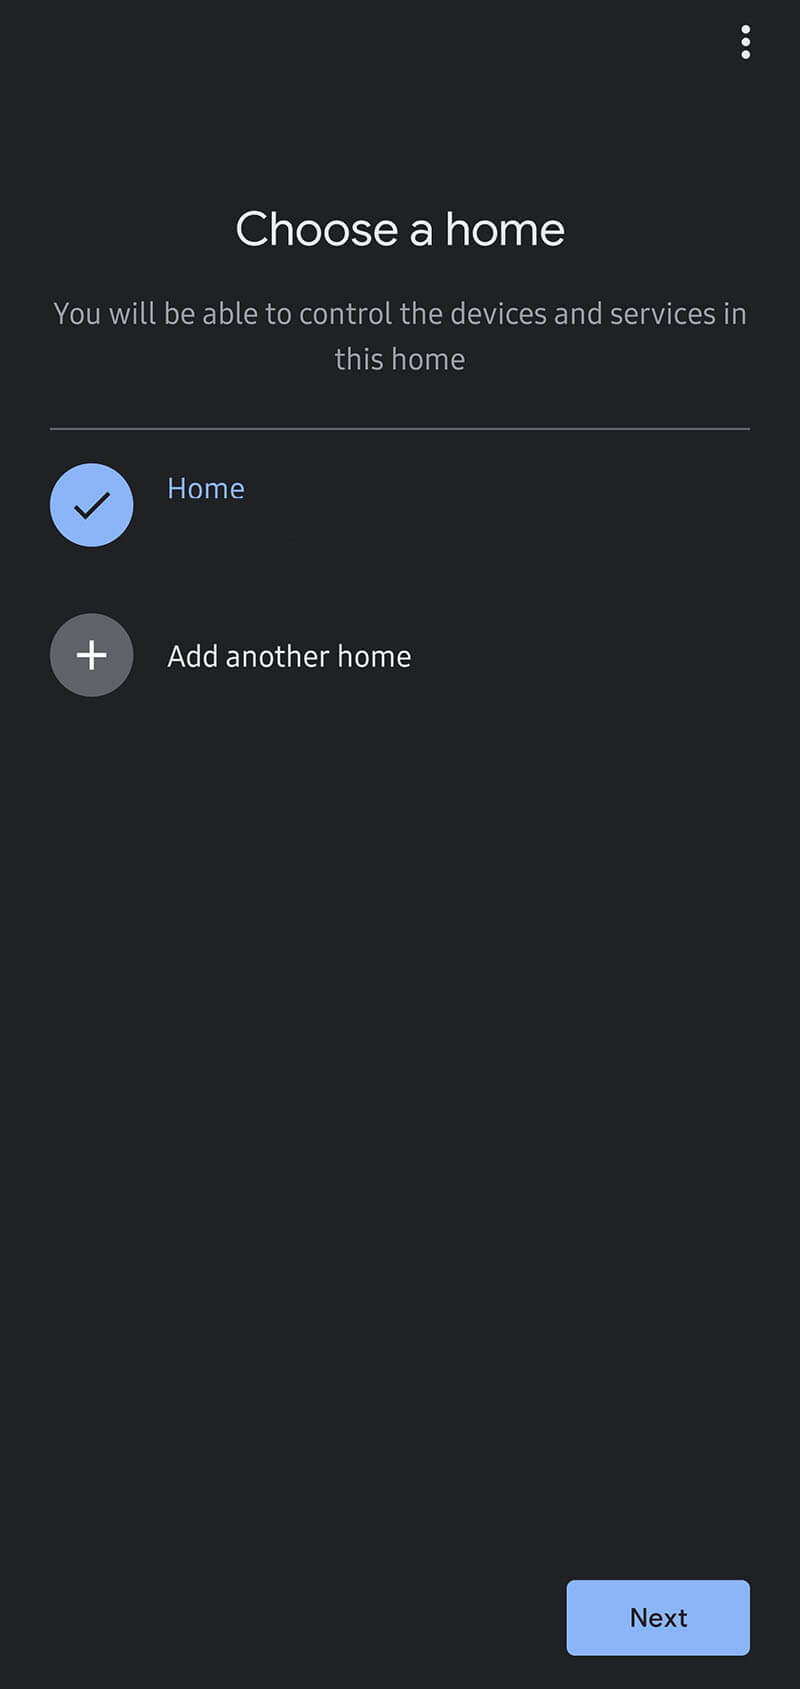


Once you’ve successfully added the Hub 2, it’s sensor readings and any child devices will appear in the Google Home app. Please note that Google Home humidity sensors support is currently not implemented, so it’s reading will not appear in the app.
SwitchBot Matter Hub 2 in Apple HomeKit
The procedure for adding the Hub 2 in Apple HomeKit is similar, with a few different steps. Similar conditions need to be met:
- SwitchBot Matter Development is still in beta, bugs may be expected
- SwitchBot App With Matter Support v7.23.13 or above is needed
- Test Flight Invitation Link: https://testflight.apple.com/join/TnTnS4Vb
- iOS 16 or above
- HomePod Mini/Apple TV
- SwitchBot Hub 2 Firmware (version 0.6-0.4)
- All devices need to be on the same 2.4GHz Wi-Fi network
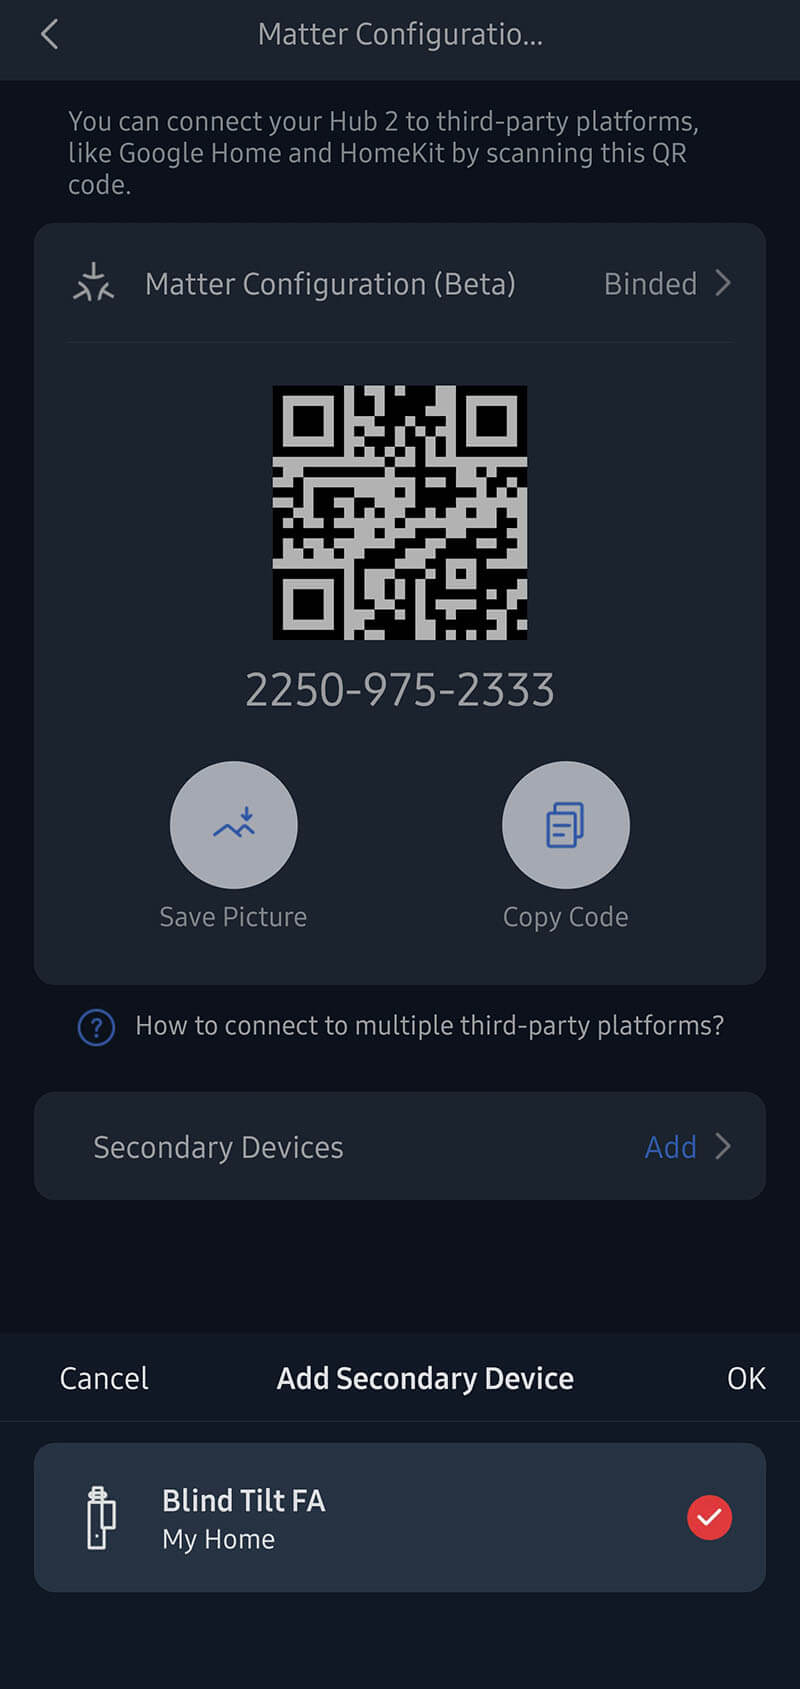
Install the TestFlight app on your iPhone, which is used to beta test new apps and features. Join the SwitchBot Beta by opening the link above on your phone. In the SwitchBot app, obtain the Matter QR Code or simply copy the code from the SwitchBot app by navigating to Settings > Meta Configuration (Beta).
Now, before adding Hub 2 to your Apple Home app, you will need to reset the Hub 2 and put it Matter Pairing Mode. Press and hold the On and Off buttons on SwitchBot Hub 2 for 15 seconds, and release them after hearing a beep sound. Open the Apple Home app:
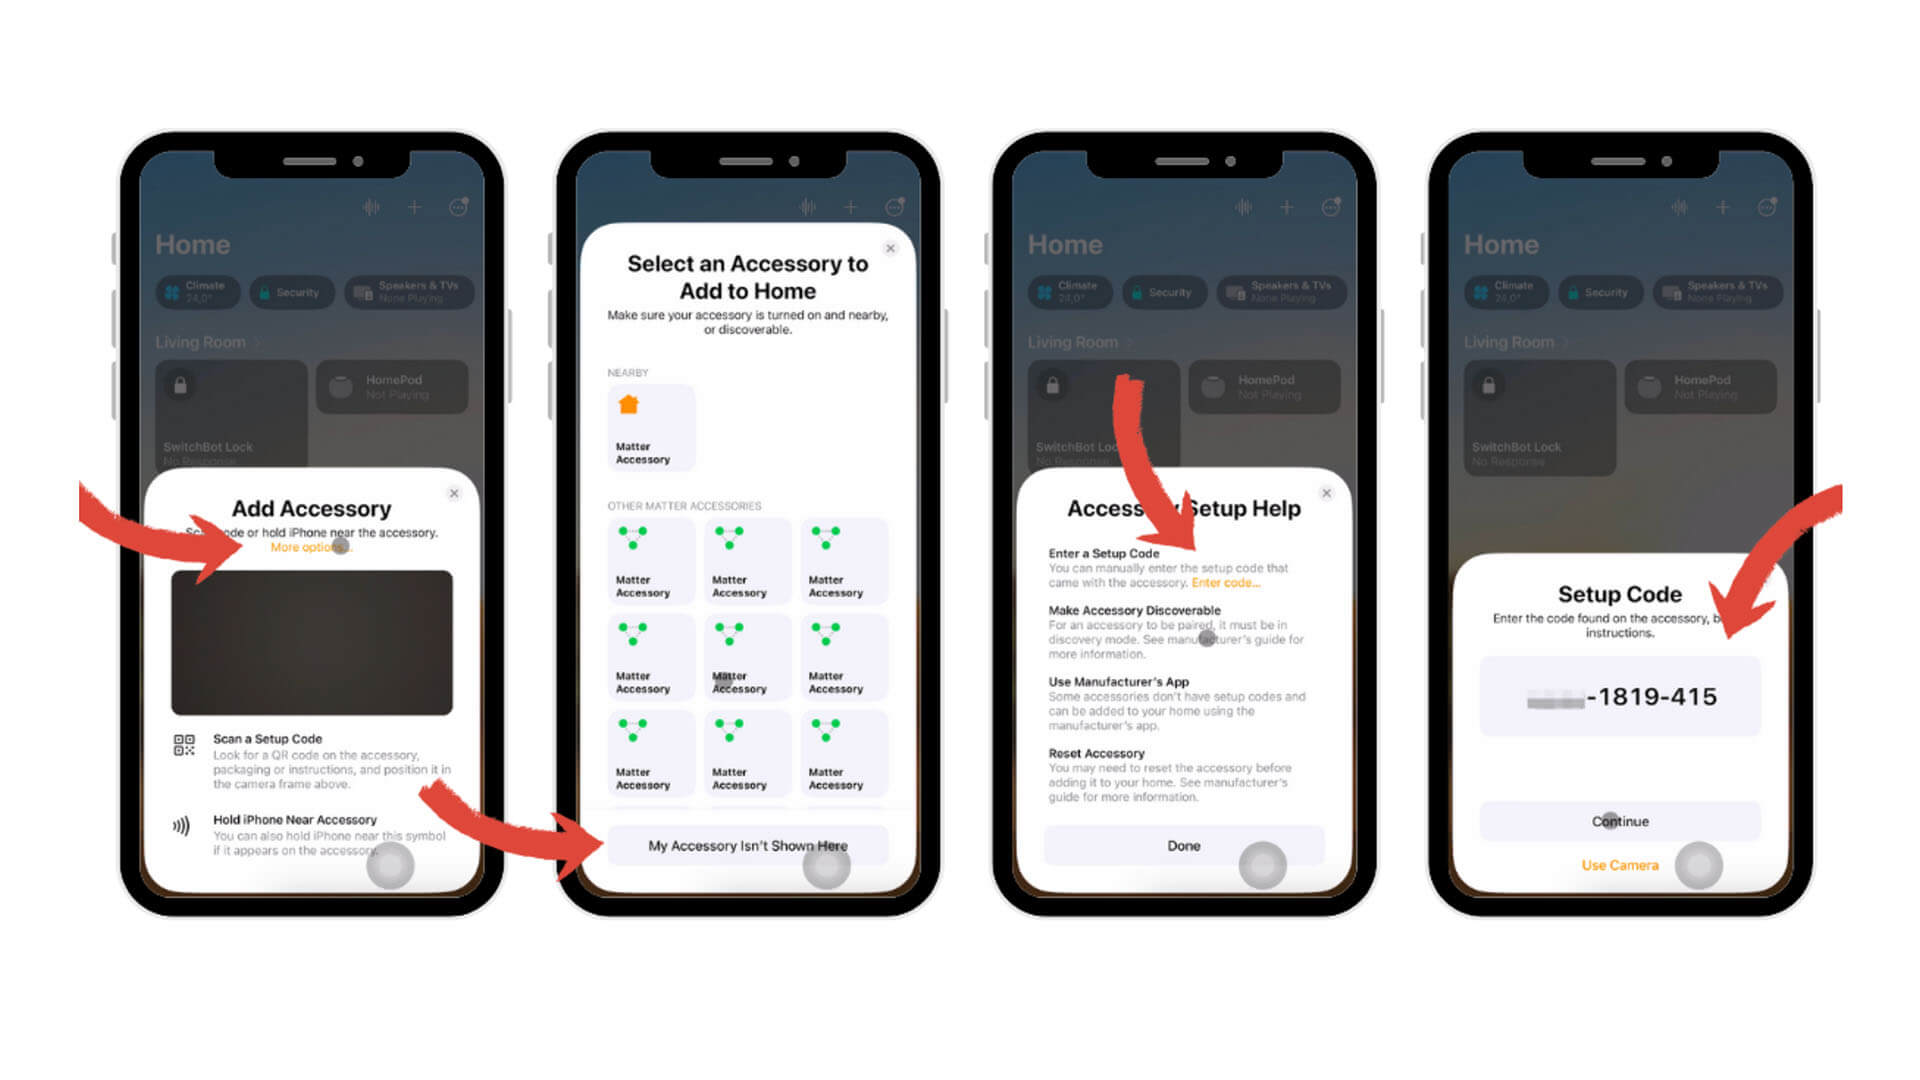
Select Add Accessory in the upper right-hand corner, then click More Options > My Accessory Is Not Here > Add with Code. Paste the copied Matter number, press continue, and finish the adding process.
After you’ve added the Hub 2 in Apple HomeKit successfully, it’s temperature and humidity sensors will also be added as separate sensors in the app.
Because the SwitchBot Matter implementation is still in beta, you can currently add only the Blind Tilt and Curtain Bot as Matter accessories under the Hub 2.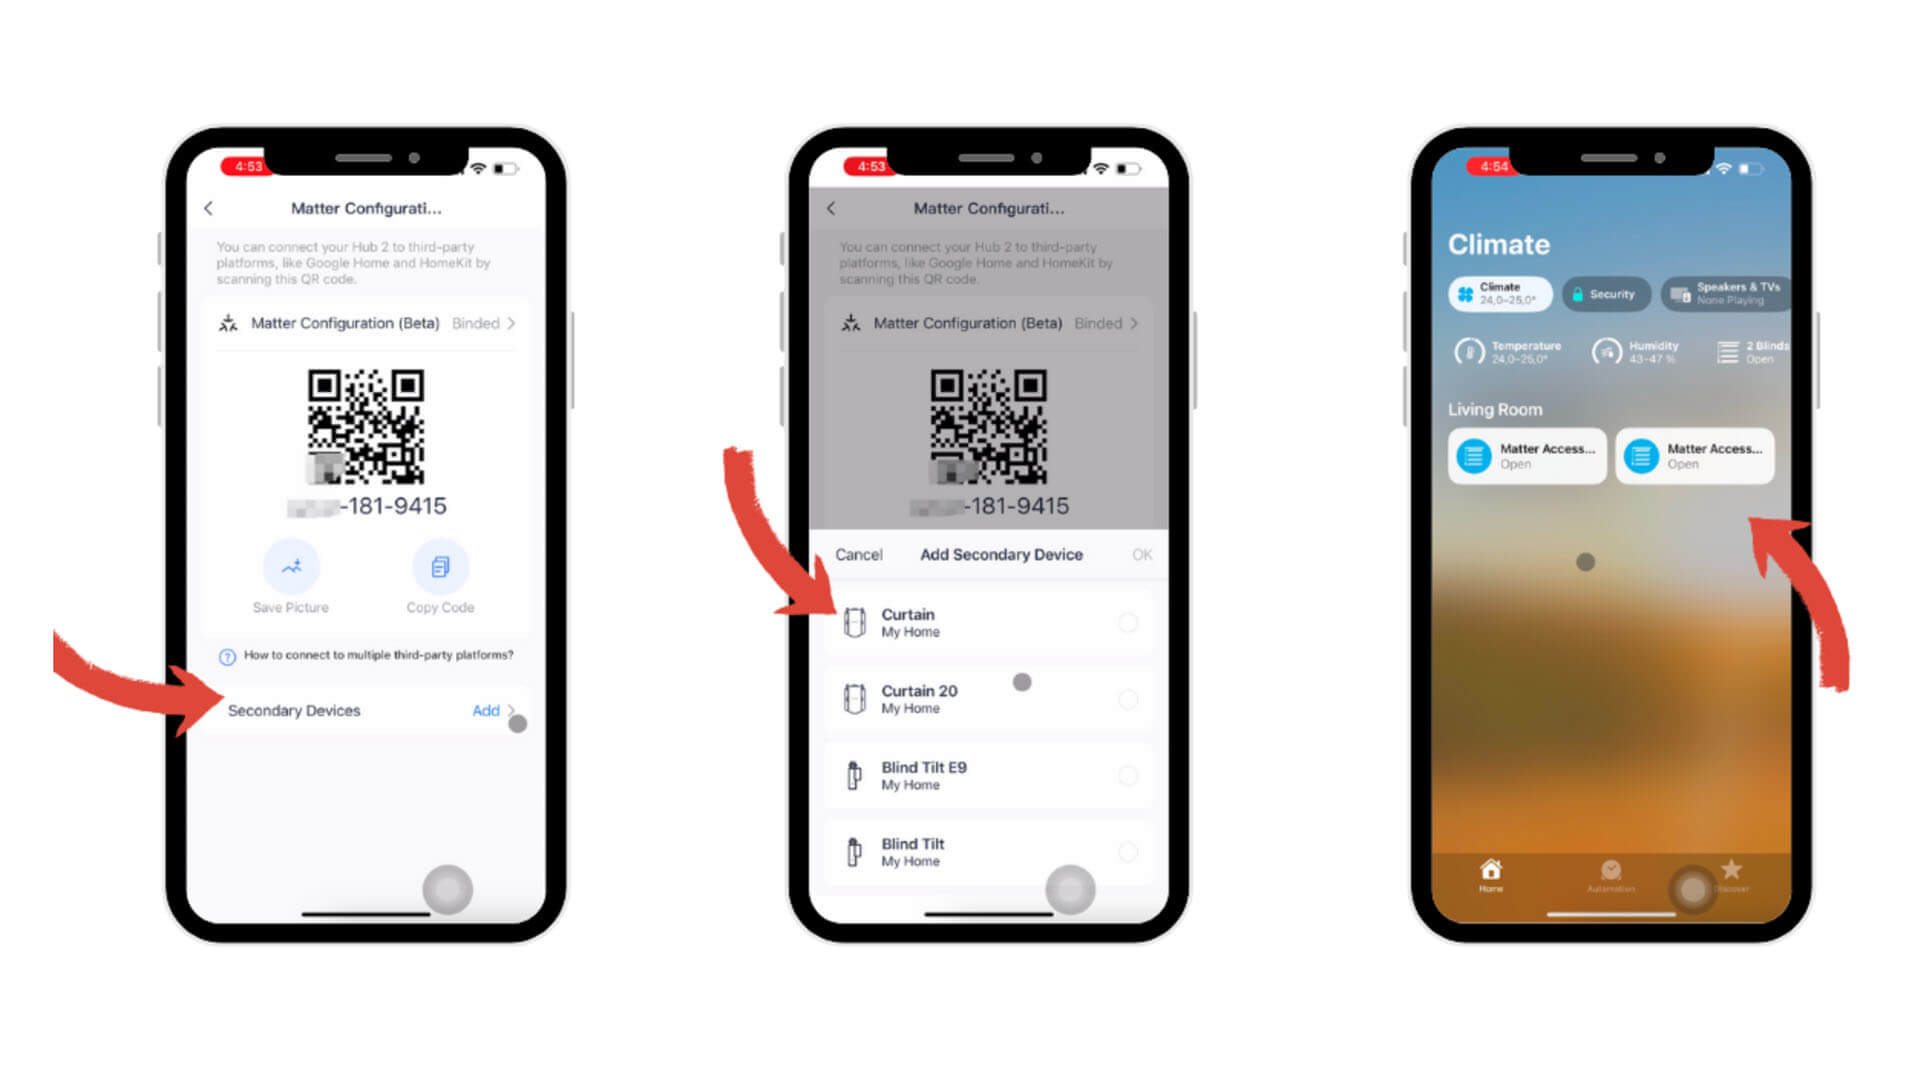
In the SwitchBot App, open the Matter Configuration Menu and click Secondary Devices. Select a Curtain Bot or Blind Tilt and press OK. The device will be added to the Apple Home app automatically.
SwitchBot Matter Hub 2 in Home Assistant
Adding a hub or bridge in Home Assistant is against it’s core principle of eliminating the requirement of a hub. However, you can add the Hub 2 to utilize it’s Temperature & Humidity sensor readings. In the current Beta stage, there are a couple of ways you can add a Matter device to Home Assistant:
- Add a device using the iOS Companion App
- Add a device using the Android Companion App
- Share a device from Apple Home
- Share a device from Google Home
You can see all the methods and step required on the official Home Assistant Matter Integration page. As an example, here’s how you can add the SwitchBot Hub 2 using the Android Companion App. First, install the official Matter (BETA) integration by navigating to Settings > Devices & Services > Add Integration > Matter (BETA). Install it and continue:
- Open The Home Assistant app on your phone.
- Go to Settings > Devices & Services.
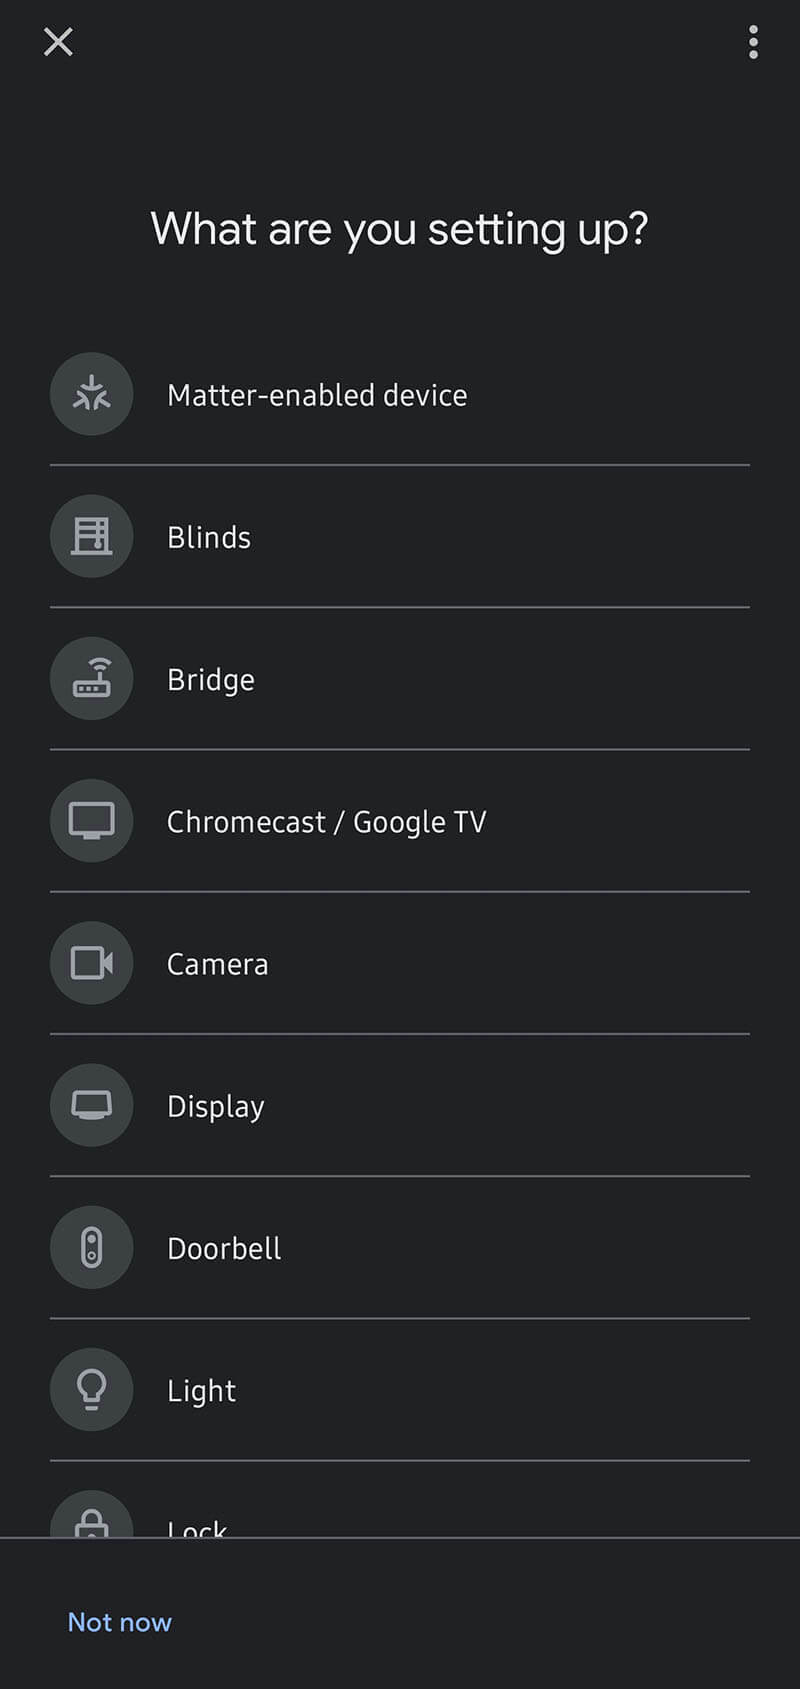
- On the Devices tab, press the Add device button.
- Choose Add Matter device as the top of the list.
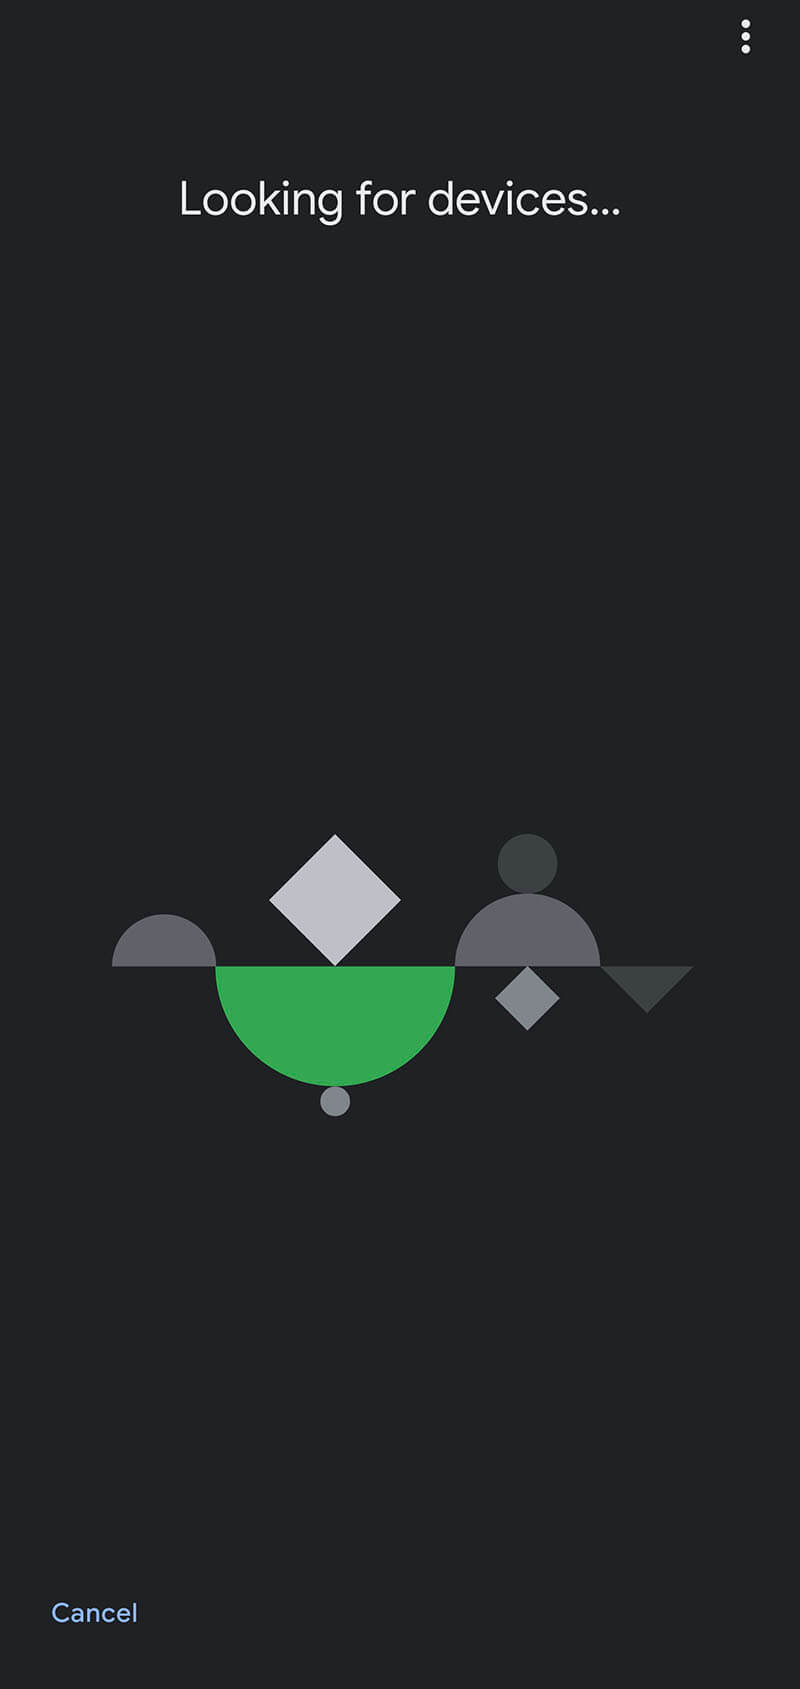
- Put the SwitchBot Hub 2 in Pairing mode by holding the On/Off buttons for 15 seconds until you hear a beep
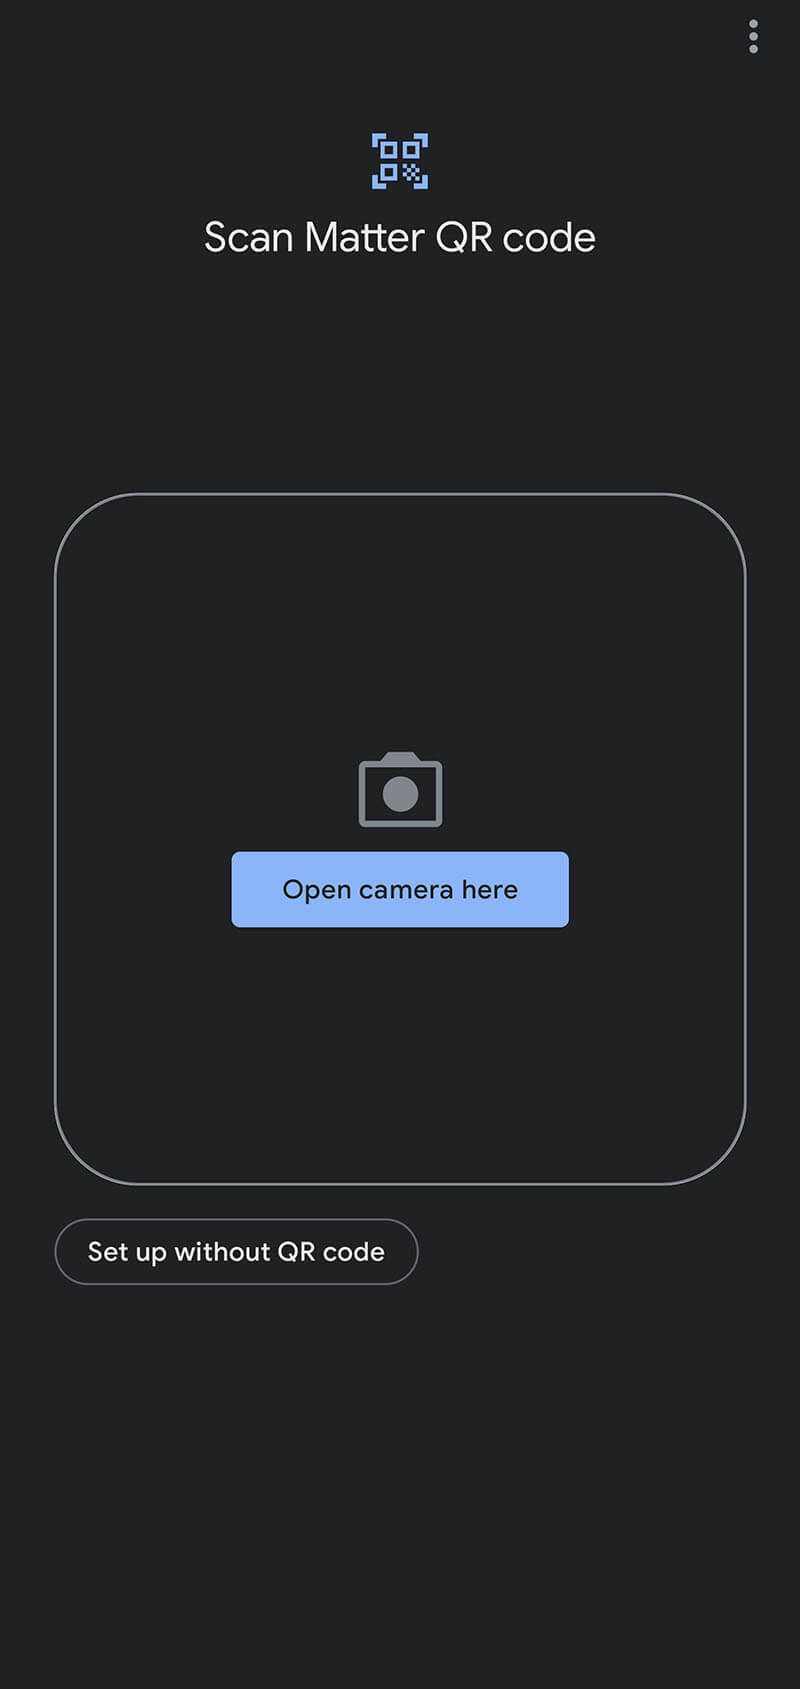
- Scan the QR-code of the Matter device with your phones camera or press the Setup without QR-code button to manually enter the Commissioning code.
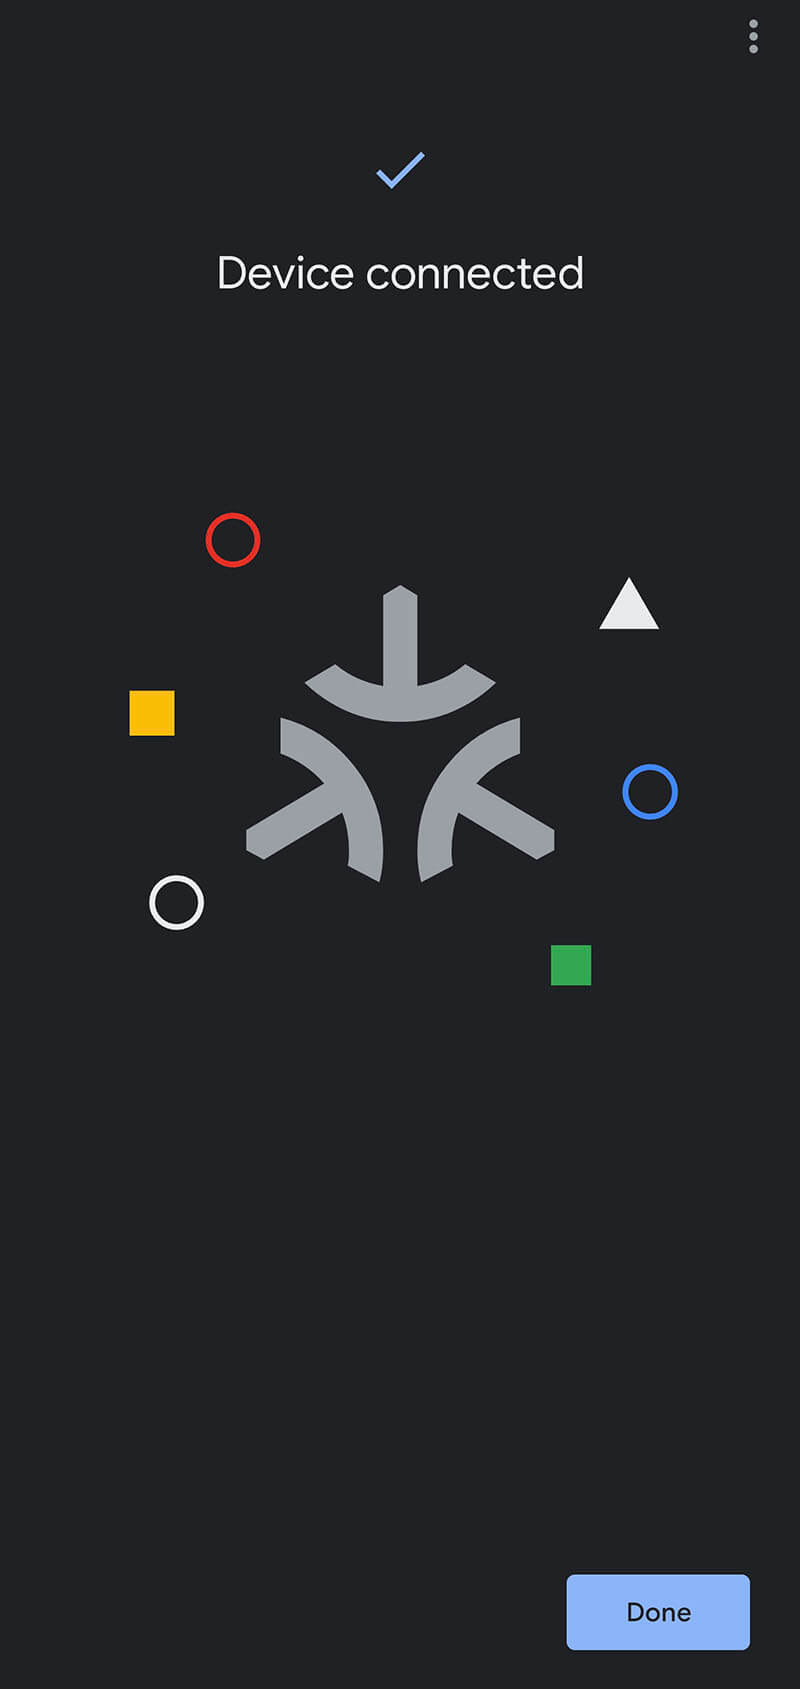
- The process will start adding the device which takes up to a few minutes.
- Once the process is complete and you pressed the Done button, you are redirected to the Device within Home Assistant and its ready for use.

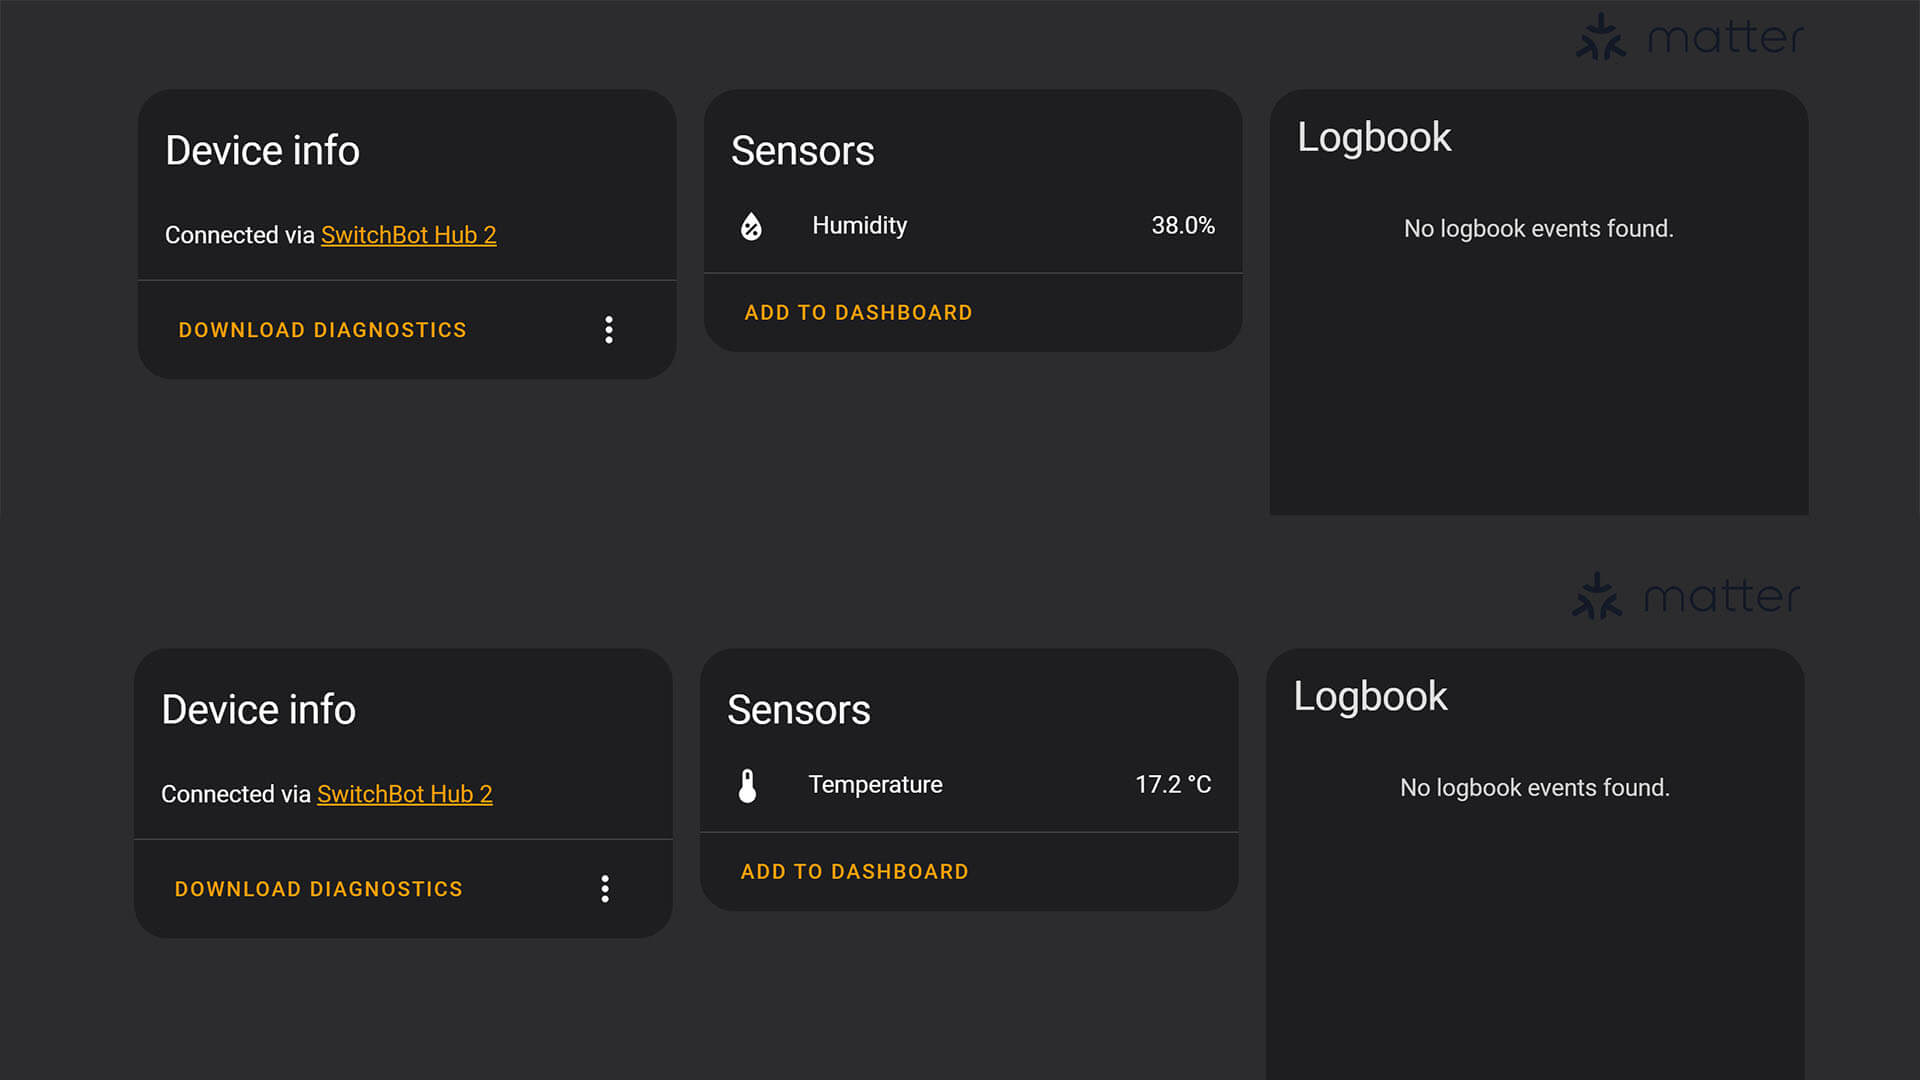
The Temperature & Humidity Sensors are automatically added as Connected Devices to the Hub 2, and their readings pushed to Home Assistant:
Currently, adding SwitchBot child devices to Home Assistant via a Matter connection is not possible in this Beta stage. You can control SwitchBot devices by using the official integration or the MQTT BLE ESP32 custom component.
Summary
Before we can rate SwitchBot’s Matter implementation, we have to keep in mind things are still in beta stage. Even though I didn’t encounter any, bugs are expected and can happen when you setup the Hub 2 and add devices under it’s umbrella.
In my opinion, SwitchBot is headed in the right direction, bringing already released devices to the new communication protocol by pairing them with a Matter-compatible hub and updating the firmware. Newly released devices should follow the standard without the need of a hub, because that’s what Matter is advertised to be.
Regarding the Hub 2 itself, it’s a high quality device, feels really premium and has a capable temperature and humidity sensor. I mentioned in my previous review of the Meter Plus that I was impressed by the quality of the screen, especially considering it’s an LCD.
The Hub 2 doesn’t have a screen at all, SwitchBot created an LED matrix which illuminates the information on the front, giving a high tech, modern vibe to your room. For a temperature and humidity reading, I must say I prefer the Hub 2 solution.
Buy
If you already own SwitchBot devices and would like to bridge the gap to Matter for your HomeKit or Google Home controller, the Hub 2 is a necessity. Samsung SmartThings and Amazon Alexa implementation is still under development, but integration should be similar once released.
The Hub 2 can be bought from SwitchBot’s Official Store or on Amazon.
SwitchBot Matter Hub 2
10HOMESCENE – 10% discount
SWITCHBOT OFFICIAL STORE
SwitchBot Matter Hub 2![]()
United States | Canada | United Kingdom
Germany | Netherlands | Sweden | Spain
France | Italy | Poland | Australia
*If links fail to open, try disabling your AdBlocker.


I noticed the NFC menu, but no description.
Does the Hub 2 offer reading of NFC tags similar to that capability on an iPhone?
It’s able to trigger scenes or paired devices through scanning NFC tags with your phone.
See here how it functions:
https://support.switch-bot.com/hc/en-us/articles/4403772342167-How-to-use-the-SwitchBot-Tag
Cheers