Recently I wrote an article about setting up automatic Home Assistant Backups, covering a couple of methods which utilize the built-in Backup integration of Home Assistant to snapshot your configuration and upload it to a cloud service of your choice.
While Home Assistant’s Backup Integration is capable enough to handle automatic backups, Proxmox users have another option for backing up their HA server, by utilizing it’s built-in backup feature which simply creates a full snapshot of your containers on a schedule and saves it on a disk of your choice. This process is seamless and can be used for whatever container you have deployed in Proxmox.
If you are thinking about migrating your HA to a Proxmox Virtual Environment, follow this guide which covers deploying HA with a simple script. Additionally, you can separate certain Add-ons from Home Assistant, like Zigbee2MQTT for example and run it independently in it’s own separate container.
Home Assistant Backup vs Proxmox Backup
If you already have a backup system in place, such as the Home Assistant Google Drive Backup Integration, you might be wondering why would you need Proxmox snapshots or backups. Well, if you have Home Assistant deployed in a Proxmox VE, you probably have other services running along side it, like Zigbee2MQTT, Mosquitto MQTT, Z-Wave JS, Pi-Hole or maybe some media servers like Kodi or Jellyfin.
If you do not use Proxmox backups, than you would have to use each service’s built in backup method to save your configuration and setup, something than can be a tedious task or in some cases, impossible. This is where Proxmox shines, by seamlessly creating full snapshots or backups of your containers and restoring them in the case of failure.
Proxmox Backup Vs Proxmox Snapshot
Another important thing is to differentiate between Proxmox Backups and Snapshots. Although they sound similar, there are differences between the two terms and the way they apply to a Proxmox Virtual Environment. In summary:
Snapshots
- A snapshot is an image of a VM at a specific point in time
- A snapshot is stored alongside the original VM disk
- Snapshots cannot be moved to new installations
- Snapshot creation is very fast
- Snapshot restoring is very fast
- Snapshots are stored on child disks that are dependent on the main source disk. If the source disk is corrupted, the snapshots are also corrupted
- Snapshots are useful when testing new VMs or containers
Backups
- A backup is a fully independent copy of an entire VM, container or individual files
- A backup can be stored on any connected storage
- Backups can be moved and used on new installations
- Backup creation takes more time
- Backup restoring takes more time
- A backup is a copy of original data that is completely independent from the source VM, and it can be kept long term
- Backups are useful for saving existing VMs and containers
Snapshots are not files that can be moved around or manipulated, there are simply a restore point in time after which all new changes can be thrown away to bring you back to the original point. On the other hand, backups are full individual files than can be saved on a remote drive and imported whenever you need to on a new Proxmox install.
In this guide, our interest is creating independent backups that can be stored on remote storage. But for informational purposes, I’m going to showcase both methods.
Proxmox Snapshots
Creating Proxmox Snapshots
To create a Proxmox Snapshot of a VM or container, select it from the list on the left and click the Snapshots menu in the middle column: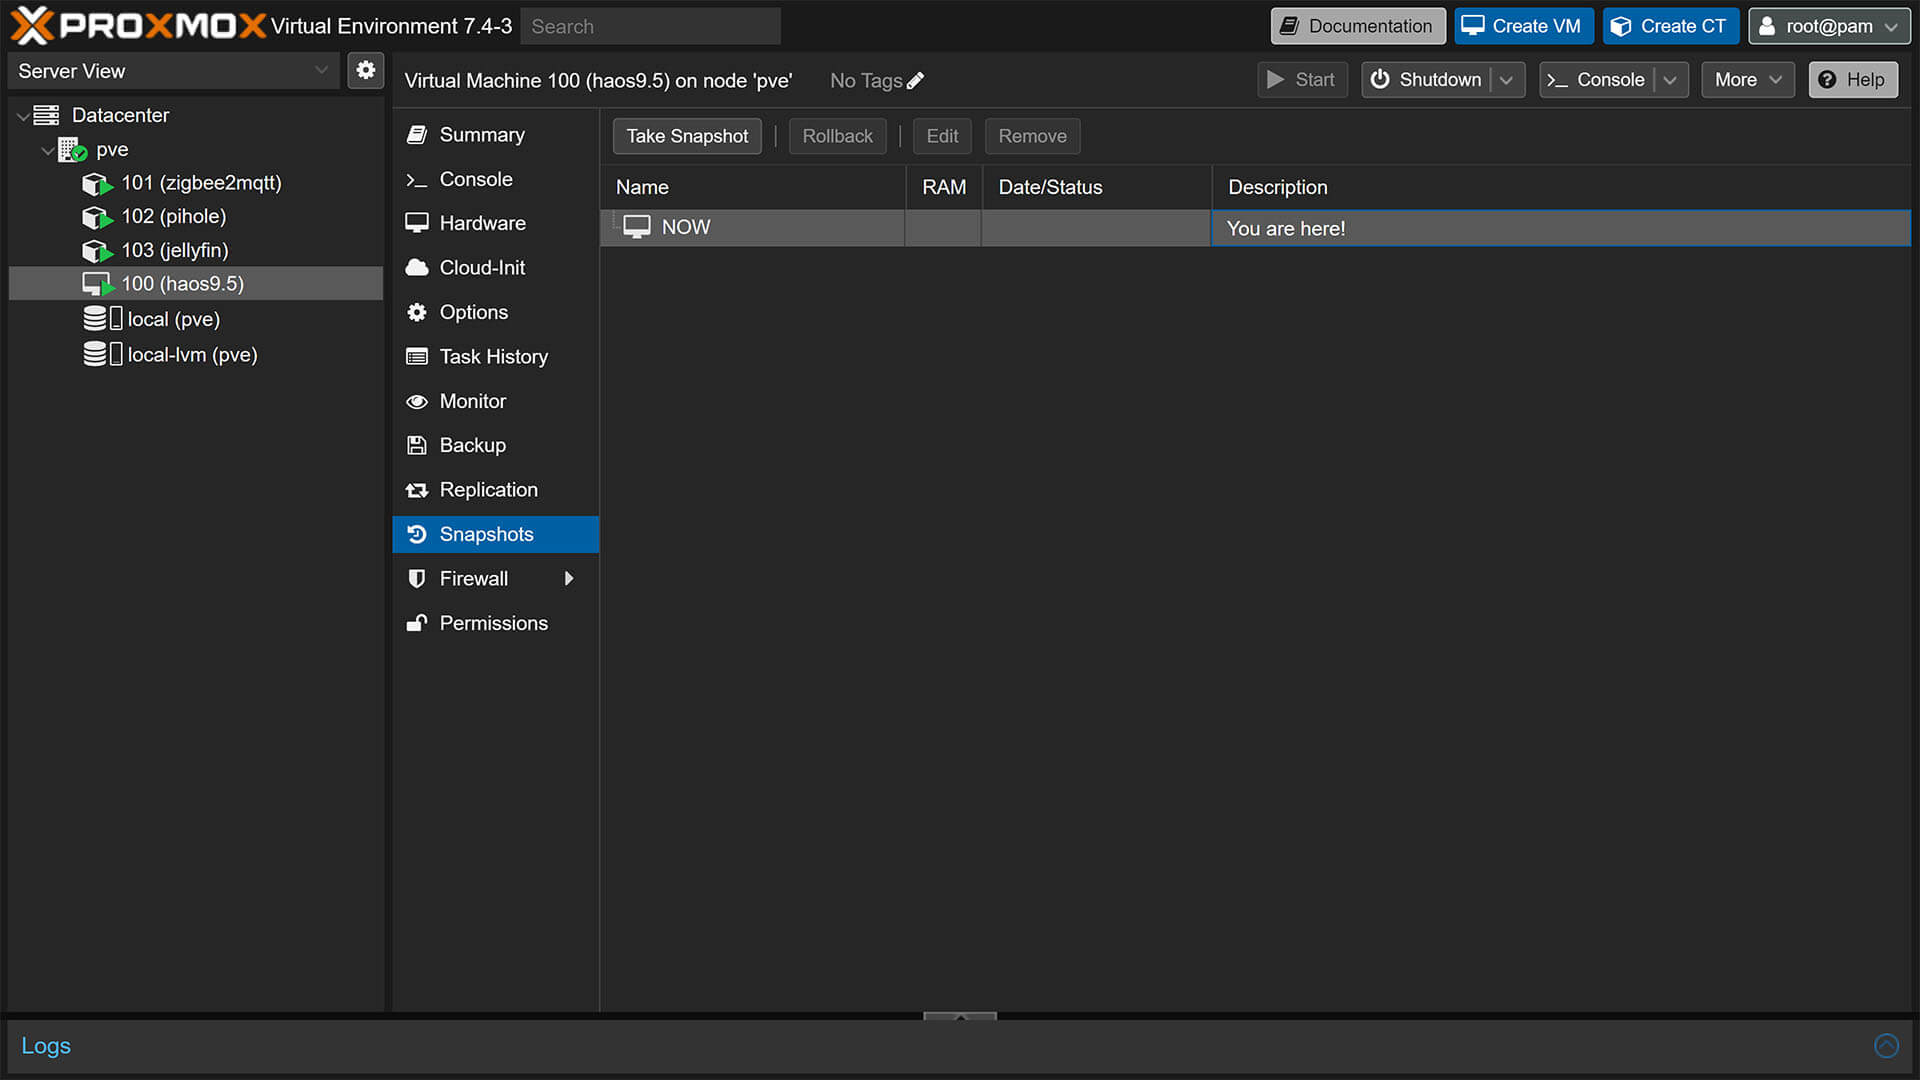
You will notice an item in the list simply saying “NOW” with description “You are here”. Consider a snapshot is simply a restore point in time, it can only be executed at the current time and date you are actually making the snapshot. Click Take Snapshot at the top: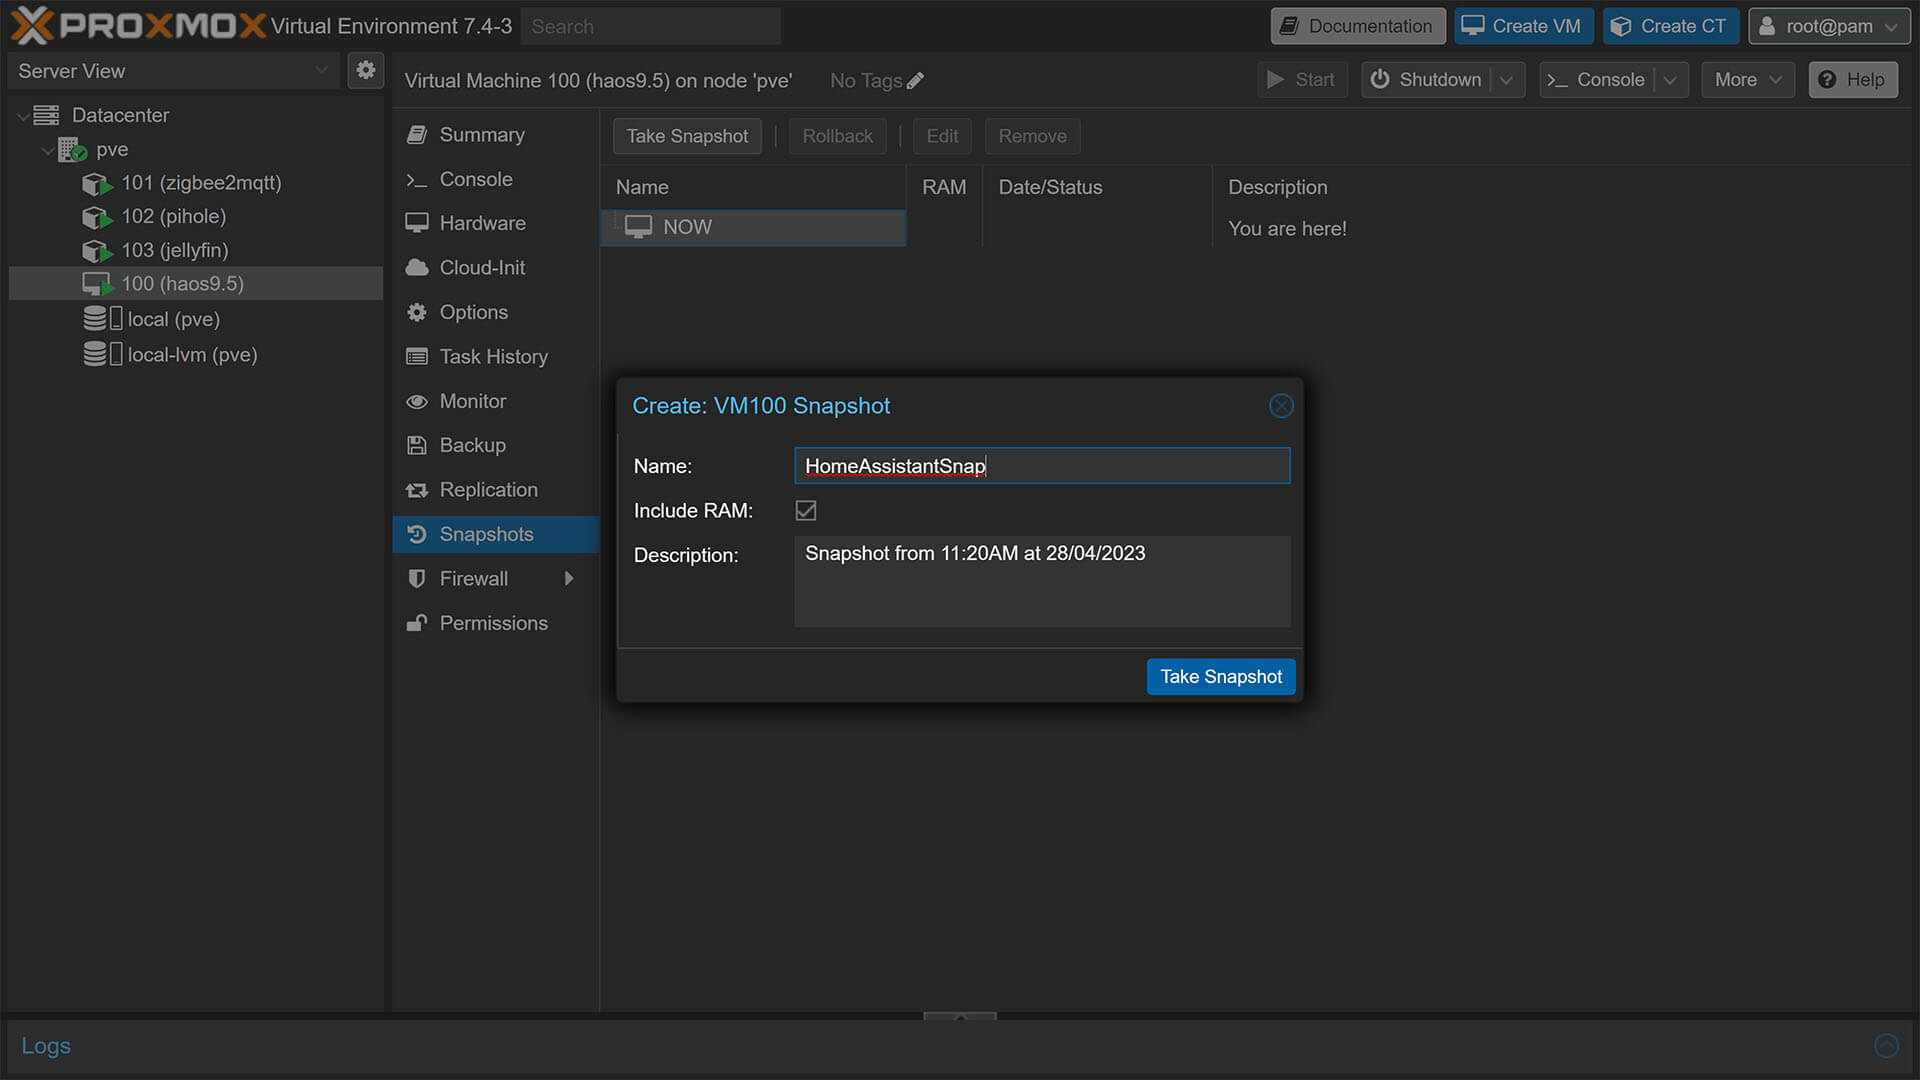
Give you snapshot a name and an optional description. Note that the name must start with a letter, cannot include empty spaces or special characters. Only letters, number and underscores are allowed. Click Take Snapshot and you will be presented with a log window, which will print TASK OK once the snapshot is completed. Close the window and your snapshot will appear in the list: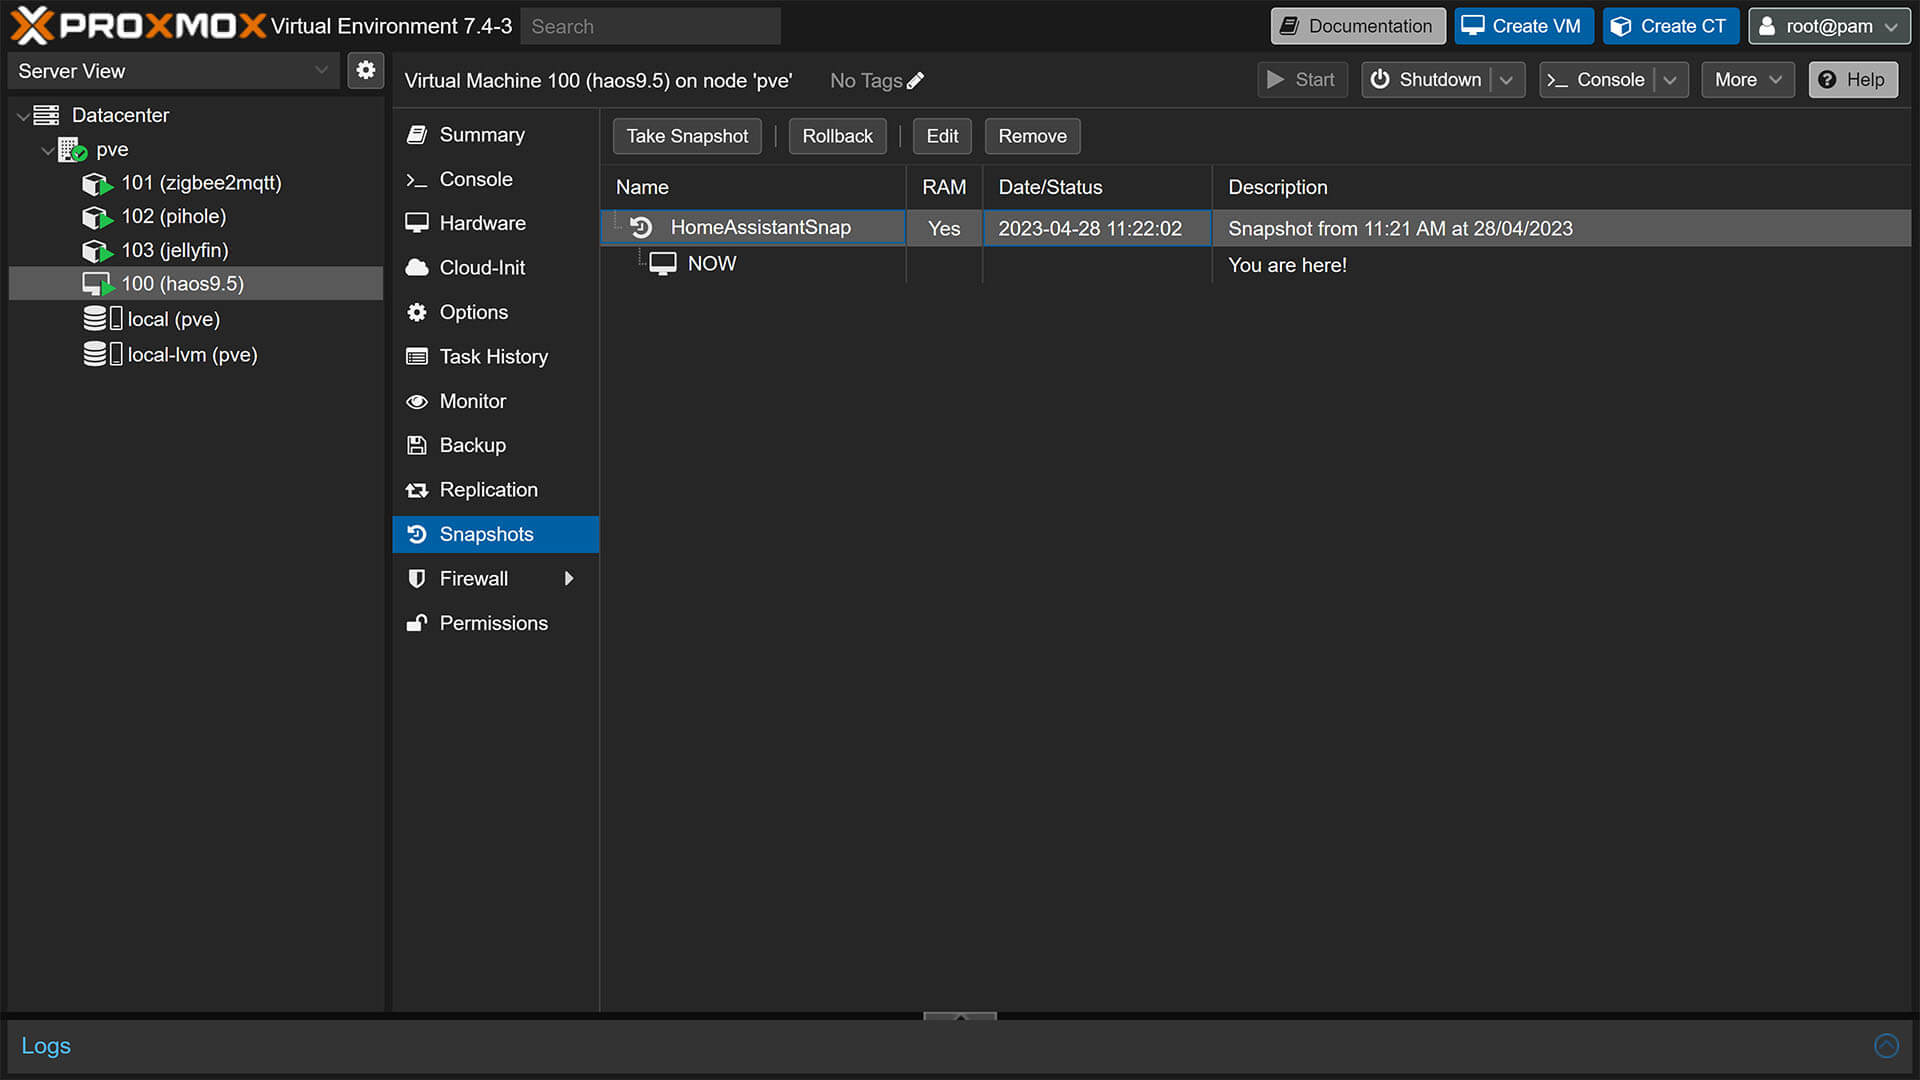
Restoring Proxmox Snapshots
To restore to a snapshotted point in time, navigate again to your Home Assistant container and click Snapshots in the mid column. Select your snapshot from the list and click Rollback at the top. A dialog popup will ask you to confirm the action, click Yes: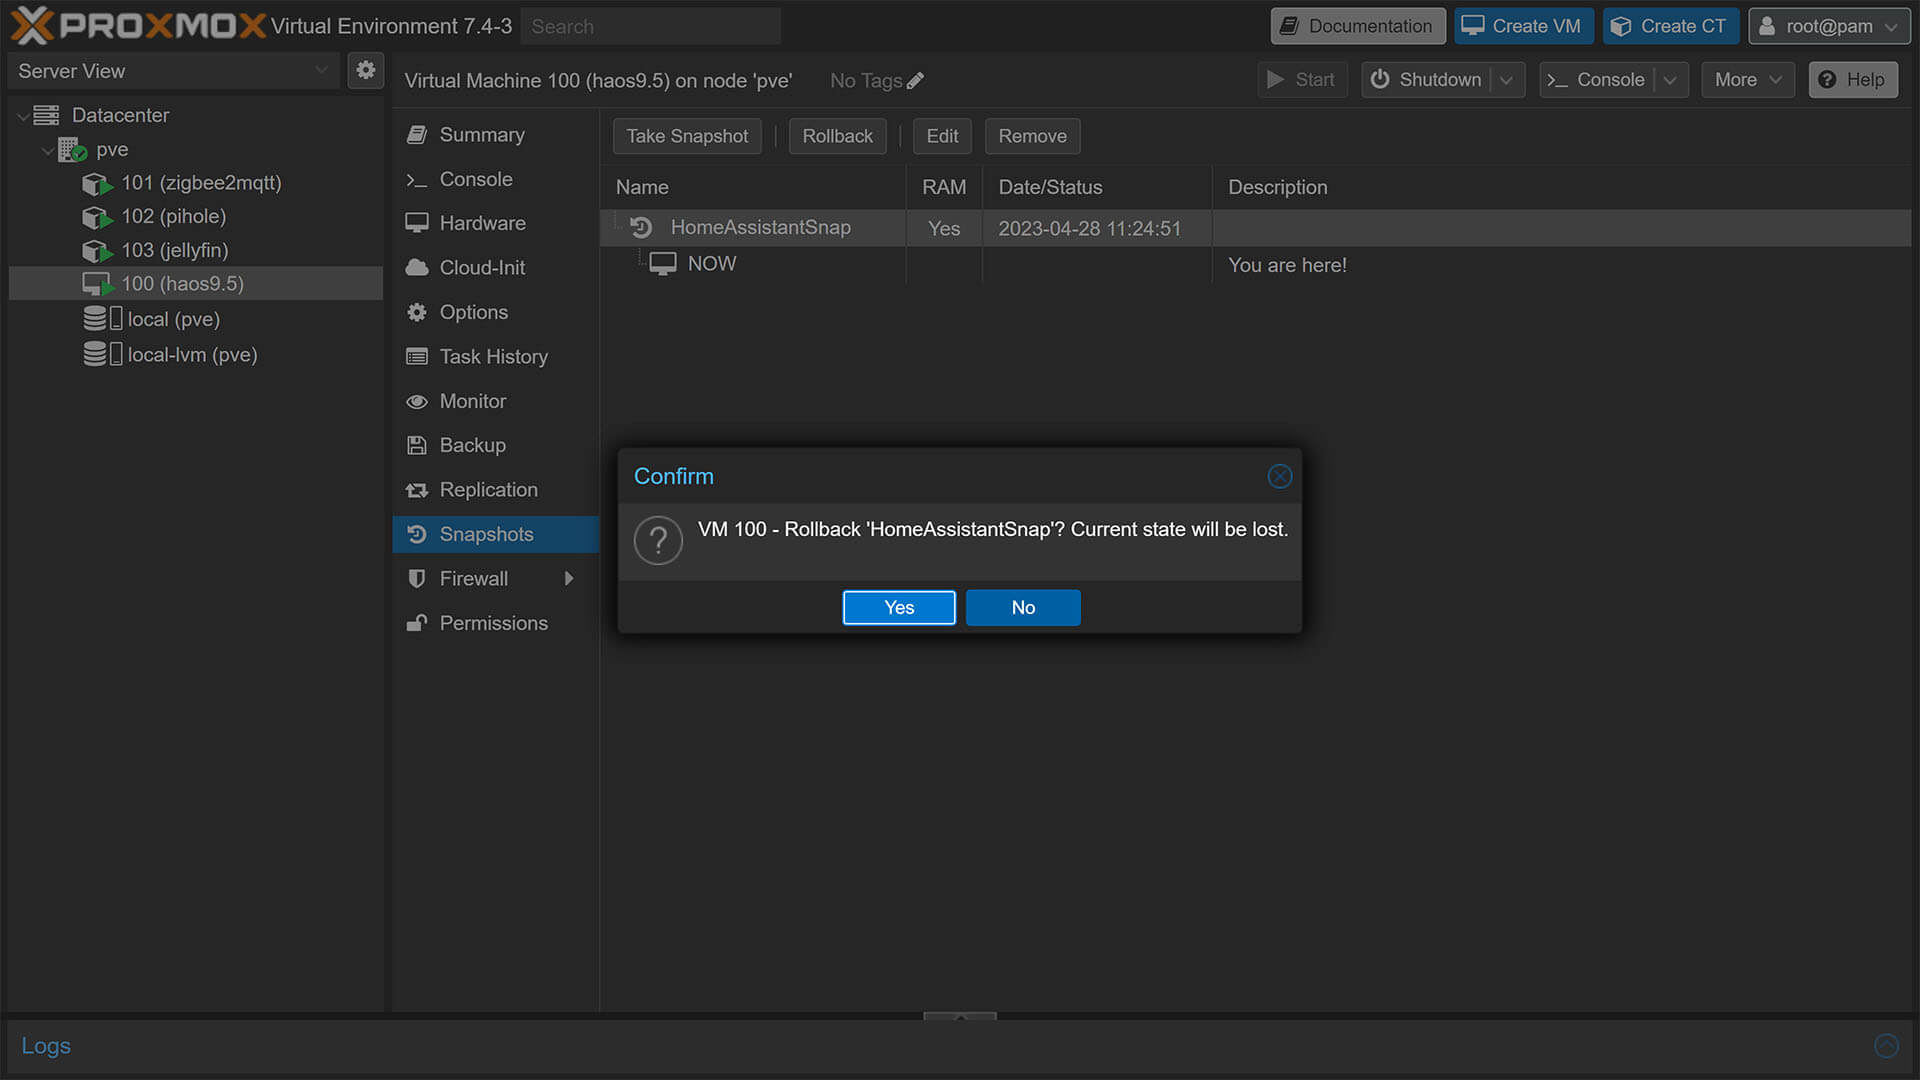
A small window will popup, displaying the process as running and once it completes it will print “Done“.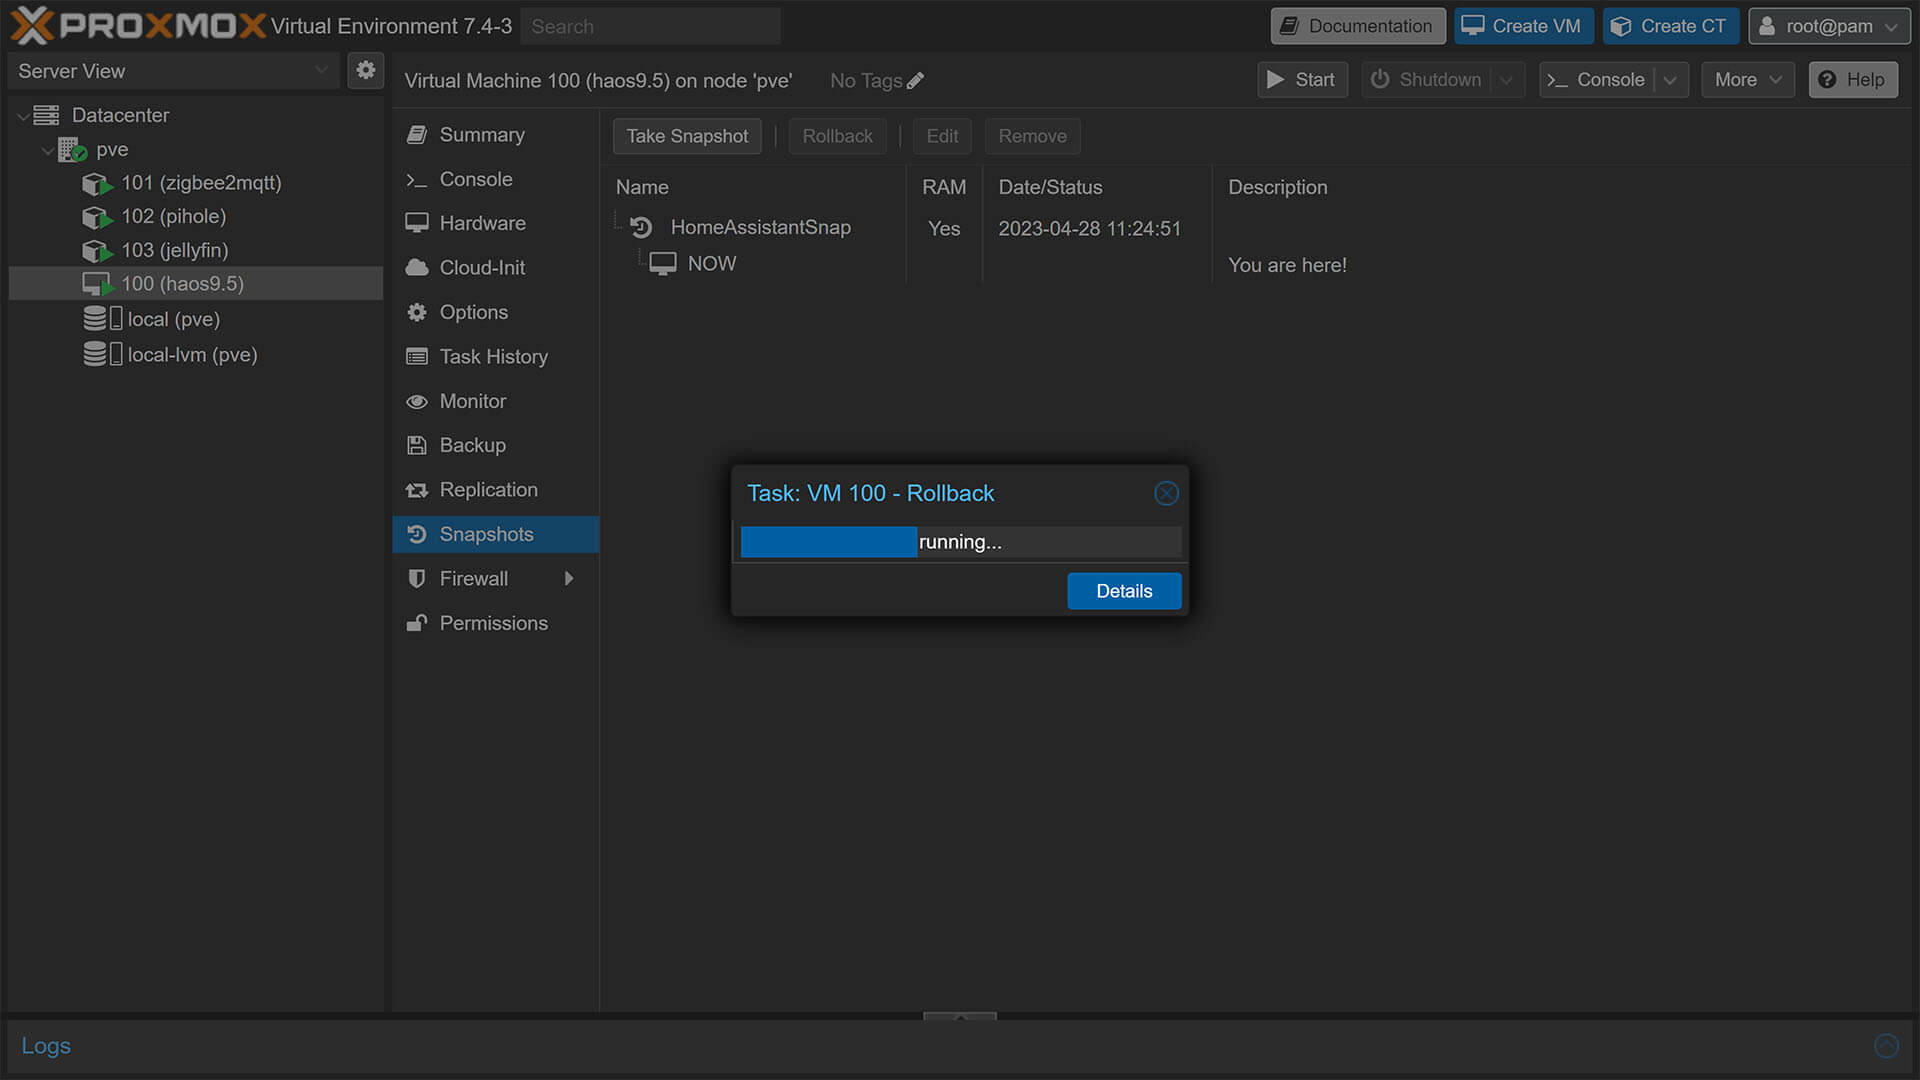
That’s it, you’ve successfully rollbacked to a point in time using Proxmox’s Snapshot feature.
Proxmox Backups
Even though you can create manual backups of each VM or container, I’m going to focus on fully automating the process by creating scheduled Backup Jobs. After creating the job, you can still manually create a backup by selecting the job from the list and clicking Run Now. The end result is the same, fully usable backup file that you can save anywhere.
Creating Proxmox Backups
To create a full Proxmox Backup of a node or VM, click the Datacenter item on the left of the UI and select Backup from the middle column. Click Add at the top: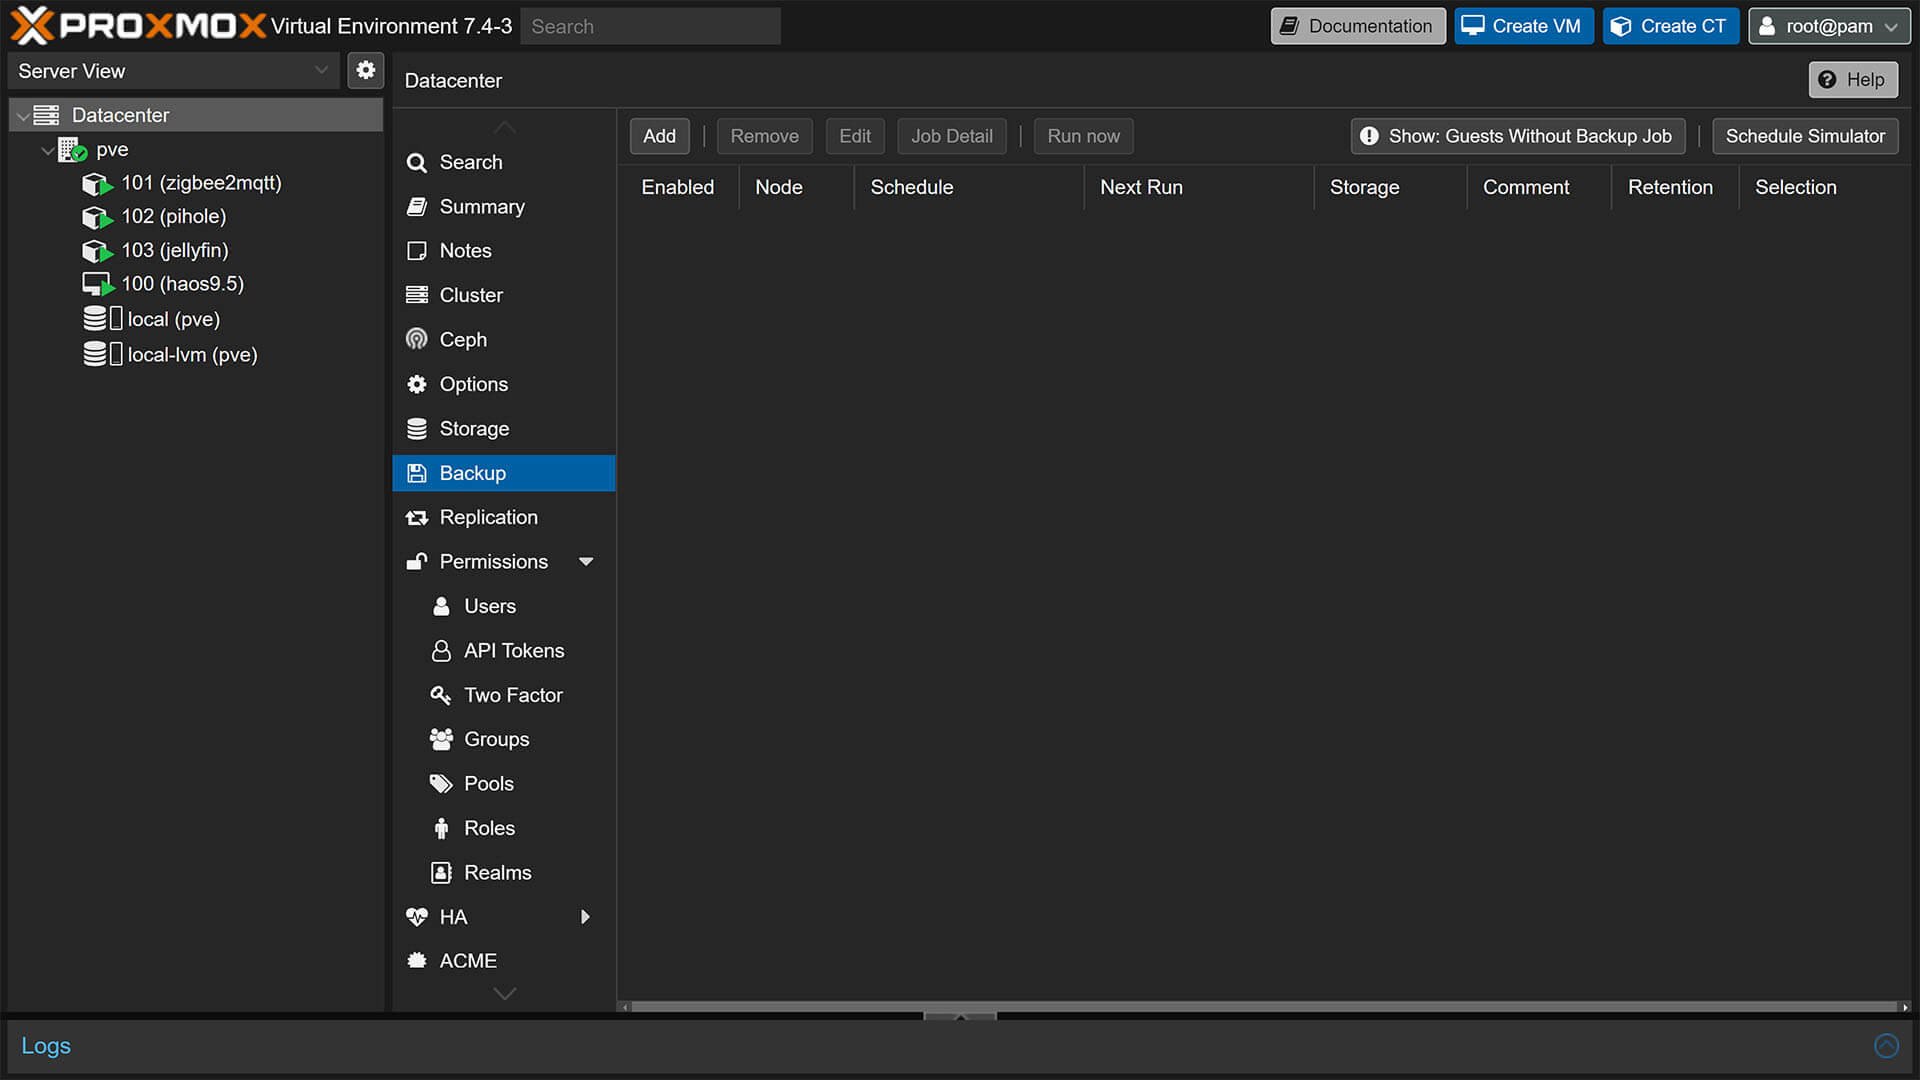
In the pop-up dialog window, you will be presented with a bunch of options to tweak and schedule the Backup Job: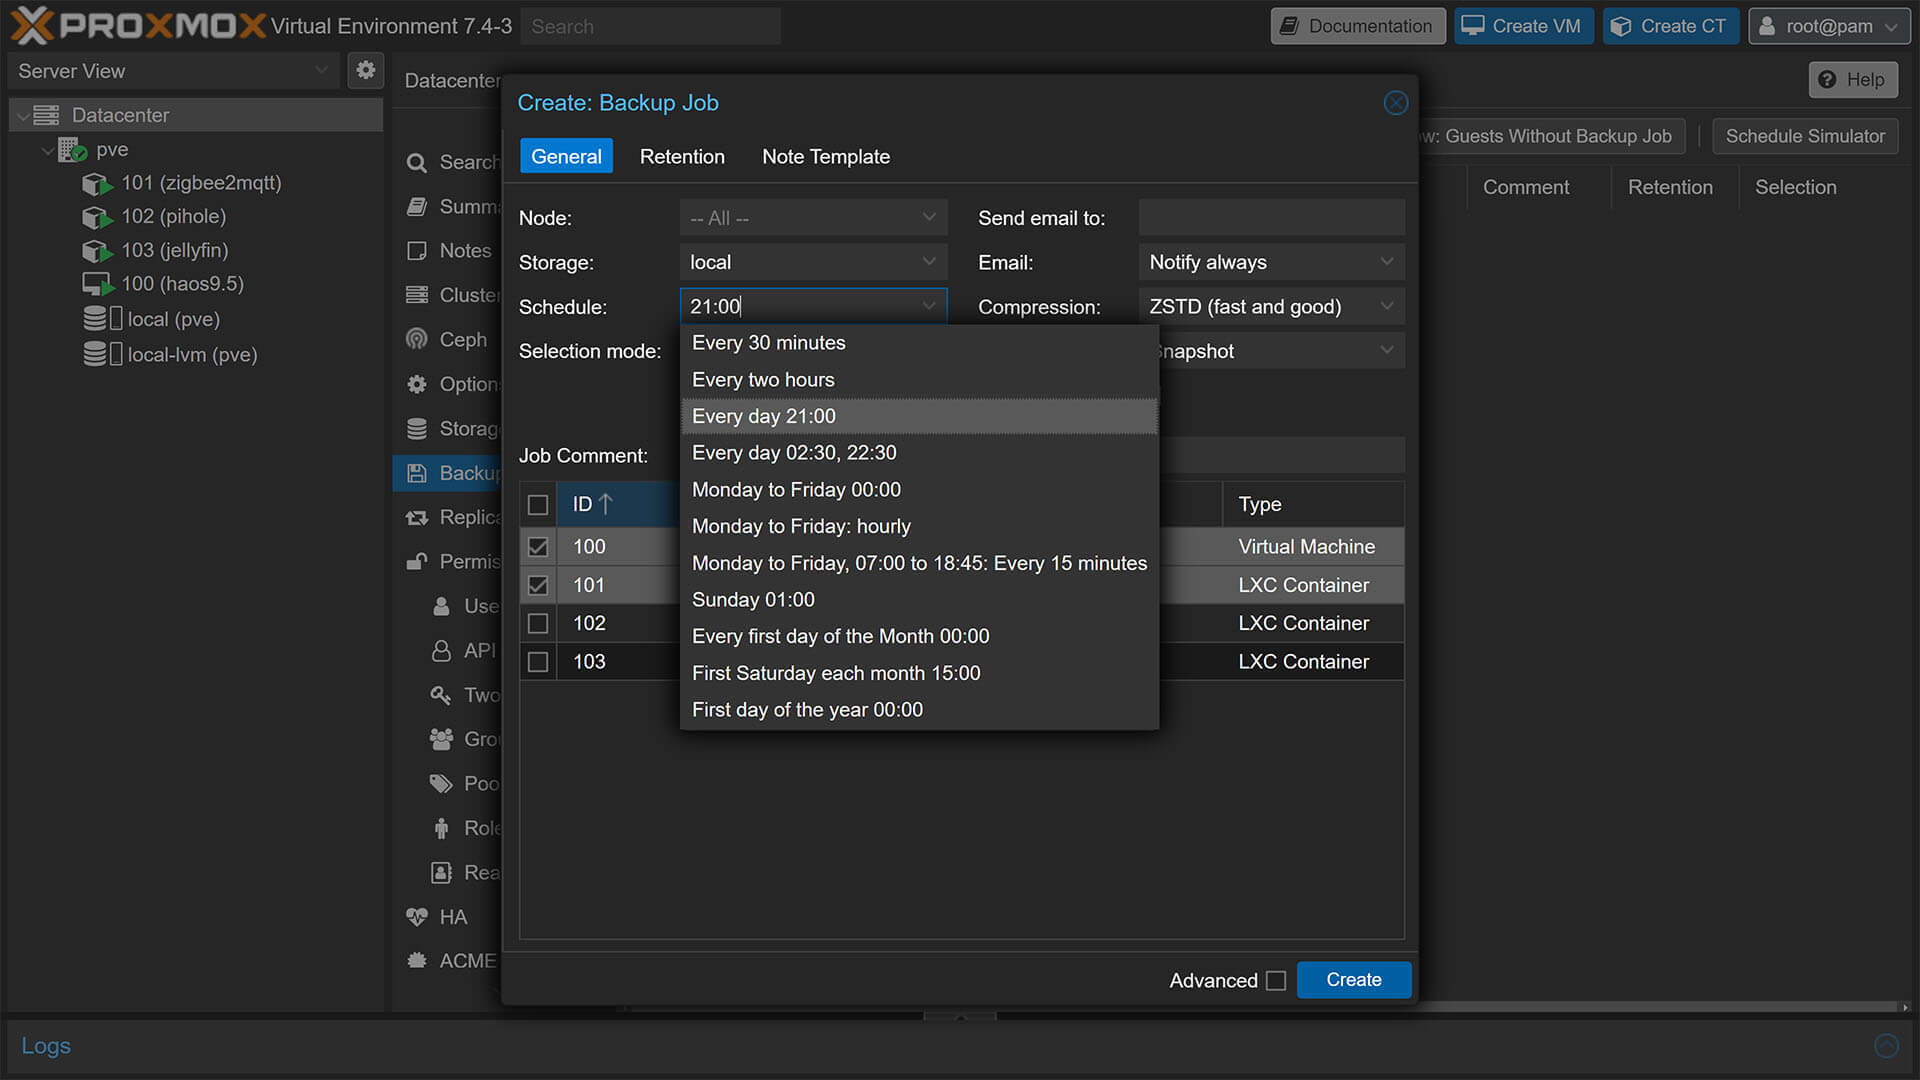
- Node: A list of your nodes, grayed out if you have only one
- Storage: Select backup location
- Local Disk (Proxmox Drive)
- Other Attached Media like NAS, USB or HDDs will be listed here
- Schedule: Set schedule
- Select from the predefined options or
- Create your own, for example for everyday backups at 03:00 AM simply enter 03:00 in the field
- Selection mode: Select what to backup
- All: Backup full list of VMs and Containers
- Exclude selected backups
- Include all selected backups
- Send email to: Notify about backup success or failure
- Email: Notify always or on failure only
- Compression: Choose compression method
- LZO (fast)
- GZIP (good)
- ZSTD (fast and good, default)
- Mode:
- Snapshot: Take a live backup while VM is running (possible file-system errors, very uncommon)
- Suspend: Suspend the VM for the duration of the backup (safe)
- Stop: Completely stop the VM for the duration of the backup (safest)
For Home Assistant, a daily backup is sufficient using the default ZSTD compression method. If you are not bothered by HA downtime while backing up, use the Suspend or Stop modes just to be safe. Otherwise, Snapshot mode works fine for me too. Select the container you would like to include in the backup and click the Retention tab. Here you can set the number of backups Proxmox should keep:
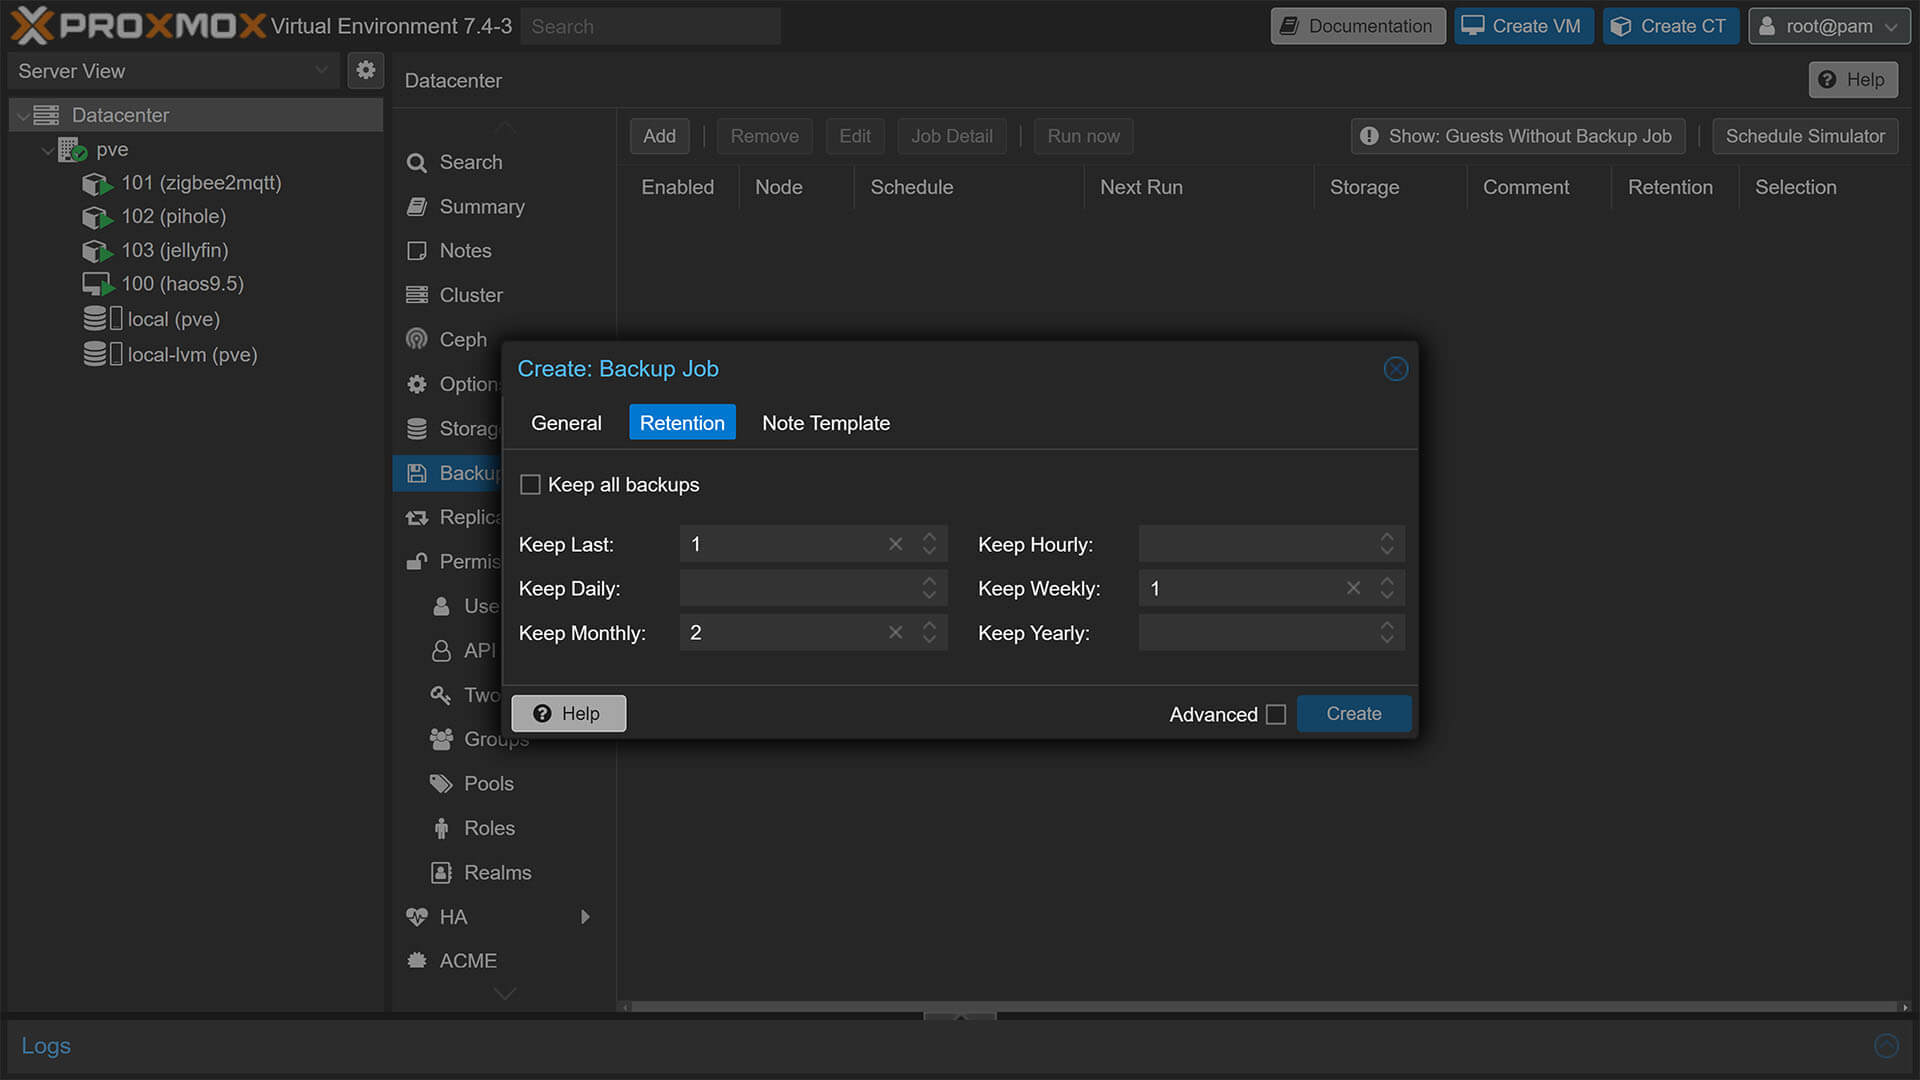
For example, I would like to keep 1 daily and weekly backup and 2 monthly backups. Newly created backups will be overwritten according to these settings. In the Note template field, you can add dynamic notes for the scheduled job, such as {{guestname}} or {{node}}.
Once you are done, click Create which will add the Backup job to the list. You can add different jobs with different parameters, each scheduled to run according to your settings.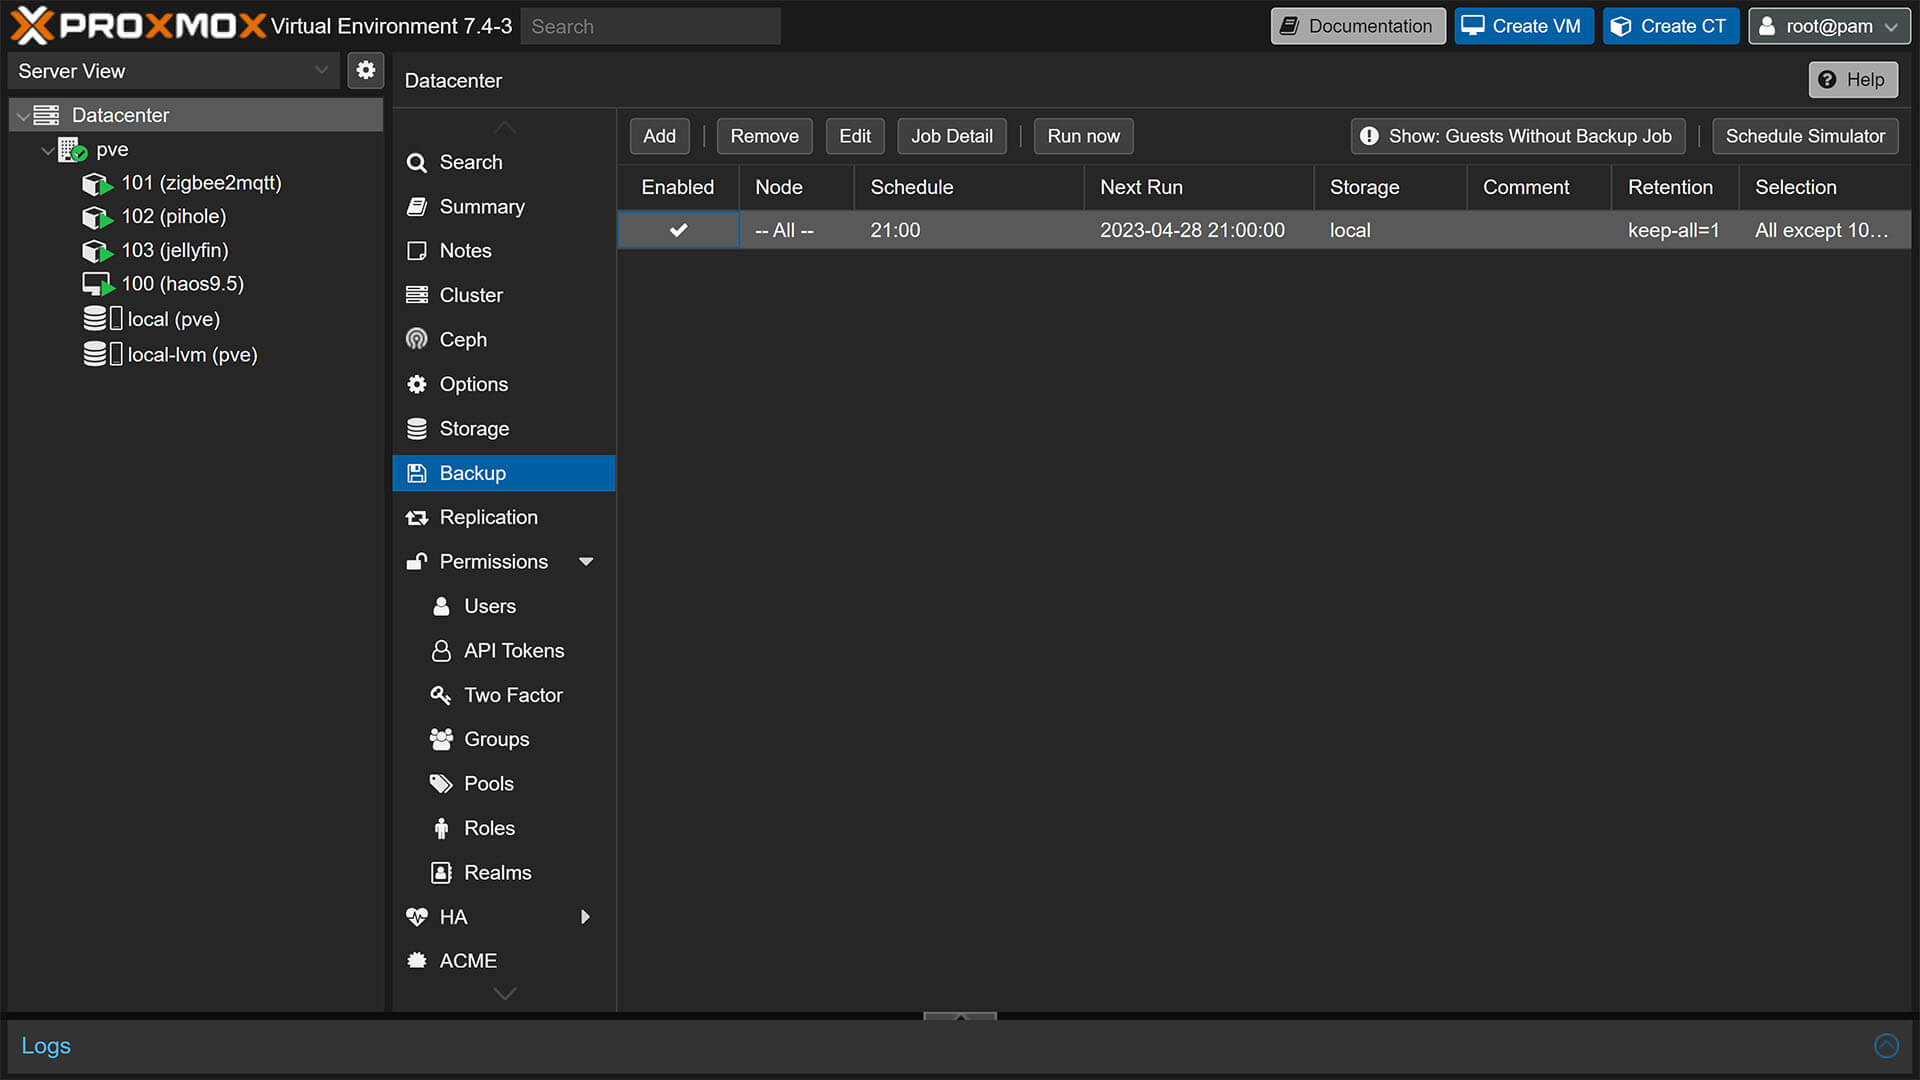
Backup File Location
The Backup job showcased above, saves the Backups on the same disk Proxmox is running from which is local by default. You can view any backups you’ve created by clicking the local (pve) storage icon from the left menu and selecting Backups in the mid column: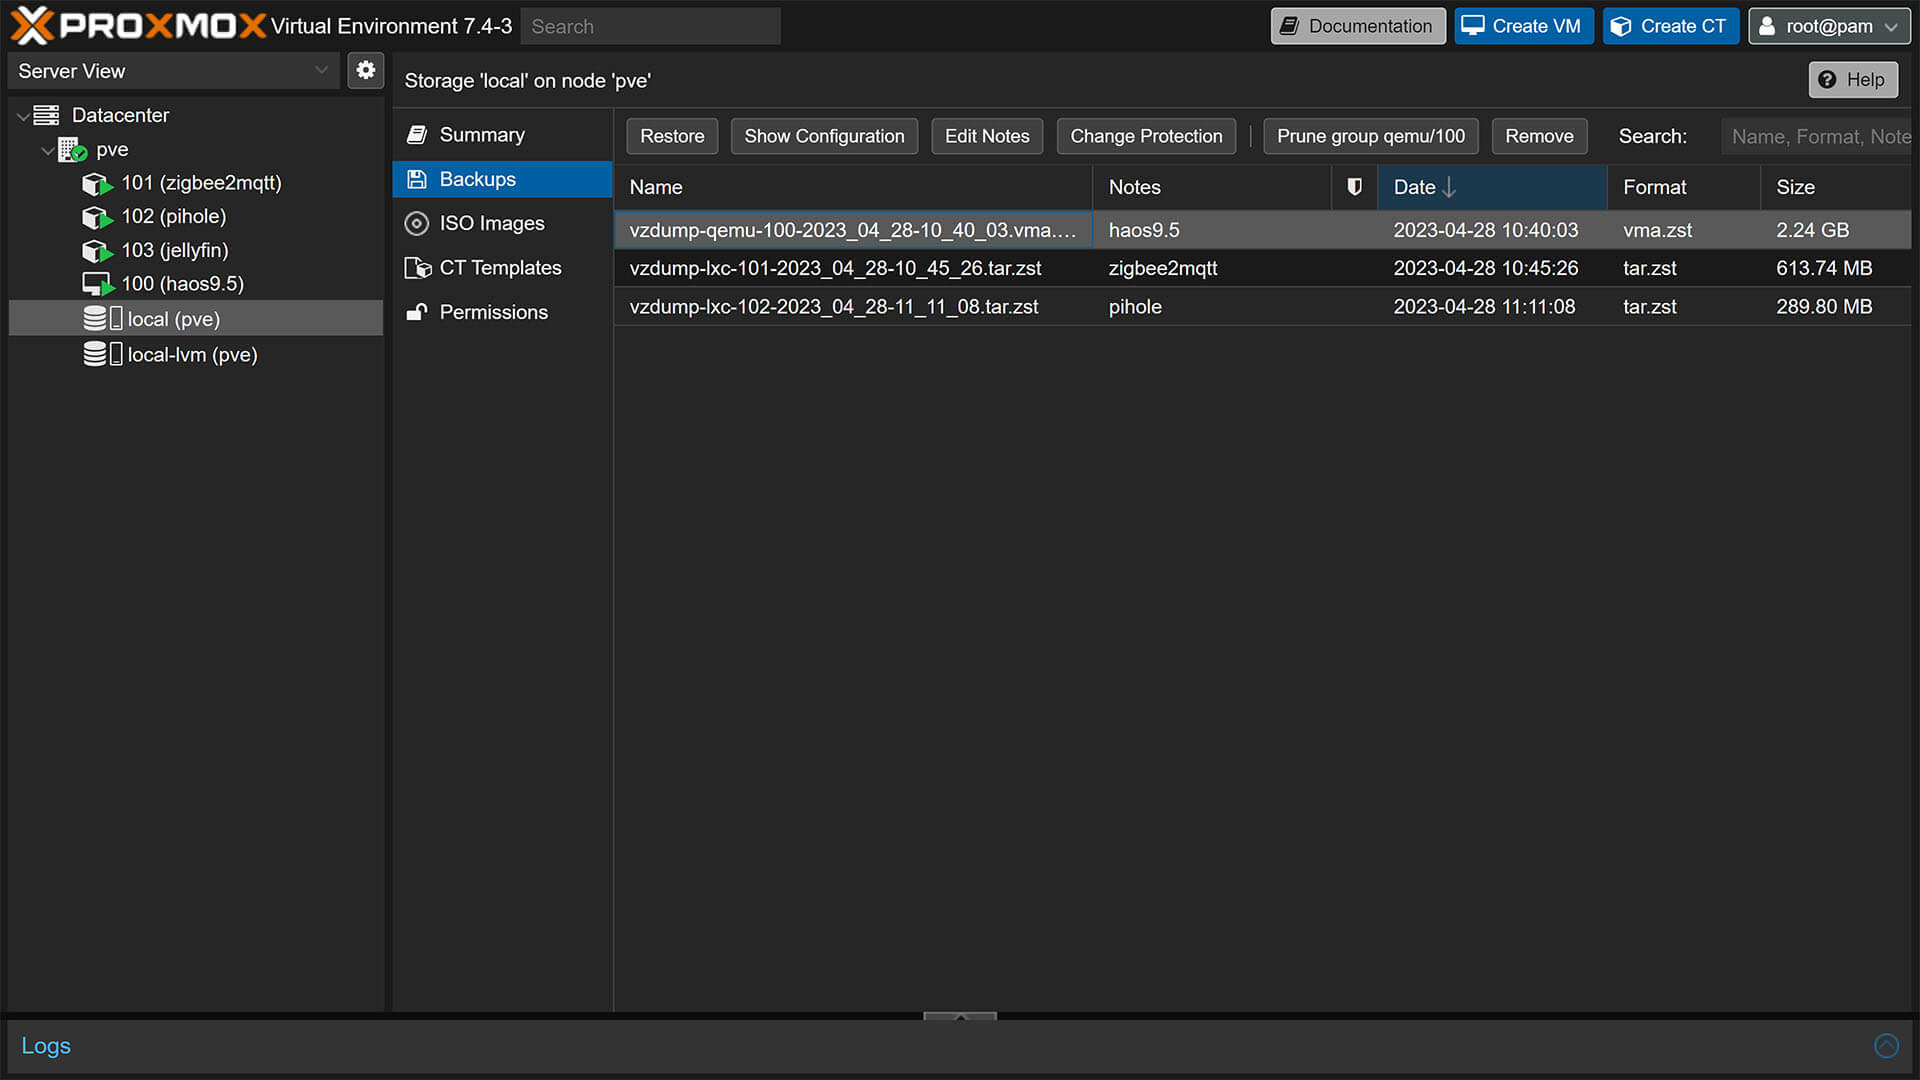
If you want to keep a Backup from being overwritten, select it and click Change Protection at the top, this will keep the file intact until you unlock it again. But what if you want to save the backups to an network drive or an USB Drive attached to the Proxmox Server? Some pre-configuration is needed before these can be used.
Save Backup File to USB Drive
To save backup files to an USB attached flash drive or a HDD, we need to add the attached disk as a storage option in Proxmox. For reference, I am using a 32GB USB thumb drive formatted as exFat. Plug in the USB drive to your Proxmox Server:
First, we need to figure out the what the drive is actually identified as. In the Proxmox Shell, execute the following command:
#List attached disks

fdisk -l
This will give you a list of attached disks to your Proxmox server. Identify your flash drive, in my case /dev/sdc labelled Flash Drive with actual usable storage of 29.3GiB.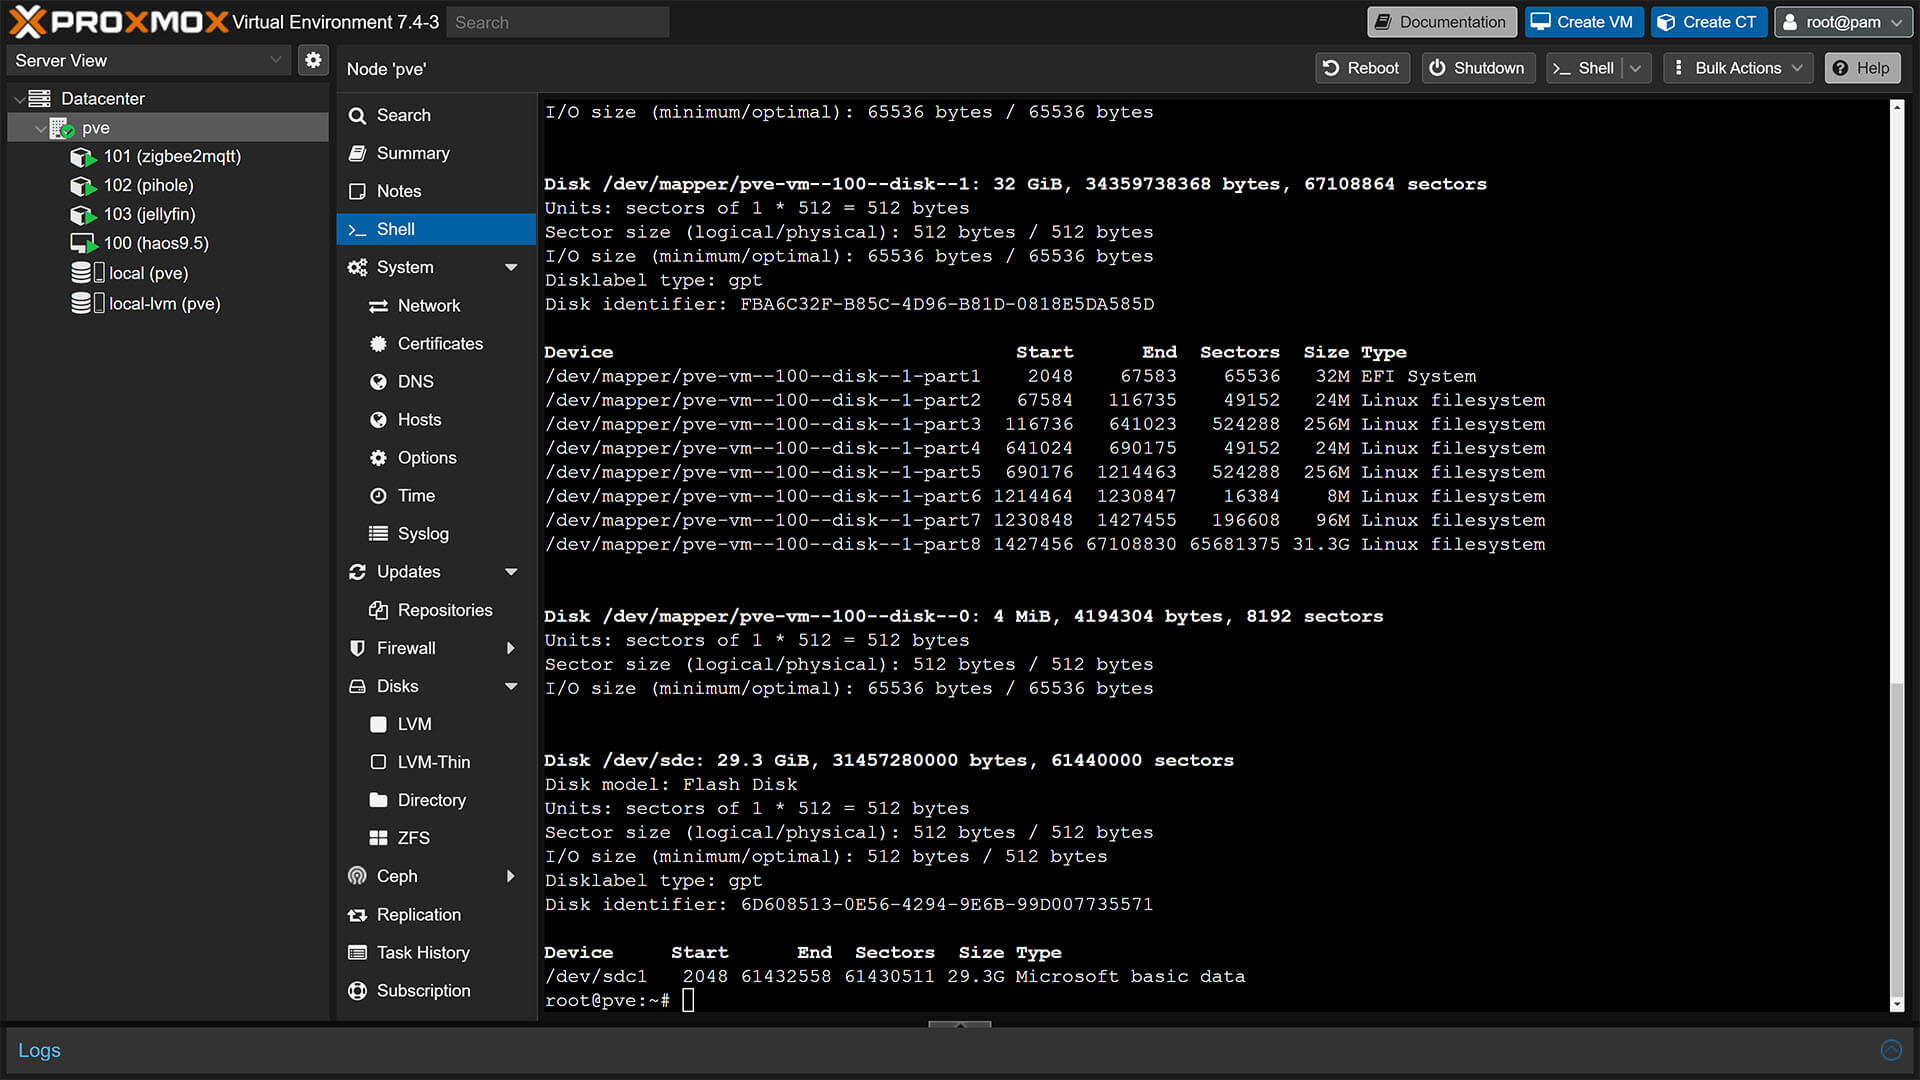
Next, set the file system of the drive by executing the following command:
#Set filesystem before mounting

mkfs.ext4 /dev/sdc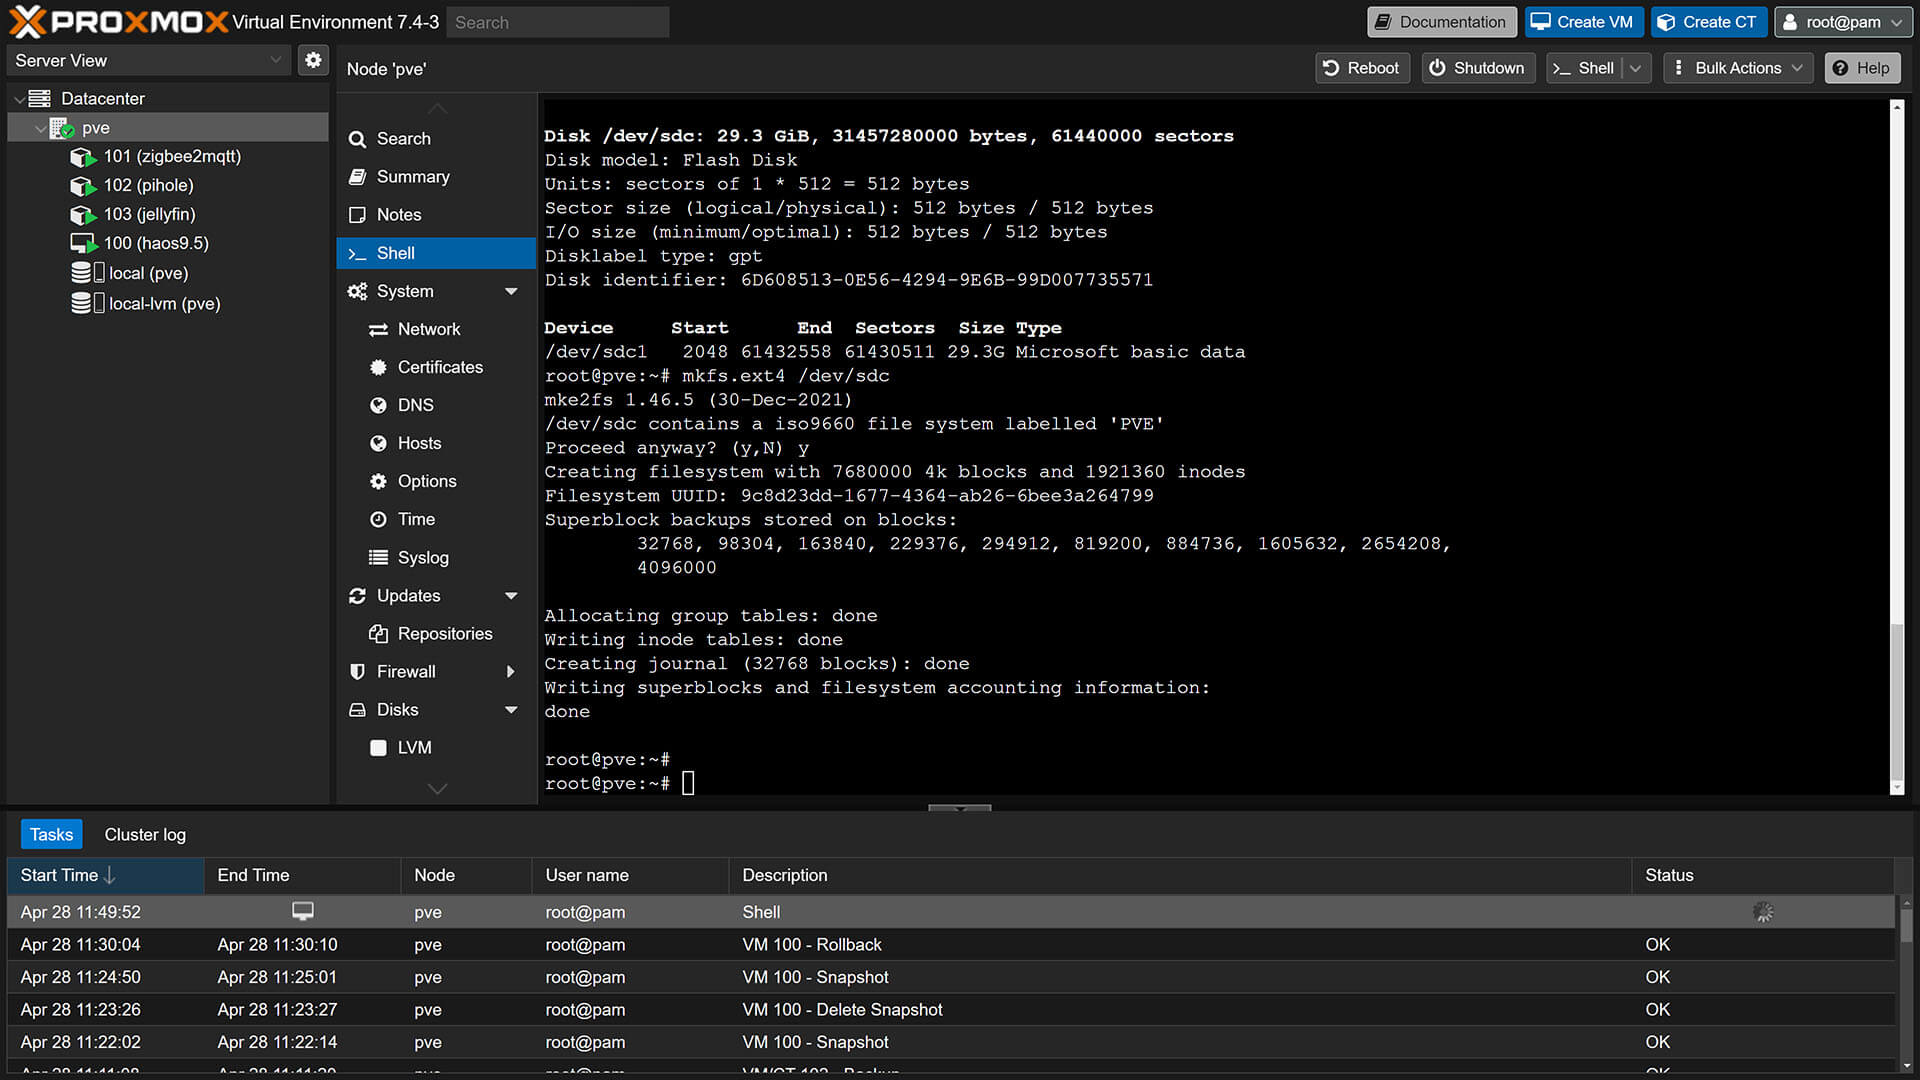
Once the process is complete, Proxmox will print a “Done” message and bring you back to root@node command. Next, we need to create a folder for mounting and actually mount the drive to this folder.
#Create the directory, change name and location if you want

mkdir /mnt/backups
#Mount the drive to the created directory, change to your drive label and folder
mount /dev/sdc /mnt/backups #Change to your drive and folder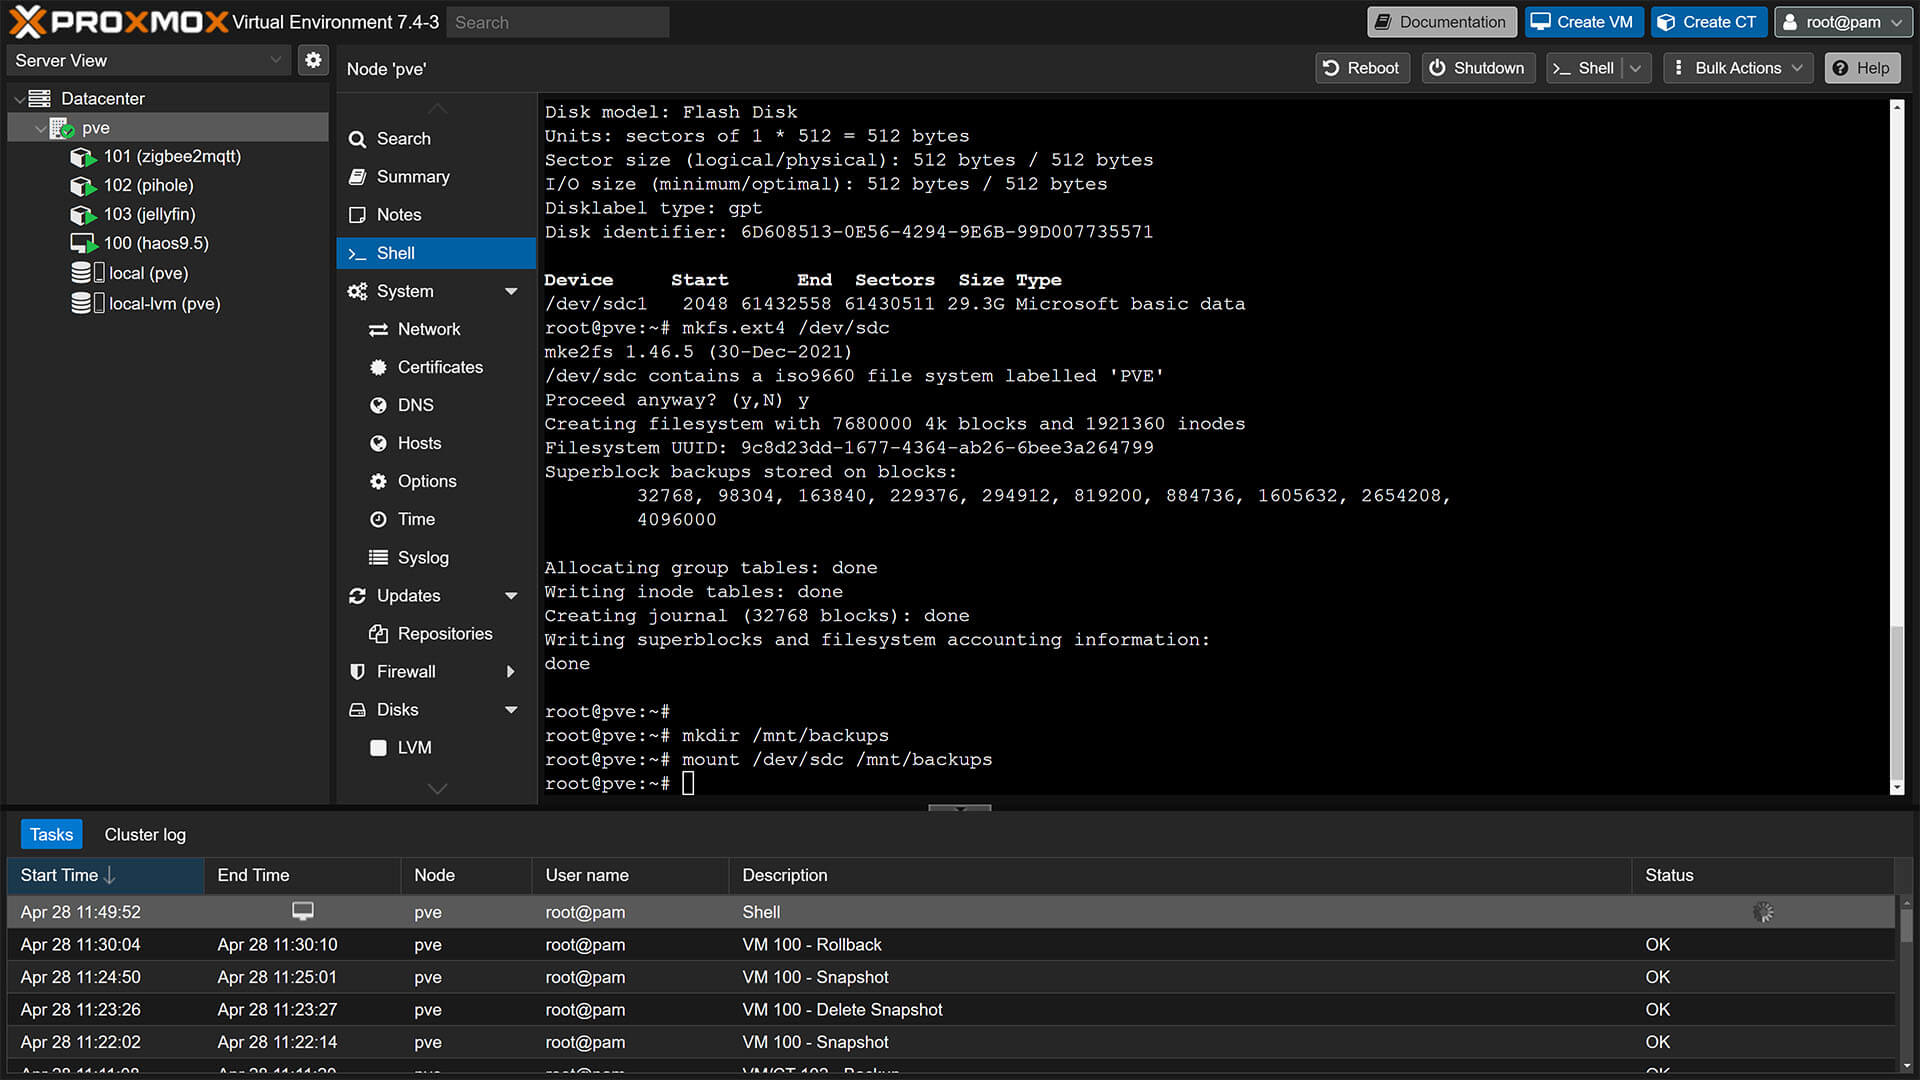
Finally, we can add the attached disk as a storage option in the Proxmox UI. Click Datacenter on the left and select Storage. Click Add > Directory: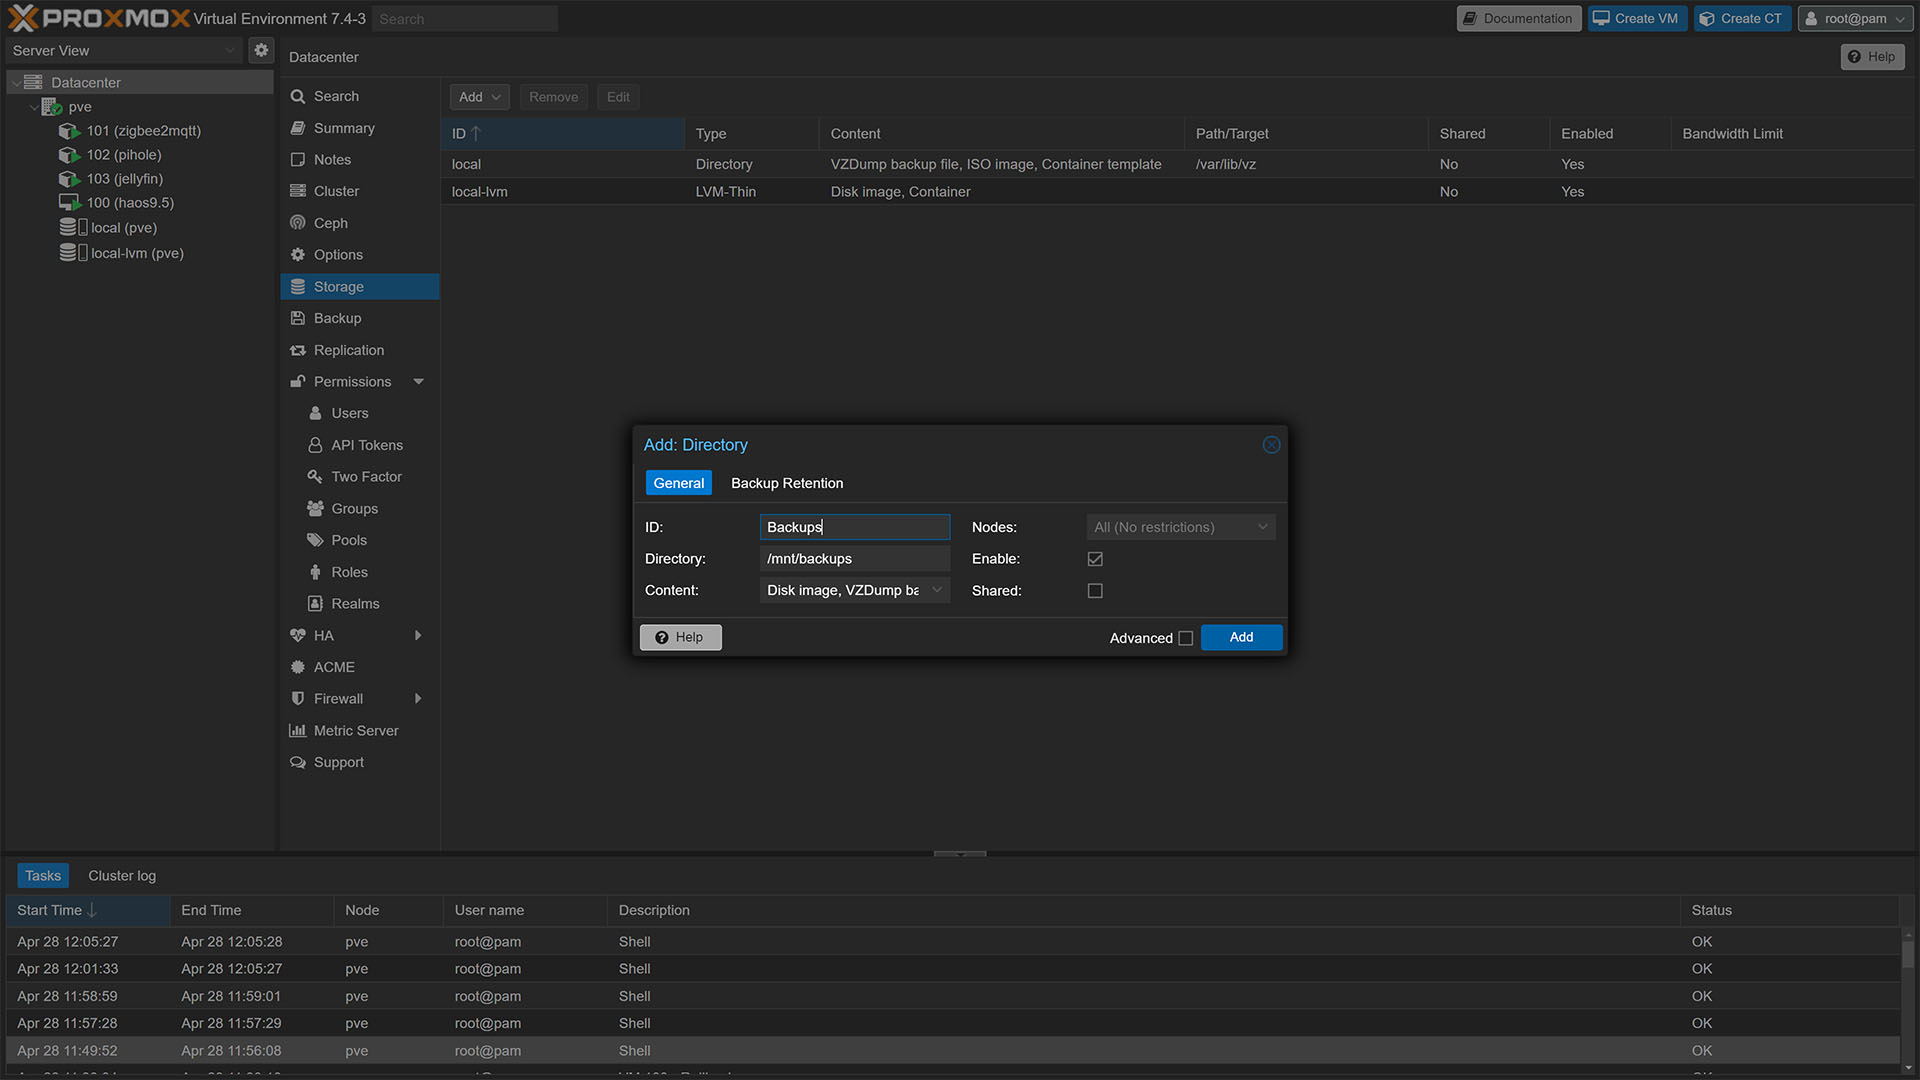
Give an ID to your storage and input the directory that you used to mount the drive, in my case /mnt/backups. Under the content menu, select the VZDump backup file option. That’s it, the drive will appear in the Storage list and you can now use it to create Backups directly to this USB drive. If you go to the Backup menu now, you will see the attached disk in the list: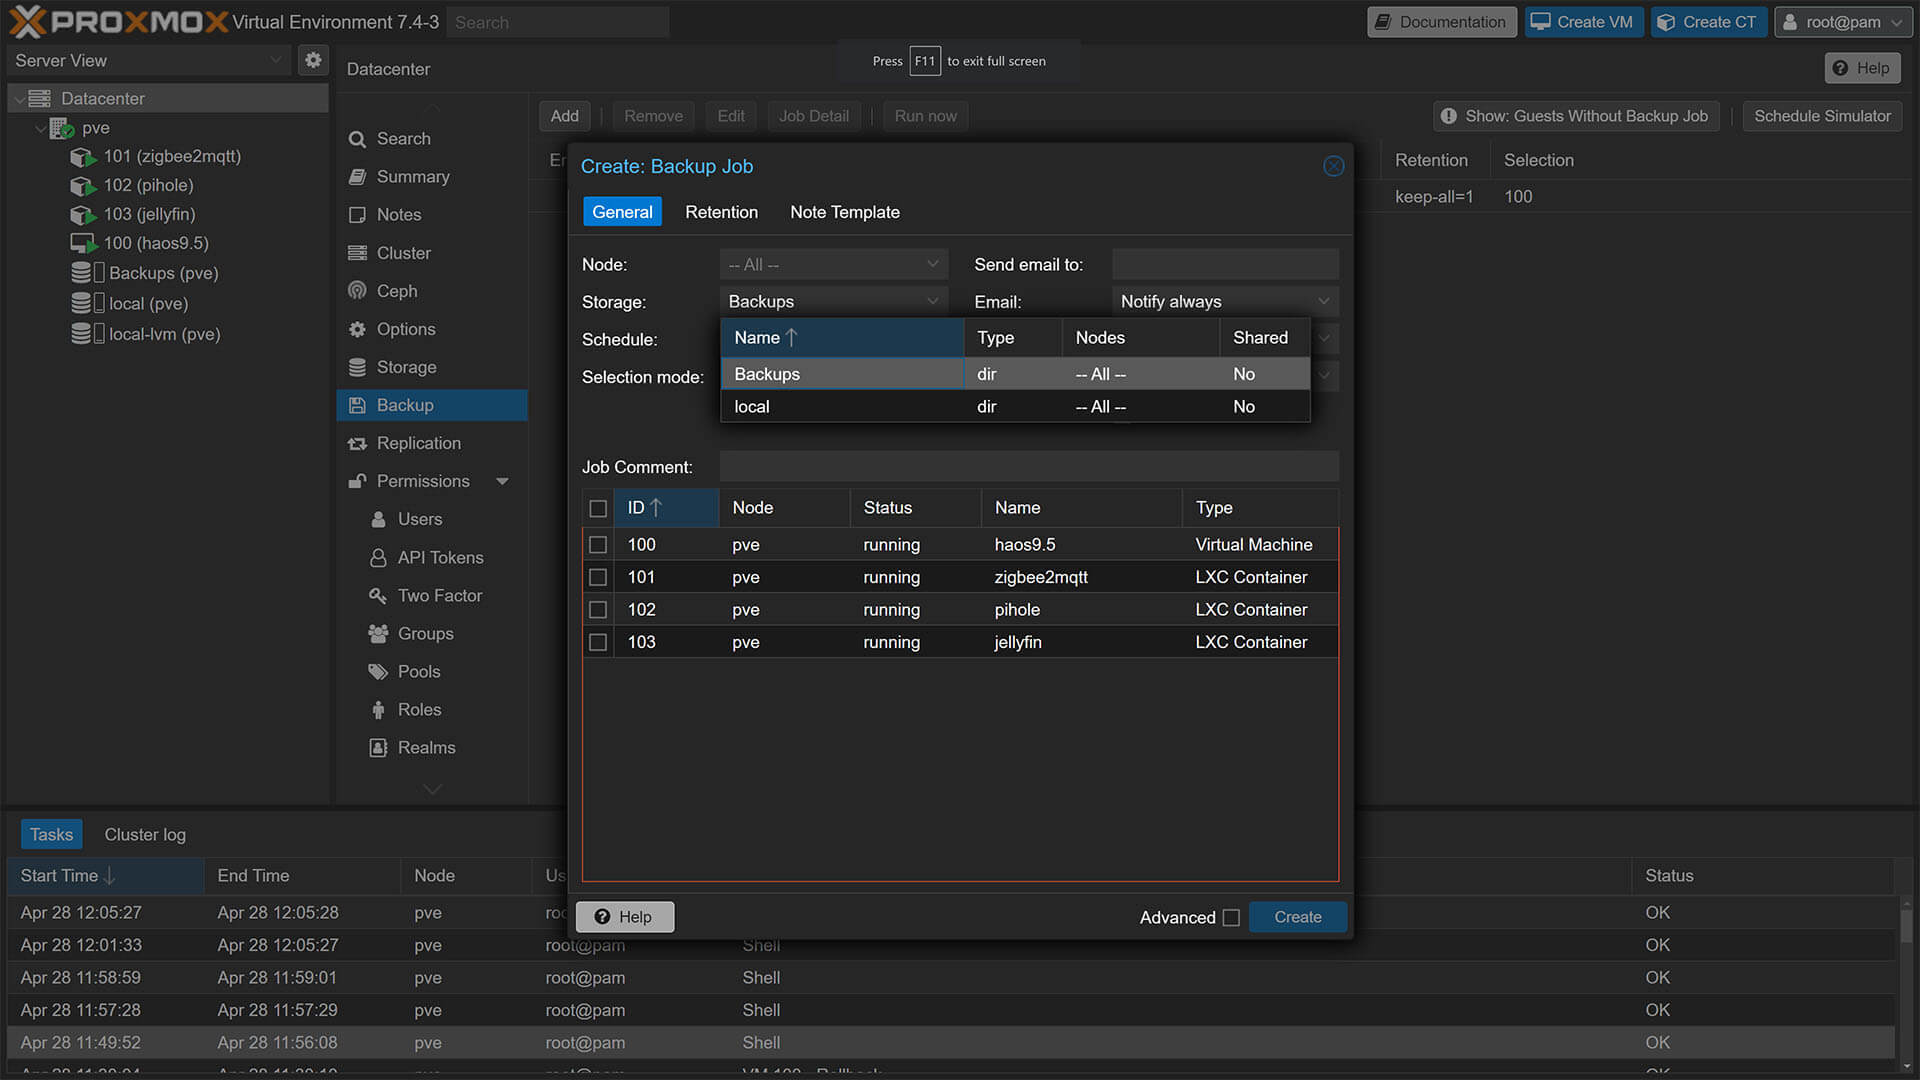
Save Backup File to Network Drive
Adding a network drive is similar to attaching an USB drive in Proxmox. Assuming you already have a disk available on your local network (e.g. NAS, Samba Shared Drive or a Windows Shared Drive) navigate to Datacenter > Storage and click Add at the top. Instead of a Directory, select SMB/CIFS: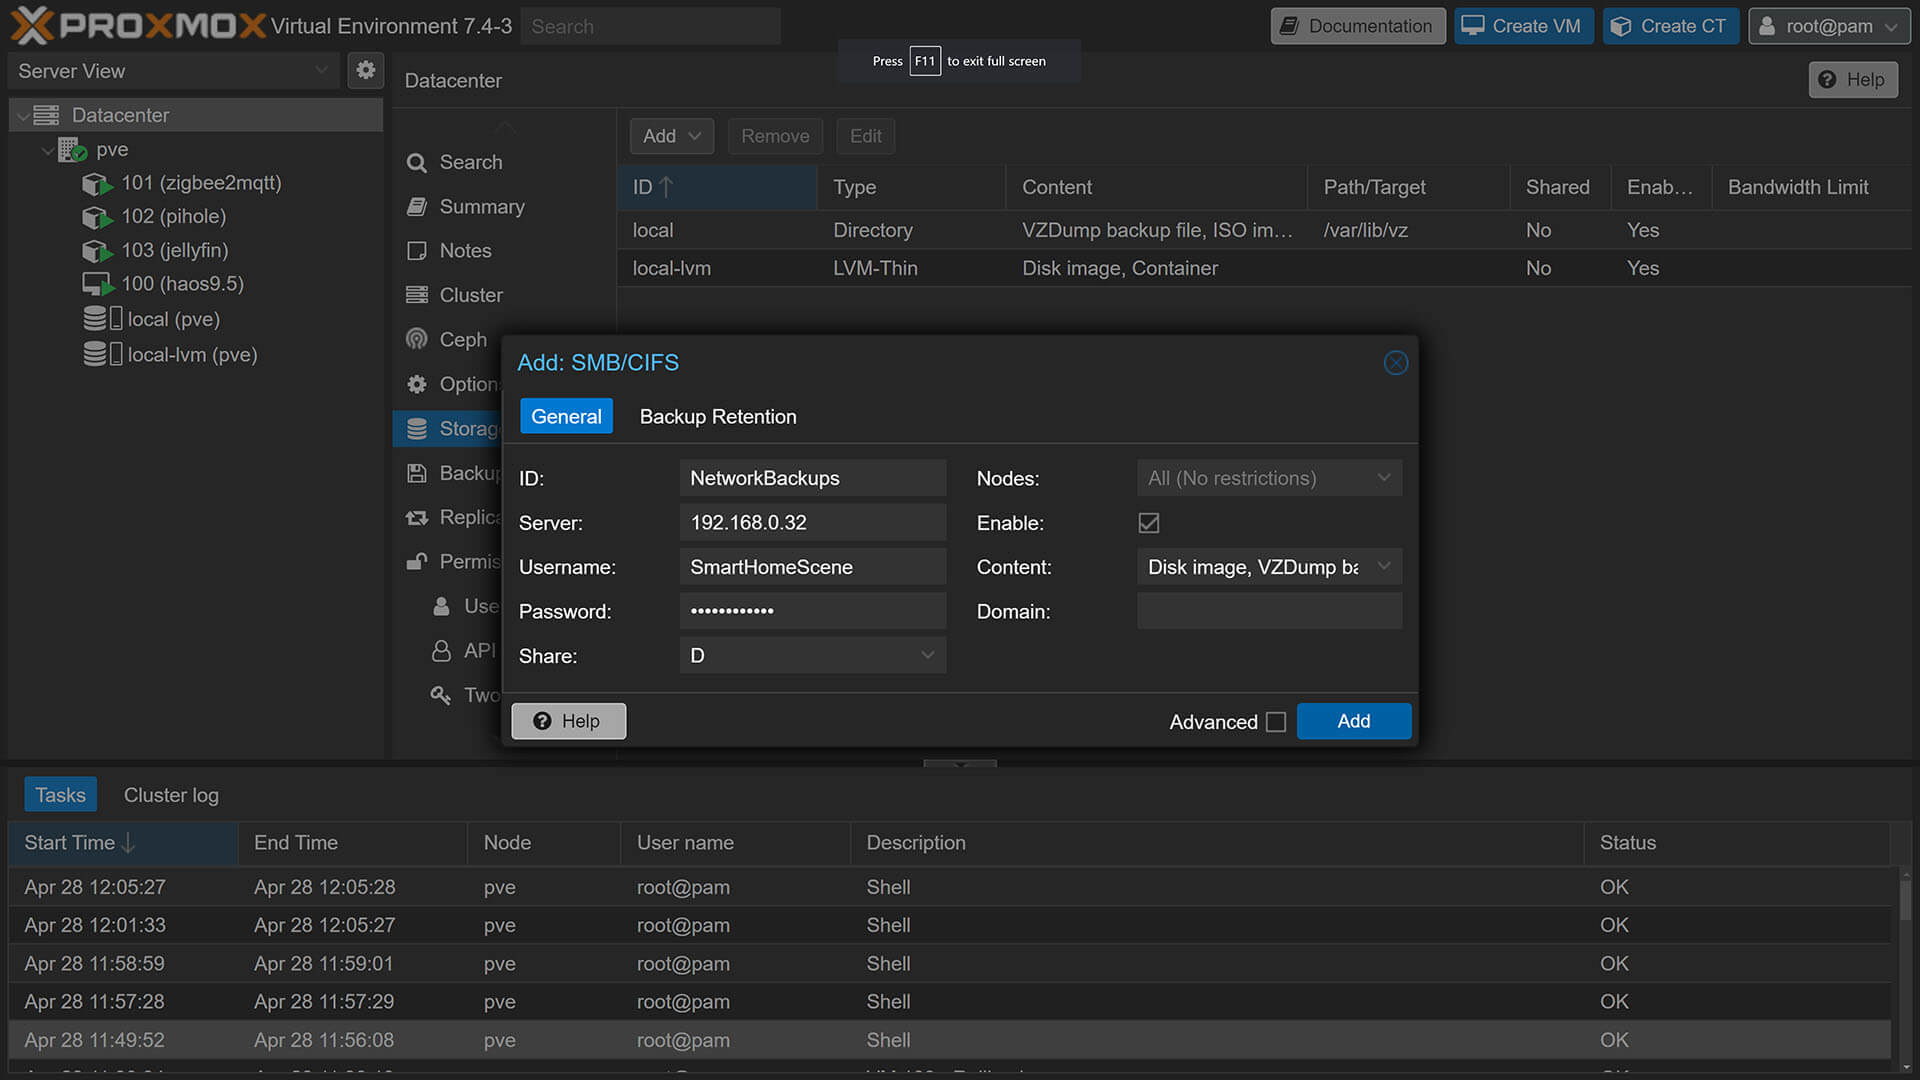
Give the drive an ID, and a server IP address on which the disk is accessible. Input your login credentials and select the drive letter or folder. Finally, select the VZDump backup file option from the Content menu, to make Proxmox treat the drive as a backup option. Click Add and the drive should be added to the Storage list.
When you go into the Backup menu and click to create a new backup job, your new network drive will be available as an option in the list: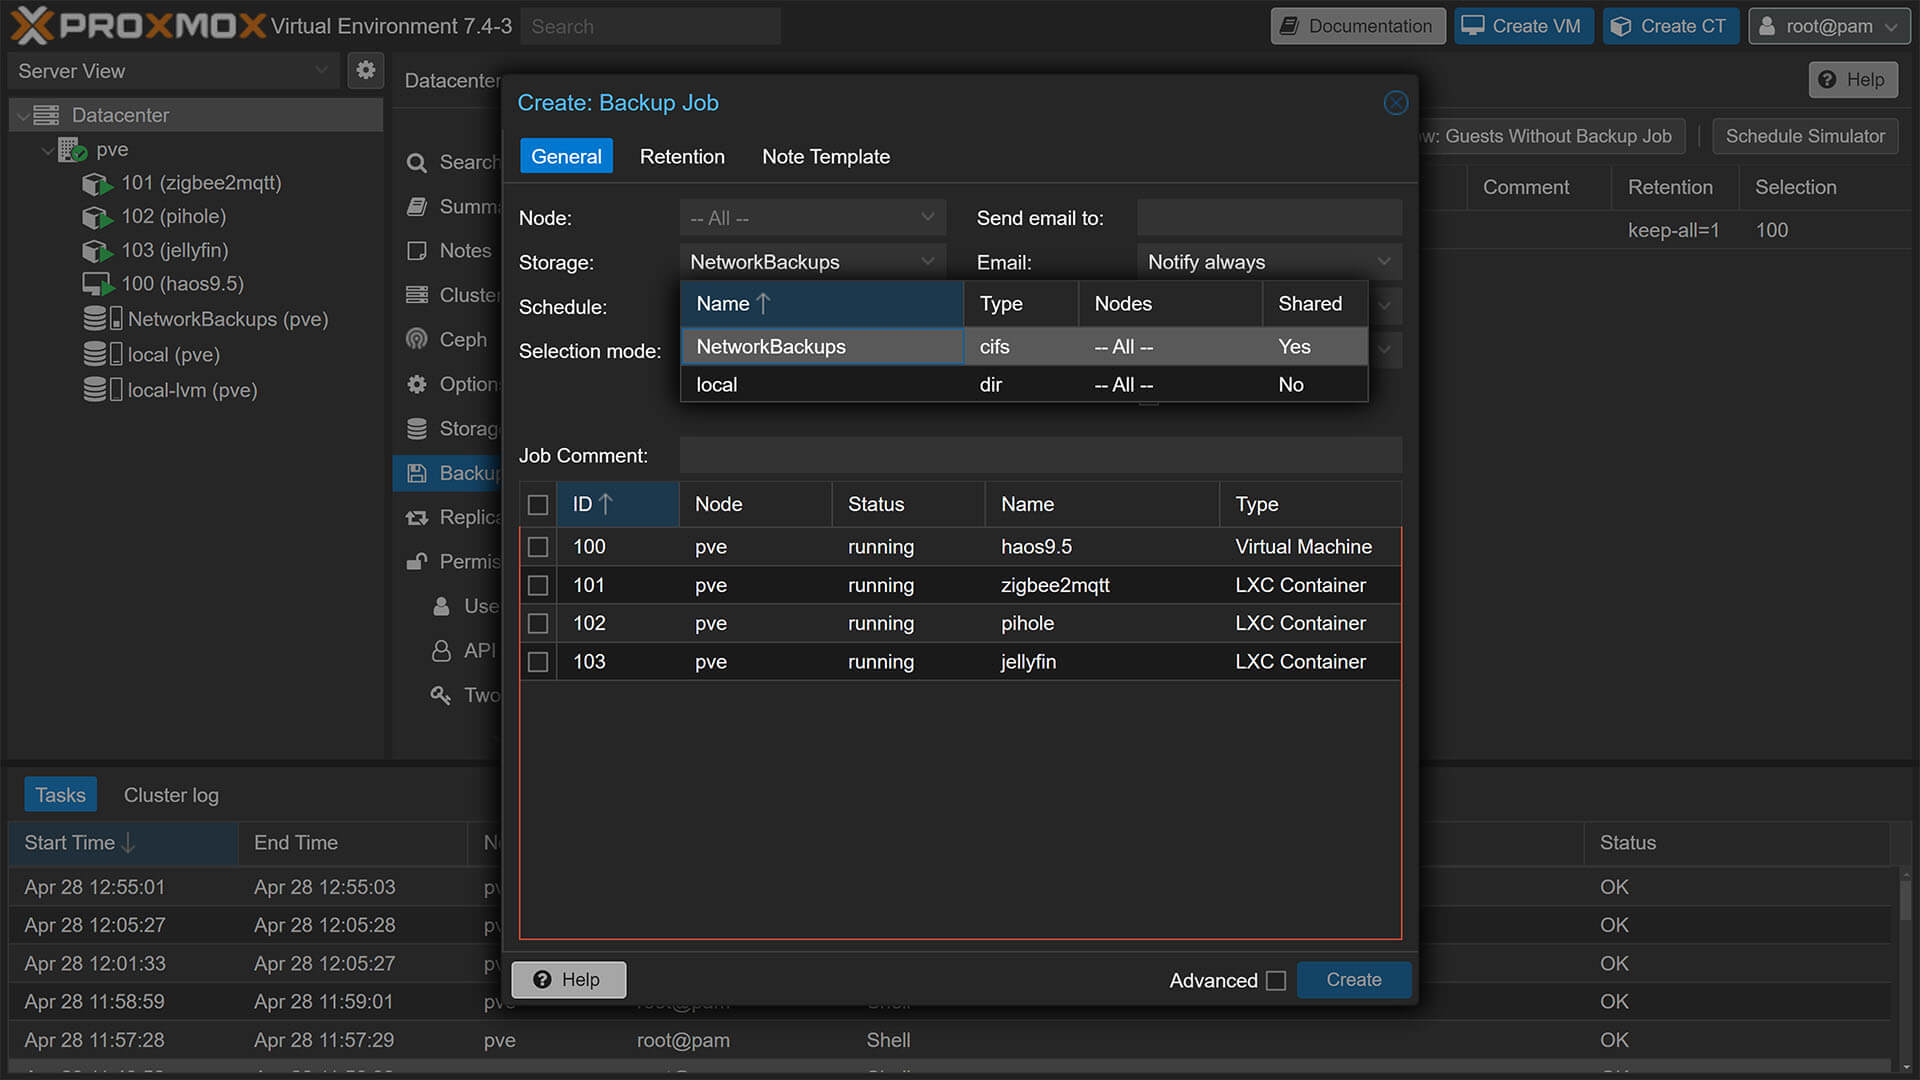
Restoring from a Backup
To actually restore from a created backup, you would have two possible scenarios:
- Restore over an existing VM (same node)
- Restore on a new a Proxmox VE (new node)
In the first scenario, you need to shutdown the VM or Container before performing a restore, as Proxmox will not let you overwrite a running VM. Select the container on the left and click the Shutdown button in the top corner. From the Backup menu in the mid column, choose your backup and click Restore: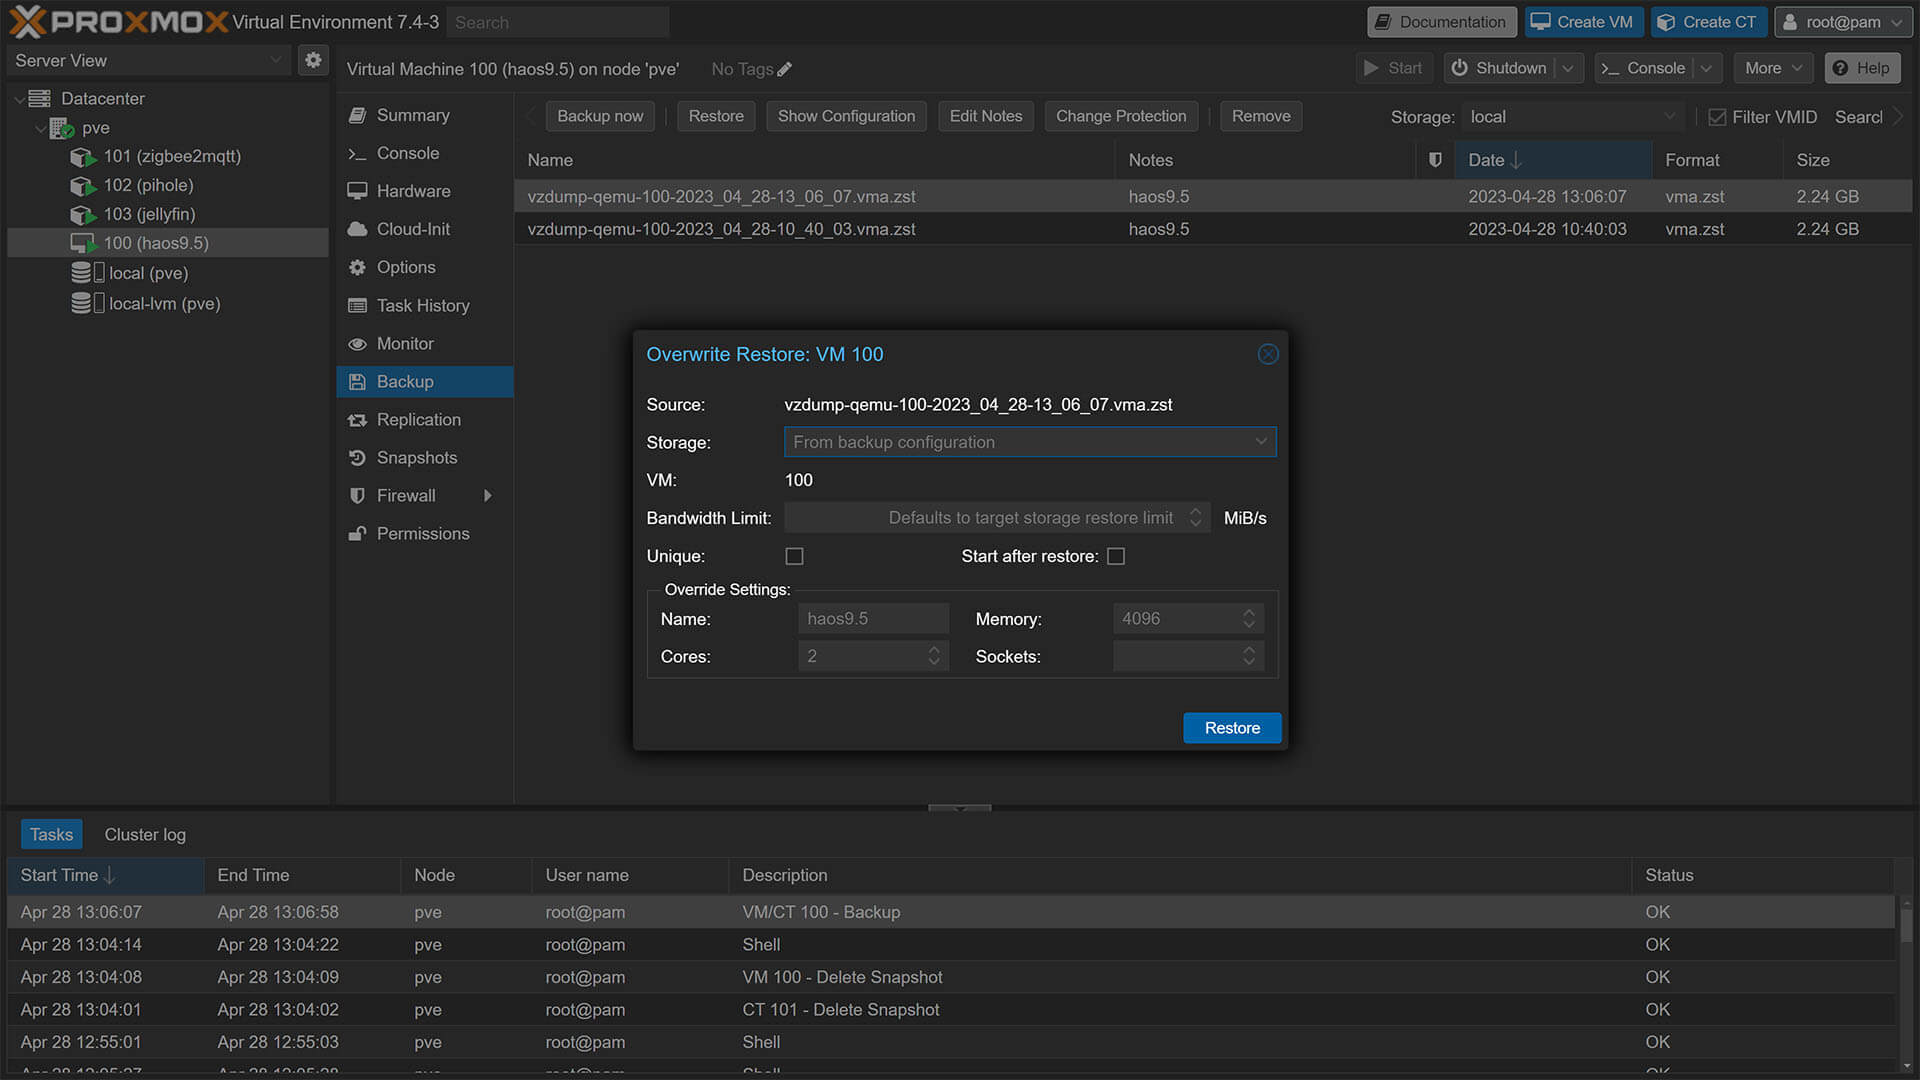
You can optionally select to start the VM after restore, leave everything else as is. Notice the VM ID cannot be changed, because you are overwriting an existing VM. Click Restore and a popup window sill appear logging the process:
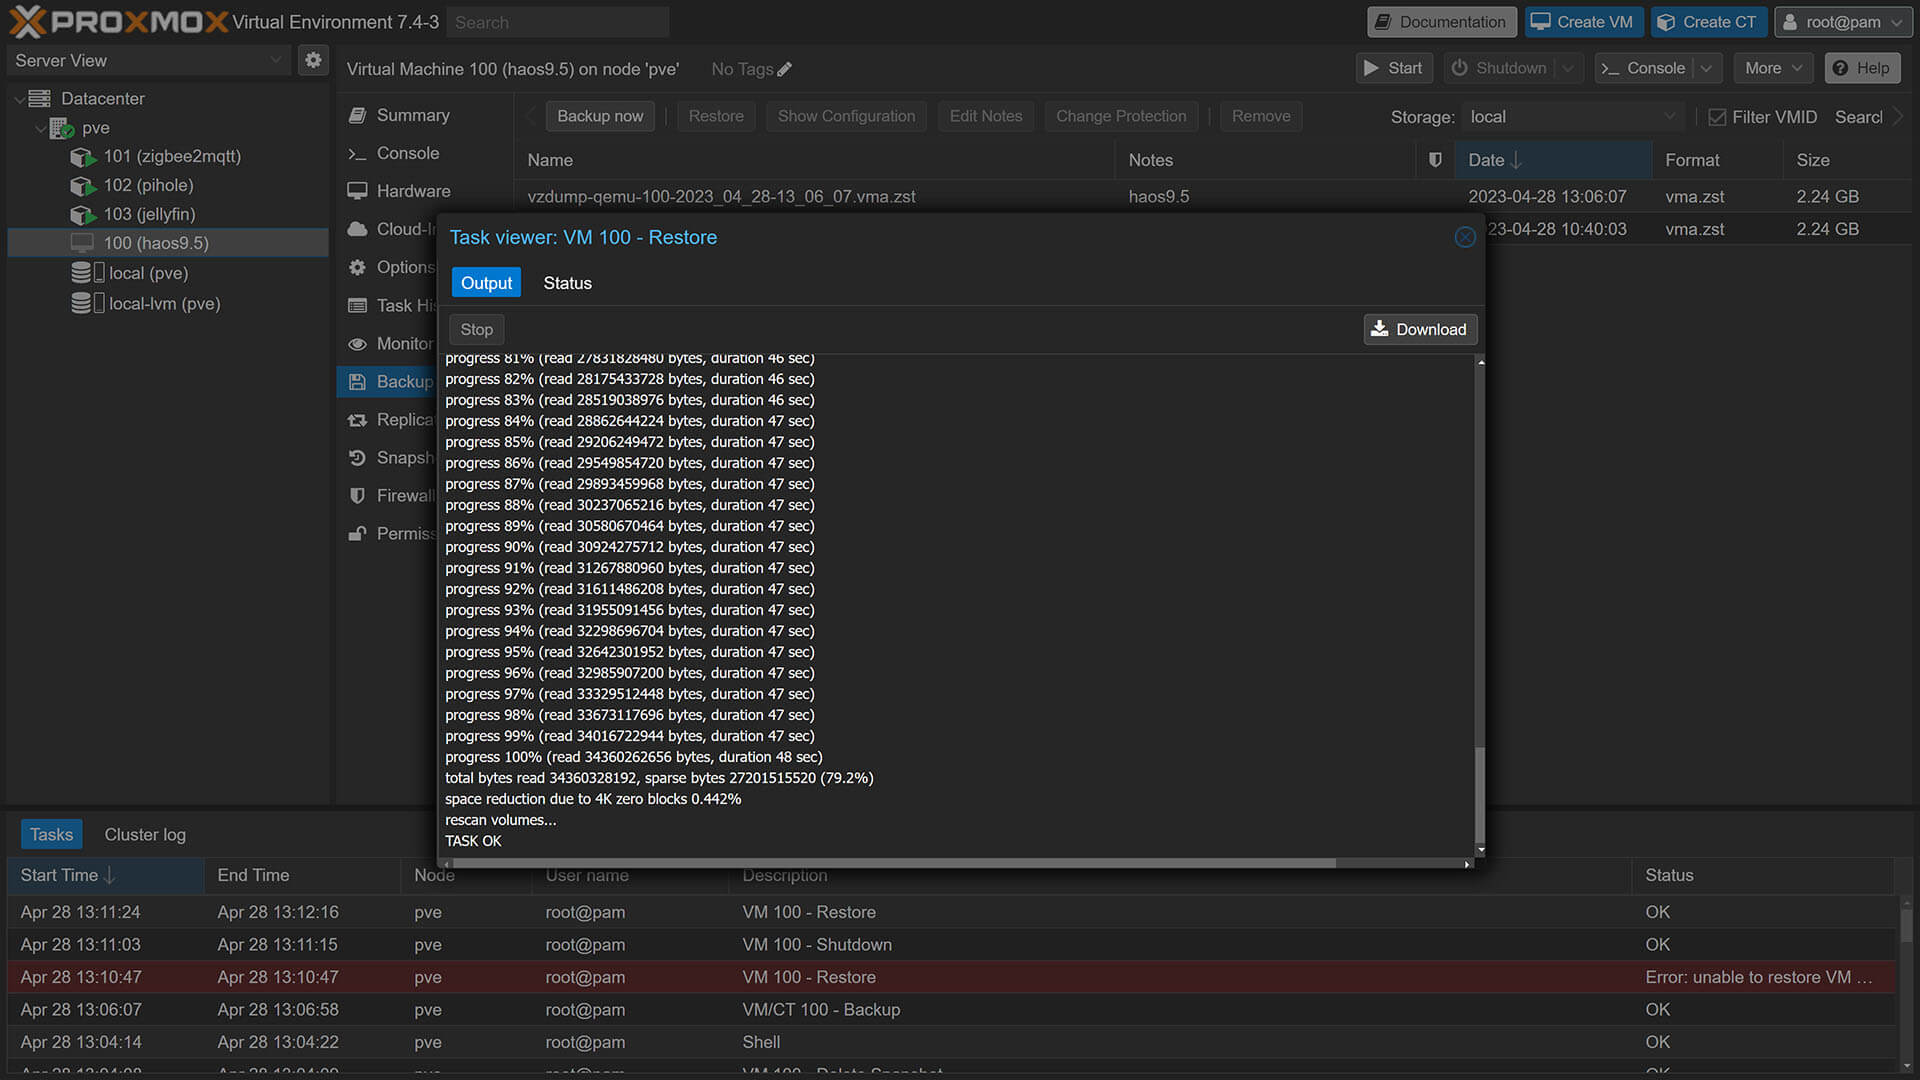
Once the process is complete, a TASK OK confirmation will appear at the end of the console. That’s it, you’ve successfully restored a backup for an active VM or Container.
The process for the second scenario, or restoring on a new Proxmox node is very similar. On your new Proxmox installation, attach a USB drive or a Network drive containing the actual backup files. Click your drive on the left menu and click Backups in the mid column. Select the backup file and click Restore at the top:
You will notice the VM ID can now be changed, essentially deploying a completely new VM or Container from your backup file. Set a desired ID and click Restore
Once the process completes, a TASK OK will appear in the log console and your new VM will appear under your new node.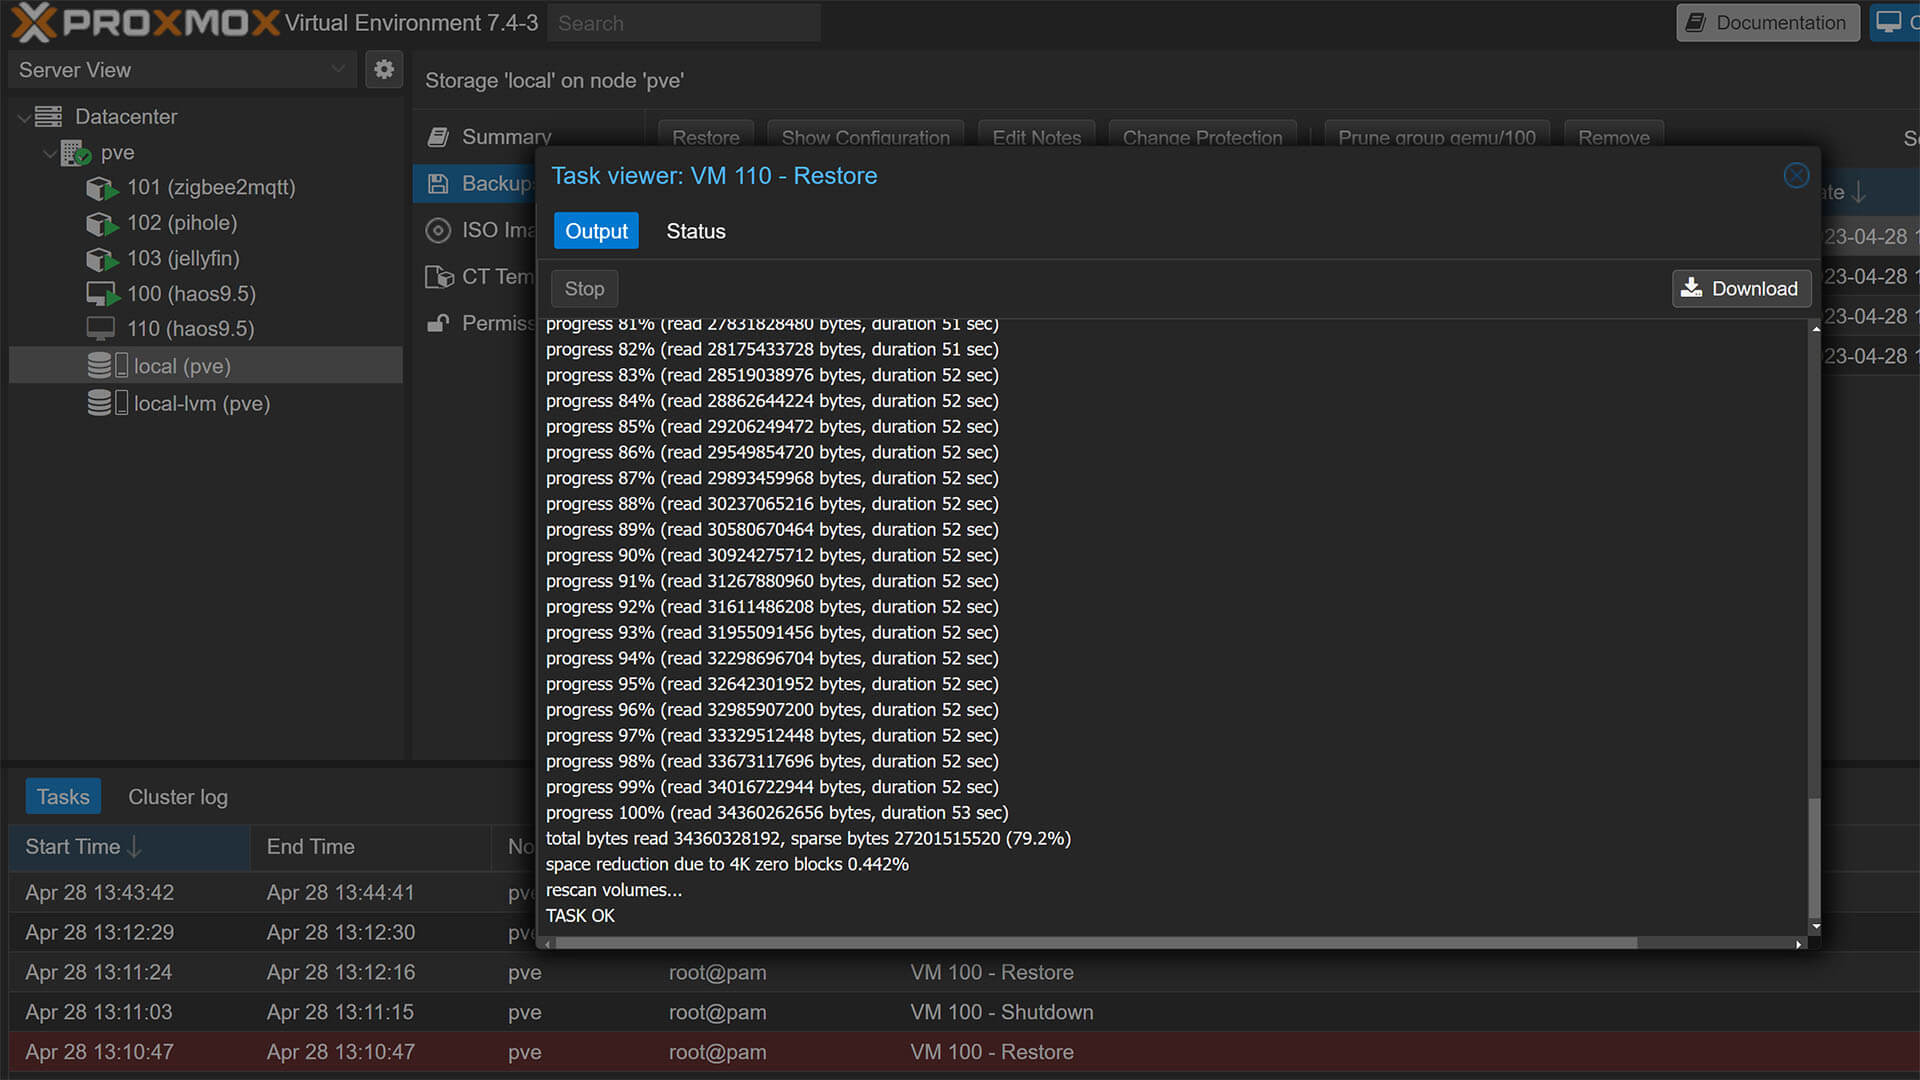
If you’ve selected the Start after restore option, the VM will be automatically started. If not, select it and click Start in the top right corner. That’s it, you’ve successfully restored Home Assistant from a Proxmox Backup on a new node!
Summary
Hopefully, by the end of this tutorial you’ve learned how to setup automatic backups for Home Assistant and other VMs or containers you have deployed in Proxmox. It’s important to note and remember the difference between Snapshots and Backups, so for easier understanding:
- Use Snapshots before testing new containers, VMs and setup changes
- Or when you know things might go wrong
- Use Backups to keep safe properly running containers and VMs
- Or when you don’t know things might go wrong
If you have proper hardware, such as an Intel NUC or Dell OptiPlex, Proxmox is a very powerful virtualization tool to keep everything inline and running smoothly. There is so much potential for experimenting and it scratches that tinkering itch real hard! If you haven’t started yet, I suggest you check out my previous articles:


