Recently a friend asked me to look into integrating his Hyundai Air Conditioner in Home Assistant, so he can control it locally and get rid of the app. After digging around and testing a couple of custom integrations, I feel I am confident enough to share the one that worked the best.
With the midea-ac-py integration for Home Assistant, the app can be freely removed and never used again once you’ve obtained the necessary keys and tokens. It also gave me the smoothest and lag-less experience compared to other custom components of the same type.
In this article, I am sharing how to integrate any AC from the Midea group, including: Hualing, Senville, Klimaire, AirCon, Century, Pridiom, Thermocore, Comfee, Alpine Home Air, Artel, Beko, Electrolux, Galactic, Idea, Inventor, Kaisai, Mitsui, Mr. Cool, Neoclima, Olimpia Splendid, Pioneer, QLIMA, Rotenso, Royal Clima, Qzen, Toshiba, Carrier, Goodman, Friedrich, Samsung, Kenmore, Trane, Lennox, LG, Hyundai and much more.
How to know if your model is supported?
If your AC is on the list of manufacturers above, chances are it will be supported. They all rely on the same wi-fi dongle that ships with the AC and are either used in the NetHome Plus app of the manufacturer app.
In any case, the Python script let’s you actually check if your particular model is supported once executed in a terminal, so let’s get to it.
Installing Midea Smart Aircon Integration
HACS
<< Click OR:
- Navigate to HACS > Integrations
- Click + Explore & Download Repositories
- Search for Midea Smart Aircon
- Click Download
- Restart Home Assistant
Manual
- Navigate to
configfolder- If you do not have a
custom_componentsfolder, create it.
- If you do not have a
- In the
custom_componentsfolder, create a new folder calledmidea_ac- Download all the files from the
custom_components/midea_ac/directory - Place the files you downloaded in the new folder you created.
- Download all the files from the
- Restart Home Assistant
Setting up Midea Smart Aircon Integration
This integration requires some information about your AC, which can be found by utilizing the included script. But first, the AC needs to connect to your network. Go through the process of adding the AC in the app (NetHome Plus, Midea Home etc.) and make sure it works and is controllable. Use a throwaway account if you want, you won’t be needing it later.
Obtaining Information with SSH Terminal
In Home Assistant, we need to install the Advanced SSH & Web Terminal Add-on so we can run the script:
- Navigate to Settings > Add-ons
- Search for Advanced SSH & Web Terminal
- Install It but don’t start it
- Select the configuration tab at the top
- Create user credentials like in the photo bellow

- Click Save
- Go back to the Info tab
- Toggle Watchdog, Show in Sidebar and Start on Boot
- Disable Protection Mode
- Start the Add-on
After you are done, you can remove the SSH add-on if you don’t need it or simply enable protection mode again. Open the Terminal from the sidebar and execute the following command:
pip3 install msmart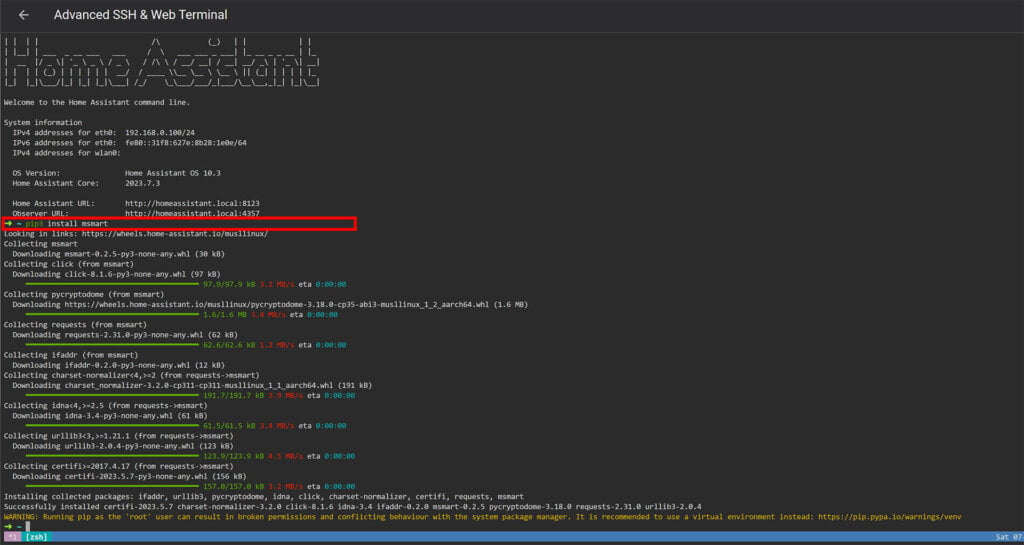
The command will install the component needed to obtain configuration variables for your AC. You will get a warning at the bottom about running pip as root, you can ignore it. Execute the following command:
midea-discover -a YOUR_ACCOUNT -p YOUR_PASSWORDIf you AC is connected to your Wi-Fi, you will get a bunch of information broken down in a few variables:
The first thing you need to notice is the support: True variable. If it’s False, the custom component does not support your AC and you won’t be able to integrate it using this method. In summary:
- If
support: Trueyou can use this custom component - If
support: Falseyou cannot integrate your AC using this custom component - If
version: 3, you need to copy key and token - If
version: <3, you need onlyID
Copy the following information (Tip: Shift + Double click copies the string) and save them it a file somewhere, so if you need to reintegrate the AC at a later stage you won’t have to run the script again. You need to save the following:
ip:IP address of the ACid:15 characterskey:64 characterstoken:128 characters
Adding the AC to Home Assistant
Once you’ve collected and saved your information, integrating the AC in Home Assistant is simply copying a few YAML lines. This custom component doesn’t have a UI configuration flow, so we need to edit Home Assistant’s configuration.yaml file. Add the following:
For version: 3
climate:
  - platform: midea_ac
    host: 192.168.1.100
    id: 123456789012345
    token: ACEDDA53831AE5DC...
    k1: CFFA10FC...
For version: <3
climate:
  - platform: midea_ac
    host: 192.168.1.100
    id: 123456789012345

#No need for Token and Key (K1)
Replace your ip, id, token and key from the information you collected, save the file and restart Home Assistant. Done, your Midea Group AC is successfully integrated in Home Assistant!
If you navigate to Developer Options > States you can see the entity created by the integration and any controls it has are now available in Home Assistant as well.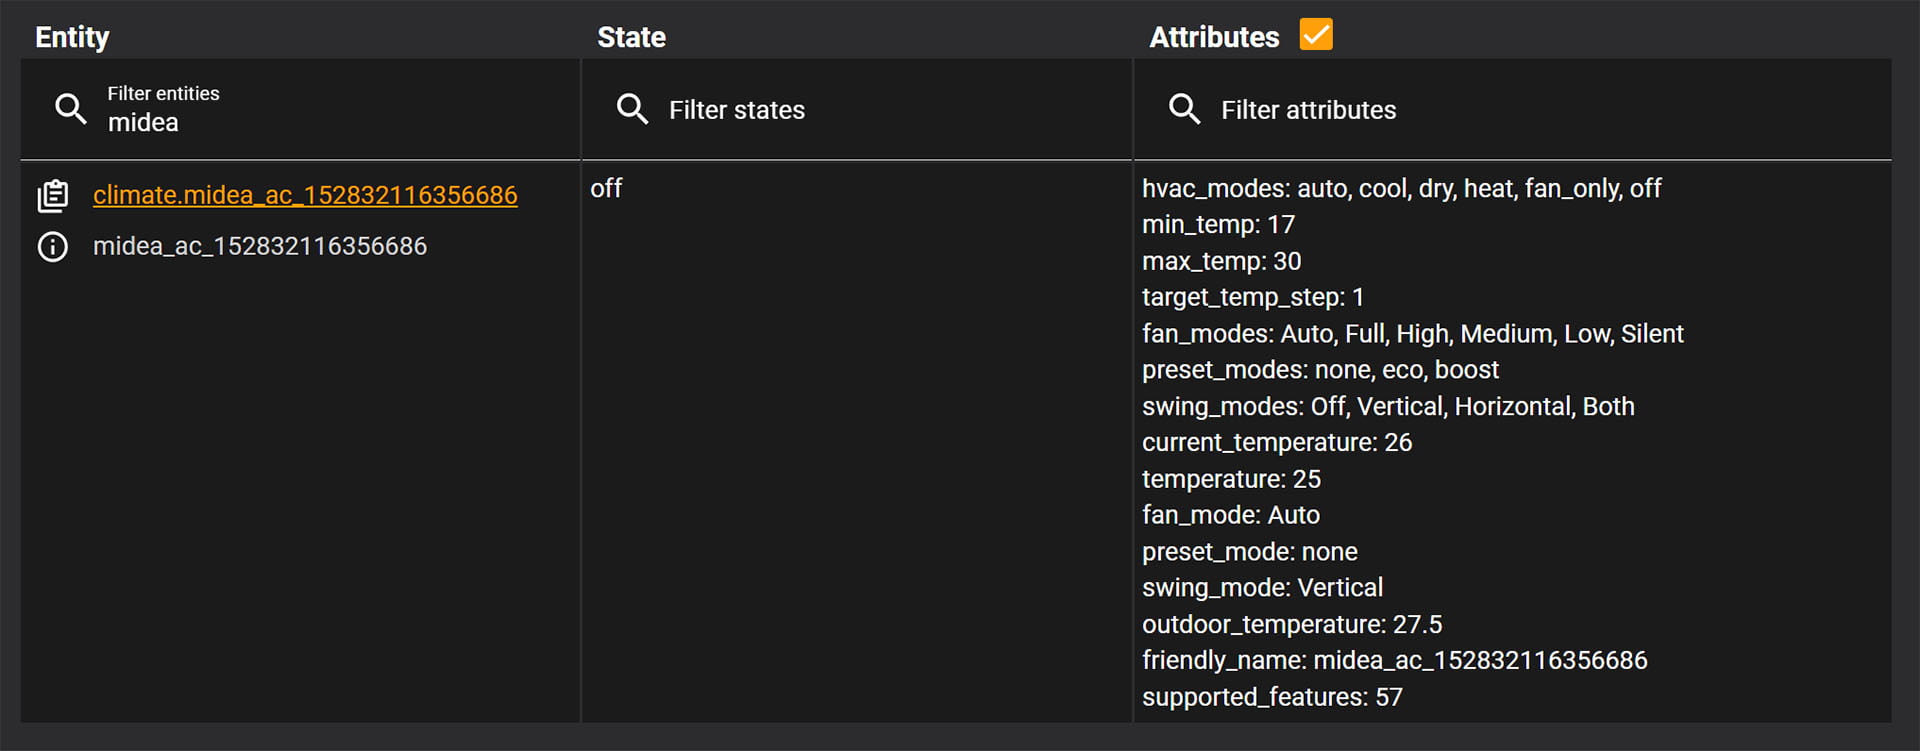
Bonus: Custom Cards
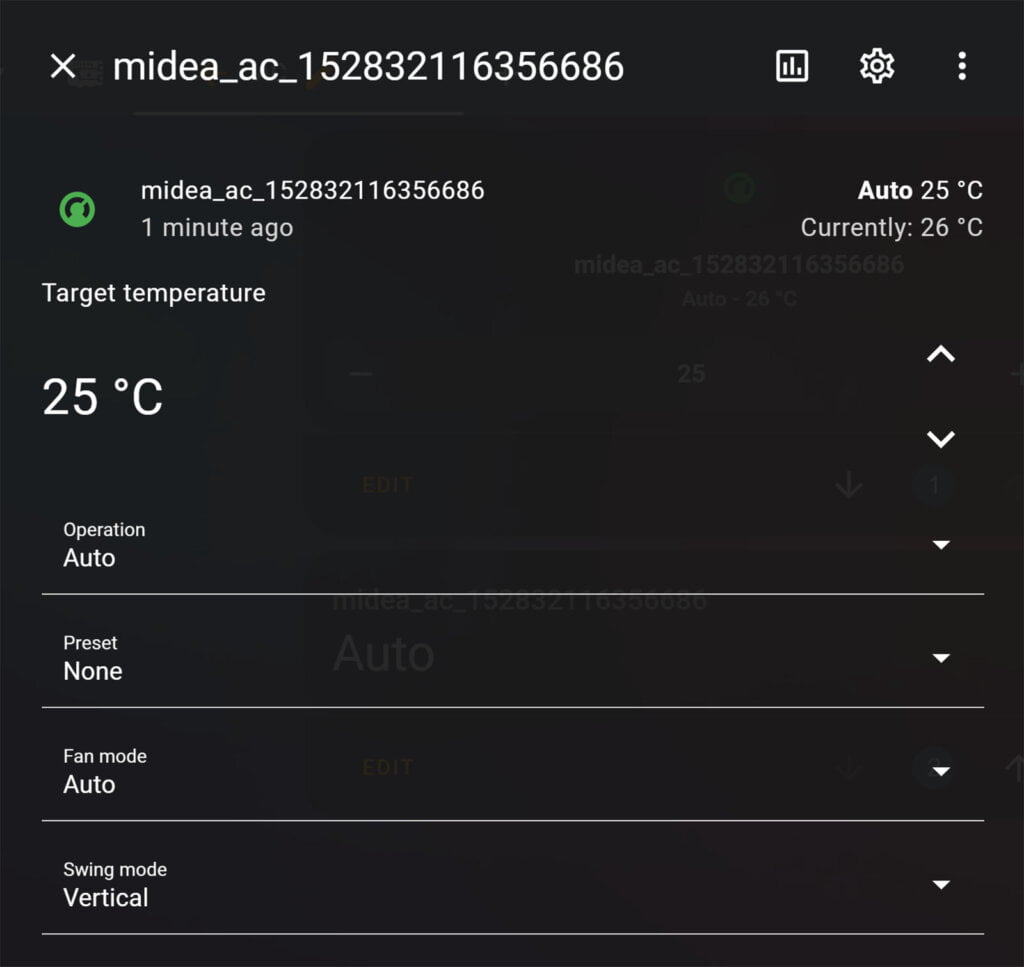
Once the AC is added in Home Assistant, you can control it using the built in pop-card like any other climate entity. This includes a drop-down menu for selecting the operation mode, preset, fan mode and swing mode. Degrees can be changed by clicking the up/down arrows on the card.
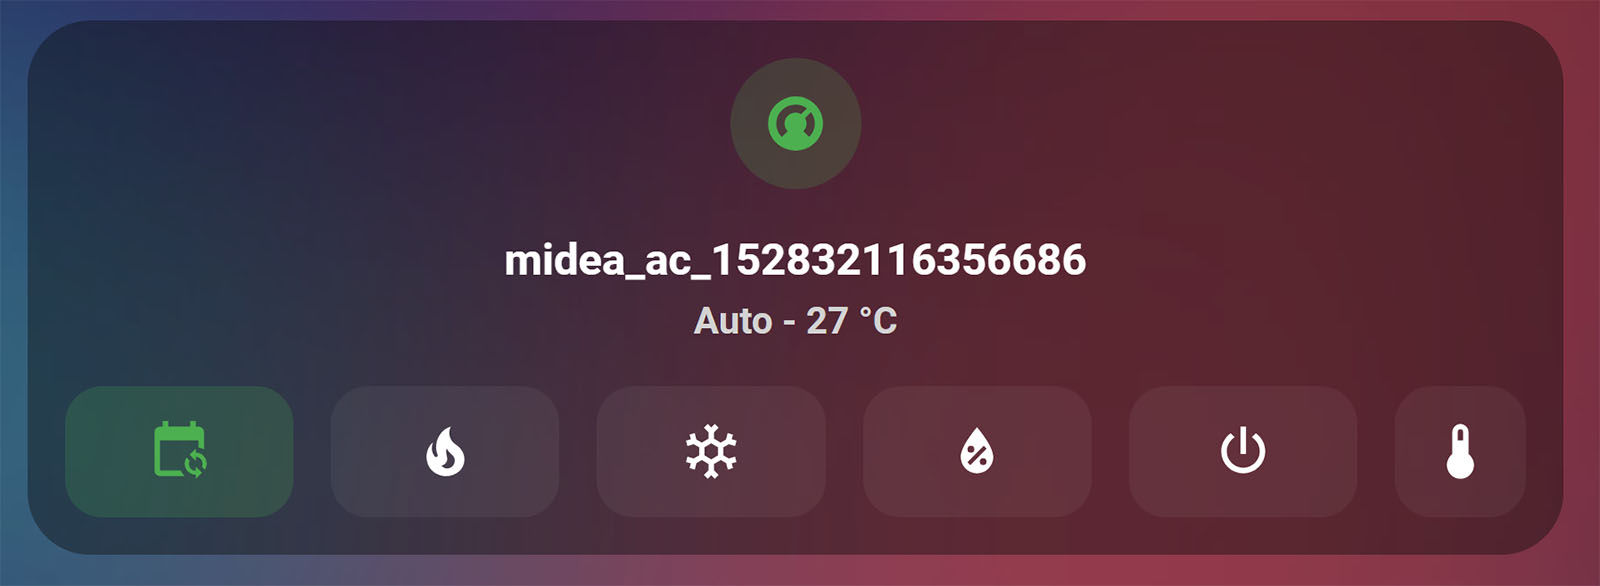
Alternatively, you can utilize a custom card to control the AC entity. Check out the Top 8 Thermostat Cards for Home Assistant. Here are two alternatives that I find to be quite intuitive for climate/thermostat entities: Mushroom Climate Card and Simple Thermostat Card.
Mushroom Climate Card by piitaya
Simple Thermostat Card by nervetatto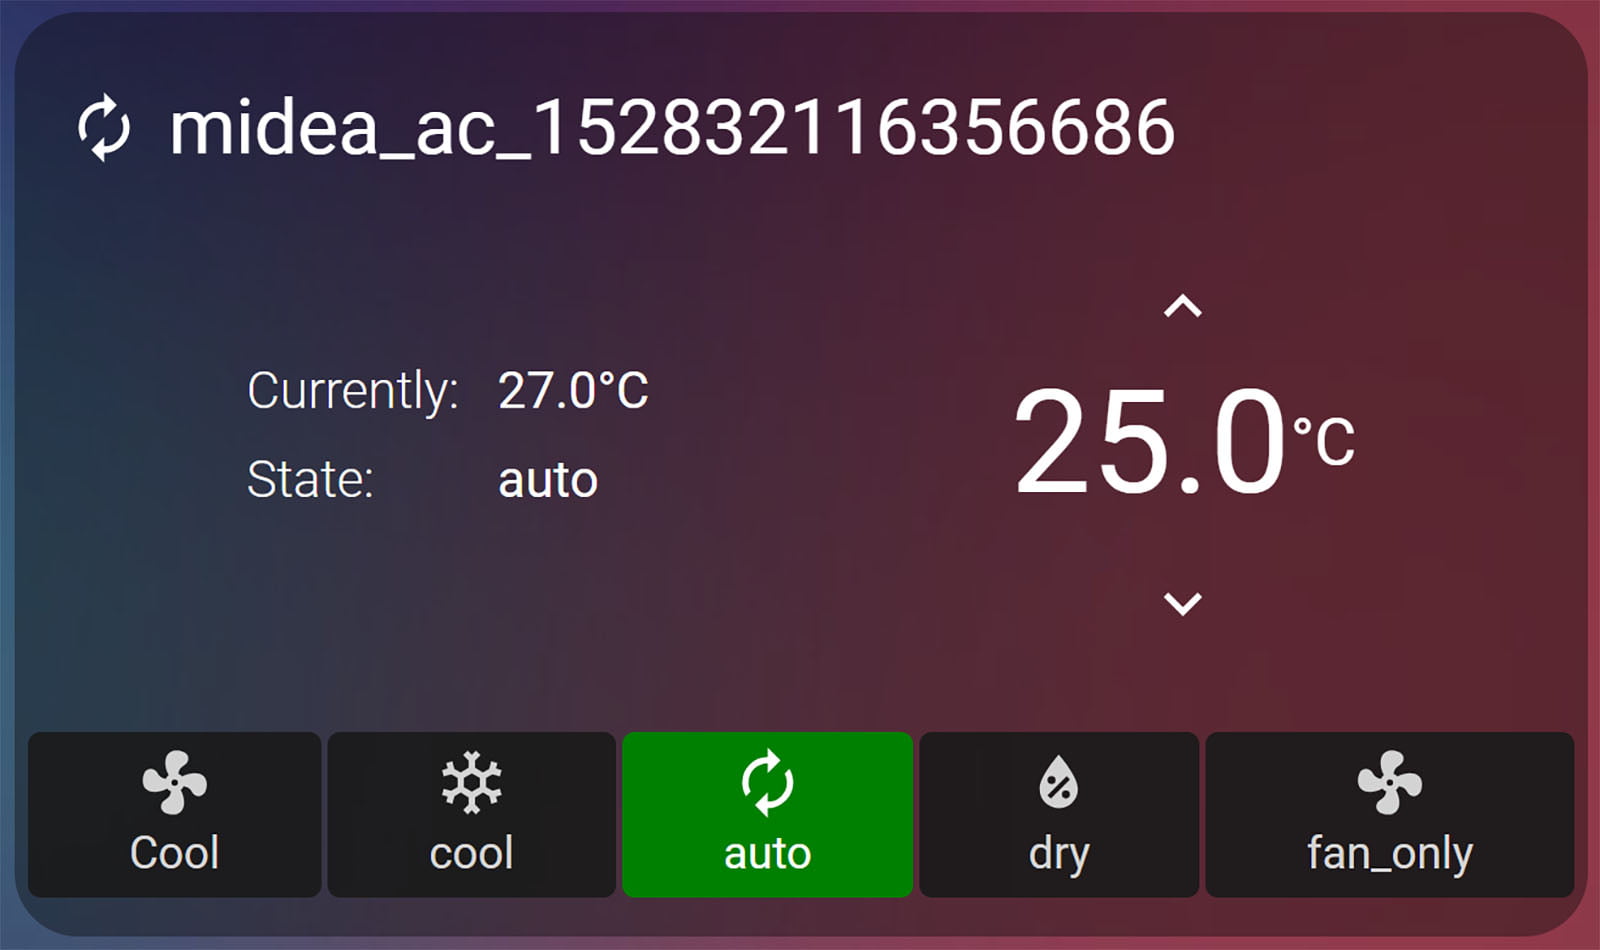



Very nice. Thanks for sharing.
I’m looking into ASHPs and Midea is on the shortlist. I am hoping there’s a way to integrate an ASHP with Home Assistant.
Hi, Midea AC LAN in HACS work much easier and is more user friendly as it does it all automatically.
Hey, you are a live saver,
now I can control my AC with external temperature sensors
You are welcome, bookmark SmartHomeScene.com. 🙂
Another option is to replace the OEM WiFi dongle by a custom one that supports ESPhome: https://esphome.io/components/climate/midea.html
There are some that you can buy of the shelf (like the SLWF-01pro) for 10$/unit, already assembled.
Doing so disconnects the unit from the Midea cloud, and offers better control over the unit(s).