A while back a shared a simple tutorial for pushing live information from your PC to Home Assistant via the Open Hardware Monitor Integration. It’s based on the software of the same name, and was capable of providing real-time data about CPU and GPU loads, temperatures, usage as well as storage stats, motherboard and memory stats, fan speeds and voltage information.
Luckily, an open-source fork has been alive for a while now, named Libre Hardware Monitor which has some additional sensors, useful for monitoring a PC or Server.
This article is a simple guide you can follow of how to setup LibreHardwareMonitor and manage it’s sensors in Home Assistant, as well as display the information in a dashboard.
Preparing Host System for Inbound Connections
Before you can setup Libre Hardware Monitor, there are two important things you must do to ensure stable and uninterrupted communication between Home Assistant and Libre Hardware Monitor running on your Host System (PC).
- Set a Static IP Address for the PC
- Open an Inbound firewall rule for the Libre Hardware Monitor Port
Setting a static IP address ensures the PC is always found at the same IP, so Home Assistant knows where to poll for data. The steps for the first one are largely dependent on your router make and model. If you google your particular model, you will find many tutorials for setting a static IP address. As an example, for TP-Link routers:
- Login to your router (default: admin/admin)
- Click Advanced
- Click DHCP Server
- Under Address Reservation, click +Add
- Either Input the MAC Address of your PC or
- Click View Connected Devices
- Select your PC and choose an IP Address
- Click Save
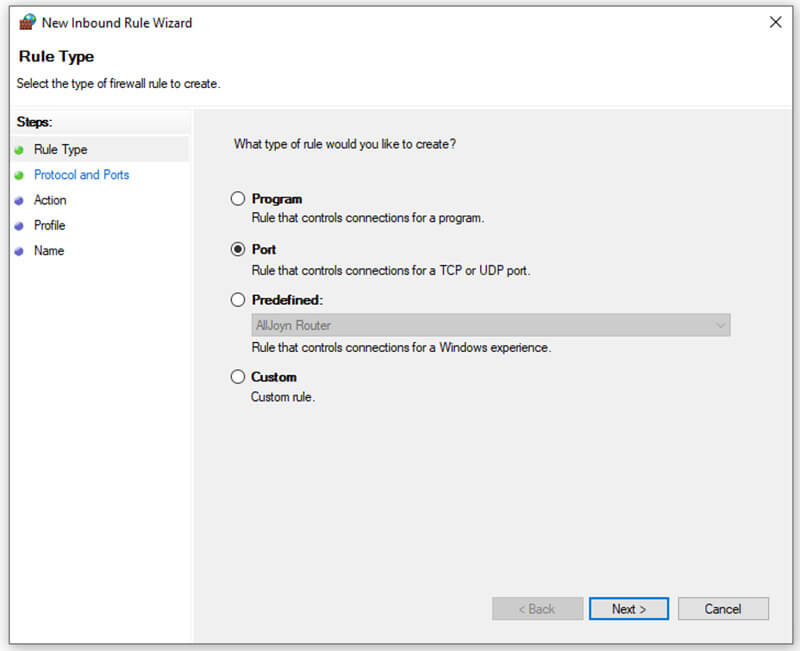
Setting an Inbound firewall rule is also a must on Windows systems, so it allows the connection coming in from Home Assistant:
- Press Windows Key + R which will open a Run dialog window
- Or navigate to Control Panel > Windows Defender Firewall
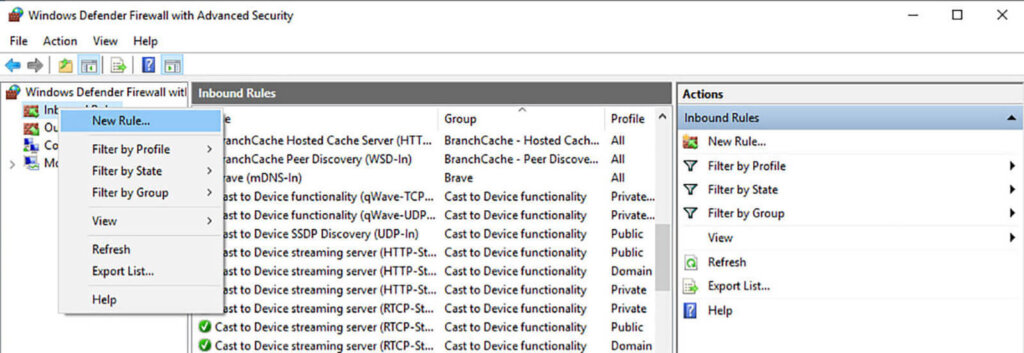
- Click Advanced Settings from the side menu
- Windows Defender Firewall with Advanced Security will open
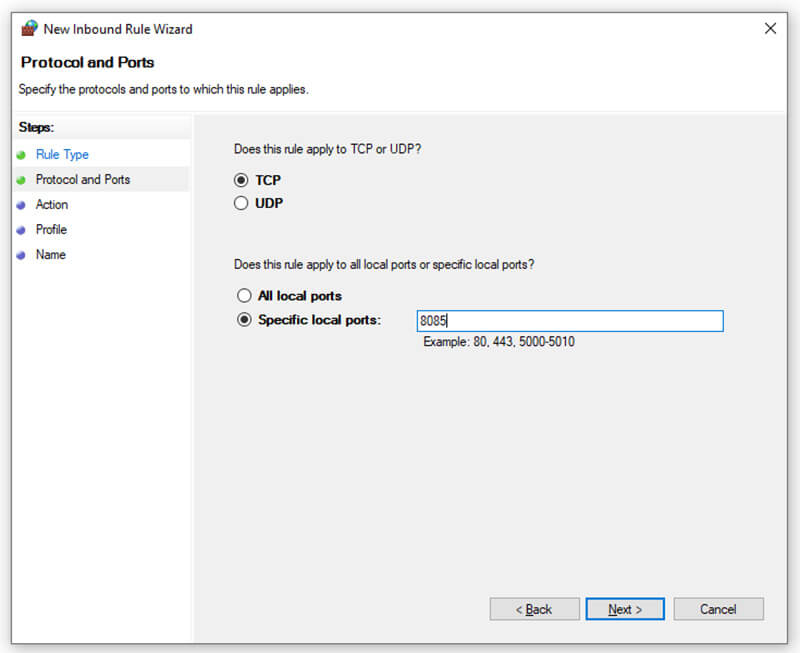
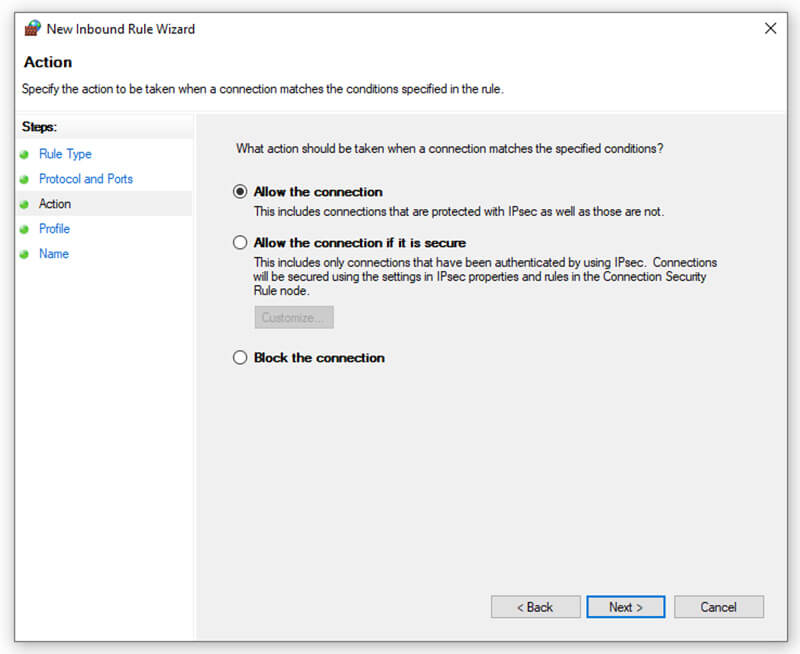
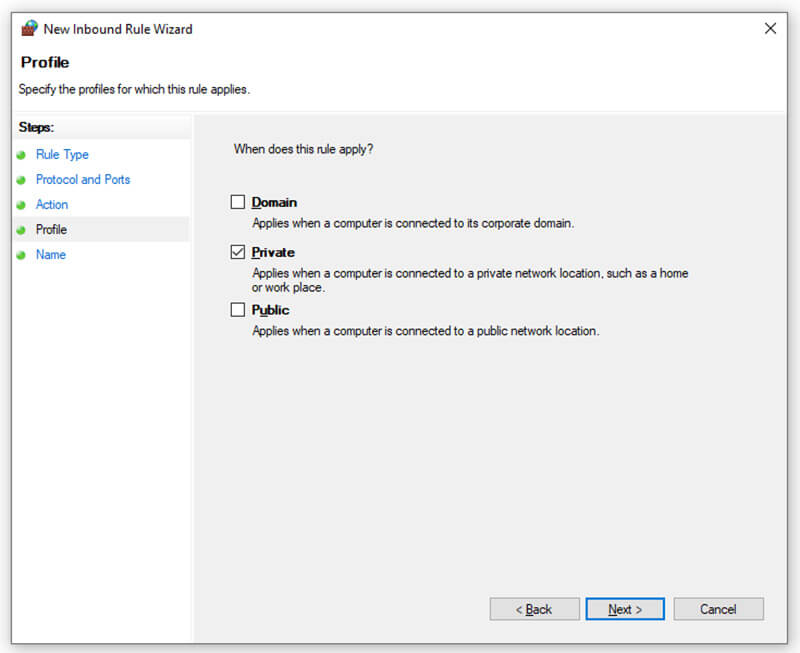
Give the rule a Name and an optional description and click Finish. Done, you have successfully created an inbound traffic firewall rule for your local network on port 8085, which Home Assistant will poll for sensor data.
Installing Libre Hardware Monitor
To install Libre Hardware Monitor, you will need to download the latest release from the repository. The application requires no installation, but some sensors benefit when you run it as an administrator in windows.
- Navigate to https://github.com/LibreHardwareMonitor/LibreHardwareMonitor/releases
- Download the latest release
- At the time of writing the article v0.9.2
- Open the ZIP file and extract it
- You will find a few files in the folder right click the LibreHardwareMonitor.exe and click Run as administrator
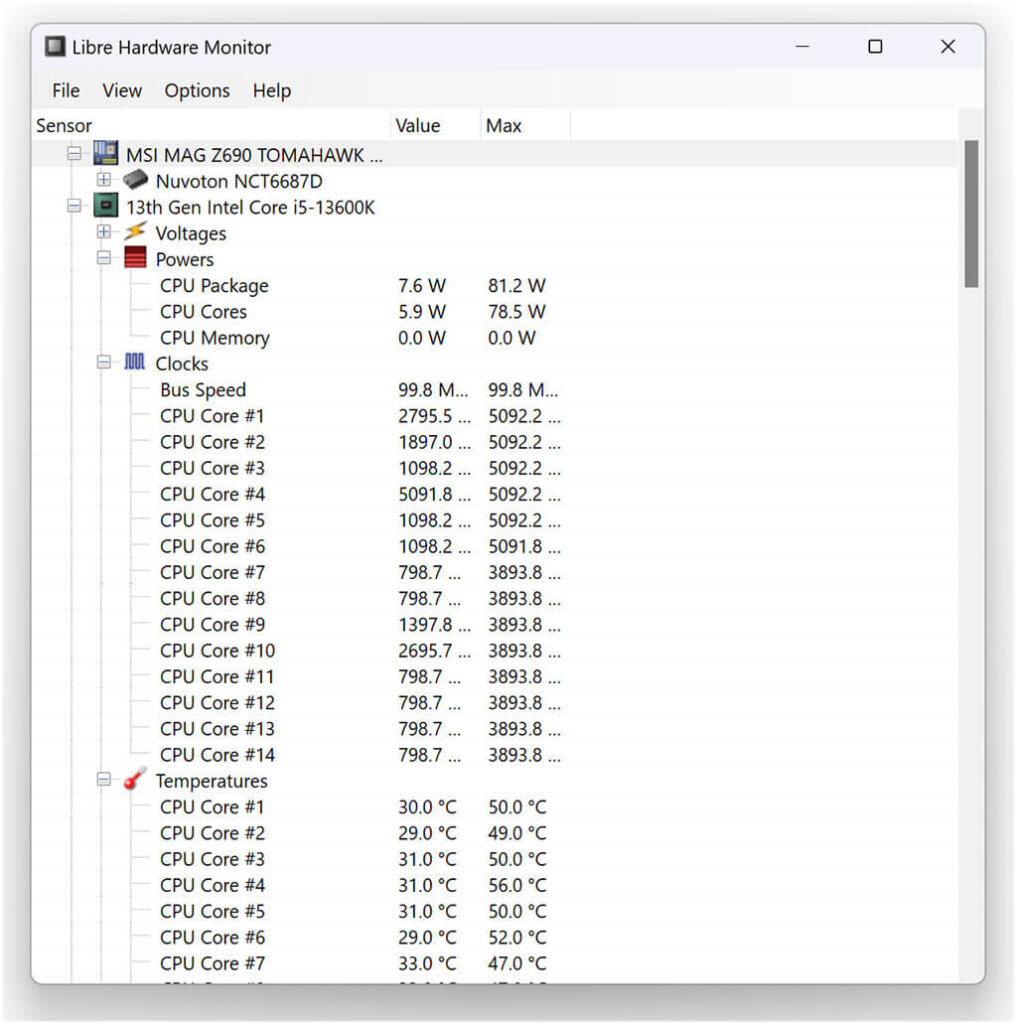
This will start the app and you glance over to see your PC information displayed in a simple user interface. These are expanded from a collapsible list and organized into categories: motherboard, processor, memory, graphics card and storage.
Before we can ensure Libre Hardware Monitor is always up, running and pushing data to Home Assistant, we need to change a few things. From the Options tab:
- Check Start Minimized (starts the app minimized)
- Check Minimize on Close (prevents accidental exits)
- Check Run on Windows Startup (starts the app automatically with Windows boot)
- (Optional) Select temperature unit °C/°F
- (Optional) Change logging interval from the default 1s to 5/10s if you want
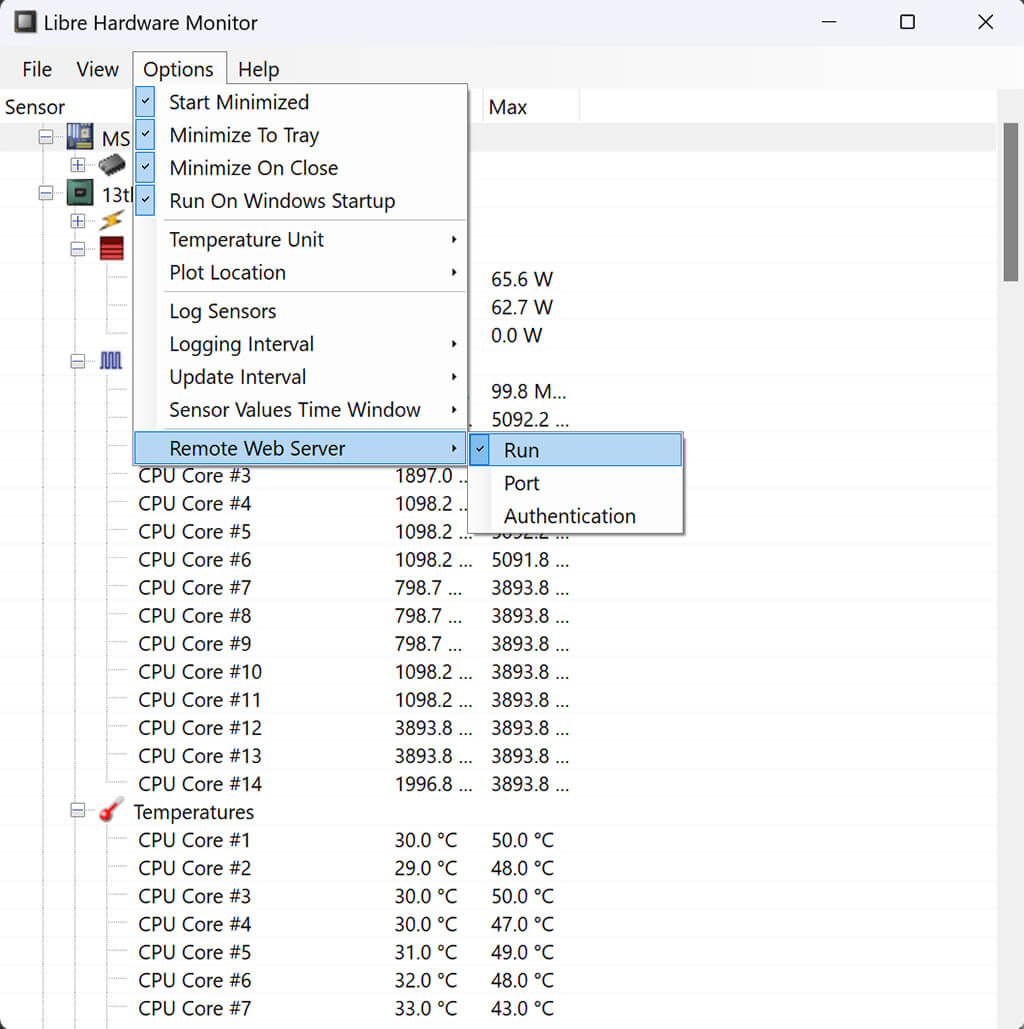
Finally, we need to start the Web server which HA will poll for data.
- Click Options > Remote Web Server > Port
- Set the Port number to whatever you want (default: 8085)
- Click Options > Remote Web Server > Run
- The web server will start and you will see a check mark
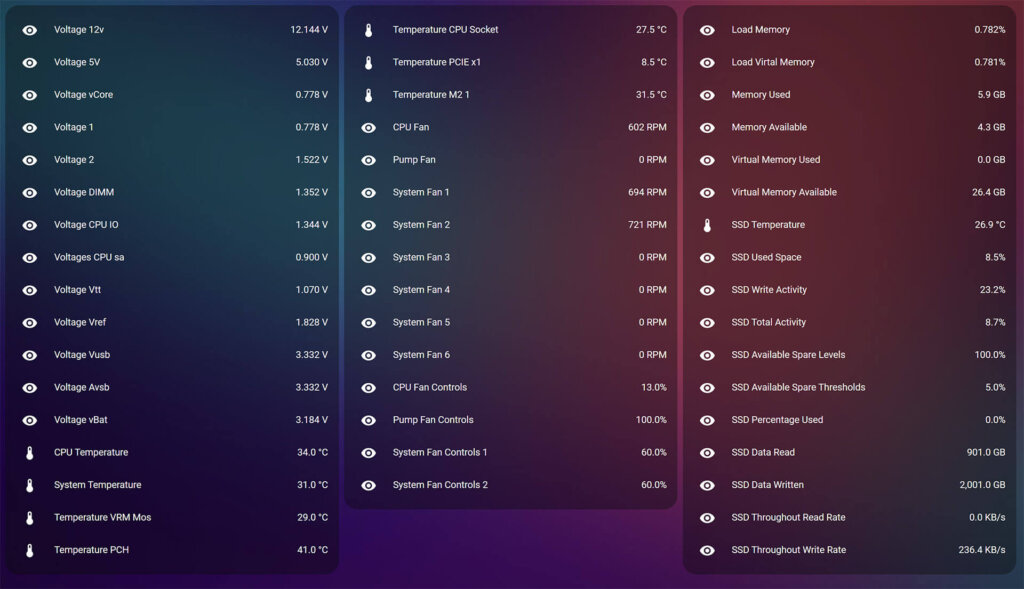
To verify everything is setup correctly, open your web browser and navigate to:
http://192.168.xxx:xxx:8085/ #Change to your IP and PortYou will be greeted with Libre Hardware Monitor’s web server UI: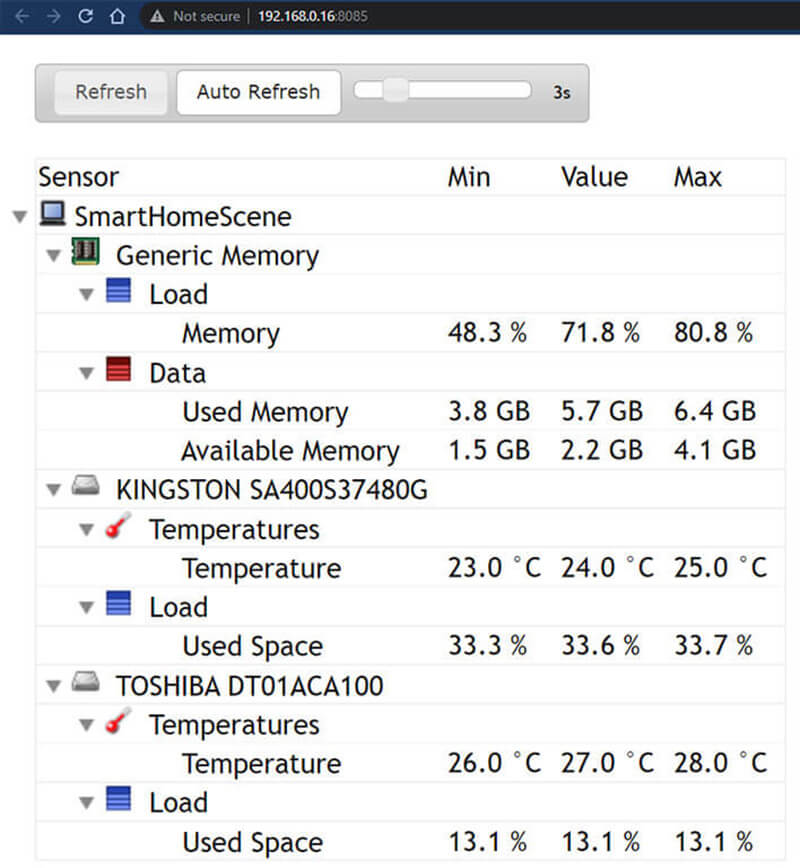
Configuring Libre Hardware Monitor in Home Assistant
The Libre Hardware Monitor relies on the the official Open Hardware Monitor Integration. There is no user interface setup flow, so you will have to use YAML. Open the configuration.yaml file with your favorite text editor, add the following lines and restart Home Assistant:
sensor:
  - platform: openhardwaremonitor
    host: 192.168.xxx.xxx (Host System IP Address)
    port: xxxx (Optional, defaults to 8085. Change if you used another port)
The integration will create a bunch of sensors providing different data to Home Assistant. A lot of these are not actually useful, so you can disable those you don’t need. To disable entities by category, open the Libre Hardware Monitor app on your PC and click File > Hardware > Uncheck those you don’t need. They will feeding data to Home Assistant.
Excluding Entities from the Recorder
Obviously, for most of the provided entities you do not need history tracked. You might want to create a dashboard giving you live data of your server, but do you really need to know the voltage every second? To exclude entities from the recorder completely, use the database to filter them out:
recorder:
  exclude:
    entities:
      - sensor.processor_temperature
      - sensor.voltage_12v
      - sensor.voltage_5v
.................
List any entities you do not need history for, save the the configuration.yaml file and restart Home Assistant. You can check out the full Optimize your HA Database tutorial for a in-depth guide.
Summary
Libre Hardware Monitor is a really capable fork from Open Hardware Monitor, providing you all kinds of information for your host system in Home Assistant. I would even say it’s too much, so you will need to remove most of the entities as they are not necessary.
There are other alternatives for monitoring system on your home network, some of which offer control on top of sensor data, such as Glances, IOT Link or HASS.agent. Libre Hardware Monitor is the simplest to setup and configure which is perfect for beginners. It offer limited flexibility, no filtering out by individual entities but it’s good enough to learn the ins and outs of PC monitoring.


