Update: This tutorial has been updated on 26.01.2023 and tested with Home Assistant version 2023.1.7.
Home Assistant uses a database to store events and parameters for history and tracking of your entities. The default database used in a fresh install is SQLite, which creates a file in your config directory (config/home-assistant_v2.db). ![]()
In this tutorial, we are going to talk about how you can set up MariaDB as a main SQL recorder database, as well as setup up InfluxDB, a time-series database for long-term data retention and how to use them both simultaneously. Finally, we are going to show you how to fine-tune your entities for history keeping.
Why change and optimize the default database?
You might wonder, why change the default database? Why include or exclude specific entities in the database when I can record them all? The answer depends on you Home Assistant installation method, the amount of devices you integrated in HA and the amount of data you want to keep for a specific amount of time.
Although the default SQLite is fine for the average user, and can be fine tuned to include or exclude entities for record keeping, we suggest switching to a better, more optimized database library, such as MariaDB.
They are both Relational DBMS, and serve the same purpose, but MariaDB is superior in handling large datasets, easier extraction of data/integrations and is faster when displaying history in Home Assistant.
By default, Home Assistant keeps data for around 10 days for usage in the history and logbook integrations using SQLite. If you have a lot of devices which in turn create a lot of entities, HA writes a lot of events and parameters in the .db file. This is very heavy on your storage medium (especially SD Cards), as it produces many I/O cycles.
For example, If you run your HA on a Raspberry Pi using an SD card, the card failing is not a question of WILL IT fail but a question of WHEN WILL IT fail? The recorder is the main culprit for crashing a Home Assistant instance running from an SD Card.
- First and foremost, to protect your HA server and save yourself some headaches from having to rebuild, we HIGHLY suggest using a backup method, such as the Home Assistant Google Drive Backup Integration.
- Second, we suggest switching to an SSD drive instead of an SD Card. Because the Raspberry Pi does not have a built-in SSD dock inside, you need to install it externally using an USB-to-SATA adapter. You need to choose carefully, as not all drives and adapters are compatible with a Raspberry.
- Third, if you insist on using an SD Card for whatever reason, picking up an appropriate medium is crucial. If you just plug your old 16GB SanDisk from your mom’s phone, crashing is inevitable in time. We suggest using an SD card labeled ‘High Endurance’, meaning it can withstand a lot of I/O cycles.
- Finally, to solidify your setup, you need to properly setup and optimize your database. Of course you want to record who opened the main door and at what time, but does keeping a history of your Raspberry’s RAM usage is important? Probably not.
Recorder vs History vs Logbook
Before we go on any further with this tutorial, we feel like it’s important to clarify the difference between Home Assistant’s recorder, history and logbook integration.
- The Recorder integration is responsible for storing events, states and data in the main SQL database. It simply handles the backend logic of the database
- The History integration is responsible for displaying data from the recorder in the UI using Google Graphs
- The Logbook integration is responsible for showing changes and events in a list sorted reverse chronologically

The important things to takeaway from this is:
- If the recorder is disabled for a specific entity, the history and logbook also become unavailable.
- If the recorder is enabled for a specific entity, you can selectively disable the history or logbook from its displaying data in the UI
Each of these components use the same filter logic to include/exclude entities in the integration itself. Filter are explained further down the tutorial.
Note: InfluxDB is not meant to replace the recorder component. It is meant run along side it for long term data keeping.
MariaDB vs InfluxDB
Both Maria and Influx are enhanced database tools, but they are in different in many ways. InfluxDB is generally explained as a “An open-source distributed time series database with no external dependencies” while MariaDB as “An enhanced, drop-in replacement for MySQL”.
- Primary database model: Relational DBMS
- Secondary database model: Document Store, Graph DMBS, Spatial DBMS
- Released: 2009
- Usage in HA: Natively, replace default SQLite database
- Primary database model: Time-series DMBS
- Secondary database model: Spatial DMBS
- Released: 2013
- Usage in HA: Long-term data retention, create advanced graphs using Grafana, Kibana
In short, MariaDB will replace the default SQLite Home Assistant database and give you a speed boost. InfluxDB will store long-term data more efficiently, from which you can build advanced graph using Grafana.
Installation and Setup
MariaDB
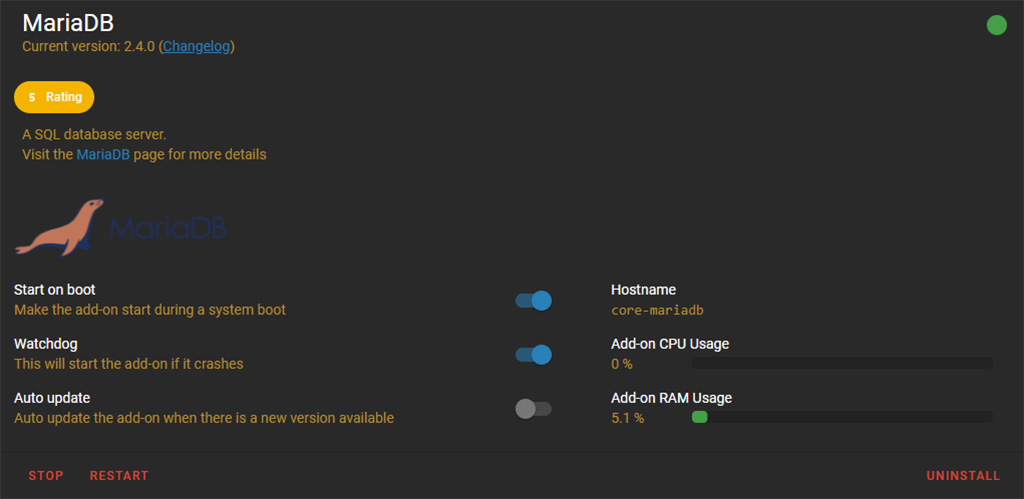
To install MariaDB, navigate to the Settings > Add-ons > Click Add-on Store and search for MariaDB. Click install and enable the Start on Boot and Watchdog toggles.
Open the Configuration tab to setup your database name and login credentials, adding quotes around !secret if you are using secrets:
databases:
  - homeassistant #Change if you want
logins:
  - username: '!secret mariadb_user'
    password: '!secret mariadb_pass'
rights:
  - username: '!secret mariadb_user'
    database: homeassistant
Next, open the secrets.yaml file and add your login credentials along with a mariadb_url, just like the example. We will use this line to enable the database for the Recorder integration. Change the ‘homeassistant’ database name to whatever you named yours in this URL.
#Secrets.yaml
mariadb_user: smarthomescene
mariadb_pass: 12345678
mariadb_url: mysql://smarthomescene:12345678@core-mariadb/homeassistant?charset=utf8mb4
To enable MariaDB, open your configuration.yaml file and add the following line. Feel free to use !include if you want for a cleaner setup:
recorder:
  db_url: !secret mariadb_url
  purge_keep_days: 30
  commit_interval: 20
  .....
InfluxDB
To install InfluxDB, navigate to Settings > Add-ons > Click Add-on Store and search for InfluxDB. Click install and enable the Start on Boot and Watchdog toggles. You can also tick Show in sidebar, as we will use the InfluxDB interface to setup our database.
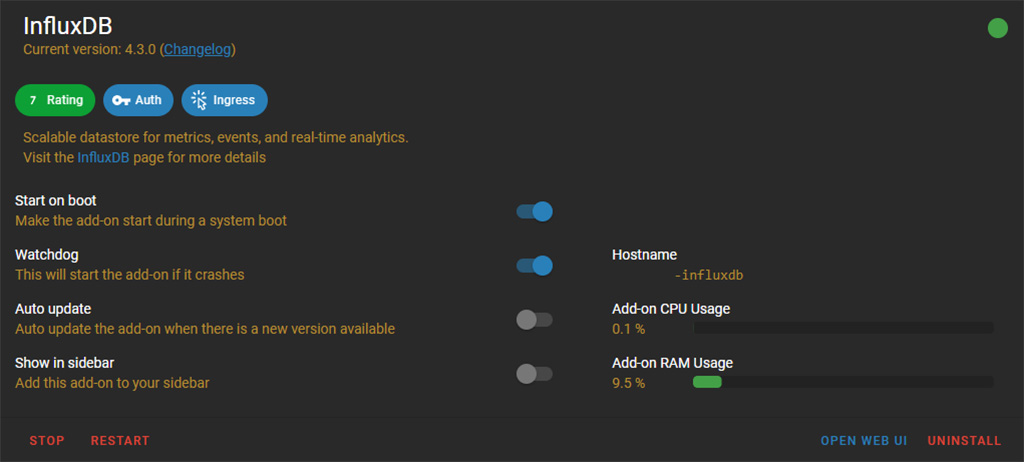
After you have installed InfluxDB, click Start and than open it’s Web UI.
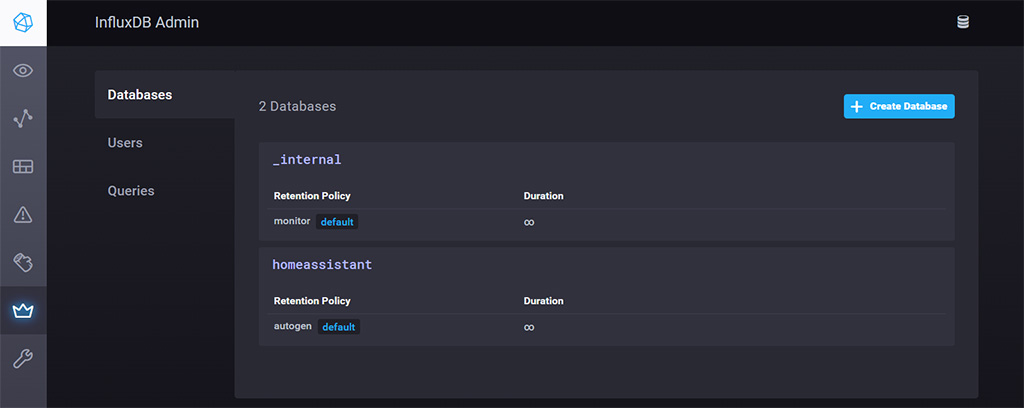
- On the left side of the UI, open the Influx Admin panel and click ‘+ Create Database’ at the top
- Name your database and click the checkmark
- Under the retention policy setting, you can edit the Duration for which InfluxDB will hold data
- As this is a time-series database which we will setup for longer data retention for specific entities, we suggest using a longer time range or set it to infinitely.
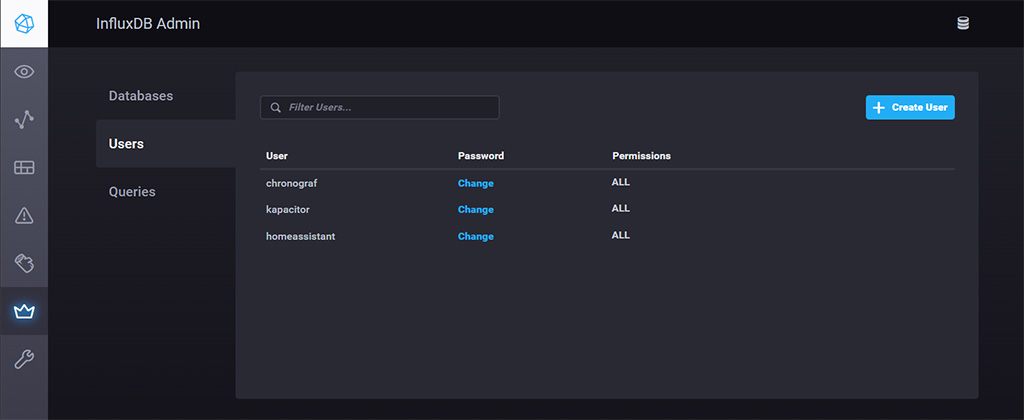
- Next, select the Users tab on the left and click ‘+ Create User’
- Name your user and set a password
- Once created, click Edit and make sure you give All permissions to the user.
To enable the InfluxDB integration, open configuration.yaml and add the following
influxdb:
  host: 192.168.0.xxx
  port: 8086
  database: homeassistant
  username: homeassistant
  password: !secret influxdb_pass
  max_retries: 3
  default_measurement: state
Set your internal IP address as a host for InfluxDB and port 8086. Input the database you created along with the user credentials. Again, you can use your secrets.yaml file to store database, username and password.
Using both MariaDB and InfluxDB
After both MariaDB and InfluxDB are installed and setup, Home Assistant will use both of them to store data. However, because we have not told HA which entities to include in which database, it will populate both databases and you will have duplicate entries. This is redundant and will increase your backups size unnecessary.
To decide which entities you want to keep track of for a longer period of time, you need to ask yourself the following question: Will this data will be useful to me 6 months or a year from now?
If the answer is Yes, that entity belongs to InfluxDB. If the answer is No, than the entity belongs to MariaDB.
Note: It’s possible some entities belong in both databases. For example, if you have a room temperature sensor and want to display it’s data natively in Lovelace, you can add it to MariaDB and retain it’s data for 15 days for example. If you want to extract an average room temperature during the winter season, you can add the sensor in InfluxDB and retain the data indefinitely or until purged.
Optimizing your databases
Optimizing your database and entities can be a time consuming task, especially if you have a lot of devices which expose a lot of entities in Home Assistant. I think you will find going trough this process worthwhile, as it can and will significantly improve your HA experience.
Both MariaDB and InfluxDB offer a variety of configuration variables, used to tweak the settings and performance of the database. You can go through all of them here: MariaDB | InfluxDB
For the purpose of this tutorial, we will explain a couple which we feel are important.
MariaDB
As you will be using MariaDB for short time span data retention and, in turn, display this data into Lovelace, we suggest setting the time interval to 7-30 days. If you want to track a longer period, you can, but this entity would probably belong to InfluxDB.
- auto_purge: Automatically purge the database every night at 04:12 local time.
- purge_keep_days: Specify the number of history days to keep in recorder database after a purge.
- commit_interval: How often (in seconds) the events and state changes are committed to the database. The default of 1 allows events to be committed almost right away without trashing the disk when an event storm happens. Increasing this will reduce disk I/O and may prolong disk (SD card) lifetime with the trade-off being that the logbook and history will lag. If this is set to 0 (zero), commit are made as soon as possible after an event is processed.
InfluxDB
Because the data retention policy is already set for InfluxDB in the UI, we do not need to add a configuration variable for the database. The important thing to note when configuring InfluxDB, is that you can use two versions of the API. Each of them requires different configuration and setup. In our example, we used version InfluxDB 1.0. You can setup InfluxDB 2.0 by following their official guide.
Note: Configuration for version 2.xx is significantly different and require different steps for setup. Furthermore, it uses Flux querry language, instead of the InfluxQL for the 1.xx version. If you’ve used the first, we suggest sticking to it as they are very different.
Optimizing your entities
Before you start including or excluding entities from the recorder, you might want an editable list to copy-paste in an Excel table for example. To get this list, open Developer Tools > Templates and paste the following code:
{% for state in states %}
  - {{ state.entity_id -}}
{% endfor %}
This will list all your entities, without their attributes or actual states. You can transfer this to your favorite cell editor and work your way through them more easily.
Both databases use the same configuration filters to include or exclude entities from being tracked. You can add this under the recorder integration for MariaDB or under influxdb for InfluxDB. To handle entities recording, we have a couple of options.
- No Includes or Exclude:
- Record all entities
- Includes, No Excludes:
- Record only included entities, exclude everything else
- Excludes, No Includes:
- Record everything, except for excluded entities
- Includes and Excludes:
- Combination of both for specific use cases
For each of these filters, we can use domains, entity_globs, or entities as a specific category for filtering:
- domains: include/exclude entire domains (eg. light)
- entity_globs: include/exclude entities matching a listed pattern (eg. sensor.weather_*)
- entities: include/exclude specific entities (eg. sensor.disk_free)
Example 1: Includes only
recorder:
  db_url: !secret mariadb_url
  purge_keep_days: 30
  commit_interval: 20
  include: #Include entities
    domains:
      - light
    entity_globs:
      - sensor.weather_*
    entities:
      - sensor.disk_free
      - sensor.disk_use
      - sensor.disk_use_percent
Example 2: Excludes only
recorder:
  db_url: !secret mariadb_url
  purge_keep_days: 30
  commit_interval: 20
  exclude: #Exclude entities
    domains:
      - automation
    entity_globs:
      - binary_sensor.*_occupancy
    entities:
      - switch.living_room_light
      - light.bathroom_light
      - sensor.processor_temperature
Example 3: Includes and Excludes
recorder:
  db_url: !secret mariadb_url
  purge_keep_days: 30
  commit_interval: 20
  include: #Include domain
    domains:
      - light
  exclude: #Exclude entities
    entities:
      - light.living_room_light
With this configuration in example 3, we have setup the integration to record all entities from the light domain, except the living room light. If you apply this logic when filtering entities, you code should not be more than a few lines.
Example 4: InfluxDB Example
The same type of config applies to InfluxDB. You include what you need for longer data retention and exclude everything else.
influxdb:
  host: 192.168.0.xxx
  port: 8086
  database: homeassistant
  username: homeassistant
  password: !secret influxdb_pass
  max_retries: 3
  default_measurement: state
  include: #Include Domain
    domains:
      - light
  exclude: #Exclude Entities
    entities:
      - light.living_room_light
Example 5: History Example
history:
  exclude:
    domains:
      - automation
      - updater
    entities:
      - sensor.last_boot
      - sensor.date
    entity_globs:
      - binary_sensor.*_occupancy
Example 6: Logbook Example
logbook:
  include:
    domains:
      - alarm_control_panel
      - light
    entity_globs:
      - binary_sensor.*_occupancy
  exclude:
    entities:
      - light.kitchen_light
Purging Database
If we want to manually purge the database of MariaDB, we fire a call-service in the Developer Tools Menu:
### Purge a single entity ###
service: recorder.purge_entities
target:
  entity_id: alarm_control_panel.apartment
### Purge a single entity ###
service: recorder.purge_entities
data:
domains: light
### Purge the ENTIRE database ###
service: recorder.purge
data:
  repack: true
The last call-service will purge the entire database and issue a repack command. Please note that this is a heavy command, which will rebuild the entire database, optimize or recreate the events and states tables. Use this only if you have slowdown issues.
If you want to purge the InfluxDB database, you can open the UI, navigate to the InfluxDB Explore Panel execute a simple query:
USE "homeassistant"; DELETE WHERE time < '2022-04-04'If you want to purge a single entity, you can run the following query for example:
USE "homeassistant"; DELETE WHERE "entity_id" = 'sensor.bathroom_temperature' AND time < '2022-04-04'Tracking Database Size
To monitor the file size of our databases, we can create two template sensors which query the database and return the value in a sensor entity.

sensor:
  #InfluxDB Database Sensor
  - platform: influxdb
    host: 192.168.0.xxx
    port: 8086
    username: homeassistant
    password: !secret influxdb_pass
    scan_interval: 3600
    queries:
      - name: InfluxDB Database Size
        unit_of_measurement: MB
        value_template: "{{ (value | float(0) / 1024 /1024) | round(1) }}"
        group_function: sum
        measurement: '"monitor"."shard"'
        database: _internal
        where: '"database"=''homeassistant'' AND time > now() - 5m'
        field: diskBytes
For the built-in recorder, which is now MariaDB you can just navigate to Settings > Devices & Services > Add Integration. Search for SQL and input the same data, including the query, column, database URL, unit of measure and name. Database URL can be left blank, since MariaDB is used as the default recorder database: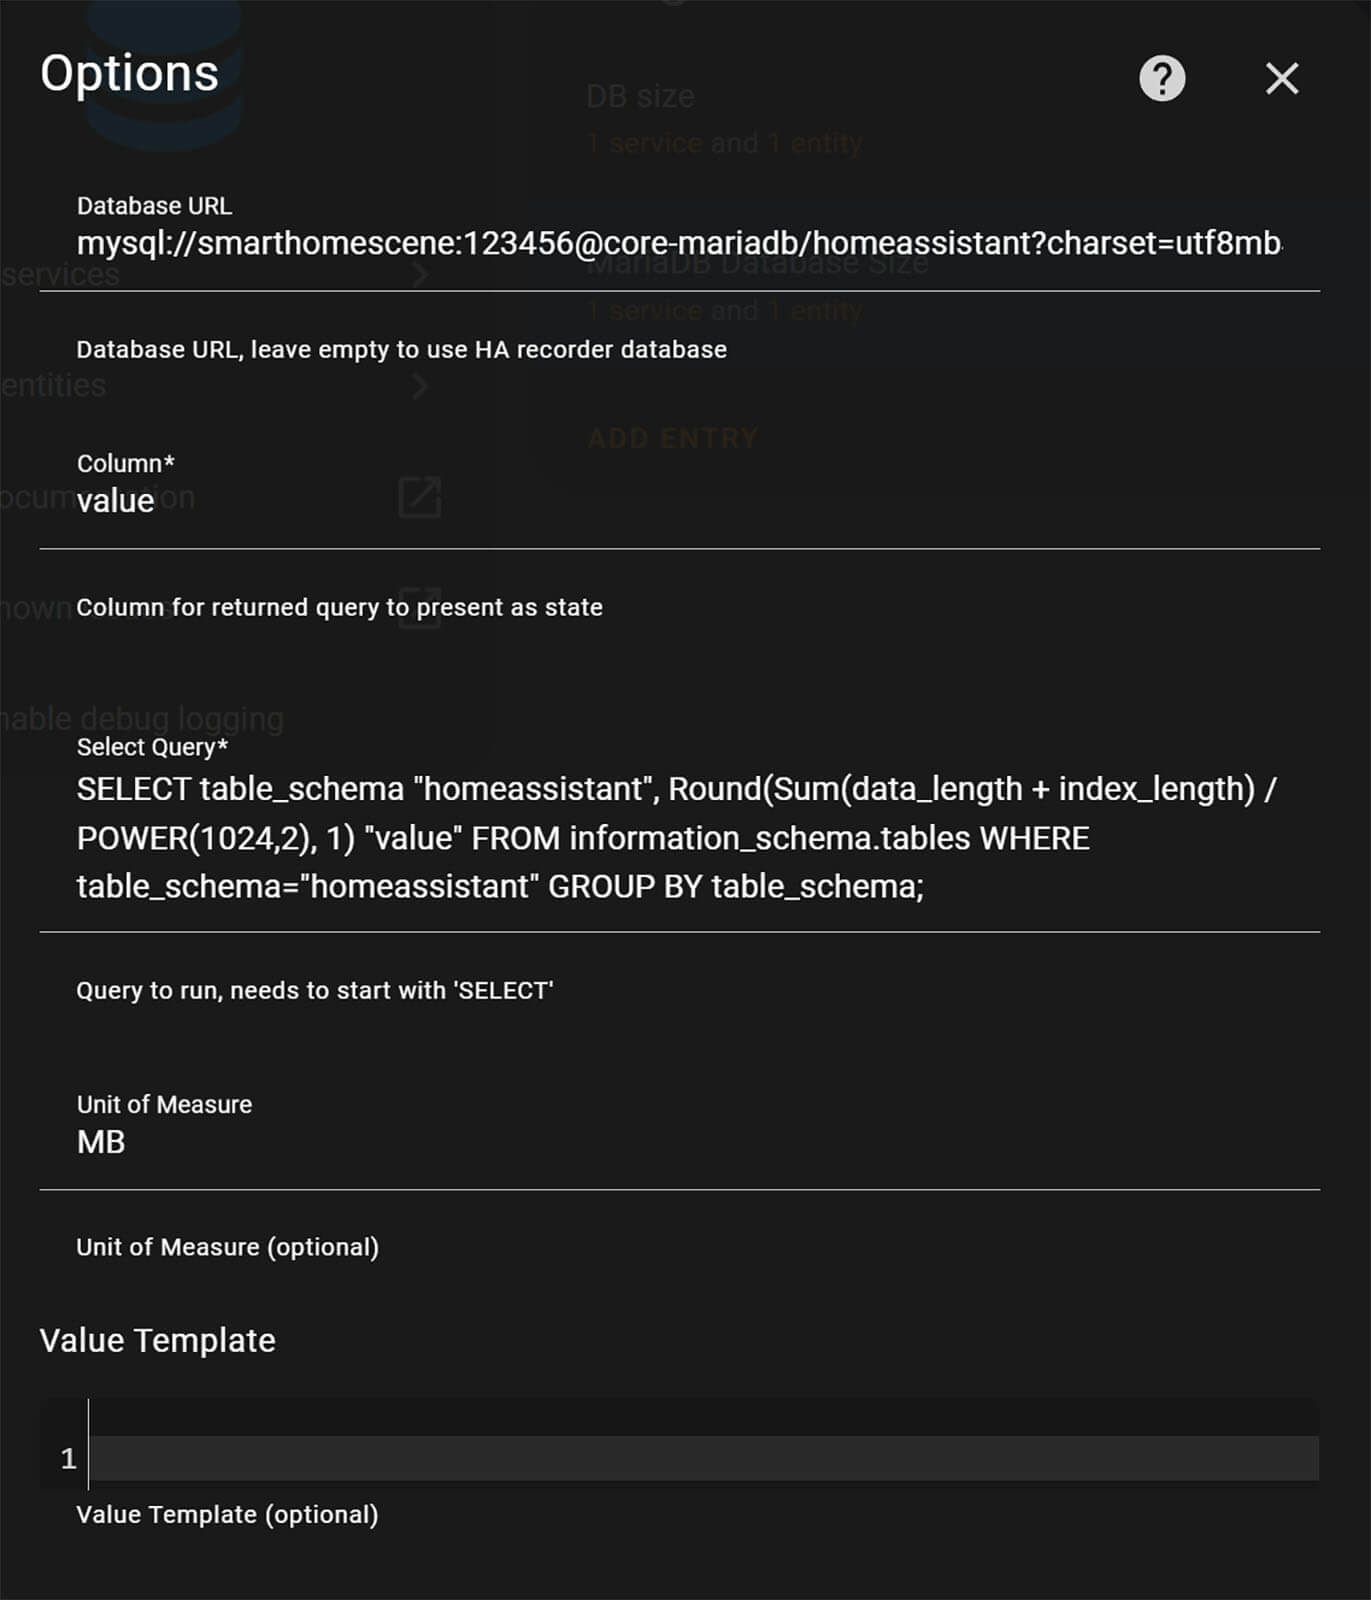
Summary
The process of optimizing your Home Assistant database can be a time consuming process, especially if you have a lot of entities to go through. We suggest using logic and common sense, to filter your entities properly. Instead of listing specific entities for recording, try to include by using the domain variable and than only exclude what you do not need. What you record is ultimately up to you and your needs.
For tutorial purposes, here is a list of entities that you probably do not want or need recorded in any database.
- System Monitor: RAM, CPU, NETWORK and DISK usage
- Mobile Device: Battery Level, Public IP address, Internal Storage
- Batteries Percentages for different sensors
- Battery Low Binary Sensors
- Zones
- Most Scripts
- Some Automations
Full Configuration.yaml Example
We hope that with this tutorial we have given you a general idea of how Home Assistant databases work, which entities to include or exclude for recording and how you can use this data for longer periods of time. To avoid any confusion, here is how finally your configuration.yaml file should look like:
#Configuration.yaml

#Loads default set of integrations
default_config:

#Databases
recorder:
  db_url: mysql://smarthomescene:12345678@core-mariadb/smarthomescene?charset=utf8mb4
  purge_keep_days: 30
  commit_interval: 20
influxdb:
  host: 192.168.0.xxx #Internal IP of Home Assistant
  port: 8086 #Access Port
  database: smarthomescene #Database Name
  username: username #Login Username
  password: password #Login Password
  max_retries: 3
  default_measurement: state

#Database File Size
sensor:
  #InfluxDB Database Sensor
  - platform: influxdb
    host: 192.168.0.xxx #Internal IP of Home Assistant
    port: 8086 #Access Port
    username: username #Login Username
    password: password #Login Password
    scan_interval: 3600
    queries:
      - name: InfluxDB Database Size
        unit_of_measurement: MB
        value_template: "{{ (value | float(0) / 1024 /1024) | round(1) }}"
        group_function: sum
        measurement: '"monitor"."shard"'
        database: _internal
        where: '"database"=''smarthomescene'' AND time > now() - 5m'
        field: diskBytes


Great write up. Thanks for the detailed work.
I do believe you have an error on your MariaDB Add-on configuration example. You have a reference back to !secret mariadb_pass where you should call out the database. You are using the following:
databases:
– homeassistant #Change if you want
logins:
– username: !secret mariadb_user
password: !secret mariadb_pass
rights:
– username: !secret mariadb_user
database: !secret mariadb_pass <—problem is here
It should be:
databases:
– homeassistant #Change if you want
logins:
– username: !secret mariadb_user
password: !secret mariadb_pass
rights:
– username: !secret mariadb_user
database: homeassistant
Thank you for your response! You are right, it’s a mistake. I’ve corrected it 🙂
Thank you very much for this valuable article
Thank you!
There is an issue with the MariaDB config using !secret.
https://github.com/home-assistant/addons/issues/2398
Use quotes around the !secret to make this work.
– password: ‘!secret mariadb_pass’
Nice catch!
Thanks!
Hi, Great Guide, I opted to install Influxdb V2. But would love to track database size. I see you have the code above for V1.
I have tried but failed to work out the new code for V2.
Has anyone achieved this?
Thank you in advance!
Hello Chris,
Make sure the following is added to the configuration.yaml:
homeassistant:allowlist_external_dirs:
- /influxdb_data
Than create a new sensor:
- platform: command_line

name: InfluxDB size

scan_interval: 3600

command_timeout: 30

command: "du -shm /influxdb_data | cut -f1"

unit_of_measurement: MB

value_template: ""
Hi, thanks this was super helpful.
Quick question:
To create the two template sensors for the “Tracking Database Size”, where do I paste that code please?
Many thanks
Hello BDR,
Those two are template sensors. You can paste them under sensor: in your configuration.yaml file.
Alternatively, It’s better to use includes in configuration.yaml to keep it clean and tidy.
Cheers,
SHS.
Hi folks,
a few days I moved the database to my Synology NAS, I mean I moved from local sqlite to MariaDB running on Synology. What I found out, is that Synology just because of the MariaDB is heavily utilising the disks, the stats reads about 4-6MB/s for write and 1-2MB/s for read. Is it normal? Is HASS generating and constantly reading that much data? If yes I really surprised that the SD card is still alive.
Thank you for any comment.
Hello Lubos,
No, that is not normal at all. Did you go through the process of actually including/excluding entities you want recorded? You probably have some noisy devices that push data every second to HA.
Next important thing, you need to increase the commit_interval of the database from the default 1 (which is almost instant event recording, hence the constant read write cycles) to something like 20-30 seconds.
Your write cycles should peak every 30sec and stay 0 most of the time.
Cheers,
SHS.
Cheers,
thanks for this nice guide, followed it step by step.
I have now two to three questions: How can i check if data is written to influxDB? i can’t see anything there, wehere should it appear?
I have an error in the log with the sensor for influxDB. It Reports 0MB and this Error-Lines (Homeassistant.log)
2023-01-23 18:06:29.710 WARNING (MainThread) [homeassistant.components.sql.sensor] Configuration of the SQL sensor platform in YAML is deprecated and will be removed in Home Assistant 2022.6; Your existing configuration has been imported into the UI automatically and can be safely removed from your configuration.yaml file
2023-01-23 18:06:29.825 WARNING (SyncWorker_8) [homeassistant.components.influxdb.sensor] Query returned no results, sensor state set to UNKNOWN: select mean(diskBytes) as value from “monitor”.”shard” where time > now() – 1m AND “database”=’homeassistant’.
2023-01-23 18:06:30.397 ERROR (MainThread) [homeassistant.components.sensor] influxdb: Error on device update!
Hey Scooter,
1. The first error is from the main SQL database. The database size sensor is deprecated, which means you can remove it from configuration.yaml and the entity will remain functional.
2. The second and third indicate a mistake in your InfluxDB config, hence the query for database size returns no results and can’t update the sensor state.
The most common mistake is an error in database name or user permission.
Double check those and try again.
If you hit a brick wall, send me an e-mail admin@smarthomescene.com
Cheers
Thanks for this. Awesome writeup. I noticed after everything was up and running we still have a [somewhat] large config/home-assistant_v2.db still sitting on the drive. I believe this is the SQLite database. Do you think it is wise to just delete it? What would happen if for some reason MariaDB failed to start one day?
If you’ve migrated to MariaDB, that file is useless in any case. Delete it completely, you’ll be fine.
If MariaDB fails to start for some reason, the recorder will notify you of an error in which case:
1. Restart MariaDB and make sure its working
2. You would need to edit the db_url to point to the default SQLite database. Upon restart, the home-assistant_v2.db would be recreated and things would go back to normal. The data in MariaDB would not be lost though, you can go through it with phpMyAdmin.
Cheers
Hey,
Thanks for the nice manual on howto. I did everything but have one small problem. The sensor for mariadb is not there. The one for influxdb is. I tried the query in grafana and then I get the size so url and query are ok.
Nothing in my log so don’t know what the reason can be.
Kind regards,
Gregory
Hey Greg,
MariaDB no longer needs the database sensor to be added in YAML. But if you’ve added it and its correct, head over to Settings after restarting HA.
You should have a new discovered sensor to which you simply need to click Configure.
The sensor will also warn you that you can remove the entry from configuration.yaml which you can safely do so.
Thats it,
Cheers.
FWIW – It never showed up after restarting for me and I needed to manually add it as shown here.
https://community.home-assistant.io/t/sensor-mariadb-size-not-working/407753/5
BTW – Your guide on this subject was a lifesaver…Much appreciated.
Hello,
many thanks for your excellent and helpful guide! I managed to switch over to MarianDB without any issues. Especially helpful after a big DB corruption with the standard SQL-lite DB in the last few days. However, when working on the next steps, I keep getting the following error with the YAML config when I try to check my config before reboot:
Integration error: logins – Integration ‘logins’ not found.
Integration error: rights – Integration ‘rights’ not found.
Integration error: databases – Integration ‘databases’ not found.
I have searched online extensively and cannot seem to find what I am missing. I also have not found a step that I missed in your guide.
Any guidance or direction here would be greatly appreciated?
Many thanks!
Hello,
Seems like an indentation issue. Can you send me a screenshot of your configuration at admin@smarthomescene.com?
Cheers
Hello,
is there a solution for the error “Integration error: databases – Integration ‘databases’ not found.” I followed the guide and got the error (not the two others of the post before. I checked the steps several times and did not find something I made wrong.
Hi Thomas,
I am assuming you are refering to the MariaDB Config. You are possibly adding the databases variable in your configuration.yaml file which is wrong.
You need to add it under the Configuration Tab of the MariaDB Addon.
Send me an e-mail if you get stuck.
Cheers
Can’t seem to get the Influxdb database size sensor to appear as an entity.
I have this in my config.yaml:
influxdb: !include influxdb.yaml
I have this in influxdb.yaml
host: a0d7b954-influxdb #Change this to internal IPport: 8086
database: !secret influxdb_database
username: !secret influxdb_user
password: !secret influxdb_password
max_retries: 3
default_measurement: state
… redacted
Hey Tom,
Your host is wrong. Need to be the internal IP Address of your Home Assistant instance, eg. 192.169.xxx.xxx.
Cheers
Excellent write up. Thank you!
Thank you for the feedback!
Cheers!
It frustrates me as a user of the Home Assistant container version when I stumble upon a great article like this one – only to find that it exclusively contains instructions for installation via Add-ons (which the container version doesn’t have). Perhaps in the next version you’ll provide a few lines addressed to those running the Home Assistant container version – at least acknowledging that we exist – and if possible providing installation instructions for us as well? (It would be greatly appreciated)
If I overlook the snub to container users, the advice in this article seems exhaustive as well as clearly presented and explained. I’m bookmarking it so I can come back after I manage to find the instructions for setting up a MariaDB container that will be compatible with Home Assistant.
Hello Mark,
Thank you for the feedback.
I’ve been meaning to create container tutorials, you may have just convinced me :)))
Stay tuned!
Cheers!
Great description.
Is there a script to copy contents from the traditional SQLite to both Influxdb and MariaDB databases?
And once that is taken care of, how to disable SQLite and continue with Influxdb and MariaDB only?
Thanks, Chris
Hello Chris,
That would requires installing phpMyAdmin and migrating the database manually, there is no script. However, you can migrate to MariaDB only not Influx, as it’s a time series database.
Whenever you add parameters under the recorder variable, SQLite gets automatically disabled and MariaDB takes over. MariaDB it a replacement for SQLite, while InfluxDB is meant to run in parallel for long term data retention.
Cheers
First, importing your Alchemy data into MariaDB it’s actually all that difficult it seems, thought I never bothered. https://gist.github.com/PattaFeuFeu/c4475457854f42f64f21268777d64d87
Second I would suggest instead of constantly polling the file system for the size of the InfluxDB, that folks just make use of the native InfluxDB v2 internal metrics. Specifically query for the size of the shard you are interested in… In my case:
## InfluxDB Database Sensor

- platform: influxdb

api_version: 2

ssl: false

host:

port: 8086

token: !secret influxdb_token

organization: !secret influxdb_organization

bucket: HomeAssistant

queries_flux:

- name: "HA InfluxDB Size"

unique_id: "HA_DB_size_Influx"

query: >

filter(fn: (r) => r._measurement == "storage_shard_disk_size" and r._field == "gauge" and r.bucket == "e3a22dacbbc461e8" and (r.id == "12" or r.id == "4"))

|> group(columns: ["_time","value"])

group_function: sum

value_template: "{{ ((value|int) |float/1000) }}"

unit_of_measurement: B
Unfortunately I have beaten my head against the wall trying to get the value templet to convert the units to G or anything else but no luck no matter what I do so I’ll leave that as a project for another time (along with optimization DB)… Enjoy!
Hi, and thank you for your super useful guides!
I configured MariaDB in a separate LXC in Proxmox, following your other guide.
I then setup a sensor to monitor the db size, as you explained here, but I cannot find the sensor anywhere in HA.
Where am I supposed to see it?
Thank you in advance!
It’s suppose to appear as an entity in Home Assistant under Developer Tools > States.
Hello,
Thank you for the tutorial. However, I would like to split my sensors configuration from the configuration.yaml file. I created the following in configuration.yaml:
sensor: !include sensors.yaml
and then in the sensors.yaml file:
– platform: influxdb
sensors:
host: localhost
port: 8086
username: !secret influxdb_user
password: !secret influxdb_pass
scan_interval: 3600
queries:
– name: InfluxDB Database Size
unit_of_measurement: MB
value_template: “{{ (value | float(0) / 1024 /1024) | round(1) }}”
group_function: sum
measurement: ‘”monitor”.”shard”‘
database: _internal
where: ‘”database”=”homeassistant” AND time > now() – 5m’
field: diskBytes
I’m getting error messages with the above configuration. How can I split the sensor for influxdb in a separate file?
Also, how do I add the output from that custom sensor to the Overview dashboard?
Hi, very helpful guide indeed. However, as I am using a SSL certificate with my HA setup, putting the local IP address 192.168.x.x (or localhost) apparently does not work with InfluxDB. I of course also tried my public *duckdns.org address, but that does also not work.
I am getting the following error message: “InfluxDB database is not accessible due to ‘401: {“error”:”authorization failed”}’. Please check that the database, username and password are correct and that the specified user has the correct permissions set.”
What needs to be done to use InfluxDB with such SSL setup? Thanks!
Hello,
Yes, SSL works with Influx.
You need to configure it though, see the SSL config options here:
https://www.home-assistant.io/integrations/influxdb/#configuration-variables
Another reason I can think of is if your changes aren’t being committed in configuration.yaml.
Share the log if it doesn’t work.
Sorry i made a typing error: assistent=assistant! The login tot influxdb is now ok, but still the following errors:
Setup failed for recorder: Integration failed to initialize.
Unable to set up dependencies of history. Setup failed for dependencies: recorder
Error during connection setup: (MySQLdb.OperationalError) (1045, “Access denied for user ‘-redacted-‘ (using password: YES)”) (Background on this error at: https://sqlalche.me/e/20/e3q8) (retrying in 3 seconds)
Setup of recorder is taking over 10 seconds.
You main SQL database isn’t setup properly (SQLite, MariaDB etc.)
You need to either change the
recordercomponent in configuration.yaml or delete it completely, to restore to default settings.Problem solved! i removed the quotes around the passwords and reinstalled the entities.
Hi, thanks for your tutorial. Setting up both InfluxDB & MariaDB works fine, and has been running smoothly for a month now. However, monitoring MariaDB file size is not working. I copied your code and made sure it’s identical, but no idea how to fix it. It is not appearing in developer tools / states or anywhere else. Any idea please?
sensor:
#MariaDB Database Sensor
– platform: sql
db_url: !secret mariadb_url
scan_interval: 3600
queries:
– name: MariaDB Database Size
query: ‘SELECT table_schema “homeassistant”, Round(Sum(data_length + index_length) / POWER(1024,2), 1) “value” FROM information_schema.tables WHERE table_schema=”homeassistant” GROUP BY table_schema;’
column: “value”
unit_of_measurement: MB
The integration has changed, you now need to use the UI. Please follow the UI method from Settings > Devices & Services > Add Integration > SQL
https://smarthomescene.com/guides/optimize-your-home-assistant-database/#tracking-database-size
Thank you – I confirm this works. URL can be left blank as MariaDB is the recorder db. Can you edit the post accordingly to keep it up-to-date?
Thanks