Those who are familiar with SwitchBot and their product portfolio are already aware that they focus on creating retrofit smart devices. For example, the SwitchBot Bot is a smart button pusher that you can install on any wall switch and control it locally. The SwitchBot Curtain and SwitchBot Blind Tilt are also retrofit devices designed for making blinds, curtains and drapery smart.
SwitchBot has recently released a new set of roller shades, but not without their own sprinkle of innovation. This device is adjustable and can span in width to accommodate different window sizes. There’s an element of DIY in this smart roller shade motor, as the fabric is cuttable and replaceable with a design and style of your choice.
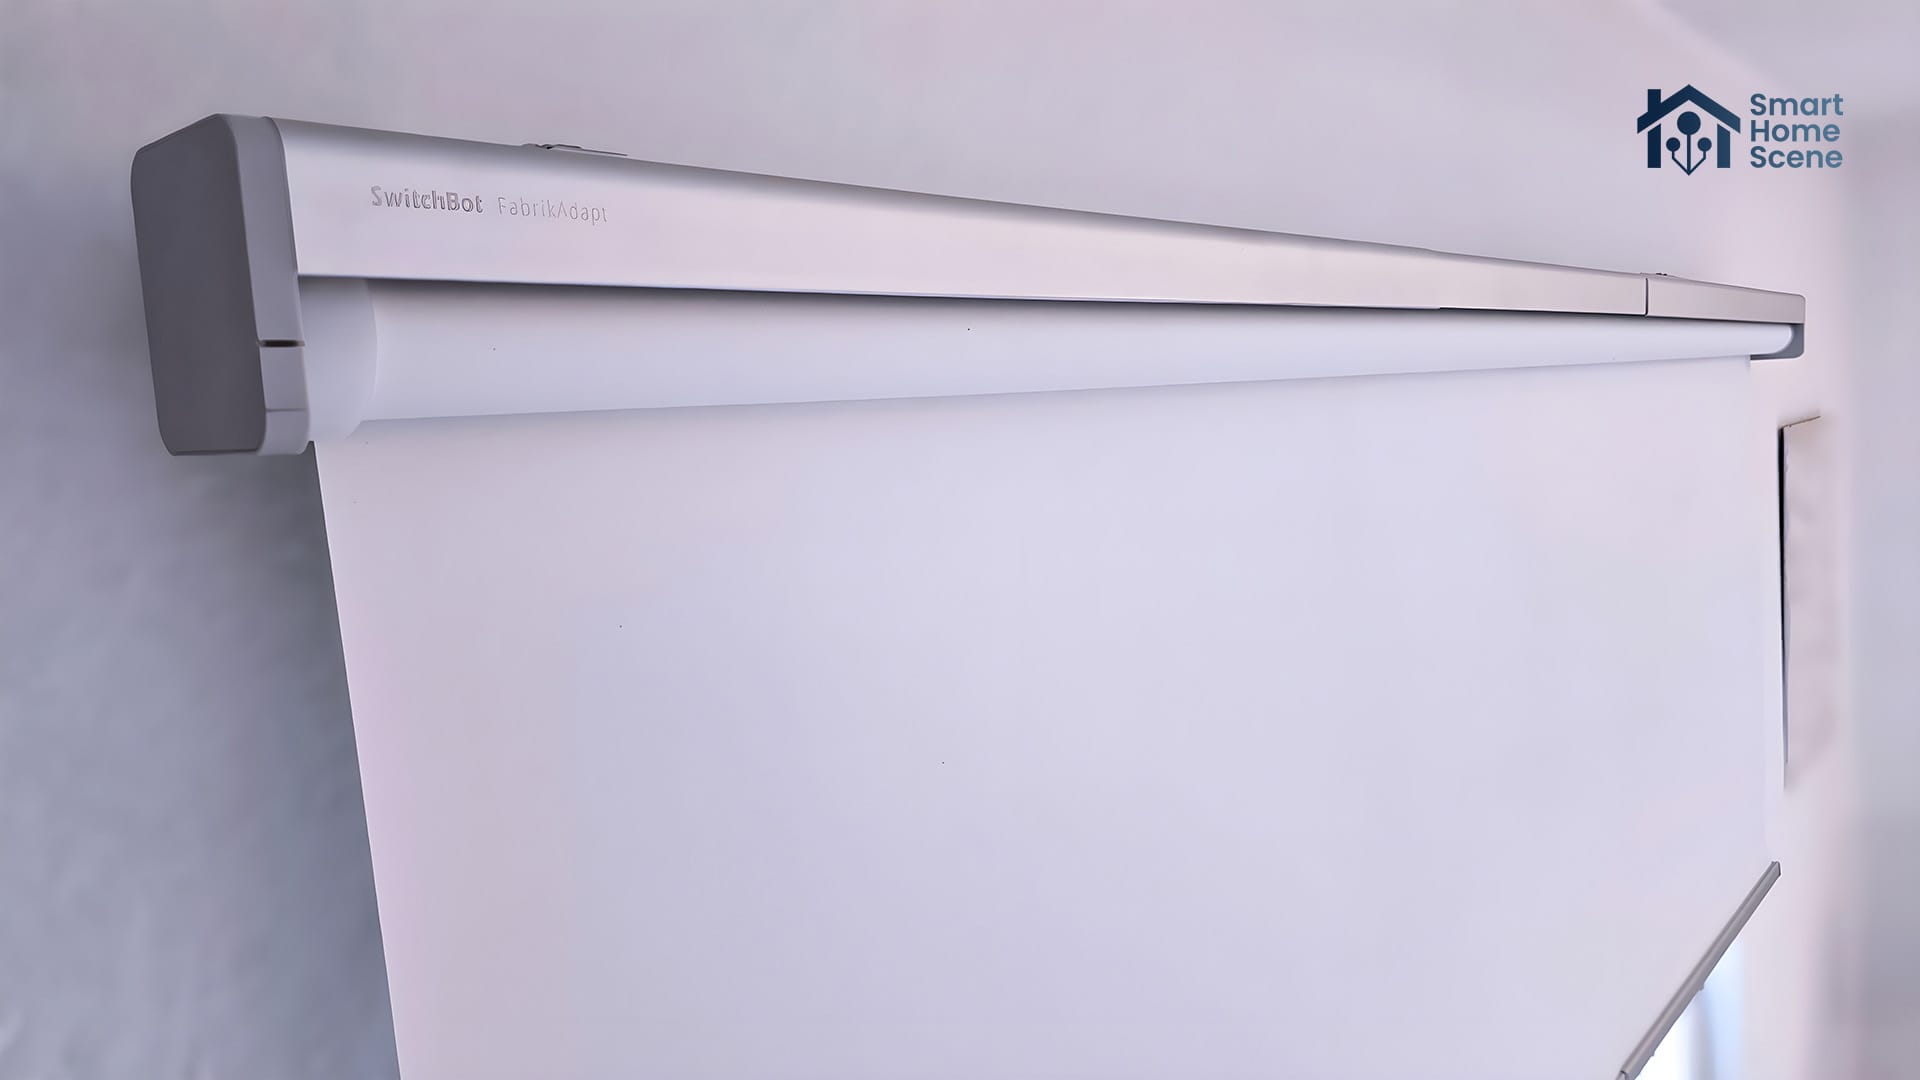
In this review, I’m sharing my experience with the new SwitchBot Roller Shades and integrating them into Home Assistant. They are available in several different sizes on their Official Website. SwitchBot also offers a Roller Shade Bundle with a solar panel and a SwitchBot Hub 2.
SwitchBot is running a sale until March 31st with the following discounts:
US: $199.99 Now $109.99, 45% OFF
EU: €219.99 Now €129.99, 40% OFF
SwitchBot Roller Shades Specification and Models
The SwitchBot Roller Shades are available in several different sizes with adjustable widths. You can mount them inside or outside the window frame and attach a solar panel for continuous power. If used only on battery, you can get up to 8 months of battery life on a single charge. Here’s how they differ:
- Name: SwitchBot Roller Shades
- Connectivity: Bluetooth LE 5.0 (LongRange)
- Connectivity Range: 80m without obstacles
- Operating Noise: Standard Mode: ≤35dB, QuietDrift Mode: ≤ 30dB
- Operating Speed: Standard Mode: ≤30s, QuietDrift Mode: ≤200s (2m height)
- Device Size and Weight:
- S: 82×72×580–800mm (3.2×2.8×22.8–31.5″), 1.16 kg
- M: 82×72×800–1100mm (3.2×2.8×31.5–43.3″), 1.4 kg
- L: 82×72×1100–1400mm (3.2×2.8×43.3–51.1″), 1.64 kg
- XL: 82×72×1400–1850mm (3.2×2.8×55.1–72.8″), 2.0 kg
- Fabric Size and Weight:
- S: 756×2200mm (29.8×86.6″), 1.20 kg
- M: 1056×2200mm (41.5×86.6″), 1.44 kg
- L: 1356×2200mm (53.4×86.6″), 1.95 kg
- XL: 1806×2200mm (71.2×86.6″), 2.55 kg
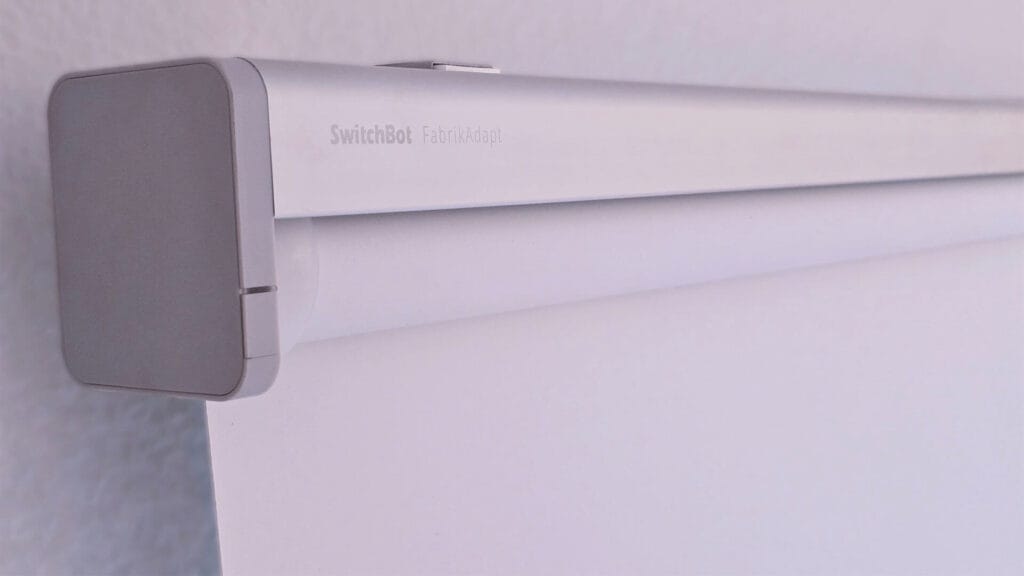
- Mounting Bracket Size: 75×40×30mm
- Material Type: Aluminum alloys with anodized, sandblasted coating
- Operating Temperature: 0°C~45°C
- Operating Humidity: 10~95% RH
- Battery Type: 2×18650 lithium
- Battery Capacity: 2600 mAh
- Battery Life: 8 months (1 cycle per day)
- Price: From €219.99
Package Contents and Disassembly
The SwitchBot Roller Shades ship in a long cardboard box containing the shade and an accessory box. Depending on the shade size you choose, you may encounter shipping and customs challenges. While the roller shade itself is adjustable, it’s set to the max size out of the box as it comes with the fabric pre-installed.
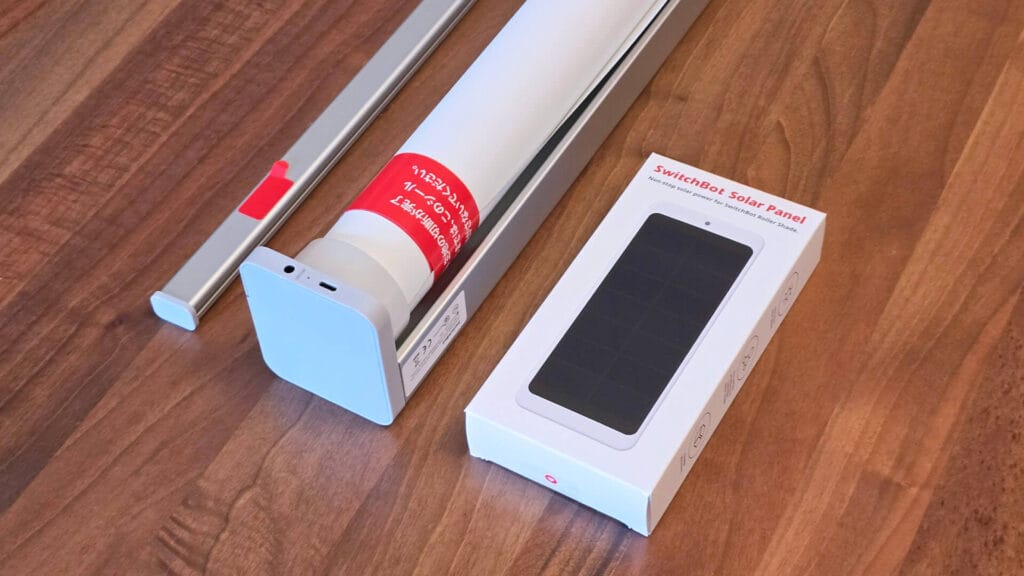
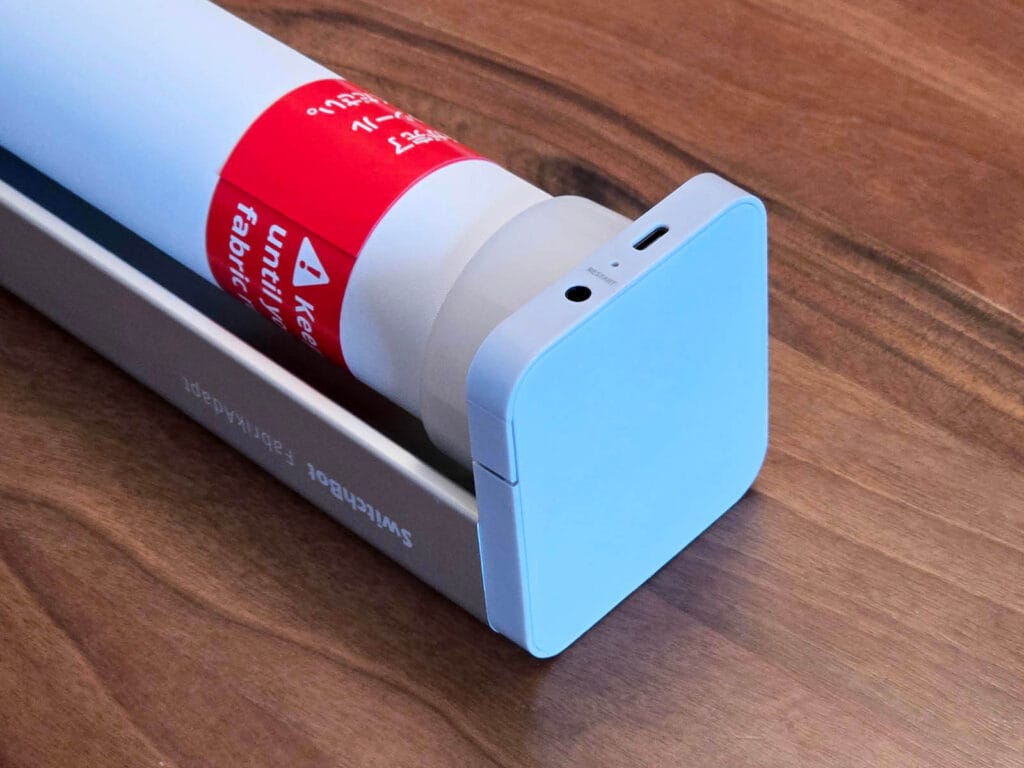
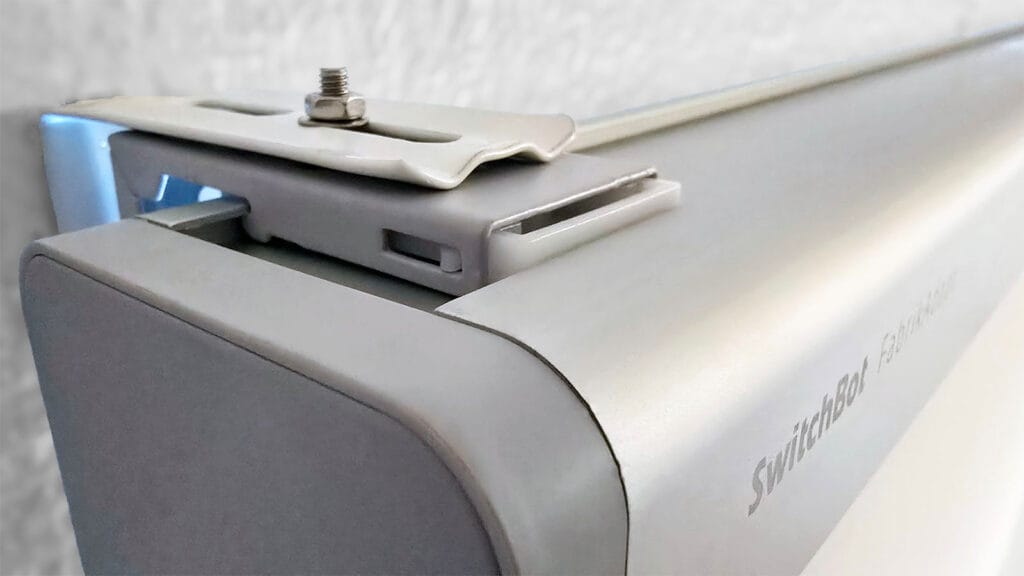
On one side of the SwitchBot Roller Shade the main motor and PCB are installed. The motor holds two 18650 batteries inside, which can be recharged by a 5V1A source. The solar panel can be connected here and attached to your window for continuous power.
The 3.5mm jack in the picture is used by the manual controller. This small two-button controller is designed to hang next to your smart shades and allow you to lift or lower the blinds locally. Each SwitchBot Roller Shade includes this manual controller, which has a cable length of 1.5 meters. The small plastic button on the side is used to initiate and confirm pairing, while the pin-accessible one in the middle is used to reset the roller shade completely.
Removing the plastic cover reveals the white PCB of the SwitchBot Roller Shade. A set of screws hold the board in place, while another set holds the entire plastic holder bolted to the aluminum frame. It’s important to note that this cap needs to be removed in order to make adjustments to the fabric width. More on this below.

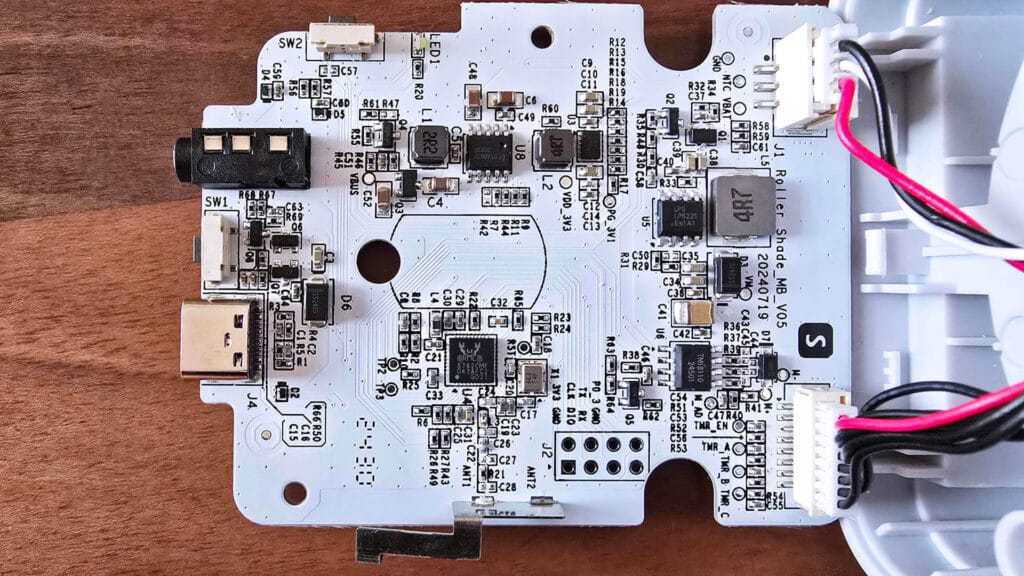
The main PCB holds various electronic components that make the SwitchBot Roller Shade tick. As with most SwitchBot products, Bluetooth connectivity is handled through the BM-8762CMF Bluetooth 5.0 BLE Module [Datasheet]. This module is based on the Realtek RTL8762C [Datasheet] Bluetooth low-energy SoC. The SwitchBot Roller Shade also uses the LongRange Bluetooth feature, which should provide coverage of up to 80 meters in an unobstructed space.
The SW1 and SW2 marks on the boards are the tactile button switches used for pairing and resetting the device. The chip labeled “LP6221” is an LP6221 step-down converter. This is a power management IC that provides a stable 3.3V supply for the microcontroller and other components. The entire PCB is covered in white solder mask, which is a protective layer that prevents solder bridges and corrosion.
I took out the main motor by slowly sliding it out of the roller tube. The entire thing is greased up to ensure it operates smoothly and with reduced noise. The motor itself was unmarked and I was unable to tell who manufactured this device. It feels very heavy and compact compared to other motors I’ve handled, possibly because of the dual batteries this device uses.
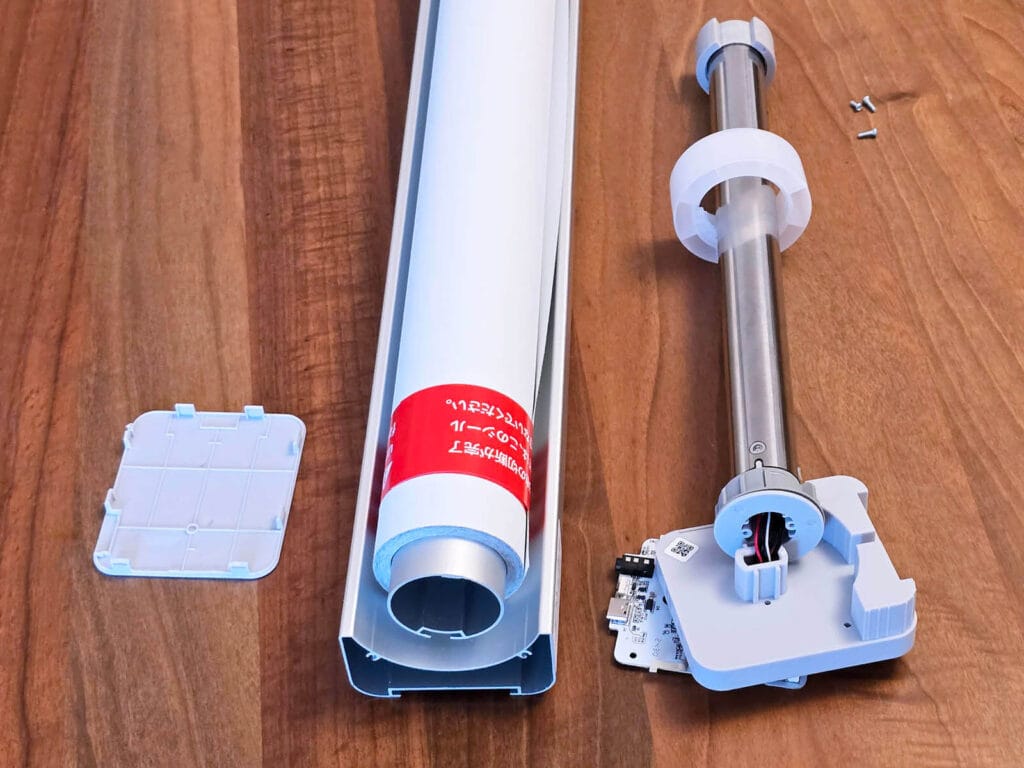
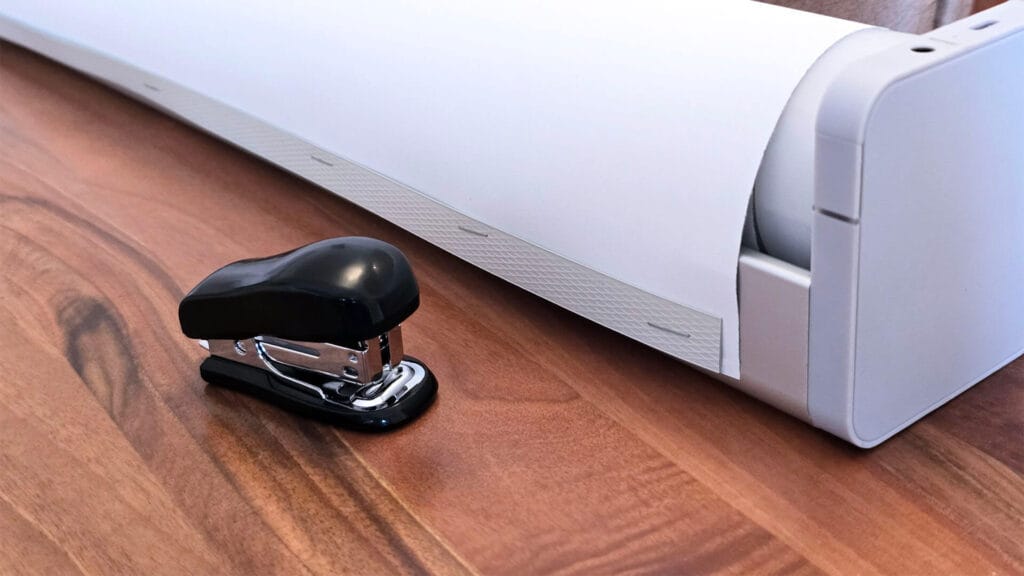
Finally, the accessory box contains a set of tools and accessories needed to install the SwitchBot Roller Shade. Some of these are quite essential, while others like the stapler and screwdriver you probably already have. Among the essentials, there is a specialized fabric cutter which is designed to rotate around the material while it is still rolled up. I don’t think you can cut the fabric with anything else quite as effectively. There’s also a small leveler in the package, which makes mounting so much easier.

Cutting, Installation and Mounting
The SwitchBot Roller Shades are easy to install in the sense that it is easy to understand where everything goes and what’s needed. Obviously, it requires drilling and installing dowels, but that is part of the mounting process for any blinds, including the SmartWings Matter over Ethernet Shades I recently reviewed.
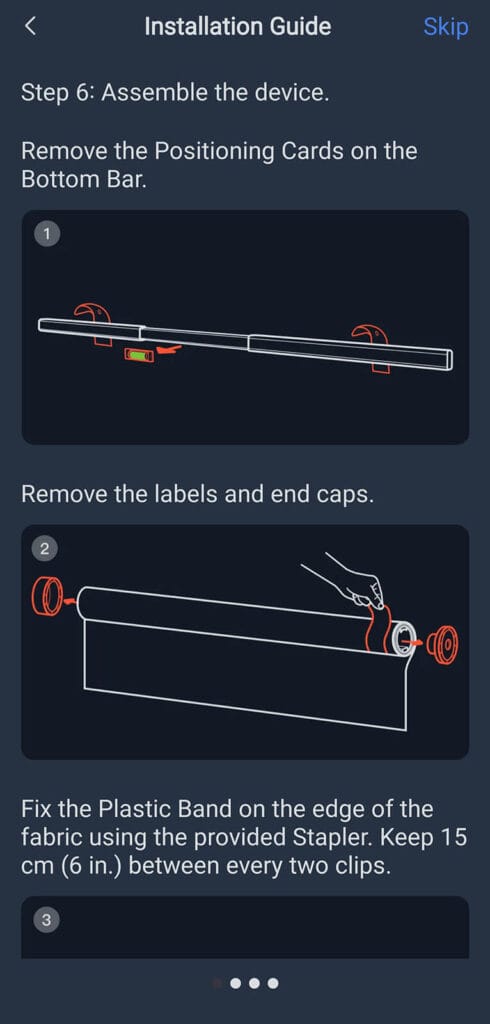
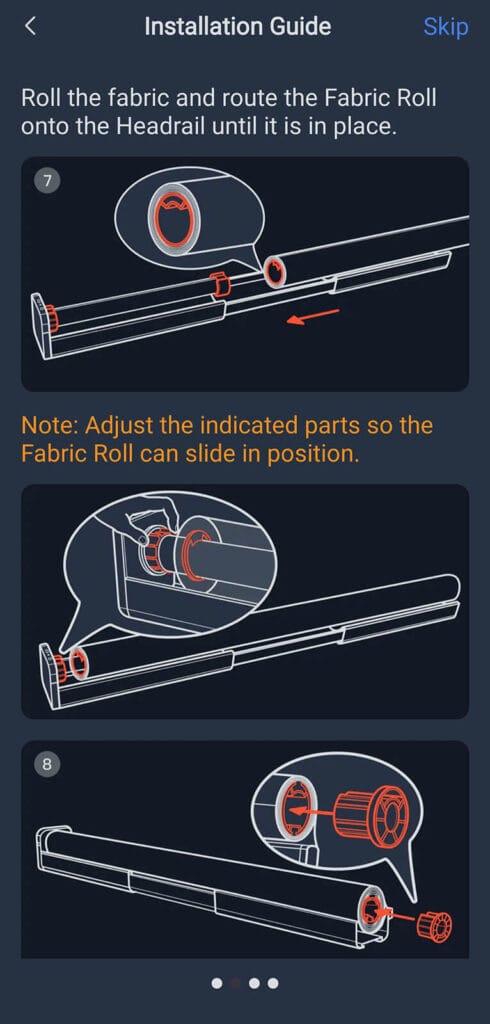
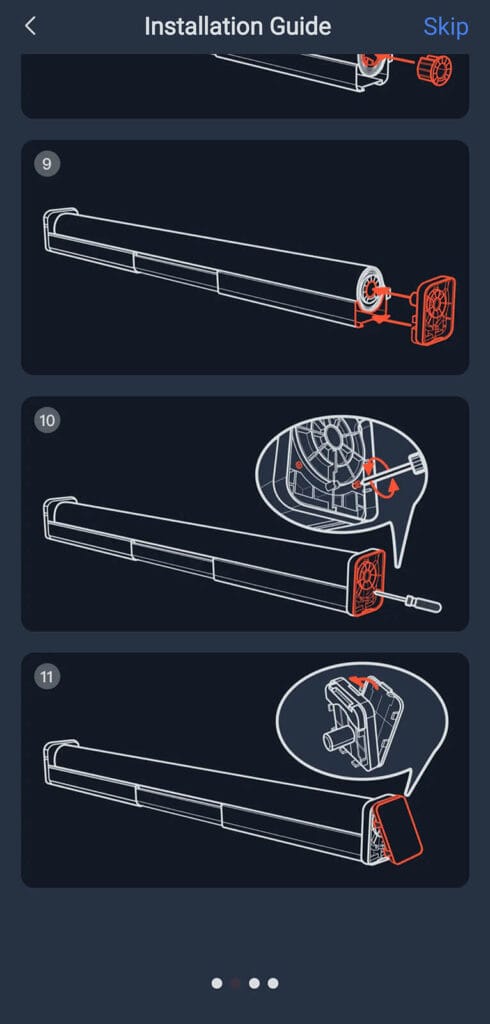
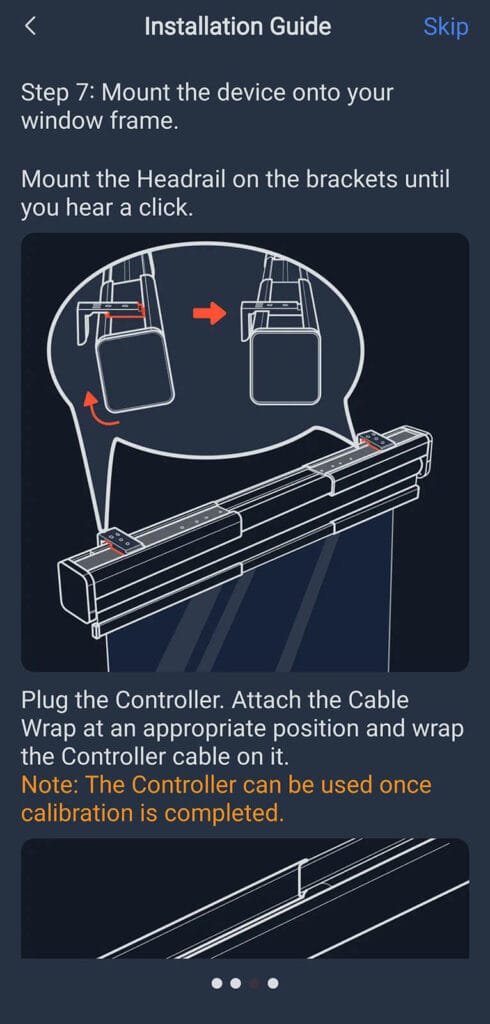
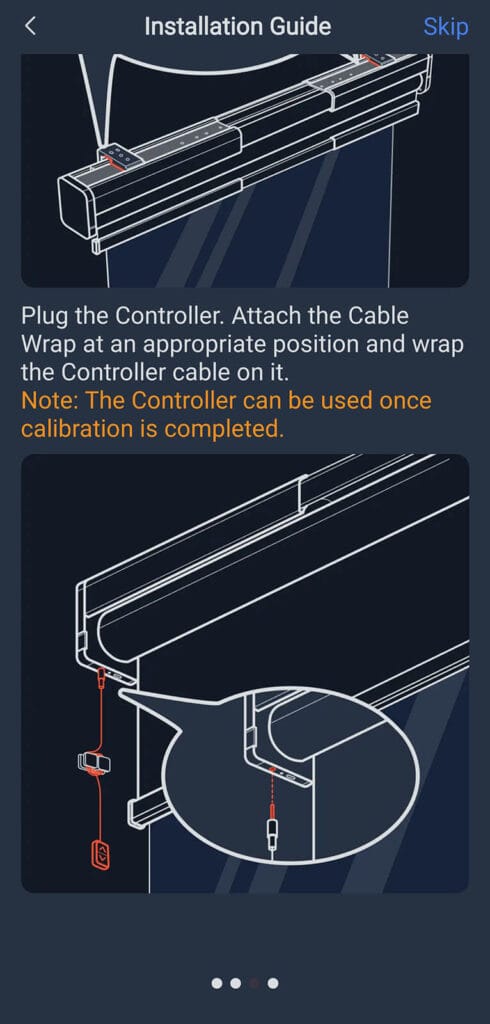
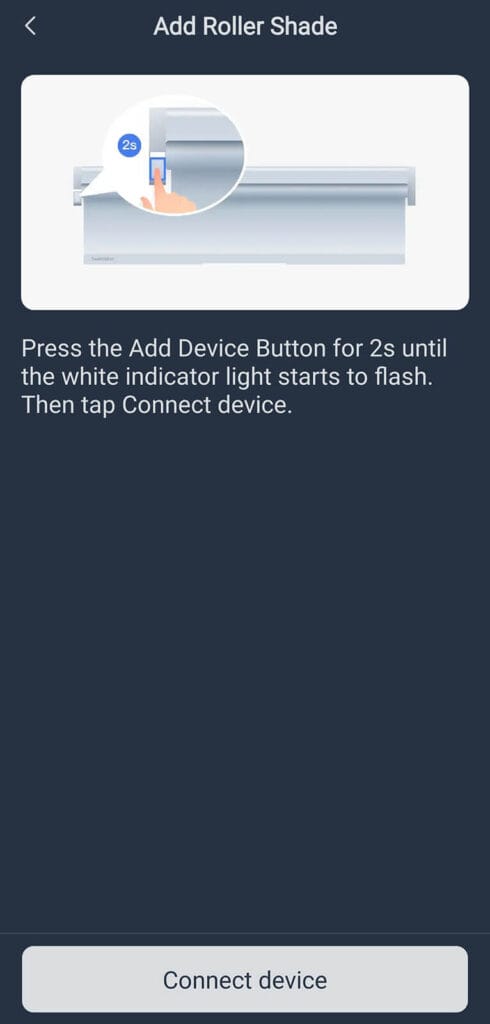
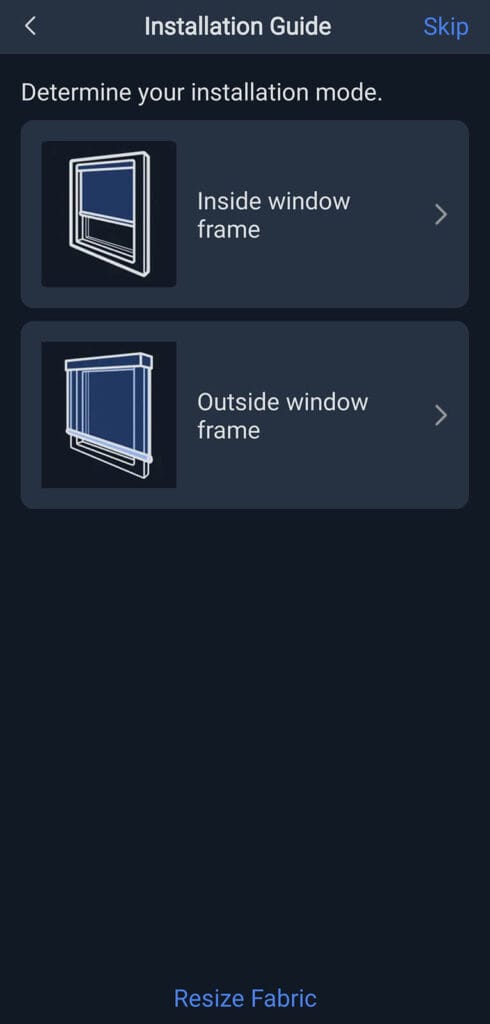
Now, SwitchBot goes out of their way to create very friendly and easy to follow user manuals for their devices. Each manual is visually presented and included in the box, so all you need is to read and follow along. Furthermore, when you pair the roller shades to the app, a visual mounting guide with some very useful graphics is available in the app if you prefer using that.
Here are a few screenshots:
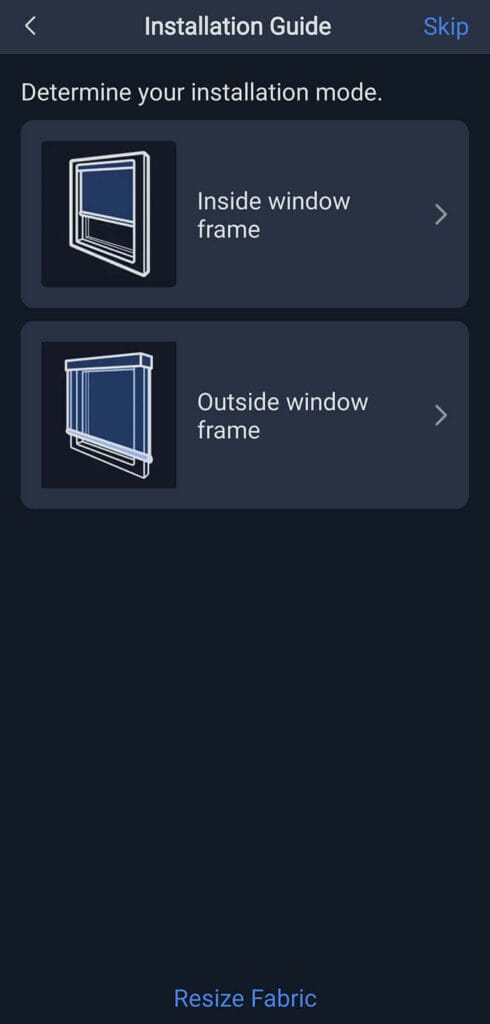
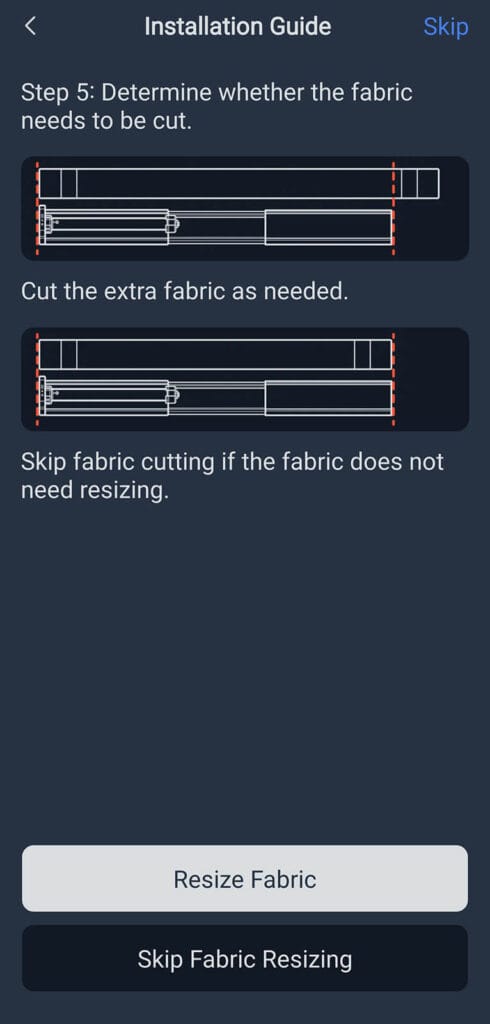

I highly suggest cutting and preparing the roller shade before you mount it on your window. In my case, I did not need to actually cut the fabric and roller tube since I ordered these at exact dimensions. If you do need to do it, follow the manual to the point, exactly as written and advised.
The metal rod that actually holds the fabric wrinkle-free and properly extended, requires stapling a plastic strip at the bottom and folding it upwards. This strip is also included in the box, but is easy to miss and discard, so be careful and remember it is there.
When you start stapling from one end to the other, make sure this strip matches the length beforehand. Even though I measured it correctly, it came out about 5mm shorter because I did not pull it inline properly. This was not an issue after all, as the entire thing goes inside the metal rod and is not visible.
The SmartWings Matter over Ethernet PoE Shades I reviewed had a set of extension brackets included in the box. These are meant to add space between the blinds and the window, in order to accommodate any manual switches or controllers. I decided to mount the SwitchBot Roller Shades onto these extender brackets so I did not have to replace them entirely.
It worked great for testing on one of my windows:
These worked great and held the shade securely in place, but the brackets were somewhat visible as the extenders added to the height of the entire thing. At the second window, I decided to just use the SwitchBot Mounting brackets without these extenders. It resulted in a sleeker look which was not visible while standing in the room.
Here’s another image:
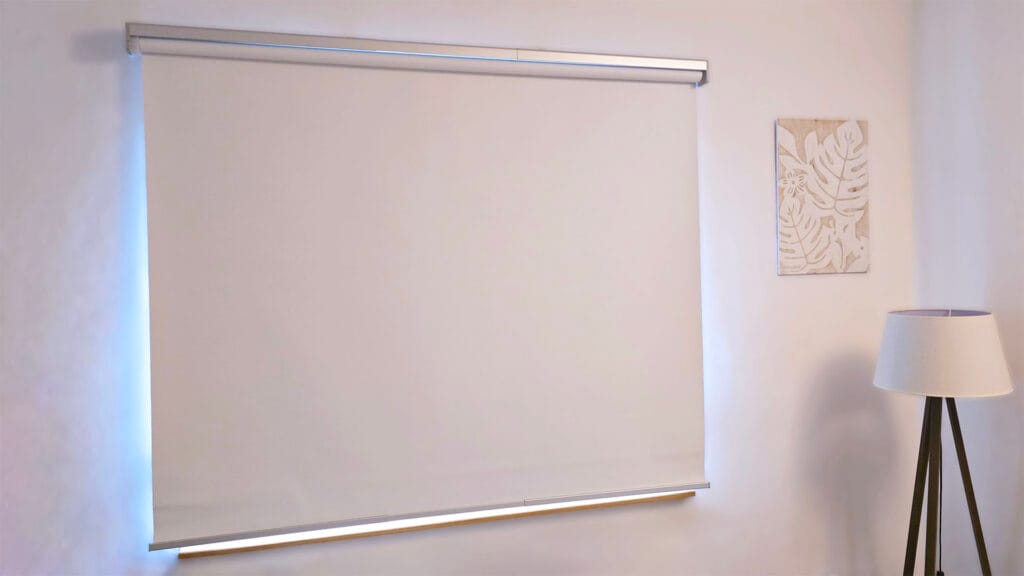
The fabric that ships with the SwitchBot Roller Shades provides 100% complete blackout. No light can protrude and everything becomes night. In my opinion, this type of fabric is much more suitable for offices and places where you need 100% blackout. The good news is this fabric can be replaced if you are willing to DIY the whole thing.
Finally, here’s how the SwitchBot Roller Shades look like installed on a window (with extenders):
In the SwitchBot App
Once I installed the SwitchBot Roller Shades, I was all ready to add them to the app. SwitchBot devices have one of the easiest and least involved pairing processes out of any other brand out there. Thanks to their passive BLE advertisements, the devices are discovered almost instantly in the app.
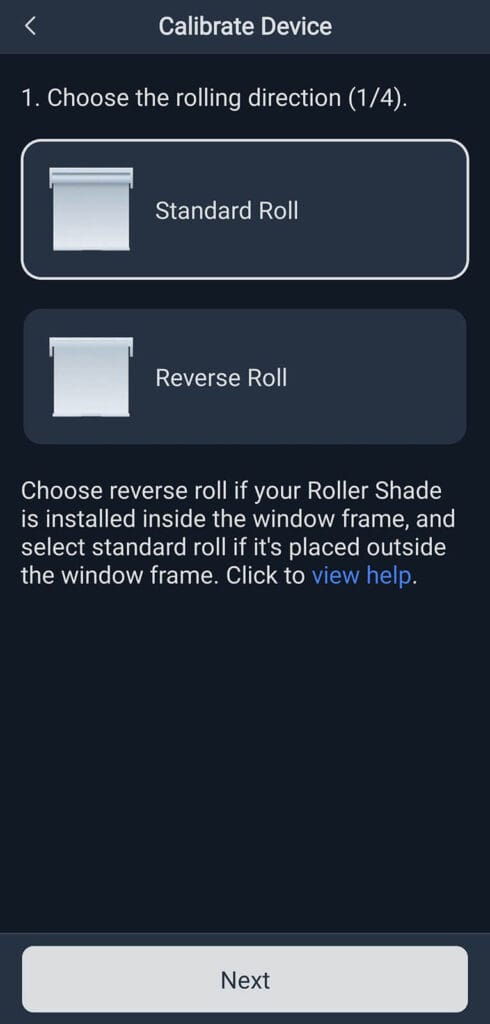
As the Roller Shade is sleeping by default, it needs to be awakened by pressing the button on the side for two seconds. Here’s how the process looks like in a few screenshots, including the calibration process:
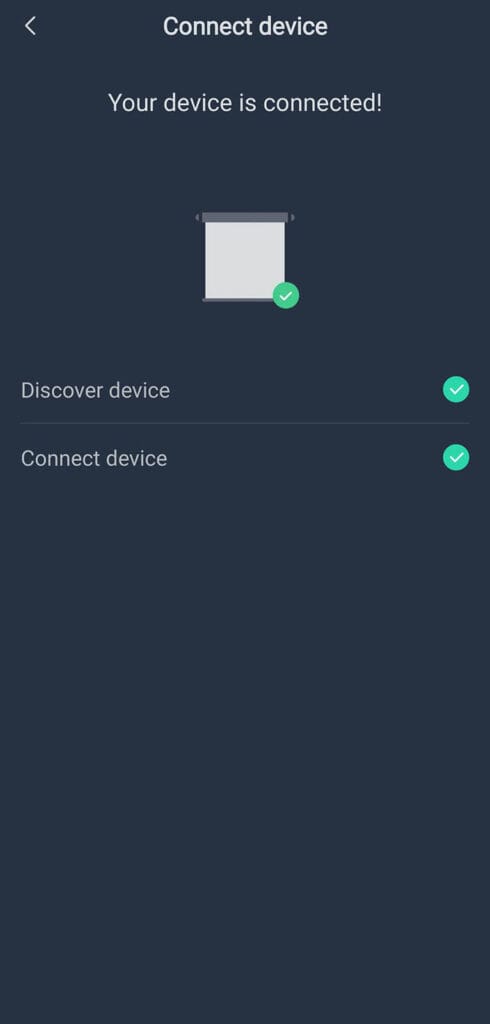
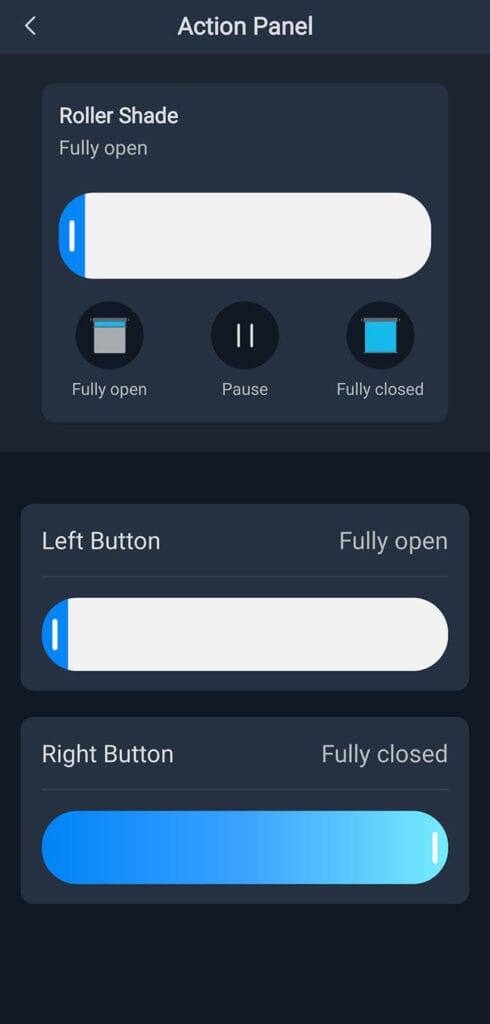
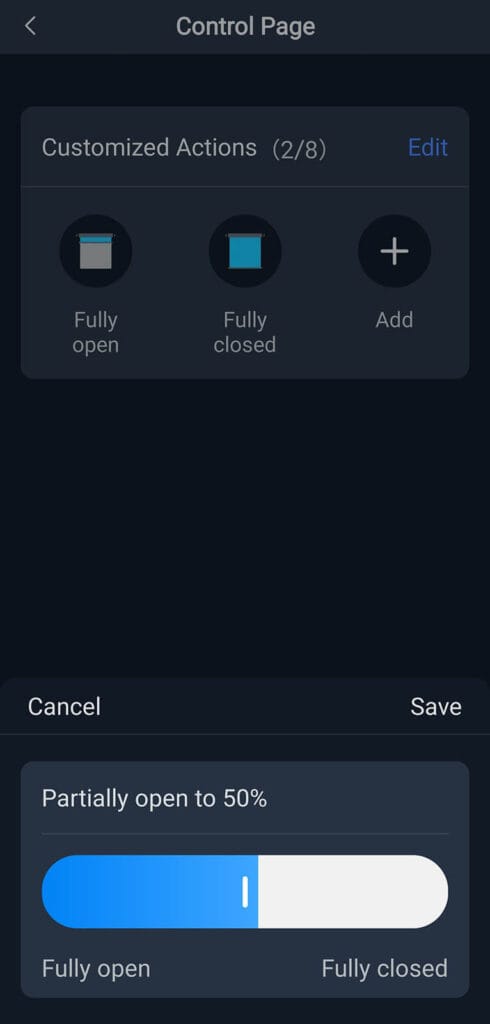
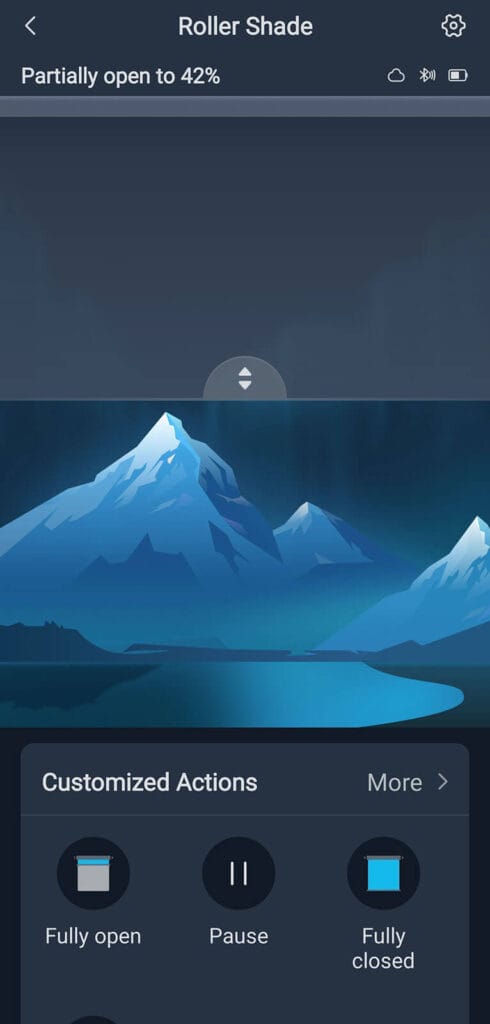
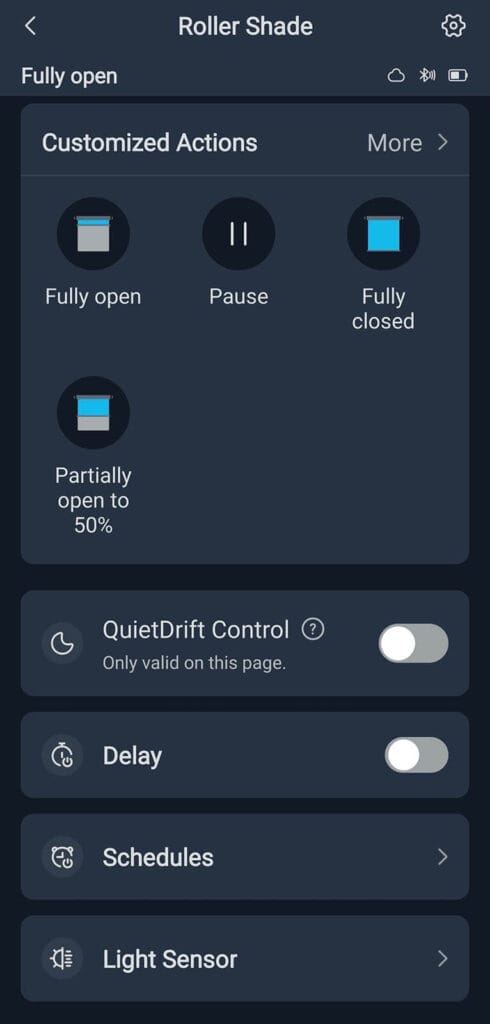
The SwitchBot Roller Shade paired to the app in about 5 seconds without any issues. The app itself is very sleek and intuitive to use. All controls are fairly standard for a device of this type, although I did appreciate the fact that you can preset customized levels and trigger those with the press of a button.
The QuietDrift mode is very quiet and almost noiseless. You basically hear nothing when the roller shade operates with this setting enabled. This mode is great for opening the shades in the morning when you are asleep. It’s worth pointing out that this mode is very very slow and not meant to be used daily.
Home Assistant Integration
At this moment, the SwitchBot Roller Shades can be integrated in Home Assistant only through one of their Matter hubs. It is worth noting that SwitchBot has announced it is expanding its official Home Assistant support, providing direct integration for many of their devices. In this list, the Roller Shades are listed as “Coming in April” which means direct and local integration in Home Assistant is on its way.
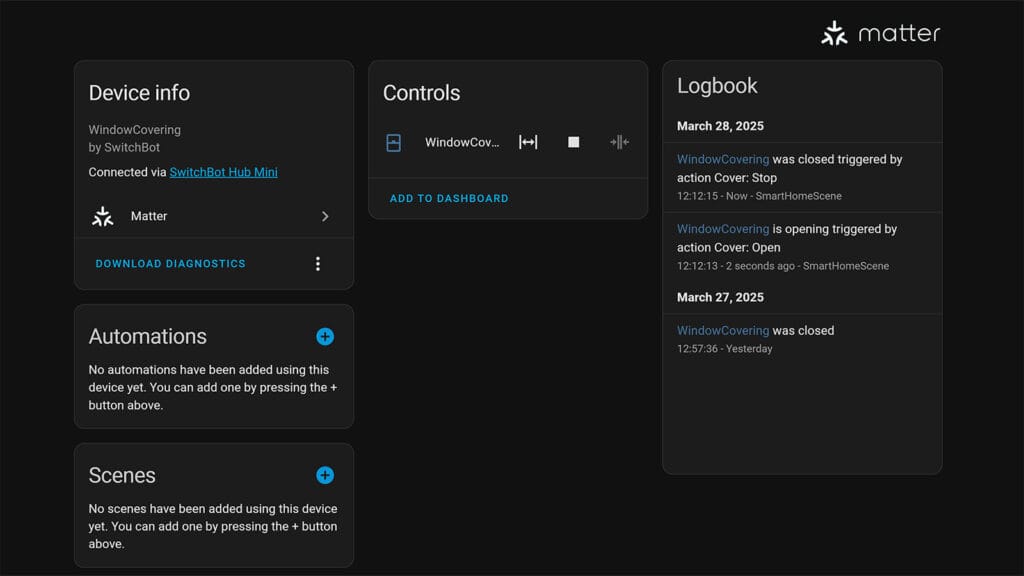
To pair the device to Home Assistant, you need to add the Roller Shades as a secondary device under the hub’s settings in the app. Once integrated in Home Assistant through the SwitchBot Hub Mini over Matter, a single cover entity is exposed and controllable:
Final Thoughts
My experience with the SwitchBot Roller Shades was very pleasant, particularly regarding the ease of installation and the intuitive app interface. The adjustable width and the option for DIY fabric replacement are innovative features that set these shades apart. Note, SwitchBot does not officially recommend replacing the fabric. However, it can be done very easily as the whole roller shade can be very easily disassembled.
The build quality of the roller shade body is top notch. The aluminum enclosure feels very sleek, smooth and well made. It’s feels heavier than the two sets of SmartWings Blinds I tested. The bulk of the weight is the actual fabric though, which can be replaced with something lighter and easier.
The QuietDrift operating mode is a nice and very welcomed feature. It is significantly slower than the standard operating mode, but perfect for those quiet mornings. This feature is also available in the SwitchBot Curtain 3 bot for controlling shades and draperies.
The current reliance on a Matter hub for Home Assistant integration can be considered a temporary limitation. While SwitchBot has promised direct integration in the near future, the need for a hub adds an extra step and cost if you do not already have one. Admittedly, It does make things much easier though.
If the SwitchBot Roller Shades fit your use case and budget, I can recommend them without reservations. If you find the DIY element of these shades challenging, consider the ready-made SmartWings Blinds as a good alternative.


SwitchBot is running a sale until March 31st with the following discounts:
US: $199.99 Now $109.99, 45% OFF
EU: €219.99 Now €129.99, 40% OFF


Thank you for the in-depth review, including some of the inner workings and the specs! Do you happen to know the diameter of the tube itself?
Thanks for another awesome and detailed review. I have a question about the space between fabric and the wall. As I see from the photo with extenders, the space between fabric and the wall is quite noticable with light getting through there. From the photo without extenders, it’s not so obvious. Could you comment, if and how big the space is.
Form my use case I need to minimize the space or actually get a situation where no light gets through there. I’ll be mounting them on the wall, same as you.
Highly appreciated if you could comment on that.
Without any extenders, you can bring it to about 1cm (0.4″).
The SwitchBot brackets themselves have holes that you can use to adjust the space a little bit.
Another option would be to mount it inside the window frame, which would cover it completely.
Cheers!
Thanks, this was what I was looking for, highly appreciated. I can’t mount them inside the window, not enough space.
Is this 1cm because of the frame? I’d like to bring it closer to the wall.
The brackets have these small hooks that hold the shades, so i believe that’s as close as you can get
I wish these came wider an XXL model up to 2.5m.
I’ve two windows I’d love to put these in but just not wide enough….