About Home Assistant Remote Access
Remote access to Home Assistant is essential for controlling your smart home from anywhere. Whether you need to check cameras, adjust lighting, or manage thermostats, having a secure and reliable way to connect home is crucial. However, opening Home Assistant to the internet without proper security can expose your system to threats, making it important to use trusted and secure remote access methods.
There are many ways to access Home Assistant remotely, each with different security levels, setup difficulty, and reliability. Some options offer plug-and-play convenience, while others provide more control and privacy at the cost of additional setup. Choosing the right method depends on your technical comfort level, security needs, and how much maintenance you’re willing to deal with.
This guide breaks down each remote access method, comparing security, ease of use, and performance, so you can find the best solution for your setup. Whether you want something quick and simple or more advanced and self-hosted, there’s a secure way to access Home Assistant remotely without exposing your network to unnecessary risks.
Port Forwarding (Not Recommended)
We’ve all started here (including me), exposing port 8123 to the internet without knowing what we were doing. It’s the simplest and most tempting way to access Home Assistant remotely—just forward a port on your router, and boom, you can log in from anywhere. It feels like magic at first, but soon, the security risks become clear.
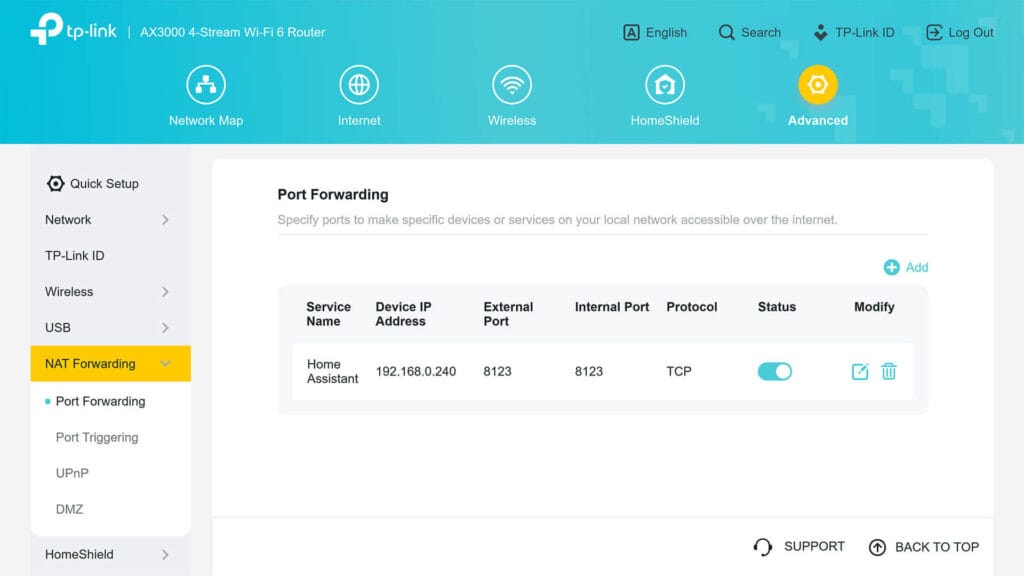
While port forwarding is fast and easy, it also leaves your system wide open to attackers. Hackers constantly scan for open ports, and without extra protection, your smart home could become a target. Some ISPs don’t even allow it, especially if they use Carrier-Grade NAT (CGNAT), which blocks external connections. Even if it works, your public IP may change, making it unreliable unless you use Dynamic DNS (DDNS) to keep your address updated.
Port forwarding gives you full control, but that also means full responsibility for security. If you don’t set up firewall rules, strong passwords, and SSL encryption, your Home Assistant is exposed to potential breaches. I learned this the hard way when I saw failed login attempts in my logs just hours after opening a port. Because of these risks, I don’t recommend port forwarding unless paired with a VPN, reverse proxy, or Cloudflare protection. There are better, safer ways to access Home Assistant remotely.
DuckDNS
After port forwarding, came DuckDNS. Back in those early days, every YouTuber had a tutorial on setting it up for remote Home Assistant access, and I followed along like everyone else. It felt like a great upgrade—no more worrying about my ISP changing my IP. With DuckDNS, I had a custom domain name that always pointed to my Home Assistant. Everything was perfect… until it wasn’t.
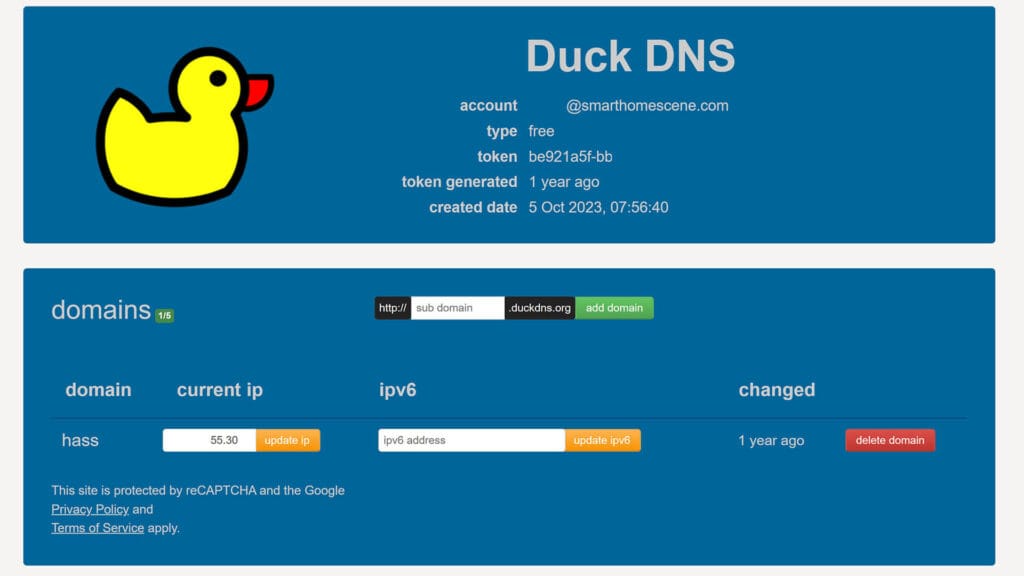
At first, DuckDNS seemed reliable enough, but I quickly learned that it depends entirely on your ISP and your local setup. If your public IP changes too frequently, there’s a delay before DuckDNS updates it, leading to random disconnects. Since it runs on your Home Assistant server, if the device crashes or restarts, the DDNS update stops working, leaving you locked out. Further, using DuckDNS alone doesn’t improve security—it simply makes your Home Assistant easier to access.
To address this, it’s crucial to pair DuckDNS with other security measures, primarily a reverse proxy and SSL encryption. Unless you pair it with Let’s Encrypt SSL, strong authentication, and extra security layers, you’re still exposed to potential brute-force attacks and exploits if you are using DuckDNS alone.
A reverse proxy, like NGINX or Caddy, acts as an intermediary between the internet and your Home Assistant server. When combined with a dynamic DNS service like DuckDNS, it provides a secure and reliable way to access your Home Assistant remotely. DuckDNS provides a consistent domain name even if your home’s public IP address changes, which is essential for remote access. The reverse proxy then handles SSL encryption (via Let’s Encrypt), adds authentication layers, and provides other security benefits.
While DuckDNS is free and better than plain port forwarding alone (because it solves the dynamic IP issue), it has its limits. I eventually moved on to better solutions that didn’t leave me rebooting the DuckDNS add-on every time my server went down. If you’re considering DuckDNS, know its limitations and secure it properly—ideally with a reverse proxy and Let’s Encrypt—or skip it altogether in favor of safer options.
NGINX Reverse Proxy with Let’s Encrypt SSL
Many advanced Home Assistant users prefer using NGINX Reverse Proxy over anything else. It provides a secure and flexible way to expose Home Assistant remotely without fully opening it to the internet. By acting as a middleman, NGINX forwards requests to your Home Assistant instance while adding SSL encryption, authentication layers, and extra security controls.
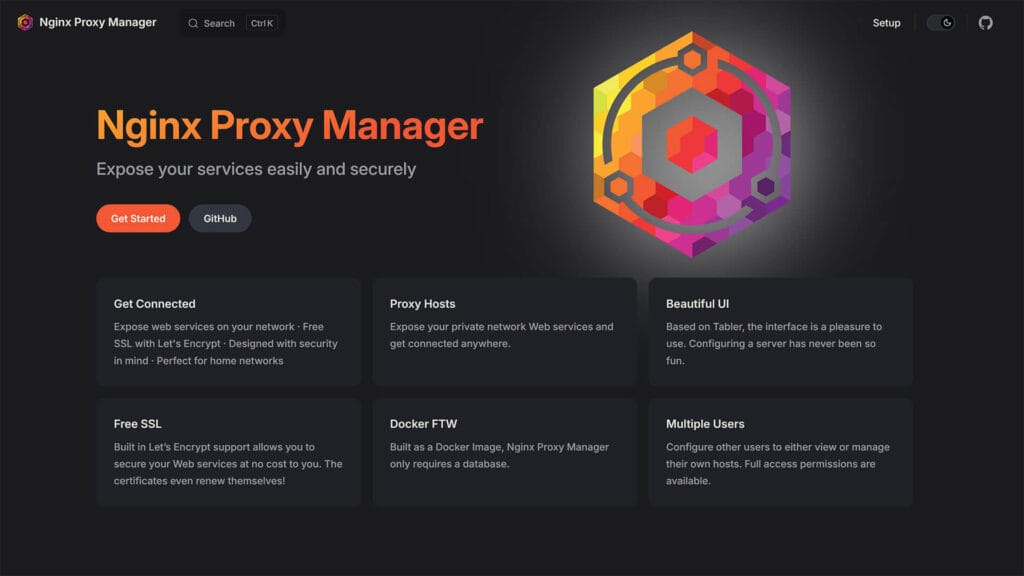
NGINX is a reliable and scalable solution, especially for those who want full control over their remote access setup. Since it’s used with Let’s Encrypt SSL certificates, it ensures that connections remain encrypted and secure. Unlike port forwarding which exposes your Home Assistant server directly, NGINX allows you to restrict access, block unauthorized requests, and even set up advanced security rules.
However, setup complexity is a major drawback for most users. You need to configure firewall rules, SSL certificates, domain settings, and reverse proxy rules, which can be overwhelming if you’re not comfortable with such level of server administration.
Because NGINX is self-hosted, it has no external dependencies, aside from Let’s Encrypt if you’re using SSL. It’s an excellent option for users who want a powerful and customizable remote access solution, but it requires regular maintenance and troubleshooting. If you enjoy fine-tuning your setup and want total control over security, NGINX is a solid choice. However, if you’re looking for a quick and easy way to access Home Assistant remotely, there are simpler and more beginner-friendly alternatives out there.
ZeroTier One VPN
I first came across ZeroTier when testing VPN-based remote access solutions without the hassle of traditional networking setups. It quickly became clear why many people use it for Home Assistant remote access—it works like a virtual LAN, making all connected devices behave as if they’re on the same local network, even when they’re miles apart.
ZeroTier is reliable, fast, and works well across different devices, but it does require a cloud-based controller to manage connections, similar to Tailscale. However, unlike Tailscale, ZeroTier gives you more networking control and allows peer-to-peer connections without relays, making it better for low-latency access. The downside is that setup is slightly more complicated than Tailscale, requiring manual network creation and device authorization. While Tailscale offers a simpler, plug-and-play experience, ZeroTier appeals more to users who want custom network configurations and a true virtual LAN experience.
Despite being cloud-managed, ZeroTier is self-hosted once devices are connected, and the data doesn’t necessarily pass through their servers (depending on the configuration).it doesn’t rely on external relay servers like Tailscale’s DERP nodes. This means it can be faster and more private, but it also requires proper firewall configurations and manual setup. If you’re looking for the easiest VPN solution, Tailscale is the way to go, but if you want more control over your virtual network and direct device communication, ZeroTier is a powerful alternative that’s well worth considering.
Tailscale VPN
The weird thing about all this is I have three different access methods for my main Home Assistant server. I have a Home Assistant Cloud subscription (although I don’t use it, I keep it active to support the devs). I use a Cloudflared Tunnel for my daily remote access. And then there’s Tailscale, which I never removed after moving over to Cloudflare.

The reason Tailscale stuck around is because it just works. Unlike other VPNs that require complex configurations, Tailscale makes setting up secure remote access incredibly simple. There’s no need to open ports, configure firewalls, or deal with domain names. You install Tailscale on your Home Assistant machine and on your other devices, log in, and suddenly, it’s like they’re all on the same local network—even if you’re halfway across the world. It uses the WireGuard protocol under the hood, ensuring fast and encrypted connections, and its relay system (DERP) keeps things working even if direct connections aren’t possible.
Compared to ZeroTier, Tailscale is easier to set up but offers less control over networking. ZeroTier behaves more like a true virtual LAN, whereas Tailscale is closer to a plug-and-play VPN. If you need custom routing and advanced networking options, ZeroTier might be a better fit. But for quick, secure, and hassle-free remote access, Tailscale is hard to beat. I don’t use it as my main method anymore, but I still keep it around—because when I need a backup remote access option, I know it’ll work without any fuss.
Wireguard VPN
When it comes to VPN-based remote access, nothing beats WireGuard in terms of speed, efficiency, and security. I’ve tested plenty of VPNs, but WireGuard always stands out because it’s lightweight, blazing fast, and incredibly stable.
It connects almost instantly, has low latency, and works well even on low-powered devices like a Raspberry Pi. Unlike Tailscale or ZeroTier, which rely on cloud-based controllers, WireGuard is a self-hosted solution, meaning you set it up, and there are no third-party services involved. This makes it one of the most private ways to access Home Assistant remotely.
One of the best use cases I’ve found for WireGuard is connecting to remote Zigbee networks, like with the SMLight SLZB-06 Zigbee coordinator. This coordinator has a built-in WireGuard client, meaning you can remotely access and control Zigbee devices without needing to run a separate server. Instead of setting up a full-fledged Home Assistant instance at a remote location, you simply configure WireGuard on the SLZB-06, connect it to your main Home Assistant network, and suddenly, your Zigbee devices are accessible from anywhere—with minimal latency and maximum security. It’s a game-changer for remote Zigbee setups.
Compared to Tailscale or ZeroTier, WireGuard requires more manual setup, as you need to configure peer connections, firewall rules, and routing yourself. However, it outperforms both in raw speed and avoids reliance on external services.
If you’re comfortable setting up a VPN server, WireGuard is the fastest, most secure, and most private way to access Home Assistant remotely. I still use other methods for convenience, but if you need a rock-solid, high-speed remote connection, WireGuard is the way to go.
Cloudflare Tunnel
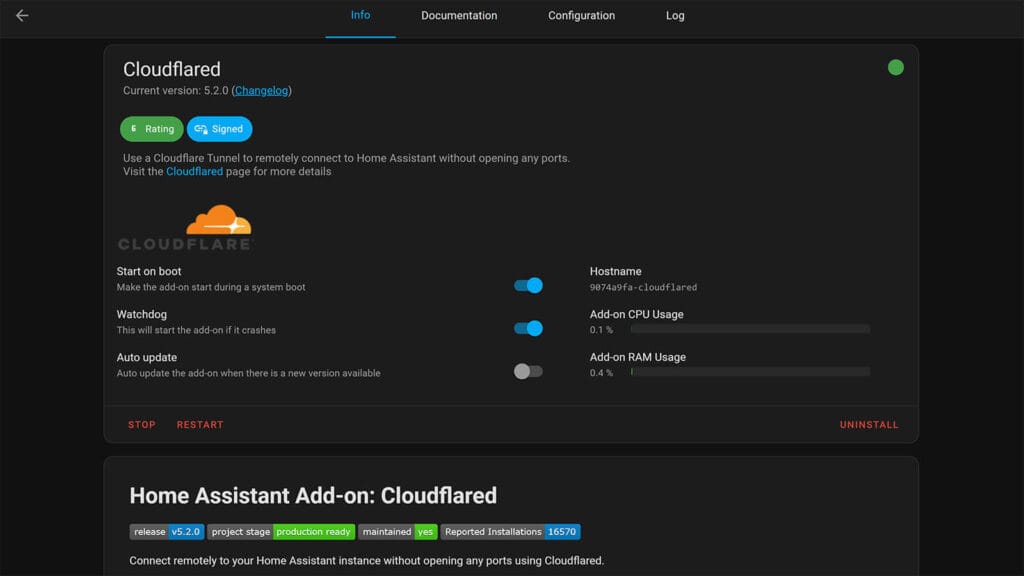
Out of all the remote access options I’ve tried, Cloudflare Tunnel is the one I use daily. It’s fast, secure, and requires zero port forwarding, which means my Home Assistant instance stays completely hidden from the internet if configured properly. Instead of exposing my network, Cloudflare Tunnel creates a direct, encrypted connection between my Home Assistant and Cloudflare’s servers, making it one of the most secure remote access solutions available.
To set it up, you’ll need a Cloudflare account, but the service itself is free for personal use. I registered a domain name for just $10 a year, making my HA remote access very affordable. Cloudflare automatically manages SSL encryption and authentication, so I never have to worry about renewing certificates or configuring security settings manually.
The Cloudflared add-on for Home Assistant made setup effortless, and once it was running, I didn’t have to touch it again. My connection is always available, with no extra maintenance required. It’s worth noting that you should always read the release notes and look for breaking changes. Although rare, they can still happen.
One of my favorite features is Cloudflare’s security controls, which let me block entire countries from even attempting to connect. Since China, Russia, and India are among the worst sources of DDoS attacks and bot traffic, I’ve completely banned them from accessing my domain. This adds another layer of security, ensuring that malicious traffic never even reaches my network.
With no ports open on my router and Cloudflare’s security features in place, my Home Assistant is completely shielded while still being accessible from anywhere. It’s been my go-to remote access method for a long time now, and I don’t see myself switching anytime soon.
Home Assistant Cloud (Nabu Casa)
I pay for Home Assistant Cloud (Nabu Casa)—not because I need it, but because I believe in supporting Home Assistant and everything it stands for. The developers have built an incredible open-source platform, and the subscription helps fund ongoing development, infrastructure, and new features. Even though I don’t actually use the service, I gladly keep my subscription active because I love Home Assistant, the community, and the mission behind it.
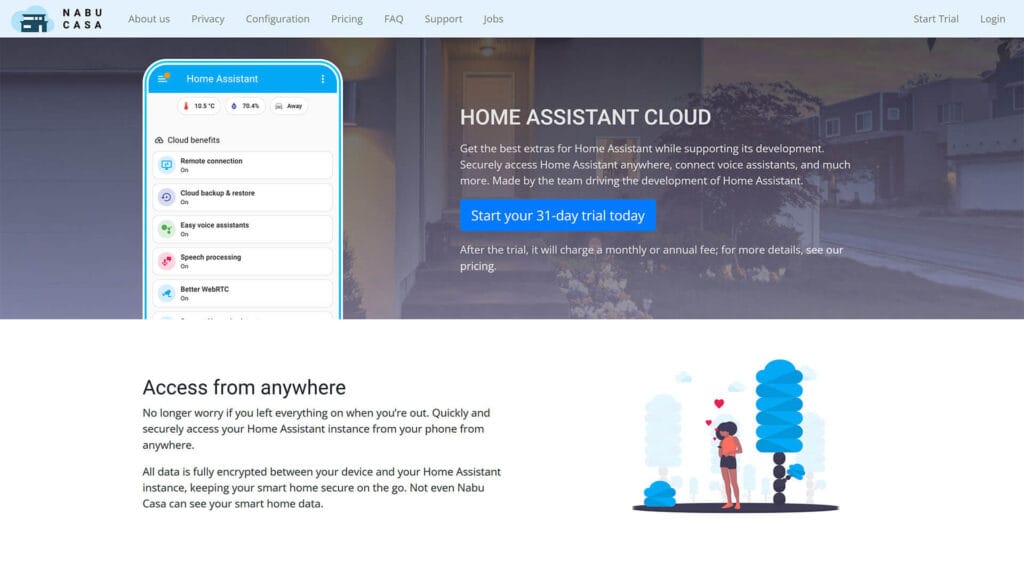
That’s definitely not the only reason to use Nabu Casa. If you need remote access without dealing with port forwarding, VPNs, or Cloudflare, Home Assistant Cloud is the easiest solution. It provides secure, encrypted remote access with zero configuration, making it perfect for beginners or anyone who just wants something that works. It also includes seamless Google Home and Alexa integration, allowing voice control for your smart home.
Even though I don’t use Nabu Casa, I see my subscription as a way to give back to a project that has given me so much. Home Assistant is one of the few platforms that truly values privacy, local control, and user freedom, and that’s worth supporting. If you need a simple, plug-and-play remote access solution, Home Assistant Cloud is a great option. And if you don’t? Consider subscribing anyway—because keeping Home Assistant strong benefits all of us.
Summary Table
The summary table compares different remote access methods based on general setup difficulty, maintenance, security, and dependencies; however, the best method for you depends on your specific home network setup, security preferences, technical expertise, and level of involvement in managing configurations.
| Method | Setup Difficulty | Maintenance | Security | Dependency | Performance | Cost |
|---|---|---|---|---|---|---|
| Port Forwarding | Easy | Low | Low | None | High (Direct) | Free |
| DuckDNS | Easy | Medium | Low | DuckDNS1 | High (Direct) | Free |
| DuckDNS + Let’s Encrypt | Moderate | Medium | Medium | DuckDNS2 Let’s Encrypt | High (Direct) | Free |
| NGINX + Let’s Encrypt | Advanced | Medium | High | Let’s Encrypt3 | High (Direct) | Free |
| ZeroTier One VPN | Easy | Low | High | ZeroTier Cloud4 | High (Direct)8 Moderate (Relayed) | Free/Paid10 |
| Tailscale VPN | Easy | Low | High | Tailscale Cloud5 | High (Direct)9 Moderate (Relayed) | Free/Paid11 |
| Wireguard VPN | Advanced | Medium | High | Self-hosted | High (Direct) | Free |
| Cloudflare Tunnel | Moderate | Low | High | Cloudflare6 | Moderate (Cloud, variable latency) | Free/Paid12 |
| Home Assistant Cloud | Easy | Low | High | Nabu Casa Cloud7 | Moderate (Cloud, consistent latency) | Paid13 |
2 – Self-hosted add-on but requires using DuckDNS DNS resolver and SSL certificate from Let’s Encrypt
3 – Self-hosted add-on but requires obtaining SSL certificate from Let’s Encrypt
4 – The control plane relies on ZeroTier’s cloud service, while the data plane can be peer-to-peer (P2P) if NAT and firewall conditions allow.
5 – The control plane relies on Tailscale’s cloud service, while the data plane can be peer-to-peer (P2P) if NAT and firewall conditions allow.
6 – Requires a Cloudflare account, the Cloudflared add-on, and a domain name. Cloudflare Tunnel eliminates the need for port forwarding by securely routing traffic through Cloudflare’s network.
7 – Relies entirely on Nabu Casa’s cloud infrastructure, routing all traffic through their servers with end-to-end encryption.
8 – Performance is High (Direct) when a peer-to-peer (P2P) connection is established, but Moderate (Relayed) if traffic is routed through ZeroTier’s cloud servers due to NAT or firewall restrictions. Users can check ZeroTier’s admin console to confirm connection type.
9 – Performance is High (Direct) when a direct WireGuard connection is possible, but Moderate (Relayed) if traffic is routed through Tailscale’s DERP servers when direct connections fail. Users can check Tailscale’s admin panel to see connection type.
10 – ZeroTier offers a free tier for basic usage, but paid plans are available for larger networks and additional features.
11 – Tailscale offers a free tier for personal use, but paid plans unlock additional features and scale.
12 – Cloudflare Tunnel has a free tier for basic use, but paid plans are available with additional features.
13 – Home Assistant Cloud (Nabu Casa) is a paid subscription service


None of the options based on opened port (port forwarding, whatever DNS, nginx, apache…) is secure by default. They make it available (for the all Internet) unles you know how to enable whitelist. And that is often impractical or even impossible. Let’s encrypt isn’t going to protect the server, it’s never been designed for that in the first place.
Use VPN or cloud.
Yep. It’s puzzling as to why people think having a reverse proxy (locally) and a tls certificate will help at all with intrusion.
The missing manual, thank you so so much!!! I’m sure many HA users will love this comparison!!
Great information. I’ve been running NGINX + Let’s Encrypt using Cloudflare DNS for some time now. while this works great 99% of the time, I do sometimes have issues with latency, like Google saying it can’t access my HA instance.
I’m tempted to try the Cloudflared addon but I don’t want to completely break my installation trying to migrate from NGINX.
Any tips you can provide for a migration like that?
Don’t migrate, run both and decide which one is better for you first.
Can any communication/connection into your home that goes via a 3rd party’s physical servers really be classed as ‘High’ security?
What if they decide to start snooping around your network or they get hacked? Yes the connection may be encrypted but they have the keys don’t they?
It’s an individual thing. I trust Nabu Casa. From that perspective, nothing is truly secure. The only way to be 100% secure is to unplug your server from the internet.
In digital world there is NOTHING 100% secure, there is only more secure or less secure.
On-Topic: I started with static IP with port forwarding but I figured out that it is not a good solution quickly and then I switched to DuckDNS (looked easy to set it up then) which wasnt a good solution also as it was constantly not working and it was taking time fixing it. Then I decided to go with the cheapest and easiest way to connect from outside to my HA and now I am using Cloudflare with a domain name I bought from them for 6$ / year. Connection through Cloudflared add-on was simple and in just 5 minutes i had secure connection to my HA from outside. Nabu Casa subscription seems like best and easiest solution as it also offers integration with all those voice assistants but for now I’m sticking to what works for me 🙂
I have Nabucas Casa now. Does it make sense to try Tailscale VPN for speed?
For a food while I used Cloudflare tunnel.Off topic I still use their https DNS in my AdGuard Home on my GLInet router. Because of this ic old use wireguard as well or even NGINX but lately I prefer Nabu Casa. First reason is to give something in return for this amazing home assistant and secondly because I do have the voice infrastructure based on Google home. With that I can easily expose to home and it works like a charm. I have even a hot water boost for my nest thermostats which stupidly google decided to not add in home after so many years. Good article thank you!
I’d throw in Pomerium + keycloak as a replacement for nginx. It’s an identity aware reverse proxy that also ties into letsencrypt. More overhead to setup, but great to not rely on a vpn
DuckDNS is just dynamic DNS, isn’t it? Should be “low” security as it is exactly the same as port forwarding, just more convenient.
DuckDNS + lets encrypt is just dyn DNS, port-forwarding, and HTTPS. You’re still exposing your home assistant directly to the internet. This should also be “low” security.
When you get into reverse proxies, I would call those medium-low security. They are in theory similar to something like cloudflare funnels, but you’re personally responsible for updating them, keeping everything secure. And unlike cloudflare there’s no heuristics looking for and blocking bad actors.
Cloudflare tunnels I would call medium security, as it is far less secure than a VPN. I would put Nabu Casa cloud under medium for the same reason.
And finally yes all the various VPNs are appropriately high security. Frankly, I believe the article would be better served by just putting 40-point type at the top “If in doubt, just use Tailscale” and then you have the rest of the article explaining other options for sophisticated users who know what they’re doing.
Agree.
But I would really put reverse proxies in ‘low’ category because as you say if you don’t add the real security layer on top of them then they don’t do anything. And almost nobody does add that layer. So in the end they end up with a false sense of being secure.
I went with “medium-low” because they do at least hide your IP. But yeah, the actual security gained there is minimal.
Well for a self hosted VPN like wireguard you have to open a port on your router.
And let’s not forget OpenVPN heartbleed, while everyone has pretended and still pretends that you just get everything super secure from a VPN because…should be?
And don’t get me wrong, I use wireguard and think it is great but the security bugs are being found on hardware level so we just don’t know yet what issues exist where.
Using someone else’s 3rd party service to open your server to their systems is another way to expose your server to whatever – less tested and secure daemon is now and entry point that can be used for attacks. And we don’t need reminders how frequently a known service provider is hacked in one way or another.
Important bits are firewalls on the server and on your router and authentication systems inside. You should always have a proxy server exposed in one way or another with all hardening done, and then that proxy is able to connect only to relevant services on another server which again is hardened and firewalled.
So what do I use? A reverse proxy! Wait what?
Yes, Cludflare domain with their DNS where I allow only specific ASNs to access my server over their domain.
I point it to my one and only 443 open port. And I use an Enterprise router where I allow only cloudflare IPs (https://www.cloudflare.com/ips) to connect to that port. Then I have fail2ban and additional authentication behind to access anything.
Now the question is, what is most likely to be hacked?
And while we all worry about the server and how it’s exposed, someone already has spyware on your phone or laptop which you so eagerly connect fully to your network and your server.
You should add to your NGINX review that using it with the NPM (NGINX Proxy Manager), makes everything so much easier. There’s no need to configure firewalls or LE Certificates separately. Everything is handled automatically by NPM, even certificate updates. Yes, you can configure proxy settings in detail, but the default setting will in most cases work just perfectly.
And best of all, it’s not just for Home Assistant. Any HTTP accessible app can be exposed and made available through NPM.
How is a reverse proxy going to protect anything ? I’m always amazed as to why people talk about installing NGINX or any other webserver. Unless you add some authentification, some IDP+IPS, and some WAF then I don’t get it.
All you need to do is to enable SPD+PSS, oh and add som RAF on topp and your good to go!
(need more TBF’s?)
I enjoyed this article and have to agree that for newbies or those without technical expertise in TCP/IP networking then Nabu Casa is the way to go and I too feel it’s a good way to support the HA/ESPHome projects. (I can recommend the HA T-shirts too – really good quality and a very funky design that gets asked about when wearing out and about!)
I myself use my existing Apache2-based reverse proxy forwarding (IPv4) and routing (IPv6) through my gateway routers/firewalls, simply because I already had it in place for other purposes.
But whether you use port forwarding, Apache or NGINX reverse proxy or Nabu Casa, the first thing you should do before configuring remote access is to enable two factor authentication on every HA account on your server.
That way, a password breach still can’t grant access to your systems.
Any 2FA Android/iOS app works fine – I prefer Twilio Authy because I can then having it running on my phone and on another device (a tablet or Android emulator on my PC for example) and it securely syncs my 2FA credentials between the two but Google Authenticator or another one is fine too.
I have UNIFI Dream SE and there is VPN feature to connect to my house. I enabled it and I have access to my home.
What about Homeway
Recently my Cloudflare setup ran into issues with the most recent core update. Therefore, I had to delete the add-on and re-install. Since it had been a few years since I had switched to Cloudflare, I needed to look up some online ‘help’. I came across the following write-up: https://kcore.org/2024/06/28/using-cloudflare-zerotrust-and-mtls-with-home-assistant-via-the-internet.
The author makes it sound like without setting up WAF rules, you are not secure with Cloudflare. They state “Right now anyone can connect to your hosted Home Assistant URL, regardless if they have a certificate or not.” Unfortunately, the author leaves out directions how to use Safari with his directions (only covers Firefox and Chrome). I tried to add the WAF rule to check for Client Certificate, but Safari made me allow the change each time I change pages within my Home Assistant. “Always Allow” was not an option. I could never figure out how to get the iOS Companion App to work with a Client Certificate.
I have 2FA turned on for each user of Home Assistant. For users that only need to use Home Assistant while they are home, I have “Local Use Only” turned on for their accounts. Is it really necessary to setup a Client Certificate and ensure my browser authenticates before allow access to my URL? Ya, long post for a one question.
The truth is, you are NEVER truly secure on the internet, right?
Even a simple port forward is only as secure as the service behind it.
Given your current setup with 2FA enabled for all users and “Local Use Only” for internal users, client certificate authentication is likely NOT strictly necessary for a reasonably secure Home Assistant setup, but it would add an extra layer of security for remote access if you can overcome the usability issues.
For reference, I do not use any 🙂
Aside from Nabu Casa, do any of these let the Home Assistant Android app work? I have Tailscale setup and can connect remotely via a phone browser to my HA, but the app doesn’t work. I could live with that, but for my wife it’s a lot easier to get her to use the app then to connect to a Tailscale IP in the browser…
Every single remote access method listed here allows you to use the HA companion app, including Tailscale.
They just need to be configured properly. You need to change the host in the app to your local IP and you will be able to used the app once you are connected to your Tailscale VPN.
The problem with just using a private VPN onto your home network is that the URL you then use to access the HA server is still unencrypted (http not https). This isn’t a problem for the companion app but there is some functionality that web browsers won’t enable over what they perceive to be an unencrypted connection. This includes access to the PC microphone for the assistant and any two-way cameras (using the HACS WebRTC card), use of Bluetooth or USB-connected devices (for ESPHome Builder) & browser push notifications.
If you’re always going to access via your private VPN then probably the simplest solution is to use the SSL option in the ‘http’ dictionary in configuration.yaml and a locally generated certificate whose CA you install into your broswers’ trusted CA stores. The NGINX add-on works for this too but is a bit sledgehammer-to-crack-a-nut.
Since I expose my HA globally (with safeguards!) then when using a browser I always access it via its public HTTPS URL even when on my home network directly or via killswitched VPN. For IPv4 this requires your gateway router (usually the one your ISP gave you) to support hairpin NAT (allows datagrams coming from within to the external IP address to be directed back in) or your local DNS server (usually your gateway router!) to support DNS lookup overrides (allows global FQDNs to be given local IP addresses when requested locally, also known as split-horizon DNS).
The issue I have is slightly different. I am running multiple services in my domain so I’ve got a wildcard certificate on my Apache2 server. Now I want to use that certificate on my HA VM.
The obvious way is to mount ://etc/letsencrypt on the VM so it is always kept up to date so long as I keep the certificate renewed. The NFS export would be restricted to the VM’s local IP.
Of course, the main point of HTTPS is to encrypt the connection so people can’t steal your login credentials. This is a foundational part of any remote access setup. Everything else depends on the link to your HA instance being secure.
Unfortunately the howtos all seem to want HA to handle the certificates while my preference is to use my server to do it. The problem is when I log in to the HA VM, the root FS is read-only, so I can’t create an /etc/letsencrypt mount point let alone an /etc/fstab to mount it.
Any ideas?
Run wire guard on your domain and use Apache2 as a secure reverse proxy to your HA WG client.
I do that with Caddy2 for various services and it makes adding new things almost trivial once it runs.
Since stuff goes exclusively through the tunnel the who, what, and where becomes irrelevant as long something can run WG where the thing is.
But make sure you harden your IP tables/routing etc. WG helps a lot but isn’t foolproof.
Also while wildcards are super “comfortable” to use, please don’t… says the guy doing the same.
Case 1 : browser access
I’ve set up a reverse proxy that only allow specific IP without auth, and allow other if authenticated.
Then, after that first wall, you have to login on HA.
The outside url can’t be found by chance ( http over ssl subdomain dot domain dot tld /specificlocation )
Case 2 : mobile app
VPN (self hosted) in any outside connexion case.
Direct connexions allowed if from LAN
I used to use DuckDNS, but I recently tried out -redacted- and it works like a charm. It’s really easy to install. Maybe we could add this as an option?
I can’t figure out if you are spamming or advertising.
Either way, that service looks like a total scam and a potential data mining operation.
Can’t figure out which cause I’d never try it.