Intro
So you’ve finally had enough of that clunky Google Nest speaker and decided it’s time to build a better smart home. A friend recommended Home Assistant, you got it installed, and now you’re staring at the interface already feeling overwhelmed. At first glance it looks too complicated, and you might be thinking this is too much to take on. The truth is, Home Assistant can be as simple or as advanced as you want it to be. It grows with you, and there are virtually no limits.
Yes, it’s true. Setting up Home Assistant for the first time can feel overwhelming. The platform is powerful, flexible, and highly customizable, which is why everyone always lands on Home Assistant when they are migrating from other ecosystems. For newcomers it is important to focus on the essentials first and takes things slow.
This guide covers the most important steps to take after installing Home Assistant. It begins with securing your instance, then moves on to remote access, essential add-ons, integrations, dashboards, and automations. By following these steps, you’ll build a solid foundation without getting lost in endless options. Everything is explained in simple, beginner-friendly language, with as little technical jargon as possible to keep things clear and approachable.
Secure Your Home Assistant Instance
Home Assistant’s onboarding usually covers the basics of security. If you clicked through quickly or skipped a step everything can be changed later. Securing the instance is critical, especially if it will be accessed from outside the home network.
Set a strong username and password
Your user account is the first line of defense. Do not reuse the same password used for your home Wi-Fi, email, or your cousin’s Netflix account. Choose something unique, long, and not easy to guess.
To update Home Assistant login credentials:
- Open Settings → People
- Select your account
- Change your username or password if needed
If more than one person in the household uses Home Assistant create separate accounts for each. This allows permissions to be managed individually and separately. Home Assistant also allows you to set up accounts for local access only, which means you can login only when you are on the same network.
Enable Multi-Factor Authentication (MFA)
Adding Multi-Factor Authentication (MFA) significantly improves that first line of defense. Even if someone gets or guesses your password, they cannot log in without the second authentication factor.
To enable MFA:
- Click your profile at the bottom of the left screen
- Select the Security tab at the top
- Under Multi-factor authentication modules enable Authenticator app (TOTP)
- Scan the QR code with the Google Authenticator App or Authy
- Done
TOTP stands for Time-based One-Time Password, which simply means TOTP is time based and relies on your Home Assistant clock being accurate. If the verification keeps failing, make sure the clock on Home Assistant is correct. For alternative MFA modes, visit this page.
Enable and configure backups
Backups are one of the most important safety nets in Home Assistant. A failed SD card, a misconfiguration, or even a simple mistake during setup can cause serious problems, and having a backup ready means you can restore the system quickly without starting over.
To create a Home Assistant backup:
- Open Settings → System → Backups
- Click Create Backup
- Choose whether to include add-ons and media
- Download and save the file
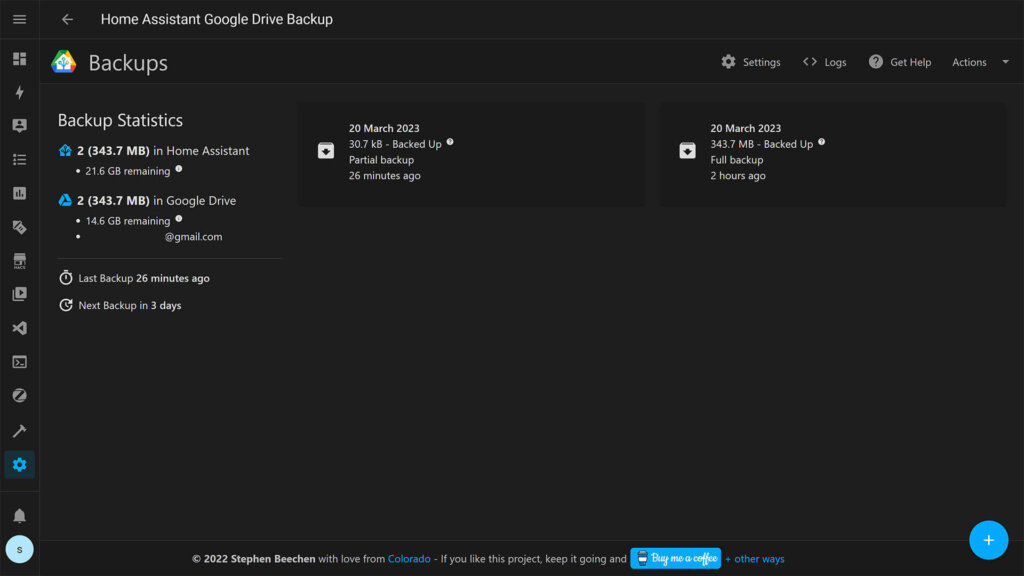
Backups can be fully automated in Home Assistant and configured to run on a schedule. In my instance, I like to use the Home Assistant Google Drive Backup add-on. It runs in the background and pushes backups to Google Drive so they are always safe offsite. Another option is the Samba Backup add-on which stores backups on a local network drive.
Relevant: Home Assistant Backup Methods and Best Practices
Set up Home Assistant Remote Access
Remote access is not required for using Home Assistant, but most users want the ability to reach their smart home when away from home. This can be done in several ways, ranging from simple subscription services to more advanced networking setups. Choosing the right method depends on how much convenience, security, and control you want over your HA server.
Relevant: Best Home Assistant Remote Access Methods Compared
Home Assistant Cloud (Nabu Casa)
The easiest and most secure way to enable remote access is by using Home Assistant Cloud by Nabu Casa. It is a paid subscription service that integrates directly into Home Assistant. Once activated, it provides remote access without opening ports on your router or configuring firewalls. This method also directly supports Home Assistant development, going towards its main vision of an open and local smart home.
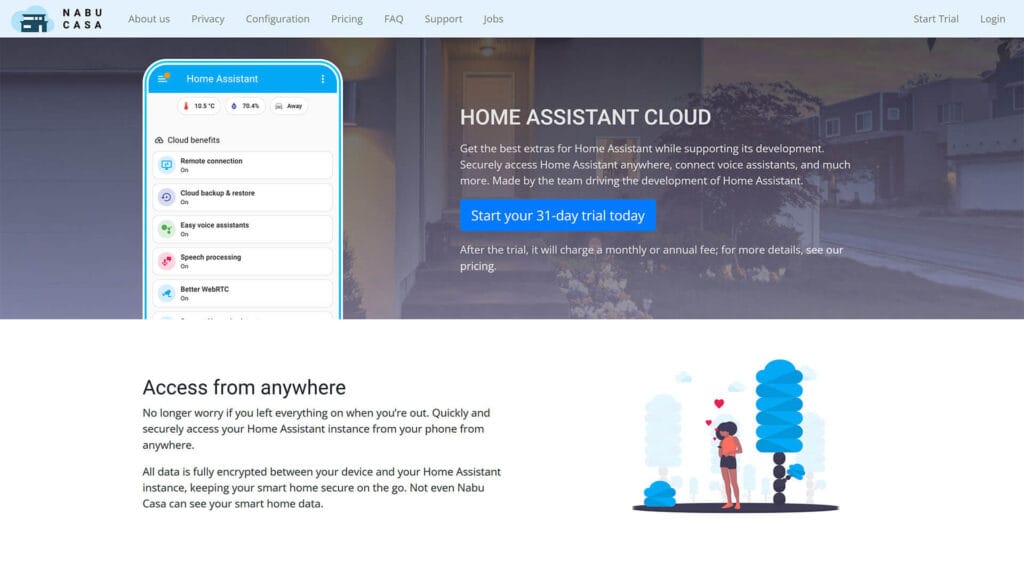
To set it up, open Settings → Home Assistant Cloud and create a Nabu Casa account. After linking the account, Home Assistant becomes available remotely through the official mobile app or any web browser. The subscription also adds other perks, like direct integration with Alexa and Google Assistant, which can save time if you already use voice assistants at home.
CloudFlare Tunnel (Cloudflared Add-on)
A popular alternative is to use a Cloudflare Tunnel and access your HA server. This method creates a secure outbound connection from your Home Assistant instance to Cloudflare’s servers, which means there is no need to open ports on your router or expose your system directly to the internet. The result is a private, encrypted link that you access through a domain you control.
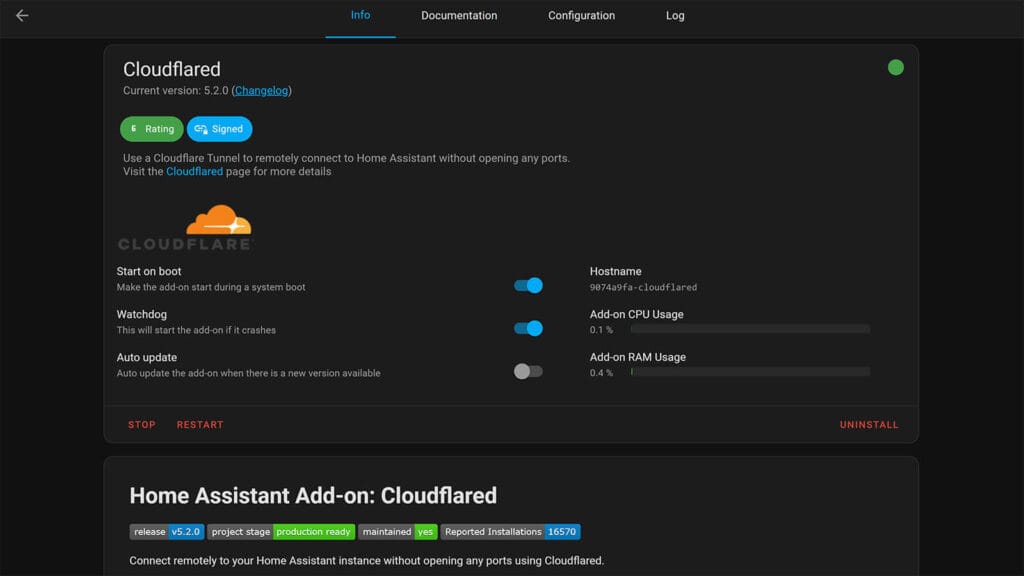
Getting started requires a Cloudflare account and a domain name managed by Cloudflare. Once that is in place, install the Cloudflared add-on from the Add-on Store and follow the instructions to authenticate it with your Cloudflare account. After configuration, Home Assistant will be available through a secure HTTPS address that works anywhere.
VPN Remote Access (Tailscale, WireGuard, ZeroTier)
Another option is to use a VPN instead of exposing Home Assistant to the internet. A VPN allows your phone, tablet, or laptop to connect into your home network as if you were physically present, which means Home Assistant remains completely hidden from outside access. This is often considered the most secure method, since your instance never sits directly on the public web.
Several VPN tools integrate well with Home Assistant:
- Tailscale
The most beginner-friendly option, based on WireGuard. It uses your existing Google, Microsoft, or GitHub account for authentication and requires almost no configuration. - WireGuard
An extremely lightweight and fast VPN solution. It delivers excellent performance but requires more manual setup and some basic networking knowledge. - ZeroTier
Creates a low-latency VPN across all your devices. It is flexible and works well if you want to connect multiple endpoints, not just a single phone or laptop.

A VPN is ideal for users who are comfortable spending a bit more time on setup in exchange for maximum security and privacy. It does not rely on subscriptions, it avoids domain registration, and once running it feels seamless and stable.
Install Essential Add-ons
Home Assistant is an OS that runs completely on its own, but add-ons extend its functionality and make it much easier to configure, manage, and expand your smart home. Even if you self-host and run different services in your home, you will find simply installing them as add-ons is much easier and simpler. Some add-ons, however, are essential from the start, especially if you plan to integrate Matter, Zigbee, Z-Wave, or build your own ESPHome devices.
Install a File Editor (File Editor or VS Code)
While things have pivoted towards UI-based configuration, at some point you will need to edit Home Assistant’s configuration files. Browsing and editing text files is much easier with a good file editor. Furthermore, these editors are more than just text tools. They also allow you to upload files, manage folders, and make structured changes without leaving the Home Assistant interface.
These two will cover anything you will ever need:
- File Editor
A simple, lightweight editor that runs directly in your browser. It is easy to install, works out of the box, and is enough for users who only need quick edits. - Studio Code Server
A full version of Visual Studio Code that runs in the browser. It offers syntax highlighting, auto-complete, and extensions tailored to Home Assistant. It requires slightly more resources but is excellent if you plan on working with YAML often.
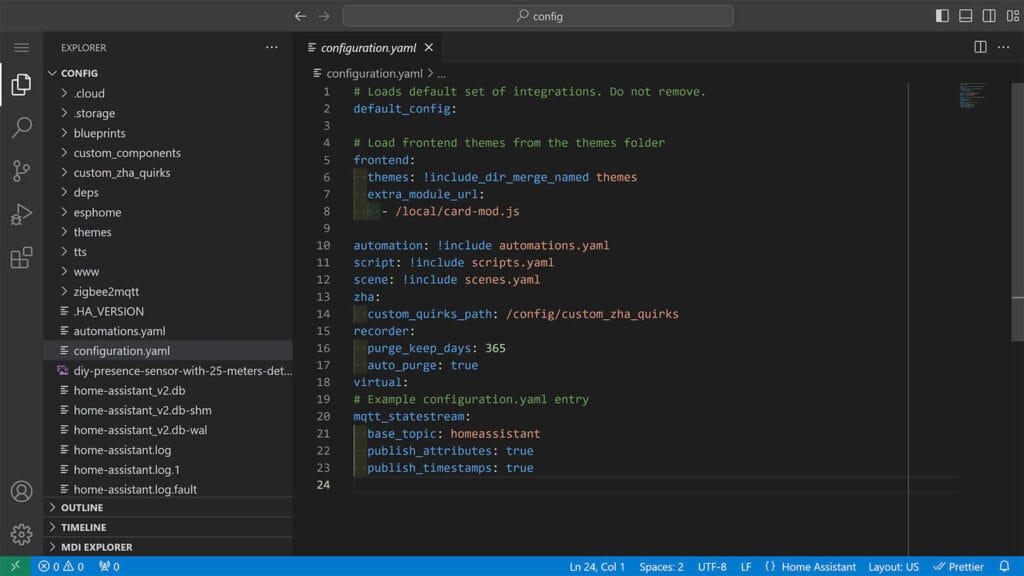
Both options give you a safe way to access configuration files without using SSH. Most beginners start with File Editor, while advanced users often prefer VS Code for its richer feature set.
Install the Matter Server Add-on
Matter is designed to be the unifying smart home standard, and to use Matter devices you need a Matter server running in your home. Home Assistant is the ideal place to run one, since the Matter add-on is always updated to support the latest version and integrate seamlessly with the rest of your smart home.
- Open Settings → Add-ons → Add-on Store
- Search for Matter Server
- Click Install
- After installation, enable Start on boot, Watchdog and Show in sidebar
- Start the add-on and start adding Matter devices
- Done
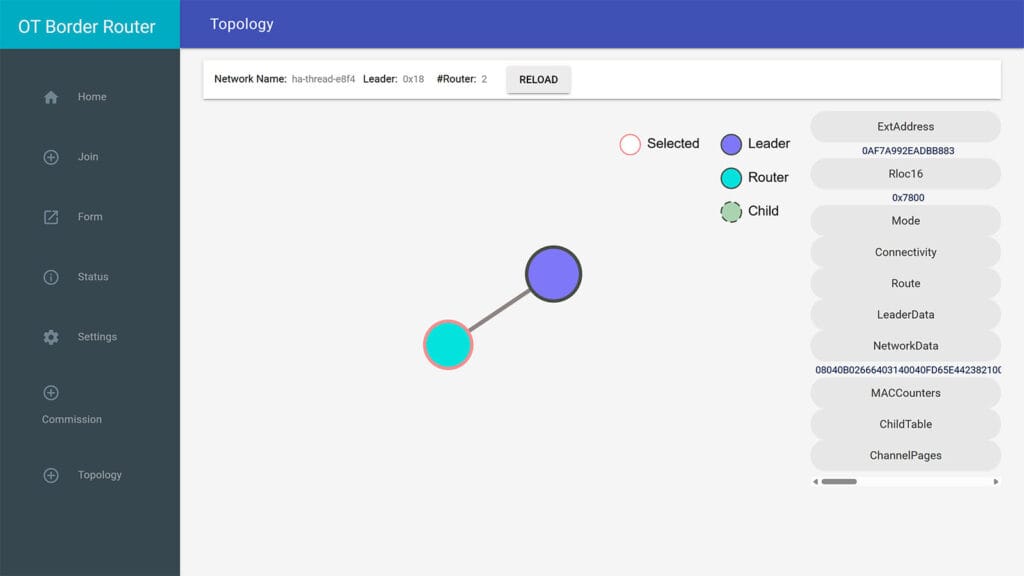
The Matter server handles pairing, device communication, and ongoing support. If you plan to use Thread-based Matter devices, you will also need a Thread Border Router. Popular options include the SMLight coordinators, which work natively with Home Assistant and have their own integration. To complete the setup, install the OpenThread Border Router add-on, which extends support for Thread and ensures all devices can talk to each other reliably.
Relevant:
SMLight SLZB-MR1 Multi-Radio Coordinator Setup and Review
SMLight SLZB-06 Zigbee POE Coordinator Review
Add Zigbee, Z-Wave, or ESPHome support
Most smart homes rely on one or more communication protocols. In one way or another, Home Assistant supports all of them, but each option has its own strengths, limitations, and ideal use cases.
Zigbee is one of the most popular protocols for sensors, lights, switches, and plugs. If you are a fan of SmartHomeScene, you already know Zigbee is heavily favored here. In Home Assistant, you have two realistic ways to use it.
- ZHA (Zigbee Home Automation)
Built into Home Assistant and very easy to get started with. It works well for common devices and requires no extra setup beyond a supported coordinator. - Zigbee2MQTT
A community-driven integration with a much larger device compatibility list. It includes advanced features like binding and group management, but requires an MQTT broker to run. If you want maximum flexibility and the broadest range of supported devices, Zigbee2MQTT is the better choice.
Z-Wave is another widely used protocol, especially in North America and Europe. It is known for reliability and strong device-to-device communication, although the range of devices is smaller compared to Zigbee. These two are the go-to Z-Wave integrations:
- Z-Wave JS
The default and simplest option. It provides stable performance and is easy to configure for most users. You can install it as an add-on in the Home Assistant Add-on Store. - Z-Wave JS UI
Includes everything in Z-Wave JS but adds a full web interface with advanced tools. It is especially useful if you want deeper visibility into your Z-Wave network or plan to fine-tune device settings.
ESPHome is quite different from Zigbee and Z-Wave. Instead of being a wireless protocol, it is a firmware platform for ESP32 and ESP8266 microcontrollers. Many ready-made devices use ESPHome and are automatically discovered in Home Assistant. Apollo Automation sensors like the MSR-2, MTR-1 or R PRO-1 are great examples of proper ESPHome devices.
For tinkerers and DIY enthusiasts, ESPHome Device Builder allows you to build custom sensors, switches, and controllers with full integration. If you plan to experiment and create your own hardware, the ESPHome add-on is a must have.
Explore Device Integrations
Home Assistant can connect to thousands of different devices and services. Some will appear automatically during the first setup, while others need to be added manually. Taking time to understand how integrations work makes it easier to grow your system in a way that stays organized and stable.
Auto-discovered devices and integrations
Home Assistant automatically scans your network for supported devices and services. These will appear under Settings → Devices & Services as discovered integrations. Common examples include smart TVs, media players, routers, and connected speakers. In many cases, all you need to do is click Configure and follow the configuration wizard.
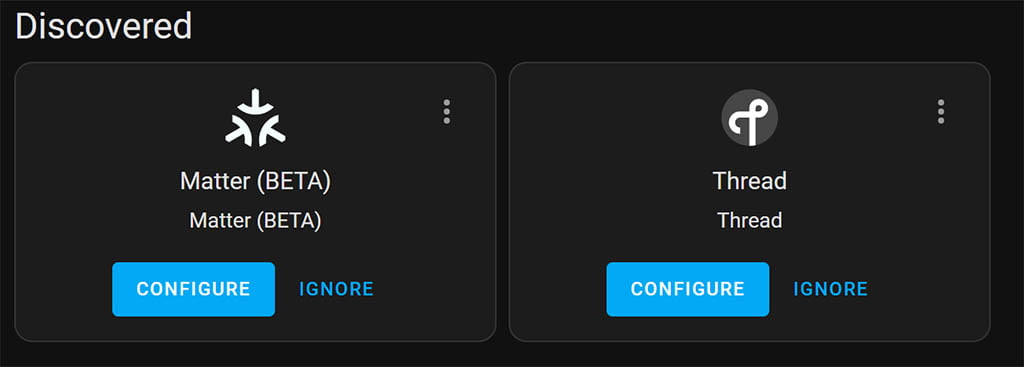
For instances where it works, auto-discovery is the easiest way to get started because it requires very little setup. Even if you are not sure what devices you own are supported, it is worth checking the integrations list. You might be surprised to see things like your router or streaming box already available.
Manually add your smart home brands
Not everything will show up automatically in Home Assistant. Obviously, Z-Wave, Zigbee or Thread devices need to be onboarded manually. This includes popular brands such as Philips Hue, IKEA Tradfri, Aqara or other third-party integrations that cannot be discovered automatically.
All integrations are managed in Settings → Devices & Services → Add Integration. Use the search bar to find the brand or service, then follow the setup flow. Once configured, devices appear in your dashboard where you can assign them to rooms and start using them in automations.
Start small and expand gradually
The best piece of advice at this point is to smart small and expand things gradually. It can be tempting to connect every device you own as soon as Home Assistant is up and running. While the platform is capable of handling hundreds of integrations, adding too much at once often leads to confusion and troubleshooting headaches. A better approach is to begin with just a few essential devices and expand over time.
For example, you might start with a smart plug that measures power consumption or a motion sensor that turns on a hallway light. These simple devices let you learn how entities appear in the dashboard, how they can be grouped into rooms, and how they interact with automations. Once you are comfortable, you can add more complex integrations like thermostats, cameras, or energy monitoring systems.
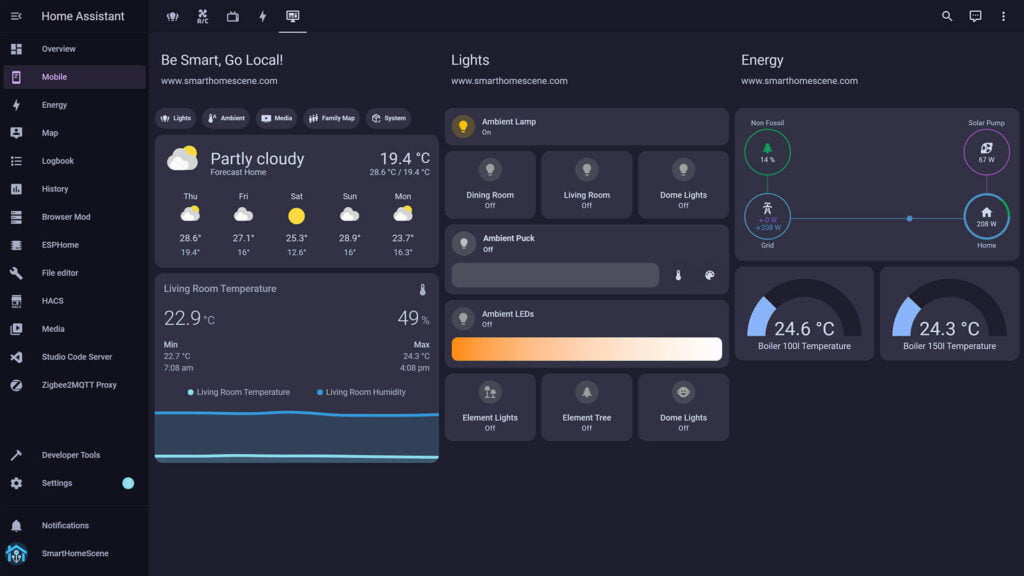
Organize Your Dashboard
The dashboard is the main control panel for your smart home, and it is the first thing you or your family will see when opening Home Assistant. A clean, well-structured dashboard makes it easy to control devices, check the status of sensors, and get useful information at a glance. While Home Assistant automatically creates a default Overview dashboard, customizing it will make your system far more user-friendly.
Group devices into areas
Assigning devices to areas (or rooms) helps keep everything organized and reduces clutter. Instead of scrolling through one long list of entities, you can open a room and see only the lights, sensors, and switches that belong there. Grouping also improves how voice assistants like Alexa and Google Assistant work, since they understand and act on devices by room context.
Explore useful dashboard cards
Dashboards in Home Assistant are built from cards, and choosing the right ones makes a big difference. Some are simple toggles, while others provide detailed data visualizations. A few that are especially useful include:
- Tile Card
A powerhouse card for lights, switches, and sensors. It combines state display, quick toggles, and optional actions in a compact format. - Statistics and Statistics Graph Cards
Perfect for showing data such as temperature, humidity, or energy usage over time. They display averages, peaks, and trends in a clear, readable way. - Horizontal and Vertical Stacks
These are not cards themselves but layout tools that let you group related cards together. They are your best friend when building dashboards with a lot of data.
Organize cards into sections
The new Sections view in Home Assistant allows you to group cards into labeled sections within a single dashboard. This layout makes dashboards more flexible, easier to read, and much cleaner to navigate. Sections can hold different groups of cards side by side or stacked, and you can move both cards and sections around with drag-and-drop.
Using sections, you can separate areas of your dashboard by function — for example, one section for climate and energy, another for security, and another for lights and media. This way even complex dashboards stay structured and easy to use.
Install HACS (Home Assistant Community Store)
HACS, short for Home Assistant Community Store, is a special integration that opens up access to thousands of community-created integrations, themes, and dashboard cards. Many devices and features that are not officially part of Home Assistant can be added through HACS. For anyone planning to go beyond the basics, it quickly becomes an essential tool.
Installing HACS requires a few extra steps compared to add-ons found in the Add-on Store, but the process is still fairly straightforward:
- Open the HACS and download the latest release
- Copy the
hacsfolder into your Home Assistantcustom_componentsdirectory - Restart Home Assistant so it detects the new component
- Open Settings → Devices & Services → Integrations
- Click Add Integration and search for HACS
- Follow the setup wizard and authorize with your GitHub account
Once installed, HACS will appear in the sidebar and give you access to its own store of community-developed content.
HACS integrations
The biggest advantage of HACS is access to integrations that are not part of the official Home Assistant repository. These community-built integrations often bring in advanced functionality, new devices, or creative features that would otherwise not be available.
Some integrations are simple to set up, while others require additional configuration such as API keys or cloud accounts. Here are a few popular examples you can find in HACS:
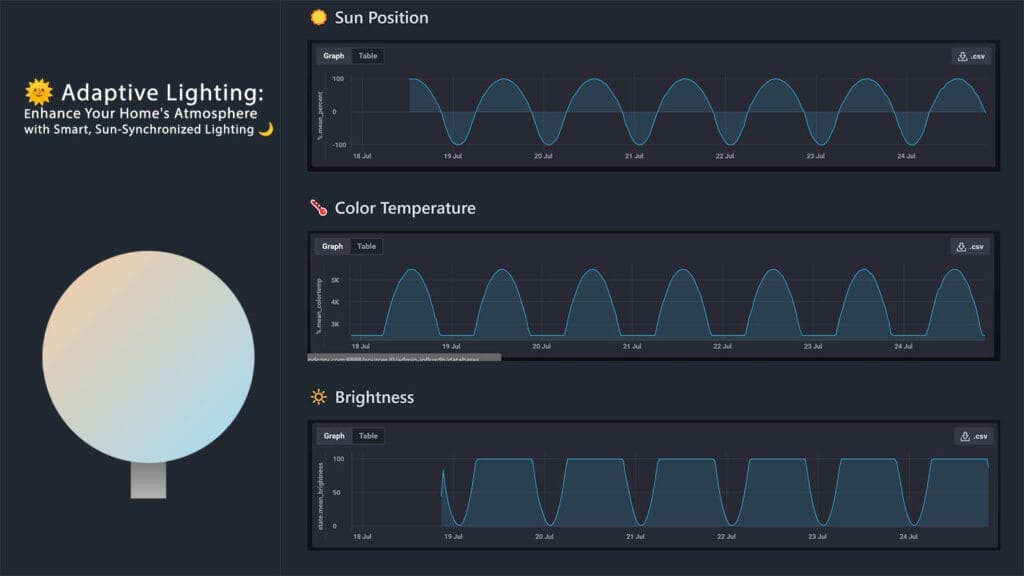
- Adaptive Lighting
Automatically adjusts brightness and color temperature of lights during the day. - Presence Simulation
Randomly turns devices on and off to make the home look occupied. - Alarmo
A full alarm system that turns Home Assistant into a security hub.
HACS integrations work just like official ones once installed. They appear in your devices and services list and can be used in automations and dashboards. The main difference is that they are maintained by the community rather than the Home Assistant core team. In many instances, I think you will find the community-developed alternative works better than the official one.
Relevant:
Best HACS Integrations for Home Assistant
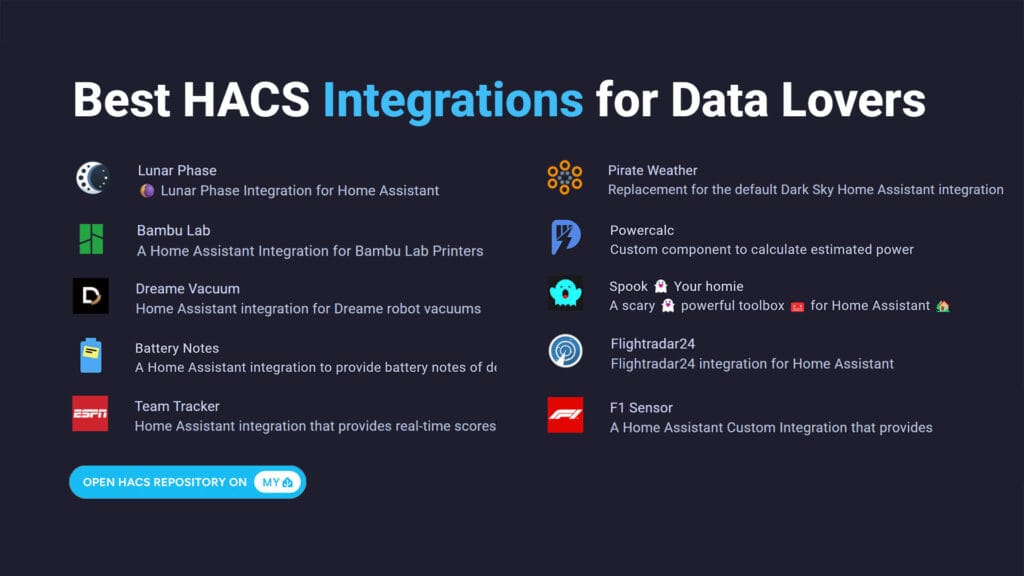
Best HACS Integrations for Data Lovers
HACS themes
Themes allow you to completely change the look and feel of the Home Assistant interface. Through HACS, you can browse and install hundreds of themes that match personal preferences, from clean minimal designs to bold custom styles. Switching between them is instant and can dramatically improve readability and usability.
While themes do not change functionality, they help personalize the experience and can make dashboards much more pleasant to use day to day. Popular choices include:
- Catppuccin Themes
A pastel color palette available in multiple dark and light variations. - Metrology
A clean and data-focused theme ideal for rich dashboards. - HA LCARS
A Star Trek-inspired design with bold colors and futuristic panels.
Relevant: Best Home Assistant Dashboard Themes
HACS dashboard cards
The real power of HACS for dashboards comes from custom Lovelace cards. These extend the default set of cards with advanced visualization options, richer controls, and widgets designed for specific devices. Installing just a few of them can transform a plain dashboard into something far more useful and polished.
Cards are especially helpful if you want to build a control panel that surfaces only the information you care about most. Here are some excellent examples from the HACS library
- Advanced Camera Card
Enhances camera views with snapshots, overlays, and live streaming. - Plotly Graph Card
Creates interactive, zoomable graphs for sensors and history data. - Calendar Card Pro
Displays multiple calendars with agenda views and color coding.
Relevant: Top 10 Home Assistant Weather Cards
Set up the Energy Dashboard
The Energy Dashboard in Home Assistant gives you a clear overview of how much electricity your home consumes or produces. Setting it up early helps track energy usage, identify waste, and optimize costs. Put simply, the Energy dashboard provides you with a huge opportunity to save money.
Adding a whole-home energy monitor
If you own a device such as Shelly EM, Emporia Vue, or a compatible smart meter, you can connect it to Home Assistant to track total household consumption. This provides a top-level view of how much power your home draws at any moment and over time.
To add a whole-home energy monitor:
- Go to Settings → Dashboards → Energy
- Under Electricity Grid, click Add Consumption
- Select the entity from your whole-home energy monitor (for example,
sensor.shelly_em_total_consumption) - If you meter is bi-directional, you can also select a Return to grid sensor
- Confirm and save the configuration
- The values will start appearing in the Energy Dashboard once data is collected
Relevant: Best Energy Monitors for Home Assistant
Monitoring devices individually
Individual appliances can also be tracked with smart plugs or relays that report energy usage. Monitoring devices like air conditioners, washing machines, or fridges shows which appliances consume the most power and helps you spot savings opportunities.
To add individual devices to the Energy Dashboard:
- Go to Settings → Dashboards → Energy
- Scroll to Individual Devices and click Add Consumption
- Select the smart plug or relay entity that measures energy for the device
- Save the configuration to include it in the dashboard
- The Energy Dashboard will now display separate charts for each tracked device
Relevant: Best Energy Monitoring Smart Plugs for Home Assistant
Visualizing energy data
The Energy Dashboard provides built-in charts for consumption, production, and return to the grid, but sometimes you may want more detailed or visually rich options. Custom cards from HACS make it possible to design energy dashboards that go beyond the default view and highlight exactly the information you care about.
Some of the best custom energy cards I’ve found are:
- Power Flow Card Plus
A modern card that displays real-time power flow between grid, solar, battery, and home in a clean and easy-to-read design. - Energy Flow Card Plus
An enhanced version of the default energy flow card with more customization options and support for additional devices. - Sankey Chart Card
Visualizes energy distribution over time as a flow diagram, making it easy to see where energy is coming from and where it is going.
Create Your First Automation
Ultimately, automations are what transform Home Assistant from a simple control panel into a true smart home platform that works with everything you already own. Even a basic rule such as turning on a light when motion is detected adds convenience and saves energy, while also showing how devices, triggers, and actions connect together. Sure, you can create simple rules with other platforms, but Home Assistant takes things much, much further.
It is an automation powerhouse, capable of linking almost any device or service into complex routines. With that said, starting small makes it easier to learn the basics without overcomplicating your setup, giving you a solid foundation to build more advanced automations over time. Happy automating!


Another incredibly good and gap filling write up, thank you!!
Thank you!
Amazing as always. Your smart home content is the best on the internet
Wow, thanks! That’s such a high praise!
Appreciate it!