In a previous article, I shared a few tips, tricks & automation examples for optimizing the Aqara FP1. I mentioned region support was being developed by a bunch of awesome people on github and while it’s been available for users of the dev branch of Zigbee2MQTT, with update 1.30.0 it was pushed to the master branch as well.
This will be a short tutorial article, showing you how to setup a region or zone in Z2M and use it in an automation. For now, regions are only supported in Zigbee2MQTT and bugs maybe expected.
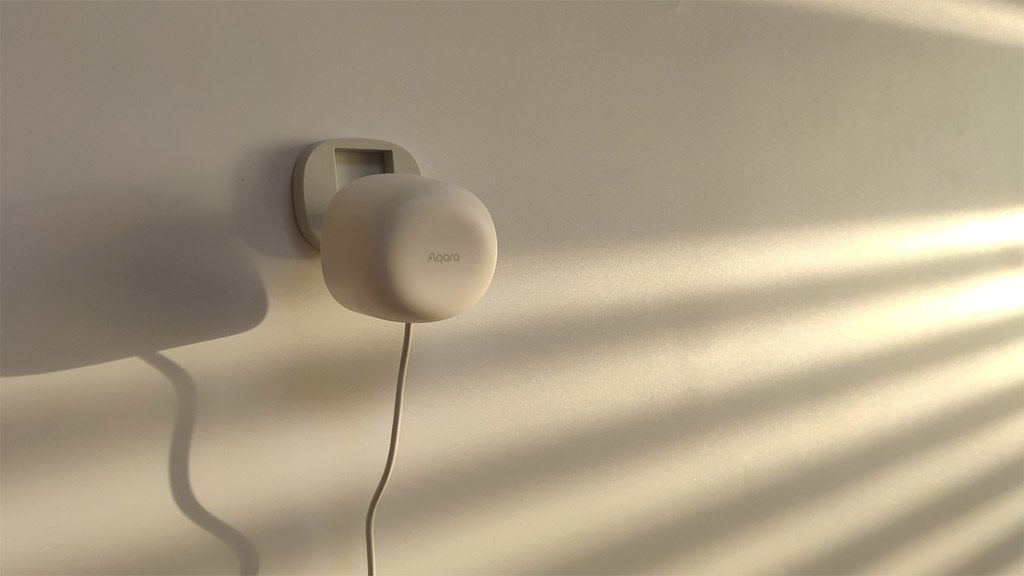
The Aqara FP1 Human Presence Sensor can be bought for $49.99 on AliExpress [Link 1, Link 2, Link 3].
What are regions?
Regions are independently defined areas in your room that the Aqara FP1 can distinguish between to trigger different automations. The functionality has been available in the official Aqara Home app since release, but now it’s also available for Zigbee2MQTT users.
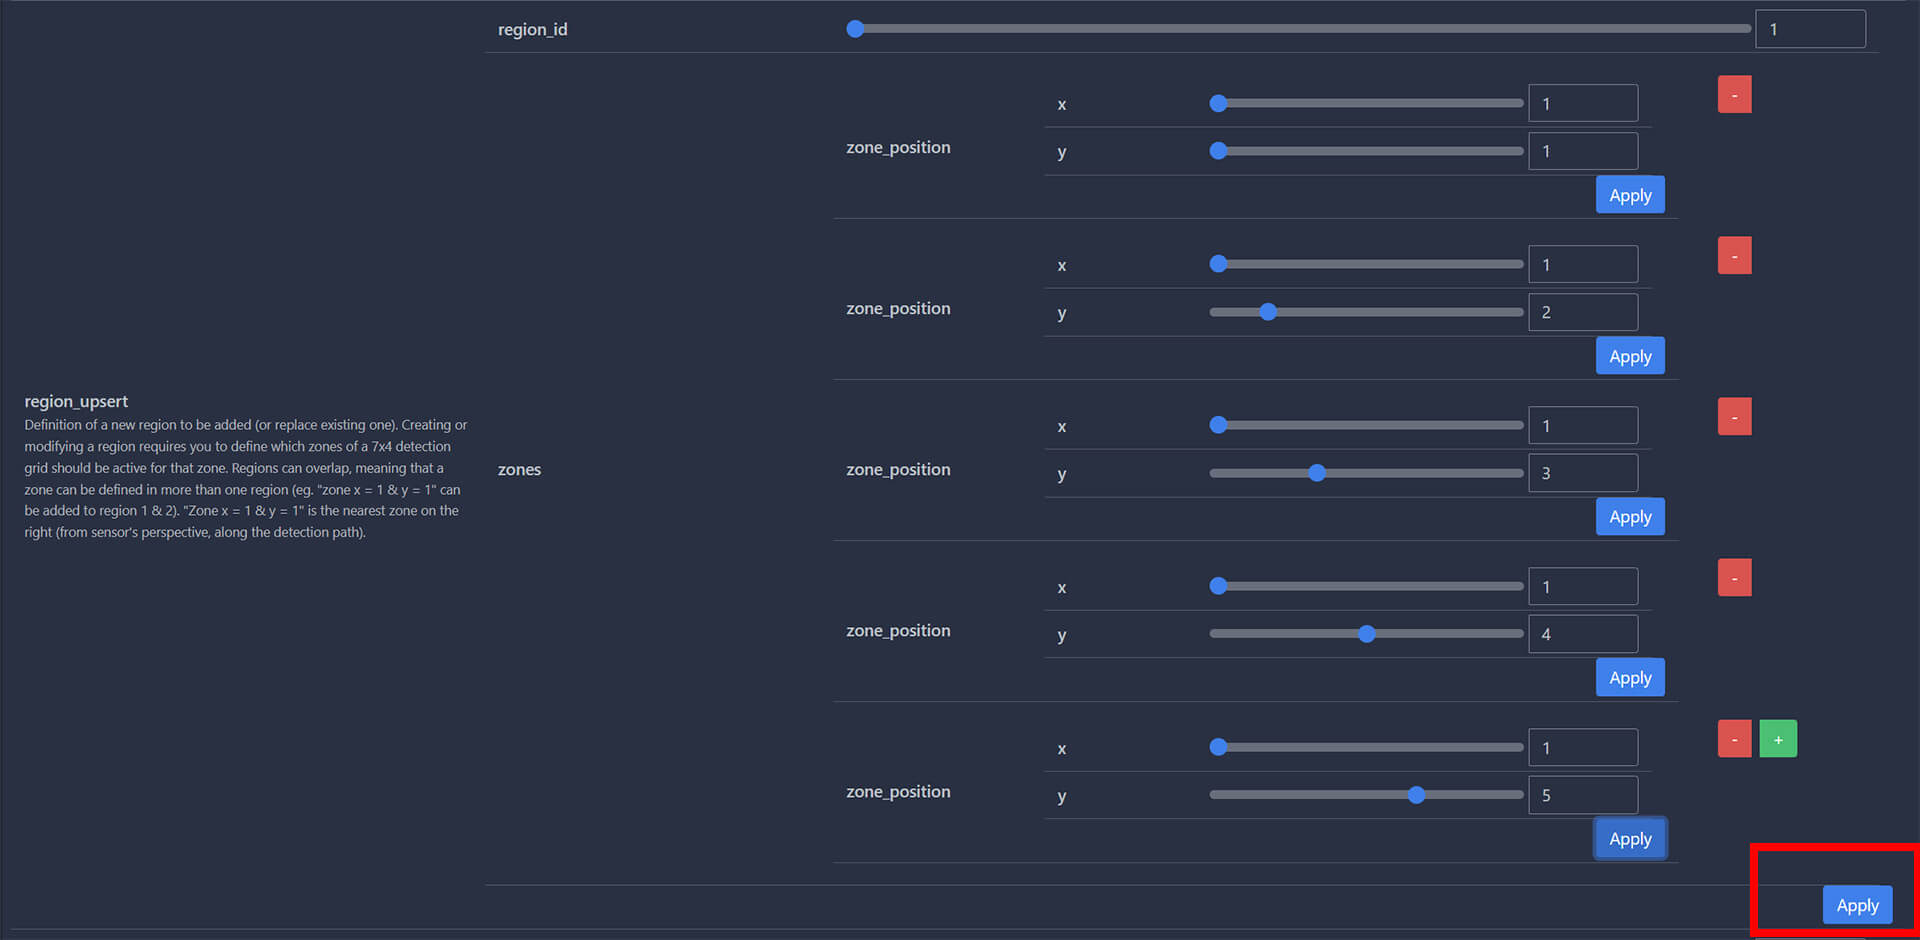
You can define a total of 10 different regions, each determined with any number of zones in a 7×4 detection grid. Each zone can be added to any region, meaning they can freely overlap. Optimized deployment and usage will largely depend on your Aqara FP1 positioning, room size, shape and configuration variables set for the sensor.
Defining a region
To define a region in Zigbee2MQTT, first you must update to the latest version 1.30.0 or anything above. After the successful update, if you navigate to Zigbee2MQTT > Aqara FP1 Presence Sensor > Exposes you will notice some new available settings in the menu:

- action: Latest region detected event:
- Format:
region_<region_id>_<event_type> - Region ID is
1-10 - Event Type is
enter, leavefollowed byoccupied, unoccupiedin a couple of seconds
- Format:
- region_upsert: Used to define new regions or replace existing ones
- Requires you to define region ID
1-10 - Requires you to define which zones of a
7x4detection grid should be active for that zone
- Requires you to define region ID
- region_delete: Used to delete a region from the list
- Requires region ID
1-10to be deleted
- Requires region ID

To define a region, we must define a region_ID and zone coordinates from a 7×4 grid. The X-axis can have a value of 1-4 while the Y-axis 1-7. Each zone can be added to any region, for example you can add coordinates X1 Y1 to both region_id 1 & region_id 2 at the same time.
Note the Y-axis is always on the sides from the sensors perspective, with 1 indicating the nearest zone to the sensor while 7 the farthest. The X-axis is down the center of its field of view.
In Zigbee2MQTT, the coordinates must be a added as a list for the selected region_id. Hit the small green plus button for each coordinate (zone) you want to add to that region. After adding a subsequent zone_position click the small Apply button under it to move on to the next. When all coordinates have been listed, hit the Apply button in the bottom right corner. You will receive a confirmation message in the top corner of the UI.
Region Examples
Here are few example to give you an idea of how you can define a few regions in Z2M up to a total of 10. Each zone is individually addressable, and must be added as a list for the corresponding region_id. Note regions are defined from the sensors perspective:
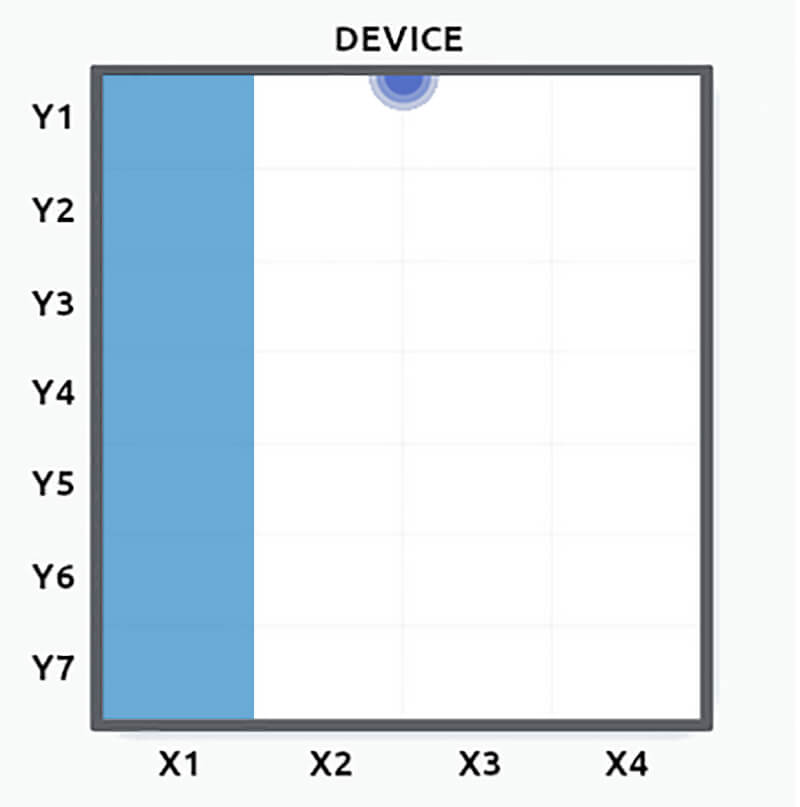
x=1, y=1x=1, y=2x=1, y=3x=1, y=4x=1, y=5x=1, y=6x=1, y=7

x=4, y=1x=4, y=2x=4, y=3x=4, y=4x=4, y=5x=4, y=6x=4, y=7
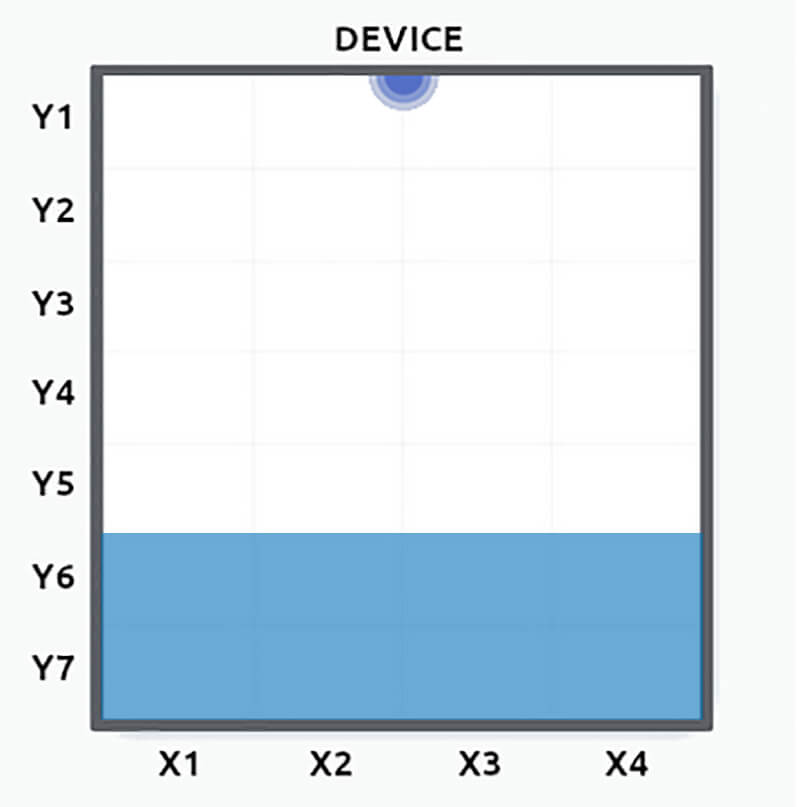
x=1, y=7x=2, y=7x=3, y=7x=4, y=7x=1, y=6x=2, y=6x=3, y=6x=4, y=6
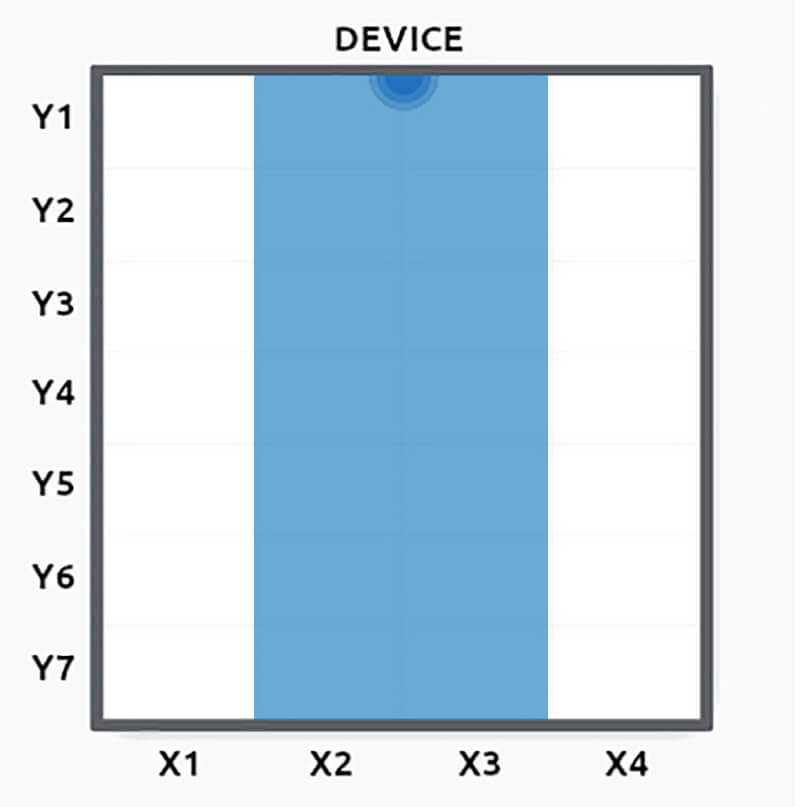
x=2, y=1x=2, y=2x=2, y=3x=2, y=4x=2, y=5x=2, y=6x=2, y=7
x=3, y=1x=3, y=2x=3, y=3x=3, y=4x=3, y=5x=3, y=6x=3, y=7
Deleting A Region
You don’t actually have to delete a region before overwriting it, but if you want to clear it completely you can do so by defining the region_id in the input field in Zigbee2MQTT:
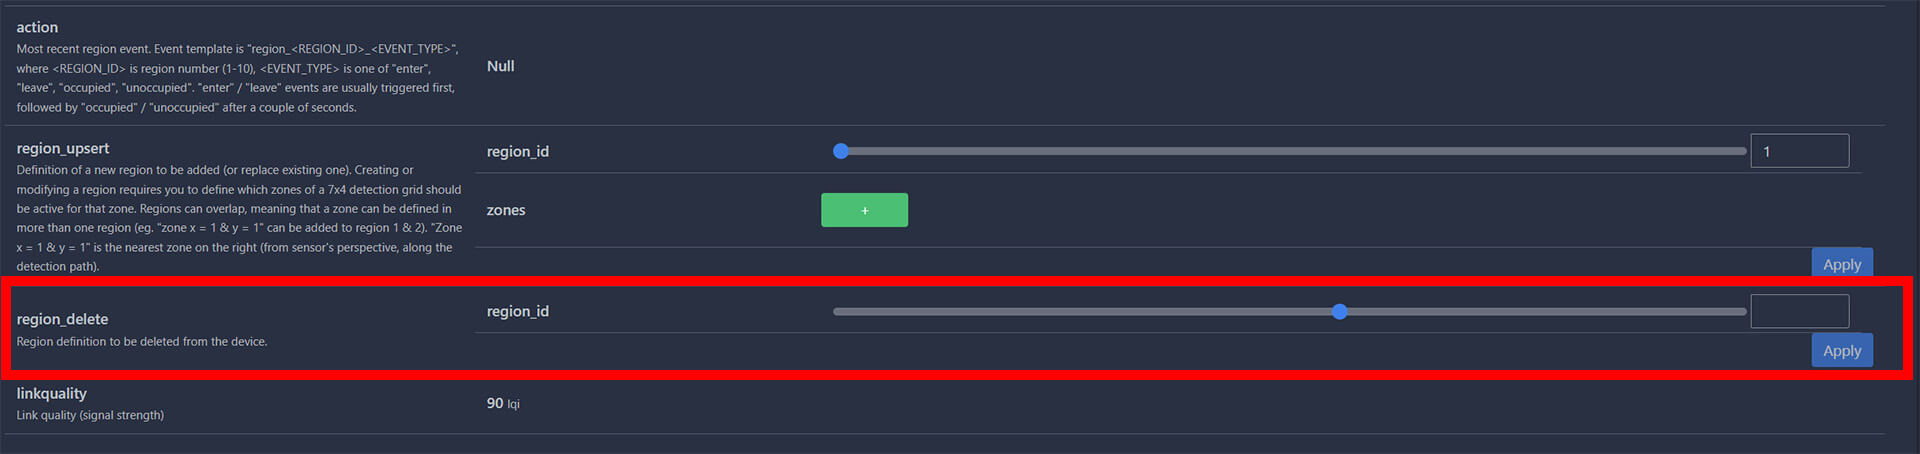
Set your desired region_id and click Apply. You will receive a confirmation in the top right corner of Zigbee2MQTT. Alternatively, you can simple add zones under the same region_id and overwrite any earlier defined coordinates.
Action Entity
The new regions update also brings a new entity called action in Zigbee2MQTT. This entity simply tells you the latest region event in a specific format:
region_<REGION_ID>_<EVENT_TYPE>
#<REGION_ID> is equal to region number 1-10
#<EVENT_TYPE> is equal to enter, leave, occupied, unoccupied.
The sensor first inherits either enter or leave state followed by occupied or unoccupied in a couple of seconds.
Usage
So, you’ve defined your regions and now you want to use them to trigger separate automations, which is actually the ultimate goal of regions. We can achieve this by triggering automations by using the newly available action entity in Zigbee2MQTT, which is under the sensor domain in Home Assistant. Example:
#Example 1: Turning ON lights when entering specific region
description: "Turn ON Lights When I Enter Region 5"
mode: single
trigger:
  - platform: state
    entity_id:
      - sensor.aqara_fp1_presence_sensor_action
    to: region_5_enter #Region event entity
action:
  - service: light.turn_on
    data: {}
    target:
      entity_id: light.living_room
#Example 2: Turning OFF lights when entering specific region
description: "Turn off Lights When I Leave Region 5"
mode: single
trigger:
- platform: state
entity_id:
- sensor.aqara_fp1_presence_sensor_action
to: region_5_leave #Region event entity
action:
- service: light.turn_on
data: {}
target:
entity_id: light.living_roomThis automation will trigger the lights almost instantly when you enter its defined zones. Whenever you leave the region, it will simply turn them off because the entity will inherit a region_5_leave state. You can also use region_5_occupied as state condition for keeping lights on in a certain region. The good news is, triggering automations is very fast because action relies on the presence_event entity of the FP1.
The Aqara FP1 can be currently bought only on AliExpress for ~$49.99. Happy automating!
Aqara FP1 Human Presence Sensor ~ $49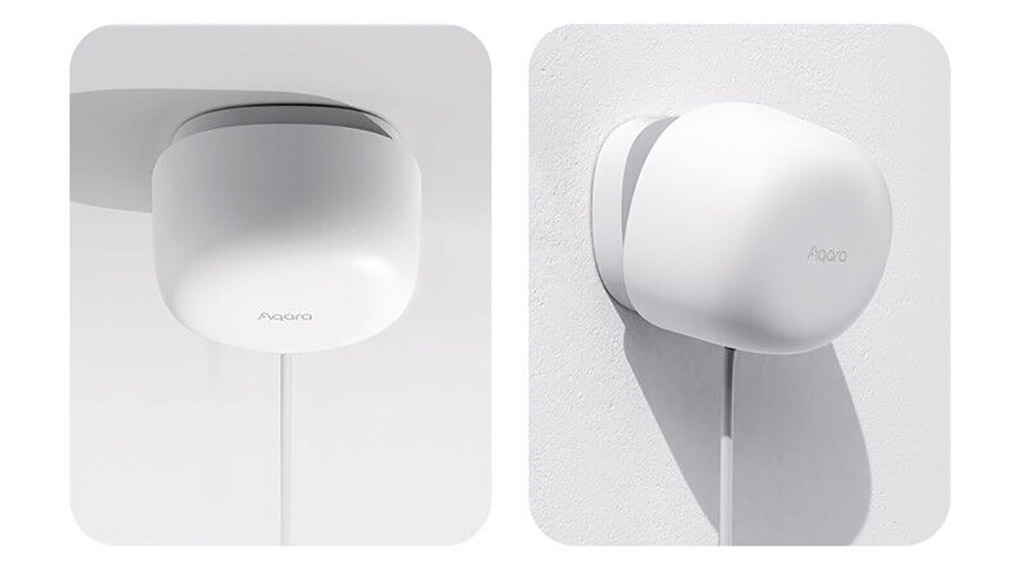
![]()
AliExpress | AliExpress | AliExpress | AliExpress![]()
Amazon.com | Amazon.co.uk | Amazon.de
Amazon.ca | Amazon.nl | Amazon.es
Amazon.it | Amazon.fr
*If links fail to open, try disabling your AdBlocker.


Thanks for explaining how to set up the FP1 with zigbee2mqtt. Do you know whether there is a way of splitting the enter/leave events and the occupied/unoccupied states for each region into a separate mqtt topic? It would make sense if zigbee2mqtt offered such an option, but I can’t seem to figure it out…
The main topic of Z2M cannot be changed, it uses the base
zigbee2mqttor whatever you’ve changed it too.However, the regions are exposed in their own sub-topic in the following format:
region_REGION_ID_EVENT_NAMERead more here https://www.zigbee2mqtt.io/devices/RTCZCGQ11LM.html