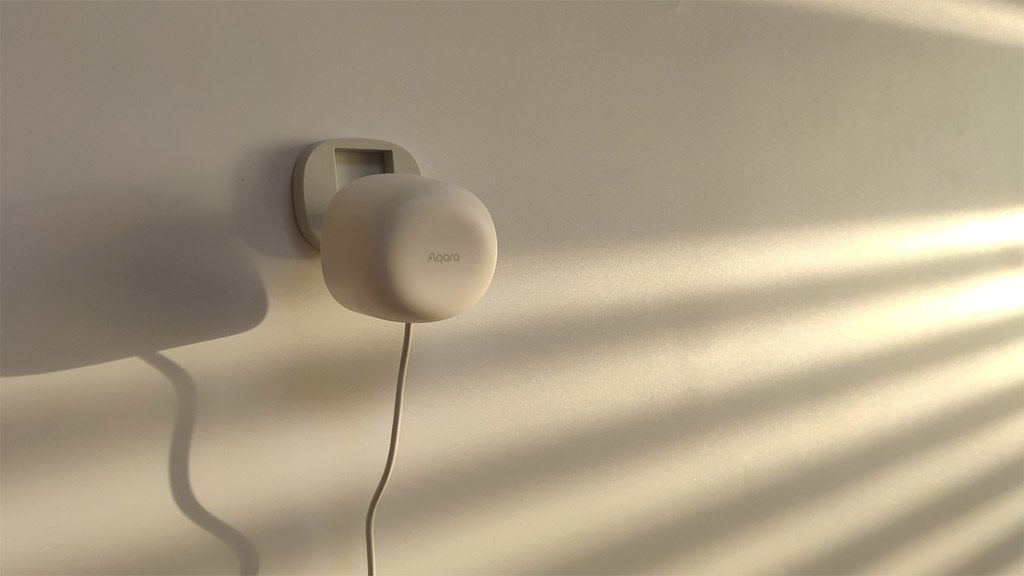
The Aqara FP1 mmWave Human Presence Sensor has been around for a while now and while it’s a capable device, it does have some drawbacks. You read my full review of the FP1 or check out how it compares to other mmWave presence sensors.
In anticipation of it’s successor, the Aqara FP2 (announced at CES 2023) I am sharing a few tips, tricks and automation examples I’ve collected over the last few months while tinkering with this device.
The Aqara FP1 can be currently bought for ~$49.99 only on AliExpress [Link 1, Link 2, Link 3].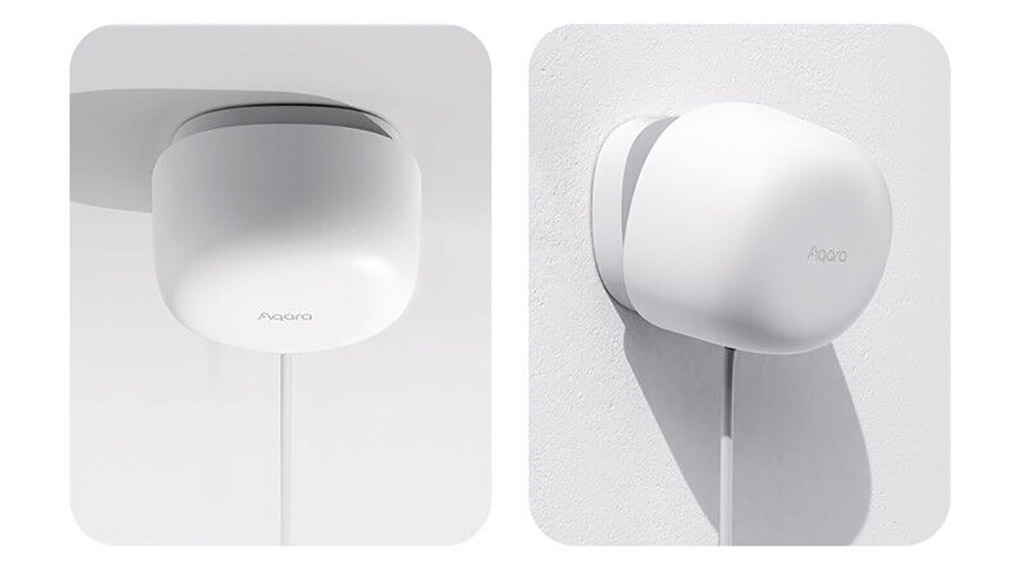
Available Entities
The FP1 exposes a couple of entities in Home Assistant through your Zigbee integration. They may vary slightly, depending on whether you are using Zigbee2MQTT, ZHA or Deconz but the main clusters are the same and operate identically. As a reference, here are all the available entities:
- binary_sensor:
- presence: ON – True, OFF – False
- update_available: ON – True, OFF – False
- select:
- approach_distance: near, medium, far
- monitoring_mode: undirected, left_right
- motion_sensitivity: low, medium, high
- reset_nopresence_status: resets presence status
- sensor:
- device_temperature: device temp in °C
- power_outage_count: how many times did device lose power
- presence_event: enter, leave, left_enter, right_leave, right_enter, left_leave, approach, away
- linkquality: signal quality in LQI
In this article I’m going to focus on optimizing automations, to eliminate (or reduce at least) false positives and false negatives detection events when using the FP1.
OTA Firmware Update
Before you read any further, you should know Zigbee2MQTT supports OTA updates for the Aqara FP1 Presence Sensor. Depending on when you bought, it’s possible the firmware is not the latest version. To update it, navigate to Zigbee2MQTT > OTA > Check for updates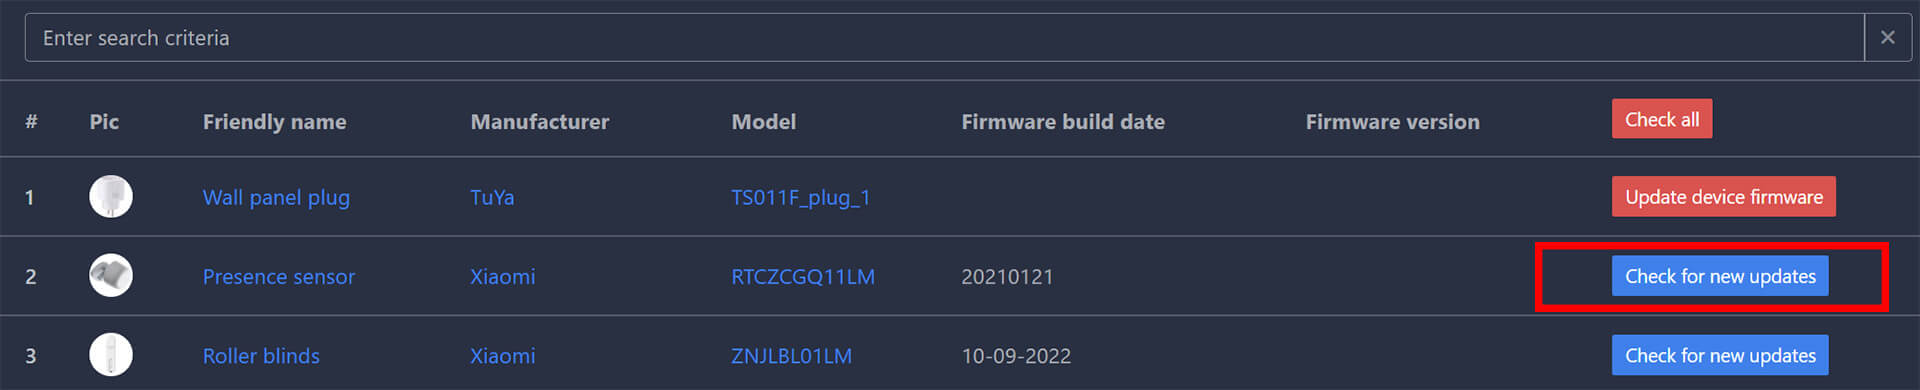
As per Aqara, the changelog is “Optimize user experience“, whatever that means. Once updated, firmware version v54 (0.0.0_0054) will be installed to your device hopefully improving its capabilities. In my case, I did not notice any difference in performance.
"releaseDate": 1655347155000,
"part": "zigbee",
"downloadUrl": "https://cdn.aqara.com/cdn/opencloud-product/mainland/product-firmware/prd/lumi.motion.ac01/20220524105221_OTA_lumi.motion.ac01_0.0.0_0054_20220509_EB279B.ota",
"upgradeTakesTime": 0,
"updateLog": "Optimize user experience\n",
"updateTime": 1655347155000,
"isNecessary": 1,
"fileSize": 317658,
"createTime": 1654158008000,
"firmwareMD5": "a4f1f449afc5c7feffc5d0a0eeeb279b",
"state": 3,
"isForce": false,
"firmwareVersion": "0.0.0_0054",
"imageType": "exe",
"firmwareCRC32": "C1B875CC"
If you want to update the firmware via ZHA, follow this guide. You must enable OTA updates for ZHA first and than fetch the image before flashing it to the Aqara FP1.
Presence Event Speed Detection Hack
The main presence binary_sensor entity inherits a state of ON when presence is detected and OFF when presence is absent. You first thought would be to use this in a simple automation (eg. Turn ON lights when I enter the room, Turn OFF lights when I exit the room), but you would encounter a well known issue with mmWave sensors: presence detection speed.
The binary_sensor.presence has a cooldown of 10 seconds before it changes it’s state to on when motion is detected. This is not very useful when triggering automations, because 10 seconds is too much for triggering lights.
However, the sensor.presence_event entity changes state almost instantly and we can use that to trigger automations with a bit of templating.
– The possible states of this sensor are: enter, leave, left_enter, right_leave, right_enter, left_leave, approach, away.
– Depending on the monitoring mode (undirected, left_right) you have set, it will change it’s state to some of these values almost immediately when approached
– When no motion is detected, the state of the sensor changes to leave
So, we can use this information and create a new template statement, which we can use in automations, in some cards on the dashboard or create a new binary_sensor:
{{not is_state("sensor.aqara_fp1_presence_event", "leave")}}In simple words, this statement will detect motion whenever the state is not leave, which will be always when motion is detected.
To create a template binary_sensor, copy the code in your configuration.yaml file.
template:
  - binary_sensor:
      - name: "Aqara FP1 Motion"
        device_class: motion
        icon: mdi:motion-sensor
        state: >
          {{not is_state("sensor.aqara_fp1_presence_event", "leave")}}
          #Replace your Aqara FP1 Presence Event Entity
Automation Example
To use this statement in an automation, a template binary_sensor is not necessary but it does make things easier. As an example, here is how an automation would like like without the template sensor and without it:
Example 1: Using the template binary_sensor:
description: "Turn ON Light When Motion is Detected"
mode: single
trigger:
  - platform: state
    entity_id:
      - binary_sensor.aqara_fp1_motion #Template binary_sensor
    to: "on"
condition: []
action:
  - service: light.turn_on
    data: {}
    target:
      entity_id: light.living_room_lamp
Example 2: Using the not is_state template statement directly
description: "Turn ON Light When Motion is Detected"
mode: single
trigger:
  - platform: template
    value_template: "{{not is_state(\"sensor.aqara_fp1_presence_event\", \"leave\")}}"
condition: []
action:
  - service: light.turn_on
    data: {}
    target:
      entity_id: light.living_room_lamp
Card Usage Example
The same thing principle can be applied to a card on the dashboard and show you when motion is detected. Not all cards support templating, so in that case you must use the binary sensor. Here are two examples, showing when motion is detected with and without the binary_sensor to achieve the same effect:
Example 1: Using the template binary sensor, in a simple Mushroom Entity Card
type: custom:mushroom-entity-card
entity: binary_sensor.aqara_fp1_motion #Template binary_sensor
icon: mdi:motion-sensor
layout: vertical
icon_color: green
name: Motion Detected
secondary_info: none
Example 2: Using the not is_state statement directly with the main sensor.aqara_fp1_presence_event entity in a Mushroom Template Card to conditionally show the state, icon and icon color.
type: custom:mushroom-template-card
primary: |-
  {% if not is_state("sensor.aqara_fp1_presence_event", "leave") %}
    Motion Detected
  {% else %}
    No Motion Detected
  {% endif %}
icon: |-
  {% if not is_state("sensor.aqara_fp1_presence_event", "leave") %}
    mdi:motion-sensor
  {% else %}
    mdi:motion-sensor-off
  {% endif %}
icon_color: |-
  {% if not is_state("sensor.aqara_fp1_presence_event", "leave") %}
    green
  {% else %}
    gray
  {% endif %}
Clearing Stuck Presence Sensor
In the community forums, some users have reported the Aqara FP1 frequently getting stuck in states (home, detected) with certain setups & coordinators. Unfortunately, the cause is hard to diagnose given the fact people use a wide variety of coordinators and routers in their Zigbee mesh network. Than comes firmware versions, integration versions etc. which make it impossible to pinpoint an exact cause.
Luckuly, there is a way to reset to no presence status if this is happening to you. Zigbee2MQTT exposes an entity directly in its dashboard, which sends a payload {"reset_nopresence_status": ``} when clicked.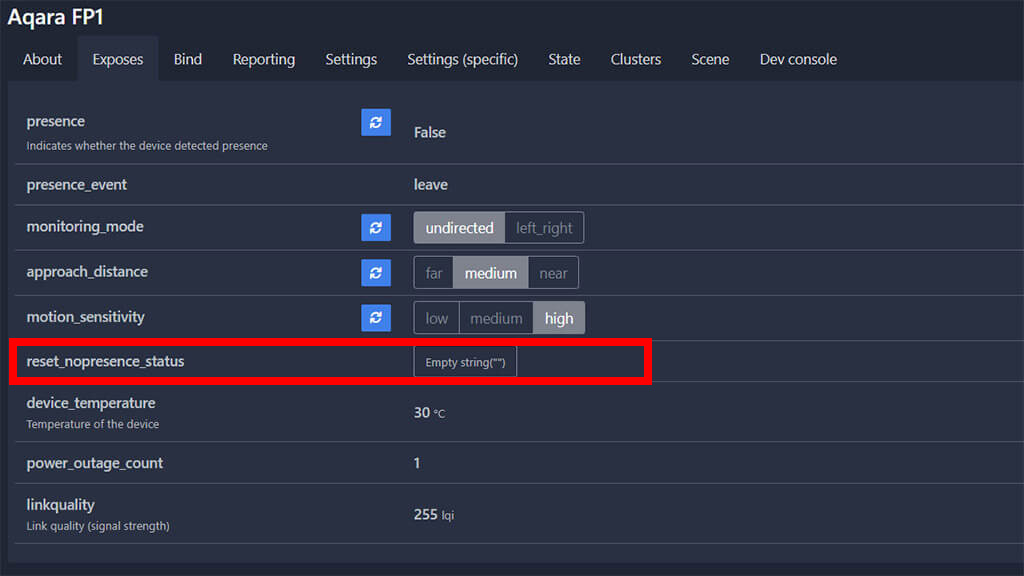
This sends an empty string payload resetting the main presence entity. You can manually send the payload via MQTT or create a button or automation for it. This is the action you would use:
action:
  - service: mqtt.publish
    data:
      topic: zigbee2mqtt/Aqara FP1/set
      payload: "{\"reset_nopresence_status\":\"\"}"
Please note: If you create an automation to reset the main presence entity, the presence_event will also reset state. Keep that in mind when creating automations.
Monitoring Modes
The Aqara FP1 has two available monitoring modes that you switch between: undirected and left_right.
- When set to undirected, the sensor would not consider the approaching sides and just inherit one of the following states: leave, enter, approach, away
- When set to left_right, the sensor would consider the approaching sides, and inherit the following states: left_enter, left_leave, right_enter, right_leave
If you are confident enough that you’ve eliminated false triggers with smart positioning, you can use these state of the presence_event sensor to trigger different automations in left_right mode. For example, you’ve positioned the FP1 in your main living room. Let’s say you can enter in this room from different sides: kitchen and terrace. You trigger a different automation action for each different entry:
Example 1: Entering from kitchen
description: "Turn on Light When Entering From Kitchen"
mode: single
trigger:
  - platform: state
    entity_id:
      - sensor.aqara_fp1_presence_event
    to: left_enter
condition: []
action:
  - service: light.turn_on
    data: {}
    target:
      entity_id: light.dining_room
Example 2: Entering from terrace
description: "Turn on Light When Entering From Terrace"
mode: single
trigger:
  - platform: state
    entity_id:
      - sensor.aqara_fp1_presence_event
    to: right_enter
condition: []
action:
  - service: light.turn_on
    data: {}
    target:
      entity_id: light.living_room
Whether this would be a reliable way of triggering automations based on the presence_event entity is completely dependent on your positioning and the field of view that you’ve given the Aqara FP1.
Combining the FP1 with a PIR Sensor
It’s sad that the FP1 is not a one-solution-fits all kind of mmWave presence sensor, but it’s first gen and hopefully the FP2 does much better. At the end of the day, it’s always best to combine the FP1 with a PIR motion sensor. This eliminates so much headaches and tinkering with sensitivity, positioning and range adjustments. 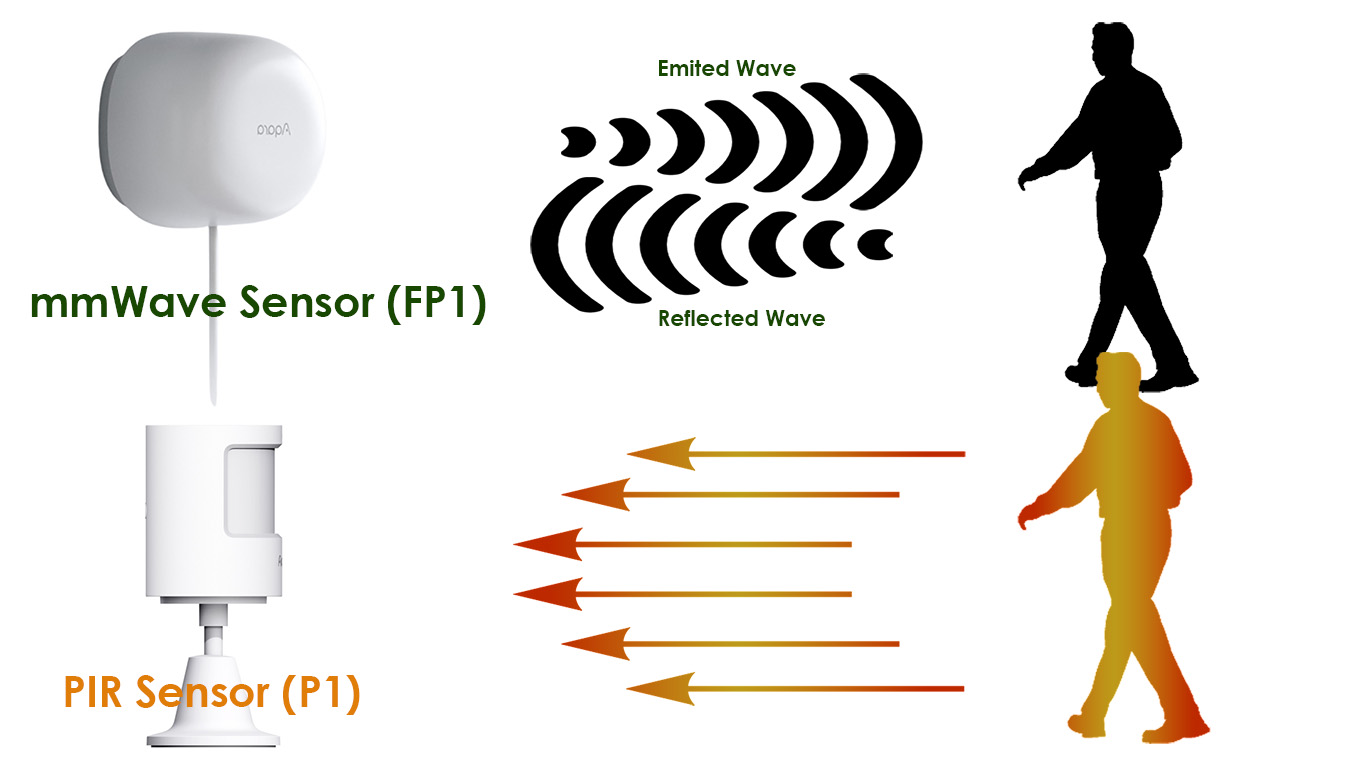
As an example, you can combine the FP1 in a template with an existing PIR motion detection sensor and create one presence entity (binary_sensor), which you would rely on for triggering automations.
– This would allow the template binary_sensor to inherit a state of OFF only after a set timeout and when both sensors clear motion;
– The sensor would inherit a state of ON when the PIR sensor detects motion (immediately);
You can tweak the delay_off interval to your liking.
template:
  - trigger:
      - platform: state
        entity_id: binary_sensor.pir_bedroom #PIR Motion Sensor
      - platform: state
        entity_id: binary_sensor.fp1_bedroom_occupancy #Aqara FP1 Main Presence Entity
    binary_sensor:
      - name: Bedroom Human Presence
        device_class: occupancy
        delay_off:
          seconds: 20
        icon: >
          {% if is_state("binary_sensor.bedroom_human_presence", "on") %}
            mdi:motion-sensor
          {% else %}
            mdi:motion-sensor-off
          {% endif %}
        state: >
          {% if is_state('binary_sensor.pir_bedroom','on') %}
            on
          {% else %}
          {% if is_state('binary_sensor.fp1_bedroom_occupancy','off') %}
            off
          {% else %}
            {{ states('binary_sensor.fp1_bedroom_occupancy') and states('binary_sensor.bedroom_human_presence') }}
          {% endif %}
          {% endif %}
Positioning Tips
Correctly positioning the Aqara FP1 is hard. That’s it, there no other way to say it. Maybe you stick in your room corner and it works like you intend it to out of the box, great. No need for further tweaking. But, for most users, proper installation without any false positive or negative triggers is going to be a challenge. This is just how sensitive mmWave sensors are, especially 60GHz sensors like in the FP1.
I’ve moved this device a lot when experimenting with it. First the living room, than my bedroom and now It’s sitting in my bathroom corner. It’s triggered by the most obscure moving things if blindly positioned. I’m sharing a list of notes I’ve wrote for myself when I tinkered with the Aqara FP1, hopefully it will have some value to you:
- False Positive Triggers (detected presence)
- Ceiling Fan
- Bathroom Fan
- Spinning Washing Machine
- Floating towel on dryer rack
- Computer PSU fan if facing the FP1
- Moving window shades
- Robot Vacuum
- Pets
- Large, open front speakers (visible vibrations, <2m)
- Moving people in front yard (window)
- False Negative Triggers (cleared presence)
- Sleeping under blanket
- Sleeping without blanket at 5meters
- Cable Notes
- Length is 2m
- Not replaceable without soldering
- Use extension cord or solder longer cable (not recommended)
- Adapter Notes
- Some AliExpress sellers don’t include adapter
- Adapter MUST be 5V1A
- Swivel Notes
- 360° rotation
If you have anything that might trigger the Aqara FP1, you should choose a different installation location. You can limit it’s field of view by lowering it (eg. so it can’t see your ceiling fan) or twisting it to one side so it can see your sitting/laying space better. Experiment with a bunch of locations before you settle.
Zones Support
UPDATE: Zones are now fully supported in Zigbee2MQTT.
As you may know, the FP1 supports defining detections zones (regions) when used with the Aqara Home app. This has been a feature long requested by the community and some awesome people have recently made a breakthrough on github. It’s still in it’s early stages of development, but you can try it for yourself by migrating to the dev branch of Zigbee2MQTT. 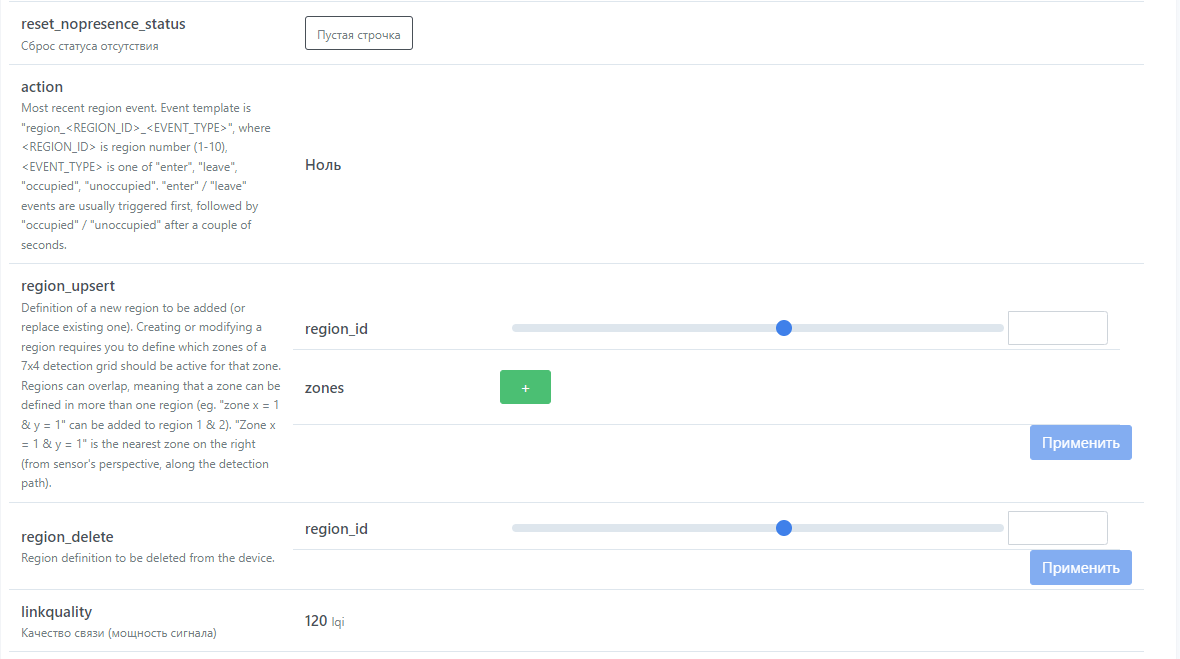
Source: Github
Summary
This has been my experience with the Aqara FP1 as an mmWave Human Presence sensor in my home. Hopefully what I’ve shared can be of use to someone. It’s a pricy device, it’s capable, but needs to be handled and installed thoughtfully, otherwise It’s just going to pi*s you off.
If you have any other tips for optimizing the Aqara FP1, please share the love in the comments bellow. If you would like to purchase the device, here are a few links from different sellers. As an alternative, I would recommend the Tuya ZY-M100 Presence Sensor. It’s half the price and operates the same way as the FP1, better even in some areas.
Aqara FP1 Human Presence Sensor ~ $49
![]()
AliExpress | AliExpress | AliExpress | AliExpress![]()
Amazon.com | Amazon.co.uk | Amazon.de
Amazon.ca | Amazon.nl | Amazon.es
Amazon.it | Amazon.fr
*If links fail to open, try disabling your AdBlocker.


I’ve found that combining my mmWave with a PIR produces great results. I spent ages trying to tune the mmWave to avoid false positives, stopping those resulted in false negatives…
Combining, as you say, is a good solution
Thanks for this article. I’m glad I stumbled across it as I just set up my first FP1 today!
Thank you, thank you, thank you!
I’ve had this thing for about a year and it just pi*sed me off! I think I might actually be able to use it now!
You are welcome friend, cheers! 🙂