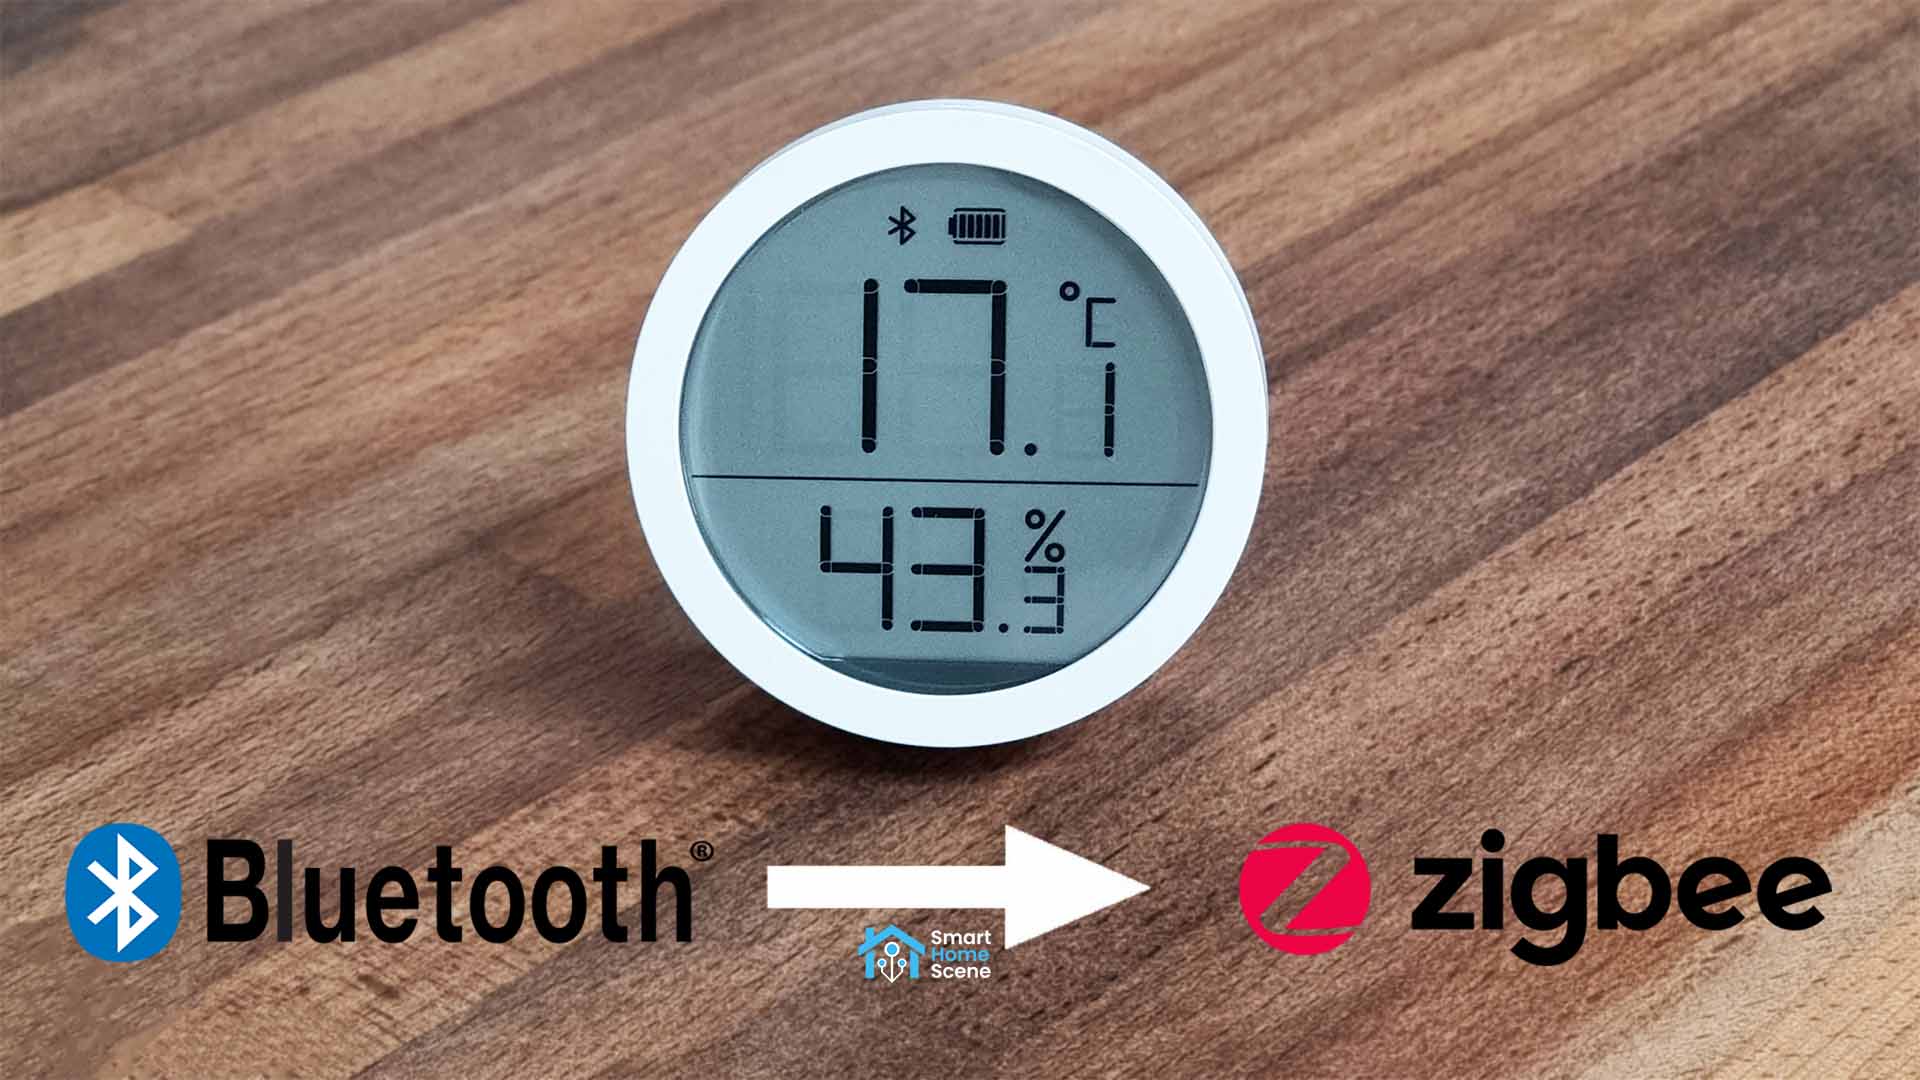
Recently, I talked about converting the Xiaomi LYWSD03MMC Temperature and Humidity Sensor from Bluetooth to Zigbee by flashing a custom firmware OTA (Over-the-Air). The process is fairly simple to do via e web browser, but you can also use UART if you encounter any issues.
There were some developments in the Beta firmware since than, the repo was forked and a couple of new devices received Zigbee support besides the LYWSD03MMC:
- Qingping (CGDK2)
- Xiaomi MiaoMiaoCe (MHO-C401)
- Xiaomi MiaMiaoCe (MHO-C122)
- Tuya TS0201_TZ3000
All of these are currently on their way to me, for the purpose of testing and providing feedback since the project is still in Beta. I already own a Qingping CGDK2 [AliExpress, Amazon], so in this article I’m flashing this model OTA via a web browser and UART.
About the Zigbee Firmware
The original Zigbee firmware for these Telink-based climate sensors was developed by Ivan Belokobylskiy (devbis) but forked and expanded by Victor (pvvx). There is no need to flash a transitional firmware file anymore, you can go straight to Zigbee. The firmware is still in Beta and additional tests are required, so do this at your own merit. Here’s a summary of this custom firmware:
- A solid “BT” icon indicates a connection loss or the thermometer is not registered with the Zigbee network.
- A flashing “BT” icon is called by the identify command.
- Default intervals for temperature and humidity reporting are set to 30-120 (min-max) seconds, with changes from 0.1°C and 1% being pushed immediately.
- Battery consumption has been optimized when the coordinator is disconnected or connection is lost.
- Battery consumption has been optimized when polling with the reset button or contacts.
- Additional adjustments to consumption and correction of the report transmission functions algorithm.
- Correspondence of transmitted and displayed measurements (correct rounding).
- Switching temperature between Celsius and Fahrenheit.
- Averaged battery level measurements (eliminates clutter on charts)
- Reduced firmware size to 128Kb
- Adding button actions (for eligible models)
The developer shared this regarding battery life of the Zigbee firmware: The final average consumption of the LYWSD03MMC when measured from a 3.3v source is between 14-26µA, depending on the dynamics in change of temperature and humidity. For comparison, the BLE firmware consumes 14µA with default settings and constant transmission of all measured values every 10 seconds.
The models with a button (CGDK2) can use the following actions (or short “reset” to “gnd” contacts for LYWSD03MMC):
- Short press – Send temperature, humidity and battery data.
- Hold for 2 seconds – Switch temperature between Celsius and Fahrenheit.
- Hold for 7 seconds – Reset the binding and restart.
Converting Qingping CGDK2 to Zigbee (OTA)
If you are using Android, Linux, Windows you need to #enable-experimental-web-platform-features in your browser. This will allow the web flasher to get the MAC Address of the device which is needed for the flashing process. Copy the following link for your browser and paste it into the address bar:
- Chrome: chrome://flags/#enable-experimental-web-platform-features
- Opera: opera://flags/#enable-experimental-web-platform-features
- Edge: edge://flags/#enable-experimental-web-platform-features
Select Enabled and restart your browser. Make sure you have a full or new battery inside the Qingping CGDK2 Temperature sensor and than continue to follow these steps:
- Navigate to https://pvvx.github.io/ATC_MiThermometer/TelinkMiFlasher.html
- Check Get Advertising MAC and click Connect
- Select the CGDK2 and click Pair
- After the connection is established, you will some info on screen
- If you are using stock firmware, click Do Activation
- If you are using custom firmware, device is already activated
- Click Zigbee Firmware: ZCGDK2_v0117.bin
- Wait for the firmware to load
- Click Start Flashing
- Wait for the process to finish
I already had pvvx’s custom firmware flashed on this particular device, so I did not need to activate device before flashing. If you are running stock, you will need to click Do Activation before anything else. Here’s how the final flashing process window looked for me:
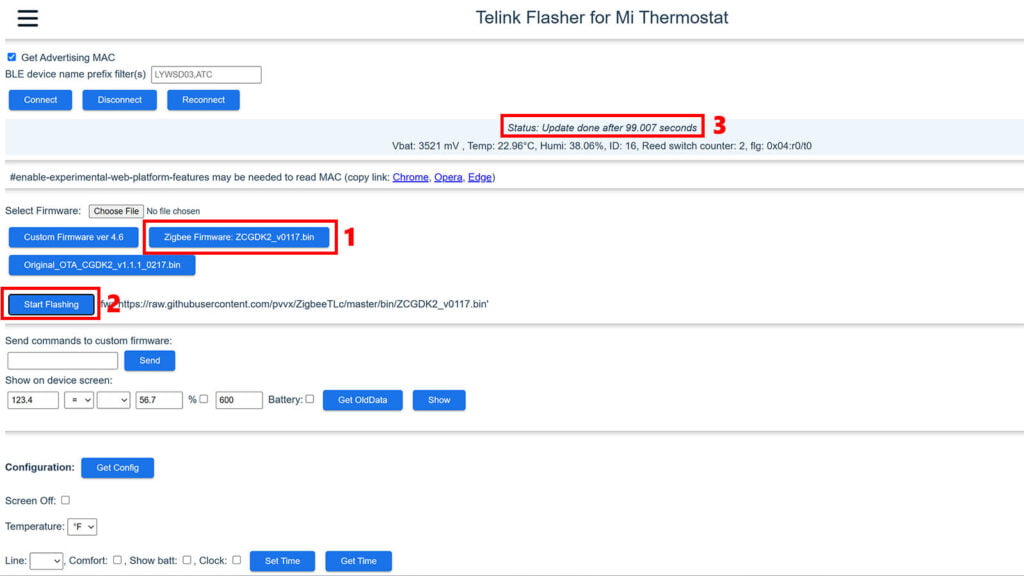
The update takes somewhere around 1-4 minutes and flasher will log Update done after XX seconds at the top. To avoid failure, it’s best to eliminate an interference sources in the vicinity of the CGDK2 and flash only with a full or new battery.
Converting Qingping CGDK2 to Zigbee (UART)
If you do not succeed flashing the CGDK2 Over-the-Air, there’s always a fail-safe option by flashing the device over UART with an USB-TTL adapter. There are a couple of important things to understand here:
- You cannot brick Telink TLSR82xx chips
- No matter what you flash, you can always use UART to restore
- You can damage the device
- If you send 5V through your adapter, you can burn the chip
- Almost every USB-TTL adapter has a jumper or toggle which switches output voltage, make sure it’s set to 3.3v
- This guide uses the TX-SWS web flasher, which requires only 3 connections and writes the firmware in the browser, I found it easier to use and wire.
You are also going to need a USB-TTL adapter if you don’t already have one. The opinion around the web for particular models vary widely, so it’s impossible to give a good recommendation. In my tests, I use the FDTI FT232RL [Amazon, AliExpress] serial converter which worked perfectly fine. Be mindful of the interface (USB-A, USB-C, Micro-USB) when ordering.
Here’s the pinout of the Qingping CGDK2:
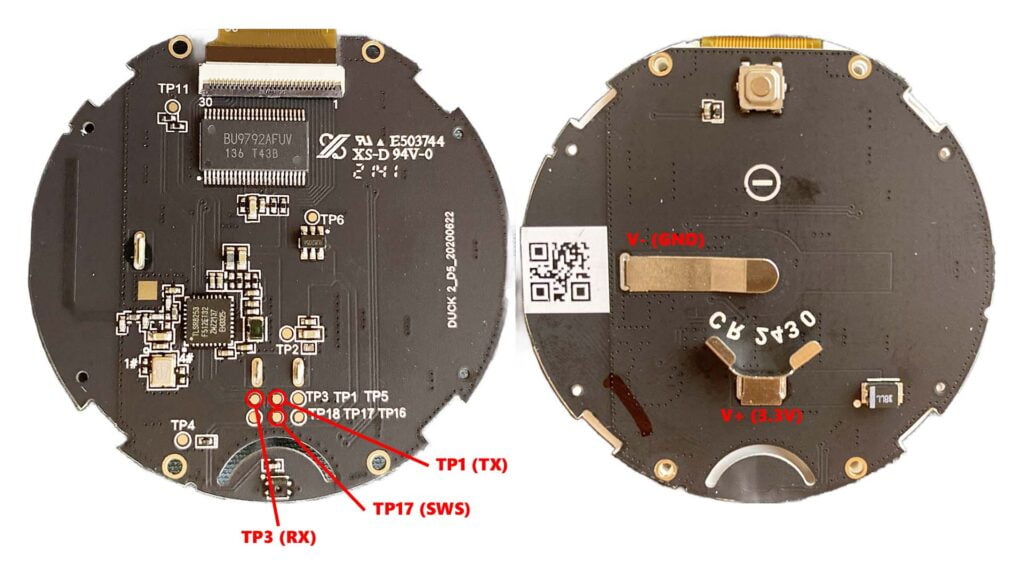
For the TX-SWS flasher we only need to connect V+, V- and SWS to the TX output of the TTL adapter. Since almost all adapters use 2.54mm male pins, it’s best to solder wires with female Dupont connectors on one end. To make it more clear, here are the connections needed for this web flasher:
| Qingping CGDK2 | USB-TTL Adapter |
|---|---|
| V+ (3.3V) | 3.3V (VCC) |
| V- (GND) | GND |
| TP17 (SWS) | TX |
IMPORTANT: If you adapter doesn’t have RTC or DCR output, the TLSR825x chip needs to be manually powered up during the activation phase of the flasher. This means connecting the TX (TP1) and V+(3.3V) on the CGDK2 for the duration of the activation time, controlled by “Atime” of the flasher.
If you are unsure, solder a 4th wire to the TP1(TX) terminal on the CGDK2 but don’t solder it to V+(3.3V). You need to only make a short connection, ~8 seconds, and than release it. Here’s how I wired the CGDK2 to my adapter:
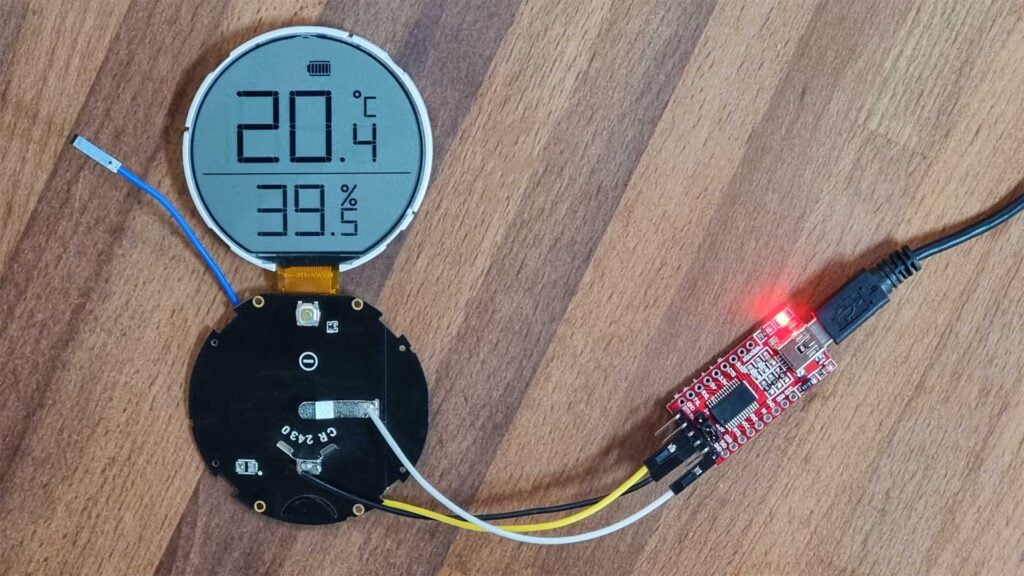
V+(3.3V) to VCC (3.3V)
V- (GND) to GND
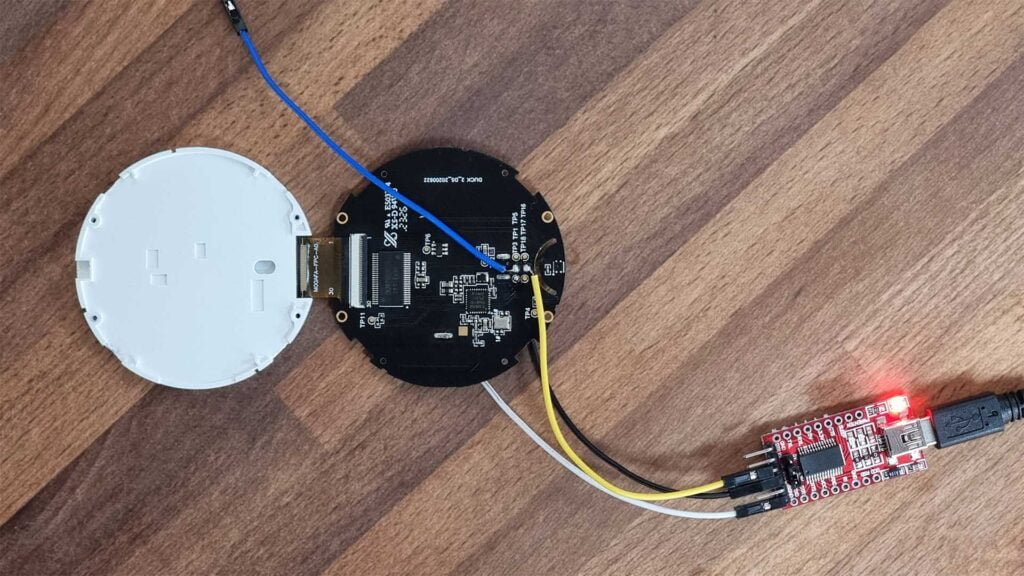
SWS (TP17) to TX
TX (TP1) soldered for connecting to V+(3.3V) during activation phase
- Solder a wire with a female Dupont connector to the
V+ (3.3V)terminal of the CGDK2 - Solder a wire with a female Dupont connector to the
V- (GND)terminal of the CGDK2 - Solder a wire with a female Dupont connector to the
TP17 (SWS)terminal of the CGDK2 - Connect the female connectors to the pins of the USB-TTL adapter from the table above
- Connect the USB-TTL adapter to your PC
- If you are using Windows, it will usually install the USB drivers for you
- If you need to do it manually, google your adapter model + drivers
- Download the latest firmware from the ZigbeeTLc repository
- At this moment, it’s ZCGDK2_v0117.bin
- Navigate to https://pvvx.github.io/ATC_MiThermometer/USBCOMFlashTx.html
- Set Baudrate to 460800 and Atime to 8 sec
- Click Open, select your adapter’s USB port and click Connect
- Select the firmware file you just downloaded
- If you need to activate the TLSR8253 chip like I explained above, connect the TX (TP1) and V+ (3.3V) terminals on the CGDK2 by temporarily holding the wire with your hand
- Click Write to Flash and once activation finishes, release the wire from the V+ terminal
- Wait for the flashing process to finish (~60sec)
- Done, your window should look like this

Adding the CGDK2 to Home Assistant
Now that the CGDK2 is using Zigbee firmware, you can add it to Home Assistant via Zigbee2MQTT or ZHA. As soon as you power the device it goes into pairing mode by default. If you need to reset, you can hold the button for 7 seconds to enter pairing mode. Holding the button for 2 seconds cycles between Fahrenheit and Celcius.
ZHA
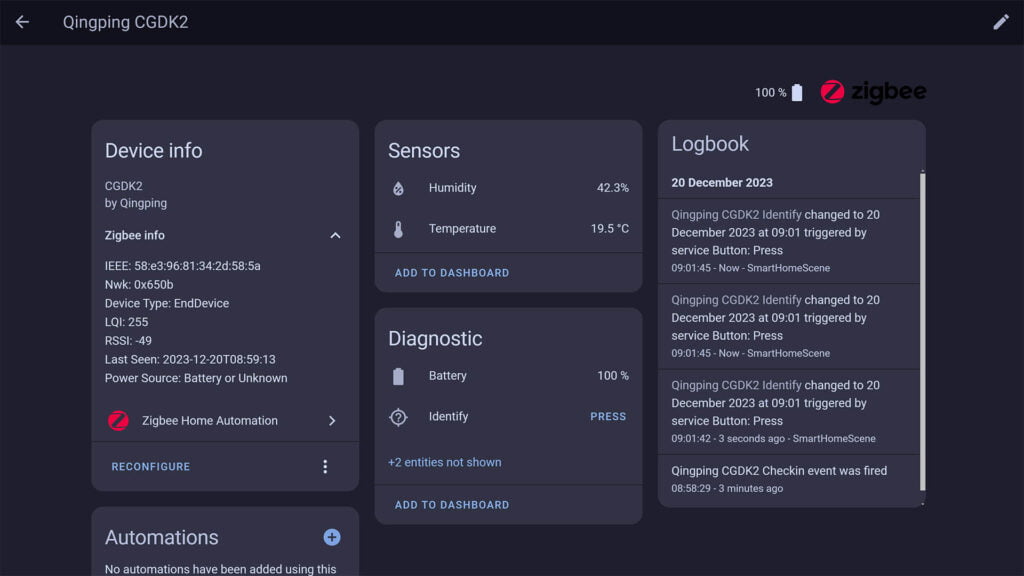
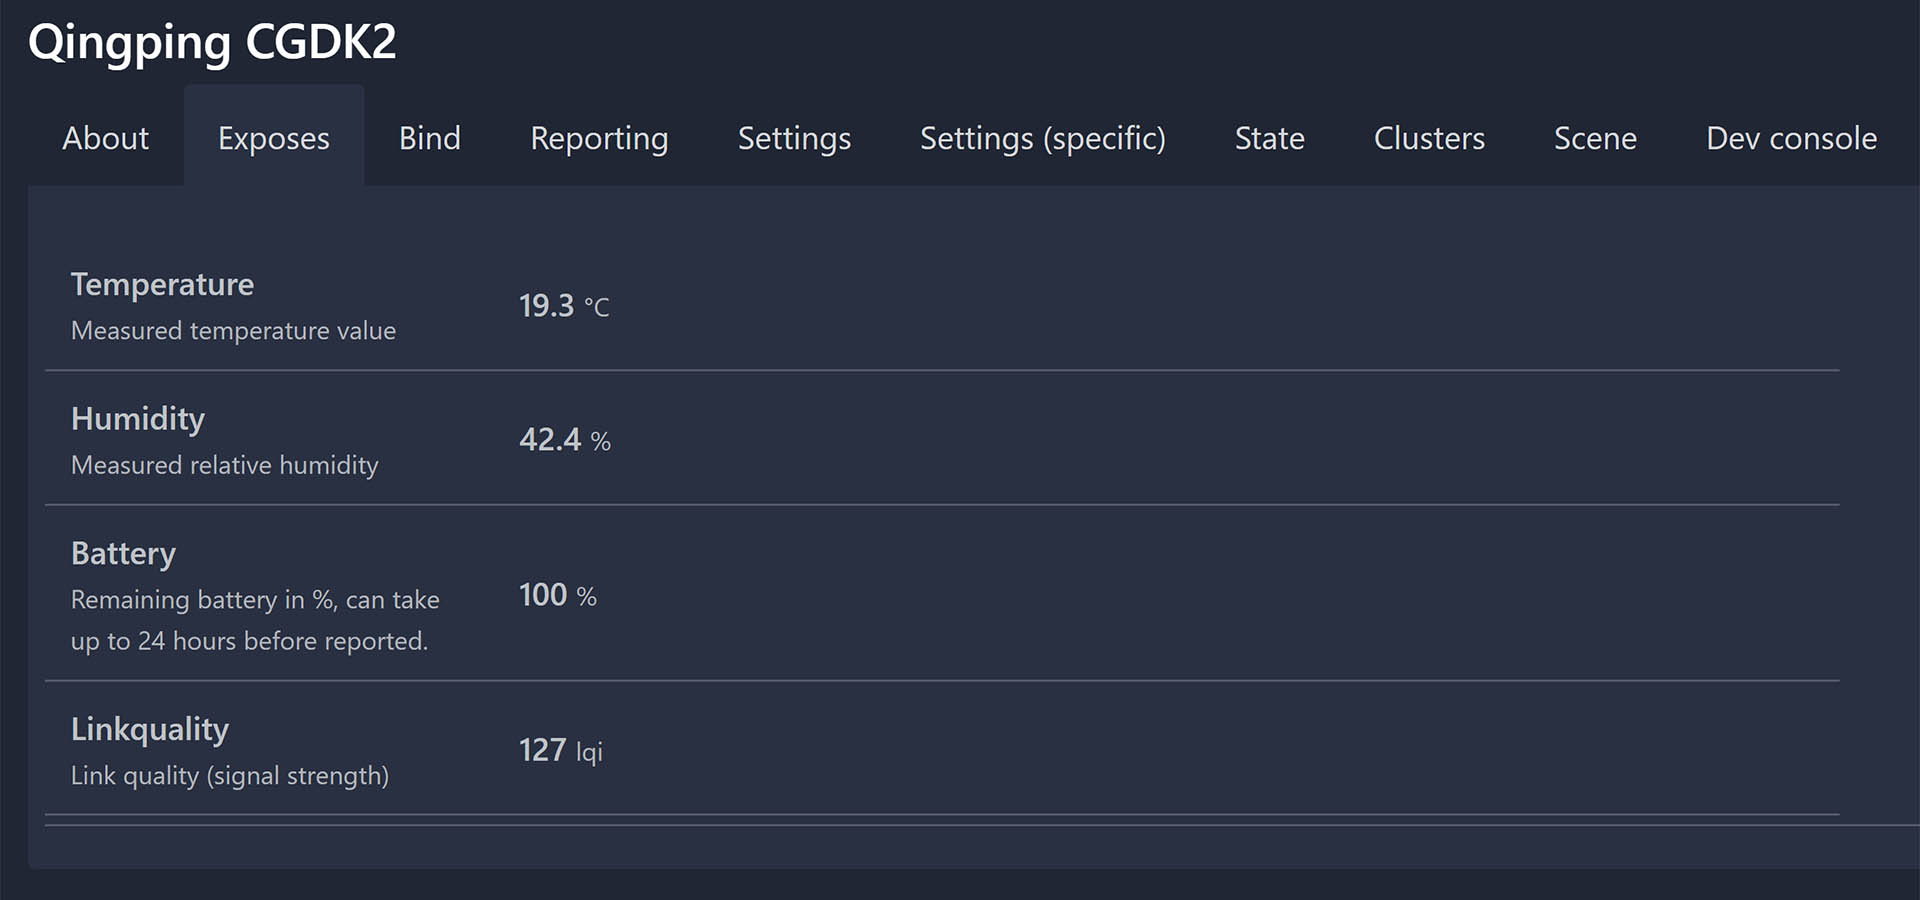
The device is identified immediately in ZHA and no custom quirk is required. It’s correctly labelled as CGDK2 by Qingping, exposing the Temperature and Humidity clusters to Home Assistant.
Zigbee2MQTT
At this point, the CGDK2 requires an external converter in order to work in Zigbee2MQTT. I’ve managed to recycle the same converter used in the Xiaomi LYWSD03MMC sensor by changing a few lines. Here’s how to add it to Zigbee2MQTT before pairing the CGDK2:
- Stop Zigbee2MQTT
- Create a new file in the zigbee2mqtt folder (next to configuration.yaml)
- Name it
CGDK2.js(make sure it ends with .js) - Open the file, copy the contents from bellow and save the file
const fz = require('zigbee-herdsman-converters/converters/fromZigbee');
const exposes = require('zigbee-herdsman-converters/lib/exposes');
const reporting = require('zigbee-herdsman-converters/lib/reporting');
const ota = require('zigbee-herdsman-converters/lib/ota');
const e = exposes.presets;

const definition = {
    zigbeeModel: ['CGDK2'],
    model: 'CGDK2',
    vendor: 'Qingping',
    description: 'Temperature & humidity sensor',
    fromZigbee: [fz.temperature, fz.humidity, fz.battery],
    toZigbee: [],
    configure: async (device, coordinatorEndpoint, logger) => {
        const endpoint = device.getEndpoint(1);
        const bindClusters = ['msTemperatureMeasurement', 'msRelativeHumidity', 'genPowerCfg'];
        await reporting.bind(endpoint, coordinatorEndpoint, bindClusters);
        await reporting.temperature(endpoint, {min: 10, max: 300, change: 10});
        await reporting.humidity(endpoint, {min: 10, max: 300, change: 50});
        await reporting.batteryVoltage(endpoint);
        await reporting.batteryPercentageRemaining(endpoint);
    },
    exposes: [e.temperature(), e.humidity(), e.battery()],
    ota: ota.zigbeeOTA,
};

module.exports = definition;- Open Zigbee2MQTT’s configuration.yaml file (NOT Home Assistant’s)
- Location of the file is zigbee2mqtt/configuration.yaml
- Enable the external converter by adding the following lines:
- Restart Zigbee2MQTT and pair the Qingping CGDK2
external_converters:
  - CGDK2.js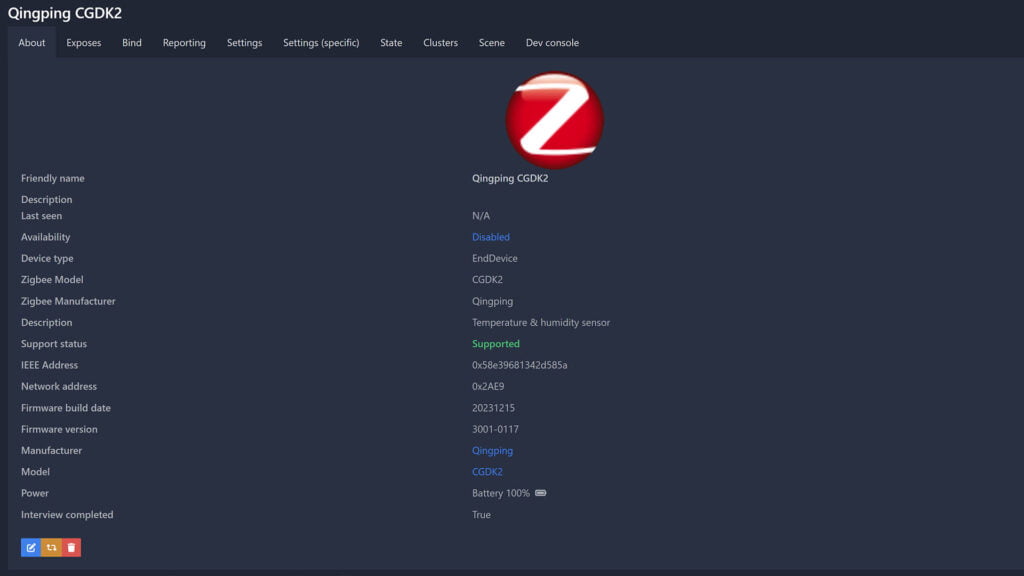
Final Thoughts
The OTA flashing process initially failed for me, possibly because I was using a weak battery. The device remained in a “bricked” state, showing only lines on the screen. It was not detectable via Bluetooth and couldn’t be paired to Zigbee2MQTT or ZHA. I suspect there was a short connection drop somewhere during flashing, but the web flasher did not record it.
If you encounter any flashing issues, you can take the following action depending on the state of the CGDK2:
- If a Bluetooth connection can be established:
- Use OTA flasher to flash any firmware, BLE or Zigbee
- If a Zigbee connection can be established:
- Use ZHA to flash any firmware OTA, BLE or Zigbee
- Use Zigbee2MQTT local index to flash any firmware OTA, BLE or Zigbee
- If no connection can be established
- Use UART to restore to any firmware, BLE or Zigbee
Once I restored the device with the USB-TTL adapter to the custom PVVX firmware and replacing the battery, the converting process went off without a hitch. Although it should not make a difference, I also made sure no other Bluetooth devices are spamming their advertisements in the vicinity of the CGDK2.
I repeated the flashing process a couple of times and it succeeded every single time. Props to Victor (pvvx) for forking and developing the custom firmware and Ivan Belokobylskiy (devbis) for developing the initial Zigbee custom firmware.
You can get the Qingping CGDK2 on AliExpress and Amazon.


Hi,
I have Qingping CGDK2 (round one), which was previously successfully flashed with custom firmware 4.5. Yesterday I OTA flashed it with Zigbee Firmware: ZCGDK2_v0119.bin with Telink Flasher to convert from BLE to Zigbee, and everything went ok according to the log, but now the sensor is stuck on -39°C and 100% humidity. Resetting by button or battery removal didn’t help. Any ideas???
Apparently, certain versions of the CGDK2 use different temperature sensors from the original one.
They can be added, but the dev does not have a version with the sensor in question and neither do I.
Go through this thread so you understand the state of the issue.
https://github.com/pvvx/ZigbeeTLc/issues/27
Your best bet for now is to revert to BLE firmware, use Zigbee2MQTT or ZHA to flash it OTA.
https://smarthomescene.com/guides/how-to-setup-zigbee2mqtt-local-ota-index/
Hi and thanks for this very interesting guide. Just a stupid question… How did you open the back of the case of the Qingping CGDK2 after removing the battery ? There is no screw on mine. Did you break the plastic ? Thanks for your help.
You need to pry it off with a screwdriver.
Insert it inside the battery hole, between the plastic and the PCB and pull one side up.
You won’t brake it.
Thanks for the tip! Very appreciated, it works like a charm with the zigbee protocol. Thanks again.
Am I right, that even though the Xiaomi LYWSDCGQ or MJ_HT_V1 look almost identical, those can NOT be flashed to Zigbee. Correct?
Yes, they don’t use Telink chips.