In a previous article, I covered how to install and setup Home Assistant on Proxmox by using tteck‘s helper scripts. If you have the hardware (e.g. Intel NUC), this is by far the easiest method for deploying HA as a VM and running additional containers in parallel.
If you are running a Zigbee network, you might also want to check out how to separate Zigbee2MQTT from Home Assistant in Proxmox, so your Zigbee network will no longer be affected by HA restarts, updates, breaking changes and other downtime you server might experience.
As usual, it’s also important to implement a backup method so you are safe when things go wrong.
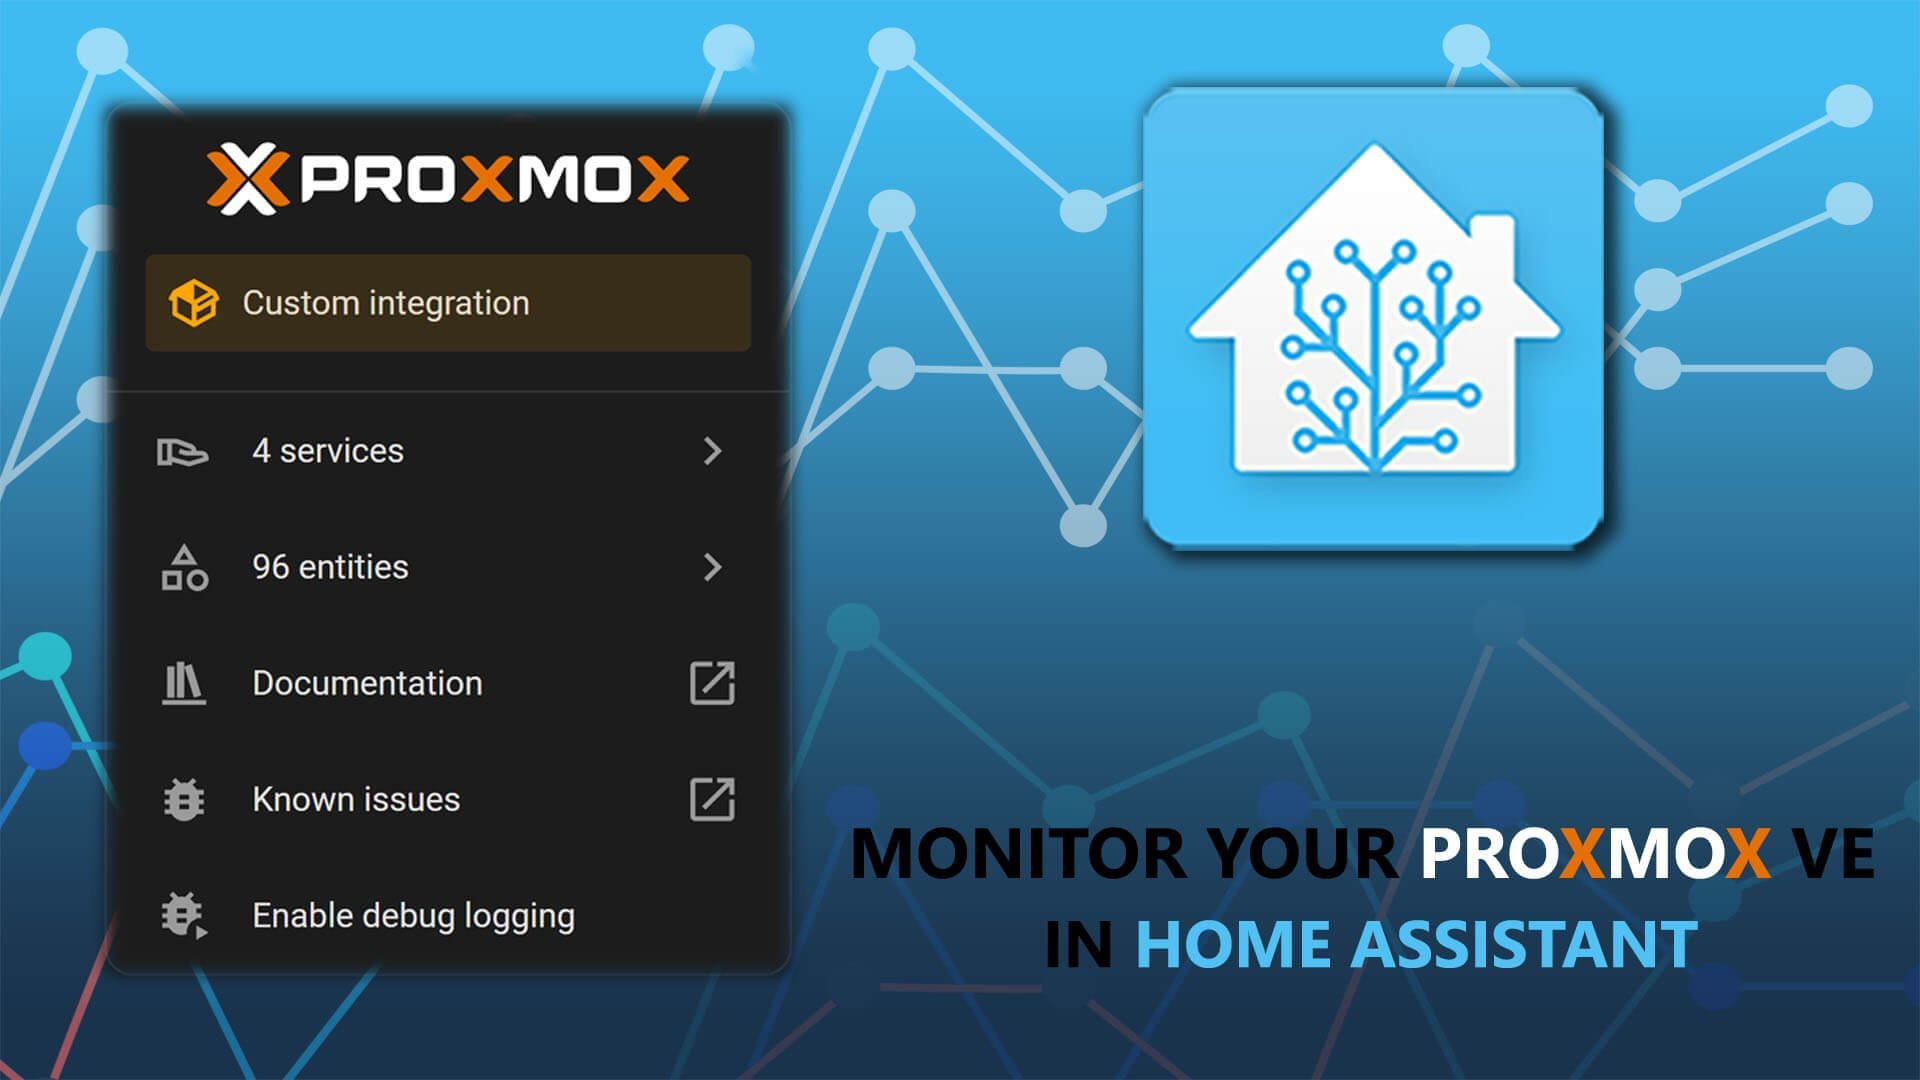
In this article, I’m going to cover how you can monitor your Proxmox Virtual Environment with a custom integration from Home Assistant. This will allow you to see host stats, control VMs and containers and have a logbook of things happening on your Proxmox Server.
Credit goes to developer dougiteixeira for creating this custom integration.
Proxmox Users and Permissions
Before we can setup the ProxmoxVE Custom Integration for Home Assistant, it’s important Proxmox is configured properly and the necessary user permissions are granted. This will enable the integration to retrieve the status of VMs and containers and control the Proxmox Server.
Creating a Group and Adding Roles
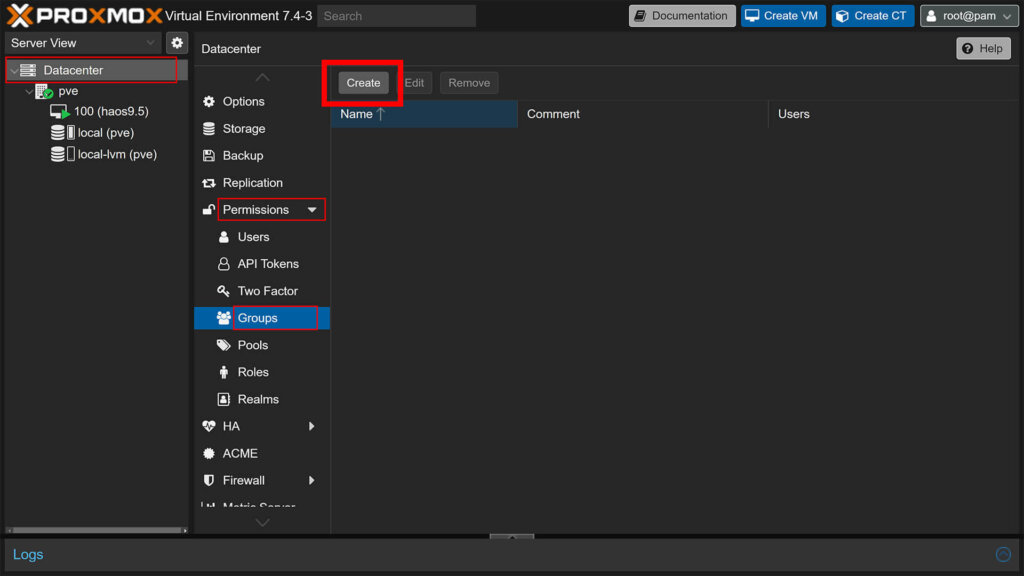
Prior to creating an actual user, we need to create a group in Proxmox to which the required privileges can be applied. In Proxmox, privileges can be applied only to groups and roles, so this is an essential step.
- Click Datacenter on the left menu
- In the middle column, expand Permissions
- Click Groups and click Create at the top
Give your group a name, an optional comment and click Create. For a group to be able to retrieve the status of VMs and containers, the auditor role must be added and to actually control them the admin role must be granted.
If you are looking for simple stats, the auditor role is enough to monitor your Promox VE. If you also want to control the VMs and Containers, you must also grant the admin role. Granting the admin role includes all privileges from the auditor group, so it will also give you access to auditing stats without the need to add both.
Navigate to Datacenter > Permissions > Add > Group Permissions: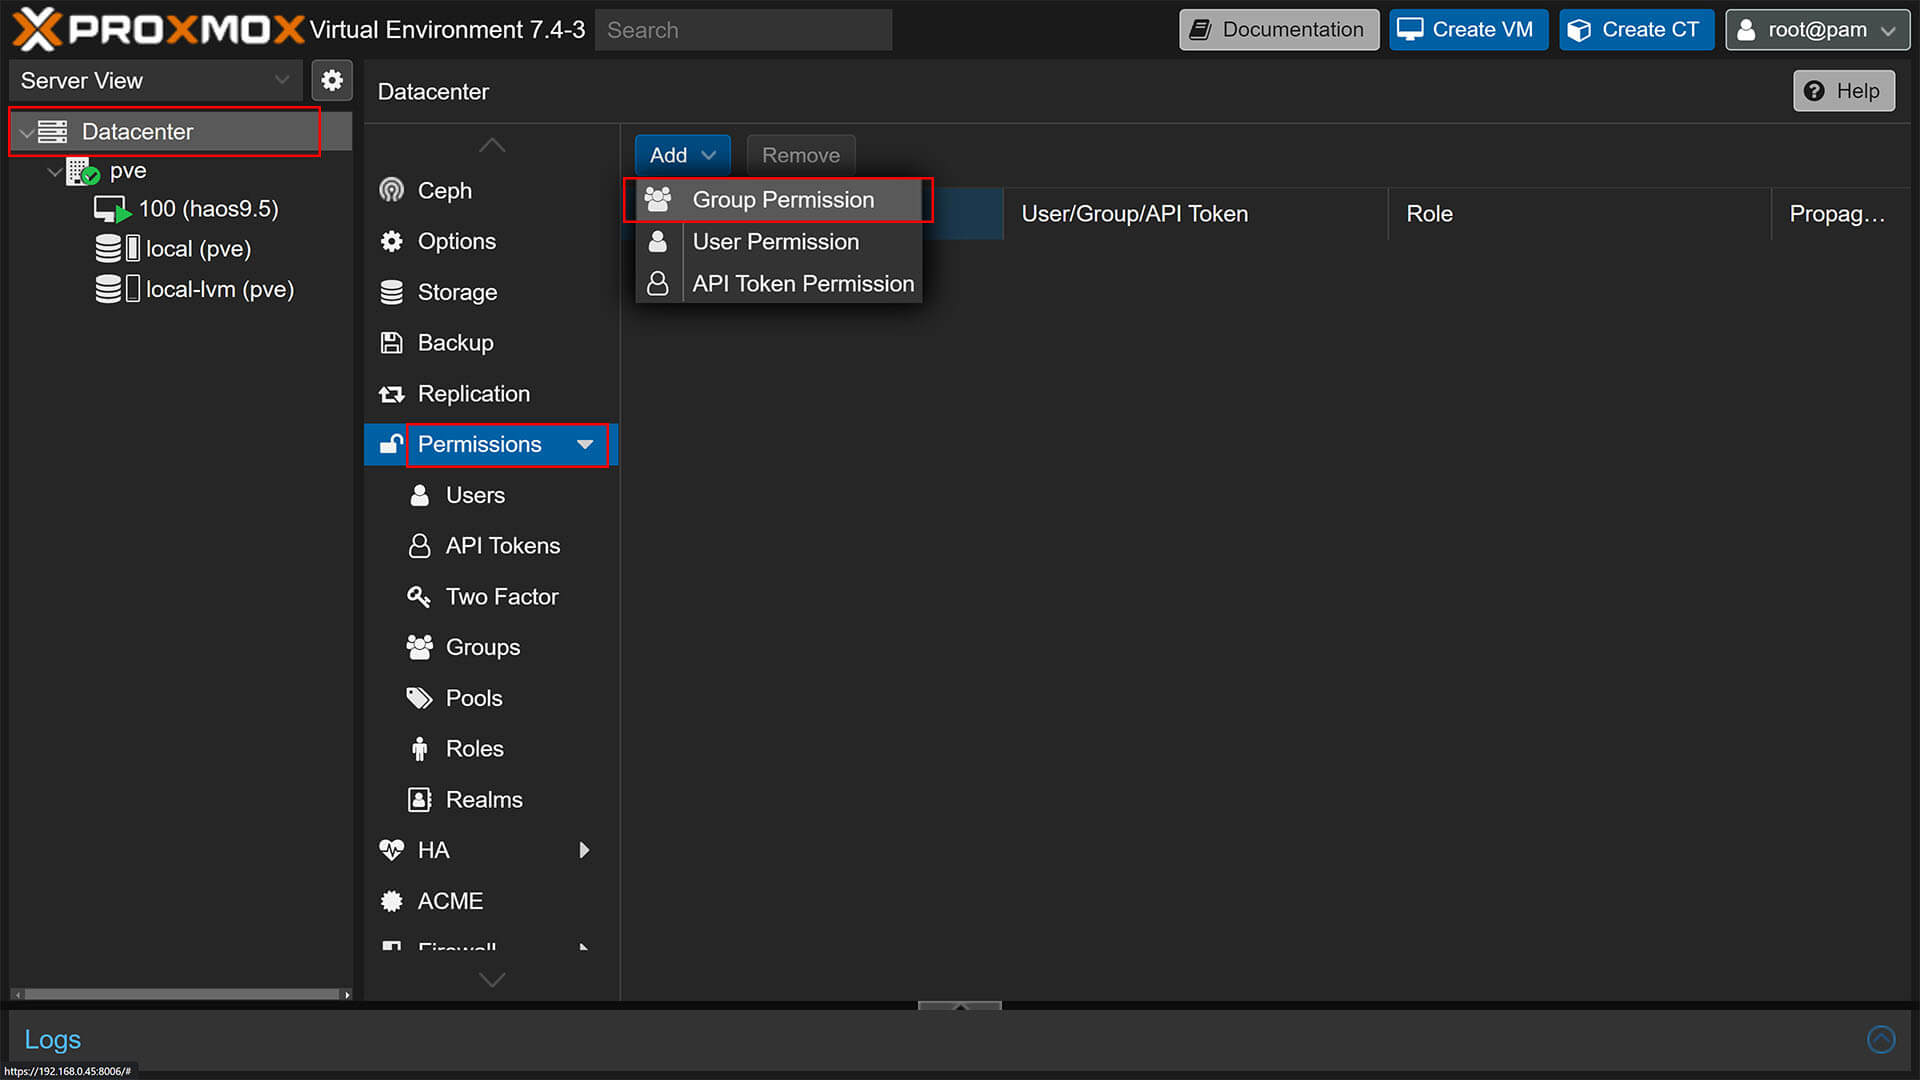
To add the auditor role to the group:
- Set Path: to /
- Choose your group
- Set role to PVEAuditor
- Make sure Propagate is checked

To add the admin role group:
- Set Path: to /
- Choose your group
- Set role to PVEAdmin
- Make sure Propagate is checked
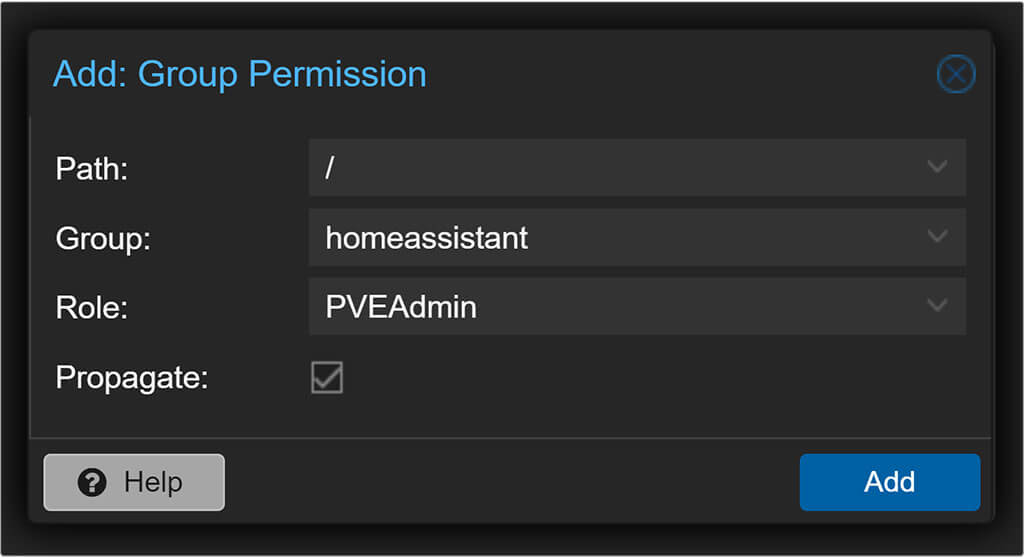
Click the Add button and the selected roles will be applied to your group.
Creating a Home Assistant User
The last step in ensuring a secure connection is to create the actual user that will used by Home Assistant to access Proxmox and retrieve data. The following steps ensure the user allows access, but is not authorized for SSH connections.
- Click Datacenter on the left menu
- In the middle column, expand Permissions
- Click Users and click Add at the top

- Add a username and password
- These will be used in Home Assistant Config
- Select Proxmox VE Authentication for Realm
- Select the group you just created
- Set Expire to never
- Make sure Enabled is checked
- (Optional) Add First Name, Last Name, E-Mail and Comment
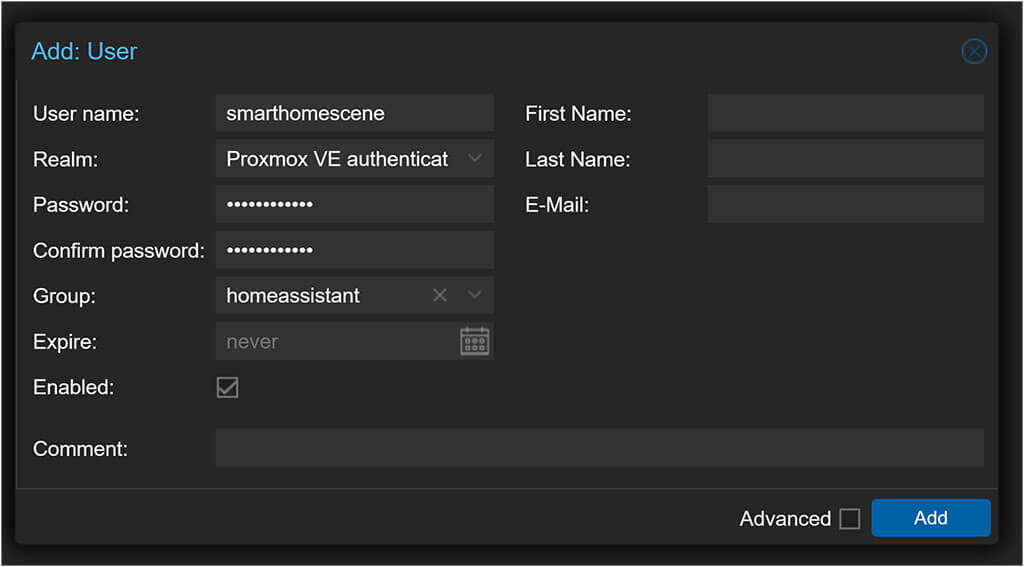
Click the Add button and the user will be created with the necessary privileges.
Installation
Once Proxmox is properly configured, we can continue to install the ProxmoxVE Custom Integration in Home Assistant. You can use HACS to install the component or do it manually:
IMPORTANT: There already is an official ProxmoxVE Integration for Home Assistant, but it’s only capable of monitoring your server and not control it. Further, there is a bug when setting verify_ssl: false which floods the logs with Unauthorized access errors and refuses to connect.
HACS
- Navigate to HACS > Integrations
- Click the three dots in the corner
- Click Custom Repositories
- Add the following: https://github.com/dougiteixeira/proxmoxve
- Select category Integration
- Click + Explore and Download Repositories
- Search for Proxmox VE
- Select and Download it
- Restart Home Assistant
Manual
- Copy proxmoxve folder from latest release to custom_components folder in your config directory.
- Restart the Home Assistant.
Configuring ProxmoxVE in Home Assistant
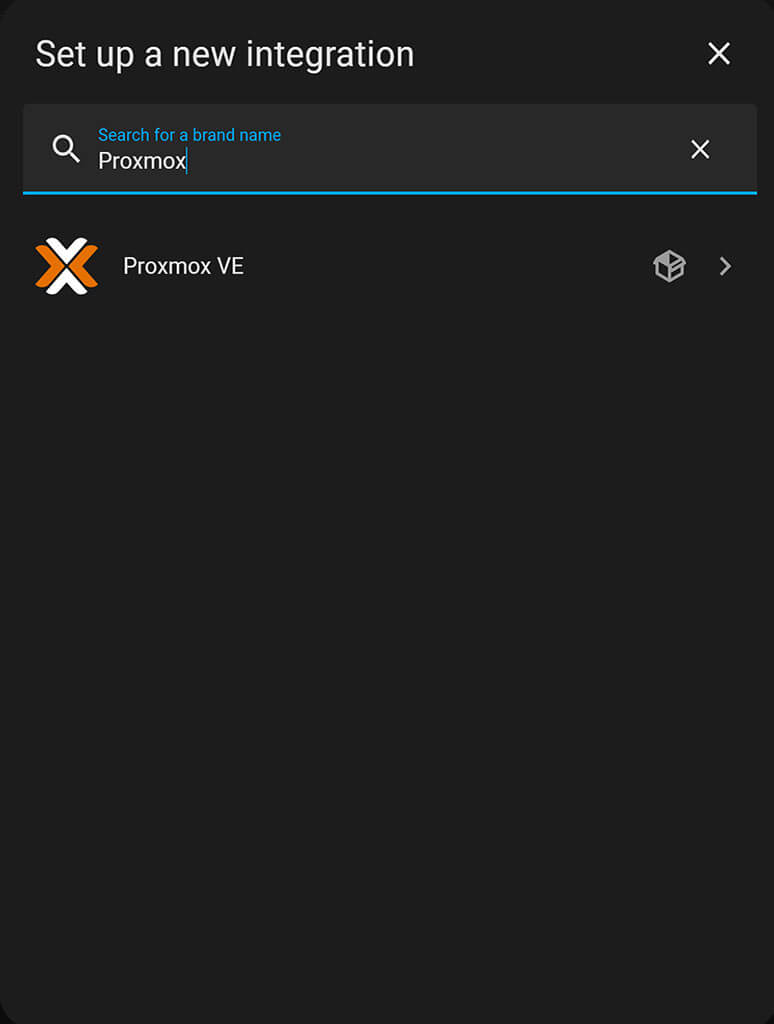
After ProxmoxVE is placed in your custom_components folder either manually or via HACS, you can configure the integration in Home Assistant. Navigate to Settings > Devices & Services, click the + Add Integration button and search for Proxmox VE. Select the component and fill out your server data and user credentials:
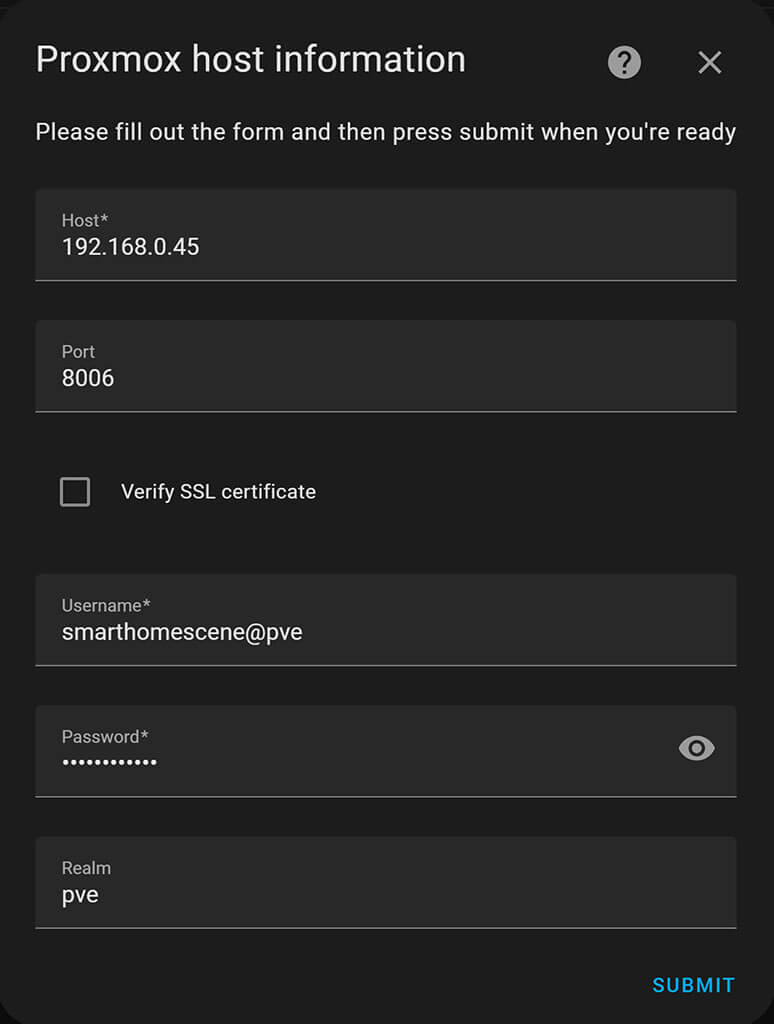
The host of your Proxmox Server should be the IP Address you are using to access it’s web UI. The default port is 8006 unless you’ve changed it during installation. Fill out your username and append the realm (@pve) we created it within along with your password. Click Submit:
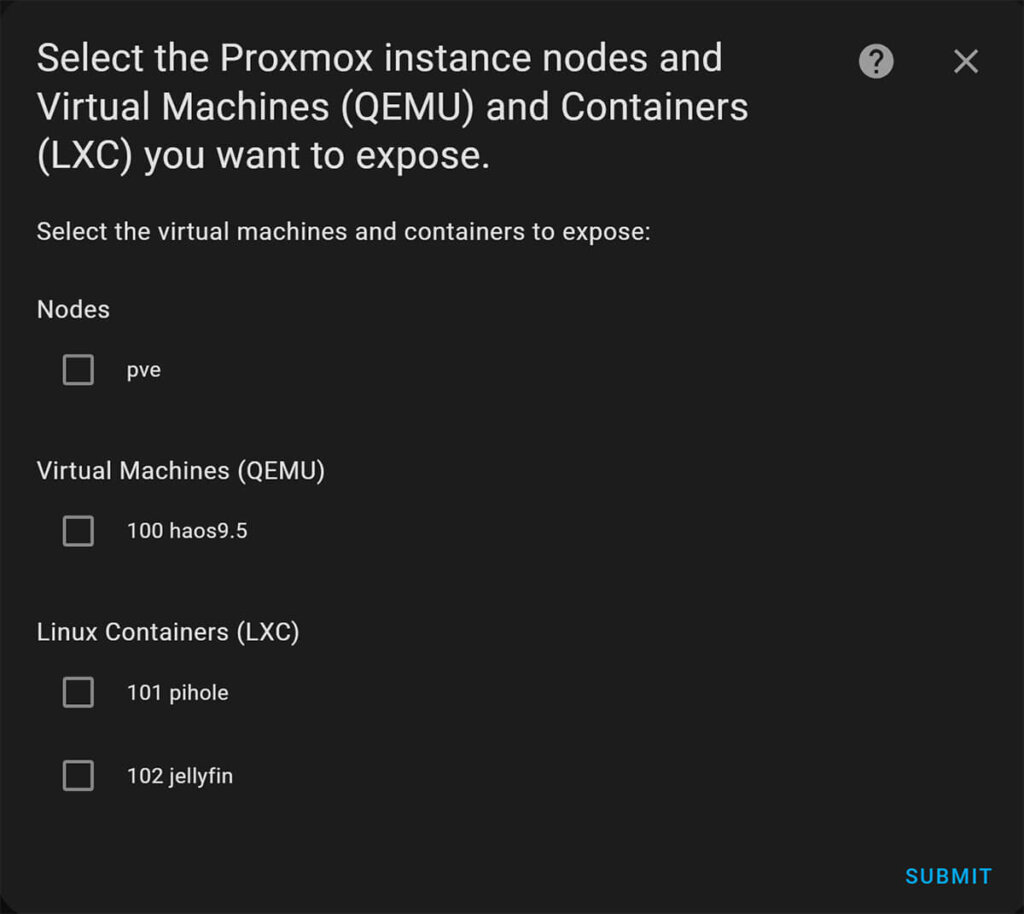
In the next dialog window, check the nodes, virtual machine and LXC containers you would like to monitor and control within Home Assistant. Finally, press the Submit button again to confirm.
Managing Exposed Entities
The custom component will expose a bunch of sensors and control entities from the button domain. If you navigate to Settings > Devices & Services and you will notice a different service for each VM and LXC container that you selected during setup:
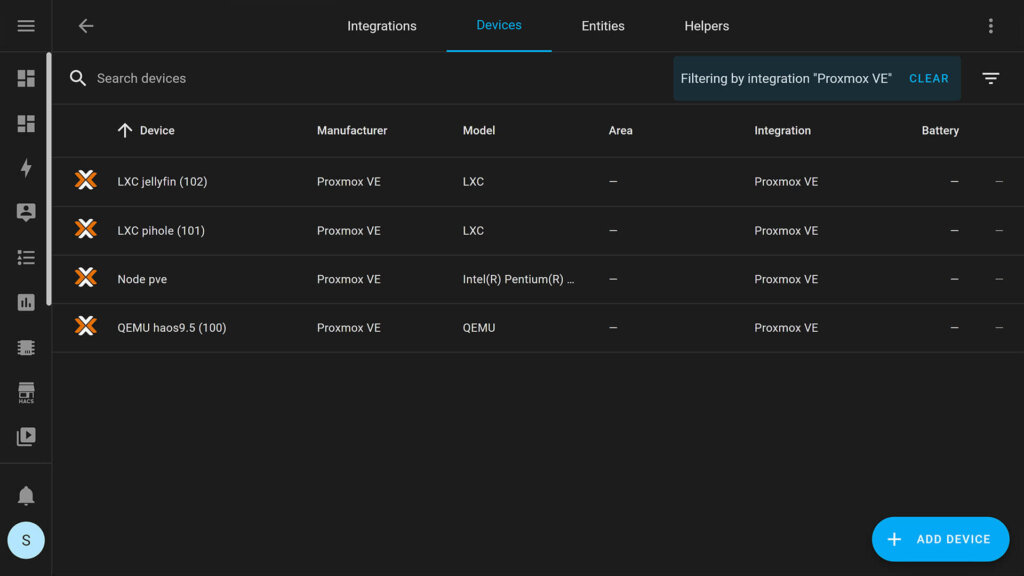
In addition to the HAOS main VM, I created two extra LXC containers (Jellyfin and Pihole) for the purpose of this guide. The Node pve is the main service for monitoring and control of your whole Proxmox Server. If you select it, you will notice all the entities the integration exposes:
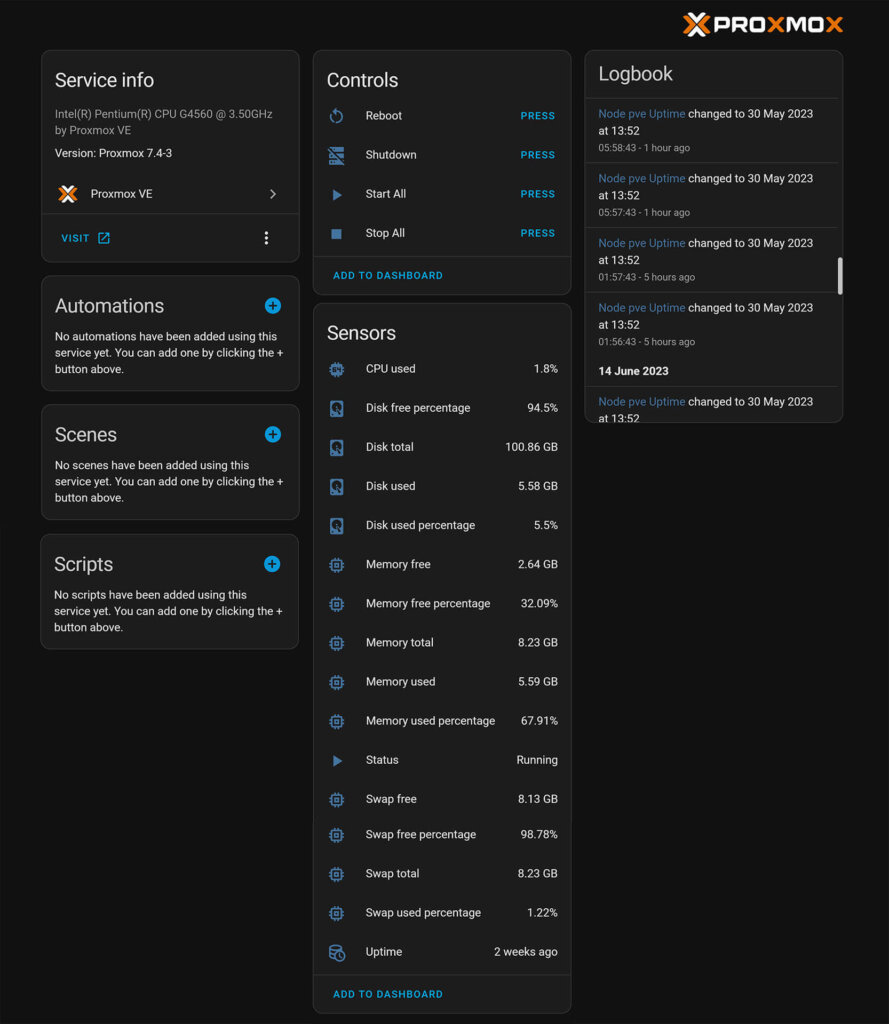
Most of the entities are disabled by default, so you will have to enable those that will be useful for you. In my opinion, some of these are helpful while others are completely redundant. Control entities are a nice and simple way to start/stop/restart a VM or Container, so I suggest you enable those.
Whichever ones you decide to enable, I highly suggest you exclude them from the recorder. For example, you want to know the current memory and CPU usage of your HA VM, but do you need it recorded for a month? Probably not. Further, they will trash you database and grow it exponentially unless you do.
Summary
Much of us begun our Home Automation journey with a Raspberry Pi. It was by far the easiest way to get started with Home Assistant and at the time, the cheapest. Remember, if you’ve never wanted to pull your hair out tinkering with Home Assistant than you haven’t explored it’s true potential.
In my experience, as you delve deeper into the rabbit hole your needs and requirements expand proportionally. Eventually you outgrow the Pi and need something more powerful, especially if you are looking to create a small server with a bunch of different services.
Proxmox is just the right tool for the job and this custom ProxmoxVE Custom Integration gives you a nice overview and control of your server. If you haven’t already, I highly suggest you read the easiest way to start with Home Assistant on Proxmox guide.


This is a well-written straight-forward guide. Thank you.
Now if I could only get my head around the detail of ProxMox!
Hi, many thanks for the guide, please correct:
“Set role to PVEAdmin” and not “PVEauditor” for the admin role group.
Thank you.
Nice catch, thanks!
Thank you for this article!
Well explained and very useful !
You are welcome! Cheers!
Such a clear and well detailed write-up. With pictures too. Amazing.
Cool guide. Really appreciate it. Just one prob in my environment. The disk free is always 100%, the disk used is 0 in percent or GB. No clue whats wrong in my setup. Any sugesstions.
Very nice. Thank you. Do you happen to have a nice lovelace card or page to go with it?
Not for this particular case, but you can maybe adjust one of these: https://smarthomescene.com/guides/how-to-track-home-assistant-updates/
Verry helpfull manual. Thanks !
Could you add a section how to add an inframe with Proxmox ? So you can control Proxmox trough HA
You can add the exposed entities for control to a dashboard and control Proxmox that way. No need for iframes.
I know, but I like the visual web-view from the Proxmox web-view