If you run a couple of different services and applications in your home lab, you can easily monitor their uptime in Home Assistant with Uptime Kuma.
Uptime Kuma is a self-hosted set of monitoring tools you can use to track your servers, services and applications. Uptime Kuma supports HTTP(s) / TCP / HTTP(s) Keyword / Ping / DNS Record / Push / Steam Game Server / Docker Containers in a reactive and fast user interface.
This article guides you in setting up Uptime Kuma as an add-on directly in Home Assistant. Additionally, I included a setup of Uptime Kuma Custom Component which exposes sensors for each monitor in Home Assistant.
Installing Uptime Kuma Add-On
Uptime Kuma is installed like any other add-on in Home Assistant.
 <<< Click here OR
- Search for the add-on in the store
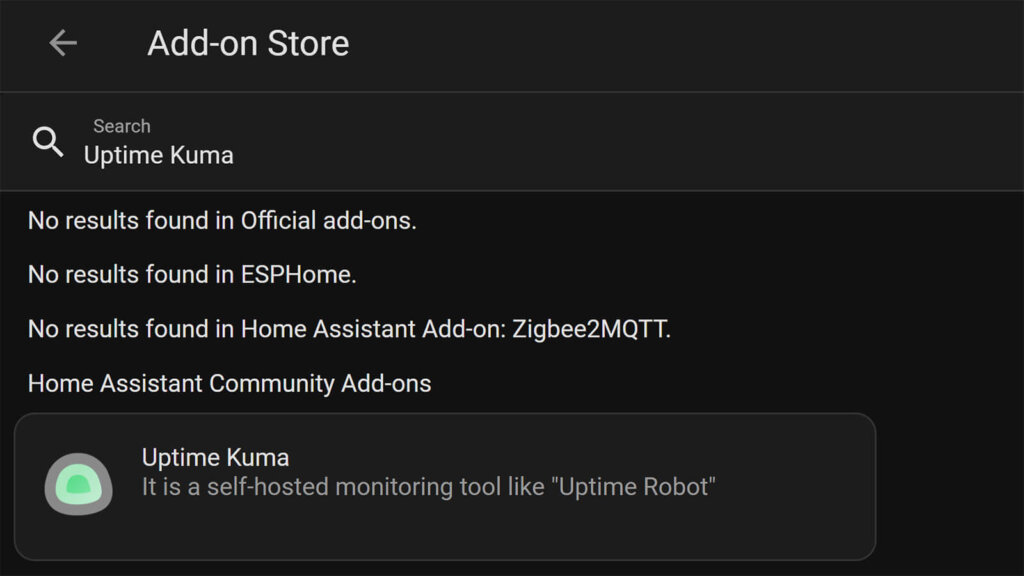
In your Home Assistant instance, navigate to Settings > Add-ons > Click Add-on Store at the bottom right corner. Search for Uptime Kuma and select it:
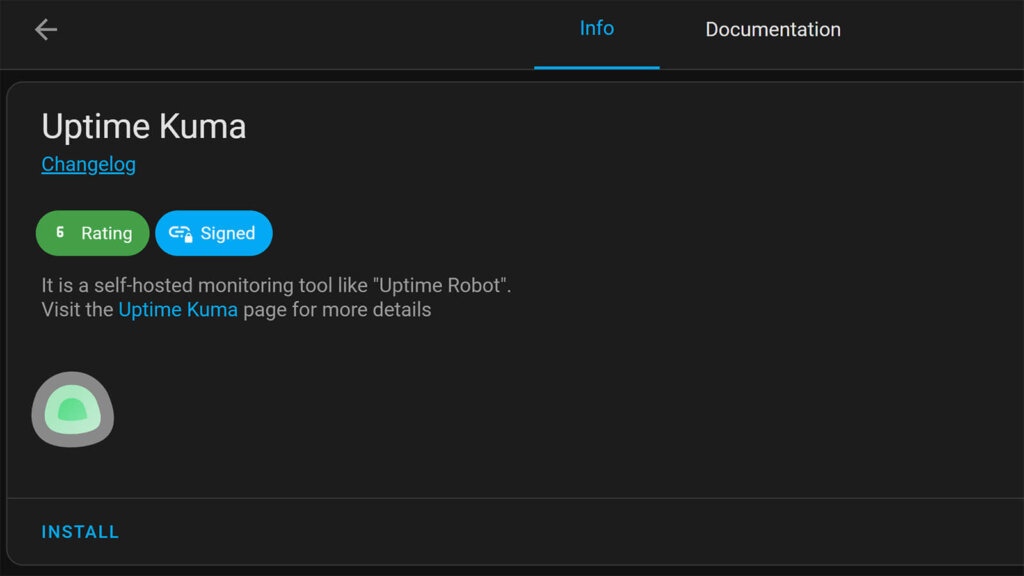
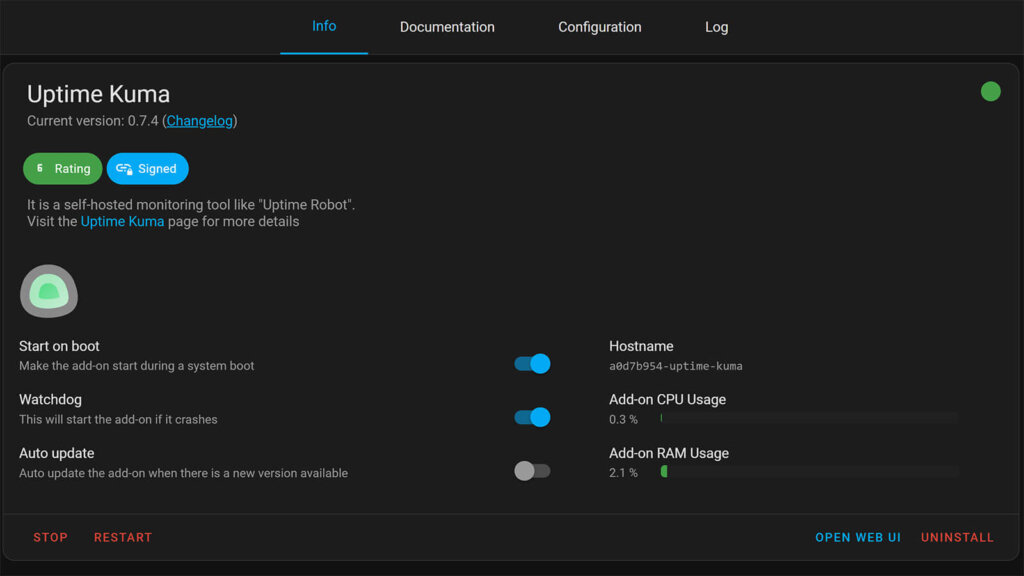
Press the Install button and wait for the process to finish. There should be no errors and you can click to Start the add-on. Monitor the logs to make sure everything is okay and click Open Web UI to enter Uptime Kuma.
Configuring Uptime Kuma Add-on
Uptime Kuma needs no configuration in Home Assistant itself, it can be configured from its user interface. The only thing in the configuration tab of Home Assistant is the port used to access the web UI of Uptime Kuma. Feel free to change it if you need to.
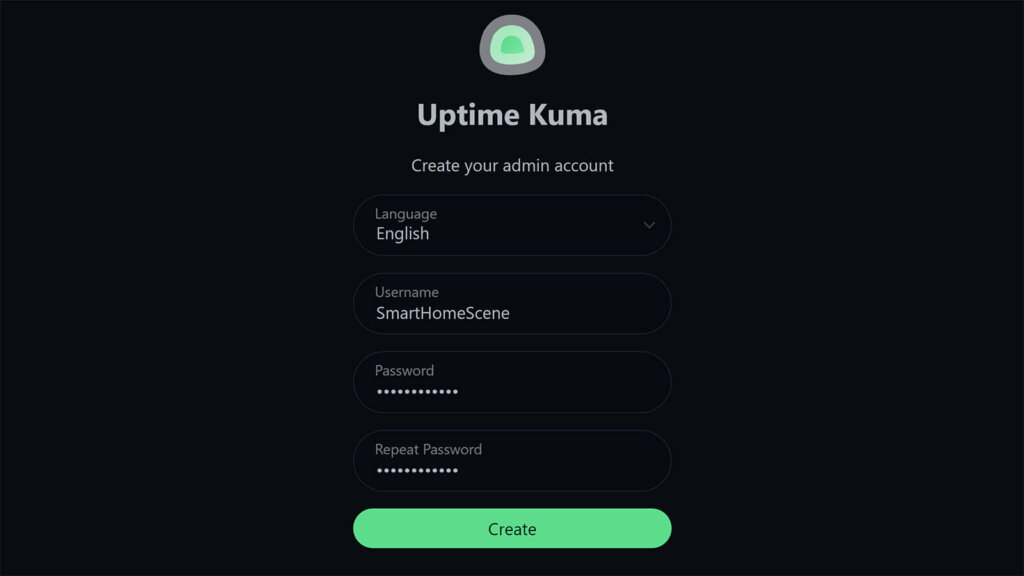
The add-on will ask you to setup your Username and Password once you first enter the Web UI. Set your desired credentials and click Create
Dashboard Overview and Settings
You will be presented with a clean, responsive and fast dashboard that you need to start configuring. Before you add new services that you want monitored, you might want to go over the Settings menu of Uptime Kuma. In the top right corner, click your avatar and click Settings.
The menu is neatly organized in categories, starting with General settings (time zone, base URL etc.) ending with an About section where you can check version and enable update notifications.
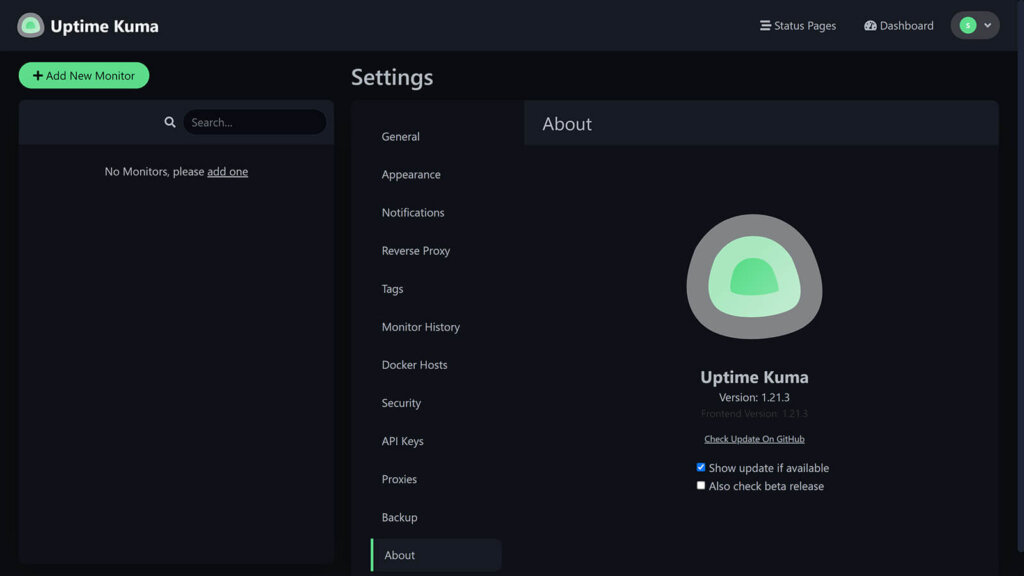
Most of the items are self-explanatory, while other require additional setup like docker hosts, reverse proxies, adding API keys and creating monitoring tags.
In the Security menu, you can edit your current user and add 2FA authentication as a security measure if you are exposing Uptime Kuma to the internet.
The Monitor History contains settings about Uptime Kuma’s database and retention policy. It’s set to 180 days by default, although you can set it to 0 for infinite record keeping.
The Notifications menu is most useful for this type of monitoring add-on, I will cover setting different channels further bellow.
Adding New Monitor
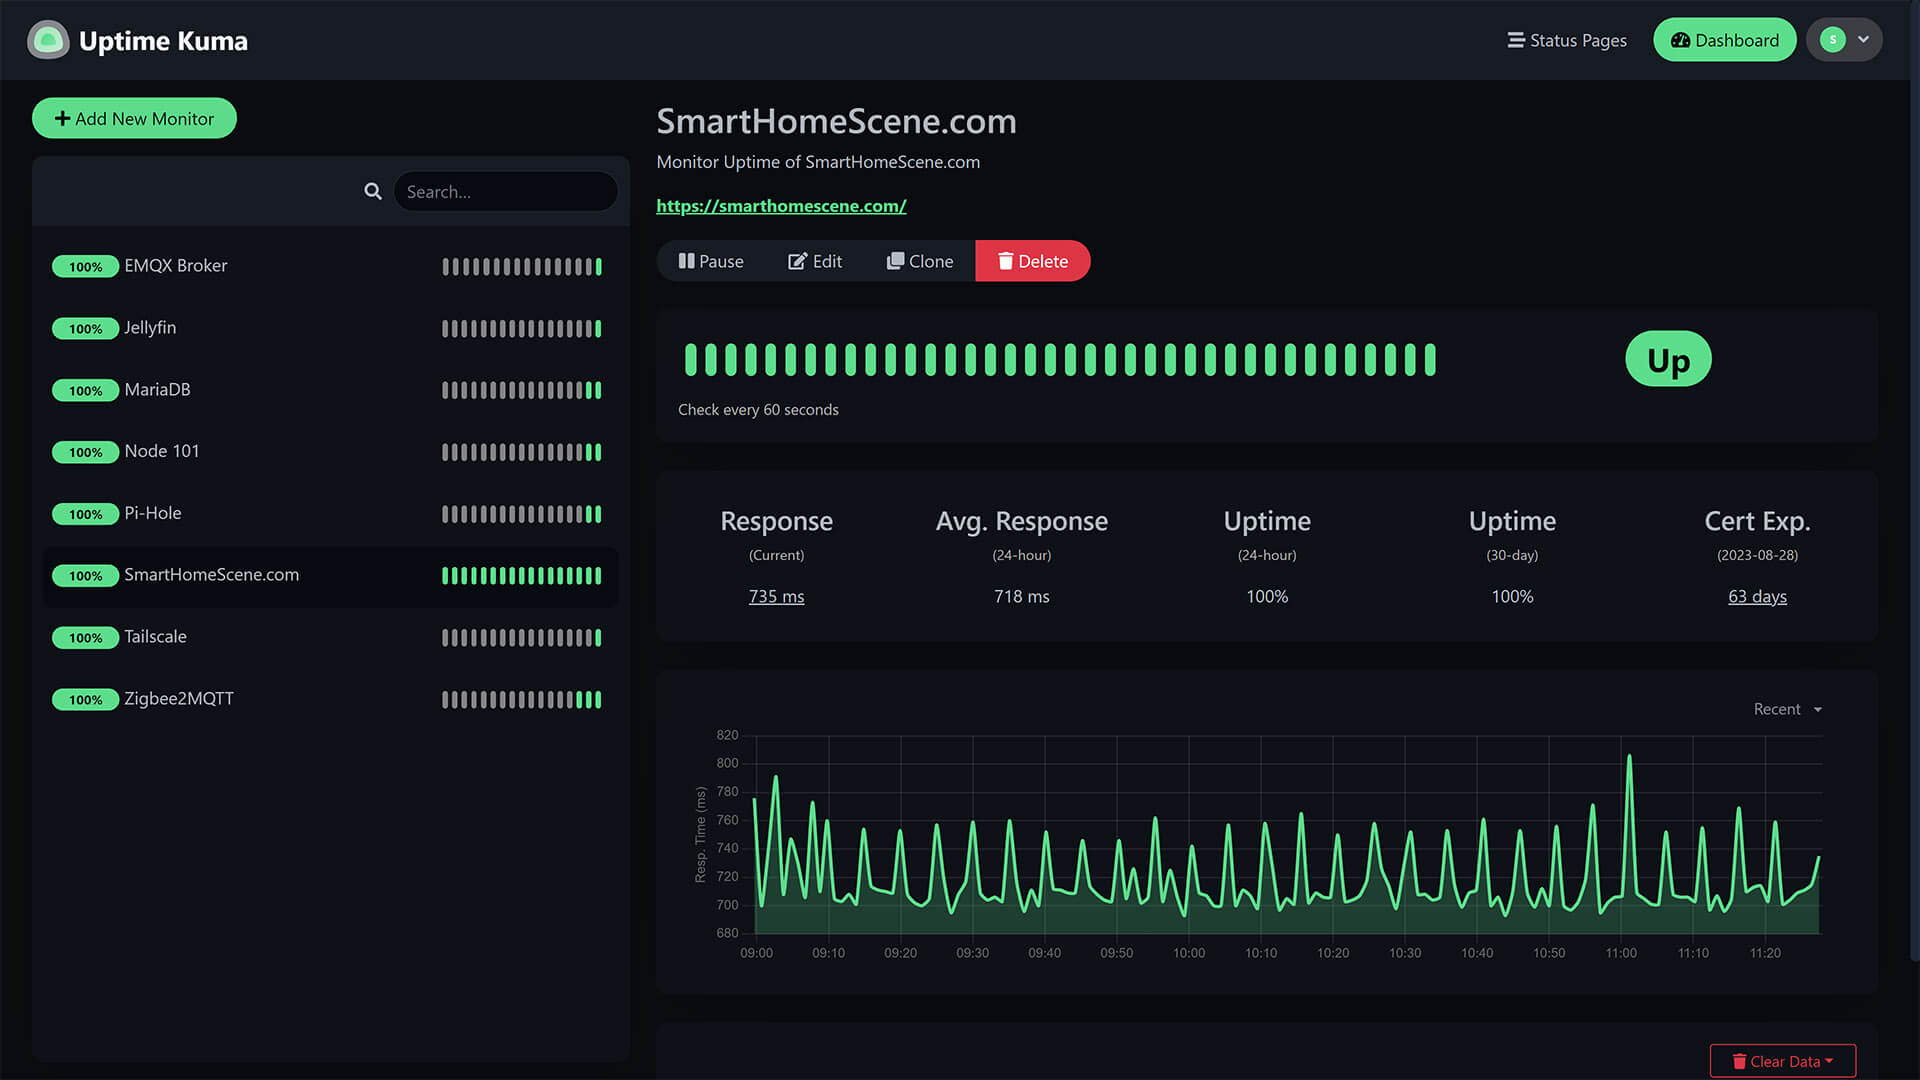
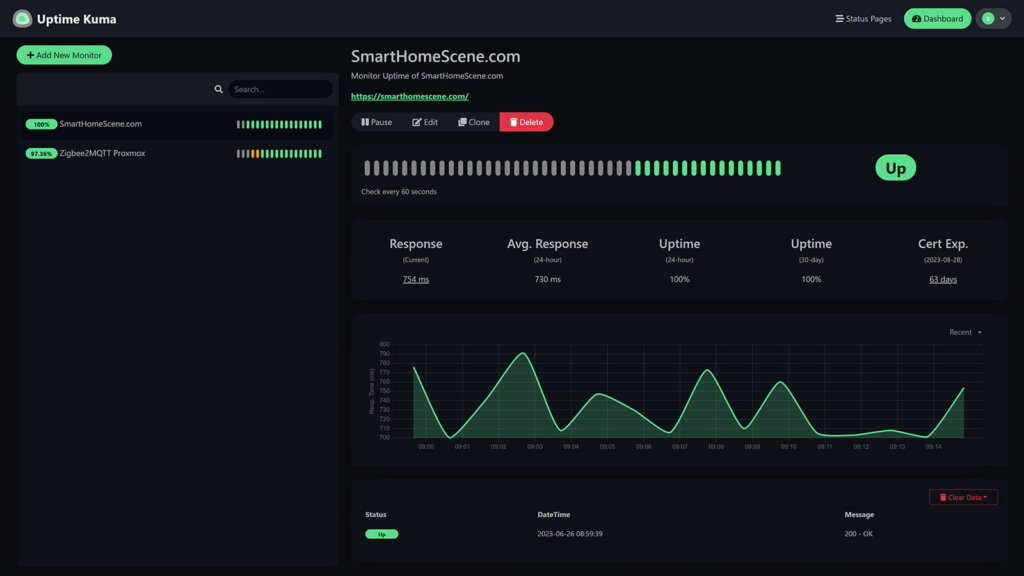
Let’s assume I want to monitor the uptime of smarthomescene.com. I can set Uptime Kuma to ping it every 60 seconds and log the certificate expiry date too.
Add a new monitor and select HTTP(s) for the monitor type. Set the URL, in this case https://smarthomescene.com and adjust the Heartbeat interval (default: 60sec). Set the number of retries on failure if you want too, and optionally toggle the Certificate Expiry Notification.
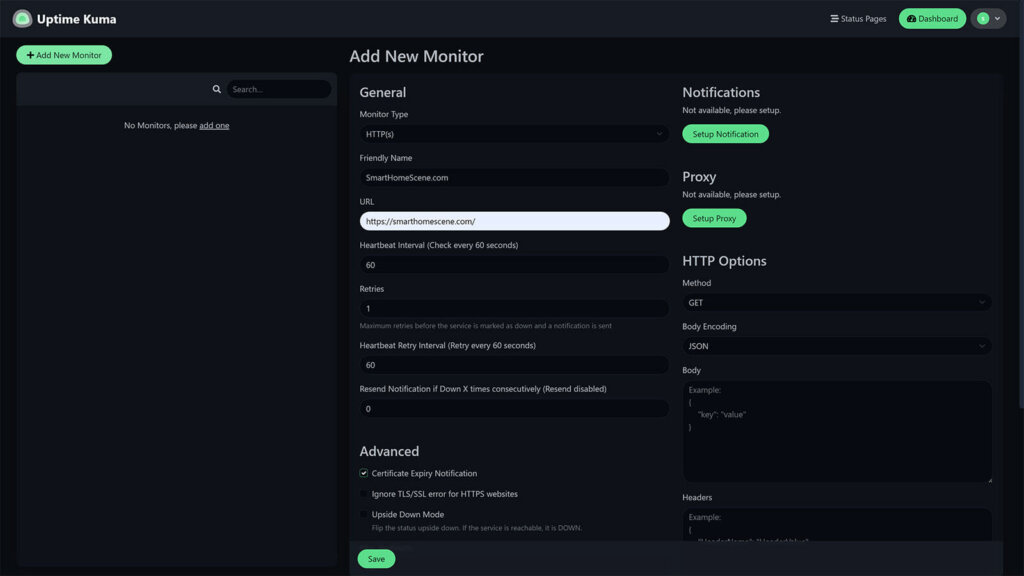
Click Save and the monitor will be added in the dashboard.
As a second example, let’s assume you have a Proxmox node running on your network hosting a bunch of different VMs and Containers. One of them is Zigbee2MQTT running as a standalone LXC. It’s Web UII is reachable locally on a reserved IP address you assigned during setup.
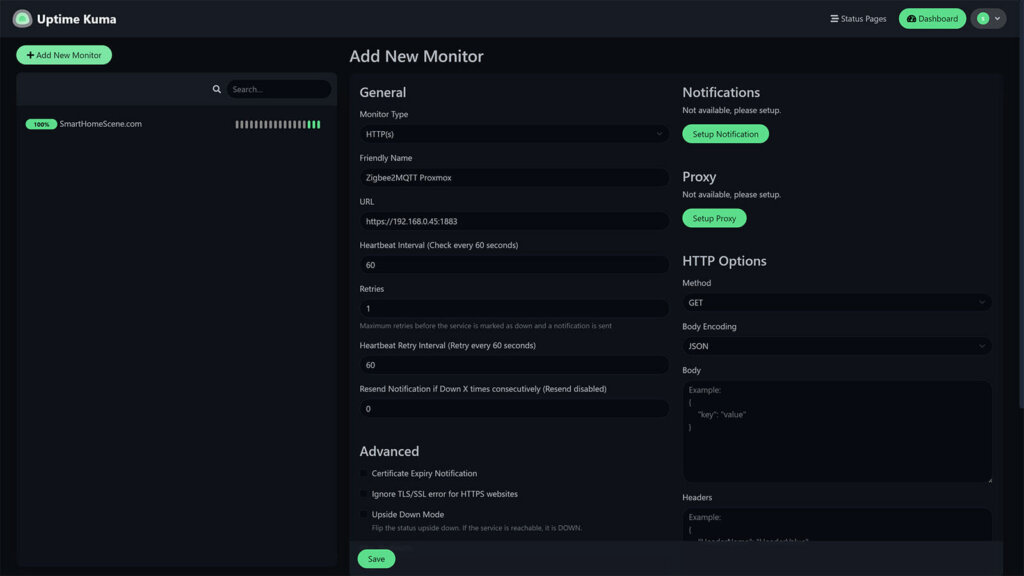
To be clear from the start, this does not mean you are actually monitoring the state of your Zigbee network, which can still fail even when Zigbee2MQTT is running. This just monitors the uptime of the Zigbee2MQTT LXC container.
Adding these two monitors will populate the dashboard and start to record their uptime history. If you select the monitor on the left, you will notice the graph being populated every 60 seconds and a line chart logging the average response time for this website.
Setting Up Notifications
Perhaps the most important feature of Uptime Kuma is the ability to notify you whenever a service or server is inaccessible. You won’t be staring at Uptime Kuma’s dashboard 24/7, so there’s no point in monitoring without notifications.
Uptime Kuma supports a bunch of different notification channels. As an example, I will set Email, Discord and Telegram notifications, which I believe are most commonly used these days.
Email Notifications
Before you can send email notification, SMTP needs to be enabled for your provider. To enable SMTP for Gmail, navigate to https://myaccount.google.com/security. If you haven’t done so already, you need to enable 2FA which is a requirement for generating app passwords in Gmail:
- Click the 2FA Authentication Menu
- Scroll to the bottom and click App Passwords
- Under select app, choose Other (Custom name)
- Input a name (e.g. SMTP) and click Generate
- You will be presented with a generated app password

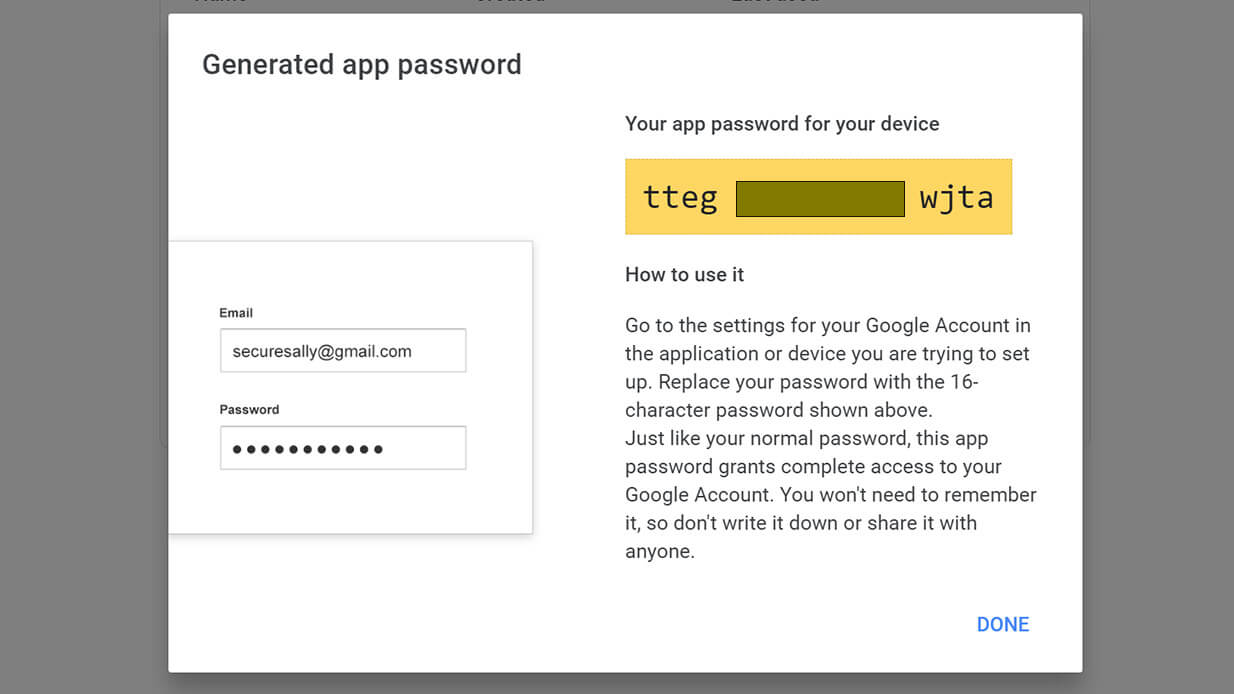
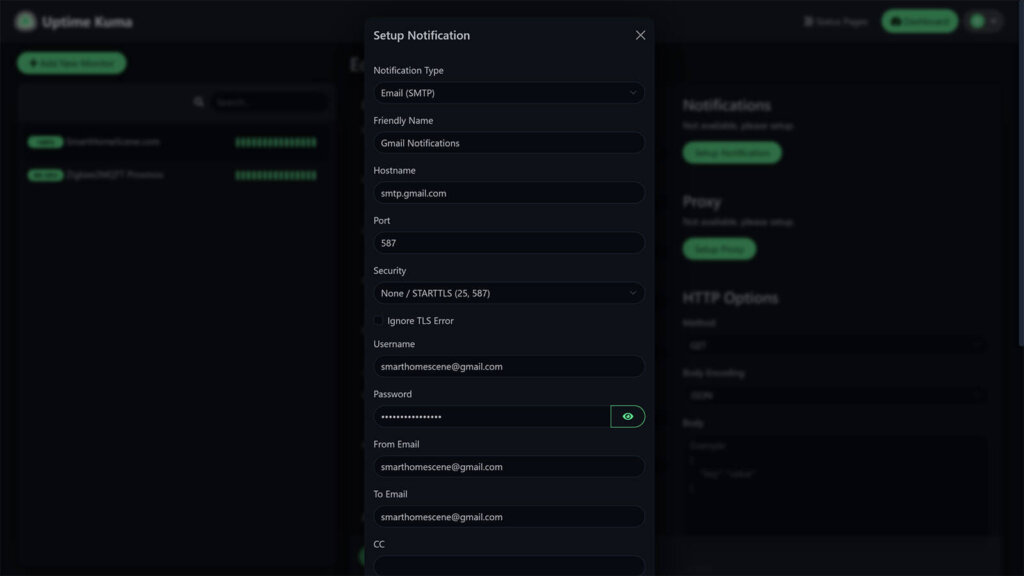
Copy and save it somewhere safe, you won’t be able to view it again. Back in Uptime Kuma navigate to Settings > Notifications > Setup Notification. Here we can create a Gmail notification channel which will be enabled for all monitors by default and you can selectively disable it. Input the following settings:
- Notification Type: Email (SMTP)
- Friendly Name: Your friendly name
- Hostname: smtp.gmail.com
- Port: 587
- Security: None / STARTTLS (25, 587)
- Username: You email account
- Password: SMTP Password you generated
- From Email: Address appearing in From field
- To Email: Destination email Address
- CC/BCC: Optional email addresses
- DKIM: Optional DKIM Settings
- Custom Subject: Email Subject
- Default Enabled: Enable the notification channel for all monitors
- Apply on all existing monitors: True/False
Click the Test button and you should get a Sent Successfully toast message in the corner. In your Inbox:
Discord Notifications
To create a Discord notification channel for Uptime Kuma, you need to create a Webhook which will be used by the service. In Discord, navigate to Server Settings -> Integrations -> View Webhooks -> New Webhook.
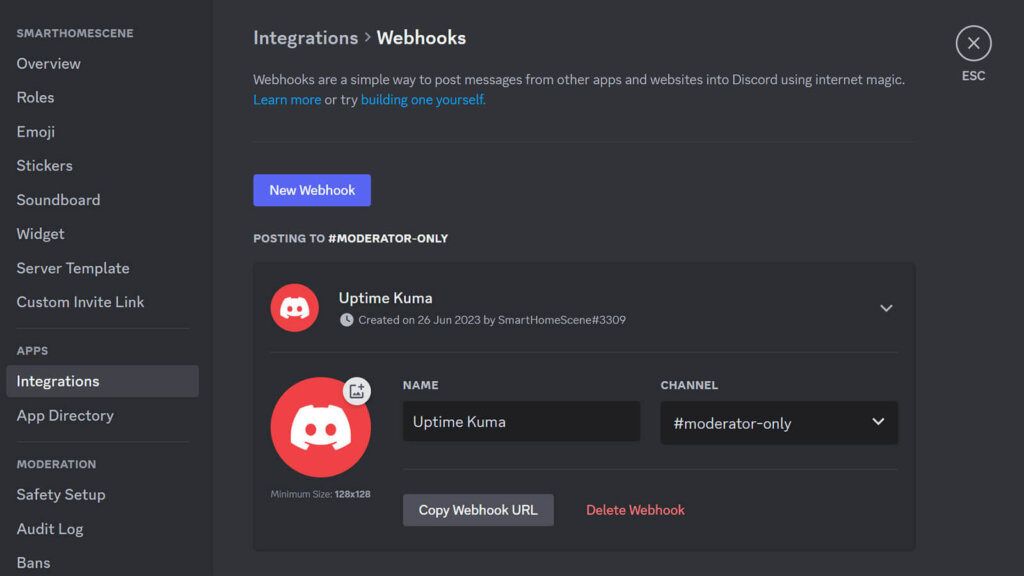
Give your webhook a name and click Copy Webhook URL. Save the changes at the bottom. Back in Uptime Kuma, create a new Discord notification channel and input the settings like in the image bellow.
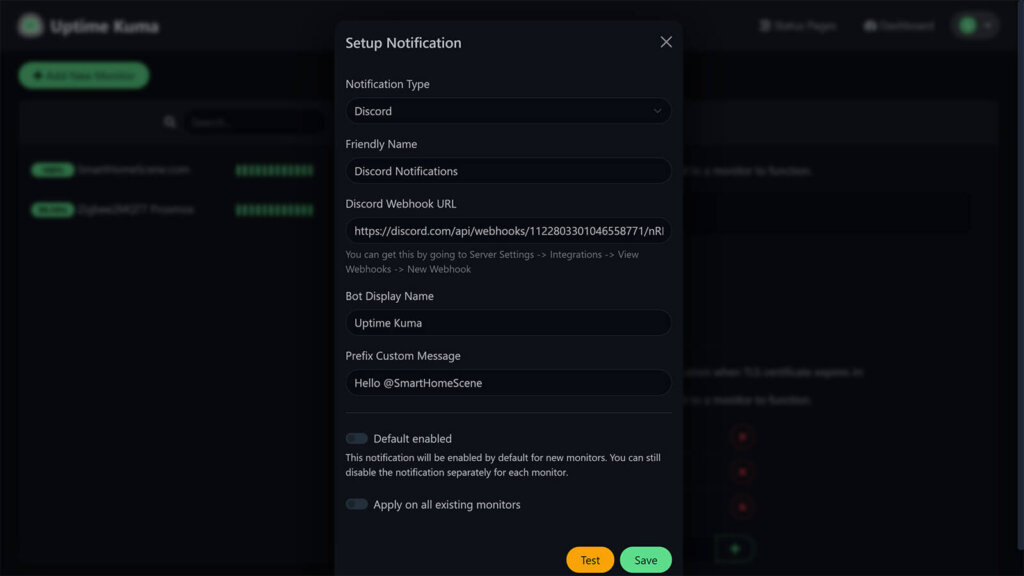
Clicking the Test button will send a notification to your selected Discord channel.
Telegram Notifications
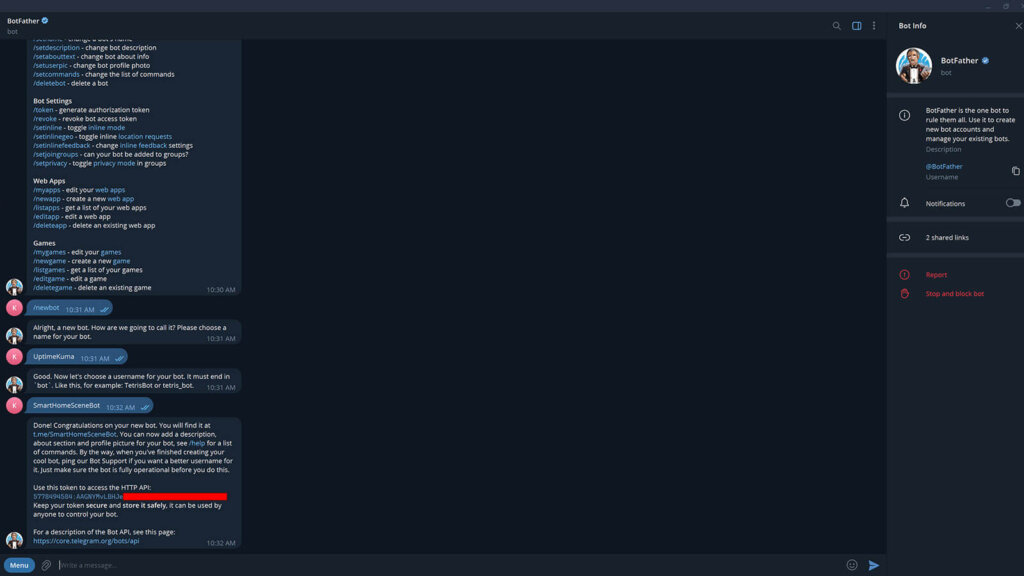
If you prefer to use telegram as a notification channel, you can do so by creating a new bot and generating an access Bot Token.
- Navigate to https://t.me/BotFather which will start a new chat
- In the chat window, type in /newbot
- Give your bot a Name
- Give your bot a Username (cannot be taken by others)
- Copy the API Access Token
You will also need to obtain the chat-id of your new bot. Message the bot in Telegram first and than click Auto-get in Uptime Kuma which will automatically populate the Chat-ID Field. Alternatively, navigate to:
https://api.telegram.org/botTOKEN HERE/getUpdatesReplace Token with the actual token you copied and you will notice an API payload in your browser. Find the “ID” and copy it. Input everything in the Notification Dialog window of Uptime Kuma like in the image bellow:
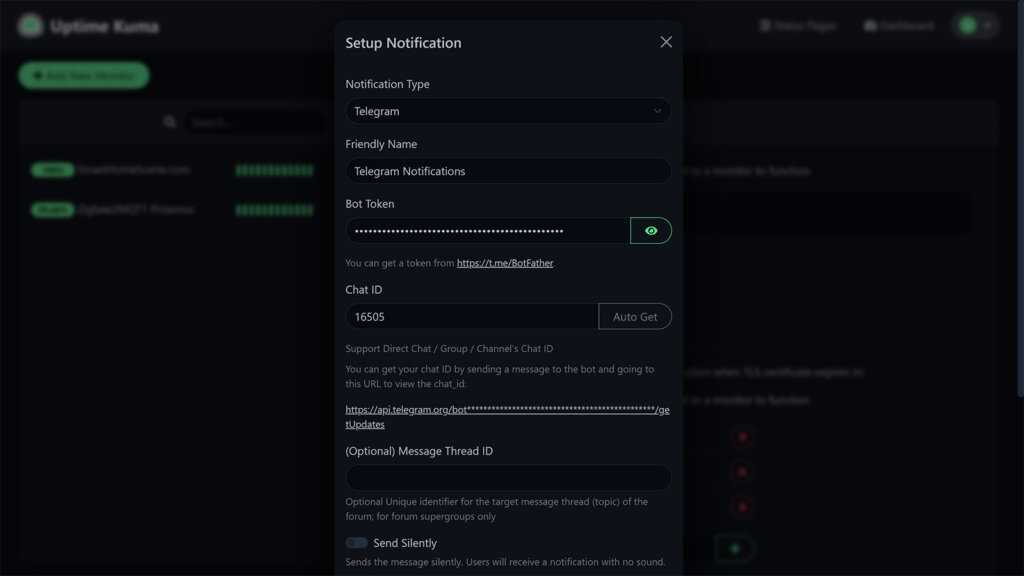
Test your new notification channel and you should receive a message in your Telegram account from the bot you just created.
Uptime Kuma Integration
Besides the Uptime Kuma add-on, you might want to add the custom Uptime Kuma integration in Home Assistant. This will expose each monitor you create as separate entities in Home Assistant, one binary_sensor and one sensor. The custom component is available in HACS:
 <<< Click here or
- Navigate to HACS > Integrations > + Explore and Download Repositories
- Search for Uptime Kuma, download it and reboot Home Assistant
- Navigate to Settings > Devices & Services > Add Integraton
- Search for Uptime Kuma and input your credentials

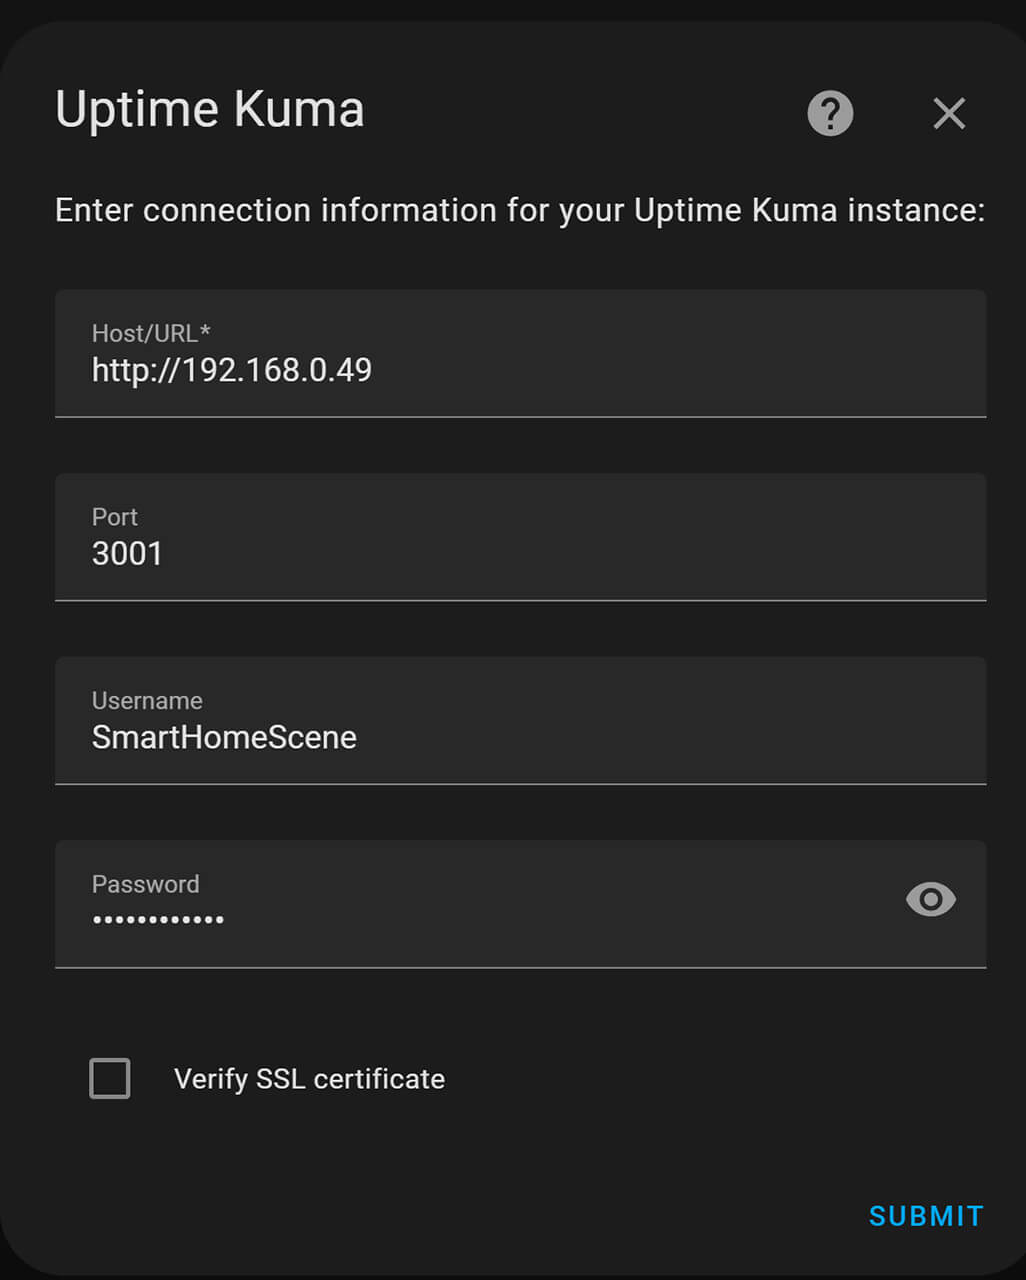
This will automatically pull information for any monitors you’ve created in Uptime Kuma and create two different sensors for each one: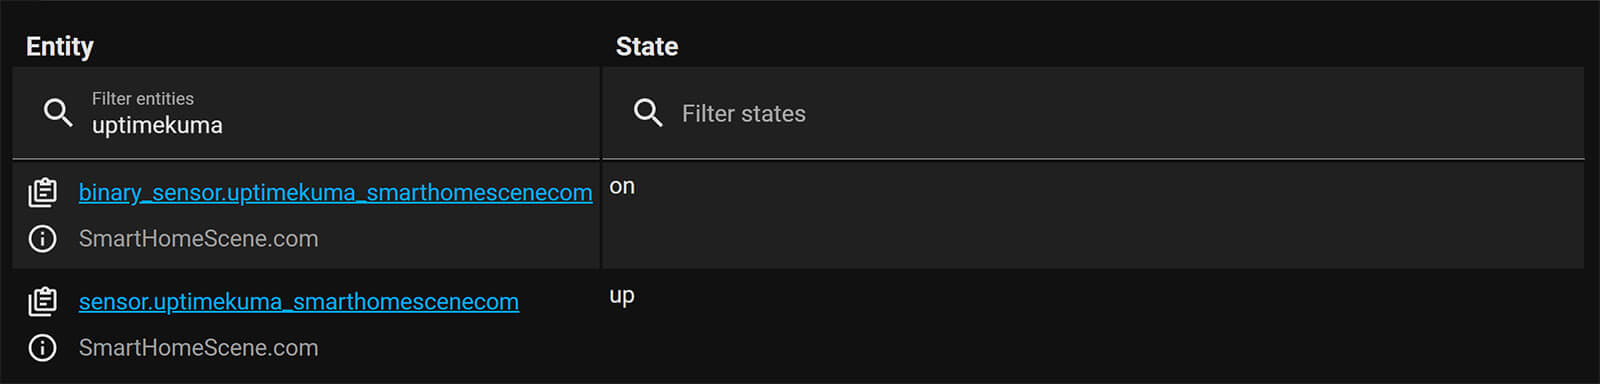
You can use these to setup notifications natively within Home Assistant instead of creating discord, telegram or email channels within Uptime Kuma. You can also add the exposed sensors in a dashboard in Home Assistant, for quickly glancing the state of your monitored services.
Summary
This article guides you in running Uptime Kuma as an add-on directly in Home Assistant. While it’s perfectly fine to do so from a monitoring point of view, it does add a little overhead to your hardware.
The proper way is to host Uptime Kuma as a separate LXC in Proxmox or Docker container, which will allow the service to run independently from Home Assistant and isolate itself from breaking changes, updates and crashes. I intend to write a separate article for Proxmox, in the meantime here are some useful links:


Exactly what I was looking for. Set this up and it’s working great.
Thanks for the clear tutorial, much appreciated!