

The AirGradient ONE is an open source indoor air quality monitor built around an ESP32-C3. It measures PM1, PM2.5 and PM10 particulate matter, CO2, temperature and humidity, along with TVOC and NOx indexes. It is one of the best air quality monitors I have tested, and it runs fully local with ESPHome.
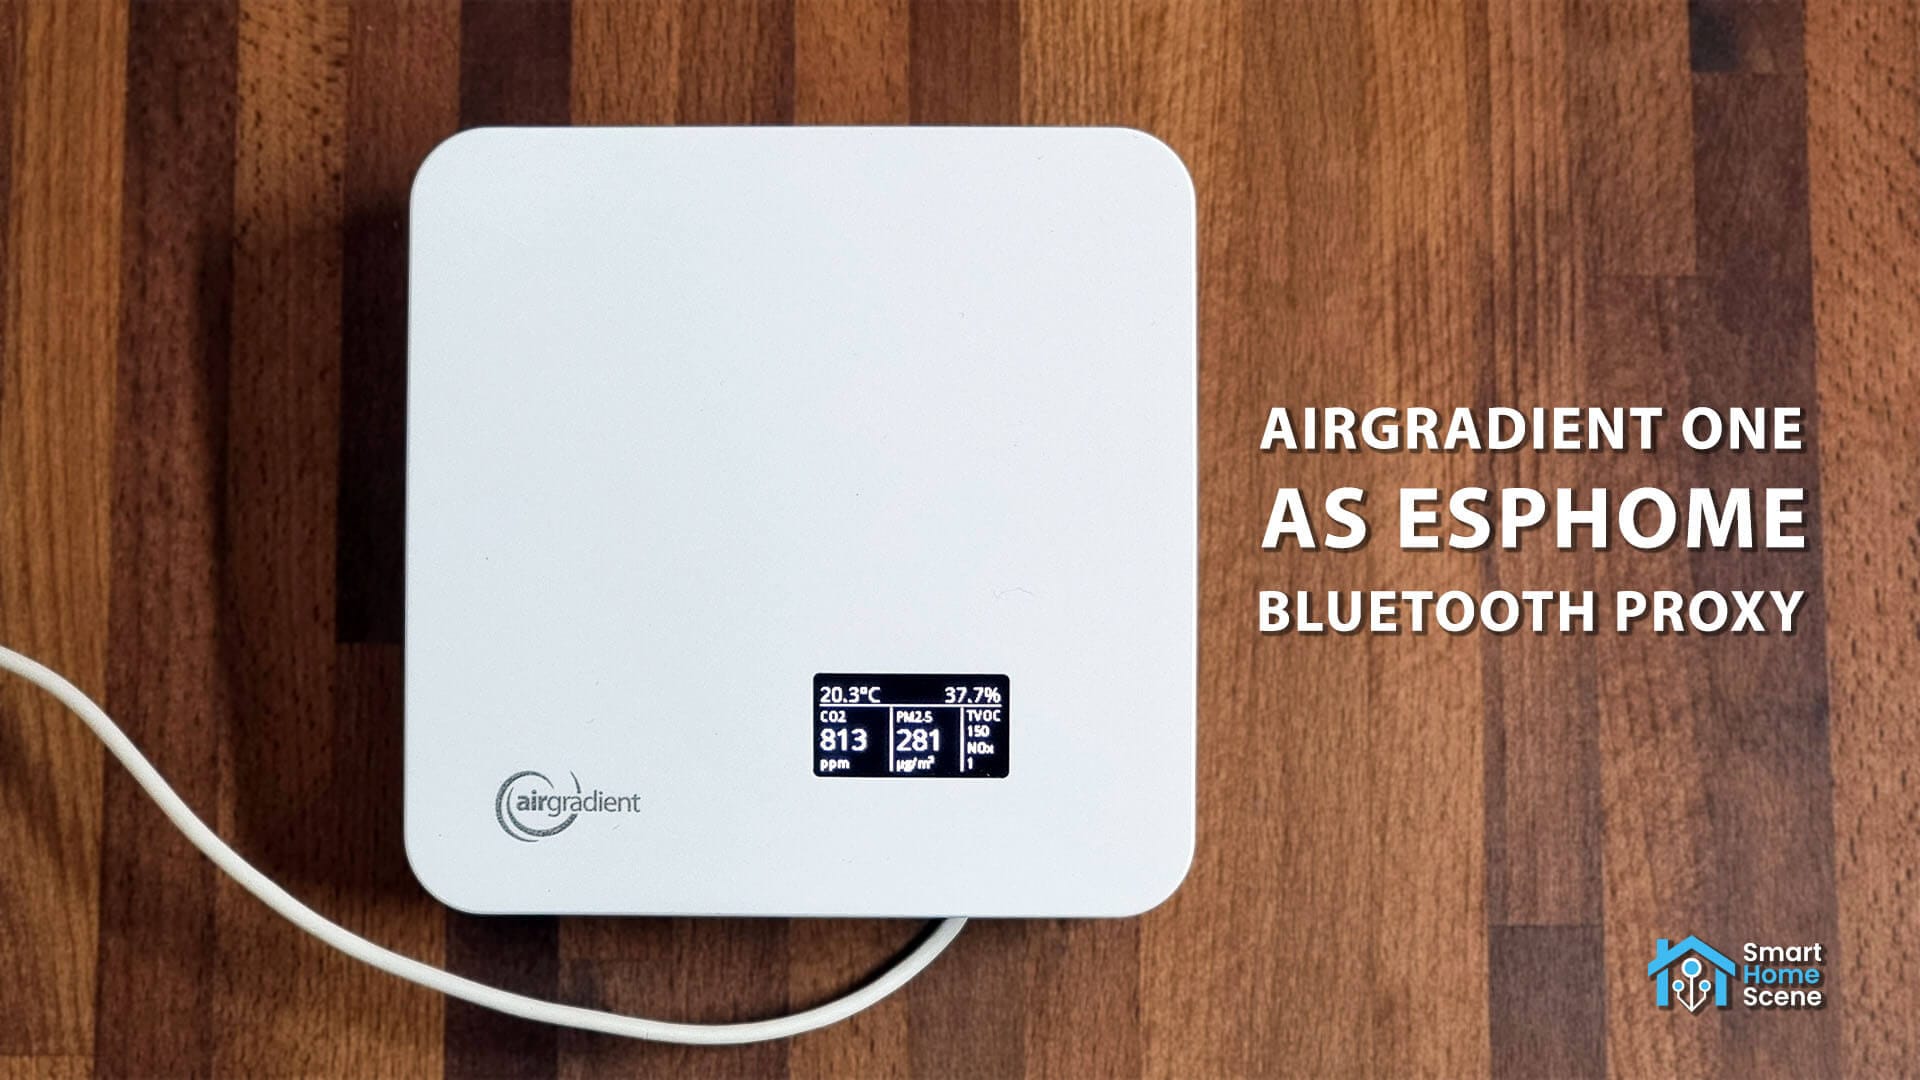
I use my AirGradient ONE as an ESPHome Bluetooth proxy by adding a few lines of YAML to its existing configuration. The air quality monitor keeps doing its job, and the ESP32-C3 inside also collects data from my passive BLE sensors and forwards it to Home Assistant.
I have had this setup on the AirGradient ONE since February 2024, when I published my AirGradient ONE review and ESPHome integration guide. About a month after that review, I added Bluetooth config to it. It has worked as a Bluetooth proxy ever since.
Why Add Bluetooth to the AirGradient ONE
My AirGradient ONE air quality monitor is powered around the clock. It just sits in one spot and never sleeps, constantly working and transmitting data to Home Assistant. Because it has a bunch of sensors, it also needs an unobstructed, central location with good air circulation to give accurate readings. That makes it a perfect candidate for a Bluetooth proxy, which also needs constant power and a good, fixed location to work well.
The ESP32-C3-MINI inside has a Bluetooth Low Energy radio that the default AirGradient ESPHome configuration does not use. At the same time, I have a lot of low power BLE temperature and humidity sensors around the house that broadcast passively, so they need something nearby to listen.
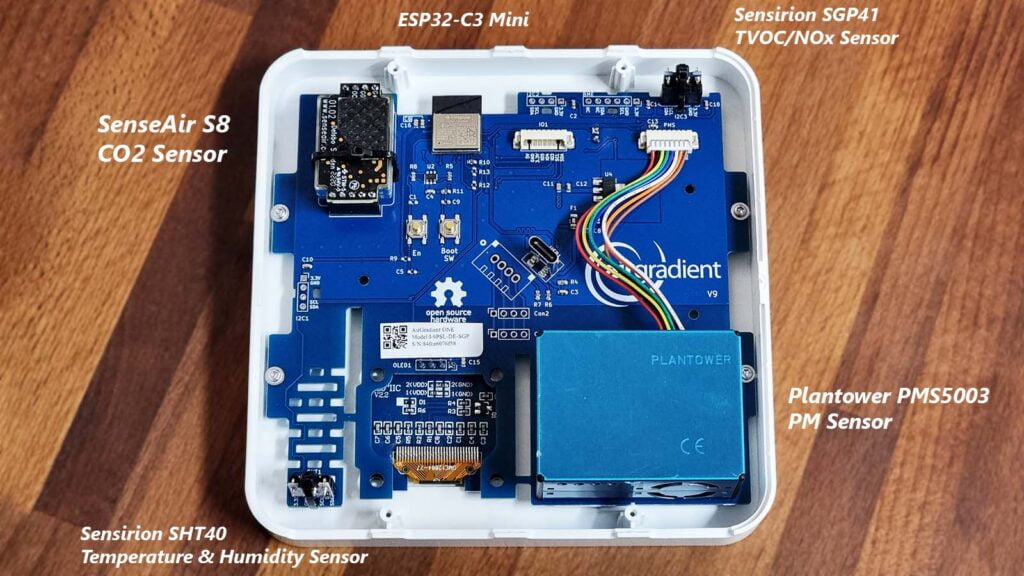
Before this, I ran a separate ESP32 as a dedicated Bluetooth proxy. It did nothing else. Adding Bluetooth to the AirGradient ONE allowed me to repurpose that board, as I no longer needed it. That is one fewer device to power and maintain. If you really want a standalone proxy instead, I covered that in my guide on building the smallest Bluetooth proxy with an ESP32-C3 SuperMini.
Using the AirGradient ONE as an Active Bluetooth Proxy
My AirGradient ONE runs the ESPHome configuration by MallocArray. It is an excellent piece of code and I changed very little to bring it to my liking. I keep most of his packages exactly as they are and simply append my own Bluetooth config below them.
To turn the AirGradient ONE into an active Bluetooth proxy, this is all you need. Add it at the end of your existing YAML.
esp32_ble_tracker:

bluetooth_proxy:
  active: true
The bluetooth_proxy component depends on esp32_ble_tracker, so both are required. Validate the config in the ESPHome dashboard and flash it over the air. The air quality sensors, display and LEDs of the AirGradient ONE keep working exactly as before.
After flashing, Home Assistant picks up the AirGradient ONE as a Bluetooth adapter automatically. It appears in the Bluetooth integration next to any other adapters and proxies you have, along with its available connection slots.
ESPHome allows 3 simultaneous active connections per proxy by default. Devices that stay connected permanently use a slot the whole time. Devices that connect and disconnect periodically share the slots, so more than 3 of them can work. Passive broadcasts from sensors do not use slots at all and are not limited to a fixed number. If you only have sensors that passively broadcast their data, you do not need active connections. Set the option to false.
bluetooth_proxy:
  active: false
The AirGradient ONE then forwards advertisements to Home Assistant but does not accept connections. Home Assistant shows it as an adapter that can listen for Bluetooth broadcasts but cannot connect to devices. This also frees the memory the connection slots would otherwise reserve.
ESPHome recommends the ESP-IDF framework for Bluetooth proxies, because the Arduino framework uses more memory. My AirGradient ONE runs the proxy on Arduino, but if you are starting from scratch, use ESP-IDF. If you switch an existing device from Arduino to ESP-IDF, the first flash cannot be done over the air. The two frameworks use different partition tables, so you need to connect the AirGradient ONE over USB for that first install. Every update after that works over the air as usual.
Capturing BLE Sensors Directly in ESPHome
The proxy is not the only way to use the Bluetooth radio. ESPHome can also read specific BLE sensors through the AirGradient ONE directly. You configure and tweak the scan_parameters under esp32_ble_tracker and then define your sensors under the sensor component, using native platforms or templates. Their readings appear as entities on the AirGradient ONE device in Home Assistant.
The esp32_ble_tracker component controls how the ESP32 board scans. These settings apply to everything that uses the Bluetooth radio, both the proxy and the sensors you capture directly. This is my configuration:
esp32_ble_tracker:
  scan_parameters:
    duration: 300s
    window: 120ms
    interval: 640ms
    active: false
I highly suggest you pick one method per sensor. If you define a sensor in ESPHome, Home Assistant will still discover it through the proxy and a native integration like Xiaomi BLE. Ignore that discovery to avoid duplicate entities.
Xiaomi LYWSD02 and Qingping CGG1
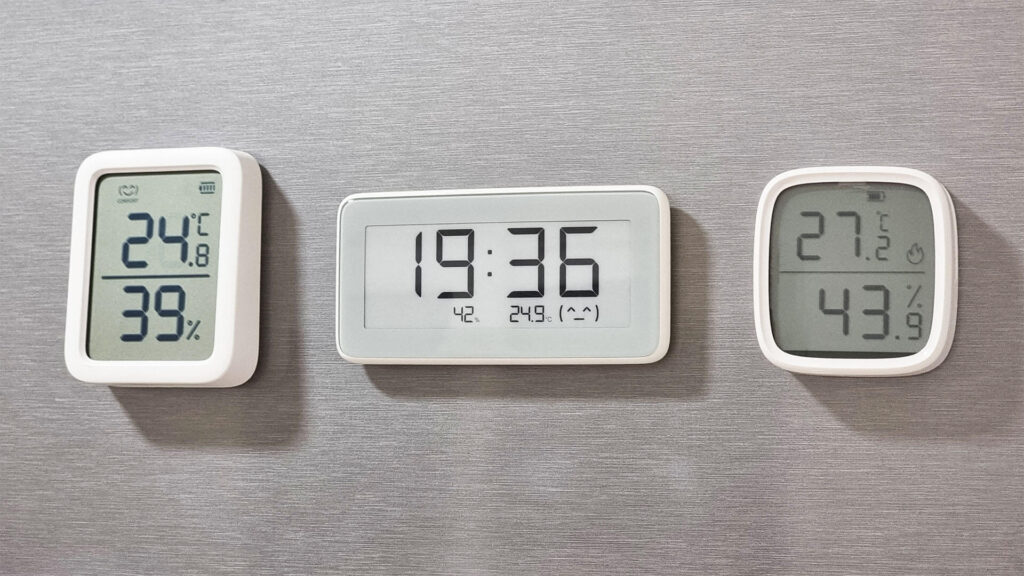
I run several Xiaomi LYWSD02 and Qingping CGG1 sensors around the house. Both are beautiful E-ink devices, and both broadcast their readings over BLE. ESPHome supports them natively with the xiaomi_lywsd02 and xiaomi_cgg1 platforms.
Each sensor only needs its MAC address. For example, this is my living room LYWSD02:
sensor:
  - platform: xiaomi_lywsd02
    mac_address: "E7:2E:01:40:C9:08"
    temperature:
      name: "Living Room Temperature"
    humidity:
      name: "Living Room Humidity"
    battery_level:
      name: "Living Room Battery Level"
And this is the Qingping CGG1 in the kids room:
  - platform: xiaomi_cgg1
    mac_address: "58:2D:34:10:53:65"
    temperature:
      name: "Kids Room Temperature"
    humidity:
      name: "Kids Room Humidity"
    battery_level:
      name: "Kids Room Battery"
Replace the MAC addresses with your own. Add one block per sensor under the same sensor component. Some newer CGG1 units or Xiaomi sensors encrypt their broadcasts. Those need a bindkey in the config, which you can extract from the Xiaomi cloud.
If your Xiaomi thermometers encrypt their data or use a format ESPHome does not support, custom firmware is another option. I explained that process in my guide on flashing custom firmware on the Xiaomi Thermometer 3.
SwitchBot Outdoor Meter With a Lambda
Not every sensor has a native ESPHome platform, but you can always decode the raw advertisement with a lambda. For example, my SwitchBot Outdoor Meter is integrated in Home Assistant through the AirGradient ONE. It broadcasts its readings openly, so the SwitchBot integration is not necessary. ESPHome handles it on its own.
This example extracts the temperature only. The on_ble_advertise trigger goes under the same esp32_ble_tracker key you already have. Do not create a second one, just list all sensors you want to add:
esp32_ble_tracker:
  on_ble_advertise:
    - mac_address: "F8:C2:2B:20:30:E5"
      then:
        - lambda: |-
            for (auto data : x.get_manufacturer_datas()) {
              if (data.data.size() == 12) {
                float temperature = (float(data.data[8] & 0x0F) * 0.1) + float(data.data[9] & 0x7F);
                if (!(data.data[9] & 0x80)) {
                  temperature = -temperature;
                }
                id(outdoor_temperature).publish_state(temperature);
              }
            }

sensor:
  - platform: template
    name: "Outdoor Temperature"
    id: outdoor_temperature
    unit_of_measurement: "°C"
    accuracy_decimals: 1
    icon: "mdi:thermometer"
    device_class: temperature
The lambda reads the manufacturer data of the advertisement. For this device specifically, byte 8 holds the decimal part of the temperature. Byte 9 holds the whole number, and its top bit is the sign. The template sensor receives the result and simply shows it in Home Assistant.
For humidity, battery level, dew point, absolute humidity and vapor pressure deficit, use the full config from my guide on integrating the SwitchBot Outdoor Meter in ESPHome. The same approach works for other SwitchBot sensors, like the SwitchBot Meter Pro and Meter Pro CO2.
Active Proxy vs Passive Scanning
The active option under bluetooth_proxy lets Home Assistant open connections to Bluetooth devices through the AirGradient ONE. This matters for devices you control, such as locks, bots and curtain motors. ESPHome allows up to 3 simultaneous active connections per proxy.
The active option under scan_parameters controls how the ESP32 listens. In active scanning, the ESP32 sends a scan request to every device it hears and asks for more data. In passive scanning, it only listens to what devices broadcast on their own.
My sensors publish all their readings passively at regular intervals, so there is nothing extra to request. Passive scanning also means my sensors never have to answer scan requests, which saves their batteries. ESPHome defaults to active scanning, so you have to set it to false yourself.
Adjusting the Scan Window and Interval
The interval is how often the ESP32 starts a new scan. The window is how long it actually listens during each interval. With my values, the ESP32 listens for 120 ms out of every 640 ms. That is roughly 20% of the time.
This matters more on the ESP32-C3 than on a regular ESP32. The C3 has a single core and a single radio, which both Wi-Fi and Bluetooth share. The AirGradient ONE also reads four physical sensors and drives a display on that same core. Leaving more time free for Wi-Fi and device processing keeps the device responsive and updating frequently without issues.
I settled on these values while tuning for my Xiaomi sensors, and they work well for them. They are not magic numbers. ESPHome itself warns that changing the window and interval on Wi-Fi proxies can cause an unstable connection. If you see Wi-Fi drops, go back to the defaults. If you miss readings from your sensors, increase the window gradually. Adjust them for your own devices and test.
The duration sets the length of each full scan cycle. 300 seconds is the ESPHome default and I leave it there.
Stability After Long-Term Use
I added Bluetooth to my AirGradient ONE about a month after I first set it up. It has run as a Bluetooth proxy for over two years now. It collects data from seven BLE sensors and still reports air quality exactly as before.
In that time, I have had no performance issues at all. The ESP32-C3-MINI handles the air quality sensors, the display, Wi-Fi and Bluetooth without trouble. It replaced a dedicated proxy board, and I have not missed it once.
If your AirGradient ONE is always on, adding Bluetooth costs you nothing. It is one of the easiest upgrades I have made to any ESPHome device. For more air quality monitors that work with Home Assistant, see my list of the best air quality sensors for Home Assistant.
FAQ
Does the Bluetooth proxy affect the air quality readings?
Not on my unit. The AirGradient ONE has reported air quality normally with Bluetooth enabled for over two years.
Can I add a Bluetooth proxy with the stock AirGradient firmware?
No. The Bluetooth proxy is an ESPHome component. You need to flash ESPHome on the AirGradient ONE first, which I covered in my AirGradient ONE review.
What is the difference between an active and a passive Bluetooth proxy?
An active proxy forwards advertisements and lets Home Assistant connect to devices through it. A passive proxy only forwards advertisements. This is set with the active option under bluetooth_proxy, and it is separate from active or passive scanning.
Does this work on the AirGradient Open Air?
The AirGradient Open Air also uses an ESP32-C3 and runs ESPHome, so the same config should apply. I have not tested it on the Open Air myself.
How many BLE sensors can the AirGradient ONE handle?
I read seven BLE sensors directly on mine without issues. Passive broadcasts are not limited to a fixed number. Active connections are, and ESPHome allows 3 at a time per proxy by default.
What scan window and interval should I use?
I use a 120 ms window and a 640 ms interval, and they work well for my Xiaomi and Qingping sensors. Start with those or with the ESPHome defaults, then adjust for your own devices.








Great tip, thanks! I feel stupid that this simple & (in retrospect) obvious idea never came to my mind before.
Now I have a spare esp32 board too! Maybe time for an esp cam water meter?