If you are as conscious about air quality and climate change like I am, than you understand the importance of breathing clean air. Sure, I love automating lights and switches but air quality goes beyond that for me. Because of this quirk, I’ve tested and reviewed every interesting smart air monitoring device I’ve ever come across.
Since I released my review of the Apollo AIR-1 Air Quality Monitor, AirGradient contacted me and asked If I could test and review their latest 9th generation indoor and outdoor air quality monitors, labelled as AirGradient ONE and AirGradient Open Air.
In this article, I am tearing down the AirGradient ONE, taking a look at it’s components/build quality and integrating the device in Home Assistant via ESPHome. I will also compare the device to two other air quality monitors I currently have on hand: the Apollo AIR-1 and Inkbird IAM-T1.
To be clear from the start, these devices are not exactly cheap, so let’s deep dive and see if their price tag is warranted. If you are up to the challenge, you can get them pre-soldered and assemble them yourself or you could just get the fully assembled version. Check out their official webpages to learn more:
- AirGradient ONE (Indoor)
- AirGradient OpenAir (Outdoor)
DISCLAIMER: AirGradient sent me the AirGradient ONE Air Quality Monitor as a free testing sample for the purpose of a review. This will in no way influence, sway or affect my opinion of the device and will just be my usual observations and unbiased testing approach. I shared my guidelines and principles for collaboration with their PR person, to which they fully agreed.
Technical Specification
- Model: AirGradient ONE, 9th Generation [I-9PSL]
- Microcontroller: ESP32-C3-MINI
- WiFi: 2.4GHz IEEE 802.11 b/g/n
- Bluetooth: BLE, Bluetooth 5, Bluetooth mesh
- Display: OLED display 1.3 inch (I2C 128x64px)
- Extensions: Broken out on PCB: I2C, 3 GPIO, 2 UART
- Peripherals: 11 RGB-LEDs, Push Button, Reset Button, USB C Connector
- External Hardware Watchdog: Texas Instruments TPL5010
- CO2 Sensor Module: SenseAir S8 (NDIR)
- Particle Sensor Module: Plantower PMS5003
- Temperature and Humidity Module: Sensirion SHT40
- TVOC/NOx Module: Sensirion SGP41
- Enclosure: ASA Plastic, UV Resistant and Weather Proof
- Cable: 2m USB C Cable including Data Lines for Flashing
- Power Supply: 5V2A
- Dimensions & Weight: 130 x 130 x 35mm, 350 grams
- Certifications: CE, RoHS, REACH, RESET Air, FCC ID: 2AC7Z-ESPC3MINI
Teardown
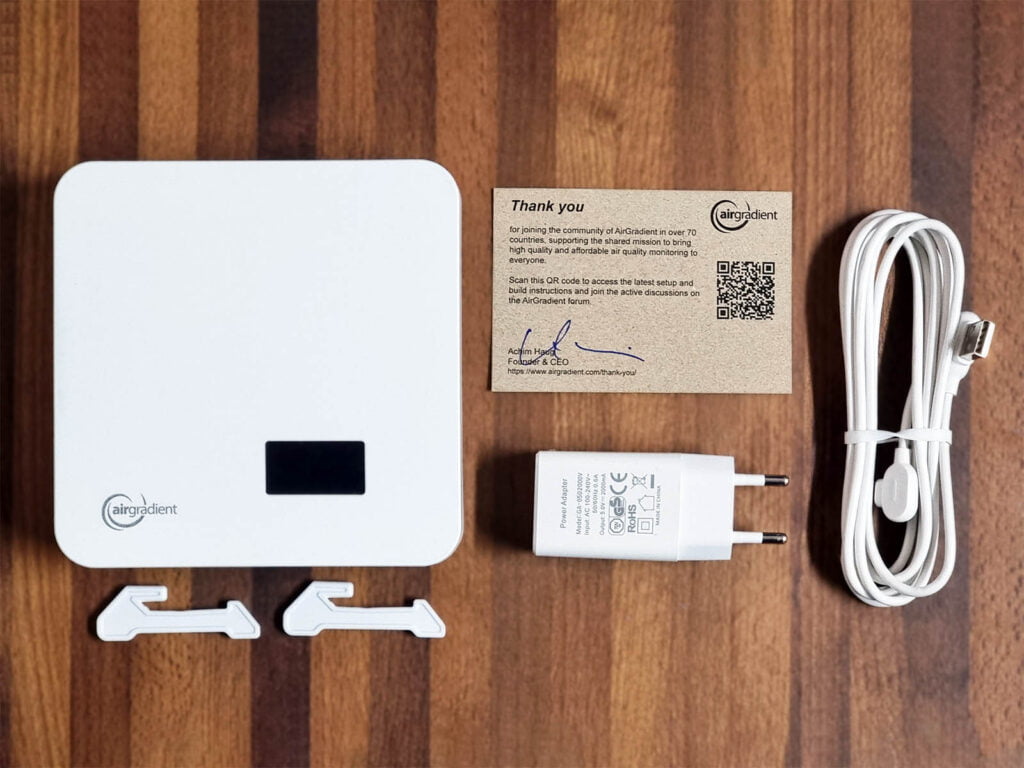
The 9th generation AirGradient ONE ships in a box containing the device itself, plastic legs for mounting it upright, a 5V2A adapter and a USB-C to USB-A power cable. The connector is angled at 90°, making it fit seamlessly and hides it from protruding at the back.
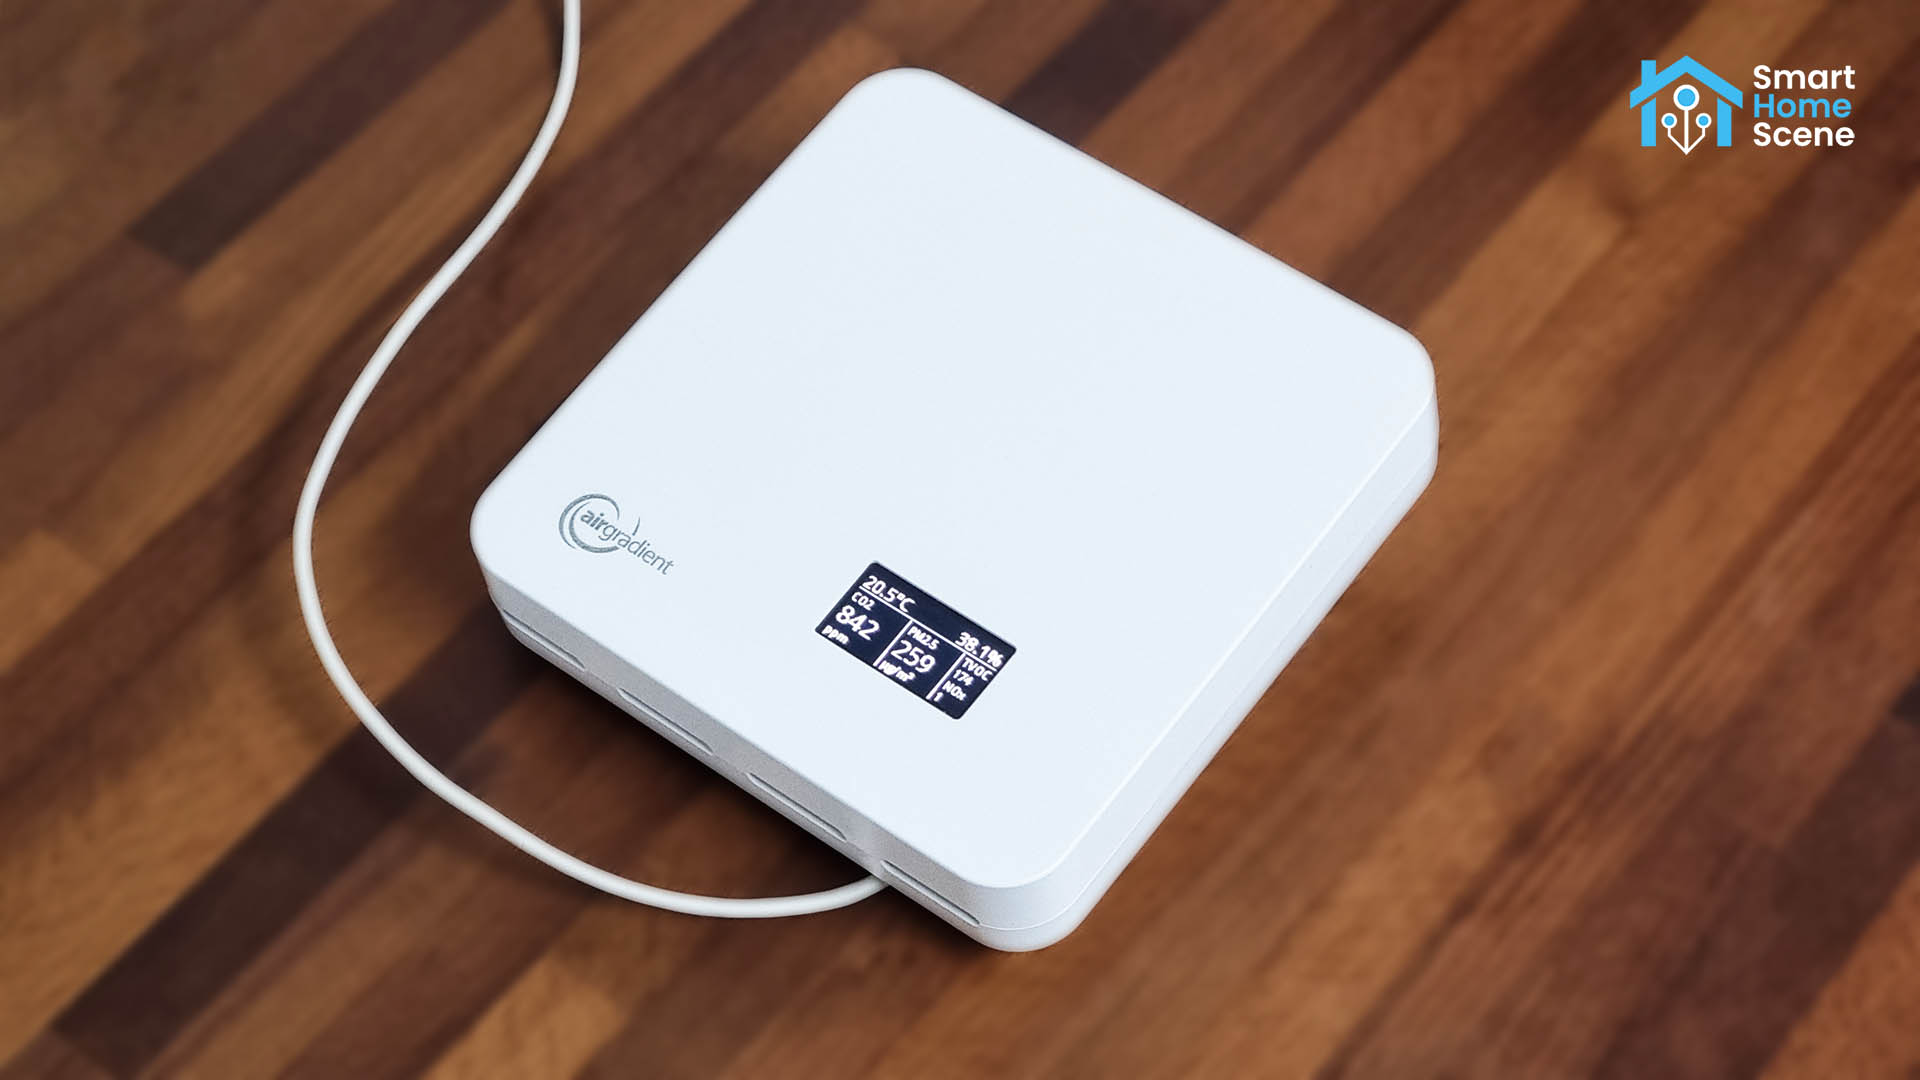
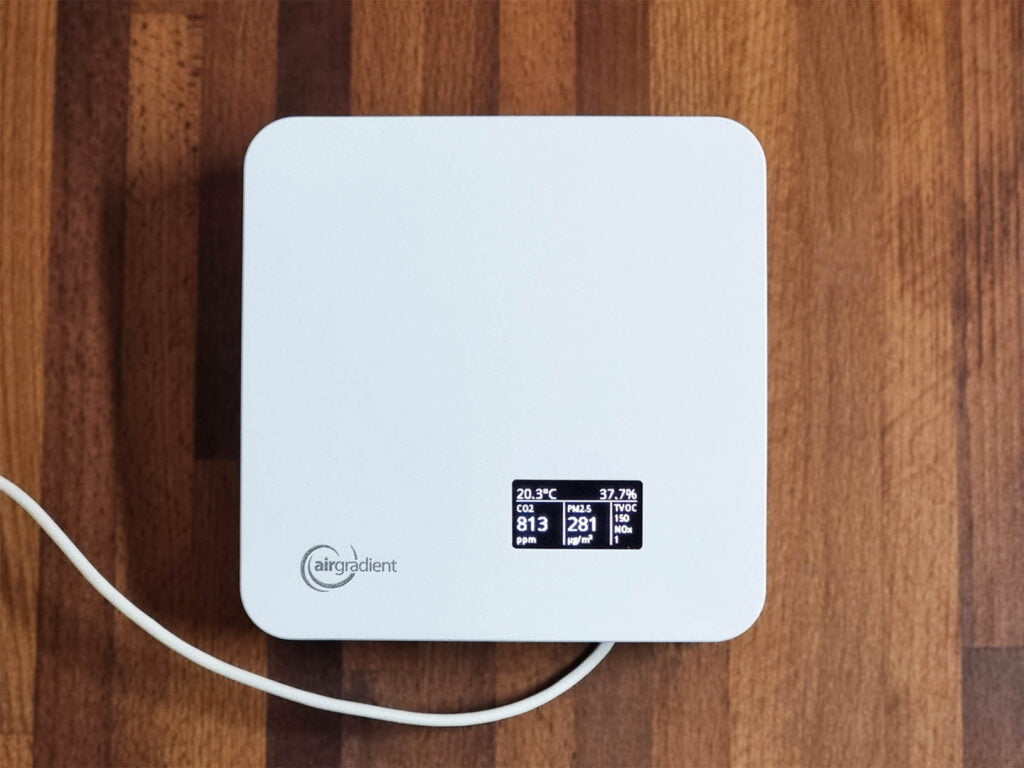
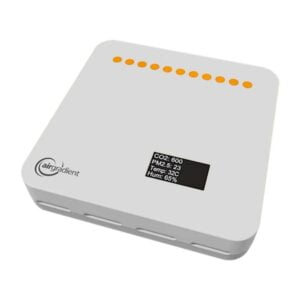
Measuring at 130x130mm, the device is larger than I expected and resembles an internet router a lot. There is a small 1.3 inch OLED screen in the bottom right corner, displaying the current measurements of the sensors, including temperature, humidity, CO2, PM particles, TVOC and NOx indexes. You can glance it from any direction and angle, there are no distortions at all.
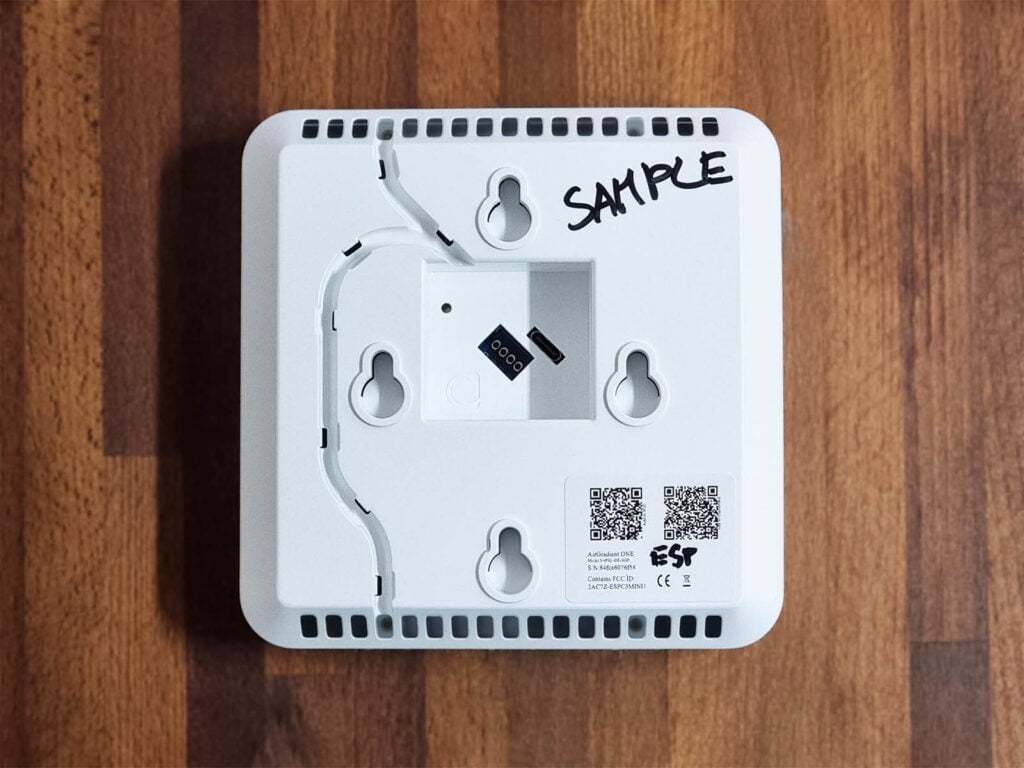
On the backside, you can see a lot of holes used for air circulation and heat dissipation. Two plastic channels can navigate the cable upwards or downwards, depending on your installation position. This makes up for a tidier setup, especially when mounted on a wall.
My device was marked as “SAMPLE” by their people, since they sent me the AirGradient ONE for testing purposes like I explained above.
The case is held together by 4 small torx screws, which I easily removed with my Kaiweets ES20 Electric Screwdriver. This kit features 137 different silver nickel bits for all kinds of screws, making my dismantling jobs very easy and pleasurable.
My first impression of the device is that it’s a very clean, neat and uncluttered design, fitting every component quite far apart from each other. Compared to the Apollo AIR-1 I recently dismantled, the AirGradient ONE is enormous.
I am not quite sure if this is a conscious decision, in terms of providing better air flow and circulation to the sensors or just a substandard design job. But considering this is a 9th generation device, and AirGradient are deemed “air quality experts” by many, I would wager its the first one.

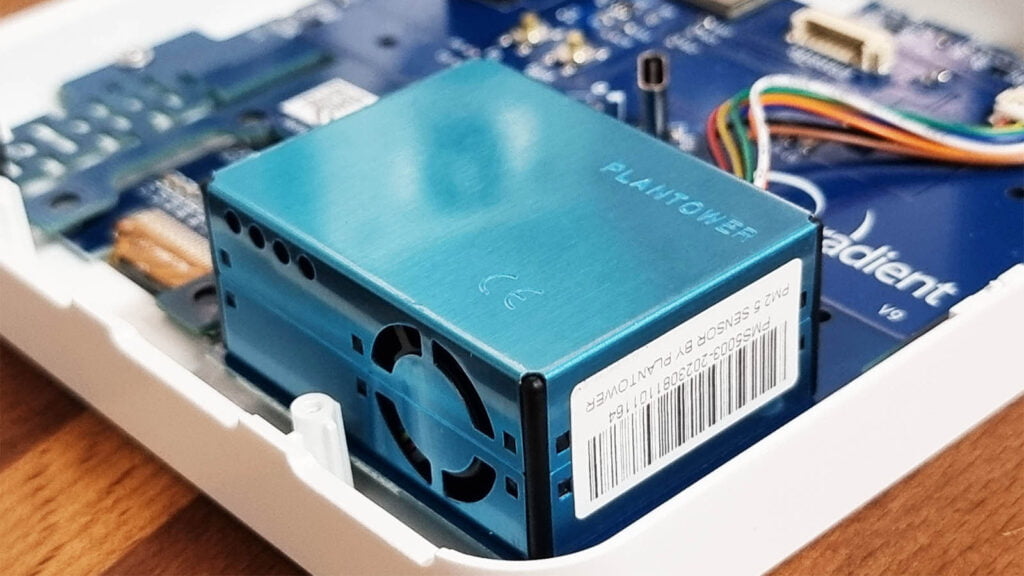
The first thing you notice on the main PCB is the large particulate matter (PM) sensor. AirGradient used the Plantower PMS5003 [Datasheet], which can measure particle from 0.3 to 10 micrometers with a high level of accuracy. This sensor/brand is used in many air quality monitors, like the Aqara S1, which uses Plantower’s PMST003 model.
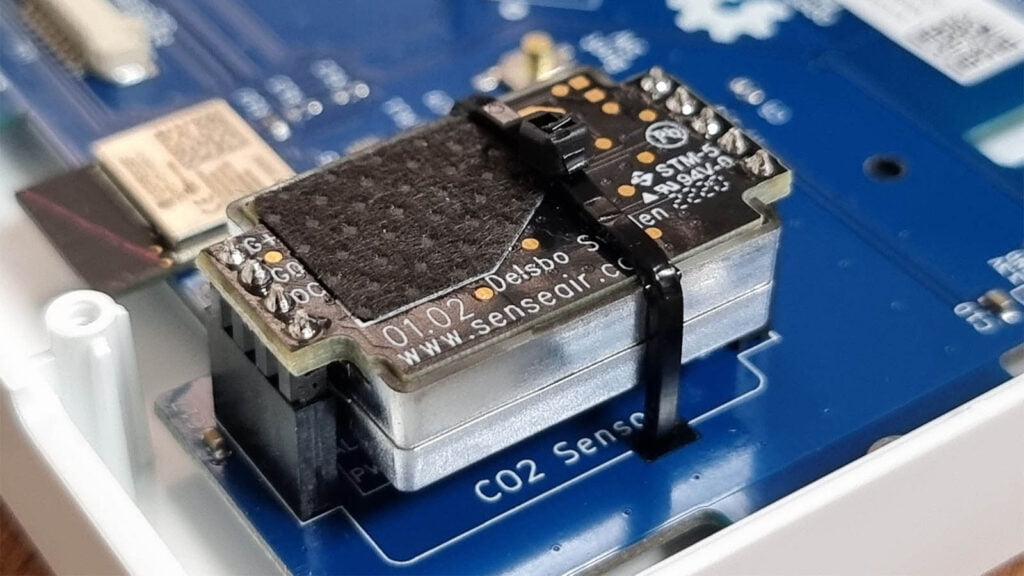
For Carbon Dioxide (CO2) measurement, they opted for the SenseAir S8 [Datasheet] from the well-known Swedish manufacturer with the same name. This is without a doubt the most popular and established CO2 sensor among DIY enthusiasts and even companies producing proprietary devices. It comes pre-calibrated from the factory and has a life expectancy of more than 15 years!
I’ve encountered a version called SenseAir HVAC in the Inkbird IAM-T1 Indoor Air Quality Monitor, you can check out the comparison between the two further bellow in this review.
For the temperature & humidity reading, the AirGradient ONE relies on the Sensirion SHT40 [Datasheet], a sensor I’ve found all over the place, including cheap devices from AliExpress. Check out my deep dive comparison of 10 Zigbee temperature and humidity sensors with a screen.
This does not make it inherently bad, I would say it produces consistent readings across all my test in different gadgets, skewed maybe by bad programing or internal heat buildup in some devices.
The TVOC (Total Volatile Organic Compounds) and Nitrogen Oxides (NOx) indexes are generated by the Sensirion SGP41 [Datasheet], two important factors for air quality. NOx is a family of highly reactive and poisonous gases that you definitely need to be aware of if you have wood/gas stoves inside your home or want to monitor your garage air quality.

Home Assistant Integration and Setup
The AirGradient Sensors can be integrated in Home Assistant via ESPHome by flashing a custom firmware they’ve forked themselves from the MallocArray ESPHome repo. Their people let me know that they are currently working with ESPHome devs to brand the devices “Made for ESPHome”, which is great news! Props to AirGradient for recognizing the open-source home automation community.
You can find their ESPHome firmware on this repo.
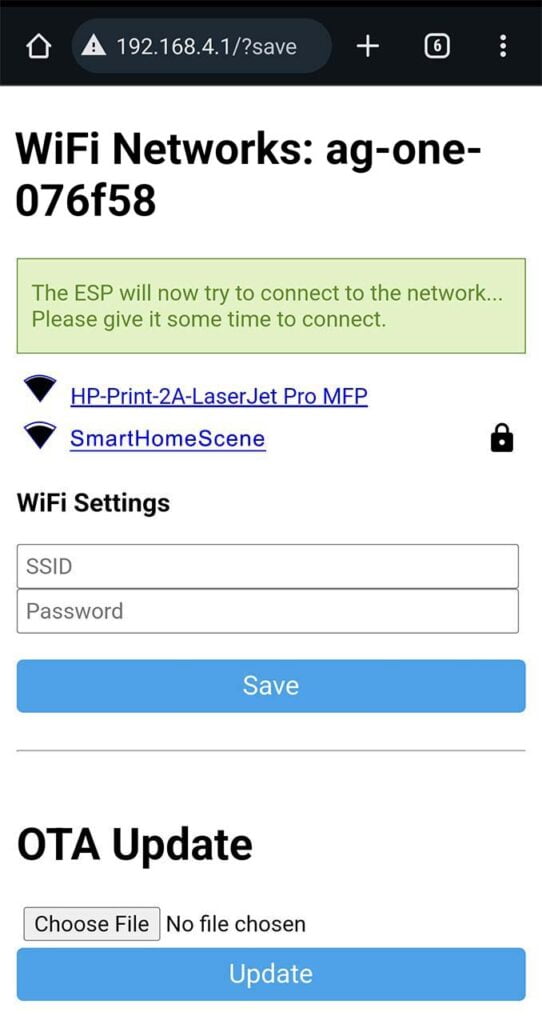
Once you power up the AirGradient ONE, it will broadcast an open Wi-Fi SSID that you need to connect to, named ag-one-xxxxxx.
I connected to the Wi-Fi hotspot and accessed the device’s local interface through a web browser by entering the default IP address, 192.168.4.1.
The AirGradient ONE will detect all nearby Wi-Fi networks. Simply select yours, input the username and password, and hit Save. That’s it.
Once connected, Home Assistant should automatically recognize the device. If not, you might have to manually enter the IP address of the AG ONE, available in your router’s DHCP list.
Sensors and Entities
Once added to Home Assistant, the AirGradient ONE exposes a bunch of entities for data and control with the ESPHome integration. Most of these are self-explanatory and need no introduction, however their minimum and maximum values need to be stated so you are familiar with range of measurement. Here’s a screenshot of the AirGradient ONE in Home Assistant:
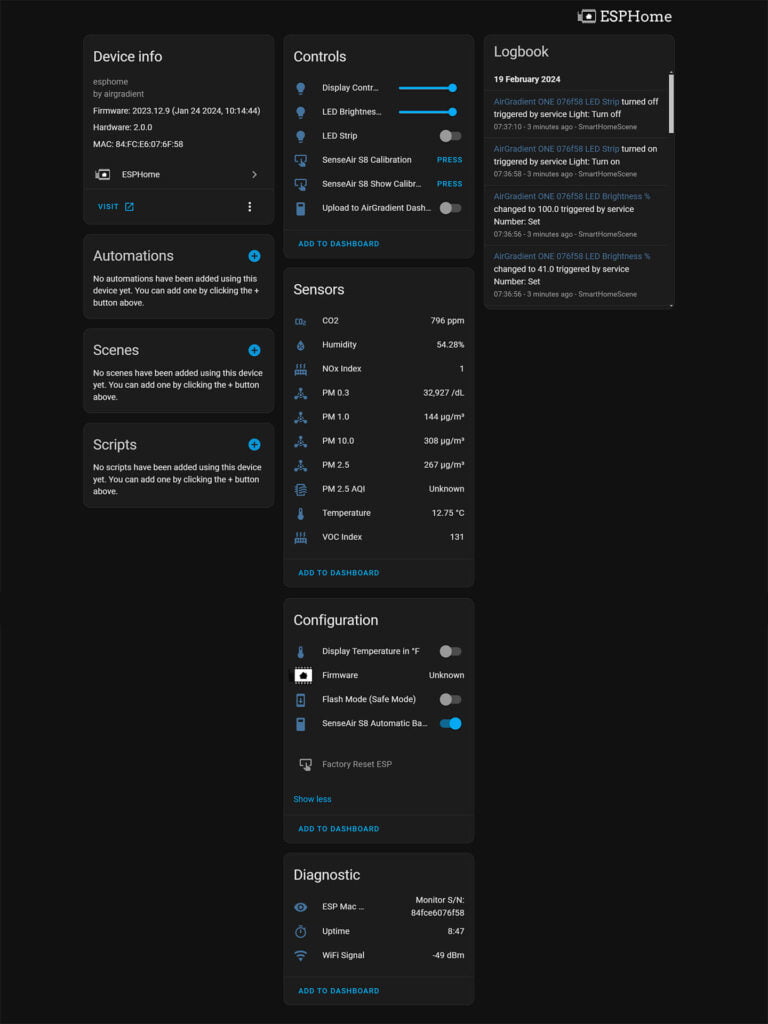
The first three entities are used to control the display and RGB LED installed in the device. The first one lowers the contrast of the screen, essentially turning on “night mode” so it doesn’t bother you during the night. The other two entities are for controlling the brightness and color of the LED, just like a regular light.
The sensors have the following measurement range and accuracy correlation:
- CO2 Sensor SenseAir S8 (NDIR):
- Range: 0 to 10000ppm.
- Accuracy: ±40 ppm ±3% of reading at 5 to 30°C, 0-85% RH (400 – 2000ppm range)
- Particle Sensor Plantower PMS5003 (laser scattering principle):
- Accuracy/Range: ±10%@100~500μ g/m³, ±10μg/m³@0~100μ g/m³
- Temperature and Humidity Sensor Sensirion SHT40:
- Accuracy/Range: Temperature ±0.2°C @ -40 to + 125°C; Humidity ±2% RH @ 0 – 100% RH
- TVOC/NOx Sensor Sensirion SGP41:
- Accuracy/range: TVOC <±15 @ 0 to 500 VOC Index; NOx <±50 @ 0 – 500 NOx Index
The other entities available are used for changing temperature unit, setting flash mode, factoring resetting and toggling the automatic background calibration (CO2). You can also get the serial number, total uptime and Wi-Fi signal strength under the diagnostic section.
Calibrating the CO2 Sensor
The AirGradient ONE is capable of automatically calibrating its own CO2 readings, a feature controllable through the S8 Automatic Background Calibration entity in Home Assistant. It works by taking the lowest value of the week and assumes it’s ambient level, a process that takes 7 days to complete.
If you suspect the values read are incorrect, you can force the sensor to recalibrate immediately:
- Take the AirGradient ONE outside for 20 minutes
- Make sure it’s still connected to Home Assistant
- Press the
Senseair S8 Calibrationbutton in Home Assistant - Wait 10 minutes
- Since outside CO2 concentration is always around 400ppm, it will record the default value as 400ppm
- Done, take it back inside
Automating the LED Strip
The LED Strip installed in the AirGradient ONE is automated by default and is used as a visual indicator for the current state of your air quality. If its toggled on, it will change color based on the current reading of the CO2 levels. You can toggle it off and automate if yourself if you want too, with your own thresholds. For example, you can create a simple automation that will turn the light red whenever CO2 levels go above 1000:
description: "Turn LED Strip Red when CO2 levels go above 1000"
mode: single
trigger:
  - platform: numeric_state
    entity_id:
      - sensor.ag_one_076f58_co2
    above: 1000
condition: []
action:
  - service: light.turn_on
    metadata: {}
    data:
      rgb_color:
        - 255
        - 0
        - 0
    target:
      entity_id: light.ag_one_076f58_led_strip
Or turn it green with 30% brightness when CO2 is in the 400-550 range. Or turn it orange when the PM 10 reading goes over your preset threshold. You get the idea. It’s very useful for visually getting the air quality of the room with a glance.
Sending data to the AirGradient Dashboard
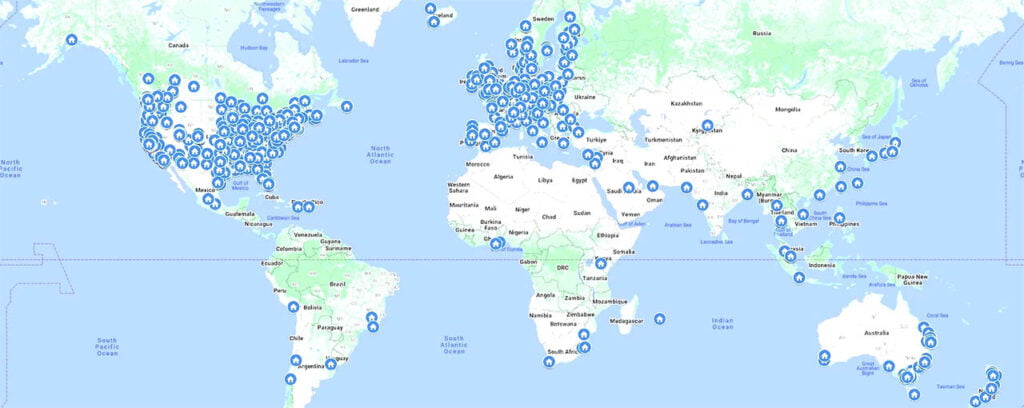
AirGradient has it’s very own cloud dashboard, collecting data from all of their devices deployed around the world. This is completely optional and works on an opt-in principle, so it’s turned off by default. With the ESPHome firmware, there’s a toggle in the configuration of the device labelled as Upload to AirGradient Dashboard if you want to participate.
You will also need to make an make an account, so you can access your air quality data from anywhere with their cloud. This is useful for real time monitoring, air quality analytics and reports, creating alerts without Home Assistant through AirGradients e-mail service.
Testing and Comparison
To benchmark the accuracy of the AirGradient ONE, I gathered data and compared it to two other air quality sensors I have on hand in my office and I’ve reviewed in the past.
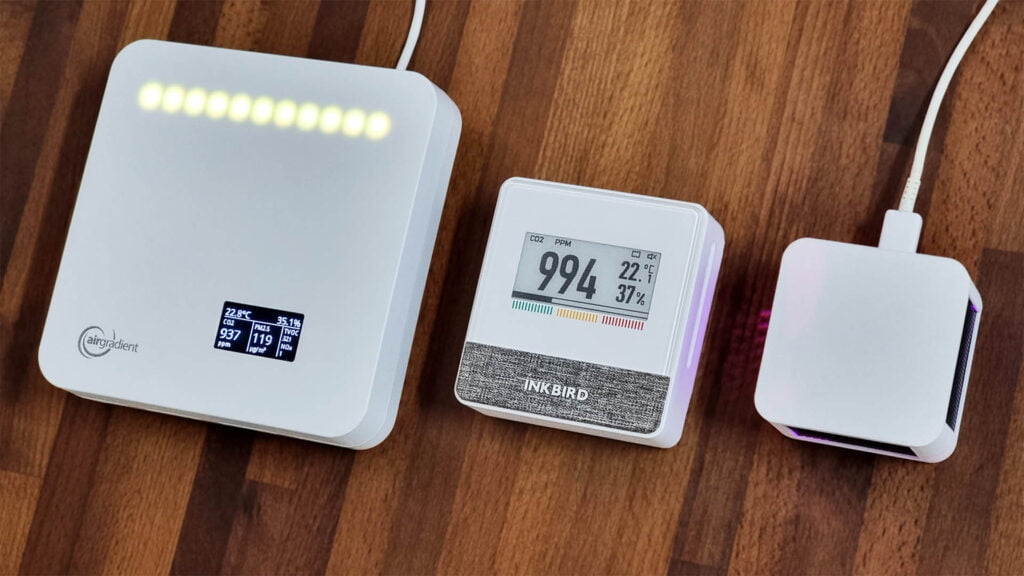
The first one is the INKBIRD IAM-T1 [Shop, Review], which I recently managed to add to Home Assistant via ESPHome and the other is the Apollo AIR-1 [Shop, Review], the worlds smallest yet most feature-rich air quality sensor.
The three of them measure CO2, with only the AirGradient ONE and Apollo AIR-1 measuring PM Particles.
Carbon Dioxide Measurements (CO2)
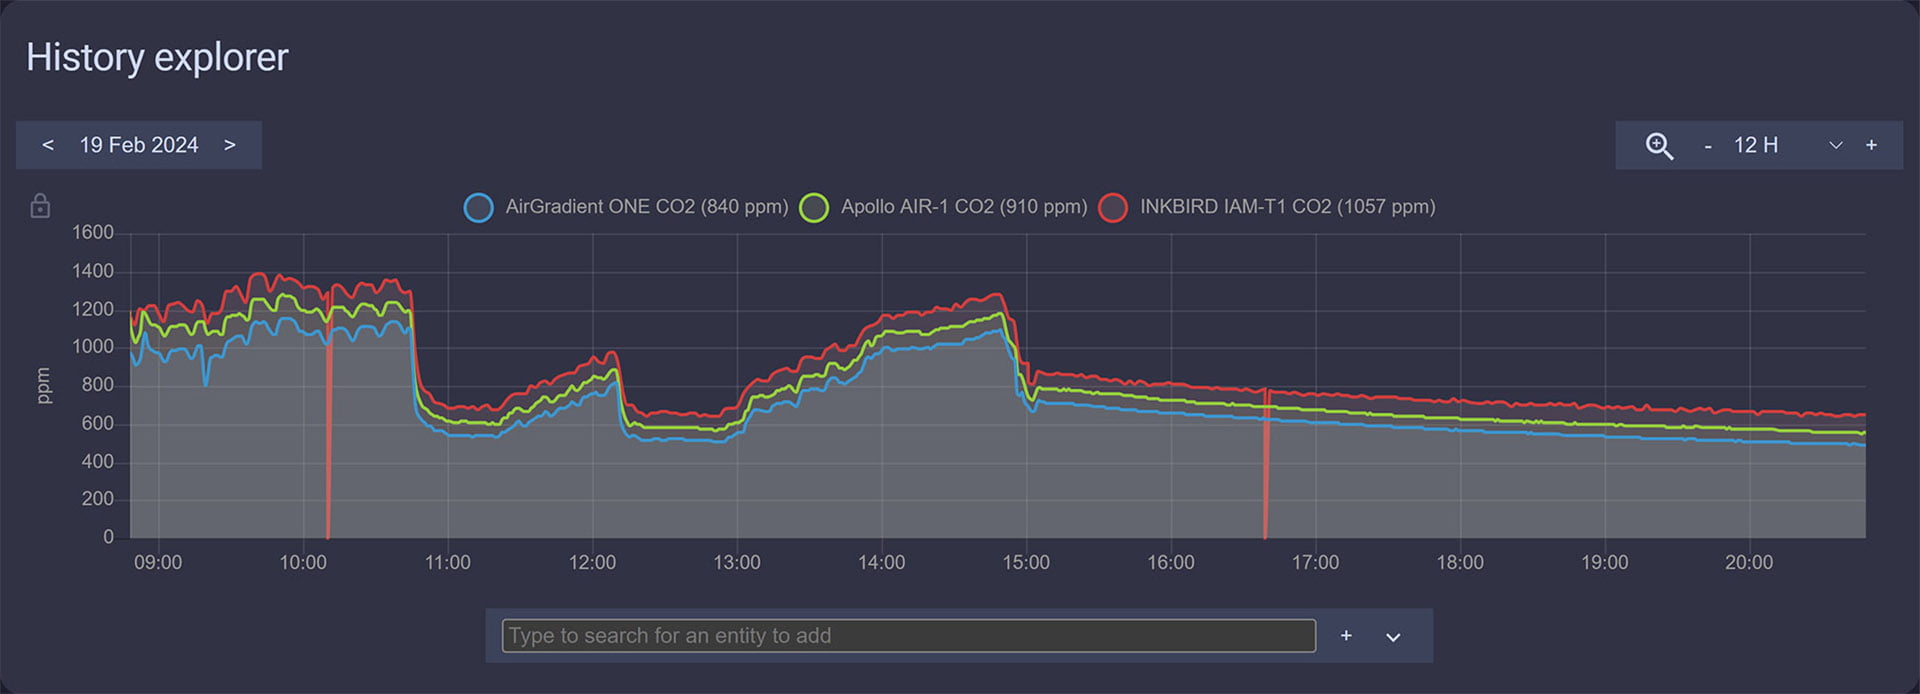
Analysis of the data across all three devices showed very similar outcomes, with each device’s curve lines closely aligning. The AirGradient ONE consistently reported CO2 levels approximately 8% lower than the other two, based on an analysis of 20 data points.
In contrast, the INKBIRD IAM-T1 recorded higher CO2 levels, including two instances of reporting a value of 0, which is likely due to a coding error on my part rather than an inaccurate sensor reading. The Apollo AIR-1’s measurements were intermediate, leaning more towards the readings of the AirGradient ONE.
Ultimately, it’s reassuring to see that all sensors show similar trends in their reading curves. If I were to calibrate one against another, I’d use the AirGradient ONE as the standard, given its superior sensor quality.
Particulate Matter Measurements (PM)
Given that only the AirGradient ONE and Apollo AIR-1 are equipped with particle sensors, this comparison is only between these two. Here how their data looked for different particulate matter diameters:
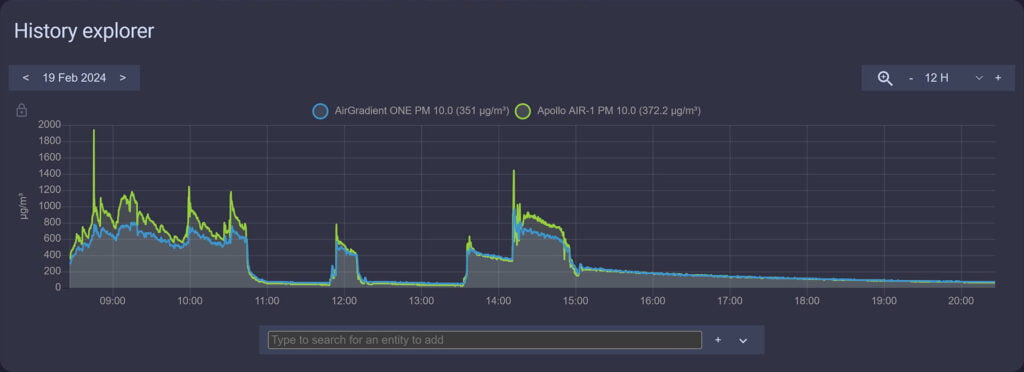
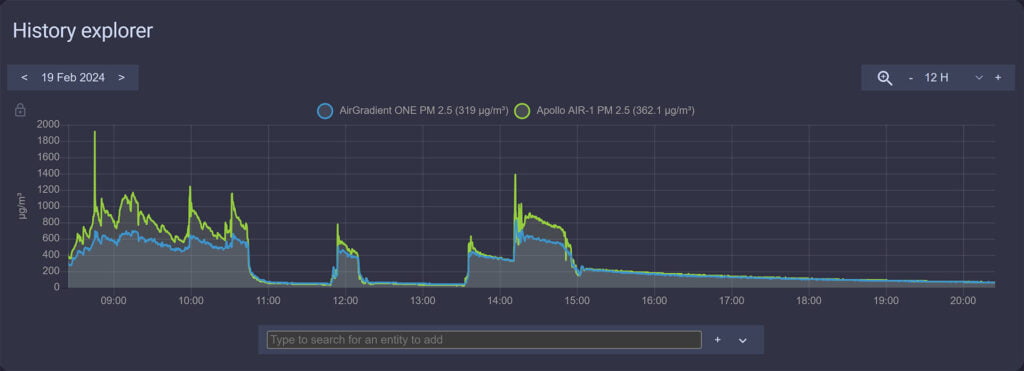

You will notice their graphs are somewhat closely mirrored, however there are a few things to observe here. The more we go lower in particle diameter, the less accurate the AIR-1 seems to be. In other words, it’s readings for PM10, PM2.5 and PM1.0 matter diameter differ very little, offset from each other by about 5%.
The AirGradient ONE on the other hand, measures tangible differences between each PM particle diameter. The Plantower PMS5003 inside it appears to be more accurate than the Sensirion SEN55 used in the AIR-1.
From this data, it’s clear that if you’re looking to measure PM10µm particles, both devices are reliable. However, for particles smaller than PM1.0µm, only the AirGradient ONE offers accurate measurements.
Final Thoughts
Taking all factors into account, the AirGradient ONE is a top-notch air quality monitor. The company works with air quality experts from around the world, including big universities like the University of Cambridge in the UK, Columbia University in NYC, and the University of Sydney, to make sure their devices are really accurate. You can read more about their research on the website.
From a smart home perspective, I can confidently recommend AirGradient’s devices for tracking the air quality in your living space. I can especially appreciate the fact that the hardware and firmware is open source and they are working with ESPHome devs to brand it “Works with ESPHome”. This makes integration of their devices in Home Assistant a breeze.
From a price tag perspective, the AirGradient ONE is competitively priced compared to similar devices, highly considering the quality of the hardware. The Apollo AIR-1 does offer an optional gas sensor which the AirGradient ONE doesn’t have, but this can be considered overkill in a standard residential environment.
You can get AirGradient devices pre-soldered and assemble them yourself, or get them fully assembled and tested directly from their store.
- AirGradient ONE (Indoor)
- AirGradient OpenAir (Outdoor)


Is there anyway to buy it from europe? because my country has to much taxes in imported goods, specially from US.
AirGradient ships from Taiwan, you shouldn’t have any issues.
Hello, I’m wondering what drew you to conclusion that airgradient reports PM particules more accurate?
I see difference in graphs, i’m just trying to understand how to properly interpret them without some reference value. Just form 3 graphs there is no way of telling which one of them is accurate one.
Since it is running ESPHome, is it possible to also use it as a BLE tracker?
Yes of course, you can freely add the BLE tracker code.
Is one of these easier to setup in home assistant?
Thanks for the amazing reviews.
Both of them use open-source ESPHome Firmware for integration with Home Assistant.
They are equally easy to integrate. See here:
1. AirGradient ONE
https://smarthomescene.com/reviews/airgradient-one-review-and-esphome-integration/#home-assistant-integration-and-setup
2. Apollo AIR-1
https://smarthomescene.com/reviews/apollo-air-1-review-complete-air-quality-monitoring-for-home-assistant/#home-assistant-integration
Cheers