Apollo Automation has been on a run lately, experimenting and testing the waters by releasing a bunch of new smart devices. The PLT-1 plant sensor was quite interesting, measuring soil moisture, air temperature, humidity, illuminance, UV rating and equipped with an addressable LED as well as their trademark piezo buzzer.
If you follow SmartHomeScene, you are aware that I’m a big fan of Apollo Automation. Those guys respect the privacy aspect of a smart home, developing devices exclusively with open-source firmware. Whatever you purchase from their store is going to be running ESPHome firmware, which does not require a cloud connection by default.
They recently sent me a new temperature and humidity sensor, labelled as the Apollo TEMP-1. This device is a probe temperature sensor with a variety of use cases, some of which are quite interesting. In this article, I’m examining the Apollo TEMP-1, integrating it in Home Assistant and evaluating it’s worth.
You can get it on their Official Webstore (US) or Domadoo (EU).
For other Apollo Automation smart devices reviews, click here:
- Apollo PLT-1 Soil Plant Sensor
- Apollo AIR-1 Air Quality Monitor
- Apollo MTR-1 mmWave Radar Multi-target Tracker
- Apollo MSR-2 mmWave Radar Presence Sensor
Technical Specification

- Model: Apollo Automation TEMP-1
- Dimensions: 40x32x13mm
- Connectivity: Wi-Fi/Bluetooth
- Main Module: ESP32-C3 Mini
- Power Options:
- – USB-C, Non-Battery Version
– USB-C, Battery Version with rechargeable CR123A or 16340
- – USB-C, Non-Battery Version
- Onboard Sensor: Aosong AHT20-F
- Sensor Interface: 3.5mm jack
- Compatible Sensors:
- – 1.5m (~5ft) waterproof flat cable (DS18B20 sensor). Max 85°C 185°F
- – 20cm (~8in) waterproof flat cable (DS18B20 sensor). Max 85°C 185°F
- – 1m (~3ft) stainless steel food-safe probe (NTC sensor). Max 350°C 662°F
- ESPHome Firmware
- RGB Pixel LED
- Piezo Buzzer
Package Contents and Disassembly
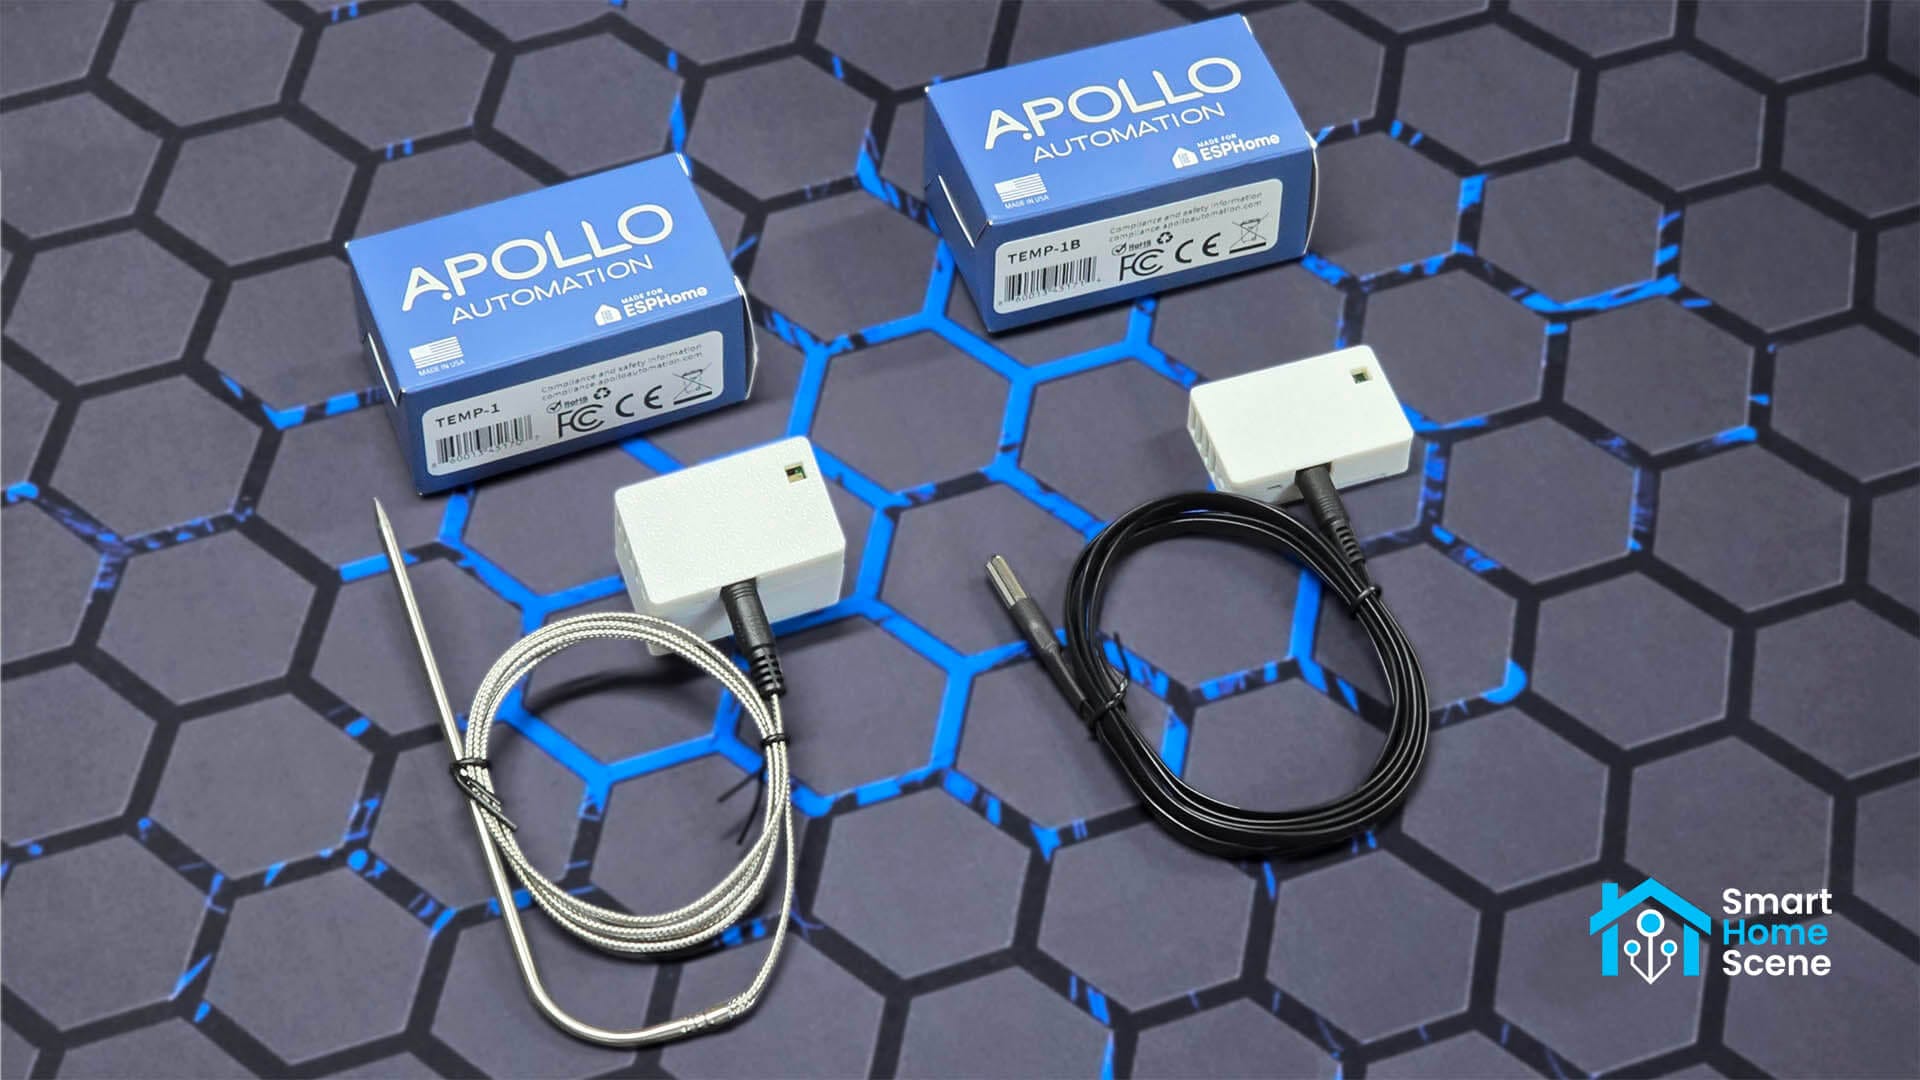
The Apollo TEMP-1 Probe Sensors came in a neatly designed, company branded box that looks better than previous packages. Apollo is upping their game and wants to be taken seriously. This box contains only the device itself, with the optional probes packaged in another plastic wrapper. Both the battery and non-battery versions feature a 3.5mm jack for connecting a sensor probe.
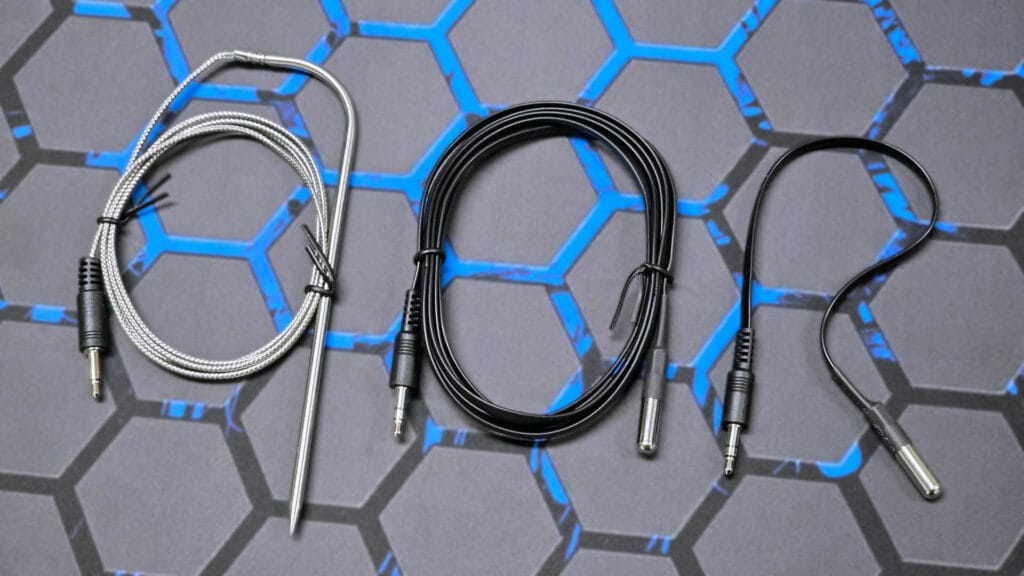
Apollo offers the TEMP-1 with three type of temperature probes compatible out of the box. The first one is a NTC, stainless steel food-safe probe with a maximum temperature of 350°C or 662°F. The other two are Dallas DS18B20 probes with 1.5m and 20cm length and maximum temperature of 85°C or 185°F. All three are waterproof temperature sensors with a different use case in mind.
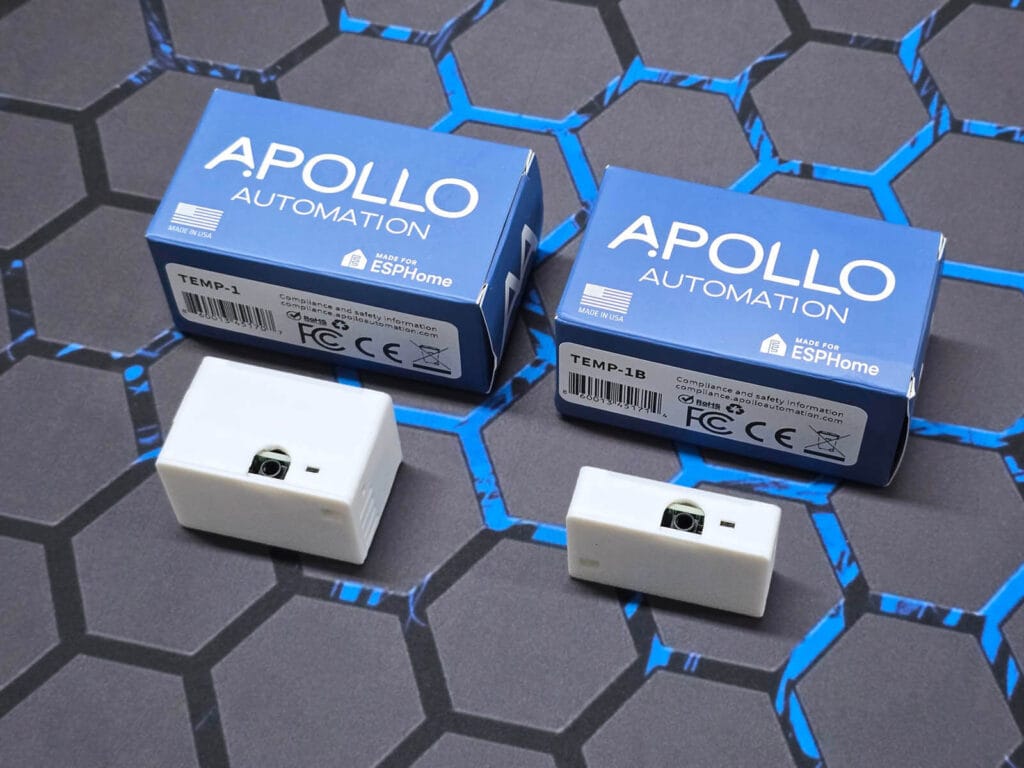
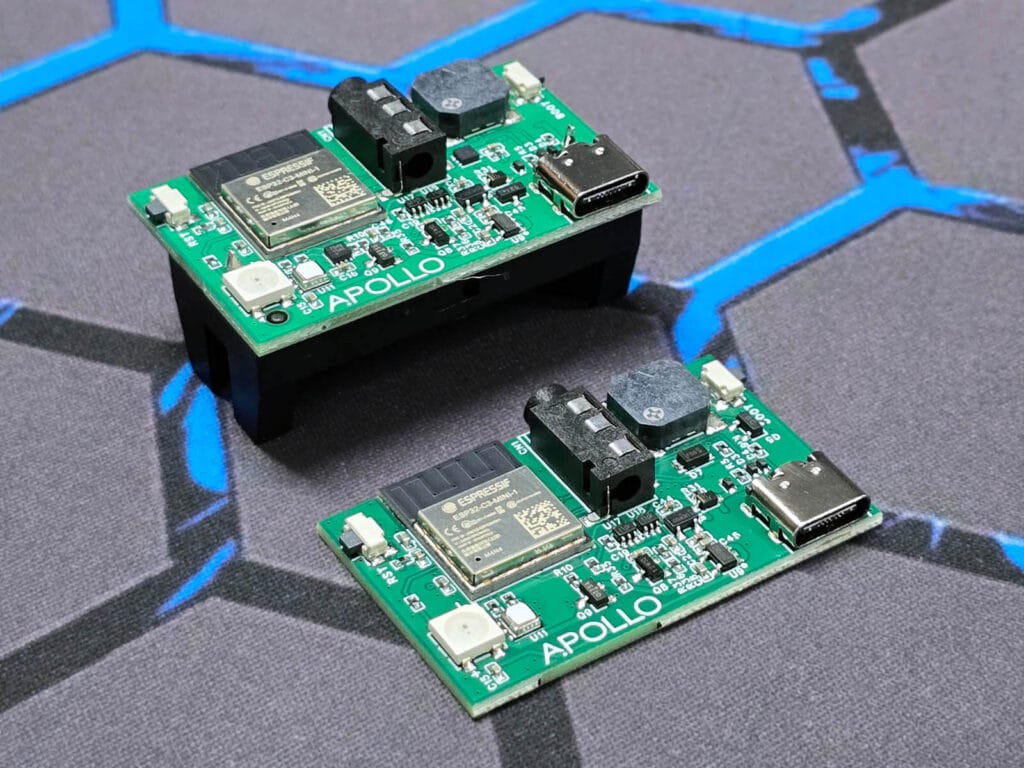
The TEMP-1 is also available in both battery and non-battery powered versions. The first in obviously bulkier and larger than the latter, designed to carry a single CR123A or 16340 rechargeable battery. Apollo sets the battery life at 6 months for this version with optimized device sleep settings.
The non-battery version is slimmer and thinner, with the PCB layout, size and dimensions remaining the same on both devices. Both variants are equipped with an USB-C port, a 3.5mm jack, an onboard RGB LED and their trademarked Piezzo buzzer for audible automations.
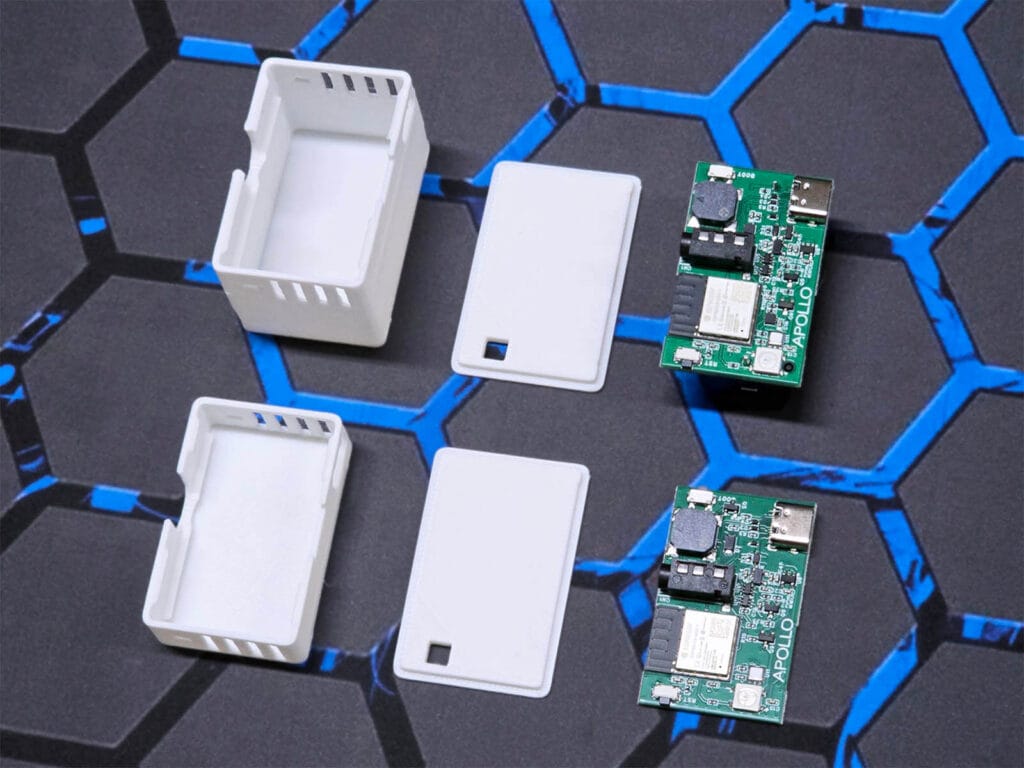
The Apollo TEMP-1 PCB is very neatly designed and arranged, with the connectivity module integrated onto the board itself. Both sensors rely on the ESP32-C3-MINI-1 [Datasheet] for processing, Wi-Fi and Bluetooth connectivity. The boot and reset buttons are set on the sides and are easily reachable with a small pin through the case.
What’s ever more clever, Apollo offers a magnet attachment for this sensor so that you can easily mount it on metal surfaces. For example, you can attach it to your fridge, grill or cookstove door and fix it in place. Just like other Apollo sensors, the TEMP-1 has a miniscule footprint of just 48x30x14mm for the non-battery version and 48x30x30mm for the battery-powered version.
Home Assistant Integration
Like all other Apollo Automation devices, the TEMP-1 comes pre-flashed and ready to use. Simply connect to the Wi-Fi network it broadcasts, enter your own Wi-Fi credentials, and let it connect to your network. Once connected, it will be automatically discovered and integrated via ESPHome in Home Assistant.
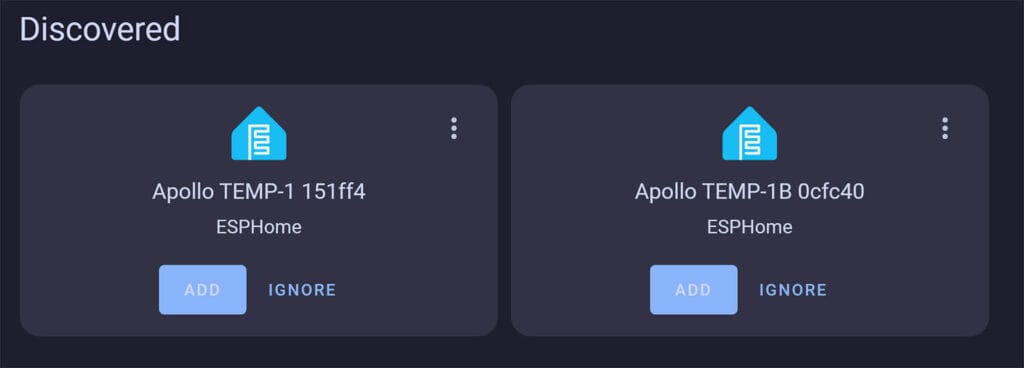
If the TEMP-1 is not automatically discovered, you can manually add a new ESPHome device using the TEMP-1’s IP address. Once added to Home Assistant via ESPHome, here’s which sensors and configuration parameters are exposed:
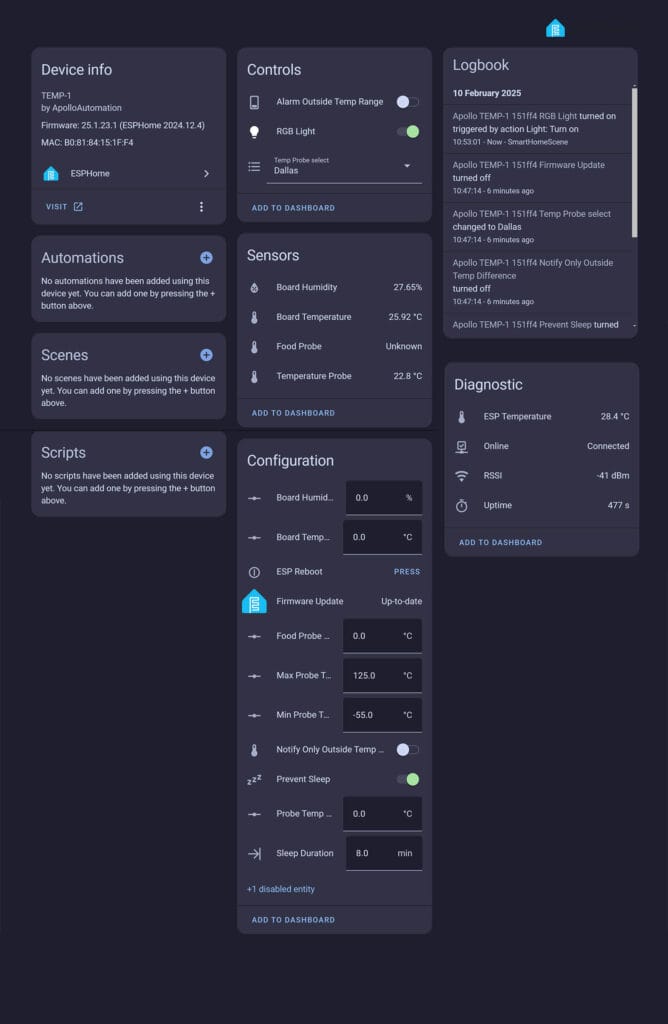
The first thing you need to once the TEMP-1 is added to Home Assistant is to select the appropriate probe model from the dropdown menu. This can be either Dallas or Food, which preconfigures some parameters of the TEMP-1. The sensor entity for the probe NOT connected will remain with an unknown state. This is normal.
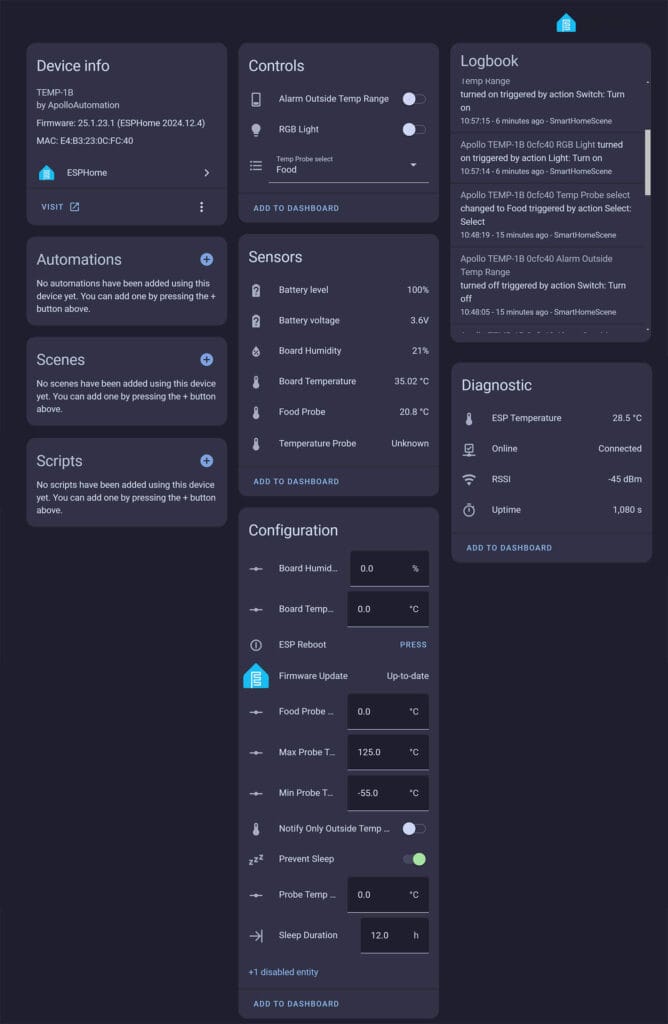
Most entities and configuration parameters overlap between both devices, with the TEMP-1B also exposing battery status entities like level and voltage. You can control the onboard RGB light, set min and max sensor limits, create offset for the values, and trigger an alarm when the reading is out of scope.
For the battery TEMP-1B version, it’s also important to configure the sleep duration parameter and prevent sleep feature. Whenever you need the sensor to remain awake, such as when you are grilling, you can simply toggle the prevent sleep toggle ON and the sensor will remain active and push updates in real-time to Home Assistant.
Testing and Use Case Ideas
I’ve been tinkering with the Apollo TEMP-1 sensor for a few days now and I’ve gotten a good sense of it’s capability. First and foremost, it’s important to clarify that this sensor is primarily a probe temperature sensor, designed for measuring food temperature, temperature in fish aquariums, pools, hot tubs, storage units, fridges, stoves etc.

The on-board AHT20 sensor measures temperature and humidity data on the devices itself, so you can use it freely as a room temperature sensor and dedicate the probe to something else. However, it’s worth noting that the ESP32-C3 the TEMP-1 uses produces a certain amount of heat in the small enclosure. You will need to calibrate the sensor and set an offset to account for the heat generated inside the device. Setting a more aggressive sleep policy also reduces heat dissipation and allows the AHT20 to measure more accurately.
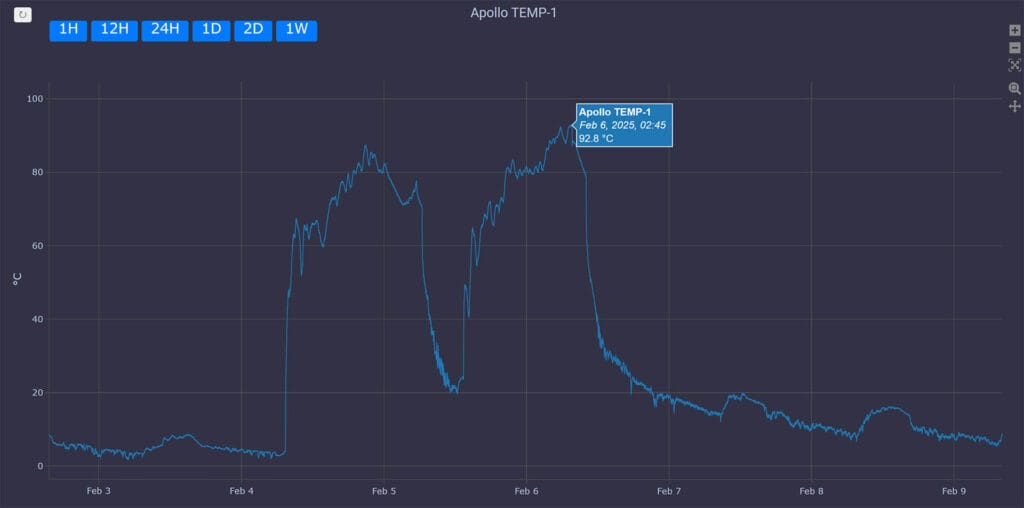
I gathered data from the probe in Home Assistant and charted it using the Plotly graph card. With no sleeping settings, the Apollo TEMP-1 records temperature quite frequently and accurately in Home Assistant. I pushed the probe to about a 100°C by submerging it in and out of boiling water. The sensor reported correctly and reliably.
Since both the NTC food probe and Dallas DS18B20 are waterproof, there are many things you can this device for. Here’s some ideas to get you started:
- Monitoring fridge/freezer: The TEMP-1 uses a flat cable design for the Dallas probe so that won’t interfere with fridge seals.
- Monitoring fish tank, hot tub (if covered), or pool (if covered or in a sealed box): Use the waterproof probe to track water temperature and prevent overheating or freezing.
- Monitoring grilling, baking, or other food activities: Use the NTC food-safe probe for precise temperature control while cooking or grilling.
- HVAC efficiency monitoring: Place the probe near air vents or ducts to measure heating and cooling efficiency in a home or office.
- Smart pet environment monitoring: Track the temperature of reptile terrariums, dog kennels, or small animal enclosures to maintain a safe and comfortable environment.
- Soil temperature monitoring for gardening: Use the probe to track soil temperature in greenhouses or outdoor gardens for better seed germination and plant growth.
- Pipe freeze prevention in winter: Install the sensor near exposed pipes to detect dangerously low temperatures and trigger heating systems or alerts.
- Server rack or electronics cooling monitoring: Place the probe inside server enclosures or near sensitive electronics to detect overheating and trigger cooling actions.
- Fireplace or wood stove efficiency tracking: Monitor the temperature of the stove or chimney to optimize fuel use and prevent overheating.
- Incubator temperature regulation: Track temperatures in egg incubators or scientific enclosures that require precise thermal control.
Summary and DIY Alternatives
The Apollo TEMP-1 is a feature-rich sensor, all things considered. It’s onboard RGB LED can be used as a visual indicator in Home Assistant automations while the Piezzo buzzer can be used for audible alerts. The board temperature sensor measures your room temperature independently from the probe, so you have two readings on a single device. The device is also pre-flashed and highly configurable, allowing you to use it with Home Assistant out of the box.
However, it’s worth noting that sensors of this type are quite easy to make – provided you do not need the additional features like the LED and buzzer. I’ve written in detail about creating your own double-probe temperature sensors with two Dallas probes and a generic ESP32 board. My DIY example achieves more or less the same thing, without the bells and whistles you would be getting with the Apollo TEMP-1 Probe Sensor.
It’s also worth noting that DIY solutions like the one I outlined above require some soldering and assembling skills, as well as a basic ability to read and adapt some ESPHome code. If you’ve tinkered with this sort of thing in the past, there is no need to explain the process and level of involvement for making this type of a device.
In summary, if you want a feature-rich, well-made, affordable probe temperature sensor, the Apollo TEMP-1 or TEMP-1B is a great choice. If you do not need anything else beside basic temperature monitor, you can follow my guide and make a basic probe sensor yourself.


This looks good, but I wish it had 2 probe inputs (e.g., fridge and freezer).
When I clicked the link these looked like a nice cheap bit of kit and then you start adding the actual sensors and not so much, and if you want to do both the fridge and freezer you are quickly up to £50 … ouch vs £10 for DIY (plus a small box).
I’ve been using a home made ESP32 and 2x Dallas sensors for over three years and had very few issues, mostly caused by Home Assistant/ESPhome updates. Build your own is so simple and cheap, you’d be mad not to try it before spending the money on an off the shelf version.
Fair enough, I agree. This device is aimed for people who do not have the skills to create their own and will also use/automate the LED and Buzzer. But, yeah it’s obviously pricier than DIY alternatives.
For the easy-to-use crowd, it’d be nice to have a screen that shows the current temperature — particularly helpful in fridge/freezer use cases. I’ve been looking at the Govee R1 as a possible option in those use cases (though I’ll probably end up just going the DIY route as I need a fair number of sensors).
One potential caveat to the magnetic mount is that neodymium magnets start to lose their mojo at like 80°C (the cutie point is higher, but weird science magic makes them sad at a much lower temperature). People should use care when attaching the main body to a grill, since many parts of the metal frame can easily get above 80°C. If they used a SmCo or AlNiCo magnet then this concern is moot.
Source: I’m an idiot who once ruined a nice magnet and the thing it was holding by sticking it on my barbecue grill.