Ever since Lewis from Everything Smart Home announced the EP1 mmWave Presence Sensor, I’ve been trying to get my hands on a sample for a comparison review to others on the market. Unfortunately, I was unable to do so because they sell like crazy as soon as they come back in stock. Being in a different time zone, I was 2 times late to the party.
Because many of you asked me to compare the EP1 to Aqara’s presence sensors, I contacted Lewis on Twitter and explained that I would like to purchase a review sample if he has a spare laying around. He refused to let me pay for the device or shipping and sent me one free of charge. Naturally, this will in no way influence my opinion of the EP1 Presence Sensor and will just be my opinion based on tests, benchmarks and facts.
My original intent was to benchmark the EP1 against Aqara’s first generation presence sensor, the FP1. But since it’s successor, the FP2, turned out to be more capable device I will compare the EP1’s performance to that one. It’s worth noting the FP2 supports detection zones, something the EP1 does not currently have. Perhaps in the EP2?
Technical Specification EP1
- Connectivity: Wi-Fi 2.4GHz
- ESP32-WROOM-32E – 4MB flash version
- Illuminance: BH1750 Light Sensor
- Temperature & Humidity: SHTC3 Sensor
- PIR Sensor: Panasonic EKMC1603111/2/3
- mmWave Sensor: DFRobot SEN0395
- Detection Angle: 100° (horizontal) 40° (vertical)
- Detection Distance: up to 9m
- Power Supply: 5V0.5A USB-C
- Additional 5V Header input for optional power
- Mounting Base: Rotating stand with screw holes and space for a sticker
- 4 Additional GPIO pins for expansion
Package and Assembly EP1
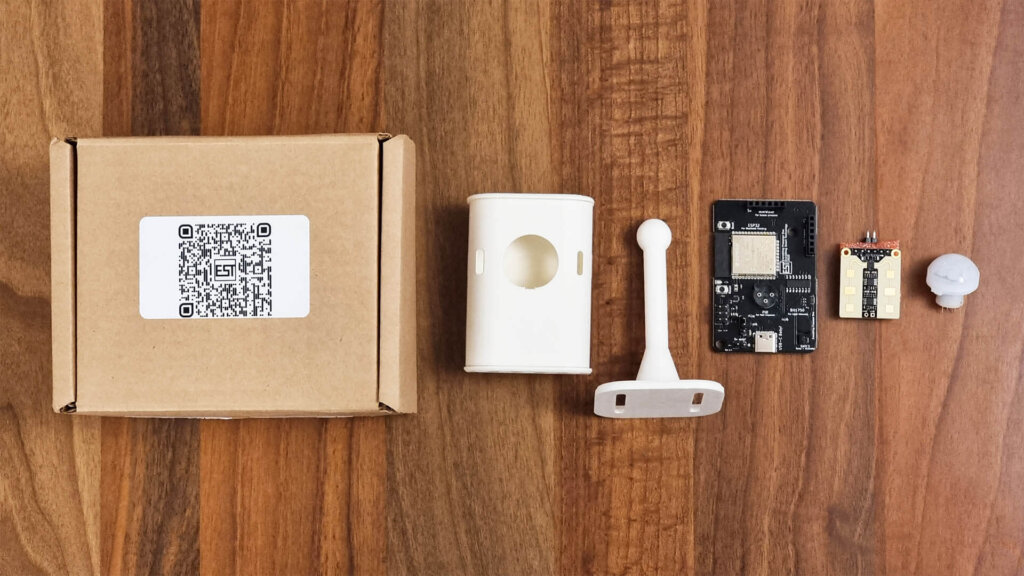
The EP1 was shipped in a cardboard box filled with loose fill foam to protect and cushion the components from shipping damage. Each of the hardware pieces are packed separately in their own wrapper, further protecting them from smashing into each other. The EP1 is a DIY kind of device, you need to assemble it to be able to use it, which is half the fun.
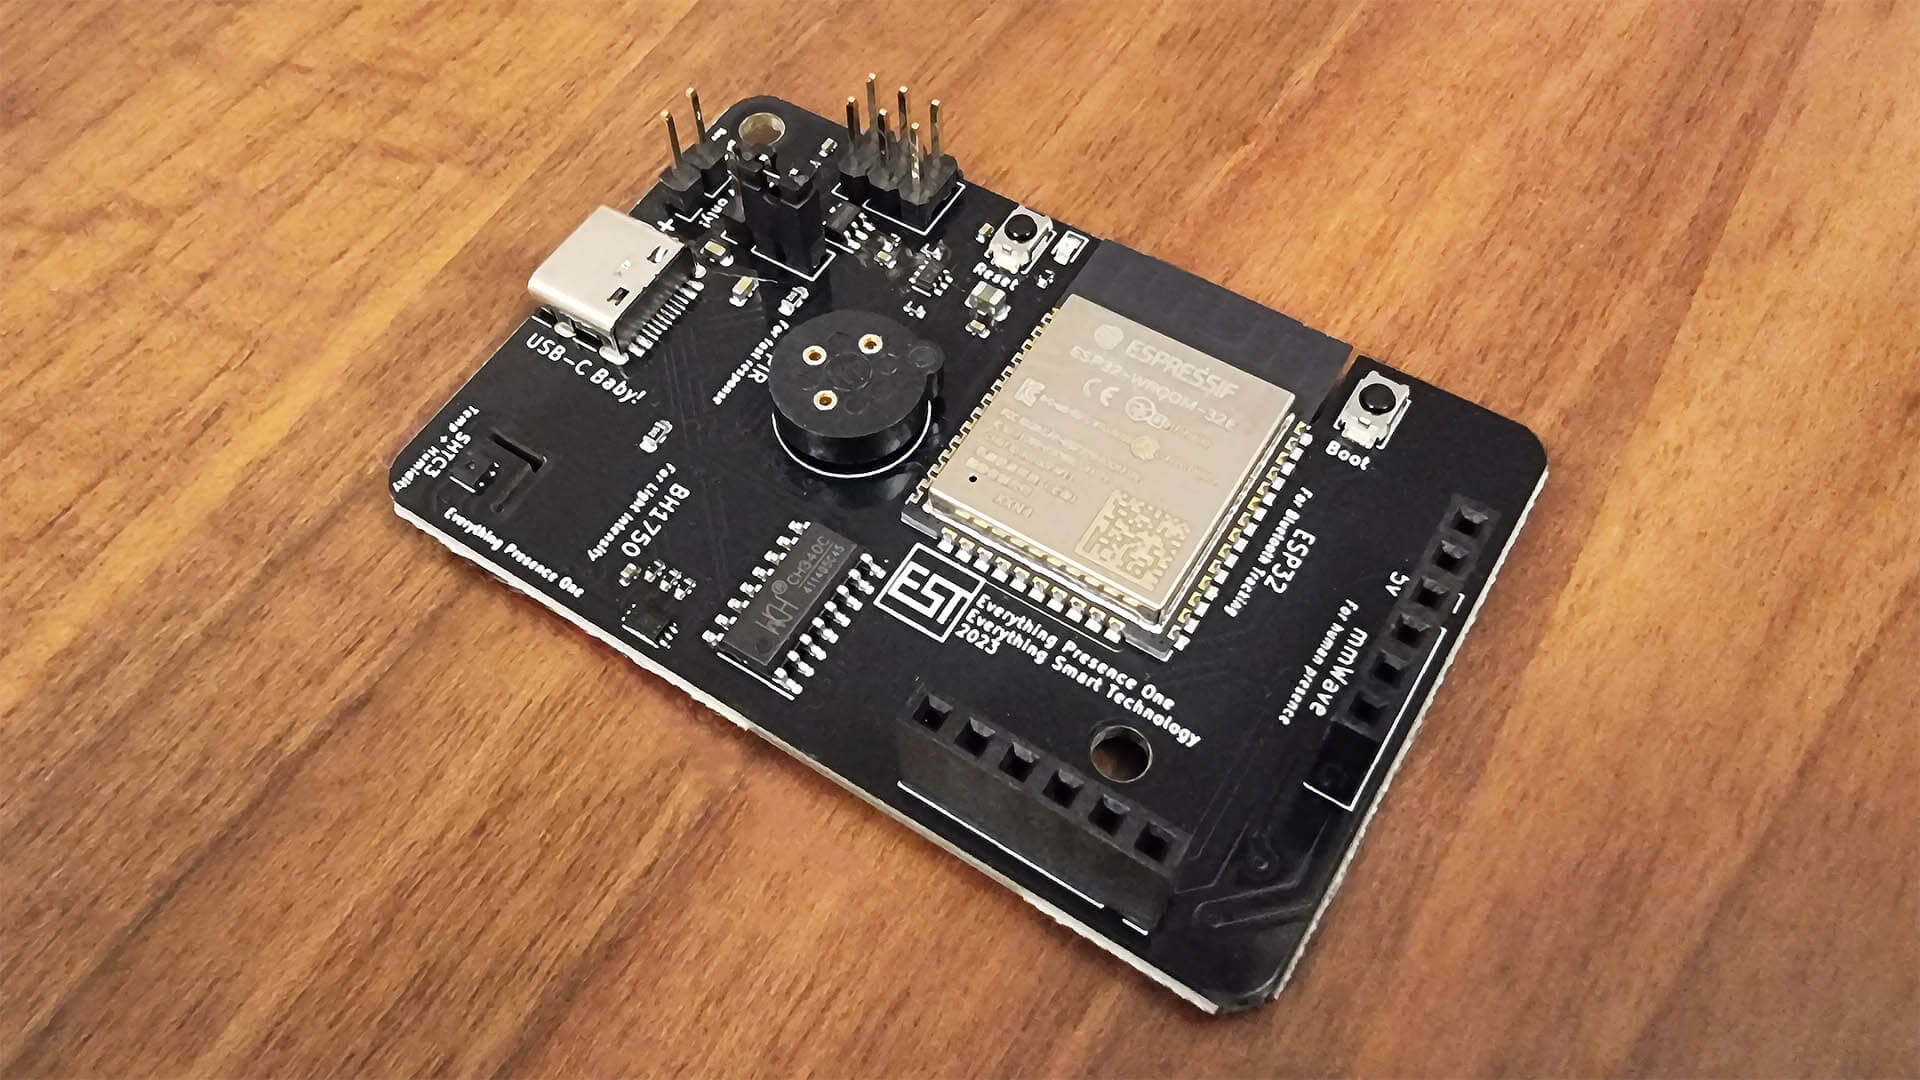
The PCB is neatly designed, the black color reminds me of trademark Aqara devices. Everything is clearly labelled including the USB-C Baby! on the port. There are two available slots for the DFRobot mmWave sensor, each giving you slightly different performance.
Slot 1 gives you a wider horizontal field of view with a narrower vertical field of view.
Slot 2 give you a wider vertical field of view with a narrower horizontal field of view.
Lewis recommends using Slot 1 at the top, which would be most suitable for most people.
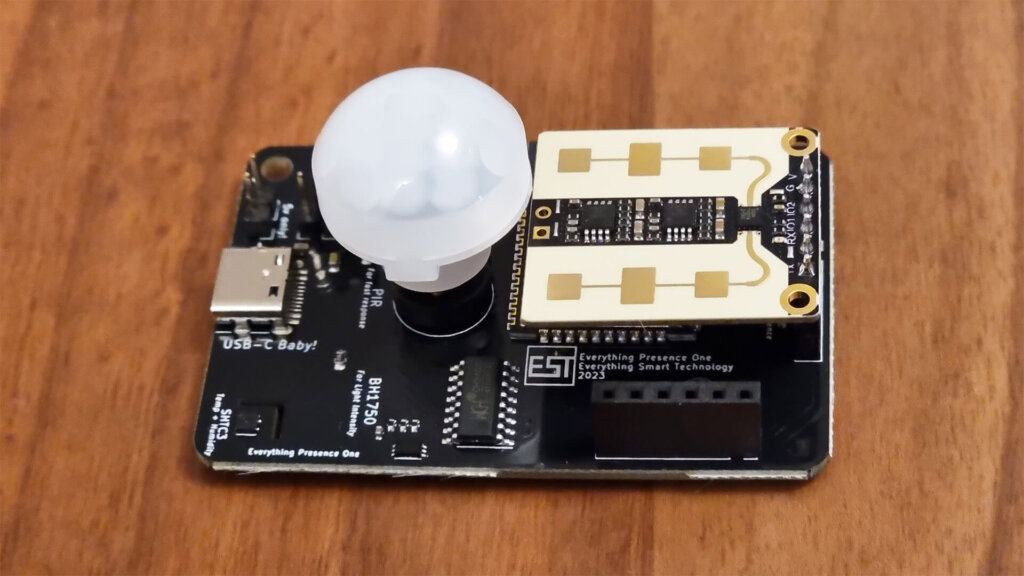
Start with the mmWave presence sensor and slot it in the desired position. The pins of the sensors are really gentle, don’t push too hard or you will bend them or even break them. Make sure the 5V pin of the sensor matches the 5V pin of the board.
Than, add the PIR motion sensor in place. This can only go in one direction, so it’s impossible to slot it wrong. Again be mindful of the pins and don’t bend them sideways.
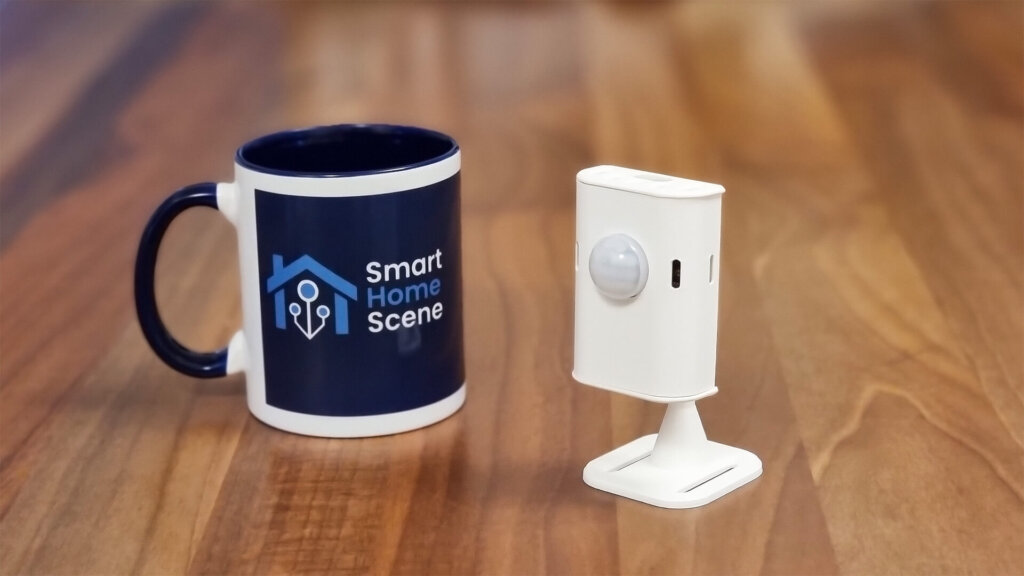
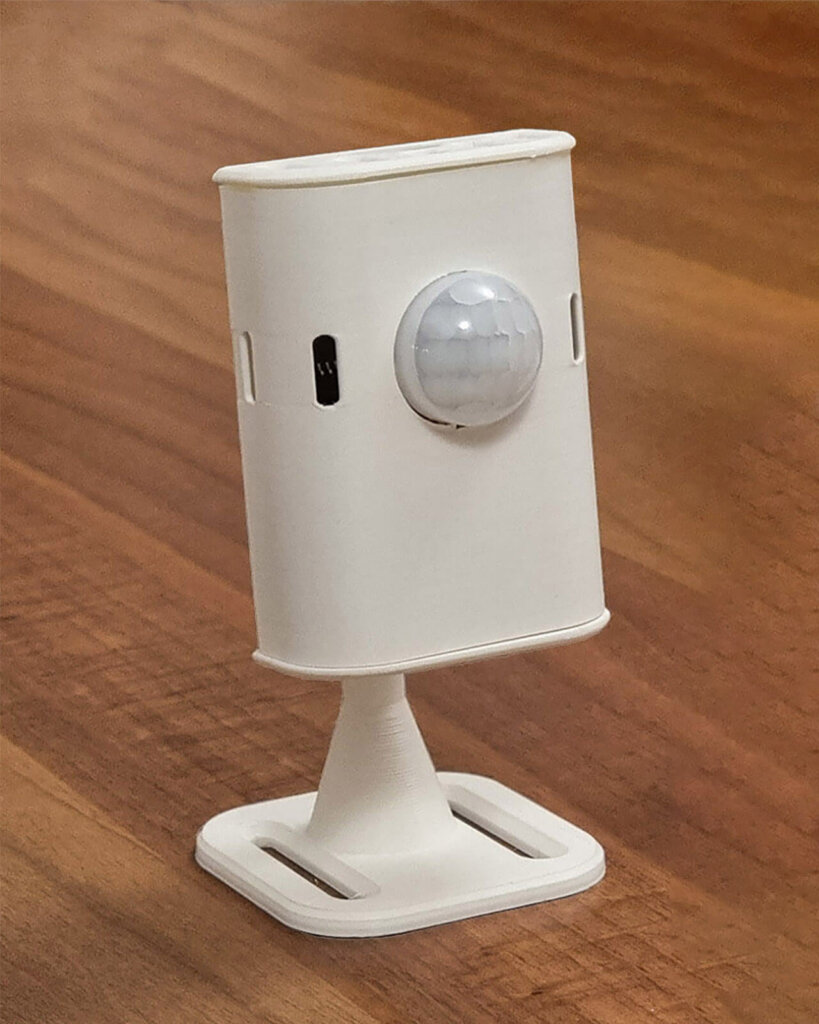
In my package, the case came preassembled but if not, it’s easy to put it together and slot the PCB inside. If you are having trouble, Lewis has put up a detailed assembly guide that you can follow. Once everything is in place, you get a nice looking human presence sensor ready to be added to Home Assistant.
Home Assistant Integration EP1
Before you can add the EP1 to Home Assistant, you need to install it’s latest software. This is done by connecting the EP1 to your PC with a USB-C Data cable, but first you might need to install the latest CH340 driver for the board:
- Download the CH340 driver on your computer
- Extract the file and run the setup.exe for Windows
- Or follow the instruction in the PDF for Mac
- Done
Installation
Once the driver is installed, visit this page of the EP1 repo and click the Connect button in the middle. This will prompt you to select a port to which the device is connected to:
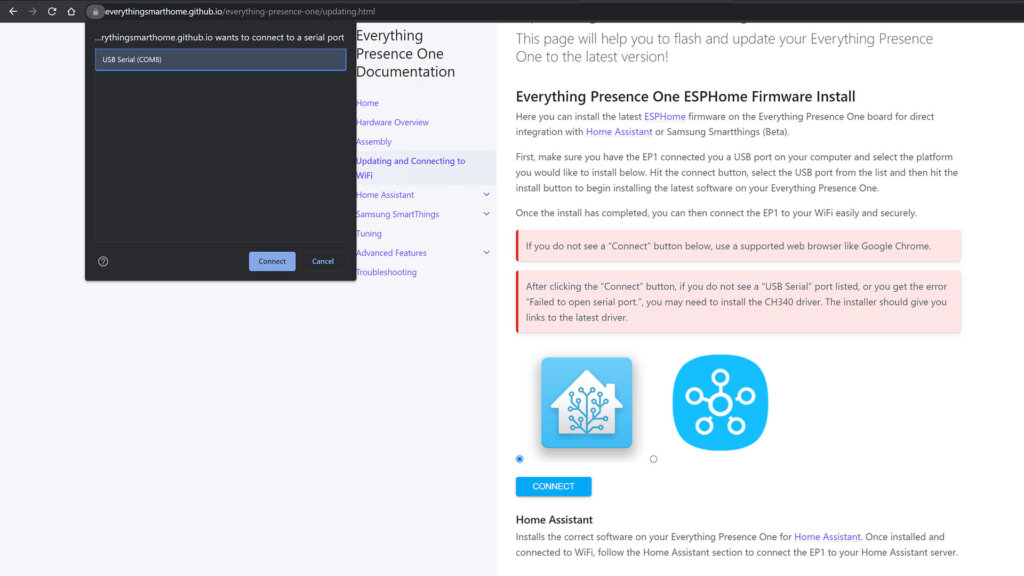
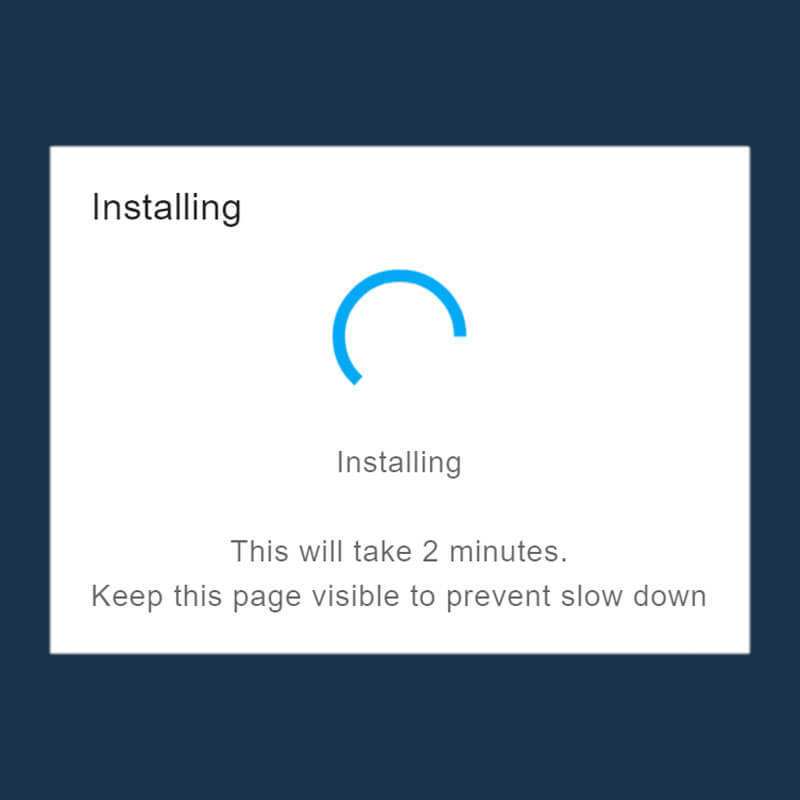
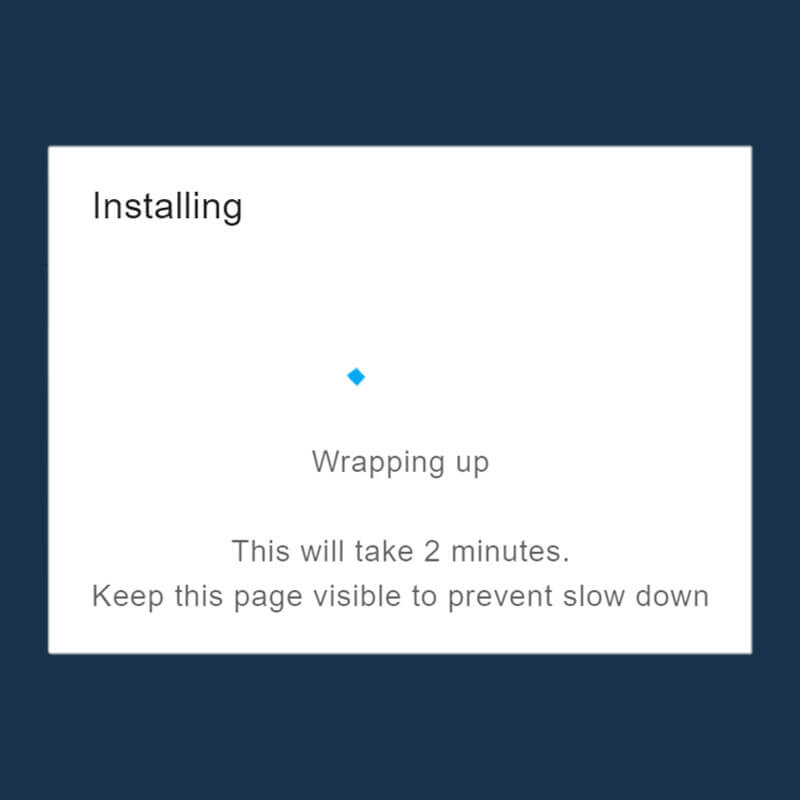
The process will start and guide you through the installation in a simple and intuitive manner:
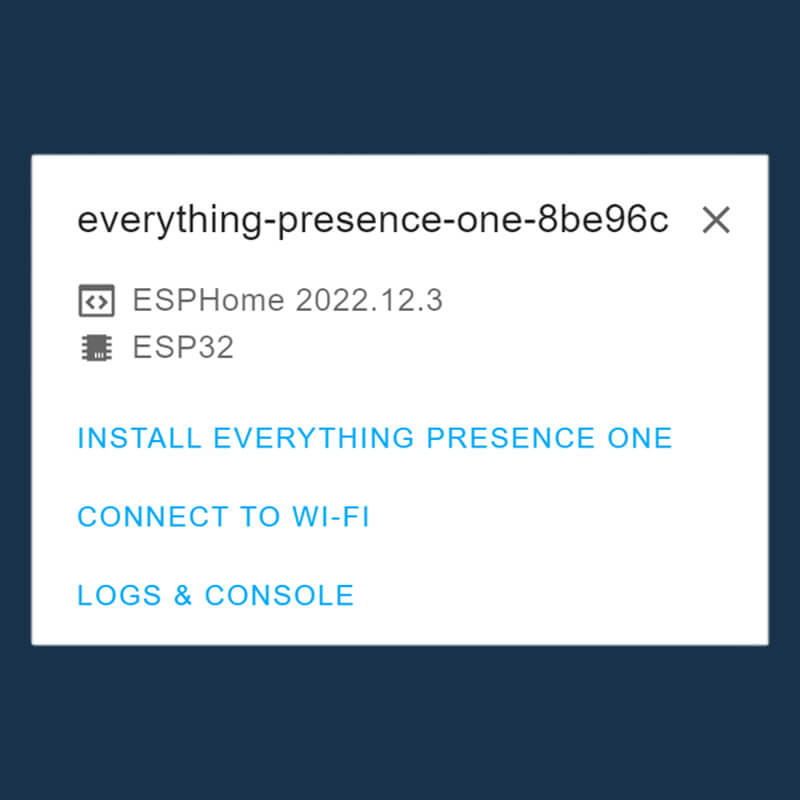


Adding the EP1 to Home Assistant
Once the EP1 is installed, you can click Add to Home Assistant at the final window which will redirect you to your HA Instance and add the device automatically. In any case, the device should be auto-discovered if the EP1 is connected to the same LAN thanks to ESPHome’s mDNS discovery. Simply head to Settings > Devices and Services and hit the Configure button to add it to Home Assistant and that’s it!
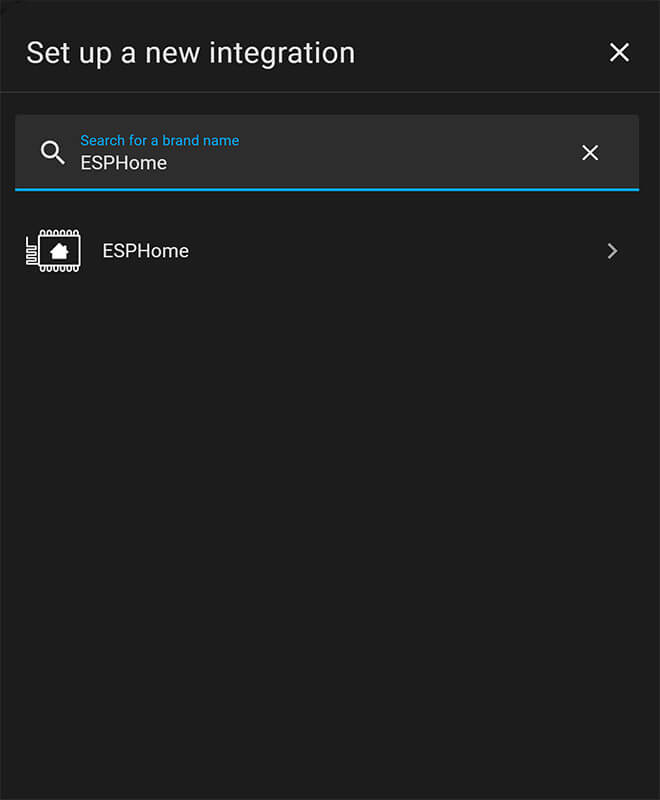
If for some reason Home Assistant doesn’t see the EP1, you can add it manually. First, you will need to find the IP Address of the EP1. You can do this in multiple ways, the most natural being looking it up in your router’s DHCP list. Alternatively, you can use a network scanning tool, like the Advanced IP Scanner app on your phone. Once you find out the IP Address, navigate to Settings > Devices and Services and click + Add Device. Search for ESPHome:
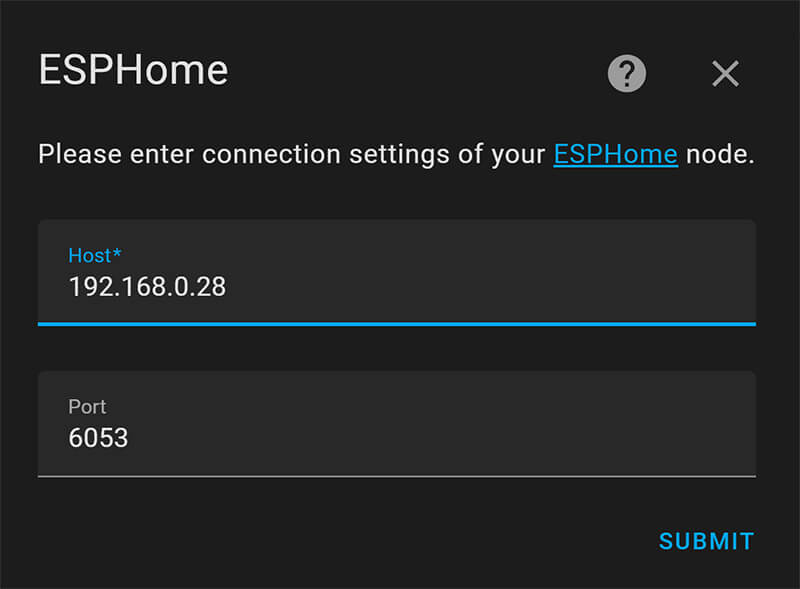
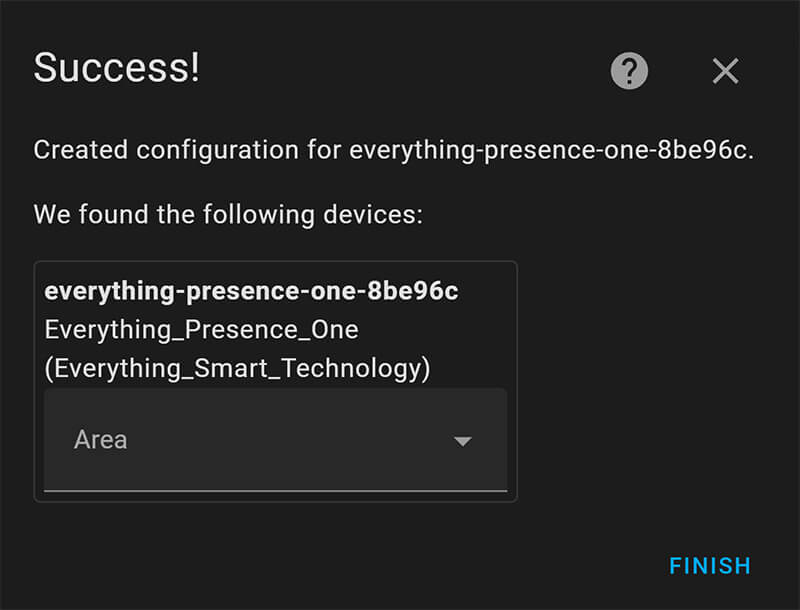
That’s it, you’ve successfully integrated the Everything Presence One (EP1) sensor in Home Assistant!
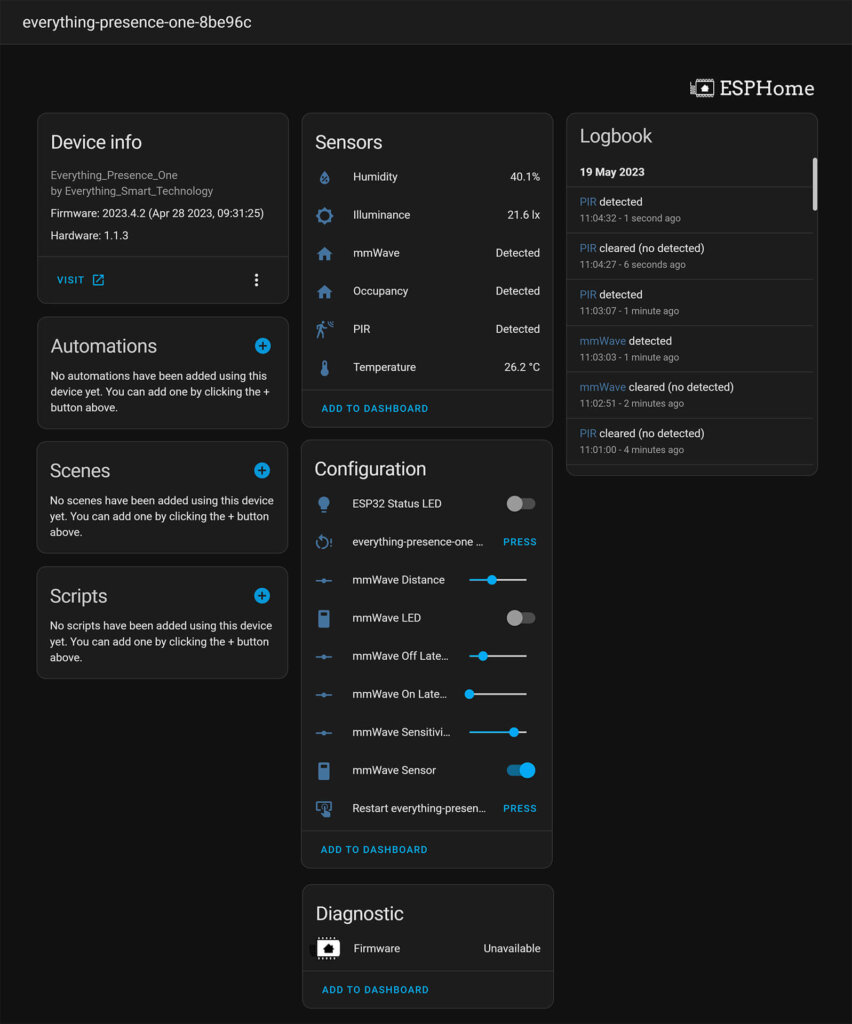
Exposed Entities
The EP1 is a highly versatile human presence sensor, it exposes a bunch of entities to Home Assistant via ESPHome which can help you fine tune and optimize it’s operation. It’s packed with sensors, some of which are useful beyond it’s intended purpose for presence detection.
- Temperature:
- Room Temperature in °C
- Measured by the on-board BH1750 Light Sensor Sensor
- Humidity:
- Room Humidity measured in %
- Measured by the on-board SHTC3 Sensor
- Illuminance:
- Room Illuminance measured in LUX (lx)
- Measured by the on-board BH1750 Light Sensor
- The slits on the side of the case allow light to pass and be measured, make sure they are unobstructed
- mmWave:
- Direct output from the mmWave sensor, indicating if presence is detected
- mmWave On Latency:
- Allows you to define how long motion must be detected for before the sensor will change to “Detected”
- mmWave Off Latency:
- Allows you to define how long motion must be cleared for before the sensor will change to “Clear”
- mmWave Distance:
- Allows you to configure the distance of the sensor
- Minimum of 0m, Maximum 8m
- Sensor sensitivity drops near the maximum distance, it cannot detect tiny movements at 8m reliably
- mmWave Sensitivity:
- Allows you to configure the sensitivity of the sensor
- You can filter out small movements (fans, curtains) by lowering the sensitivity
- Minimum 1, Maximum 9
- PIR:
- Direct output from the PIR sensor, indicating if motion is detected
- Occupancy:
- Combination from both mmWave and PIR sensor
- If either mmWave or PIR detect motion, the Occupancy will stay as detected
- Both mmWave and PIR need to be clear for Occupancy to inherit a Clear state
- ESP32 Status LED:
- Allows you to turn off the ESP board indicator LED
- mMWave Status LED:
- Allows you to turn off the mmWave status LED, which flashes by default when movement is detected
- Restart Everything Presence One:
- Remotely restarts the device
The EP1 will set default values on initialization, but because every room and mounting location will be different, you will need to play around with it’s settings to get optimum results.
Everything Presence One Vs Aqara FP2
The EP1 doesn’t support detection zones like the FP2, so in terms of features this might not be considered a fair comparison. However, the EP1 is still a highly versatile static human presence sensor, so the focus of this review will be comparing presence detection time, presence clear time, false positive/negative triggers and overall performance of the two devices.
Technical Specs EP1 vs FP2
Before diving in actual performance benchmarks, here’s a summary of the technical specs of both devices:
Everything Presence One EP1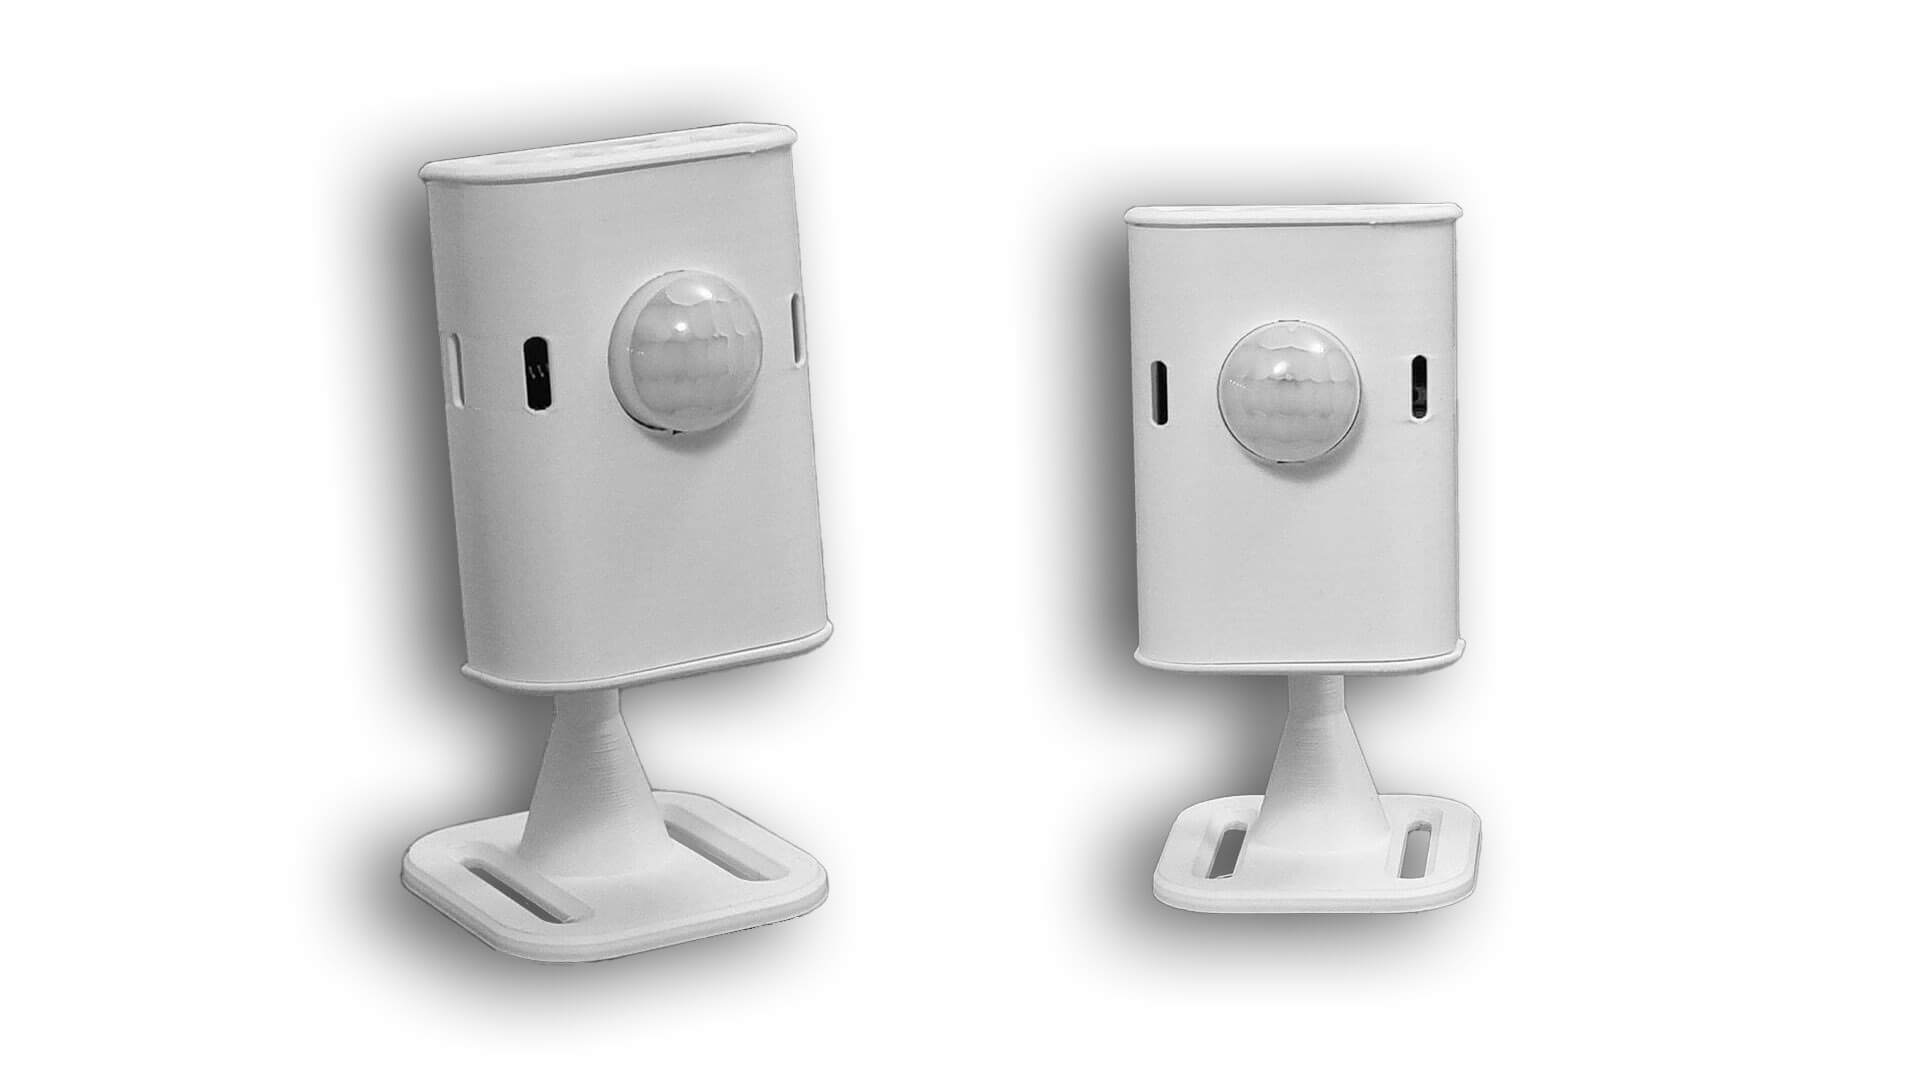
- Connectivity: Wi-Fi 2.4GHz + Bluetooth
- Power Supply: 5V0.5A
- USB Port: USB-C
- Mounting Base: Rotating stand with screw holes and space for a sticker
- Sensor Type: 24GHz mmWave Radar
- Sensor Model: SEN0395
- Sensor Manufacturer: DFRobot
- Detection Angle: 100° (horizontal) 40° (vertical)
- Detection Distance: up to 9m
- Detection Modes: Static presence detection, PIR motion detection
- PIR Sensor Range: 12m
Aqara FP2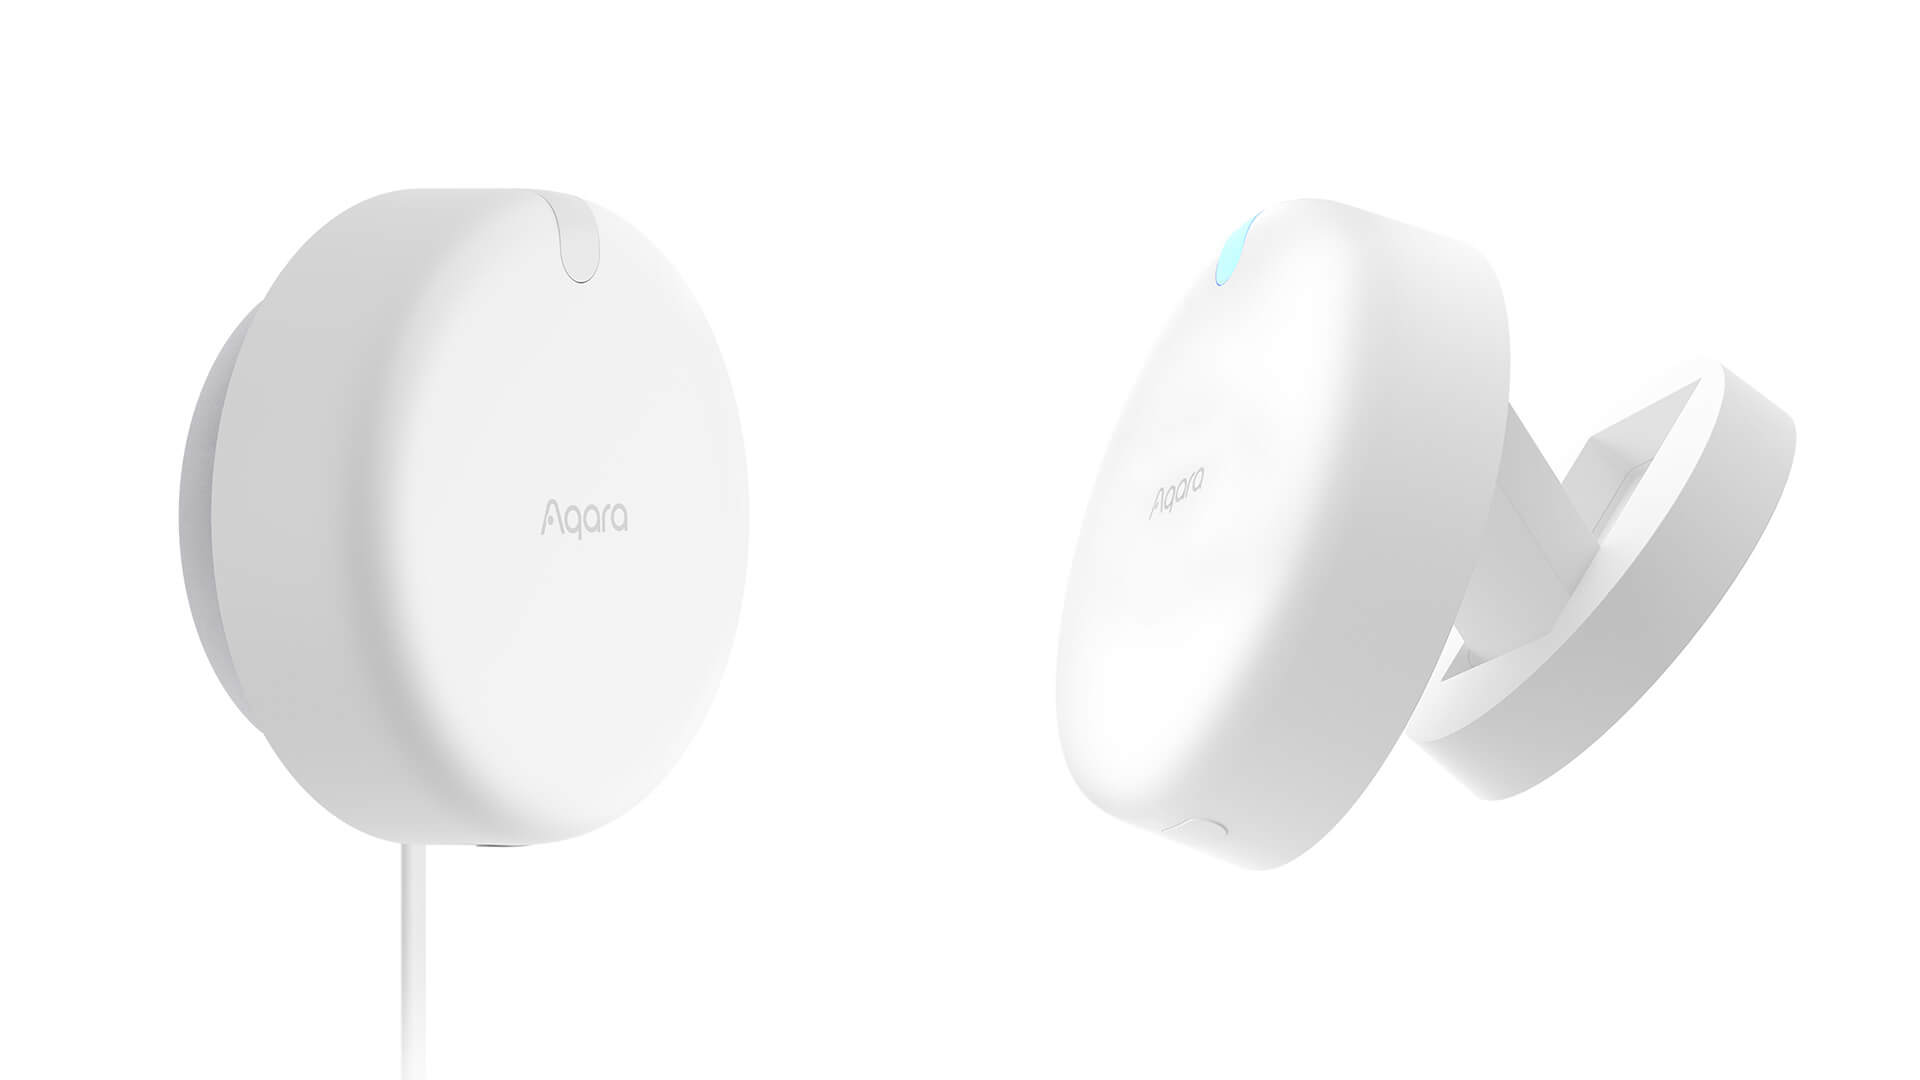
- Connectivity: Wi-Fi 2.4GHz + Bluetooth
- Power Supply: 5V1A
- USB Port: USB-C
- Mounting Base: Non-rotating magnetic swivel with included sticker and screws
- Sensor Type: 60-64GHz mmWave Radar
- Sensor Model: IWR6843
- Sensor Manufacturer: Texas Instruments, USA
- Detection Angle: 120°
- Detection Distance: up to 8m
- Detection Modes: Static presence detection, multiple people tracking, falling detection
Design EP1 vs FP2
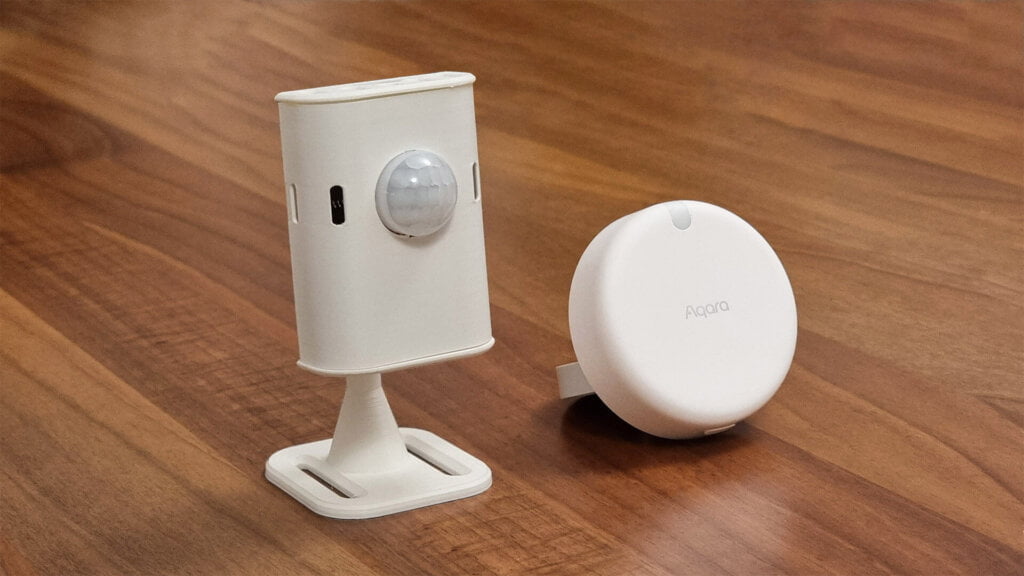
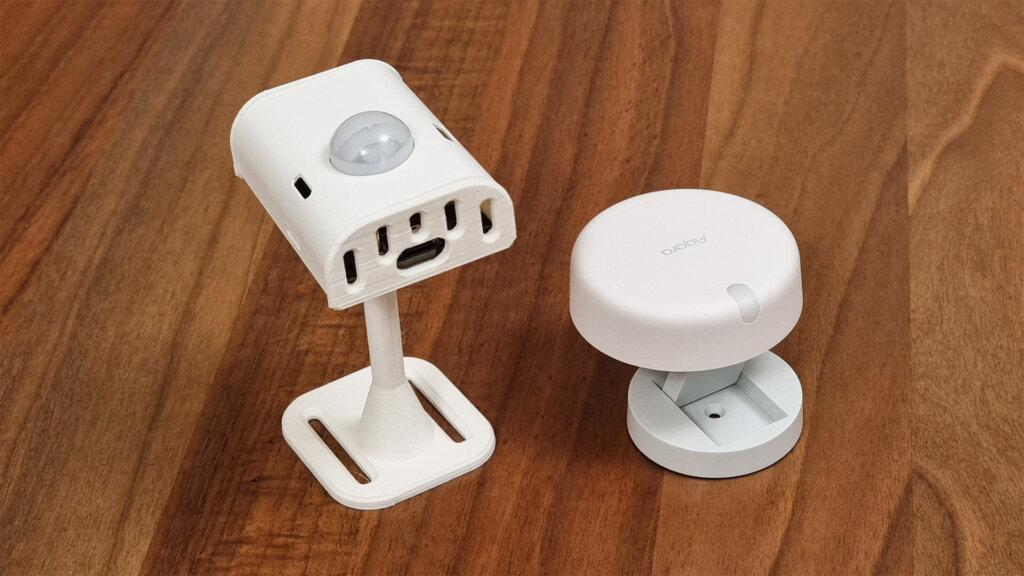
Comparing the design of the two devices is not really fruitful, because it’s a thing of preference. One is designed and mass produced by a global smart home manufacturer (Aqara) while the other is 3D printed from a fellow smart home enthusiast (Lewis @ ESH). However, it’s important to note the differences in size, installation options and installation flexibility.
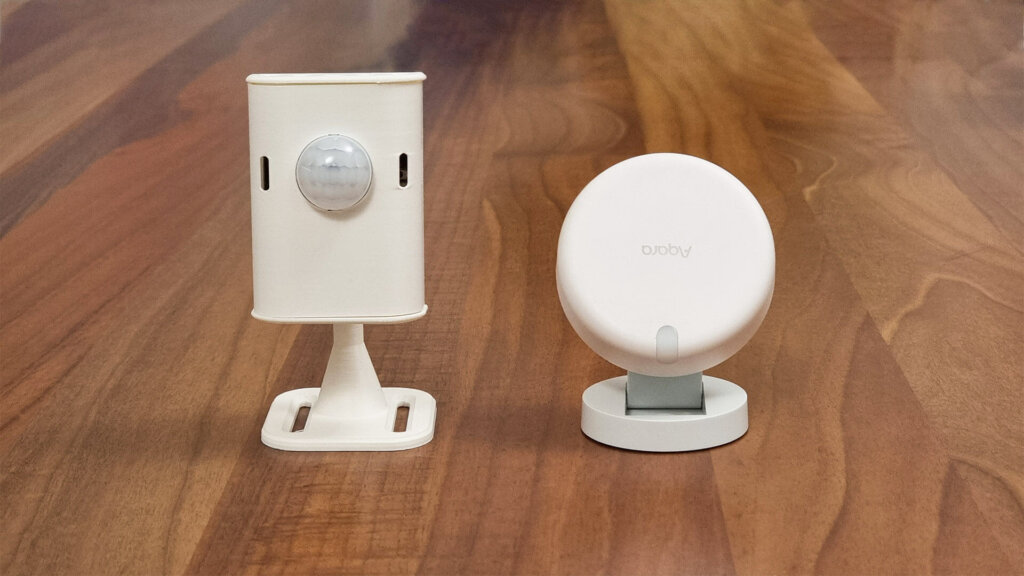
The Everything Presence One is a fair bit larger than the Aqara FP2, because the PCB measures at 62x42mm to accommodate all it’s components. It also has a rectangular shape design, mounted on a pretty long leg stand. The FP2 on the other hand, is completely round with a magnetic base for installation.
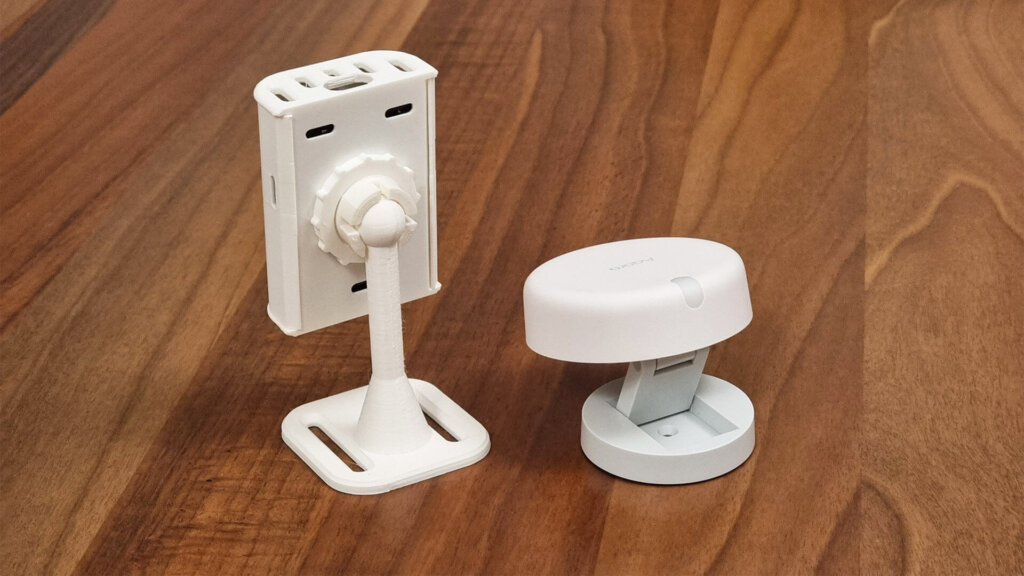
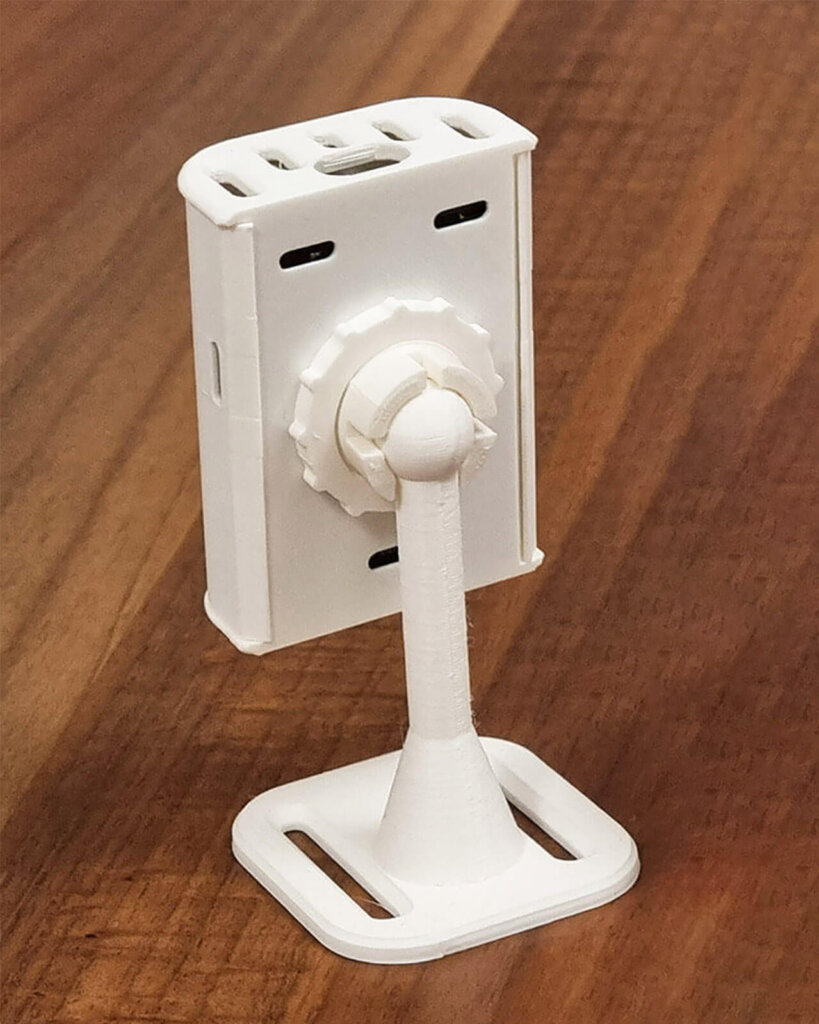
The stand of the EP1 rotates completely and allows for a versatile mounting installation. Two slits on the base give you flexibility when installing the device with screws on a wall, bookshelf and gives you enough flat surface for simply using a sticker.
The FP2’s base does not swivel like the EP1, but I don’t feel like you are limited by this in any way. There is an option in the app that allows you to select the installation position (upright or upside down). The only downside being that Aqara’s logo will be inverted if you go for the latter.
The USB-C port of the EP1 comes out the top or bottom of it’s case, depending how you turn it, so some cable management will be needed in order to hide it completely out of sight. The port of the FP2 tucks underneath it’s base, hidden completely when installed in place.
The EP1 also has various holes all around it’s body, which let light and air protrude and reach the on-board illuminance and temperature sensors. The front one is used as a window for the indicator LED of the ESP32 board, notifying you about presence event changes.
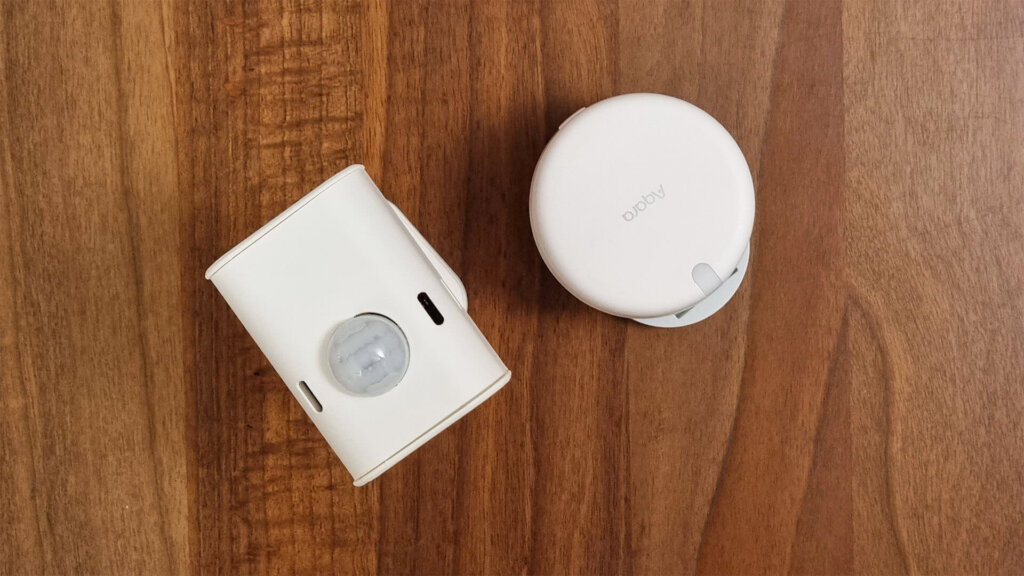
The Aqara FP2 feels like the more compact device, which is objectively true. Again, this device is the works of a giant manufacturer so it’s expected. The EP1 on the other hand, feels lighter and more DIY-like. Which is perfectly understandable, Lewis did an excellent job of fashioning a case for his presence sensor.
It’s important to mention that you can print the EP1 case for free if you have a 3D printer. Lewis shared his design on Printables, which is in the nature of the open source smart home and I respect it.
I installed both sensors in a corner in my living room, overlooking my living area and conducted some tests. Both are connected to Home Assistant locally.
Presence Detection Speed EP1 vs FP2
To benchmark presence detection speed, I tested by entering the room from different entry points and recorded the results in Home Assistant. For the FP2, I created a Zone of the full room which is exposed as a separate entity. I used the following setting for the EP1 and FP2:
EP1 Settings (Home Assistant)
- mmWave Sensitivity: 9 (max)
- mmWave Distance: 750cm
- mmWave ON Latency: 0 (fastest)
FP2 Settings (Aqara Home App)
- Proximity Sensing Distance: Far
- Proximity Detection Sensitivity: High
- Detection Mode: Undirected
Test A1: Kitchen
Entering from the kitchen area, on the left side of the sensors, at a distance of around 4 meters: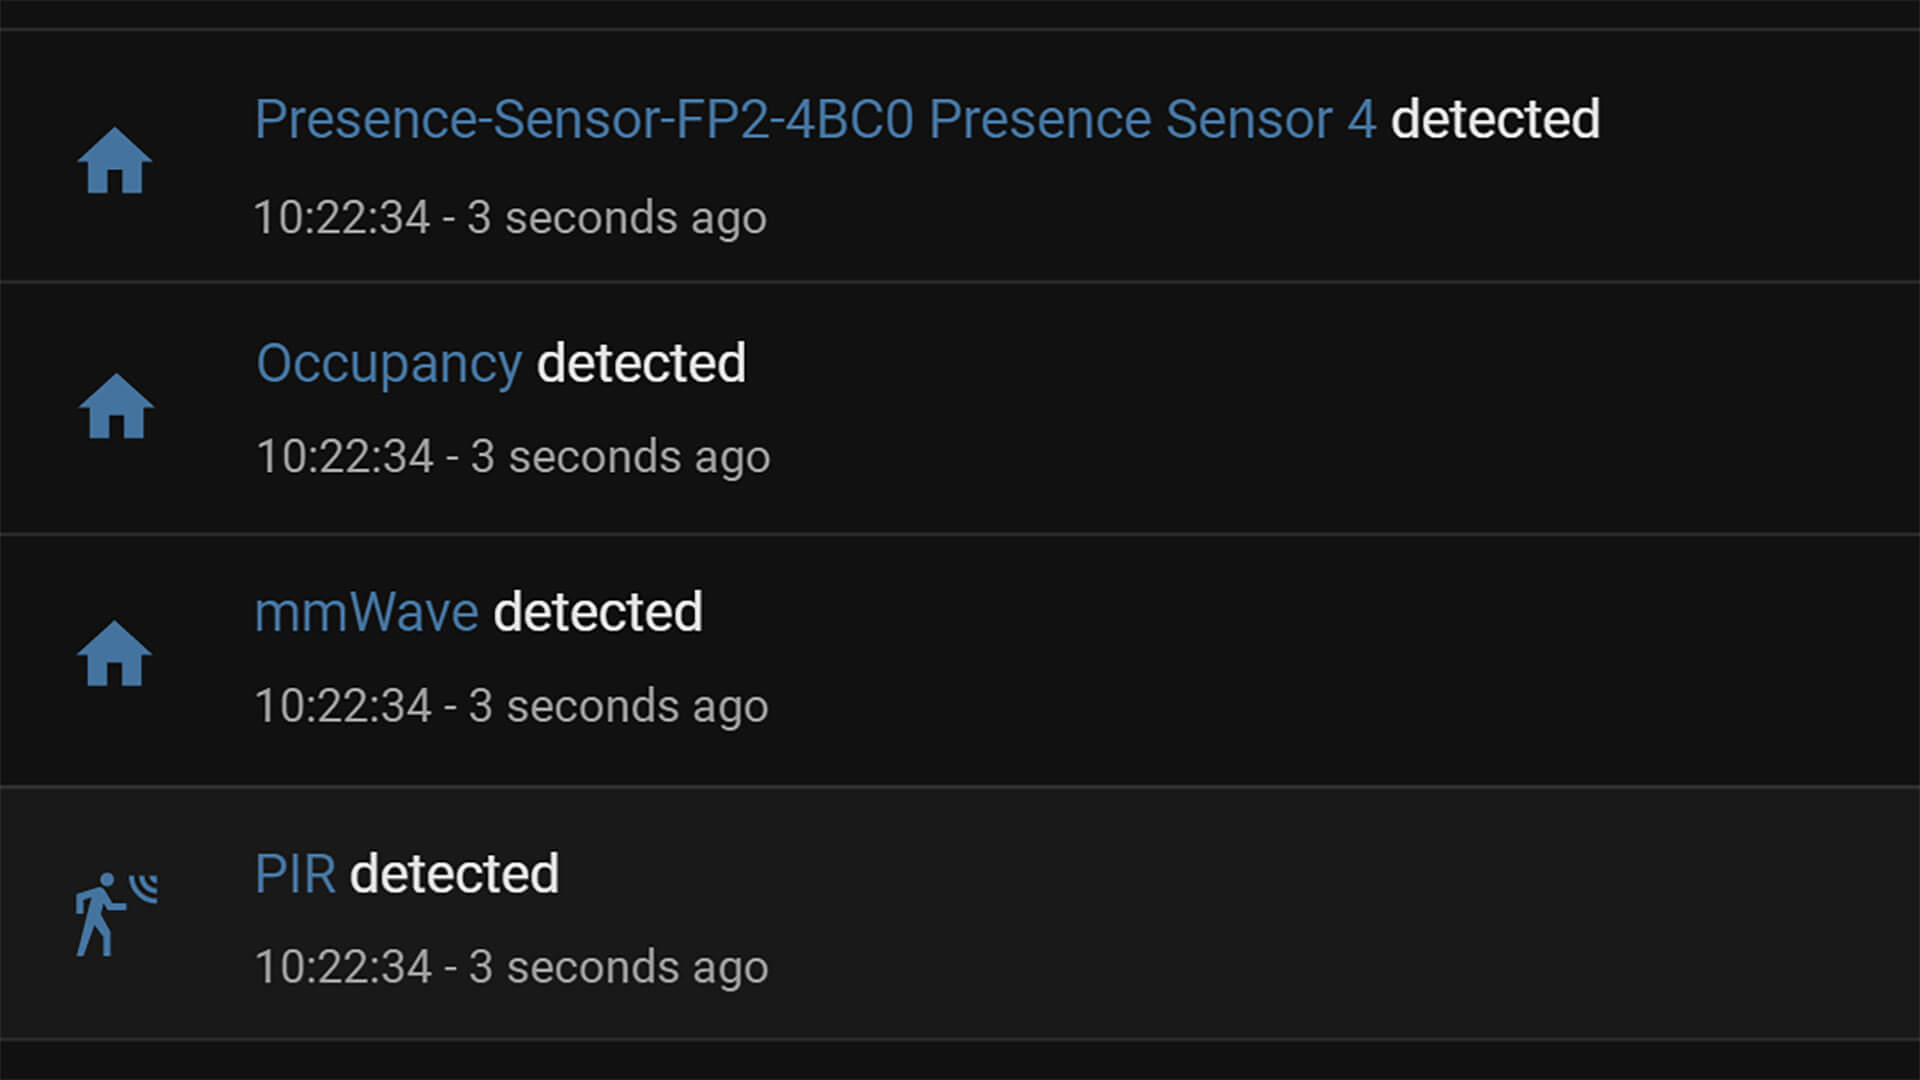
- First Entity: EP1 PIR Entity
- Second Entity: EP1 mmWave Entity
- Third Entity: EP1 Occupancy Entity
- Forth Entity: FP2 Presence Entity
With the sensitivity to 9, the EP1 was the first to log a “detected” status. mmWave changed state to detected immediately too, because of the ON latency being set to 0 (instant). The FP2 clocked in at the same second, offset by less than half a second. A near identical result at the 4m test, coming in from the left side of the sensors.
Test A2: Terrace
Entering from the terrace door, on the right side of the sensors, at a distance of around 5 meters:
- First Entity: EP1 mmWave Entity
- Second Entity: EP1 Occupancy Entity
- Third Entity: EP1 PIR Entity
- Forth Entity: FP2 Presence Entity
In the second test with the same settings, the mmWave entity of the EP1 was logged first, which immediately updated the Occupancy entity. Interestingly, the PIR entity was logged third, albeit in the same second. Aqara’s presence entity was logged last, coming in half a second late.
Test A3: Hallway
Entering from hallway, directly in line with the sensors, at a distance of around 7 meters: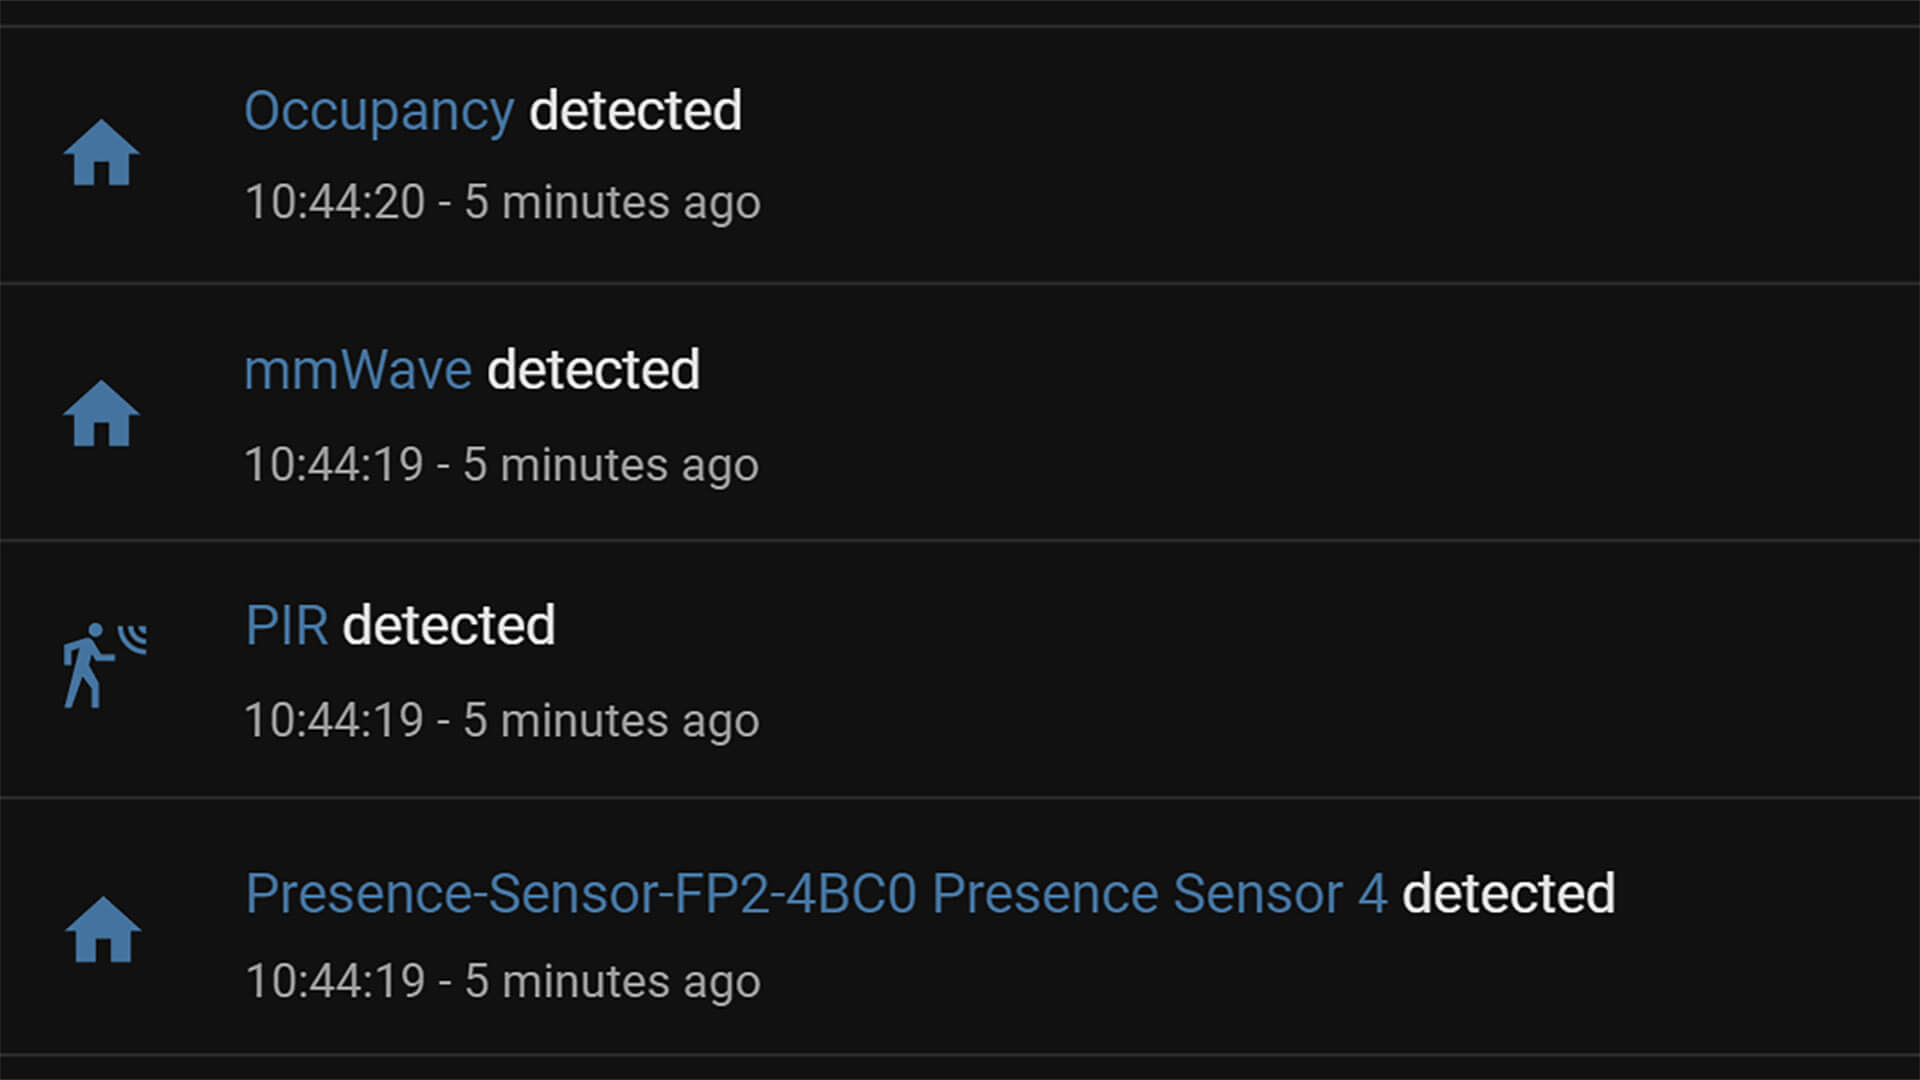
- First Entity: FP2 Presence Entity
- Second Entity: EP1 PIR Entity
- Third Entity: EP1 mmWave Entity
- Forth Entity: EP1 Occupancy Entity
In the last test at 7 meters, the FP2 presence entity clocked in first followed closely by the PIR and mmWave sensors of the EP1. The Occupancy was updated a second later, a very close result with no clear winner.
Presence Clearance Speed EP1 vs FP2
To benchmark presence clear speed, you really only need one test provided you have eliminated any false triggers in the room. I got the following clear times when I left the room:
Test B: Exit Room
Left the room through the hallway, in line with the sensors field of vision: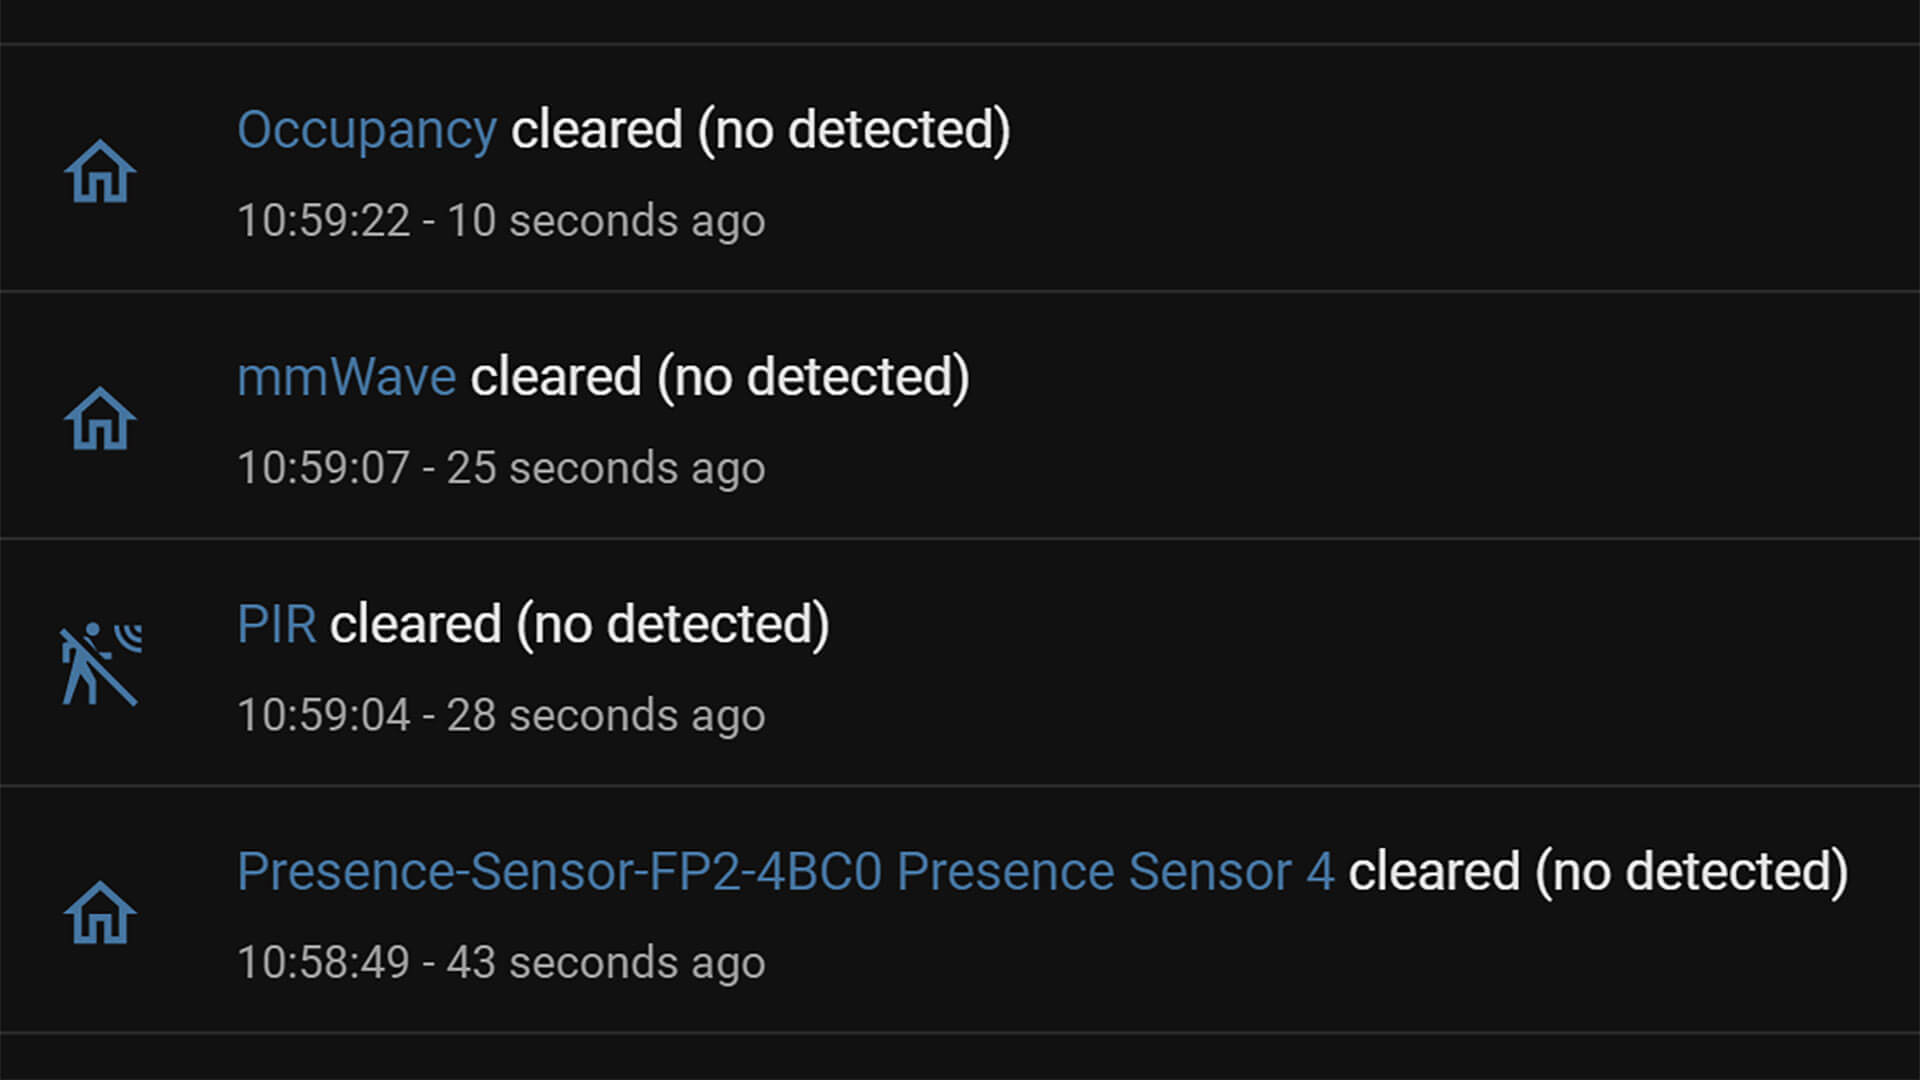
- First Entity: FP2 Presence Entity
- Second Entity: EP1 PIR Entity
- Third Entity: EP1 mmWave Entity
- Forth Entity: EP1 Occupancy Entity
The first entity to clear presence is Aqara’s FP2 presence sensor. About 15 seconds later, the PIR sensor of the EP1 clocked in, 3 seconds later the mmWave did and finally the Occupancy entity with a 33 seconds difference from the FP2.
It’s worth noting, the detection clear times of the occupancy, mmWave and PIR variables can be further lowered down by editing the code in ESPHome, achieving better clearance times than the default setting of the FP2.
False Triggers EP1 vs FP2
When reviewing mmWave-based presence sensors, I’ve mentioned many times that false triggers are a factor and extensive testing of your environment is needed to get optimum results. This often includes repositioning the device, dealing with moving objects like fans, curtains and tweaking it’s settings. The same goes both for the EP1 and FP2, but there are some differences that need to be noted.
First and foremost, it’s important to remember that at this point the FP2 can only be tweaked when using the official Aqara Home app. None of it’s settings can be adjusted in Home Assistant, as it’s only integrated through the HomeKit Controller Integration. You can read more about this in my detailed review.
On the other hand, each and every tweakable parameter of the EP1 can be adjusted in Home Assistant which makes things much easier and is in the nature of a “locally controlled smart home”. Lewis knows the importance of this factor among the community, so he made everything readily available for fine-tuning.
As a short summary, I got false positive triggers by both devices. My home currently has very lightweight curtains on all windows in the living area, so the slightest breeze makes them dangle and create shadows which mmWave detects. I have had this problem with the FP1 too, and was only able to solve it by steering away the device from the windows. You are only going to solve false positive trigger by continuous trial-and-error and playing around with the sensitivity, range and latency settings.
The EP1 however, is more versatile than the FP2 in handling positive triggers by utilizing it’s different entities in your automations. For example, you can trigger the lights with the PIR motion sensor entity and keep them on with the mmWave or Occupancy entity.
False negative triggers were non existent for me, their sensors are incredibly sensitive. My living area is around 5×6 meters, so both devices were able to detect me laying down or watching TV calmly.
Summary
When the first mmWave-based sensors appeared on the Smart Home market, like the Aqara FP1 or Tuya ZY-M100, they were unusable as triggers in automations because of their slow detection times. It took upwards of 1 second, sometimes even more for them to change state to “Detected”, which was not fast enough to beat traditional motion sensors (PIR).
Lewis did a great job with the EP1, identifying this drawback in the first gen presence sensors. He paired the EP1 with a powerful PIR motion sensor, so you get the best of both worlds: fast motion detection and accurate static presence detection. On top of that, he installed an illuminance and temperature & humidity sensors on the board, making this gadget an interesting multi-sensor device.
The EP1 has a DIY-like feel to it, especially highlighted by the fact that you can print the case yourself. Assembling the components is very easy and if you are tinkerer, a satisfying feeling. Whether or not this is something that’s up your alley, you need to decide for yourself.
In comparing the EP1 to Aqara’s FP2, I could not decide for certain which one is the more capable static human presence sensor. In each test, they clocked in at the same second, making them almost identical as far as presence detection speed goes. The FP2 was faster by around 30 seconds in clearing presence though, so it might be able to save you a few bucks by turning the lights off earlier.
Regarding static human presence in a room, they both performed similarly with no clear winner. I suffered false positive triggers on both devices from my curtains, until I turned them to face the other direction. This is something that you will need to optimize yourself, as it’s largely dependent on your installation area/room.
In any case, I would like to remind everyone about the fact that Lewis is a Smart Home enthusiast just like any of us, sharing his knowledge freely with the community on his YouTube channel ever since 2020. It is my personal precedence to support a fellow Home Automation tinkerer instead of some corporate manufacturer that doesn’t care about it’s end users.
If you share my point of view, you can support Lewis by subscribing to his YouTube channel, following him on Twitter or perhaps supporting him on Patreon.
You can get the Everything Presence One EP1 Full Kit (Board, PIR, mmWave) for $77 from the ESH Store, the case is sold separately for $9. If detection zones are something that you want to utilize, you can get the Aqara FP2 instead, but I do recommend you read the full review first.


I’ve got both devices, but haven’t plugged in my FP2 yet. I installed my EP1 in my living room and at first I got plenty of false positives, likely from light weight curtains as well. For me I solved it by adding a 0.5s delay for the mmWave on and it solved it completely. The PIR is still there for fast detection and even that 0.5s, at least for my current automations, is completely acceptable. I haven’t had any false positives since. Obviously YMMV.
Just a small correction – the EP1 case was designed by John at The 3D Room: https://the3droom.co.uk
Excellant review of both models Thx 4 sharing 9n the interneet..