Those of us who follow home automation product manufacturers and brands have most likely heard of SwitchBot, a Hong Kong-based company with offices in the US, UK & Canada. It’s a well known brand among smart home enthusiasts, named after their recognizable finger bot: a mechanical switch bot used to automate dumb switches and buttons in your home.
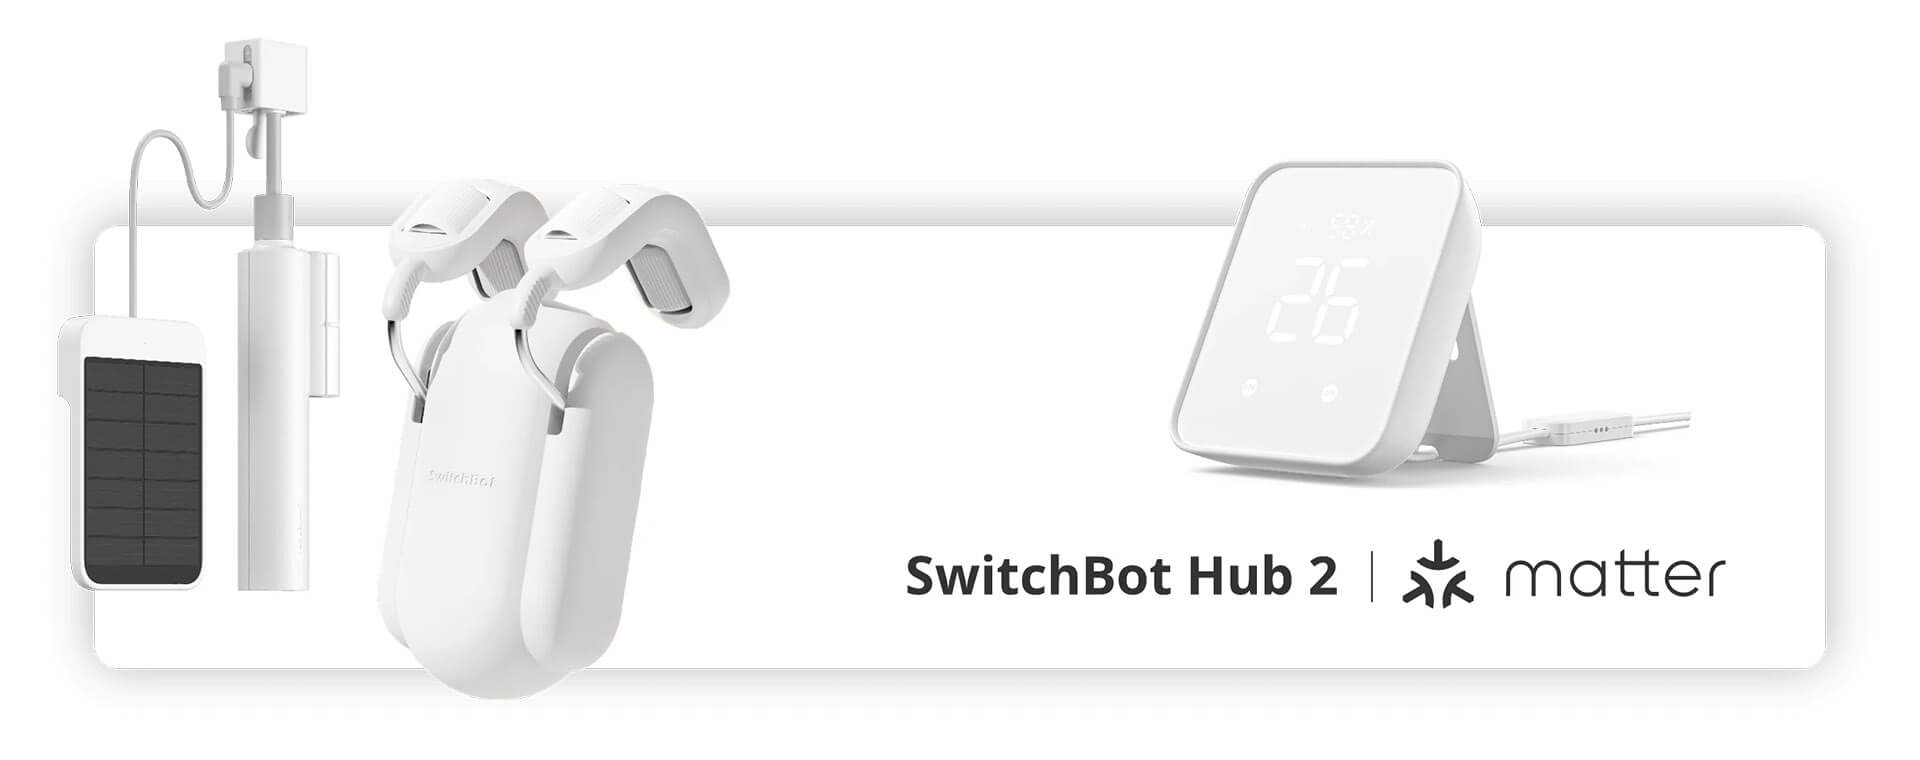
They recently announced they are making the jump to Matter, and much like Xiaomi’s Aqara, SwitchBot is going to bridge the gap with a firmware update pushed to their Hub 2, bringing their product range to Matter controllers like HomeKit and Google Home. The first two products which would become Matter-compatible are the SwitchBot Lock and SwitchBot Curtain Bot.
In this review, I’m going to test their existing ecosystem and deployment process, talk about some pros and cons and integrate the devices in Home Assistant. The SwitchBot Blind Tilt will not be included in this article, as it’s a significantly more complex device which requires a more involved setup. I will publish a separate post for that one.
FULL DISCLOSURE: SwitchBot sent me this product package for the purpose of reviewing some of their smart devices. This will in no way affect, sway or influence my opinion of their products and will be just my honest review as usual. I underlined this in the first e-mail I sent to their PR person, to which they replied they are confident in their products and have no issues with my approach.
If you decide you want to try out SwitchBot’s Products, you can use our discount code 10HOMESCENE for 10% OFF on Amazon Store and 15HOMESCENE for 15% OFF on the SwitchBot Official Store:
SwitchBot Smart Home Products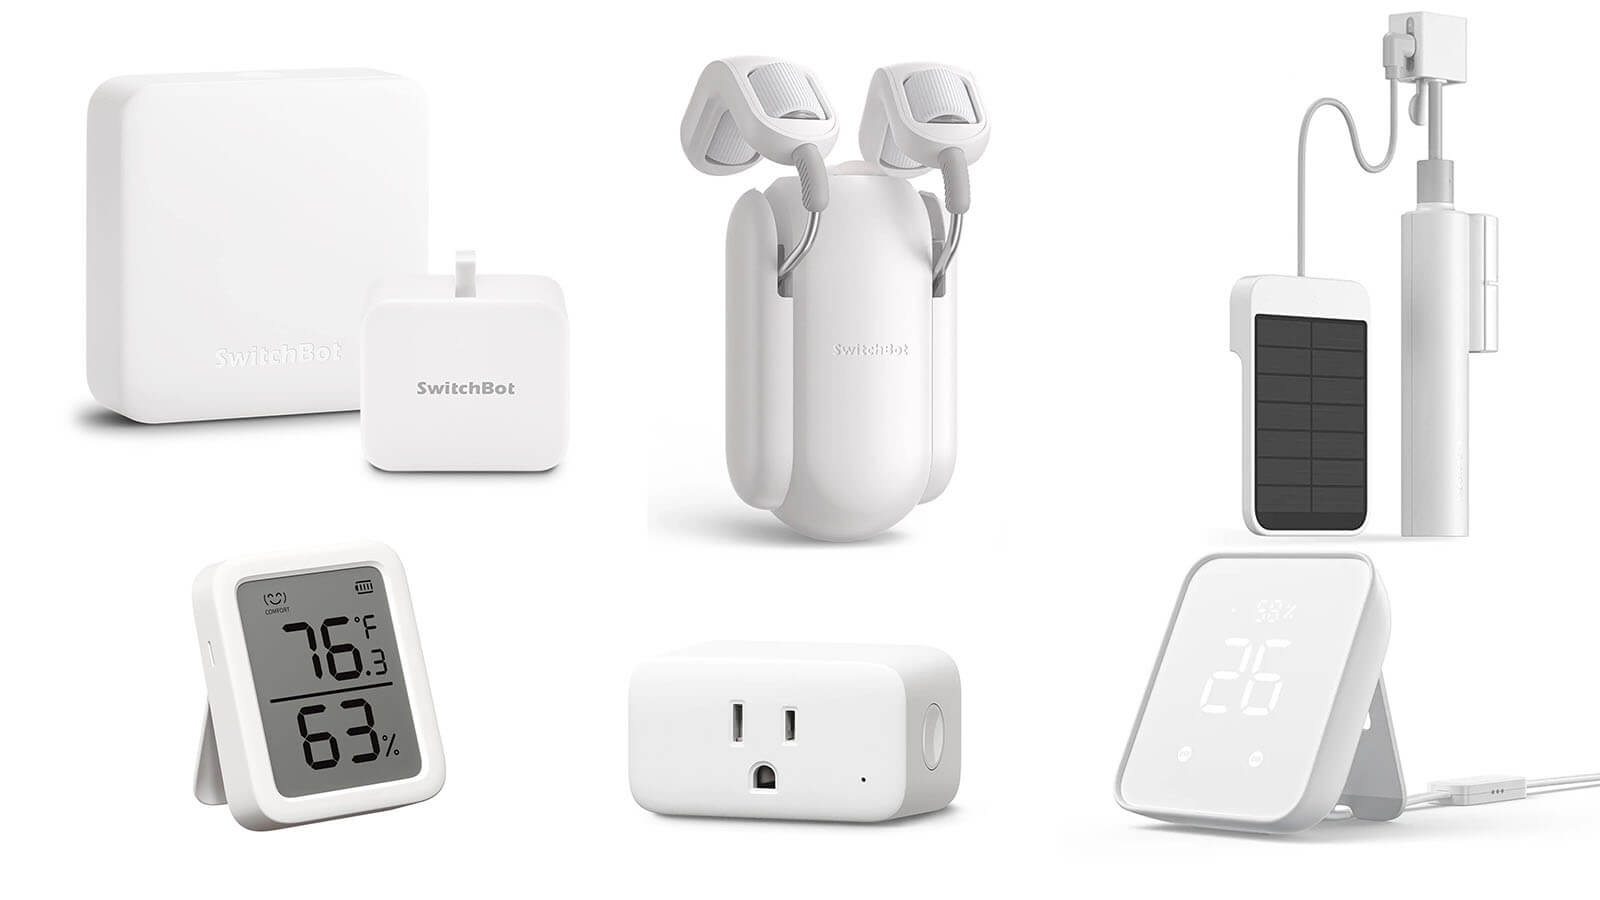
Amazon Store: 10HOMESCENE for 10% OFF
SwitchBot Store: 15HOMESCENE for 15% OFF
SWITCHBOT OFFICIAL STORE
Hub Mini | Hub 2 (Matter) | Plug Mini (HomeKit)
Bot | Meter Plus | Remote | Blind Tilt | Curtain![]()
United States | Canada | United Kingdom
Germany | Netherlands | Sweden | Spain
France | Italy | Poland | Australia
*If links fail to open, try disabling your AdBlocker.
SwitchBot Hub Mini
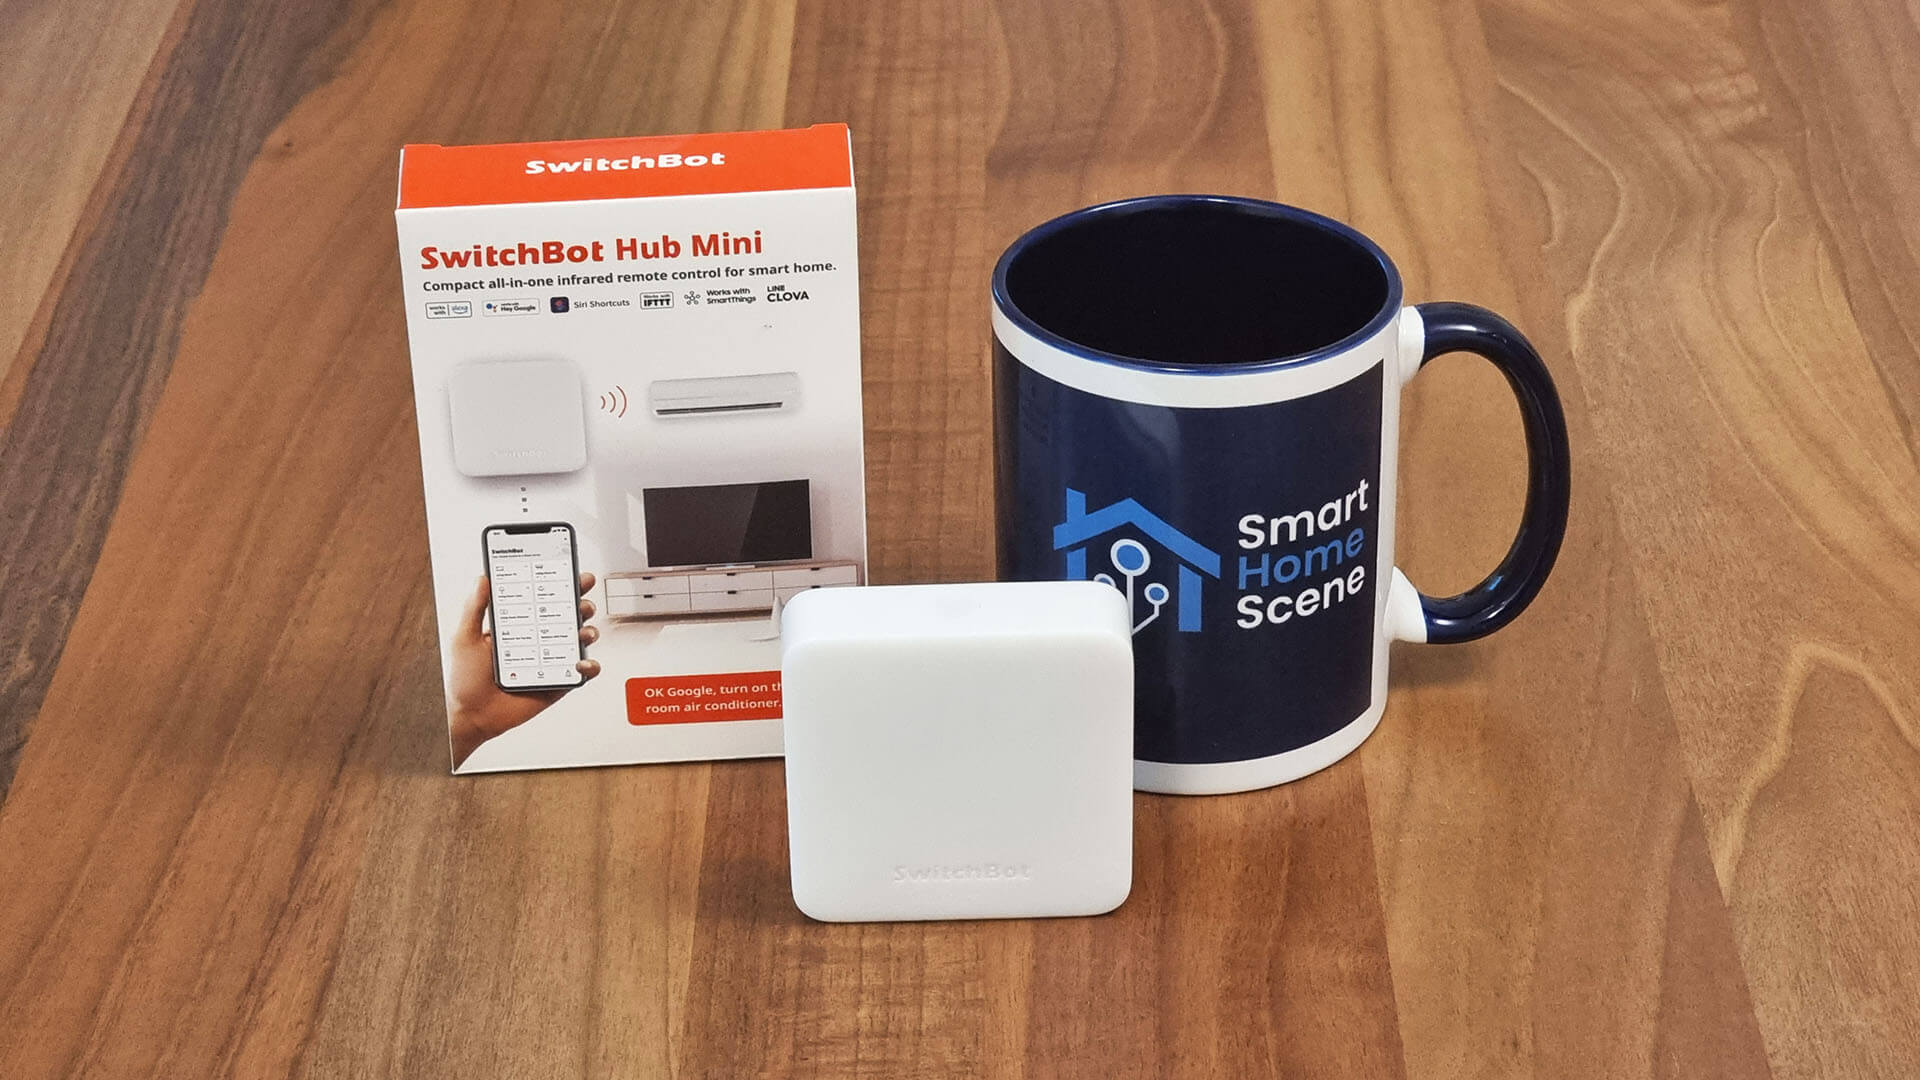
If you don’t use Home Assistant, you are going to need one of SwitchBot’s smart hubs to control and deploy their devices. The Hub Mini is a multipurpose bridge used to onboard their product range by using the SwitchBot App on your phone. For now, SwitchBot has not announced Matter support for this mini version of their hub, just the Hub 2.
Technical Specification
- Color: Black/White
- Color: Black/White
- Material: Semi-transparent ABS Plastic
- Size: 65x65x20mm (2.6x26x0.8″)
- Weight: 36g (1.3oz.)
- Input: DC 5V1A
- Operating Temperature: -10°C-60°C (14°F-140°F)
- Operating Humidity: 5-95% RH
- Wi-Fi: 802.11 b/g/n 2.4GHz
- Bluetooth: 4.2 or later
- Infrared Blaster: Up to 30m within sight
Disassembly
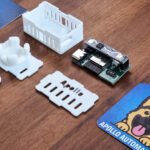
The Hub Mini comes in a neat package box containing the hub itself, a manual, a mounting sticker and a 1 meter long USB-A to Micro-USB cable. No adapter in included, you need to provide 5V1A to power the device.
The Hub is very small and feels incredibly light when held, which is a plus for installing it with the sticker to act as an IR blaster.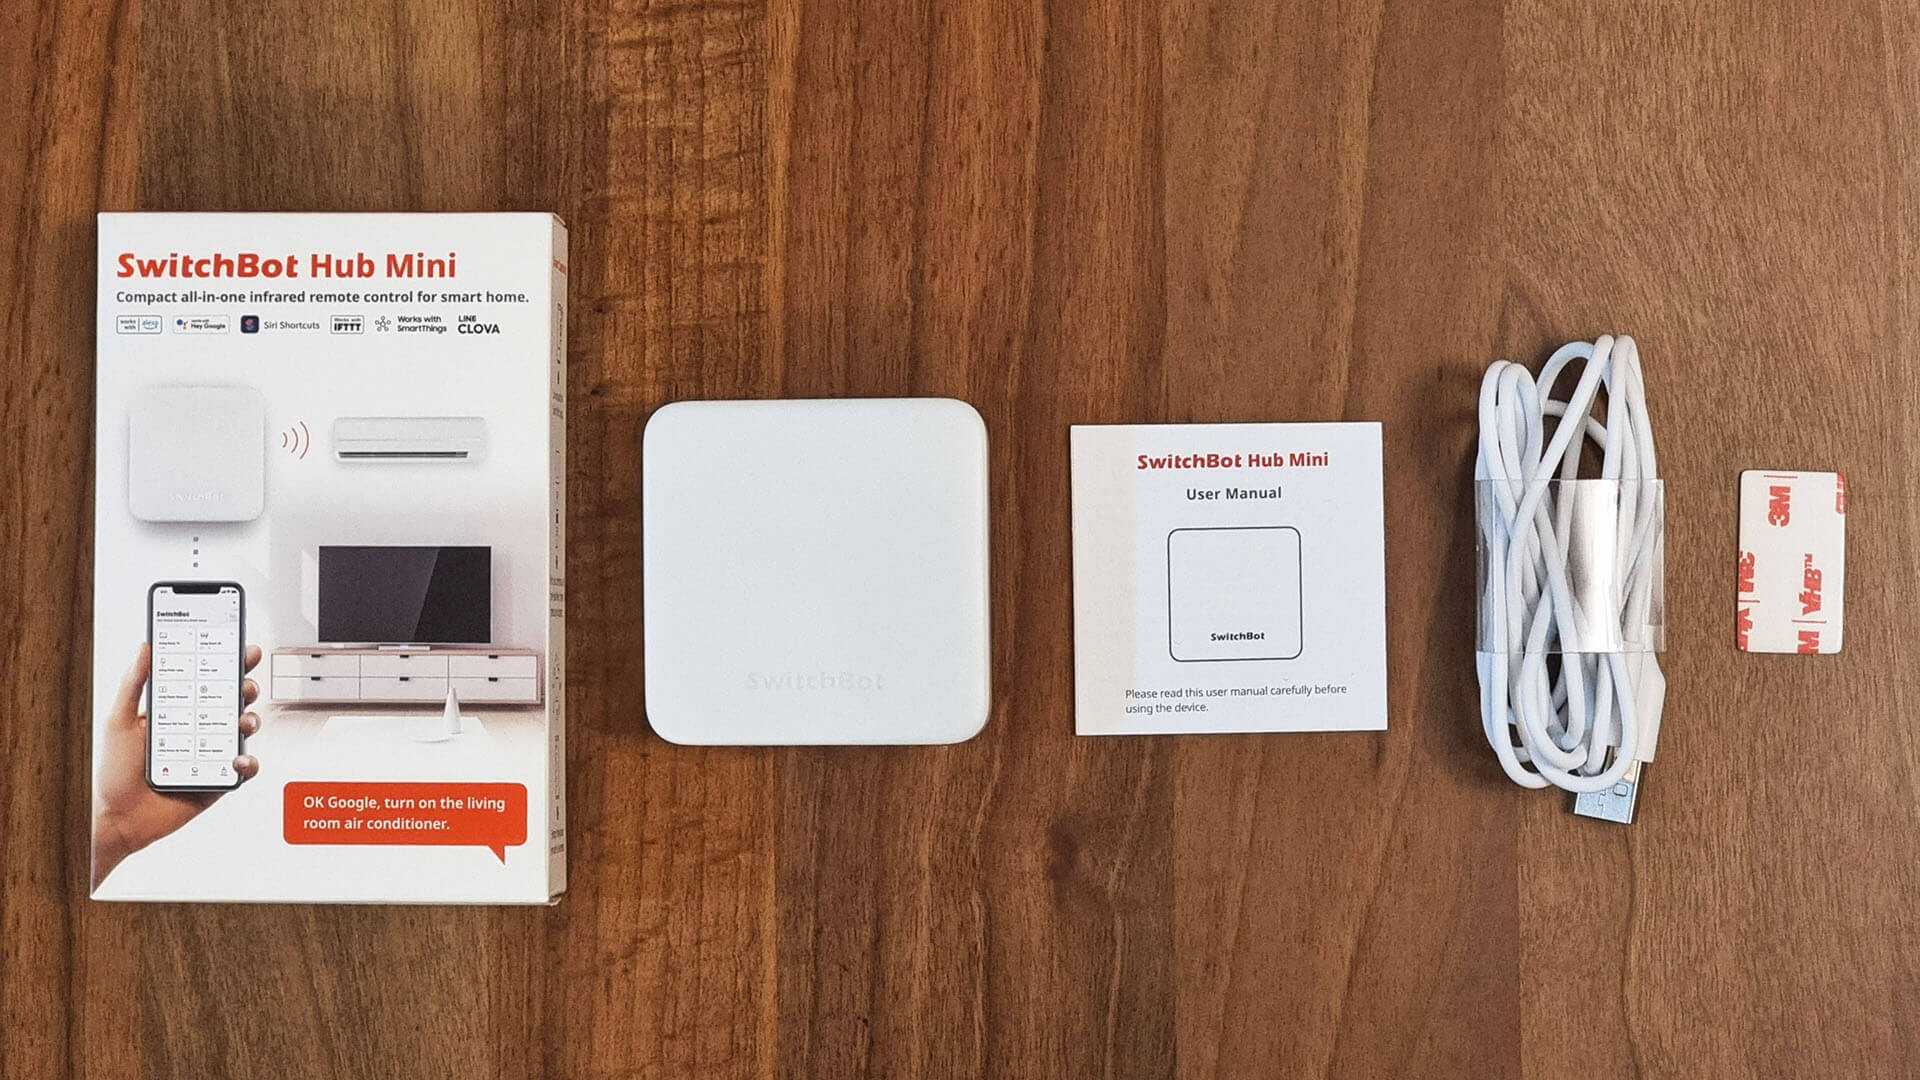
Opening up the Hub Mini, reveals a bright white PCB containing all the components that drive this device. The PCB is very neat and clean and gives me “professionally done” vibe.
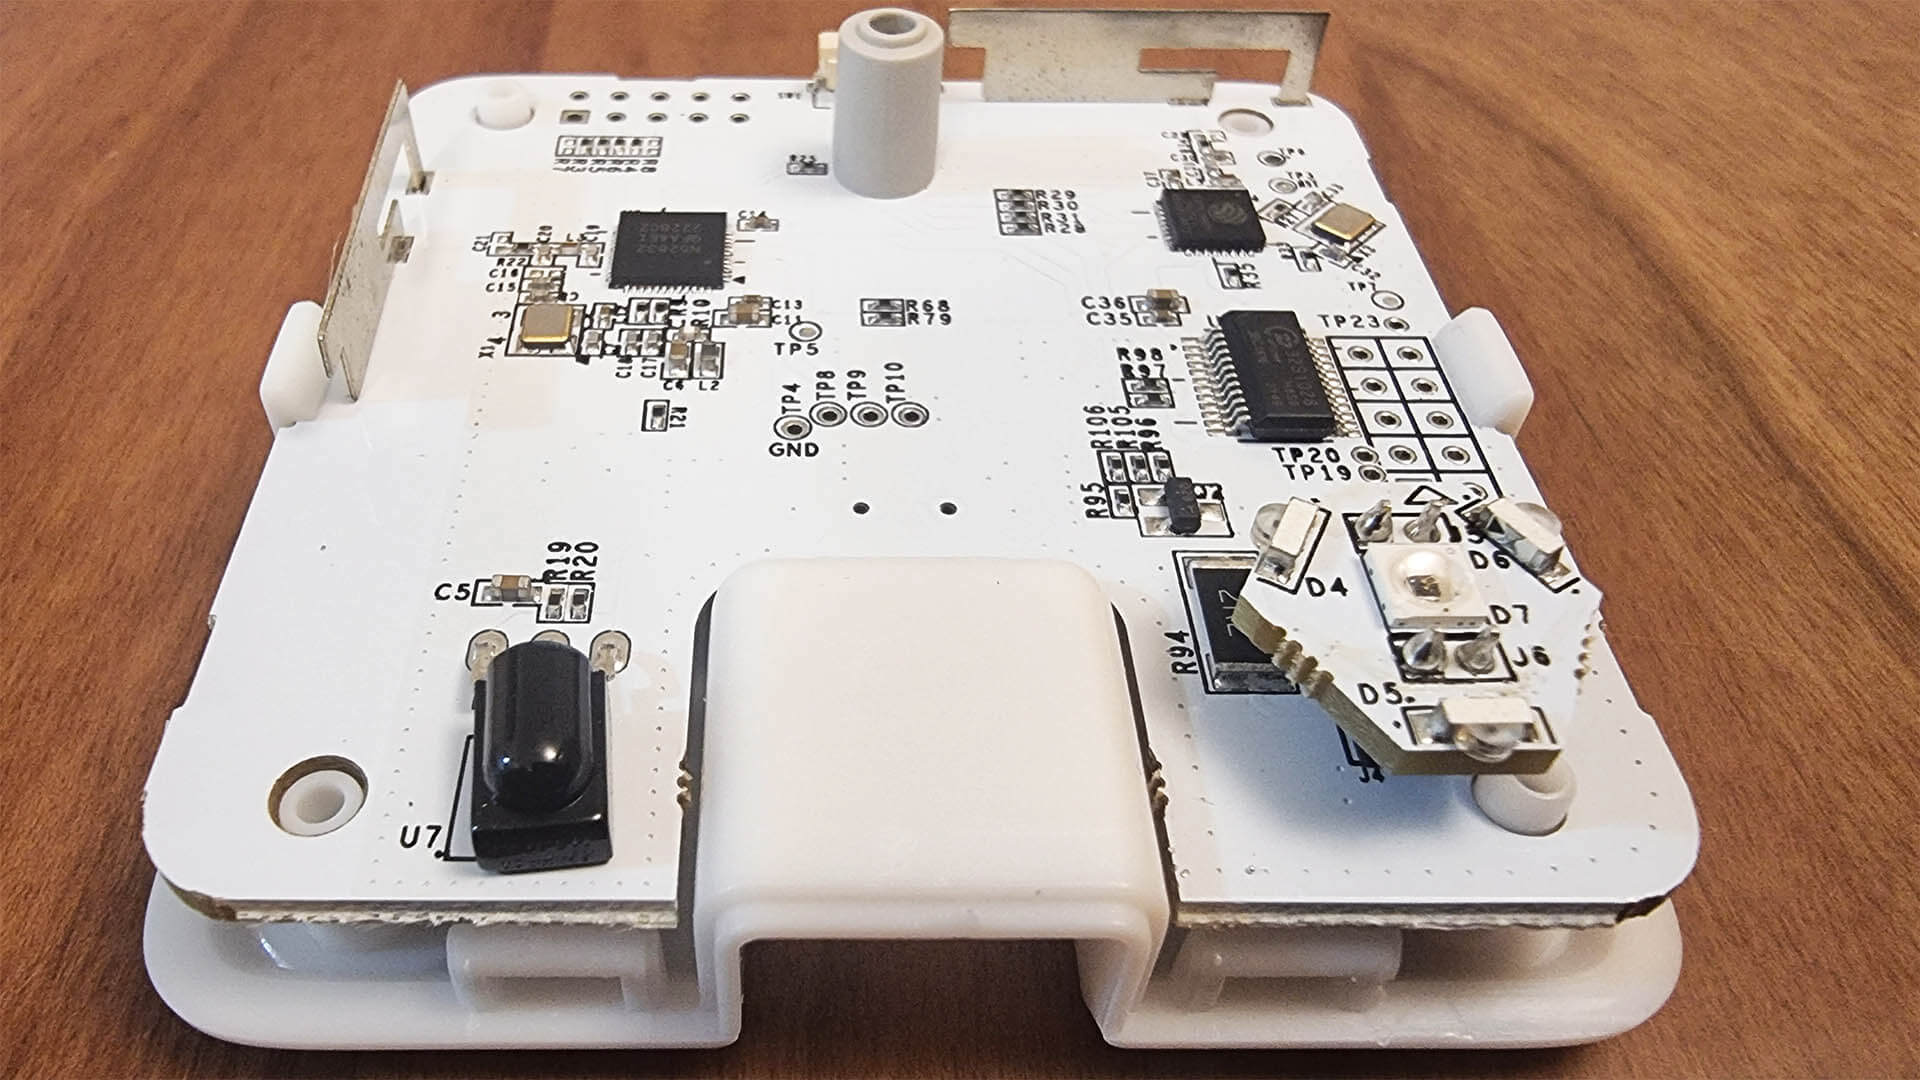
Zooming into the components, I found a low-power ESP8266EX [Datasheet] chip installed as a Wi-Fi module, which supports 802.11 b/g/n connections at up to 72.2Mbps speeds. I would have preferred to see an ESP32 module instead, but maybe the 8266 is fit for its purpose here.
Bluetooth communication is handled through a Nordic Semiconductor N52832 [Datasheet] module, which is a general multiprotocol SoC, meaning it supports Bluetooth Low Energy, Bluetooth Mesh Networking and NFC Tags for payment deployment. Nordic Semiconductor is a Norwegian company also supplying the Zigbee module in the Aqara FP1.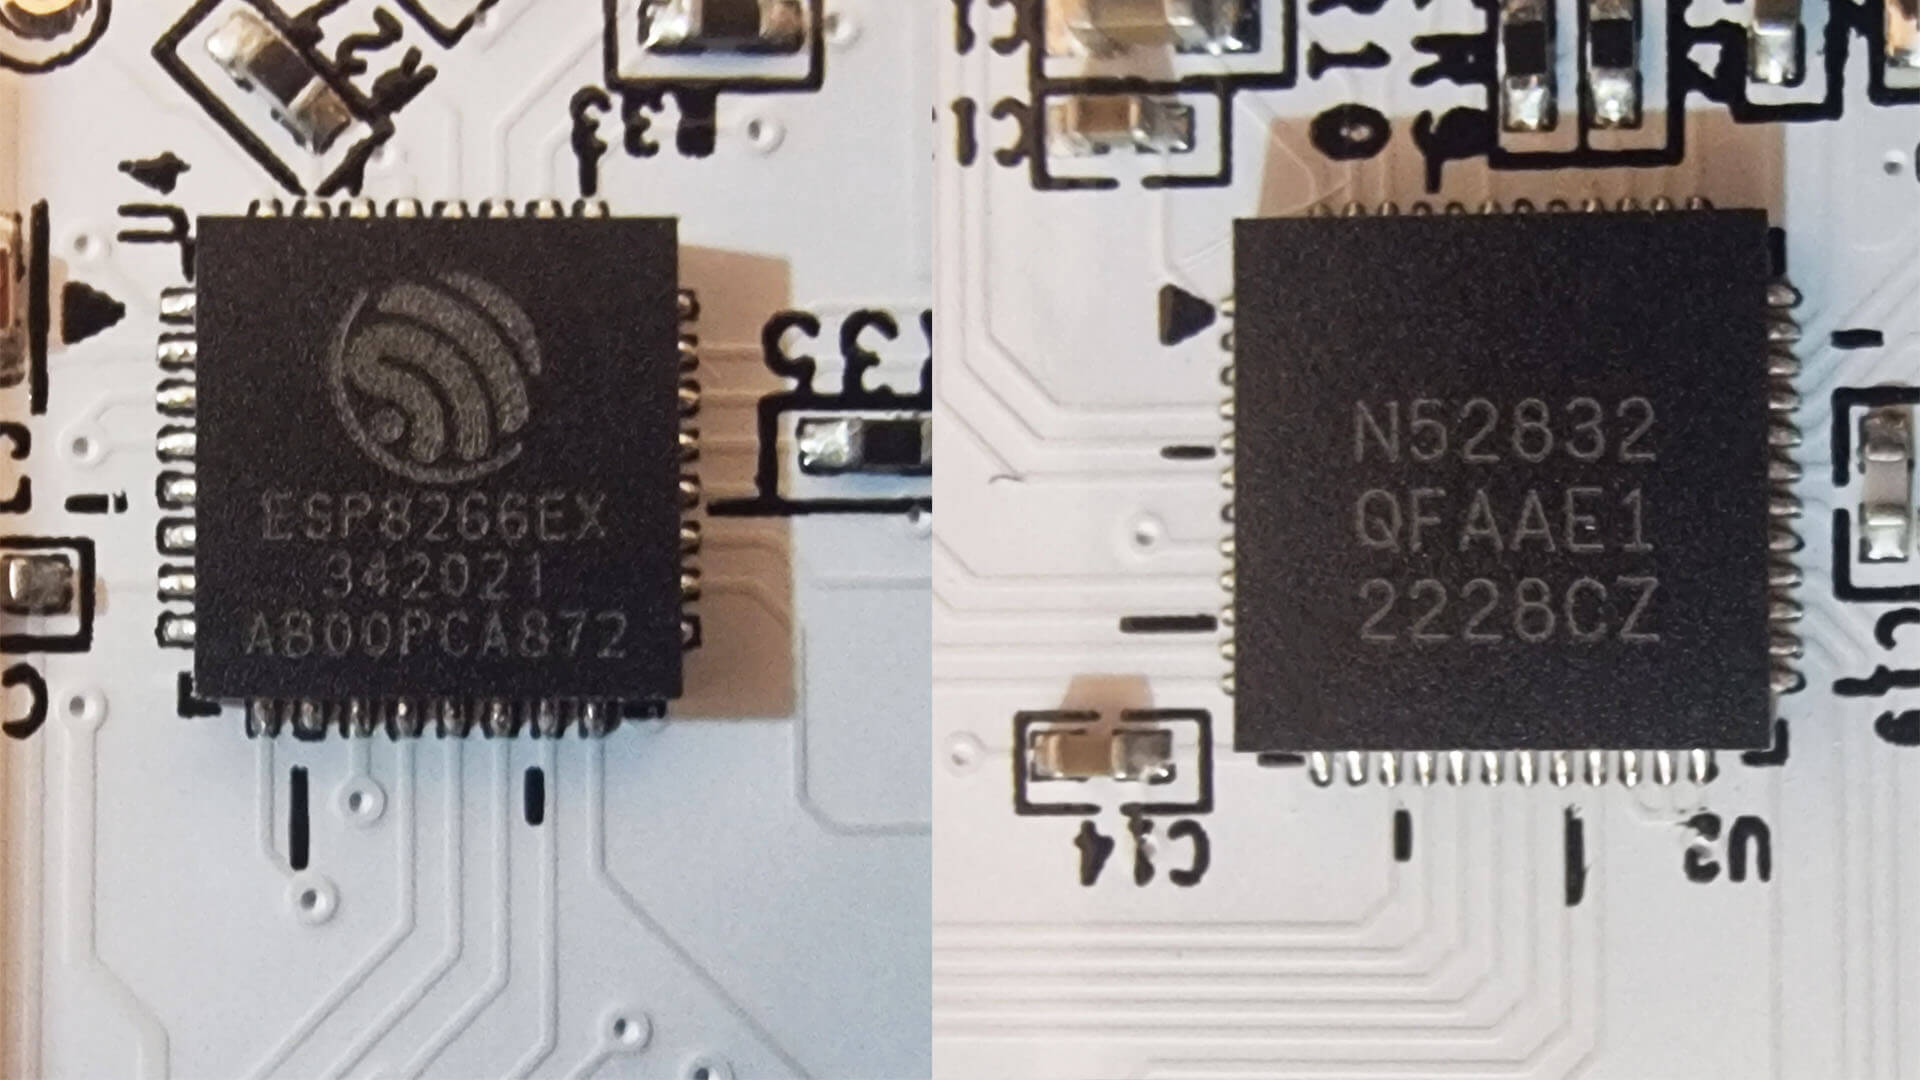
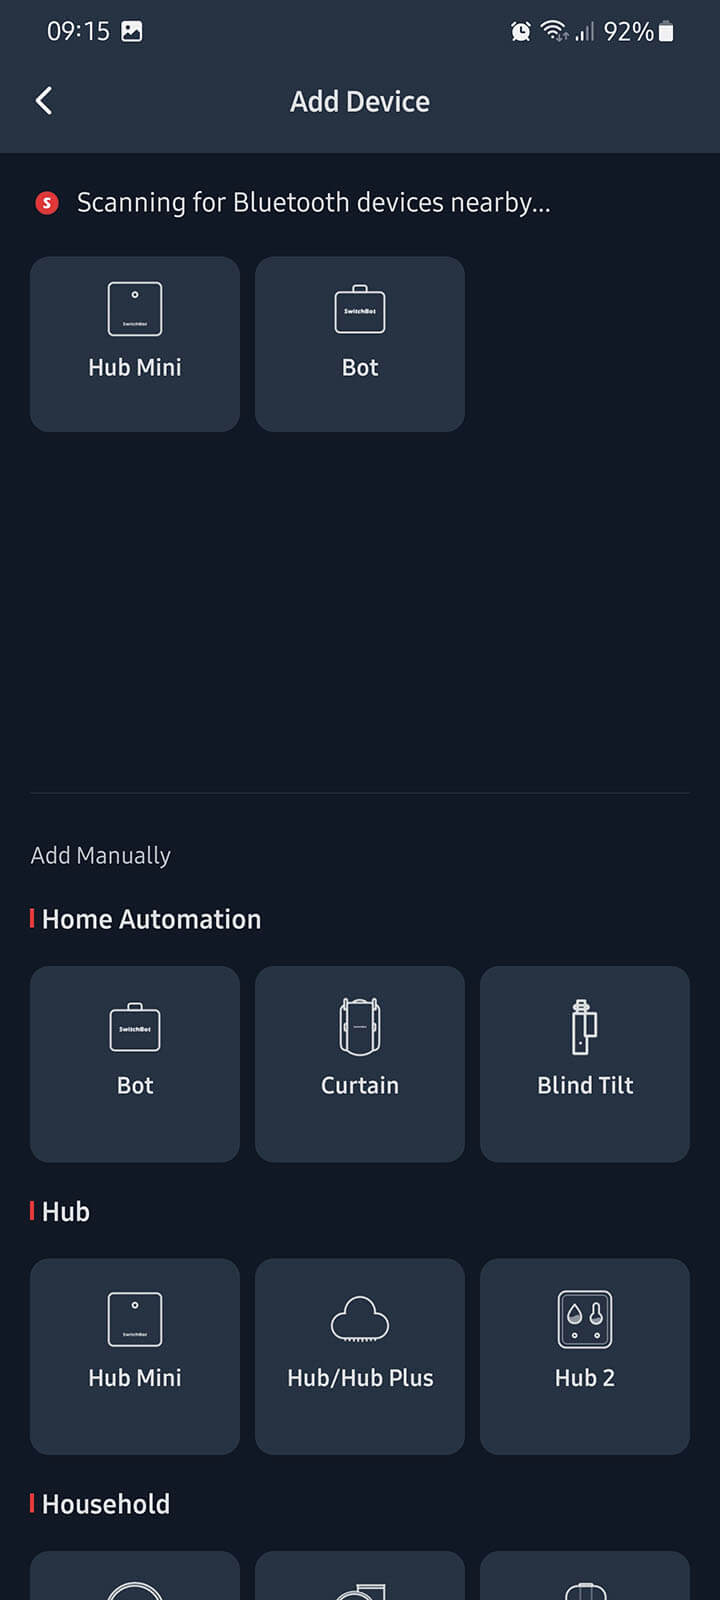
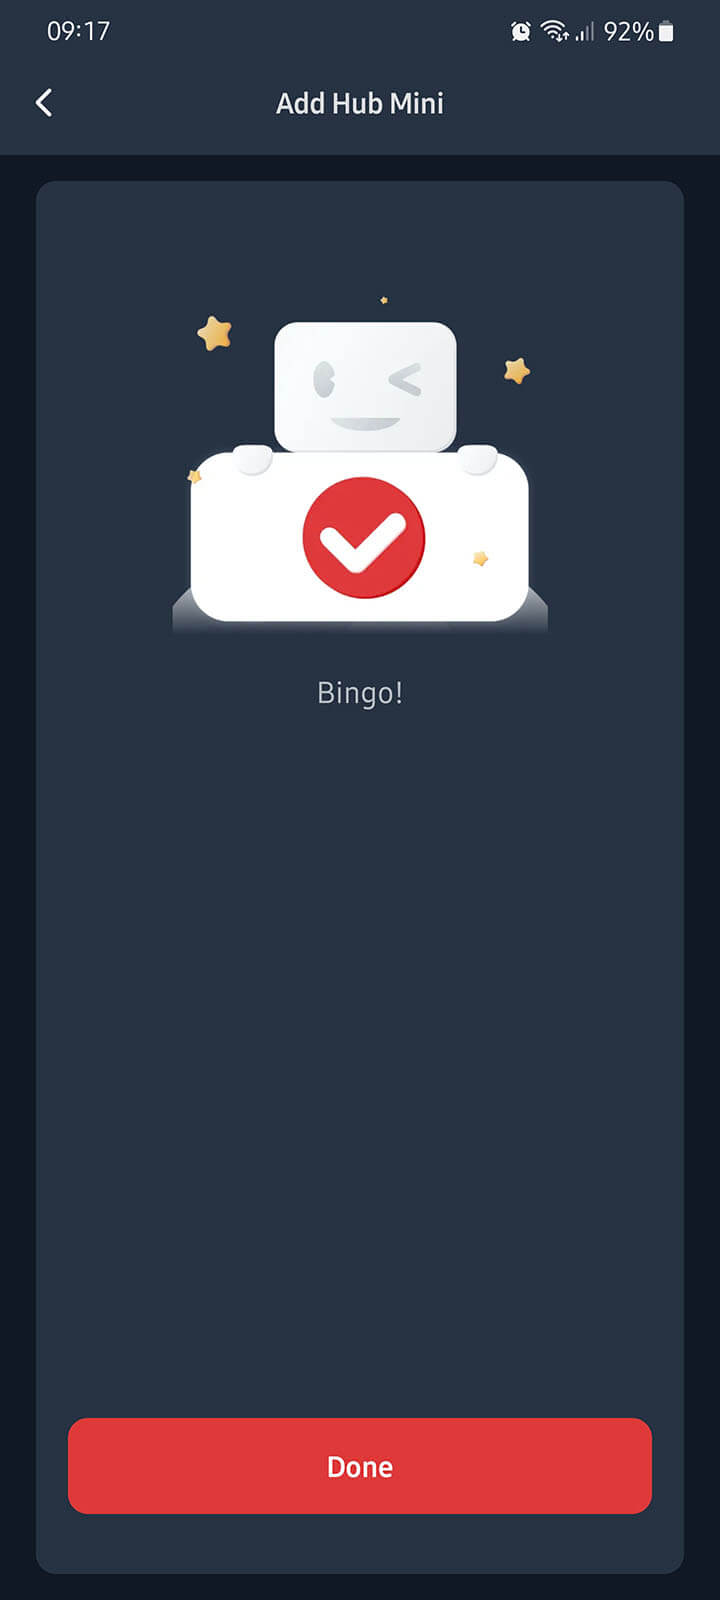
To onboard any SwitchBot device to cloud services such as Google Home or Amazon Alexa, first we need to setup the hub. Download the SwitchBot app from the PlayStore or Appstore and create a username. After you are all set, click the + button in the top right corner of the App.
SwitchBot Hub Mini in the App

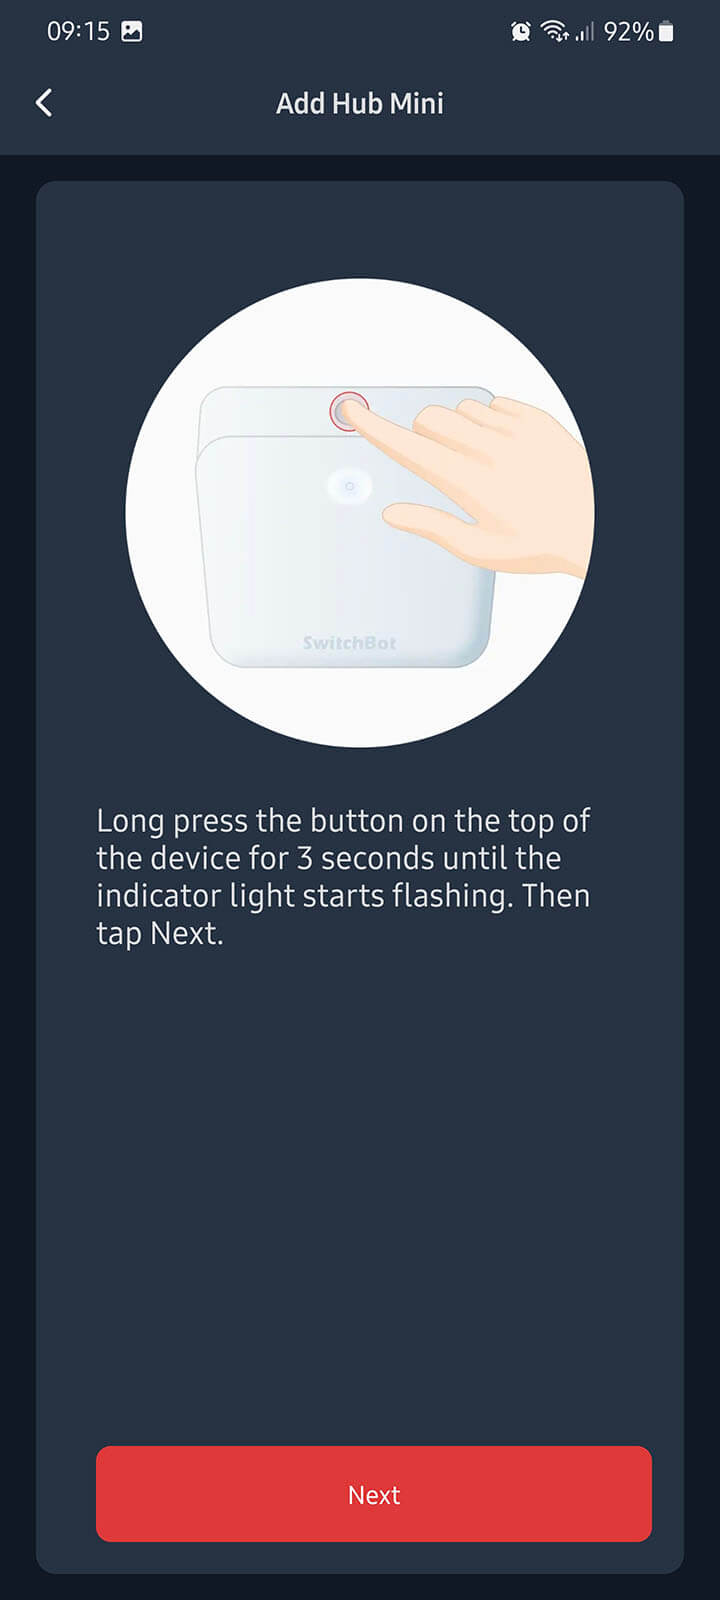
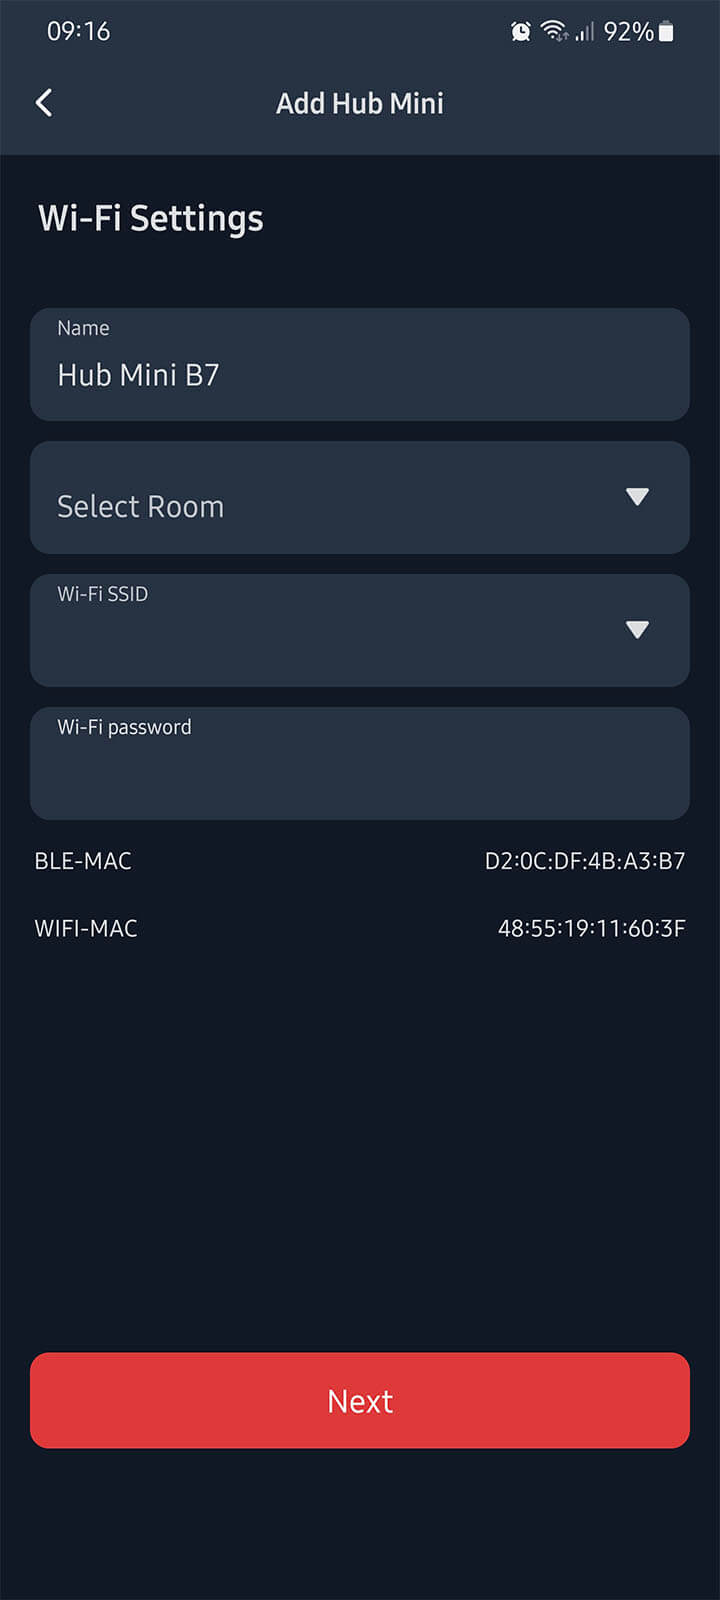
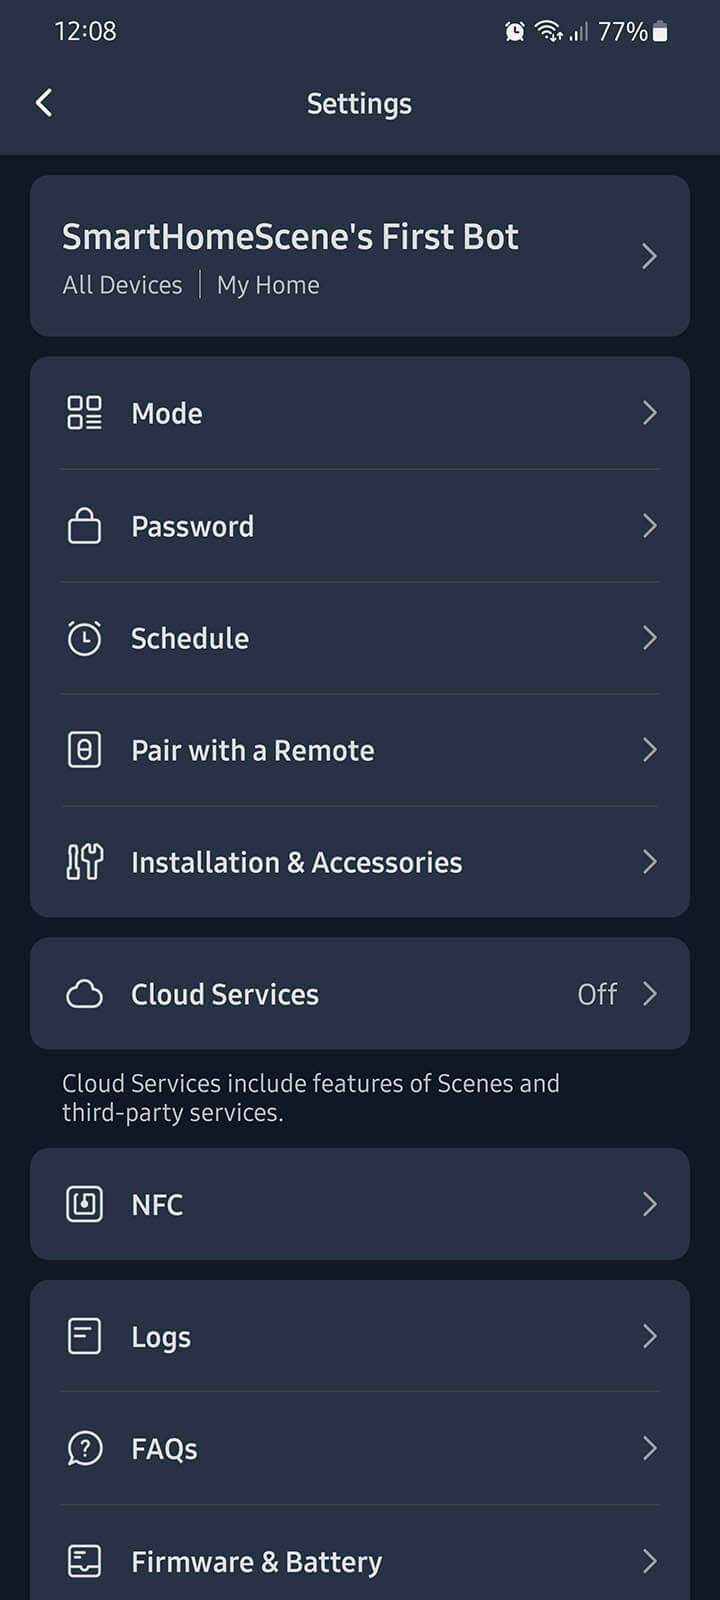
The Hub Mini is added to your profile and you can add devices under it, so they remain online and you can access them from anywhere. The indicator light on the hub can be turned off by clicking the hub in the app and navigating to Setting (Cog Wheel in Corner) > Indicator Light. Firmware version, Wi-Fi credentials and MAC addresses are also accessed in this menu.
In this menu, you also have an option to add NFC tags for quick triggering devices. You will need a smartphone with NFC capabilities and NFC tags, to which you will write some information using the SwitchBot app. You can than assign that particular tag to trigger any scene or action when scanned with your phone’s NFC scanner.
Enabling Cloud Services
To be able to use SwitchBot devices with cloud services, such as Google Assistant, Amazon Alexa, IFTTT or Clova (Japan) you to enable Cloud Services in the app. These can be enabled after adding your first device in the app and pairing it to your Hub Mini or Hub 2.


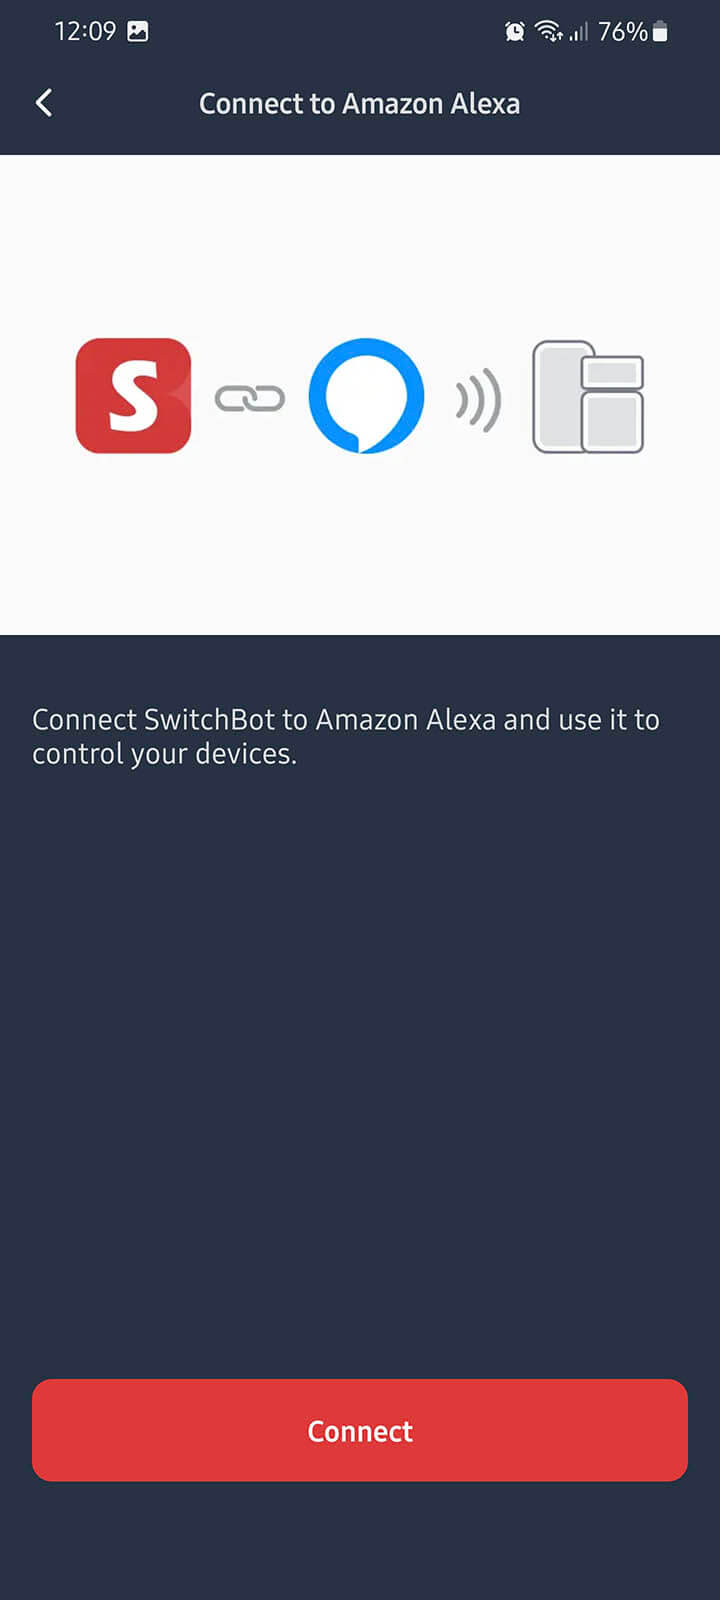
Whichever ecosystem you choose to configure, you will be taken to their app to complete the setup. Follow the instructions on screen and once you are done, you can control your devices with your voice.
Using the Hub Mini as an IR Blaster
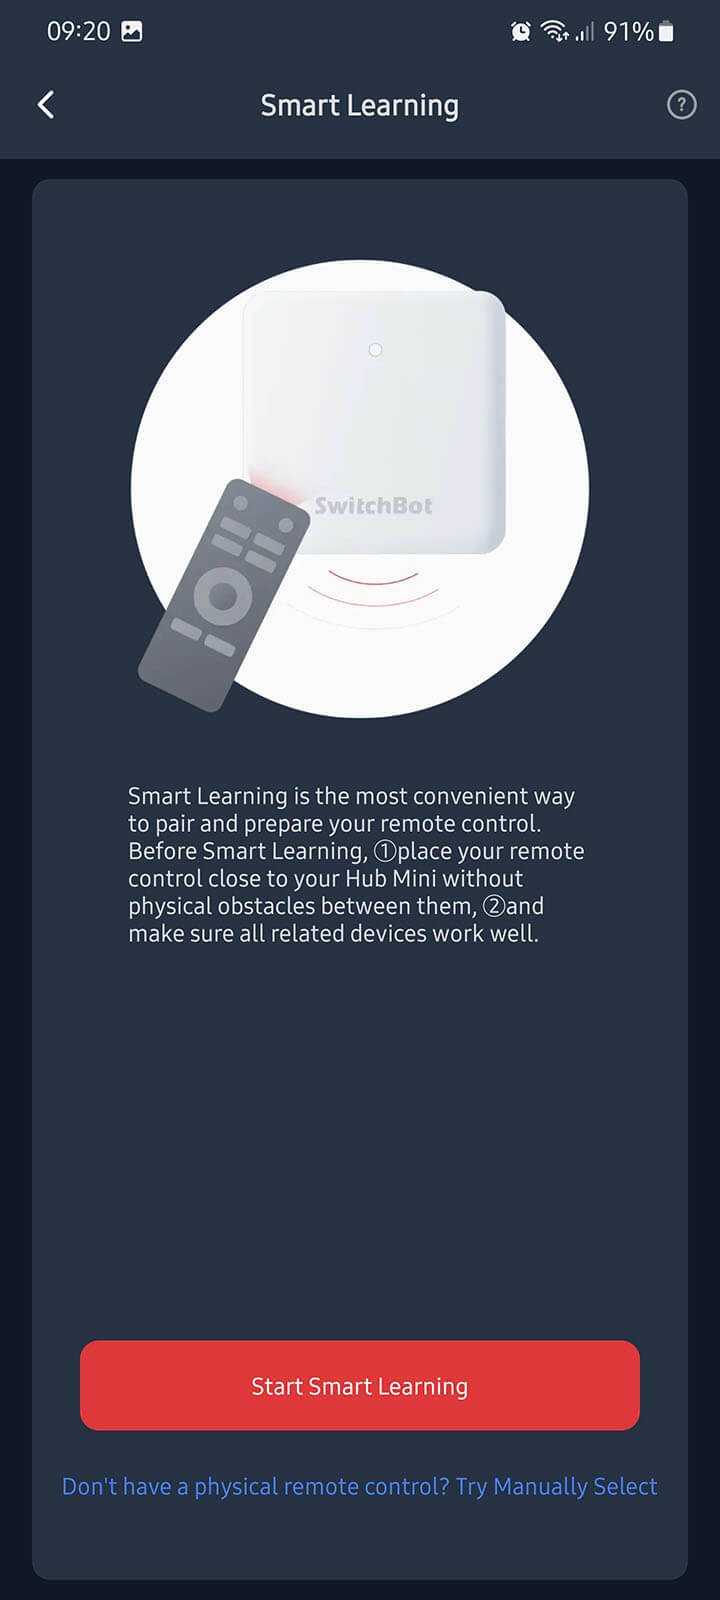
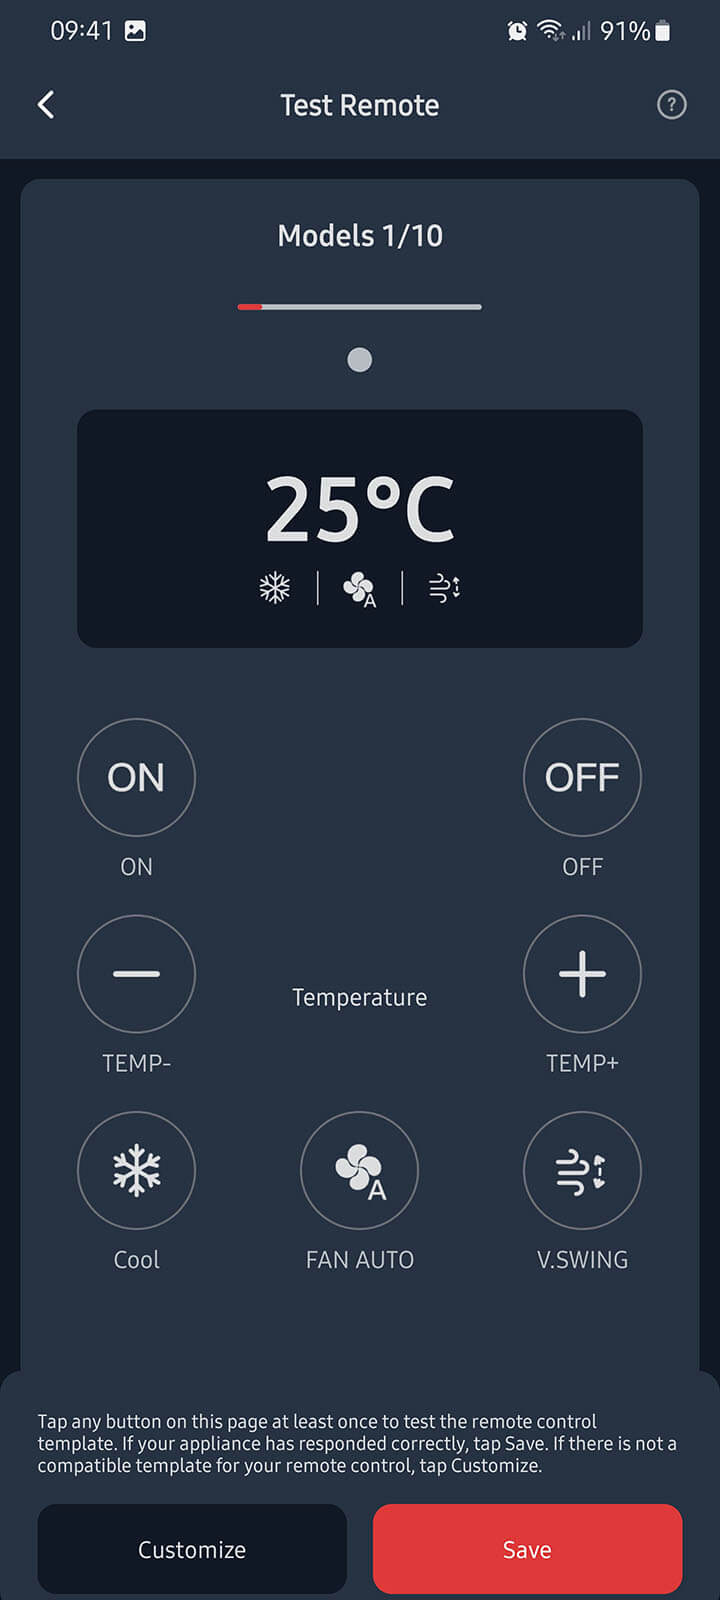
Because the Hub Mini doubles as an IR Blaster, you can add your dumb remotes and control them within the app. In my example, I added a Midea AC remote which worked with the first template the app gave me. If you are having issues, try cycling through the templates to see which one fits your particular remote.
If you want to deploy a second Hub Mini or Hub 2 to act as a IR Blaster, you can use the Copy Remote Control option to transfer any existing remote you’ve already added to your account without having to re-learn all the buttons and templates.

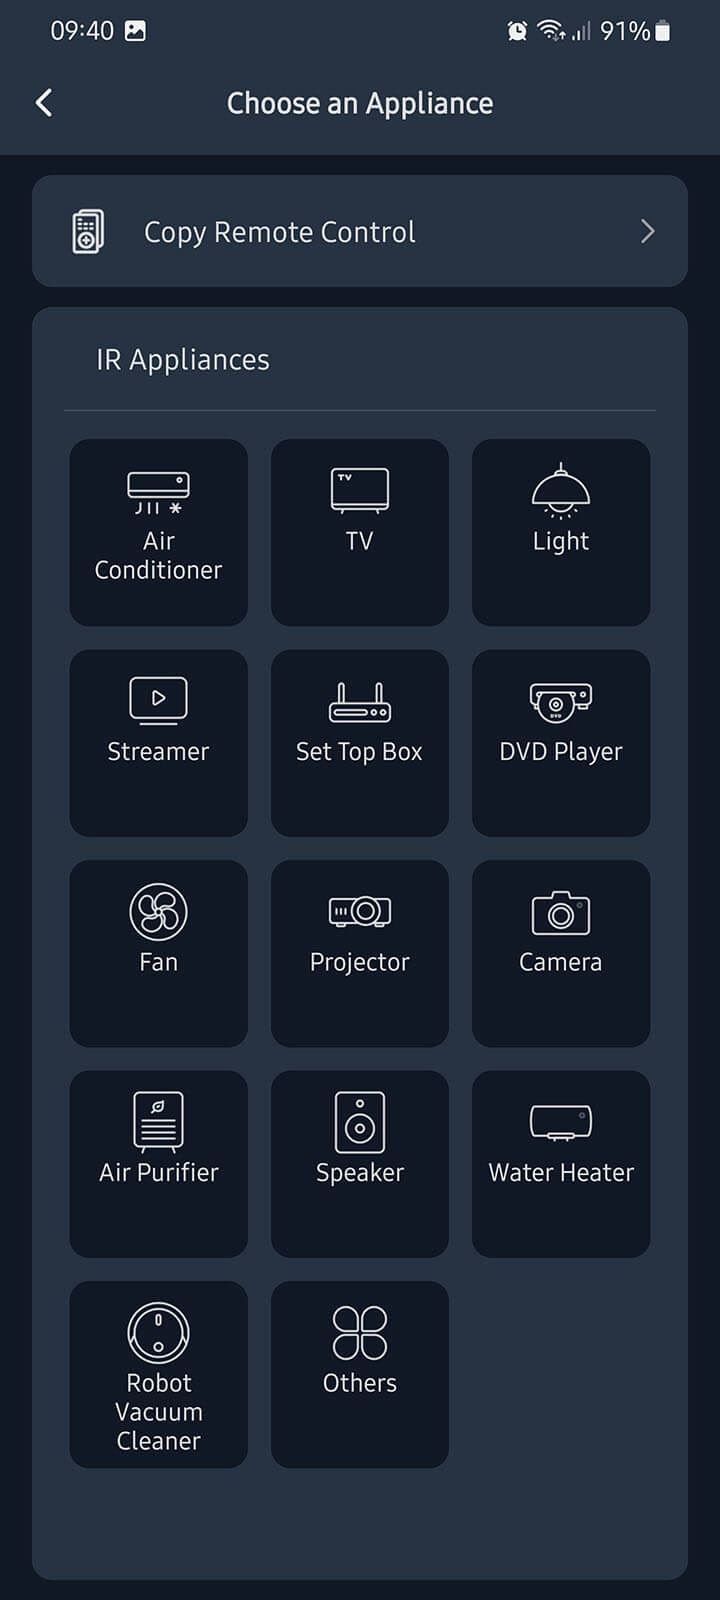
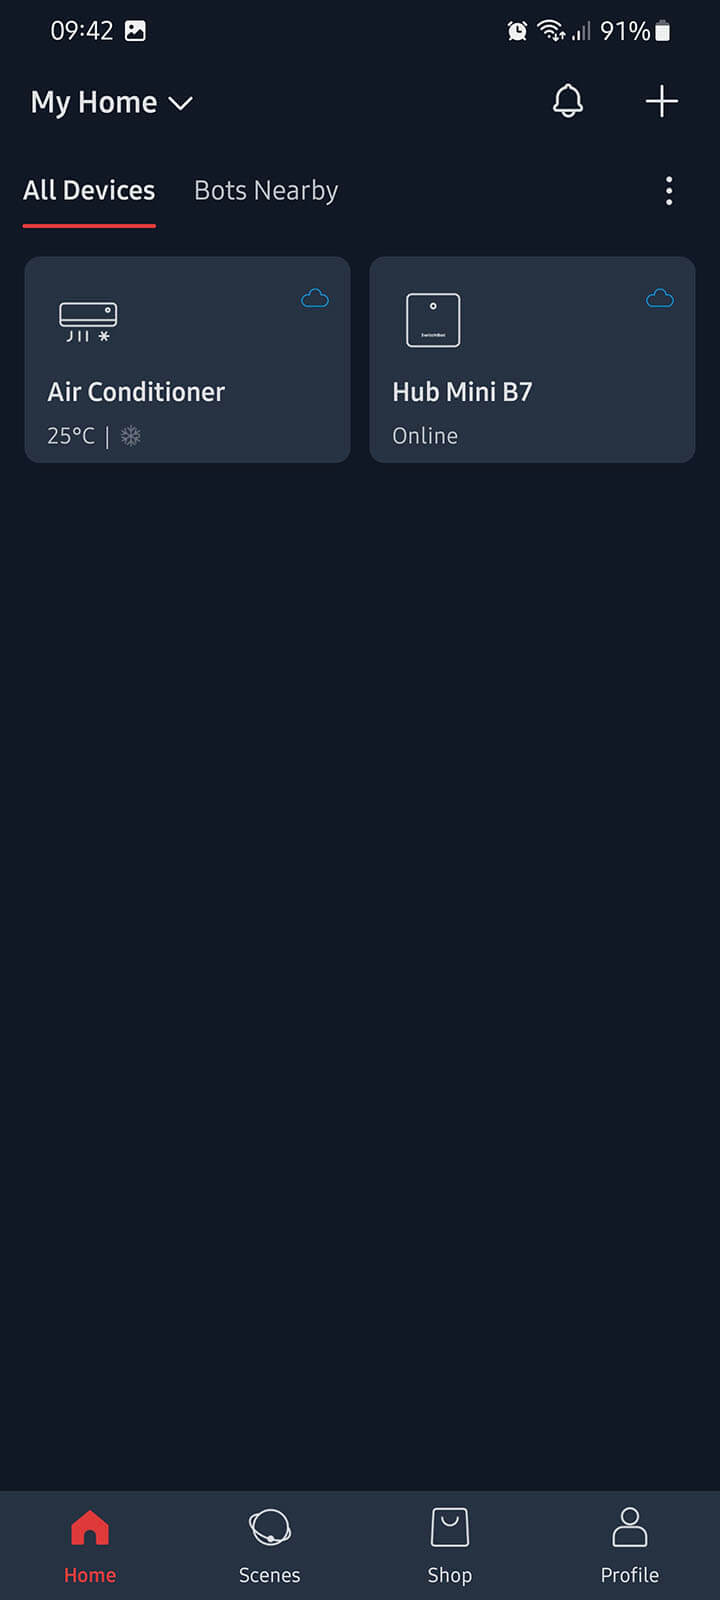
The Hub Mini’s IR Blaster has a range of 30 meters (~98 feet), covering a vertical angle of 360° and horizontal 180°. I placed the hub behind a bookcase in my living room to see if it will trigger my AC, which it did.
SwitchBot Bot
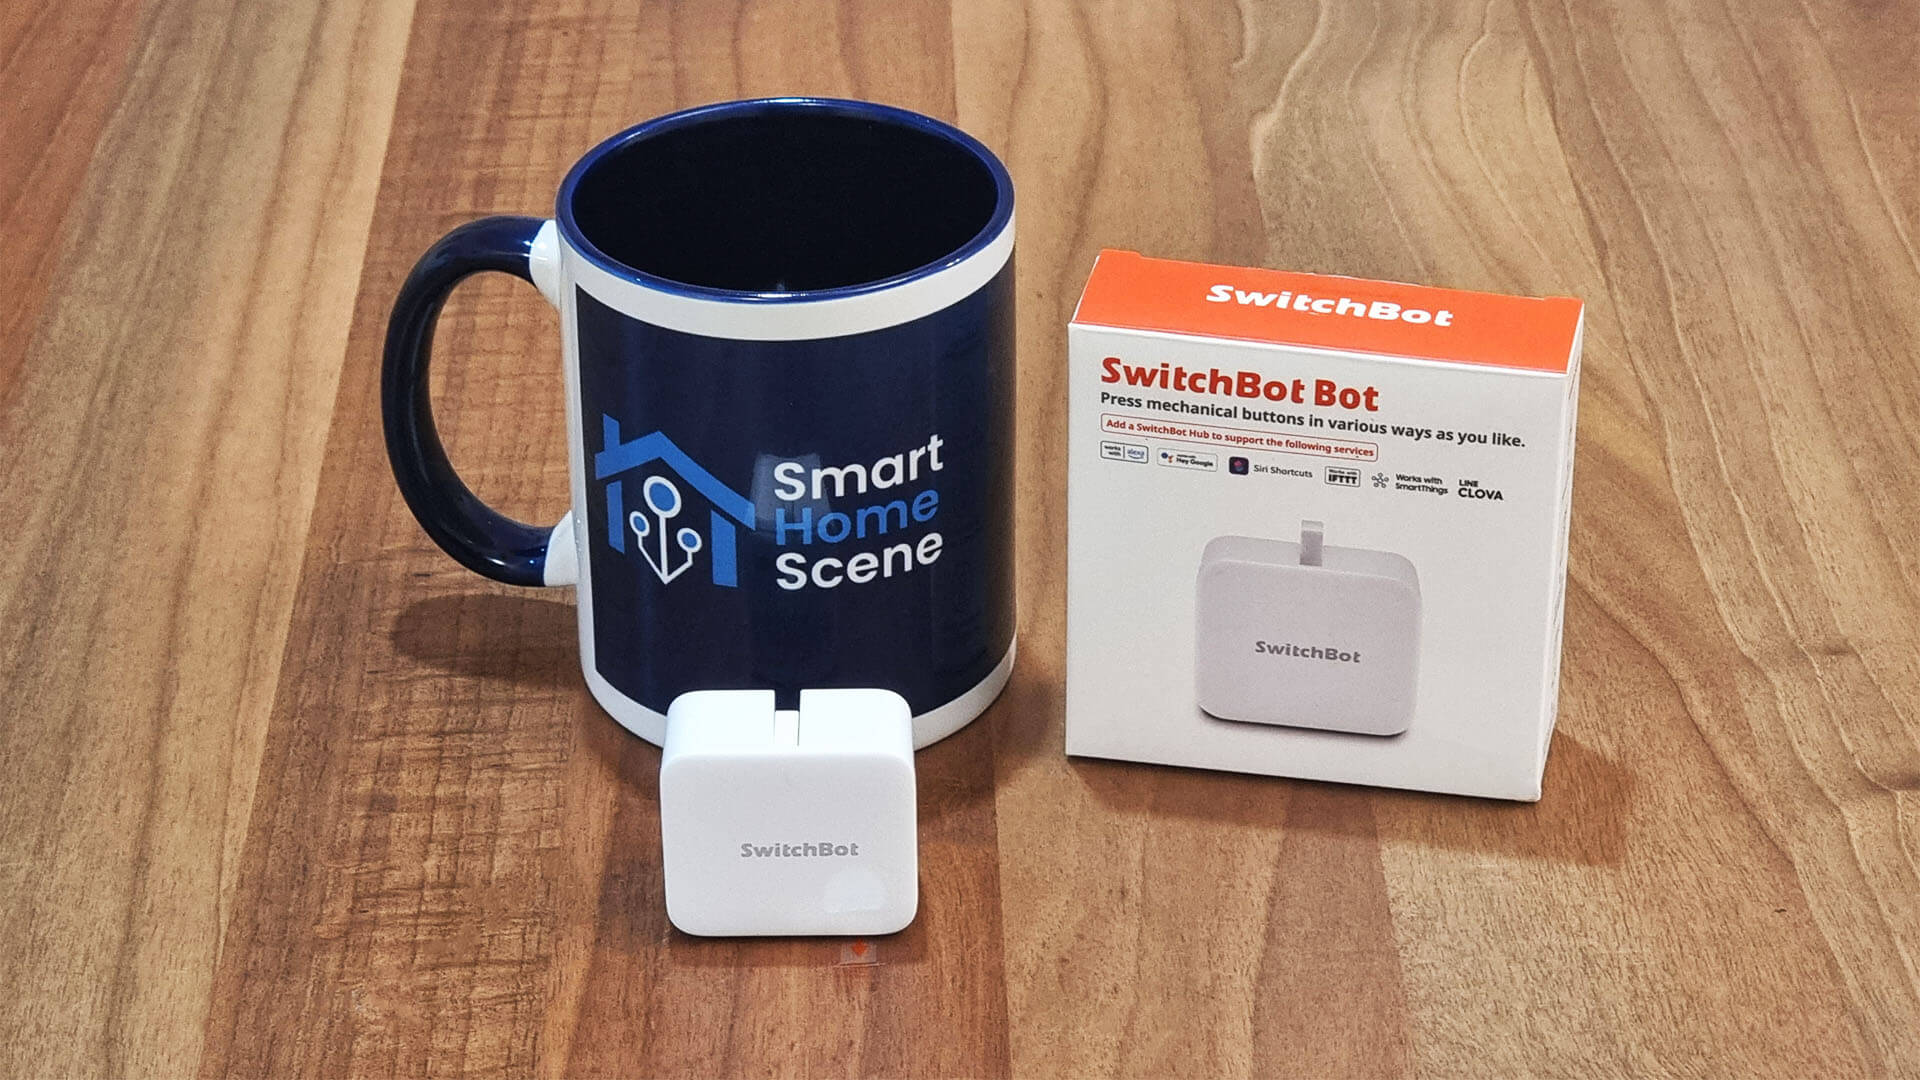
SwitchBot’s most recognizable device is the finger bot or SwitchBot Bot as they’ve named it, which is used to mechanically press buttons, switches and toggles essentially making them smart. For illustration, you can use the finger bot to toggle buttons on dumb coffee makers, electric kettles, air cookers, mixers, stoves, ovens, microwaves, fans, speakers, washing machines, drying machines and anything with a button really.
Technical Specification
- Size: 43x37x24mm (1.7×1.45×0.95″)
- Weight: 42g (1.48oz.)
- Battery: 1xCR2
- Battery Life: 600days, toggled twice a day
- Connectivity: Bluetooth 4.2 or later
- Swinging Angle: 135°
- Torque Strength: Max 1.0 kgf
Disassembly
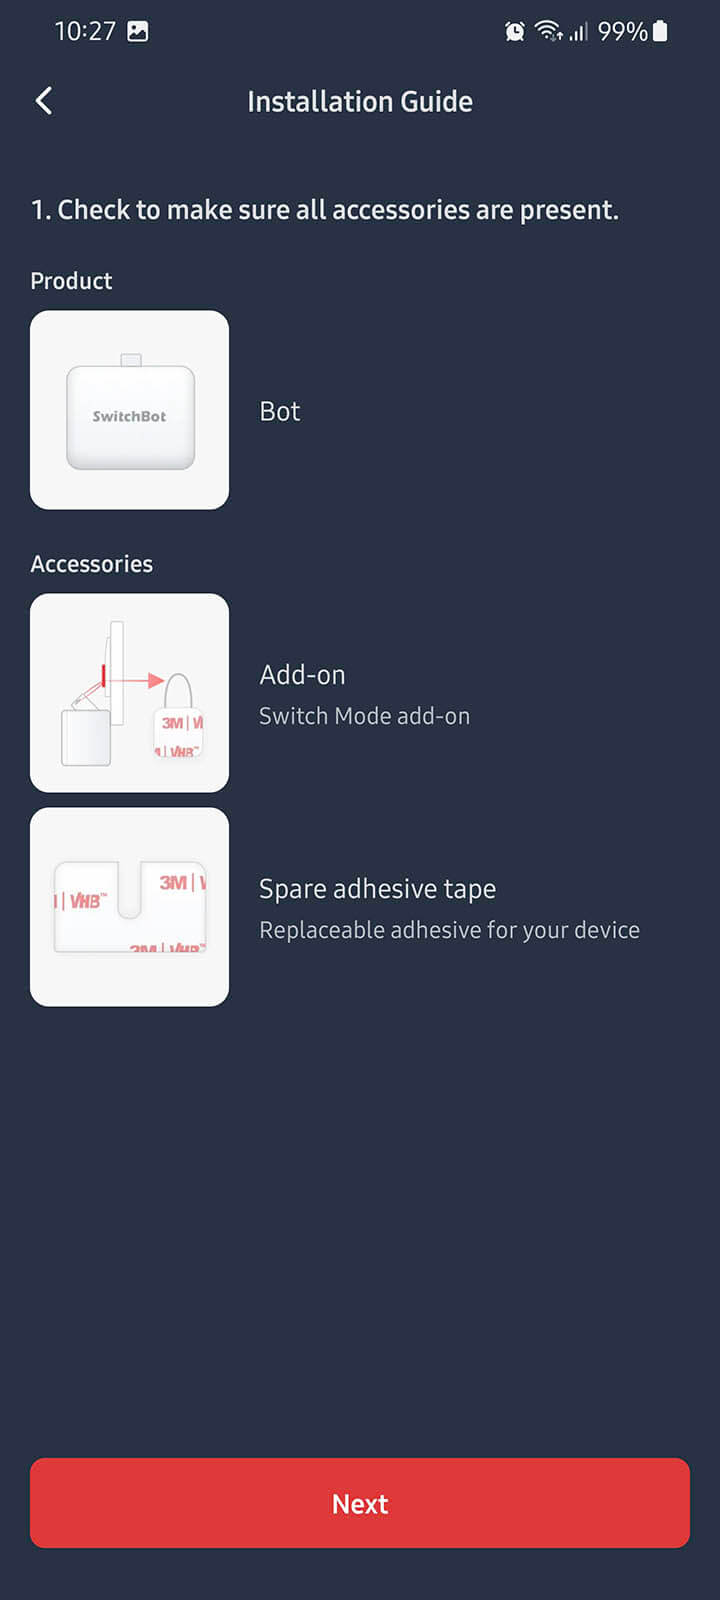
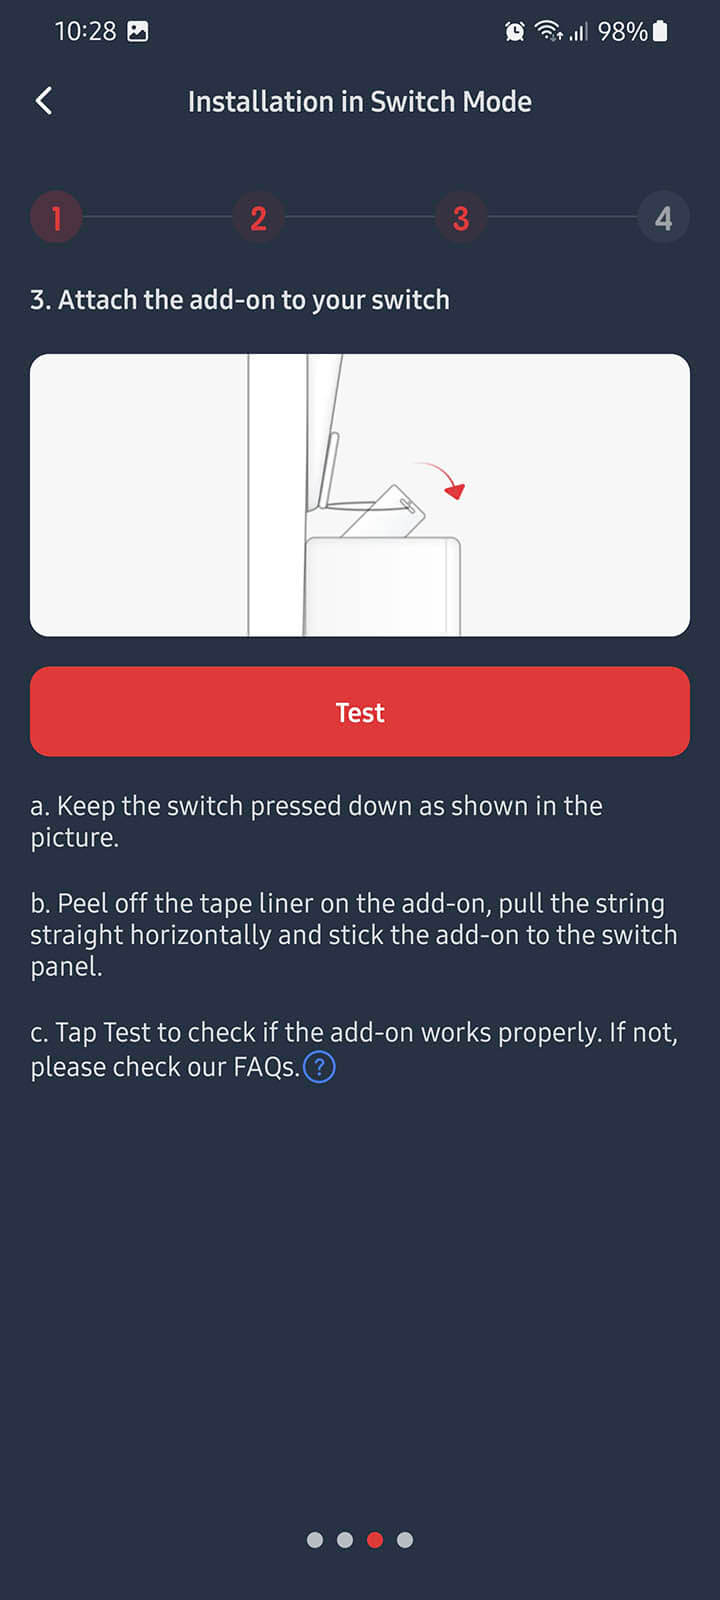
The SwitchBot Bot comes packaged in a similarly branded box, containing the bot, a manual and some stickers for installation. The battery is already preinstalled in the device and a sticker is pre-applied, the one included is a spare. The two small stickers with loops are used to pull the switch back, essentially performing an opposite action to the press action (Switch Mode).

The case of the bot measures just 43x37x24mm which makes it small and very convenient for installation in tight spaces. The edges of its case are smooth and the devices feels heavy in hand. It’s actually heavier than the Hub Mini, which is because of the motor inside the bot.
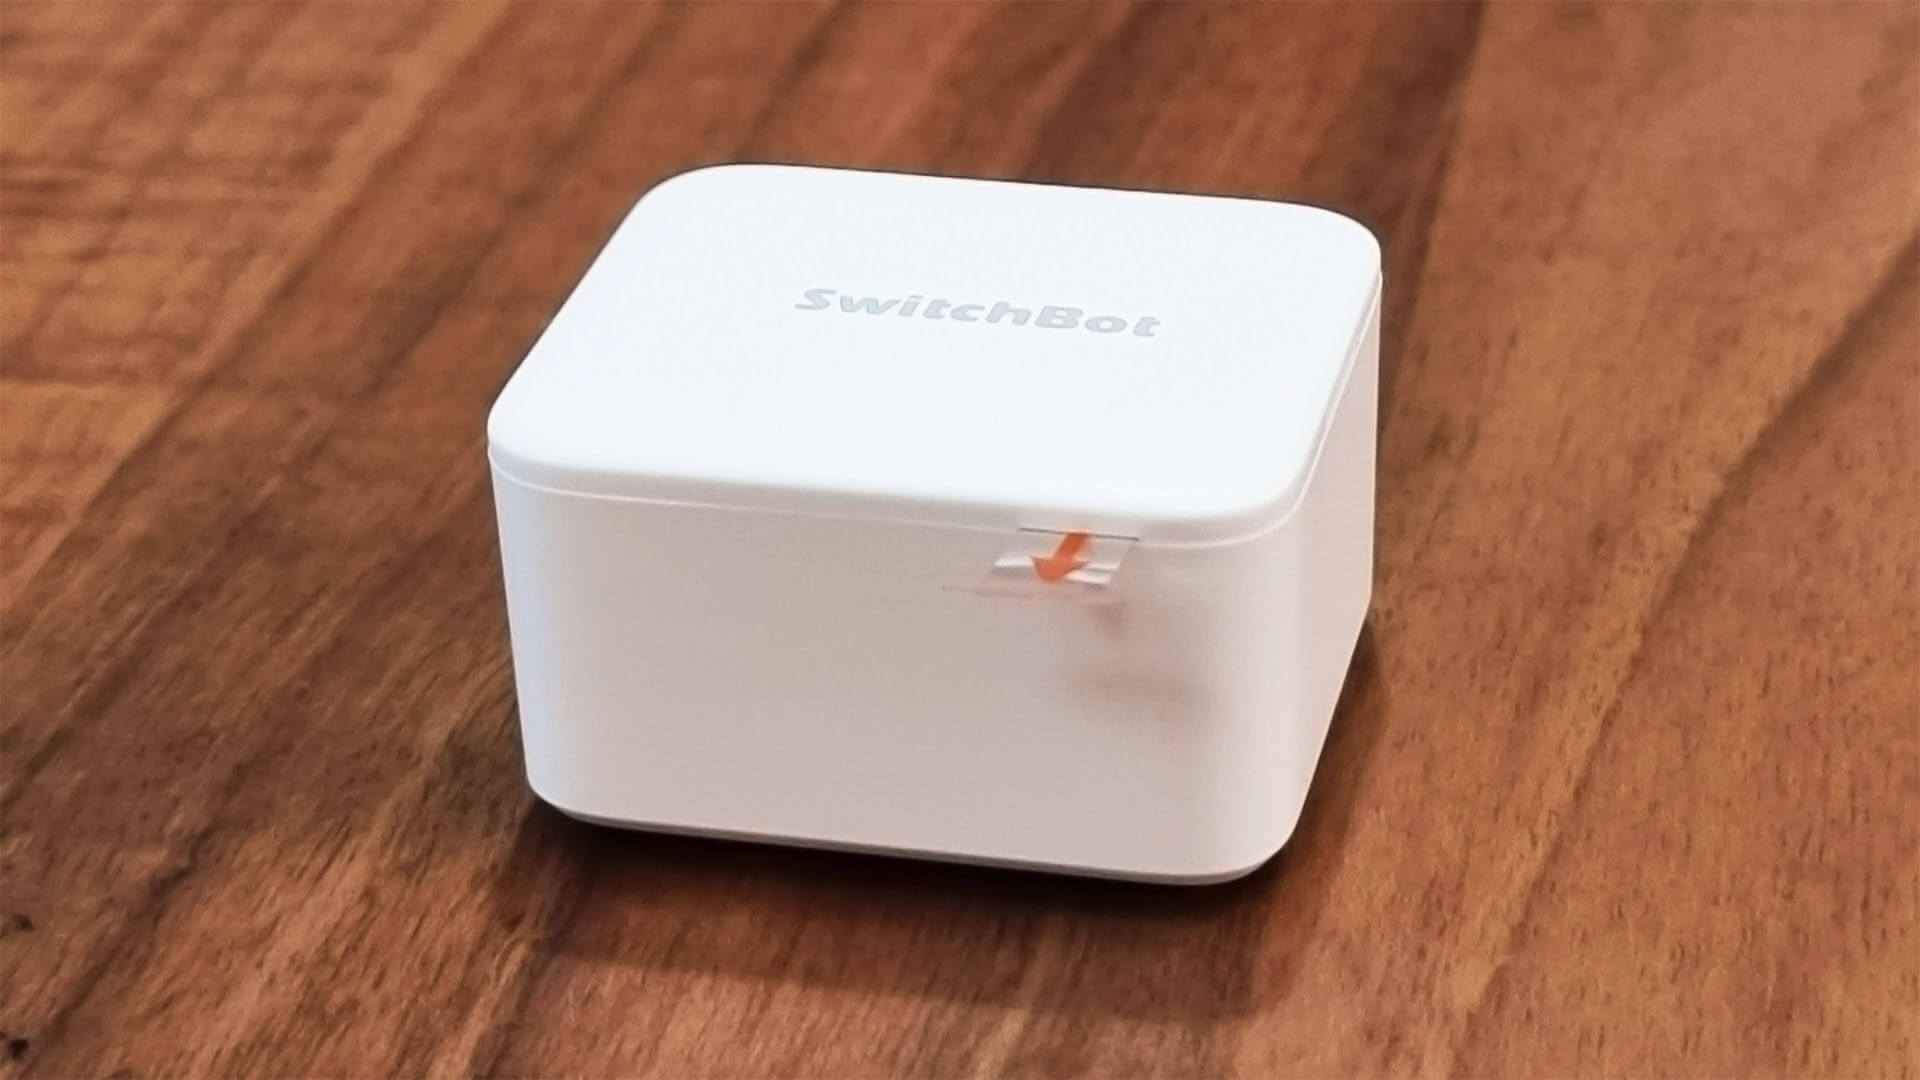
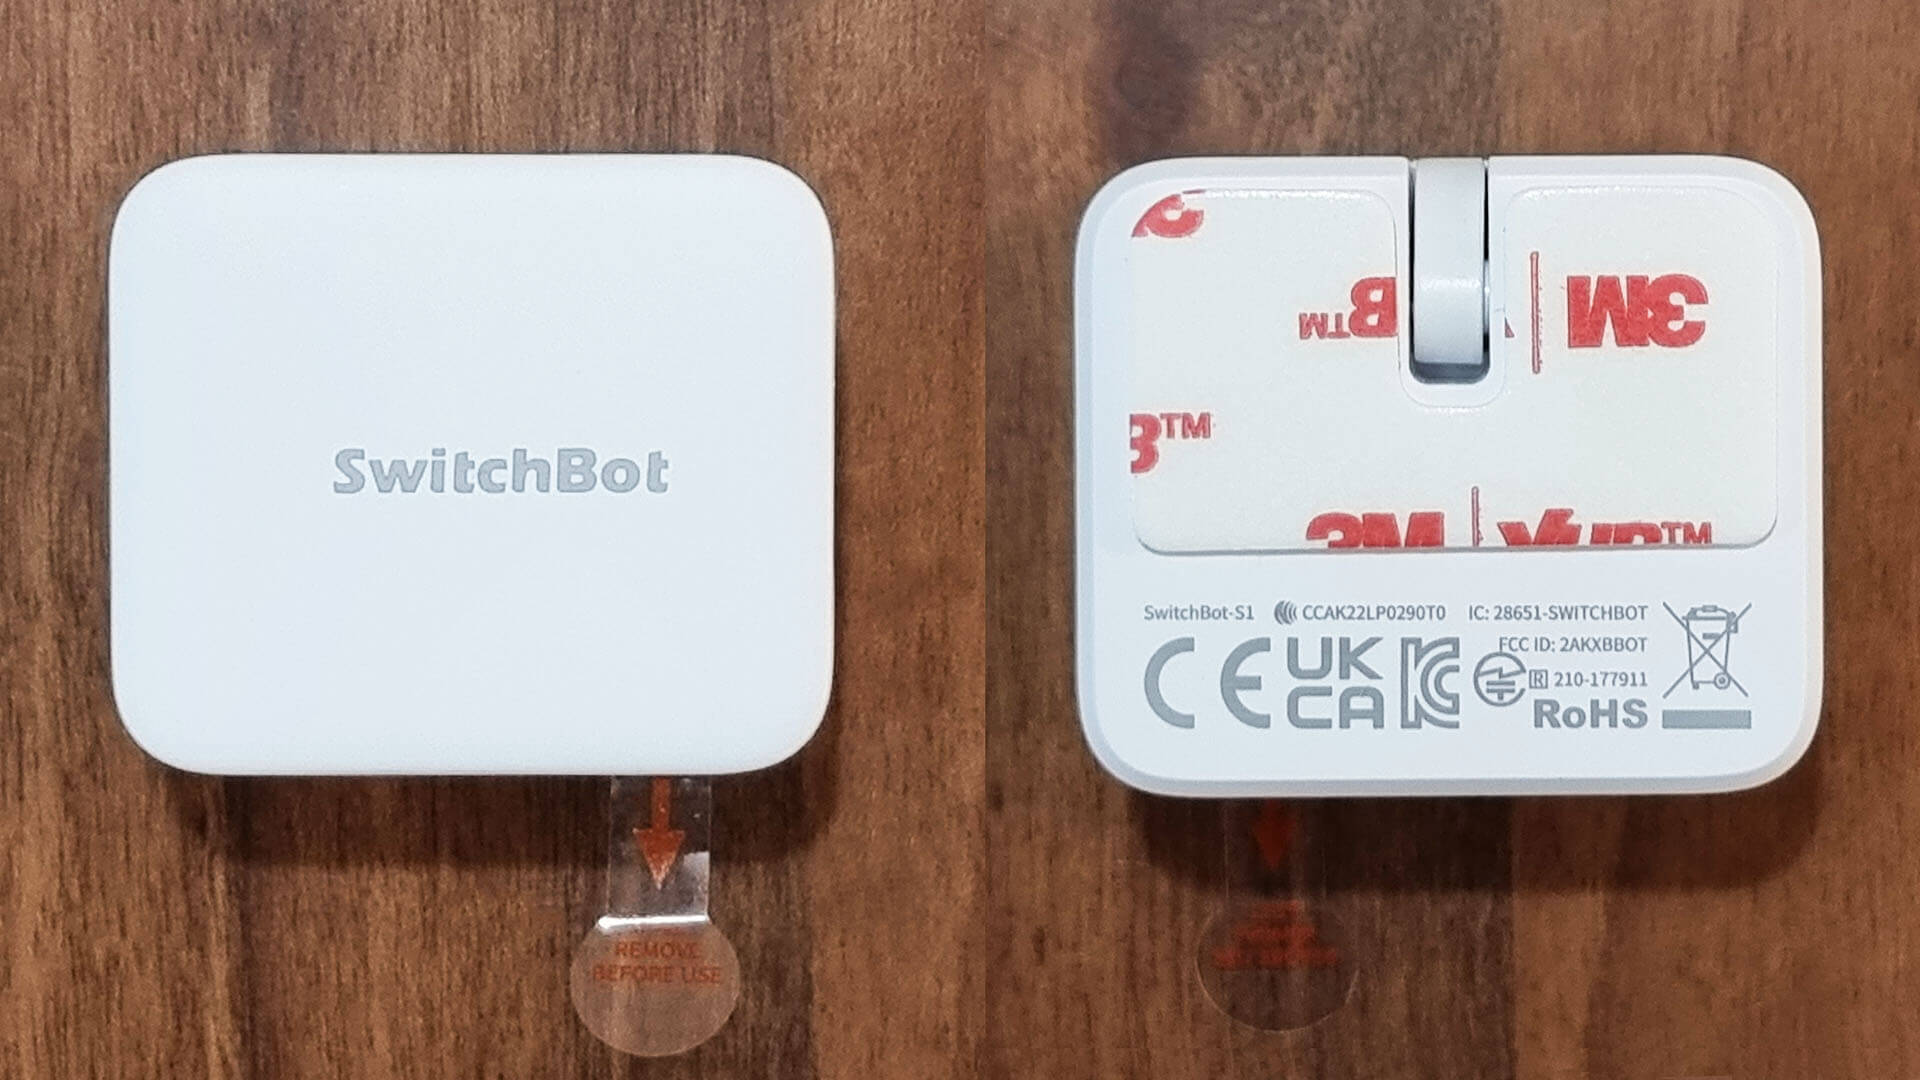
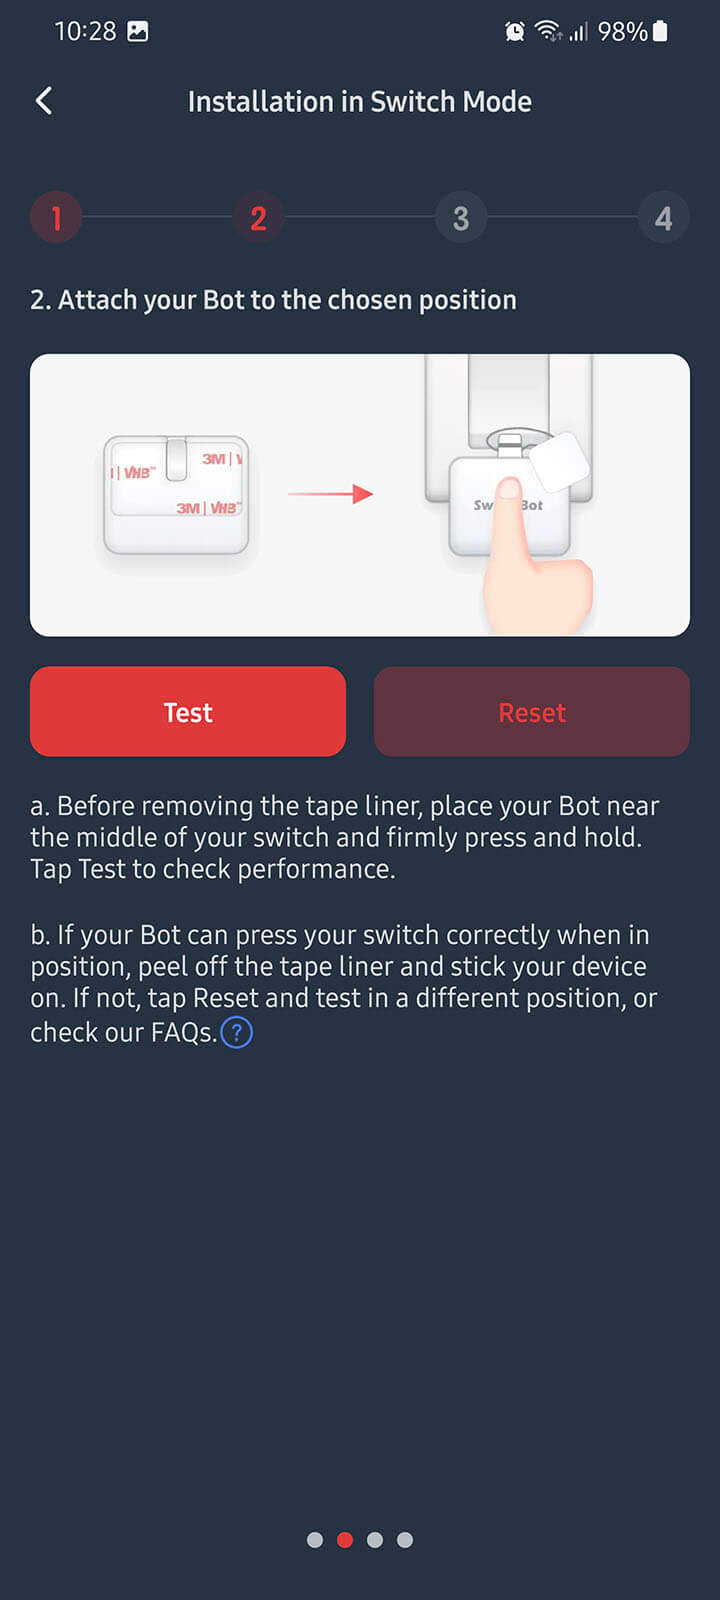
Before installing the Bot in it’s final position, make sure you pull the little foil sticking out of the case. SwitchBot instructs 24 hours are needed for the adhesive in the sticker to fully set, so not fiddling too much with it once initially installed is a good idea.
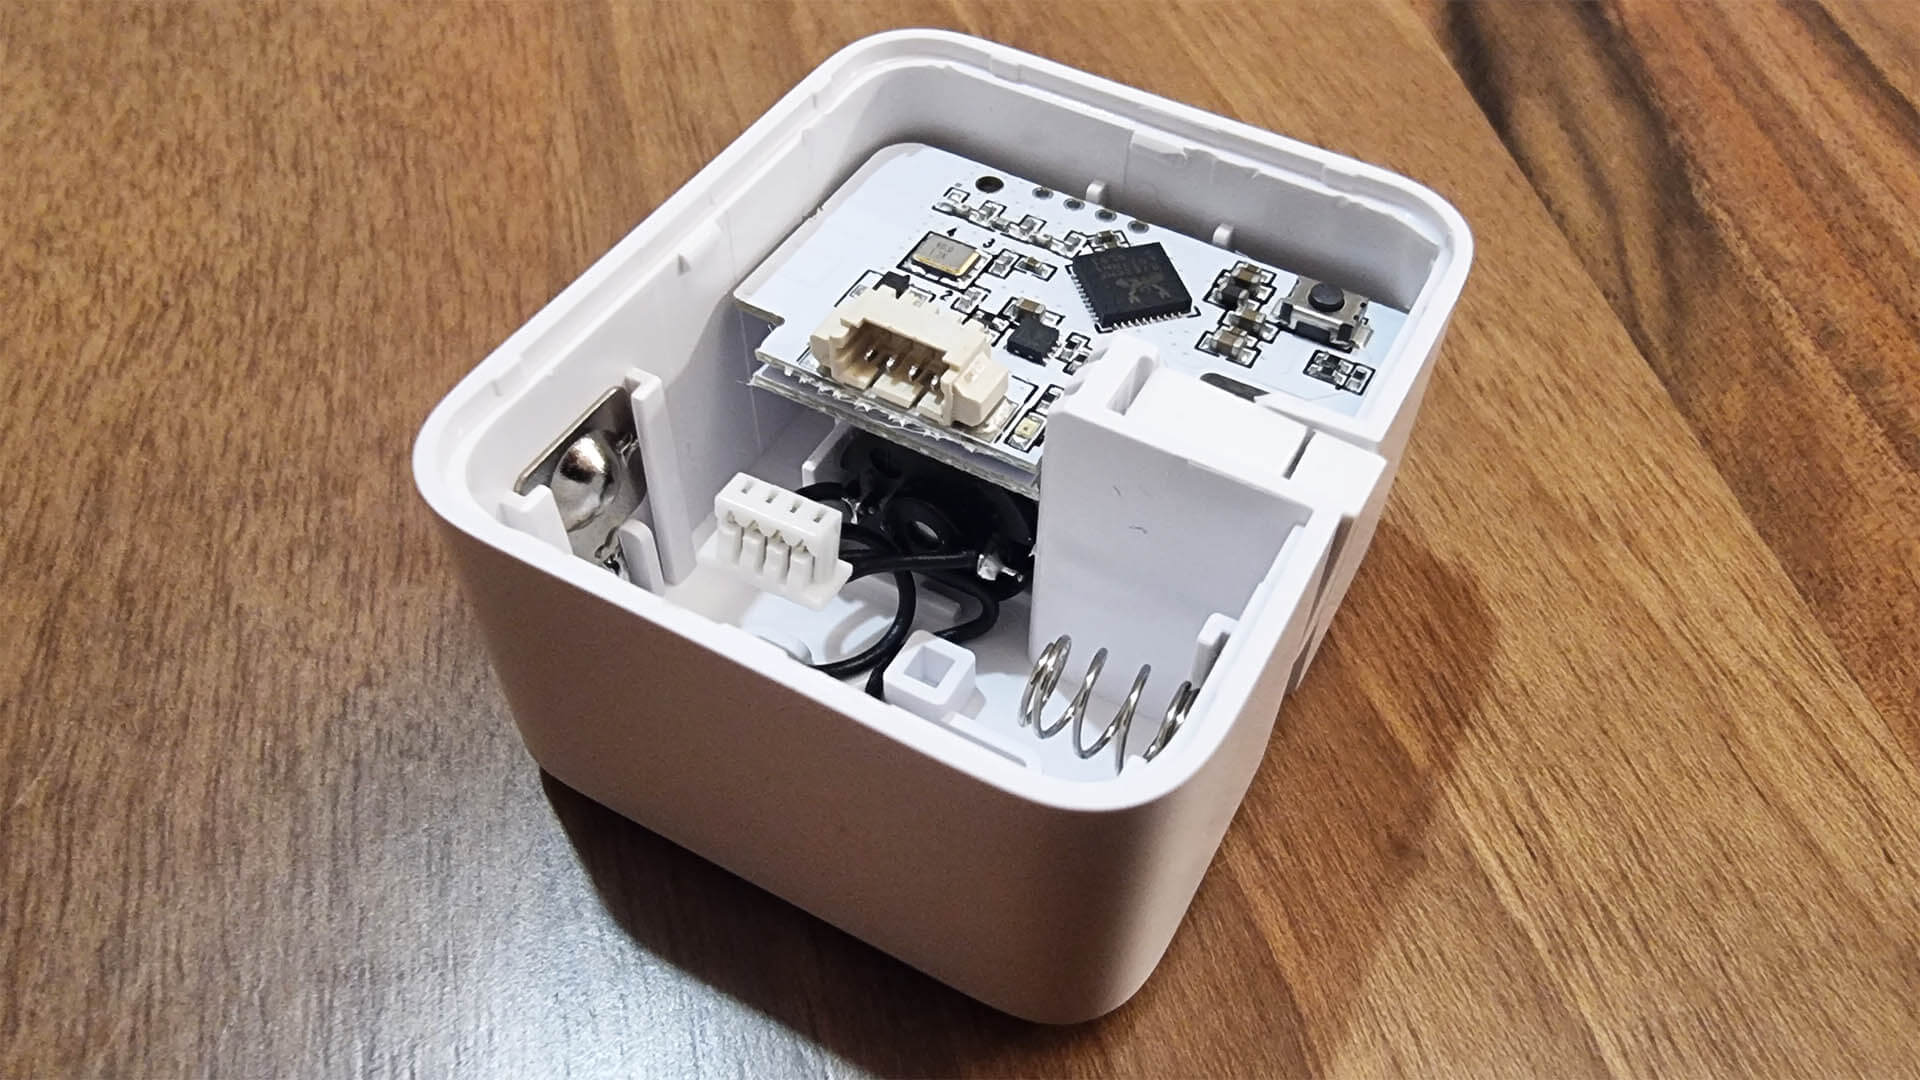
To open it up for a battery change, you can use a small screw driver or a knife that you insert underneath the top cap. If you gently pry it open, you can see it’s powered by a 3v CR02 battery. The manufacturer claims a whopping 600 days of usage on this battery, triggering the bot twice a day which is an overstatement in my opinion.

Underneath the protective cap, a small white PCB can be seen just like the one in the Hub Mini. There is a small reset button which resets the bot in pairing mode if you encounter any issues with connectivity. It’s driven by a small BM-9762CMF Bluetooth 5.0 BLE Module [Datasheet], manufactured in China by a company called CC&C Technologies. This Bluetooth module is reused throughout all of SwitchBot’s product lineup. I have no opinion of this chip, so I will have to test for connectivity issues after using it for a while.
SwitchBot Bot in the App
The SwitchBot Bot can be easily added to the Hub Mini via their app, so it is always accessible for quick control. For illustration, here is my experience in adding the device to the app:

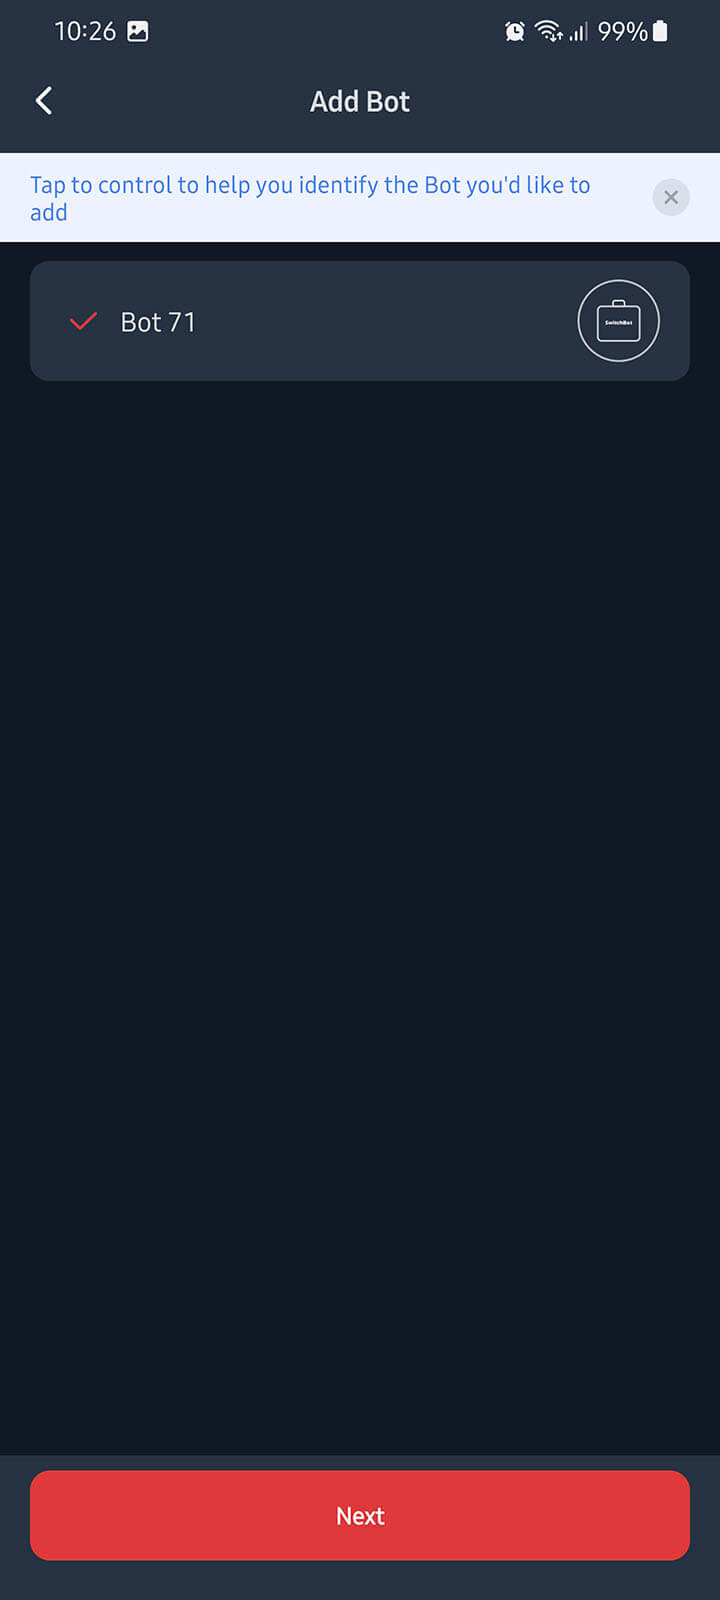
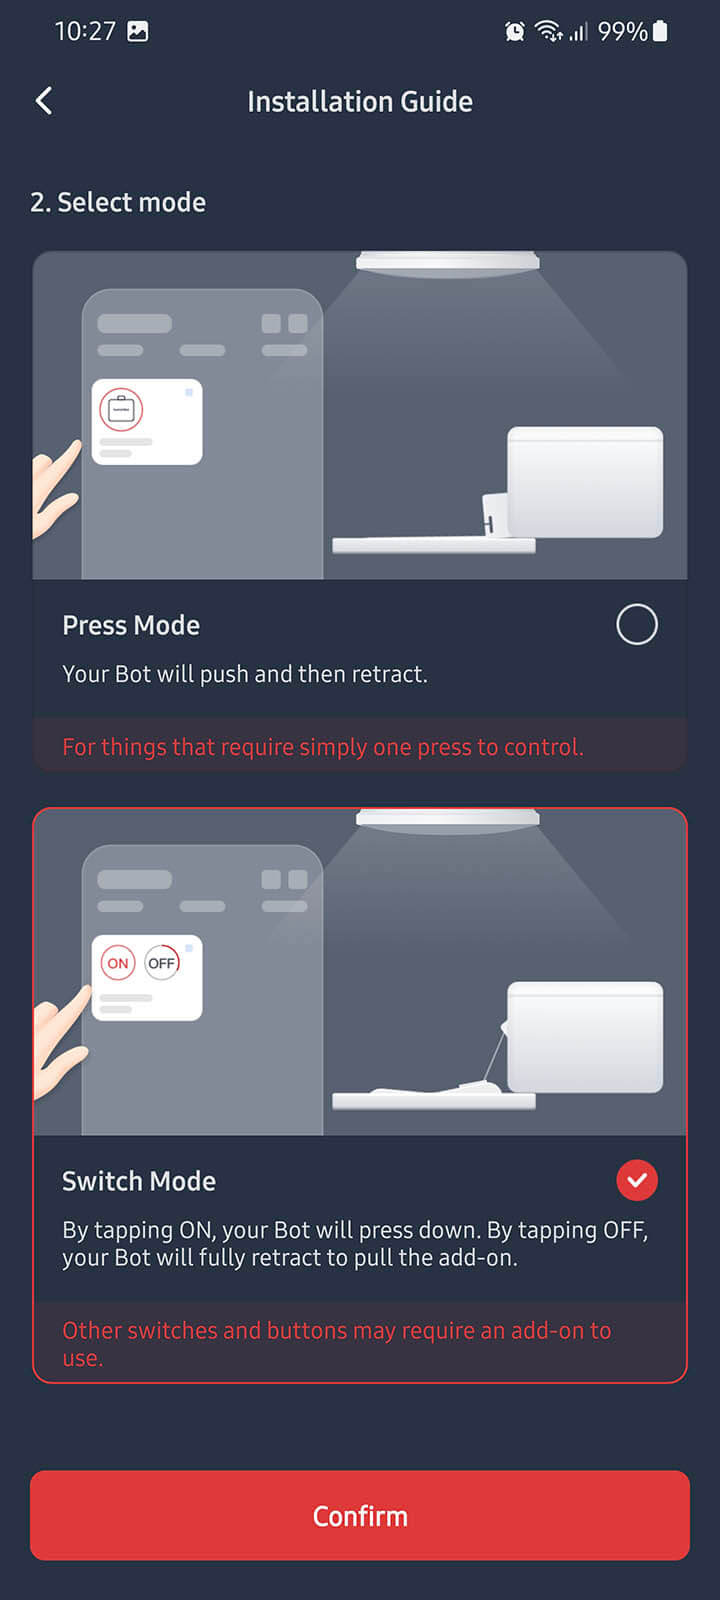

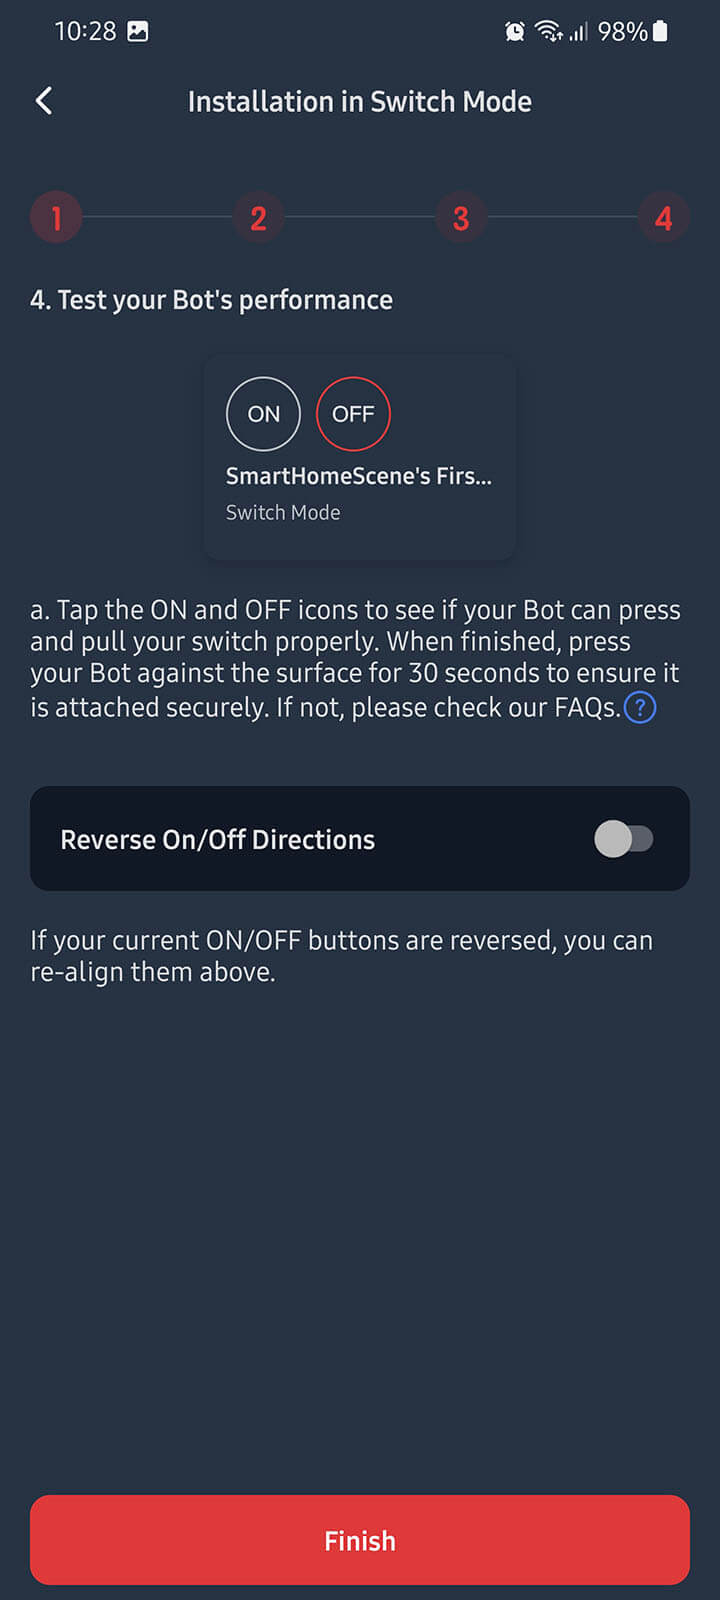
Two initial Modes are available for controlling the bot: Press Mode and Switch Mode.
In Press Mode, the bot will simply press your button and return to the original position. This mode is suitable for various push buttons and momentary switches.
In Switch Mode, the bot will push the button once pressed and stay in that position (ON) until you toggle it again to (OFF). You use the adhesive sticker with the loop and install it on the switch itself, meaning the bot will pull the switch back into place when the OFF button is pressed. You can reverse the ON/OFF actions in the app if you need to.
A third, Custom Mode is available for setup when you navigate to Settings (Cog Wheel in Corner) > Mode. Custom Mode allows your bot to complete combinations of repeated or different actions. You can also set a delay between actions. This is used for triggering more advanced actions on a timer.
Firmware version, Battery level and BLE MAC Address of the device can also be checked in the Settings menu.
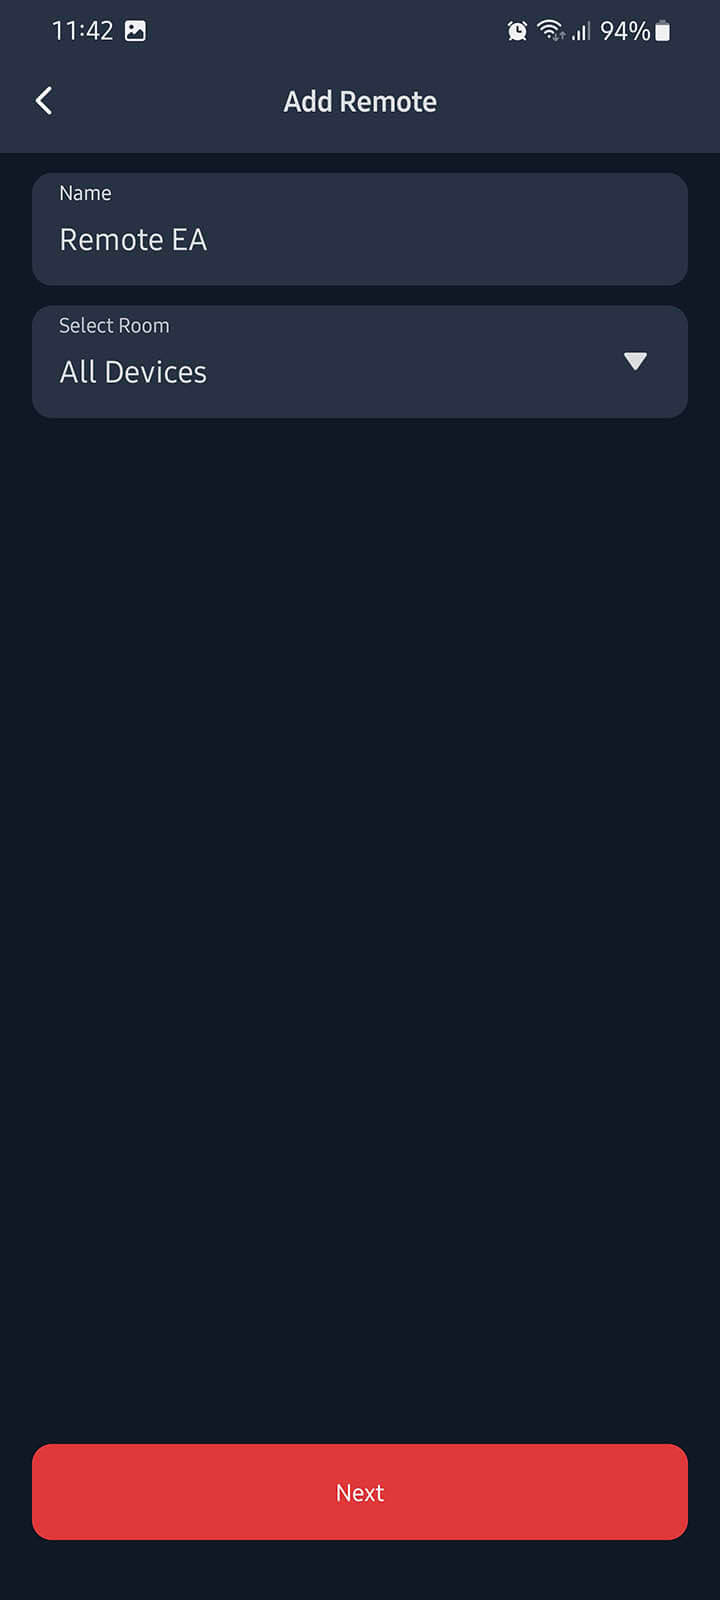
SwitchBot Remote
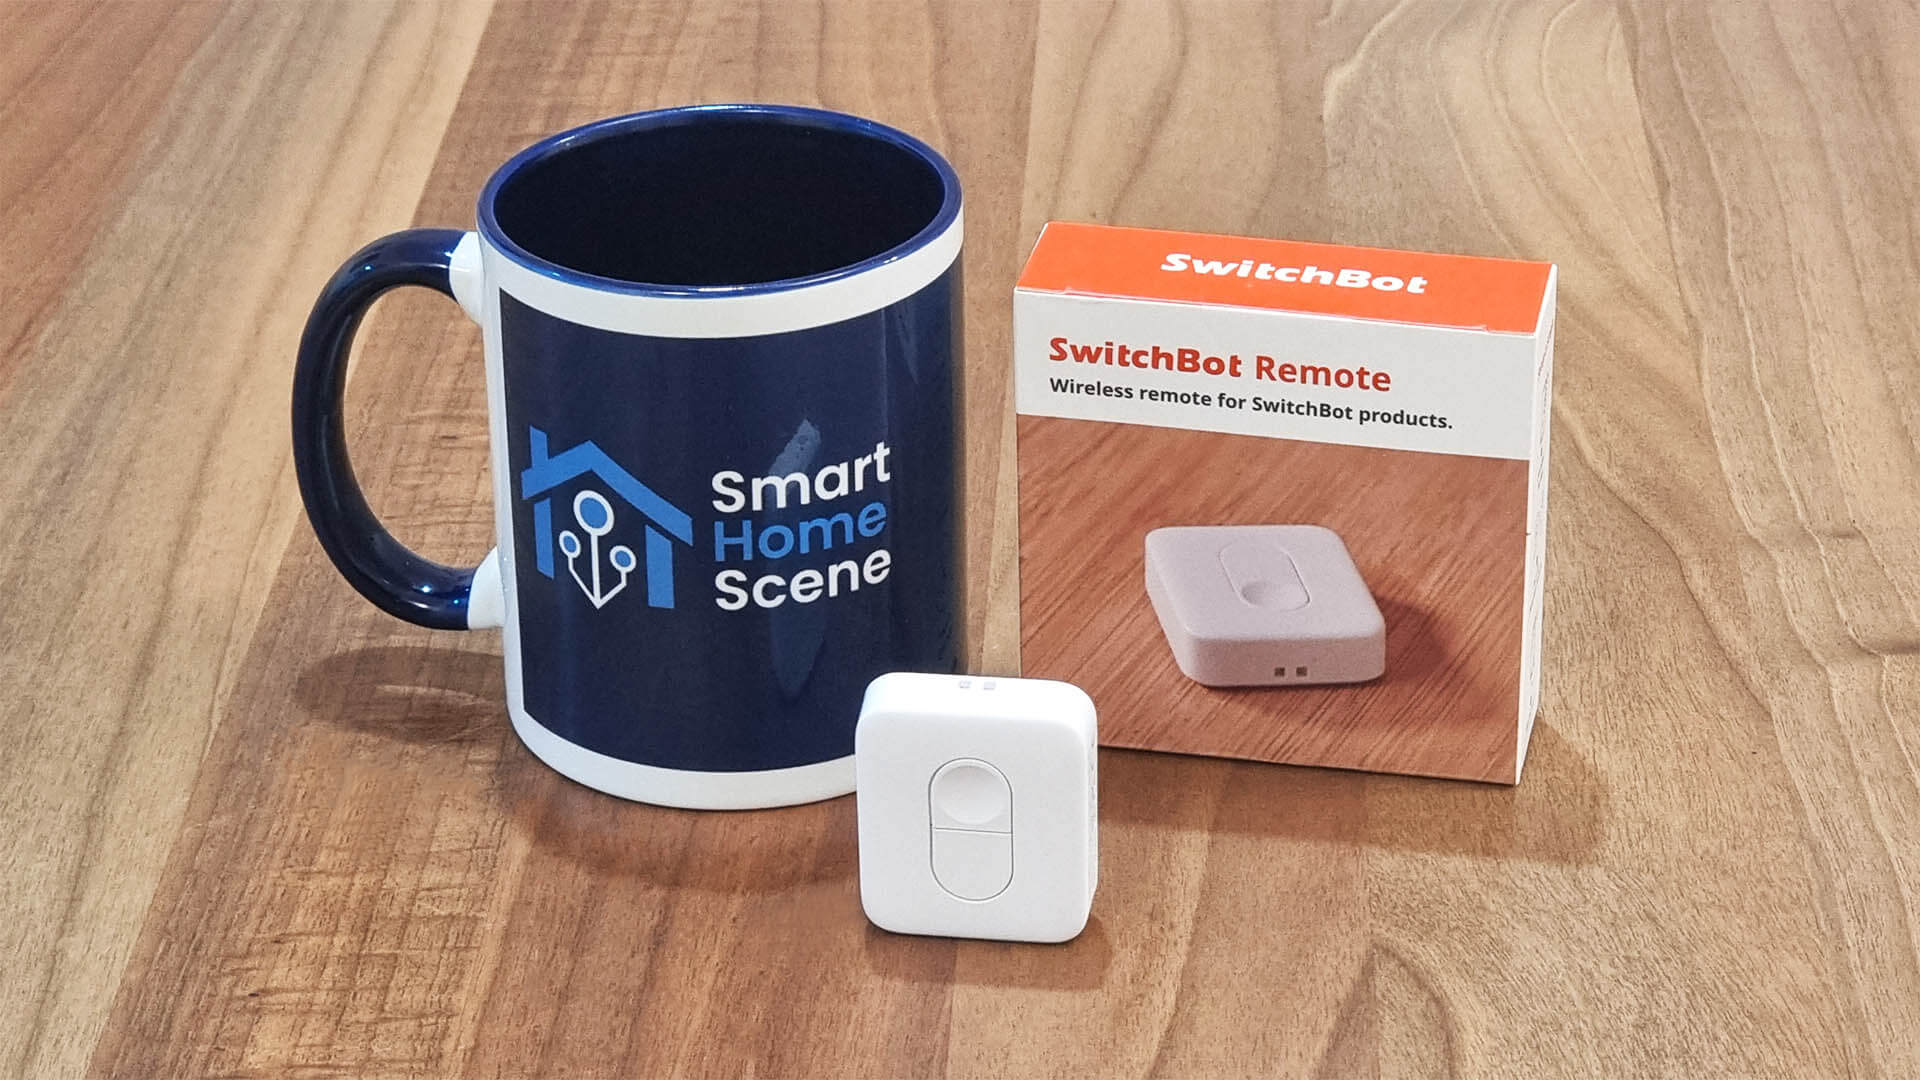
The SwitchBot Remote is a simple double button remote used to trigger various automations, scenes or switches within the SwitchBot ecosystem. Like most of SwitchBots devices, it operates via Bluetooth and is powered by a CR2450 button battery.
Technical Specification
- Color: White
- Material: ABS Plastic
- Size: 37.1×43.1×13.4mm
- Weight: 17.7g
- Battery: 1xCR2450
- Buttons: 2 (1xConcave, 1xConvex)
- Connectivity: Bluetooth Low Energy (BLE)
Disassembly
The SwitchBot Remote comes in a small package containing the double button remote, a manual and a double sided Velcro sticker. This sticker can be used to move the remote around or carry it with you and put it back in place once you are done using to avoid losing it. There’s also a small loop on the bottom for attaching the remote to a keychain.
This remote features two buttons: a concave and convex button, which are also their labels in the SwitchBot app.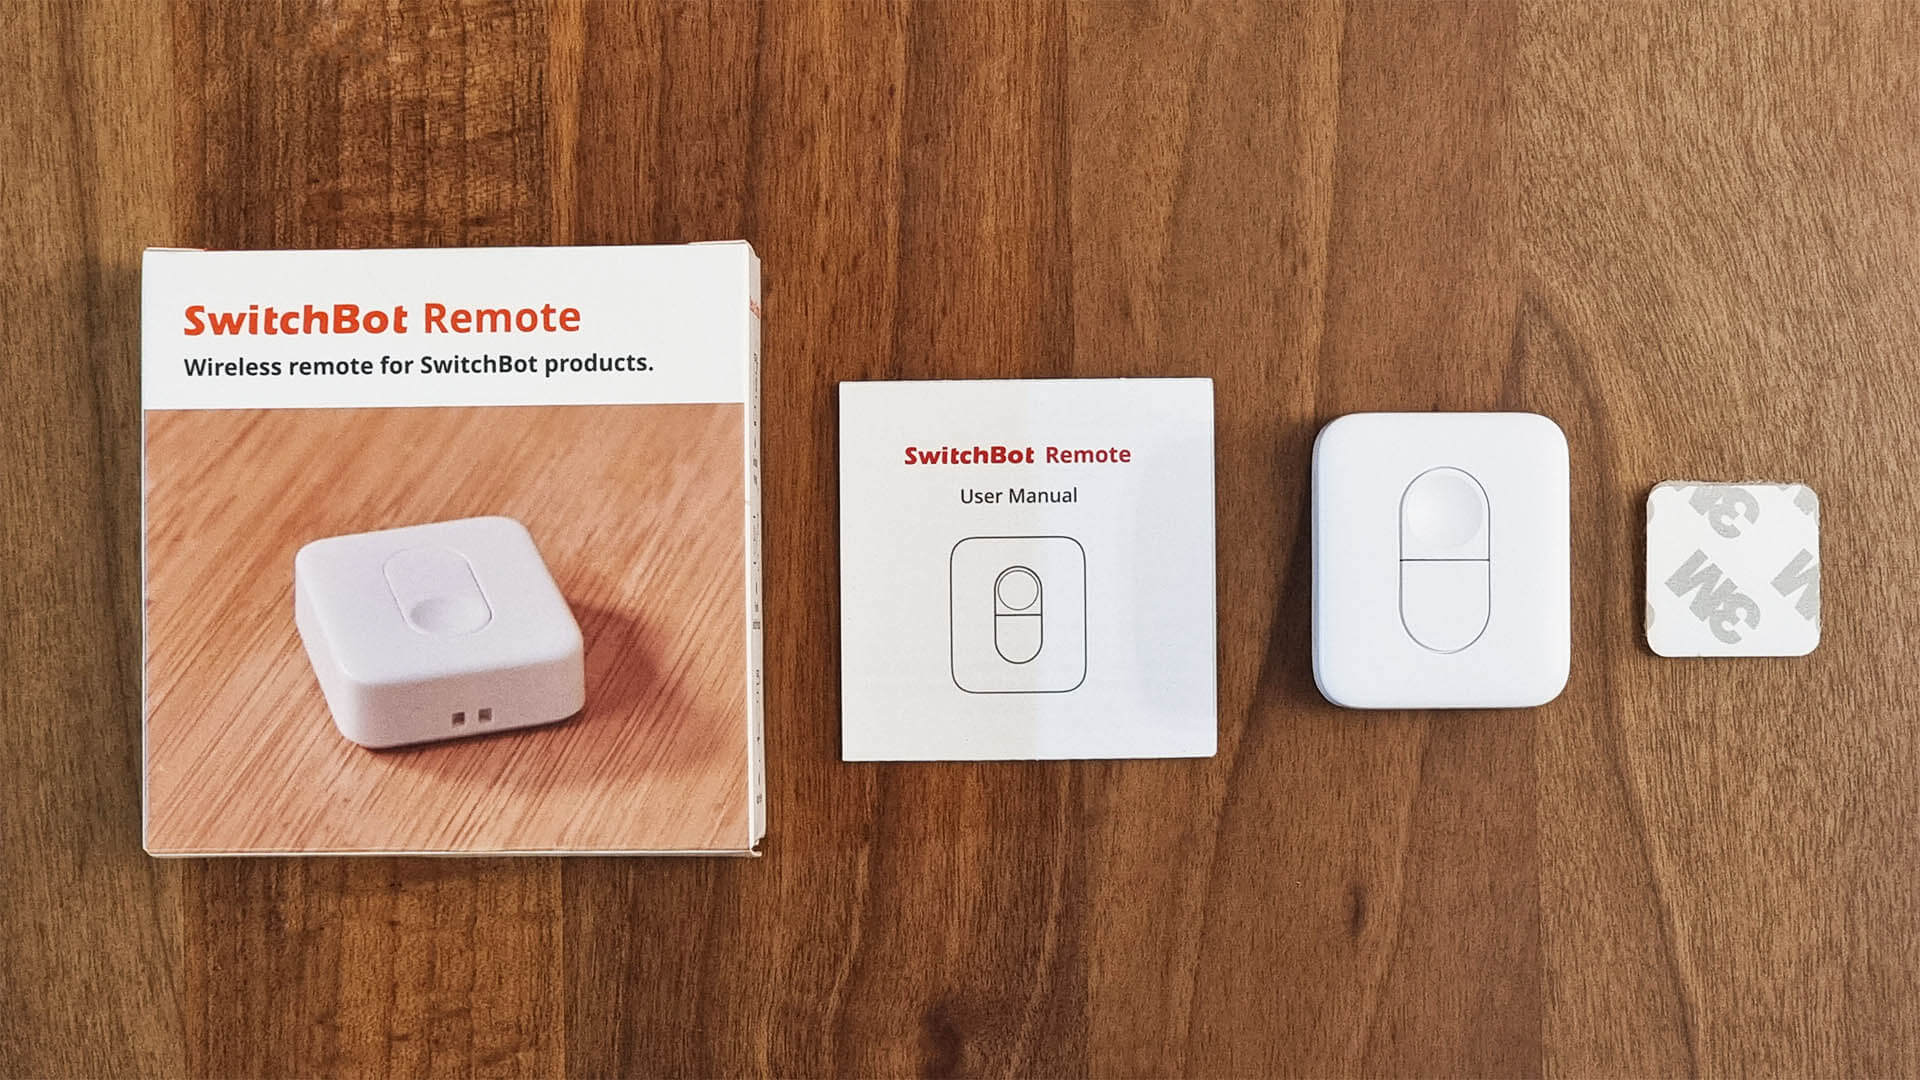
The SwitchBot Remote is powered by a single 3v CR2450 battery which is preinstalled in the device. The company claims a full year battery life, tested at 10 times a day. It’s a fairly common battery among smart home devices, so it easy to source and replace for dirt cheap.
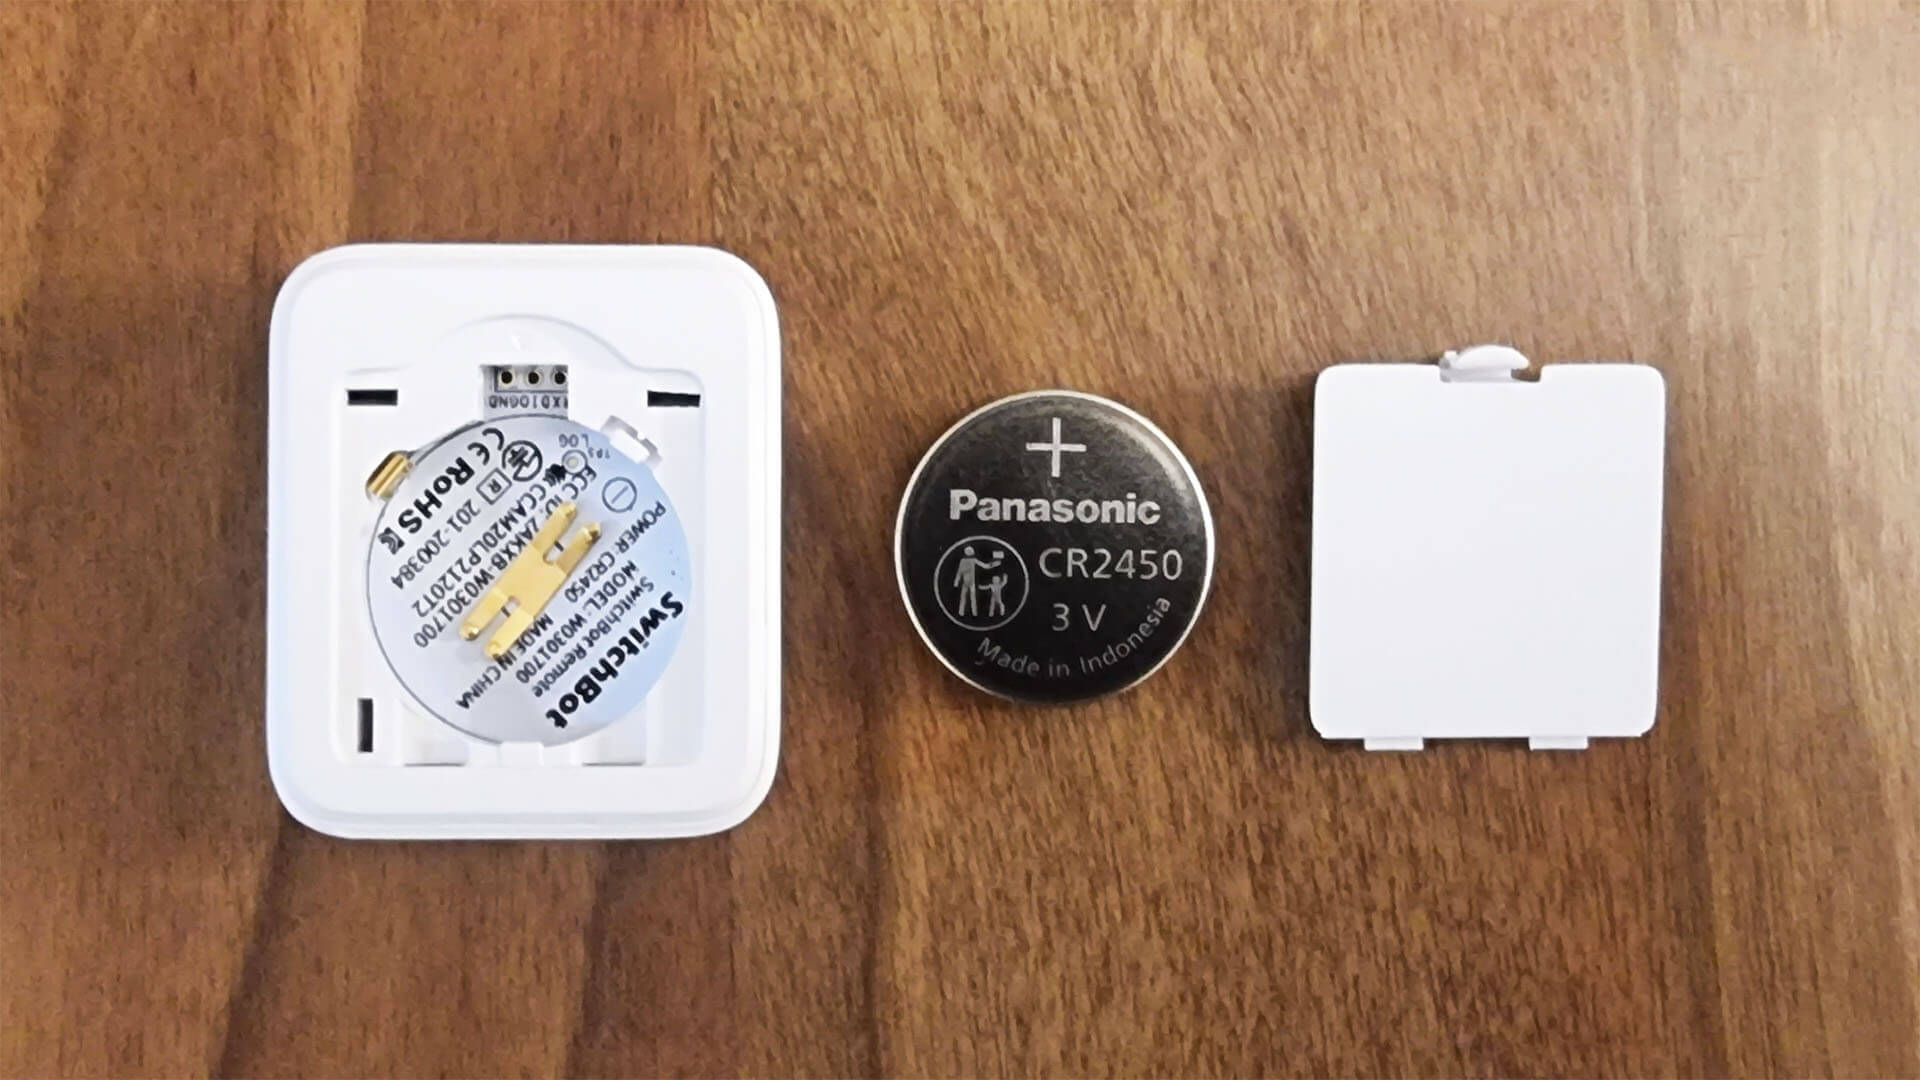
Disassembling the remote was easy, just prying it open with a small screwdriver. I was pleased to see metal tact buttons installed instead of plastic ones, which are more durable and provide nice clicky feedback to the user. Bluetooth communication is handled by the same chip across SwitchBot’s products, BM-9762CMF Bluetooth 5.0 BLE Module [Datasheet].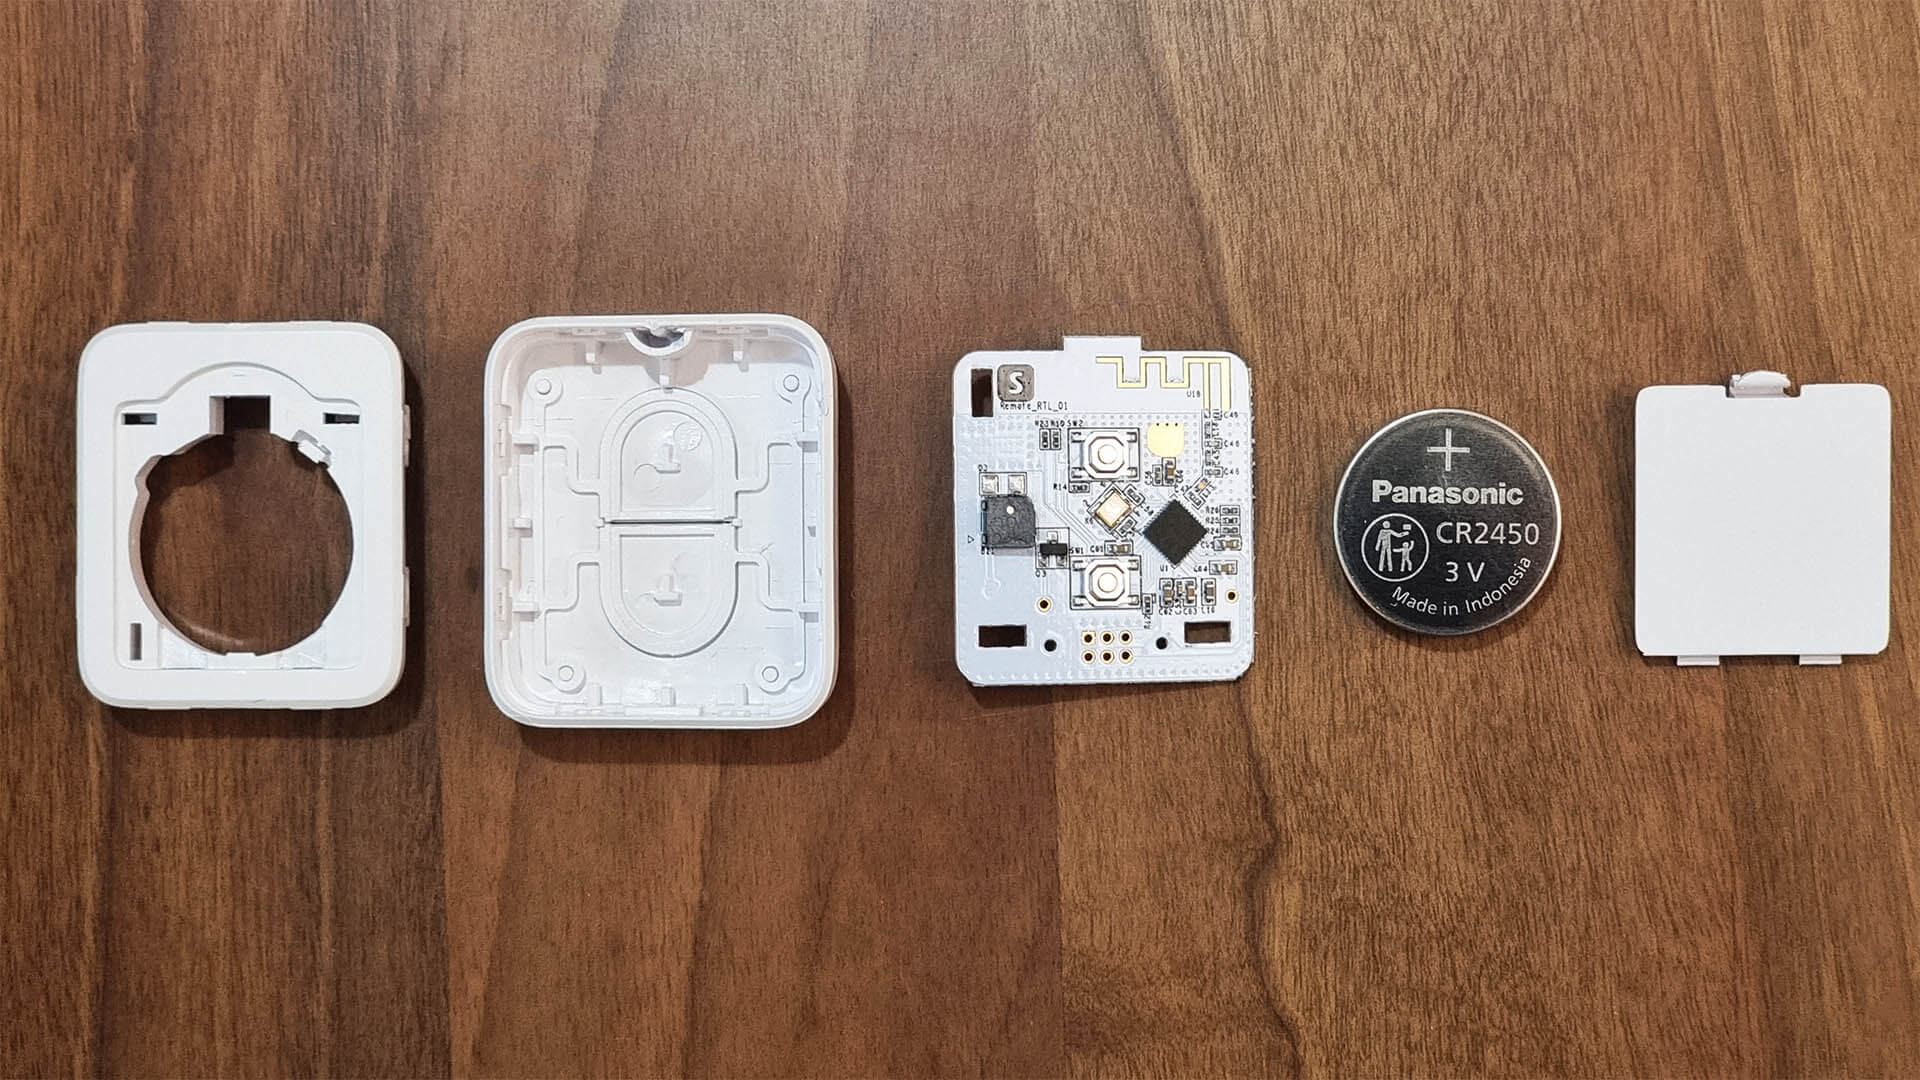
SwitchBot Remote in the App
Adding the Remote to the SwitchBot app is a seamless process. You click the plus button at the top corner just like for any other device and follow the screen instructions:
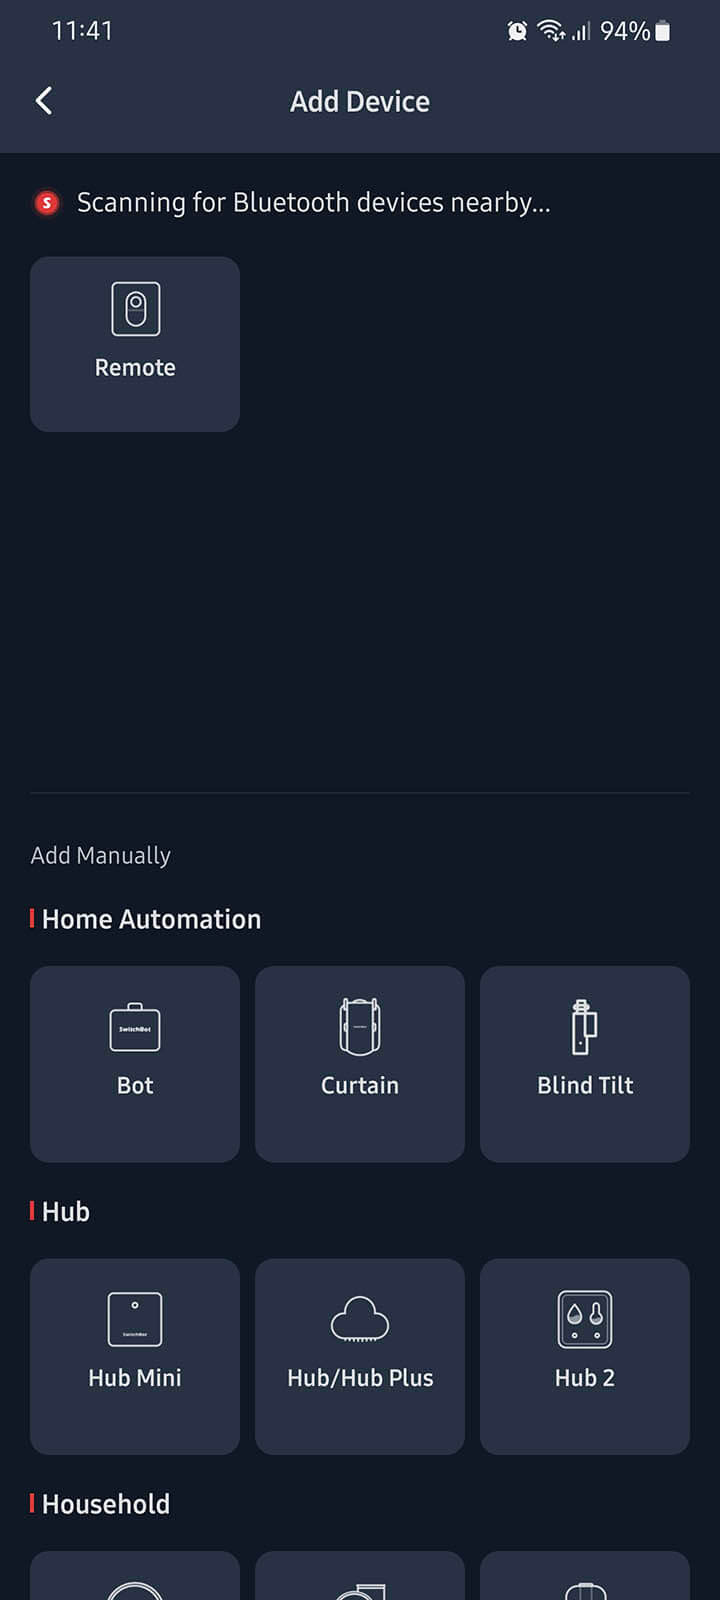
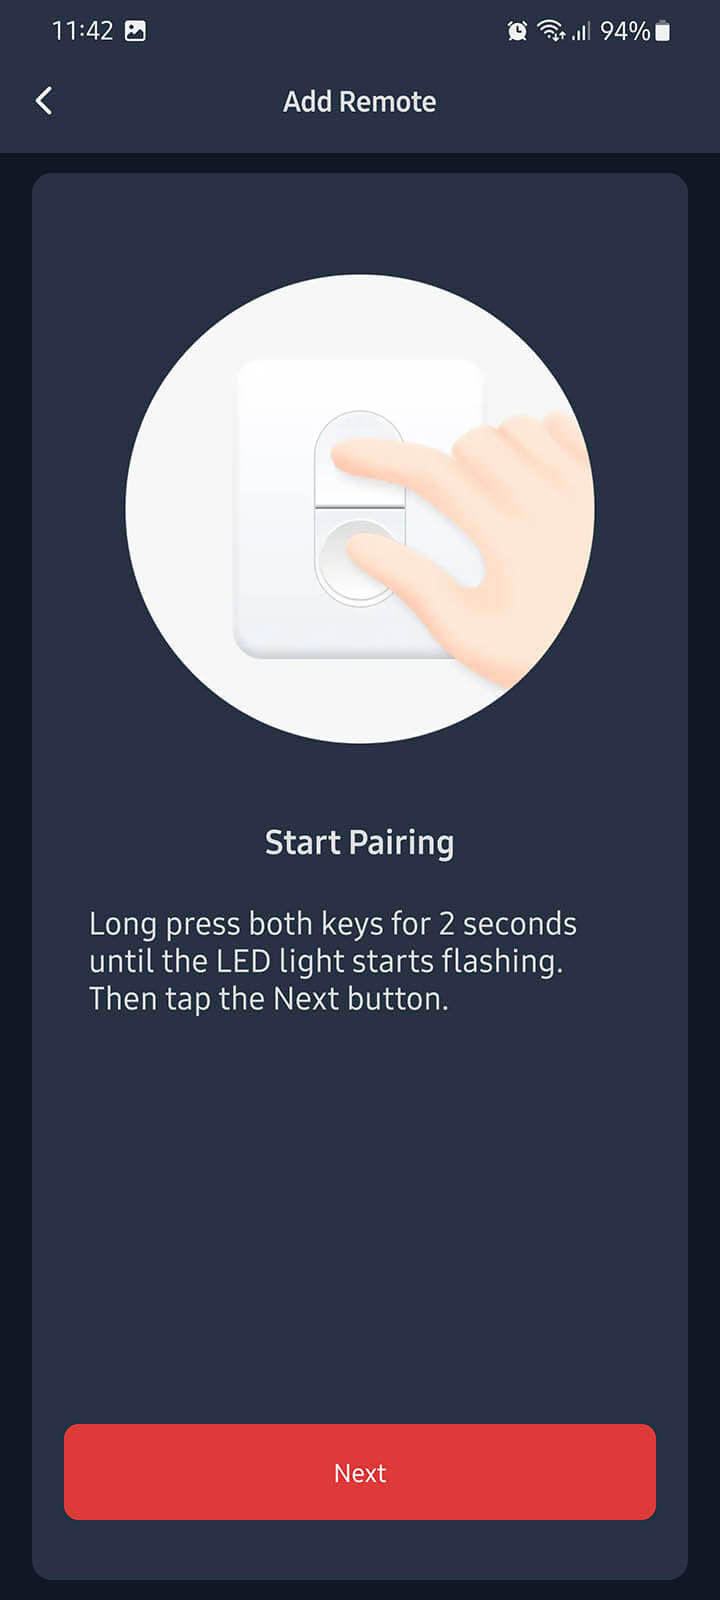
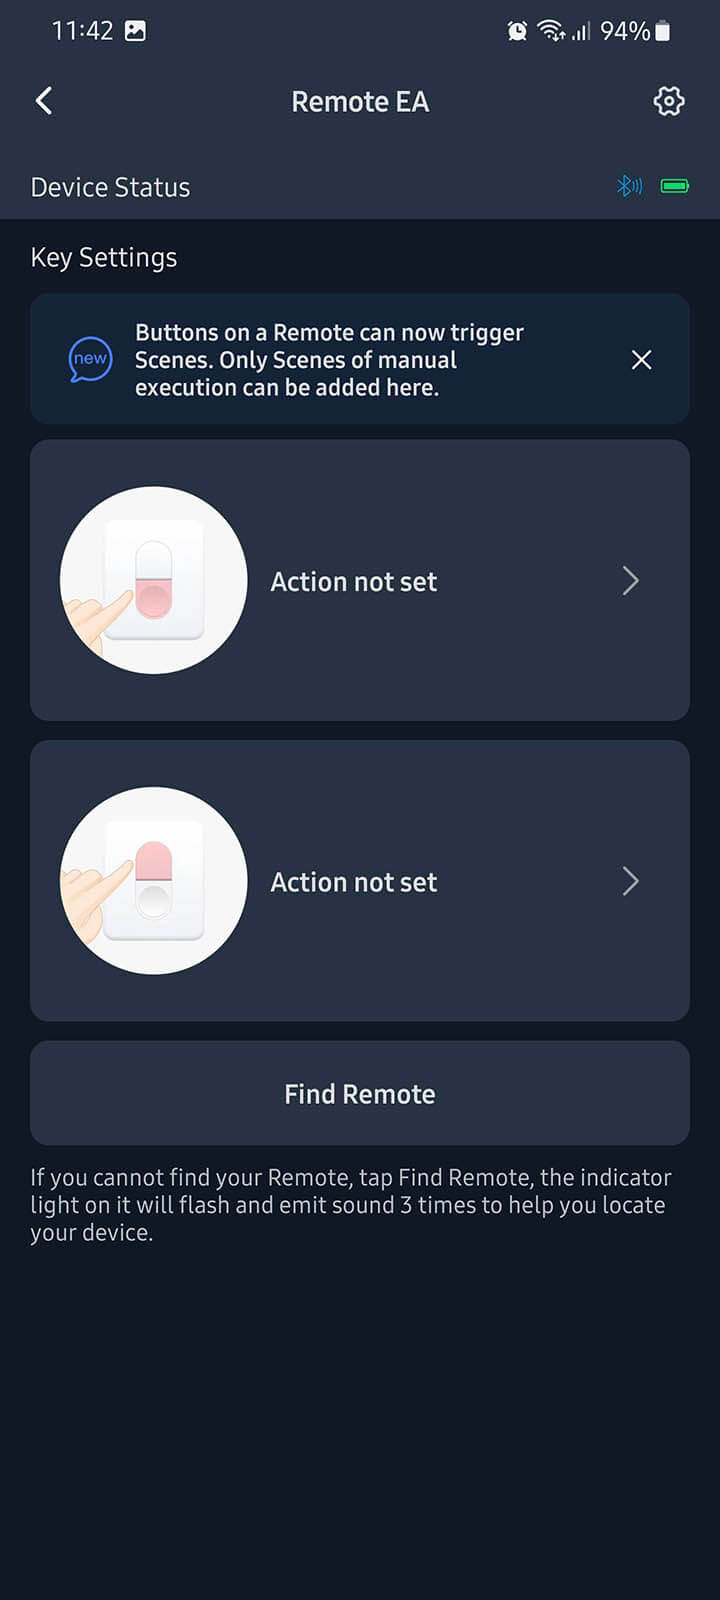
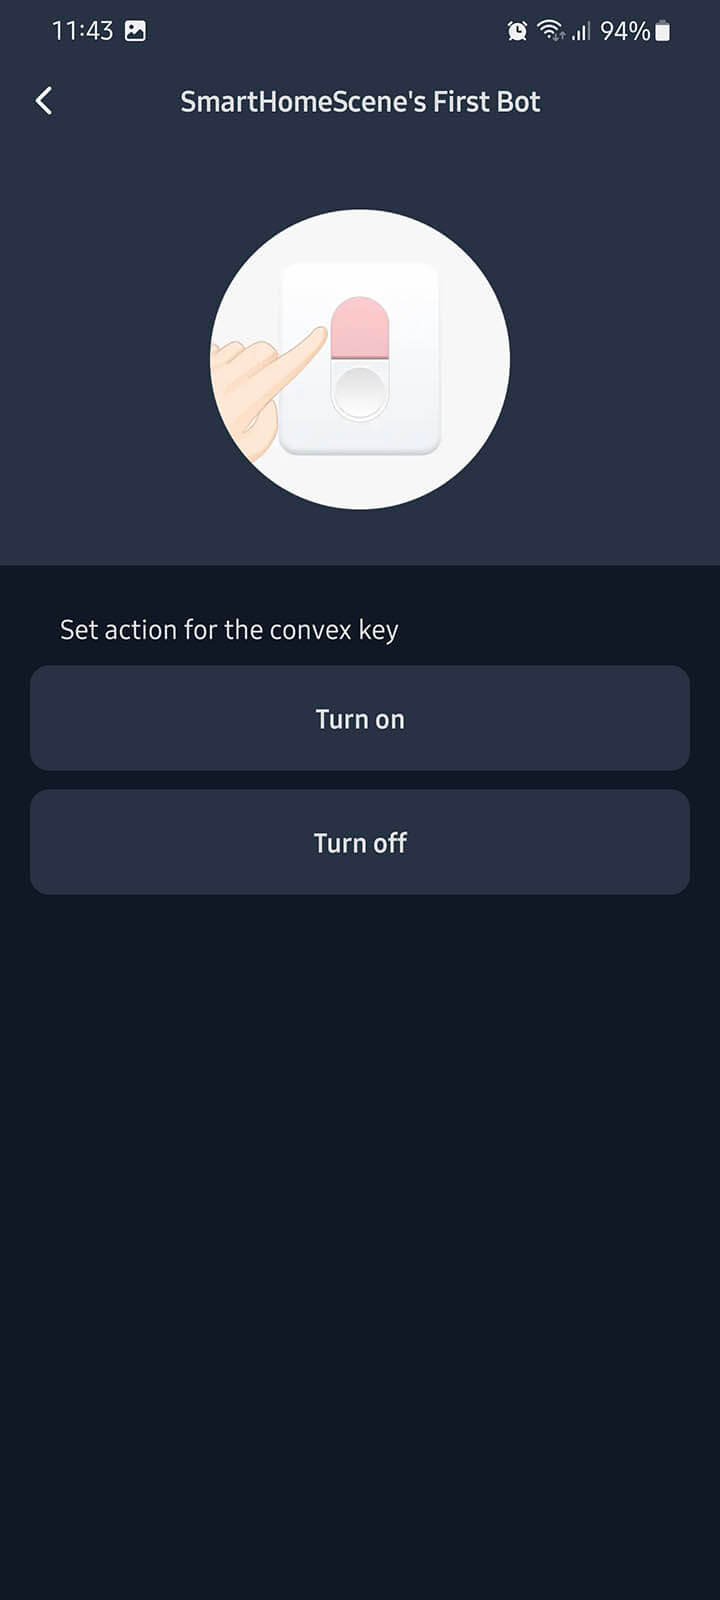
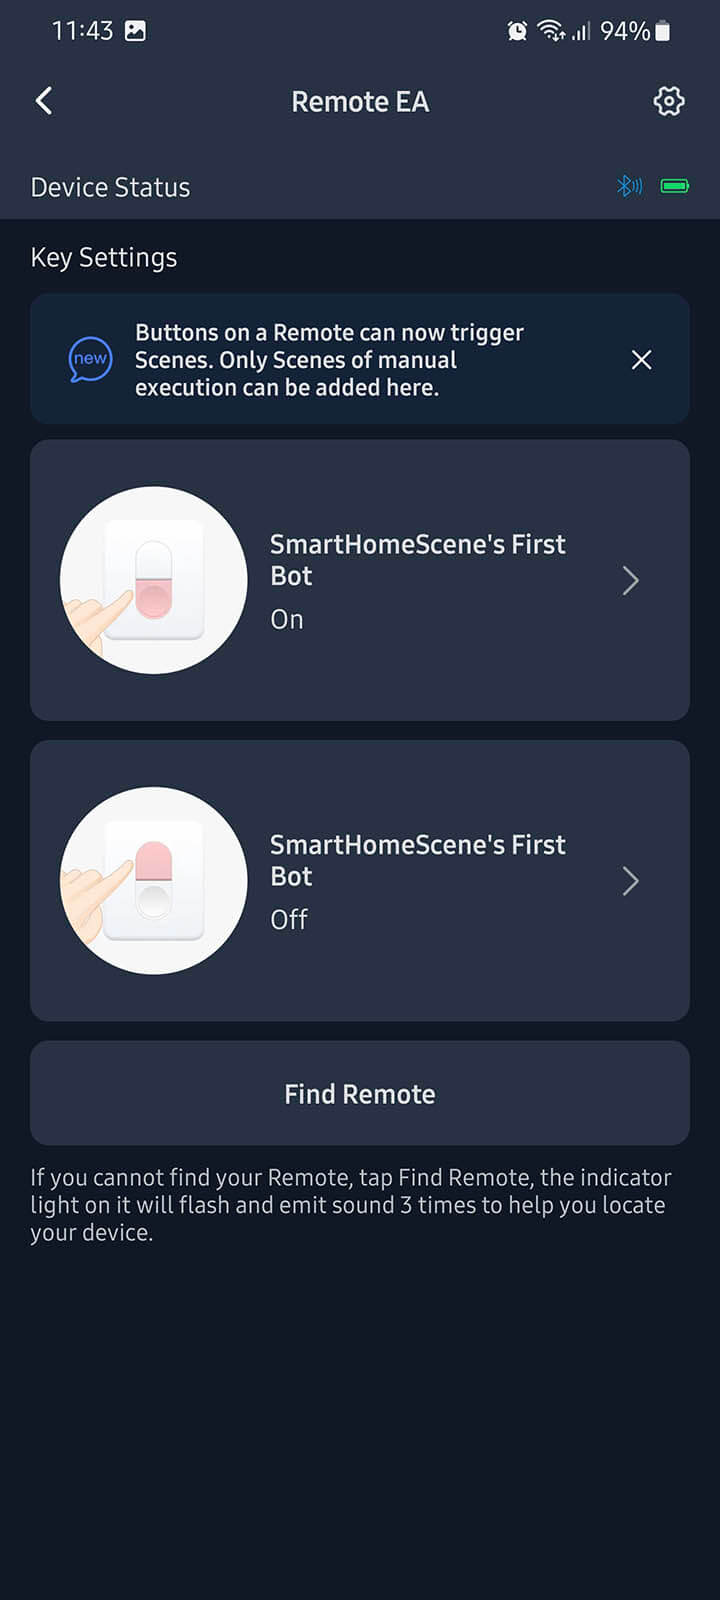
You can add any action you want to be trigger by one of the buttons. If you don’t have anything paired, you can do it afterwards.
Once the device is added, it outputs a beeping sound and a LED flash by default whenever a button is clicked. You can turn these options of by clicking the remote in the app > Settings (Cog Wheel in Corner) > Advanced Settings. Firmware version and battery level can also be checked in this menu, as well as the BLE MAC of the remote.
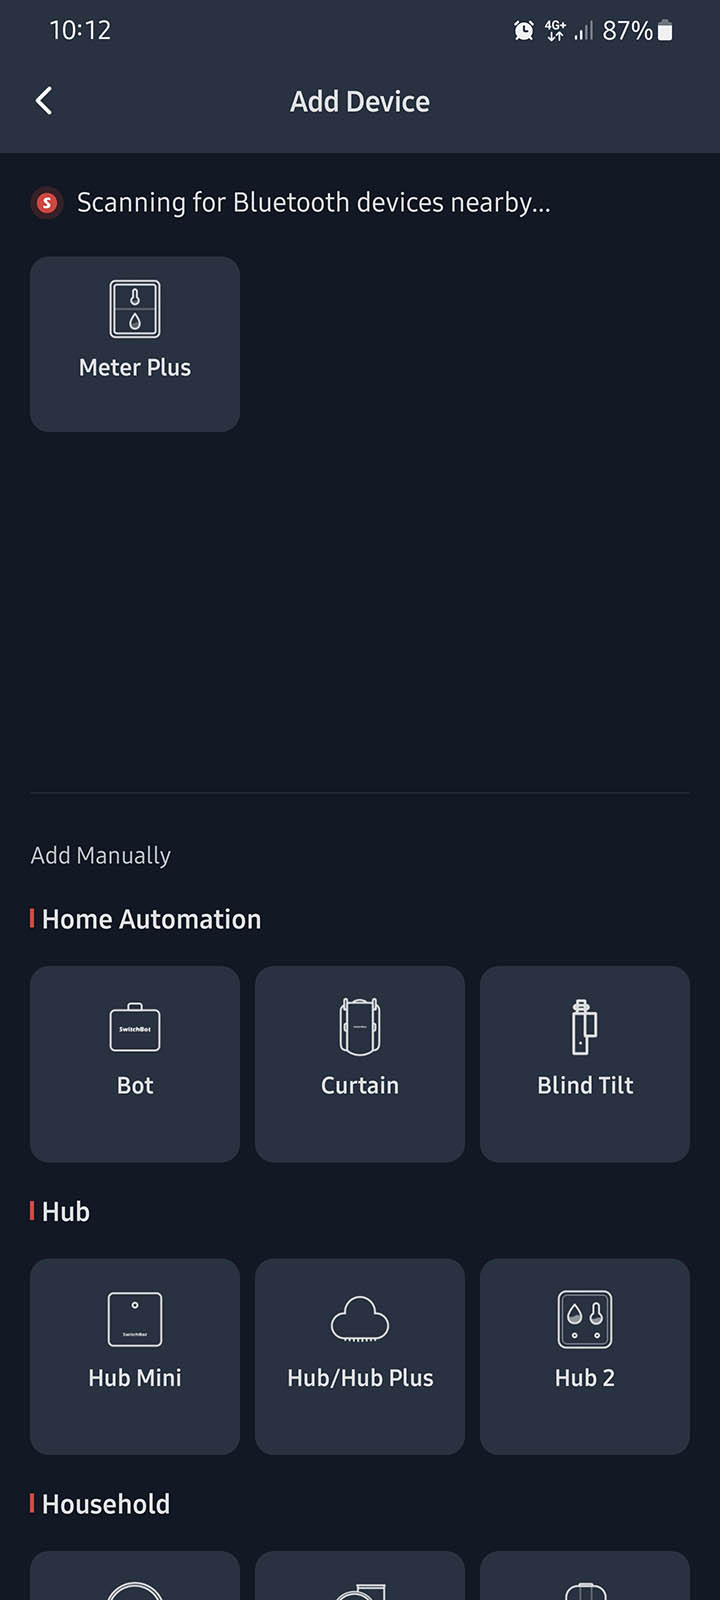
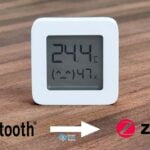
SwitchBot Meter Plus
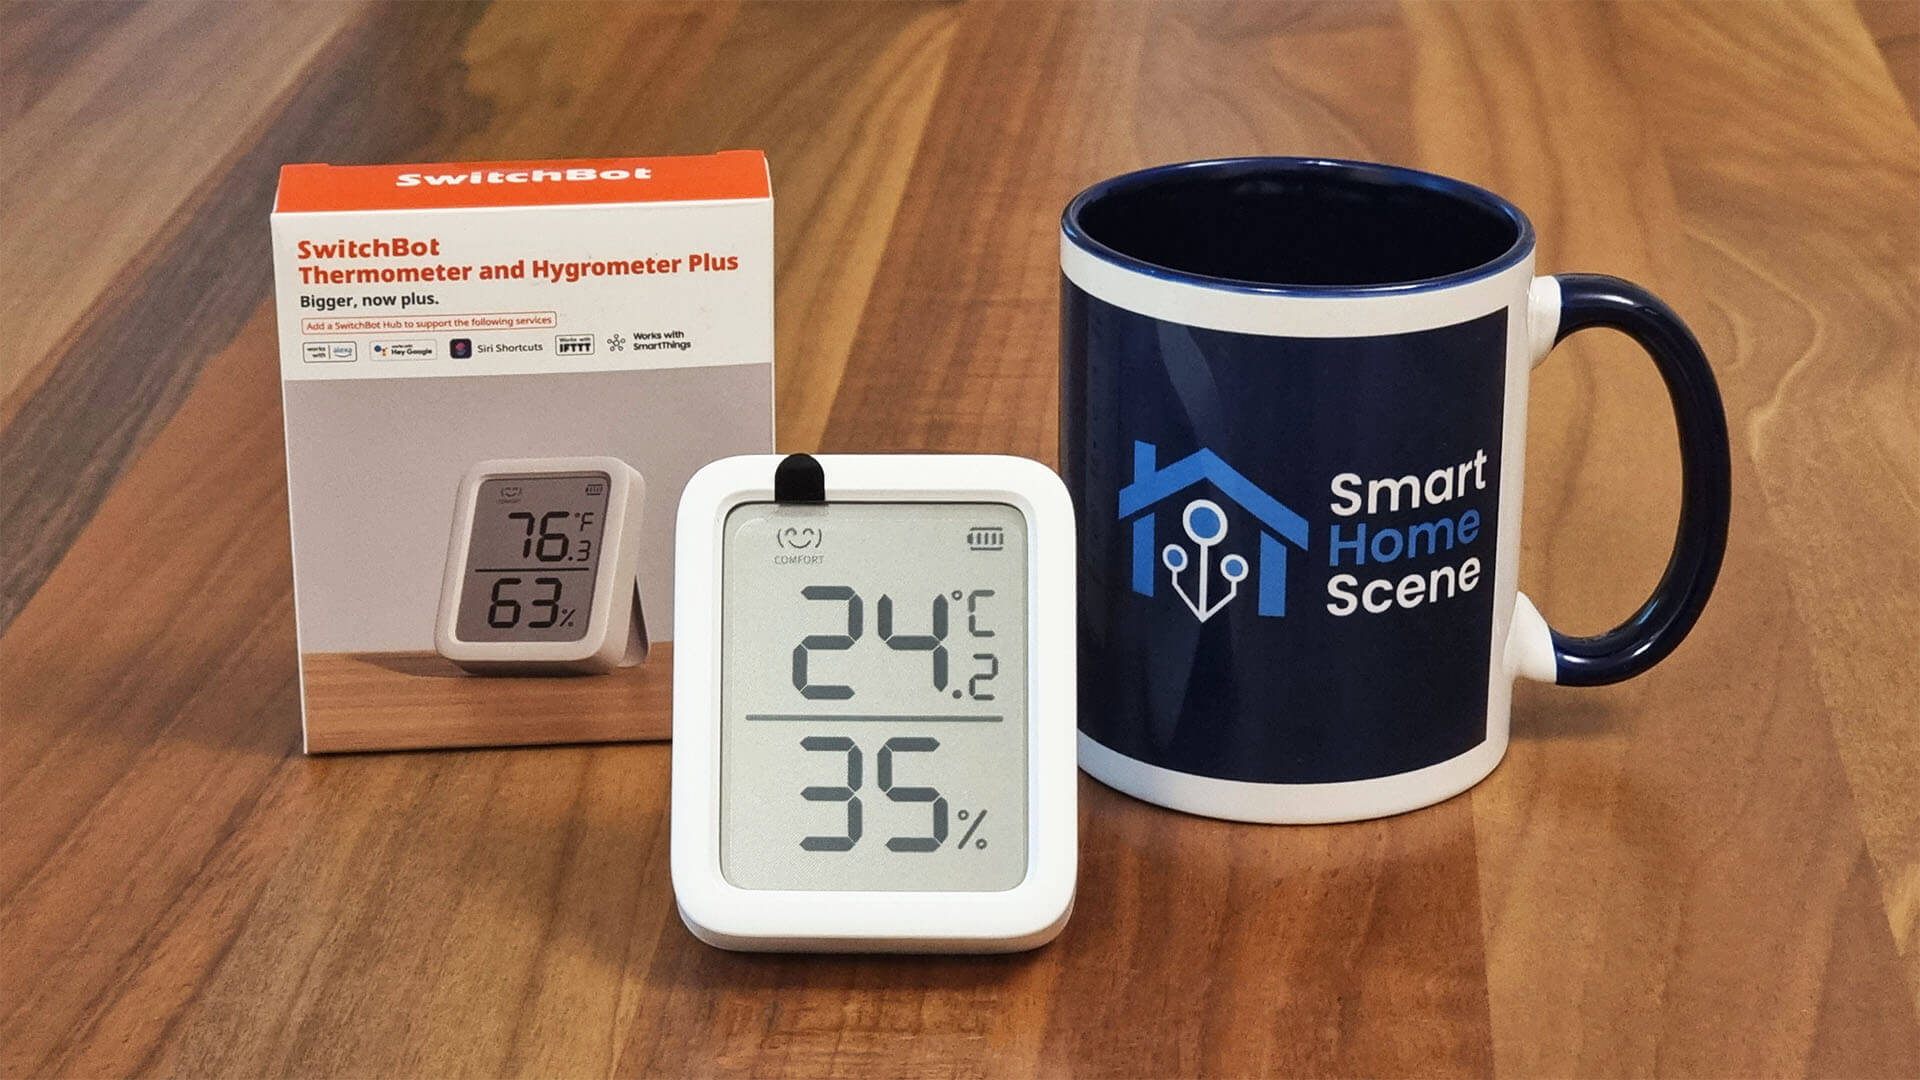
The SwitchBot Meter Plus is a BLE-based thermometer and hygrometer device with an LCD screen, powered by 2xAA batteries. It’s a successor to their original SwitchBot Meter, being larger and with a better screen.
Technical Specification
- Color: White
- Material: ABS Plastic
- Size: 79x65x22mm (3.1×2.5×0.9″)
- Weight: 64g (2.3oz)
- Battery: 2xAA
- Battery Life: ~1 year
- Connectivity: Bluetooth Low Energy (BLE)
- Measurement Resolution: 0.1°C/0.1°F, 1% RH
- Temperature Range: -20°C – 80°C (-4°F – 176°F)
- Temperature Accuracy:
- -20°C-0°C ±0.4°C
- 0°C-65°C ±0.2°C
- 65°C-80°C ±0.3°C
- Humidity Range: 0 – 99% RH
- 0-10%RH ±4%
- 10-90% ±2%
- 90-99% ±45
- Humidity Accuracy:
Disassembly
The SwitchBot Meter Plus comes packaged in the similar box like their other products, containing the device itself, a manual and a mounting sticker. The screen is surprisingly good for an LCD, you can clearly glance the information on it from a distance. Viewing angles are better than any non e-ink thermometer I’ve tested.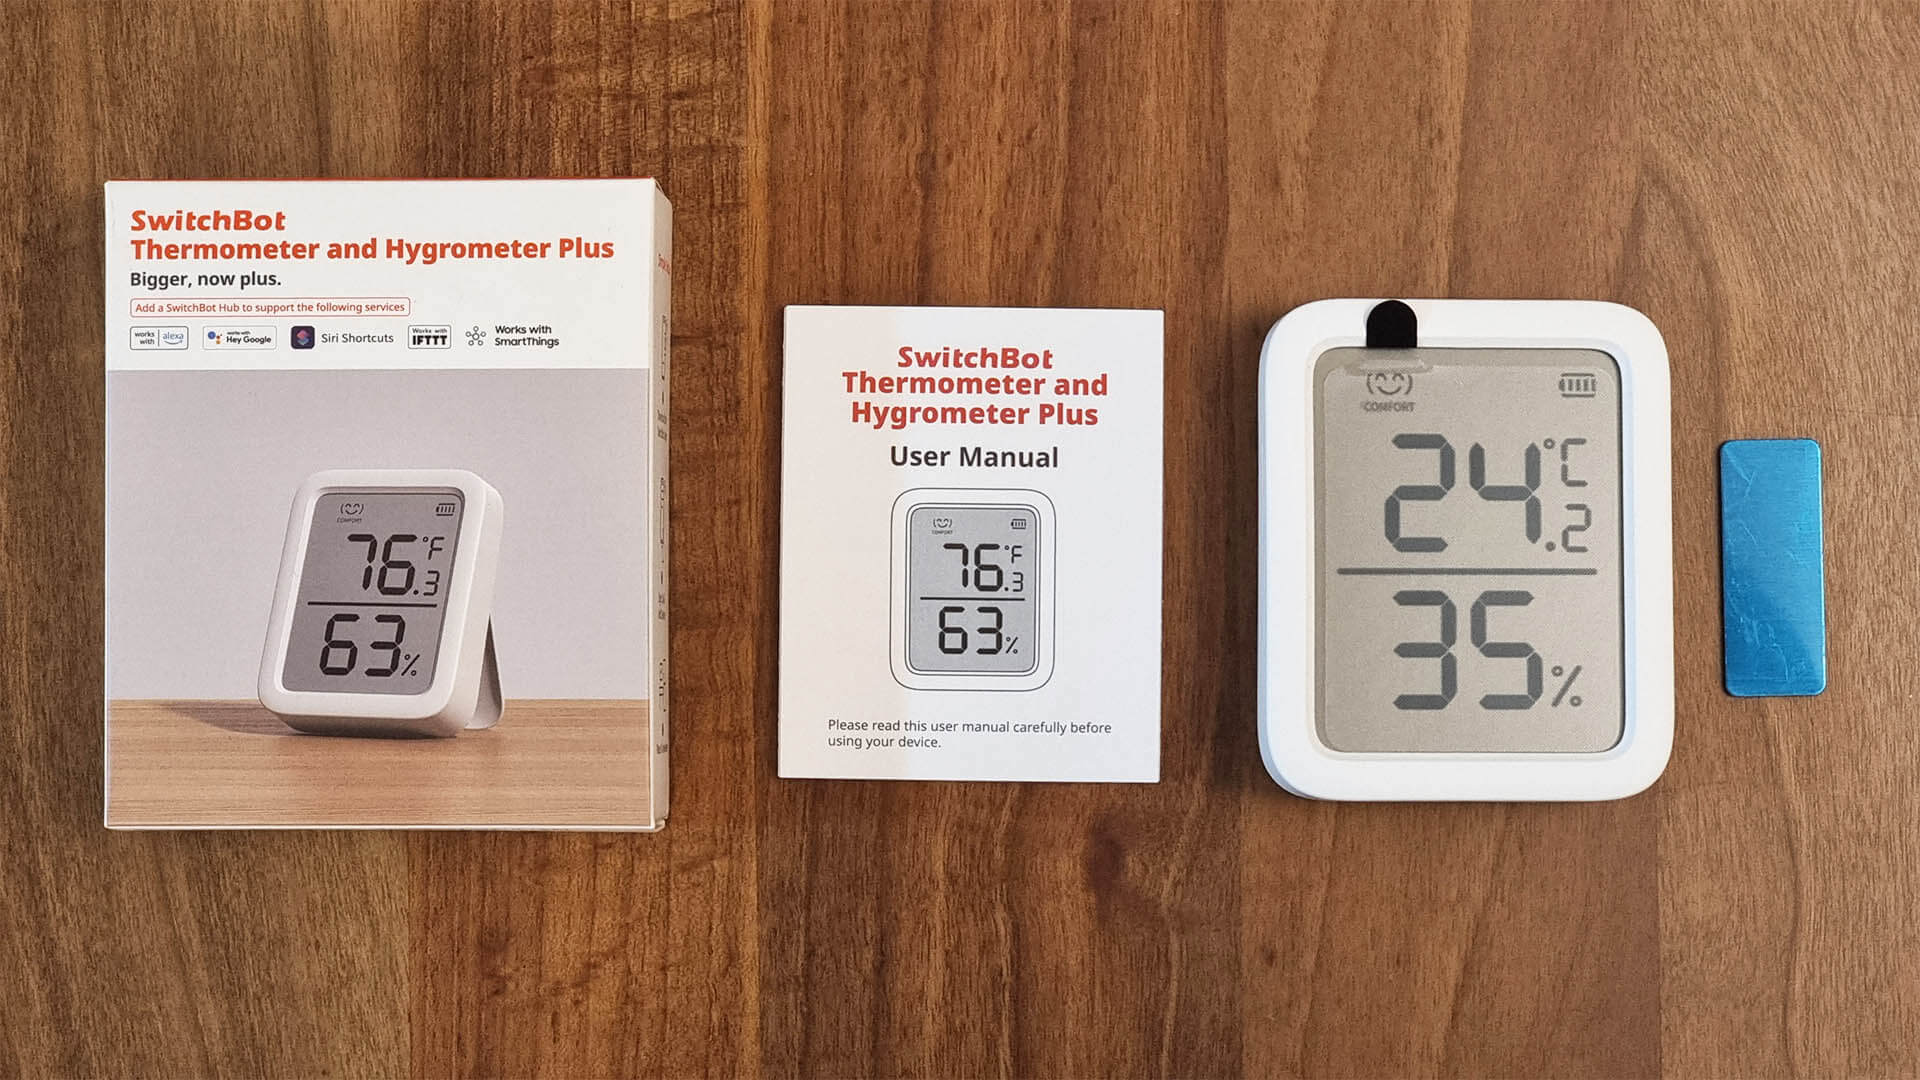
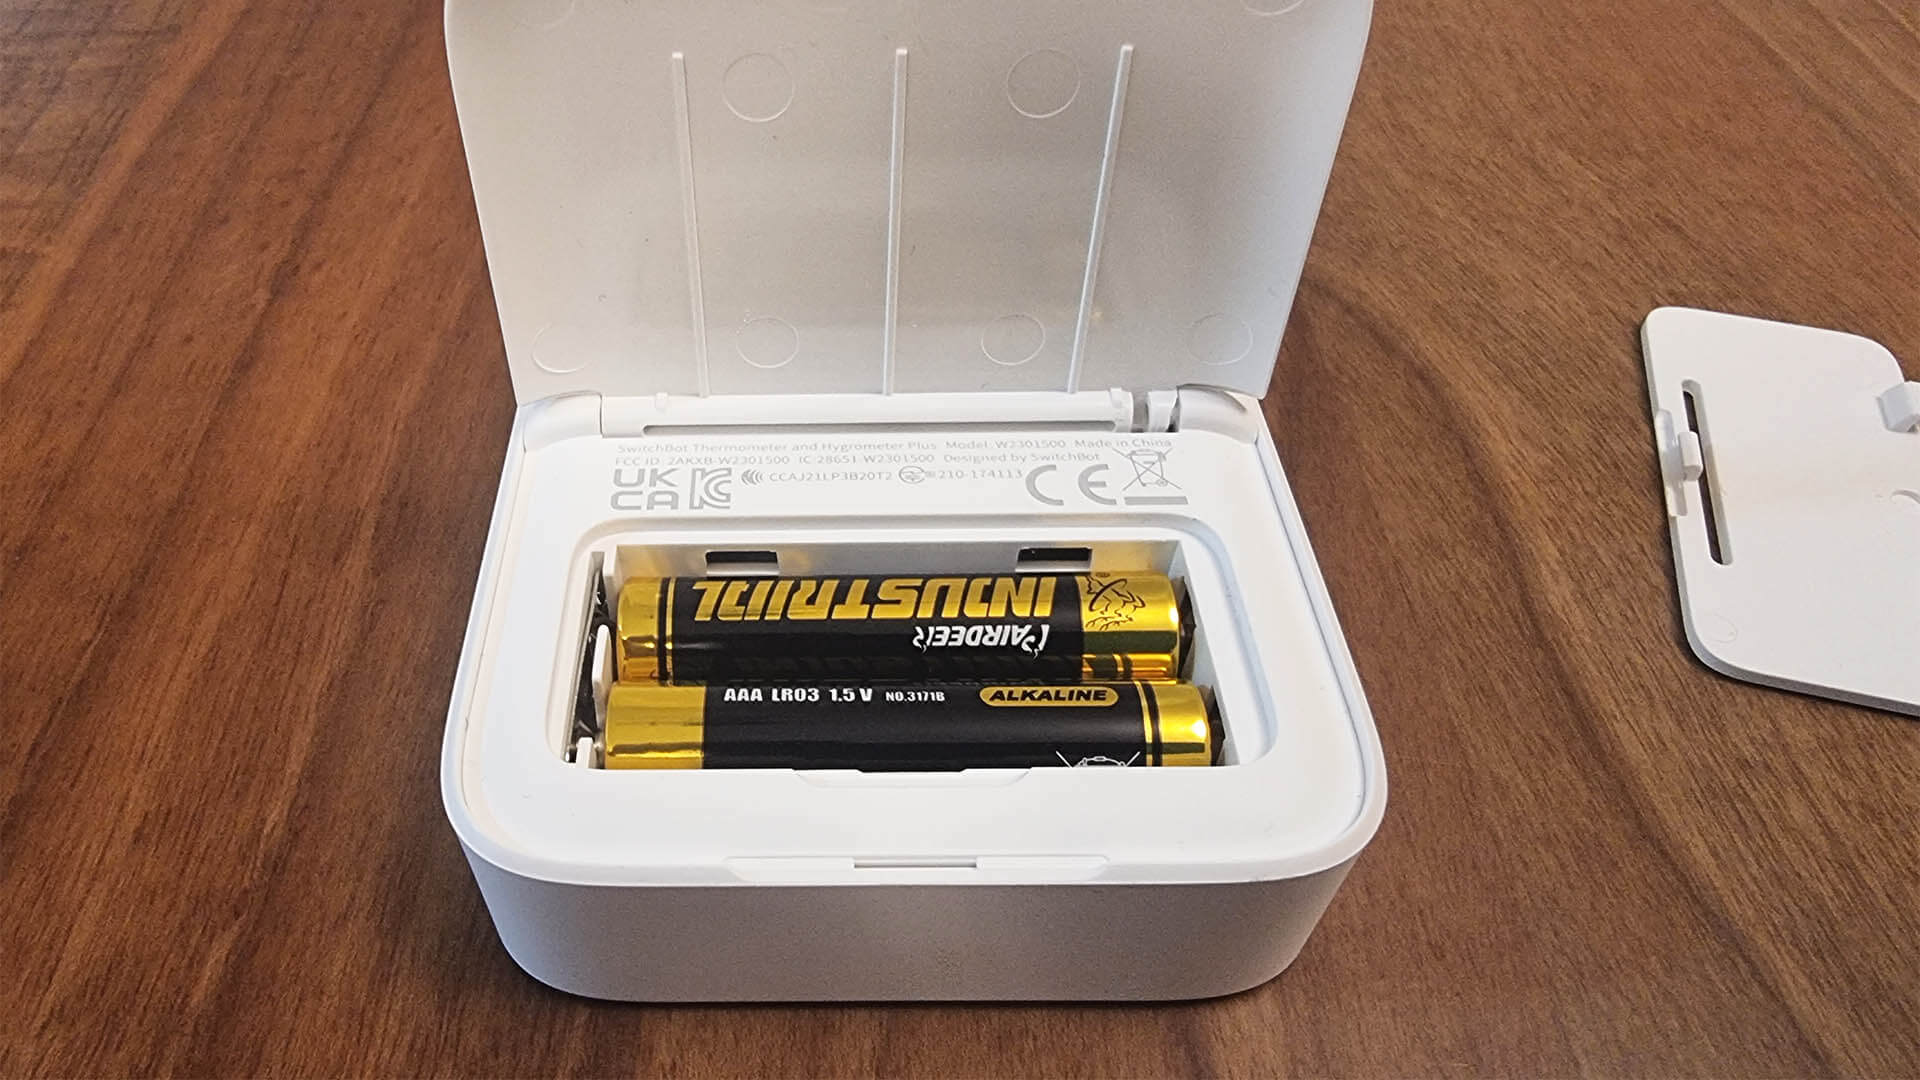
Lifting the back stand of the device reveals the cap which cover the batteries. This device is powered by 2xAA batteries, which come included in the package. AA is the most common battery type, used in many home appliances and gadgets like TV remotes, AC remotes etc.
Opening up the sensor, revealed the same BM-9762CMF Bluetooth 5.0 BLE Module [Datasheet] handling communication. A button which puts the device in pairing mode can be seen on the middle of the PCB. Another interesting thing that I didn’t know before opening it up, is that this gadget is equipped with two neodymium magnets. These are used to install the thermometer on any metal surface, such as a fridge or a metal door.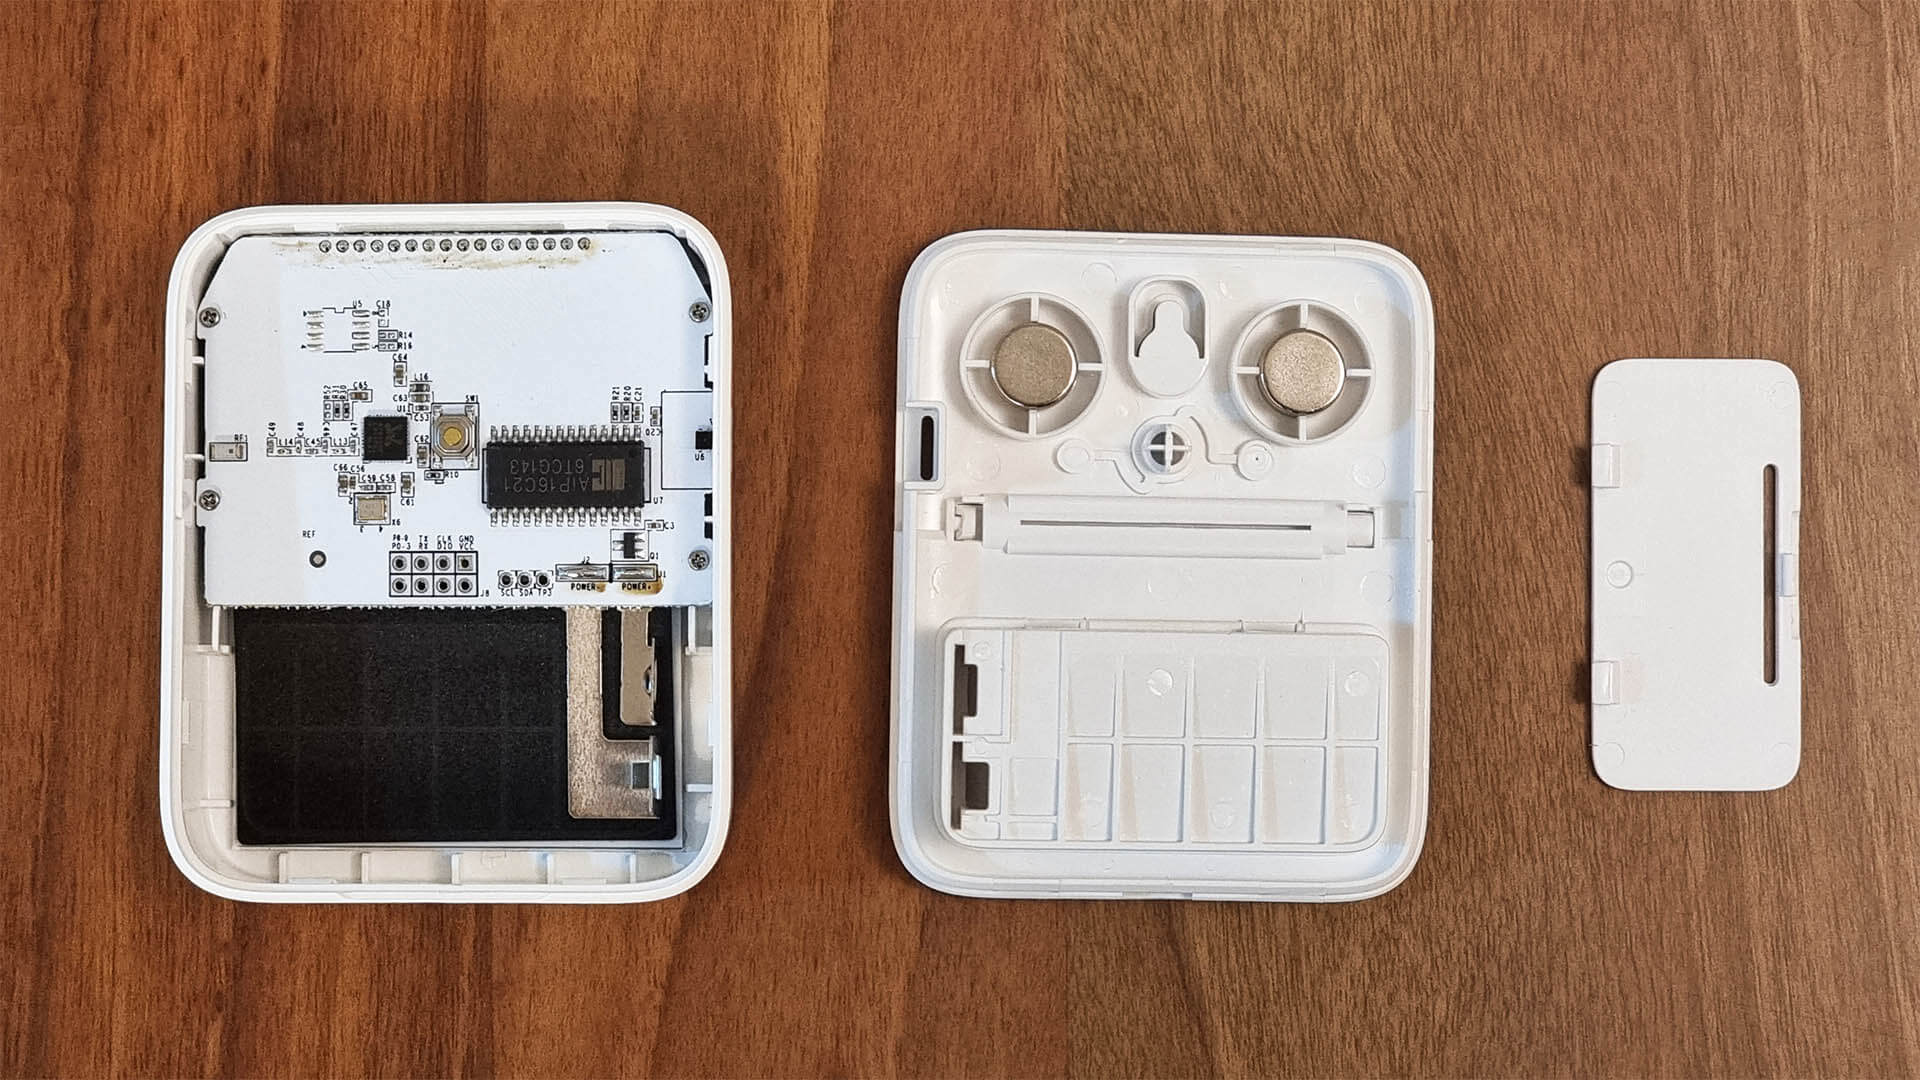
The SwitchBot Meter Plus gets it’s temperature and humidity reading from the Sensirion SHTC3 [Datasheet]. Sensirion is a reputable manufacturer from Strafa, Switzerland in the smart sensor industry. A similar CO2 module from the same company also powers the expensive Aqara S1 Air Quality Monitor.

SwitchBot Meter Plus in the App
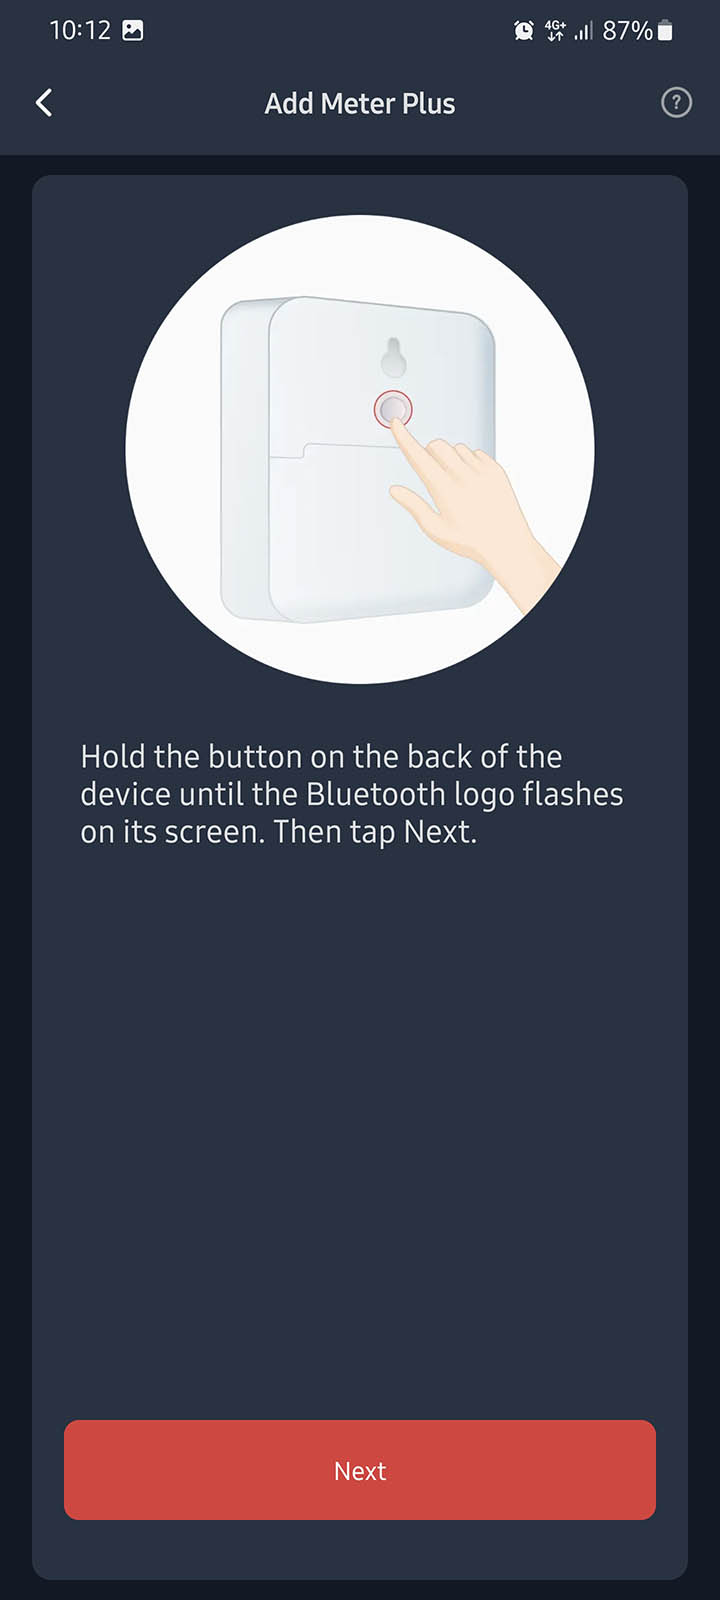
Adding the Meter Plus Thermometer in the app is as simple as can be. Put the sensor in pairing mode by pressing the button, click add device and give it a name and a room. That’s it!


If the device was recording the temperature and humidity in your room before being paired, it will download the history to the app once you add it. Hourly, daily, weekly, monthly and yearly charts are available for exploring the graphs.
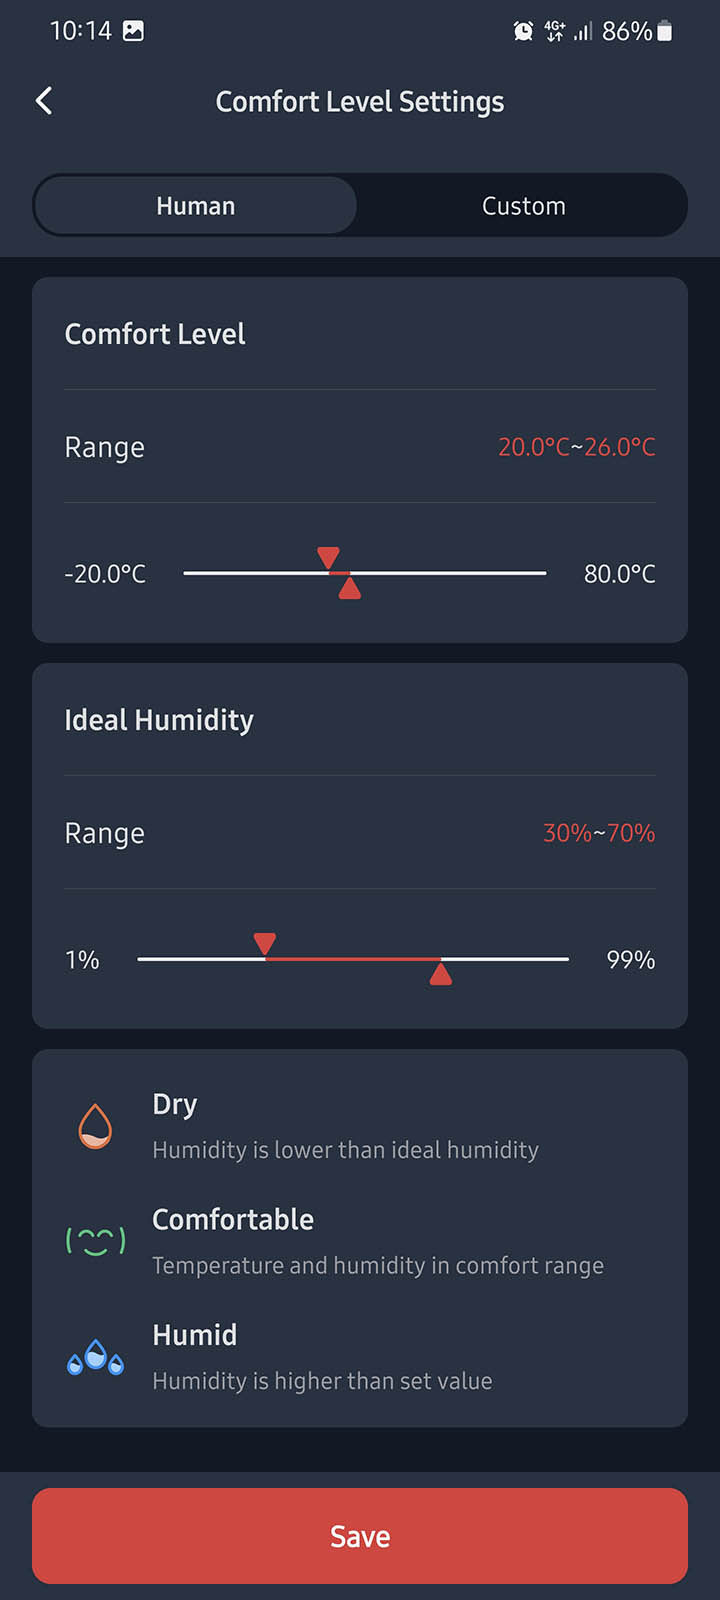
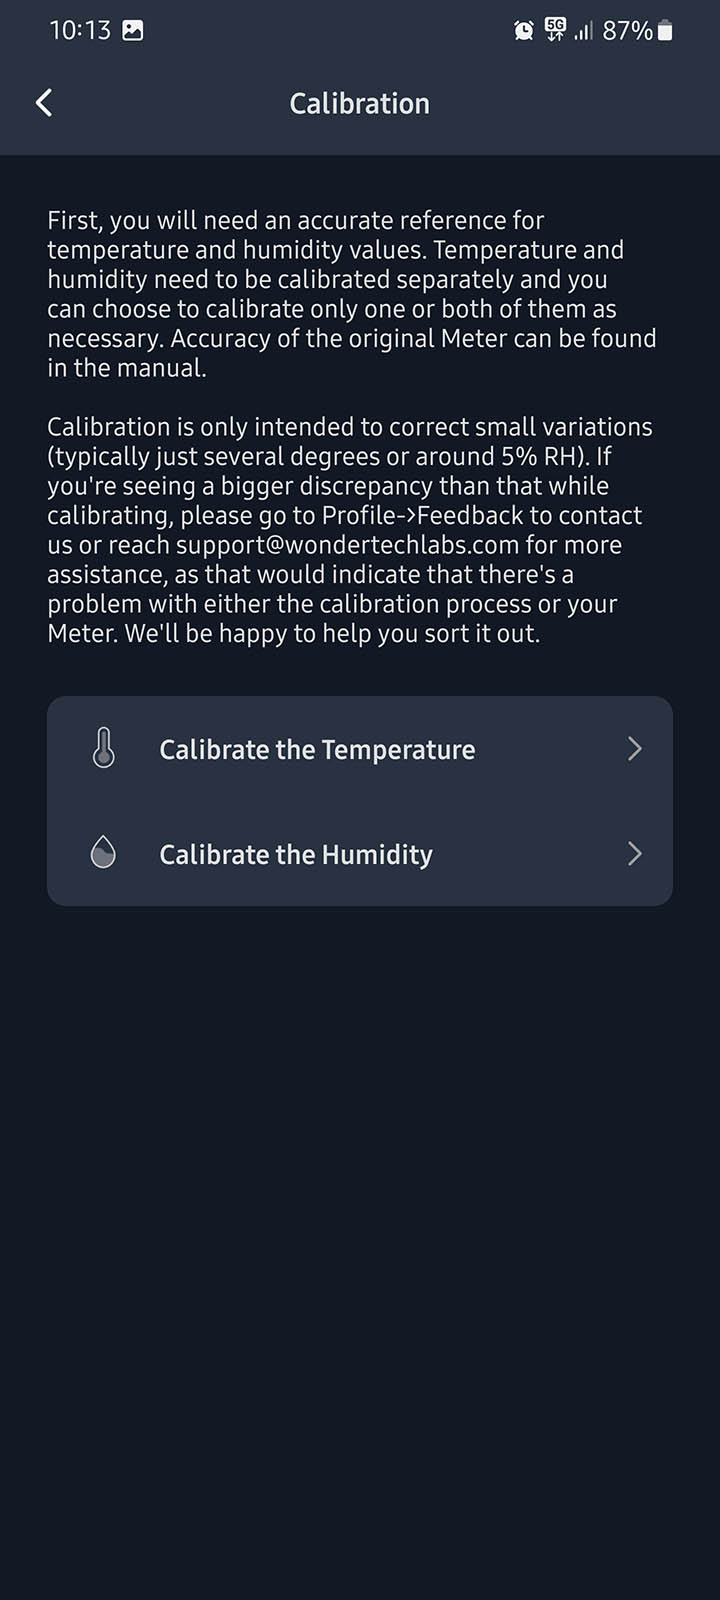
In the Settings menu, you can set Desired Conditions and have the device alert you when your preset threshold is reached or passed. The Comfort Levels menu allows you to customize your desired optimal conditions for temperature and humidity, which affects the smiley face on the screen. Calibration of the readings is also an option in the Settings menu, and the App guides you through the process highlighting you need a second, accurate source to compare the Meter Plus to. A useful and important feature.
Home Assistant Integration
Considering all SwitchBot products are Bluetooth or Bluetooth Low Energy (BLE), integration in Home Assistant is mostly easy and uninvolved. However, not all of their devices are currently supported by the official SwitchBot Integration so I’m going to share an alternative way of controlling SwitchBot devices via Home Assistant.
Official SwitchBot Integration
The official SwitchBot Integration requires working Bluetooth set up on the device running Home Assistant. If you are using a Raspberry Pi for your Home Assistant server, you can use the built-in Bluetooth module to discover SwitchBot devices. If not, you are going to have to add a Bluetooth dongle to your setup. The official integration supports the following devices:
- Color Bulb (WoBulb)
- Bot (WoHand)
- Contact Sensor (WoContact)
- Curtain (WoCurtain)
- Humidifier (WoHumi)
- Light Strip (WoStrip)
- Meter/Meter Plus 70BB (WoSensorTH)
- Motion Sensor (WoPresence)
- Plug Mini (WoPlug), both the original (model W1901400) and HomeKit-enabled (model W1901401)
- Lock (WoLock)
If you have multiple devices of the same type (eg. bots), you need to get the BLE MAC address of your device to tell your devices apart. You can find the address for your device by navigating to Settings > Device Info in the SwitchBot App. No hub or app is required for the official SwitchBot Integration.
From the devices I currently have, the Bot and Meter Plus can be added using the official integration. The SwitchBot Remote is unsupported and there is no need to add the Hub Mini in Home Assistant, unless you want to control IR devices which can be achieved using the second method you will read on later.
SwitchBot Bot
If you have the Bluetooth Integration active in Home Assistant, the SwitchBot Bot will get auto-discovered. Simply click Configure and confirm the dialog prompt to add the Bot to HA which will auto-enable the SwitchBot integration.
If you do not have the Bluetooth integration available, follow the official documentation to enable it. Subsequently, navigate to Settings > Devices & Services > + Add Integration and search for SwitchBot. This will prompt you to add and configure the bot. Once setup, it exposes the following entities to Home Assistant via the SwitchBot integration:
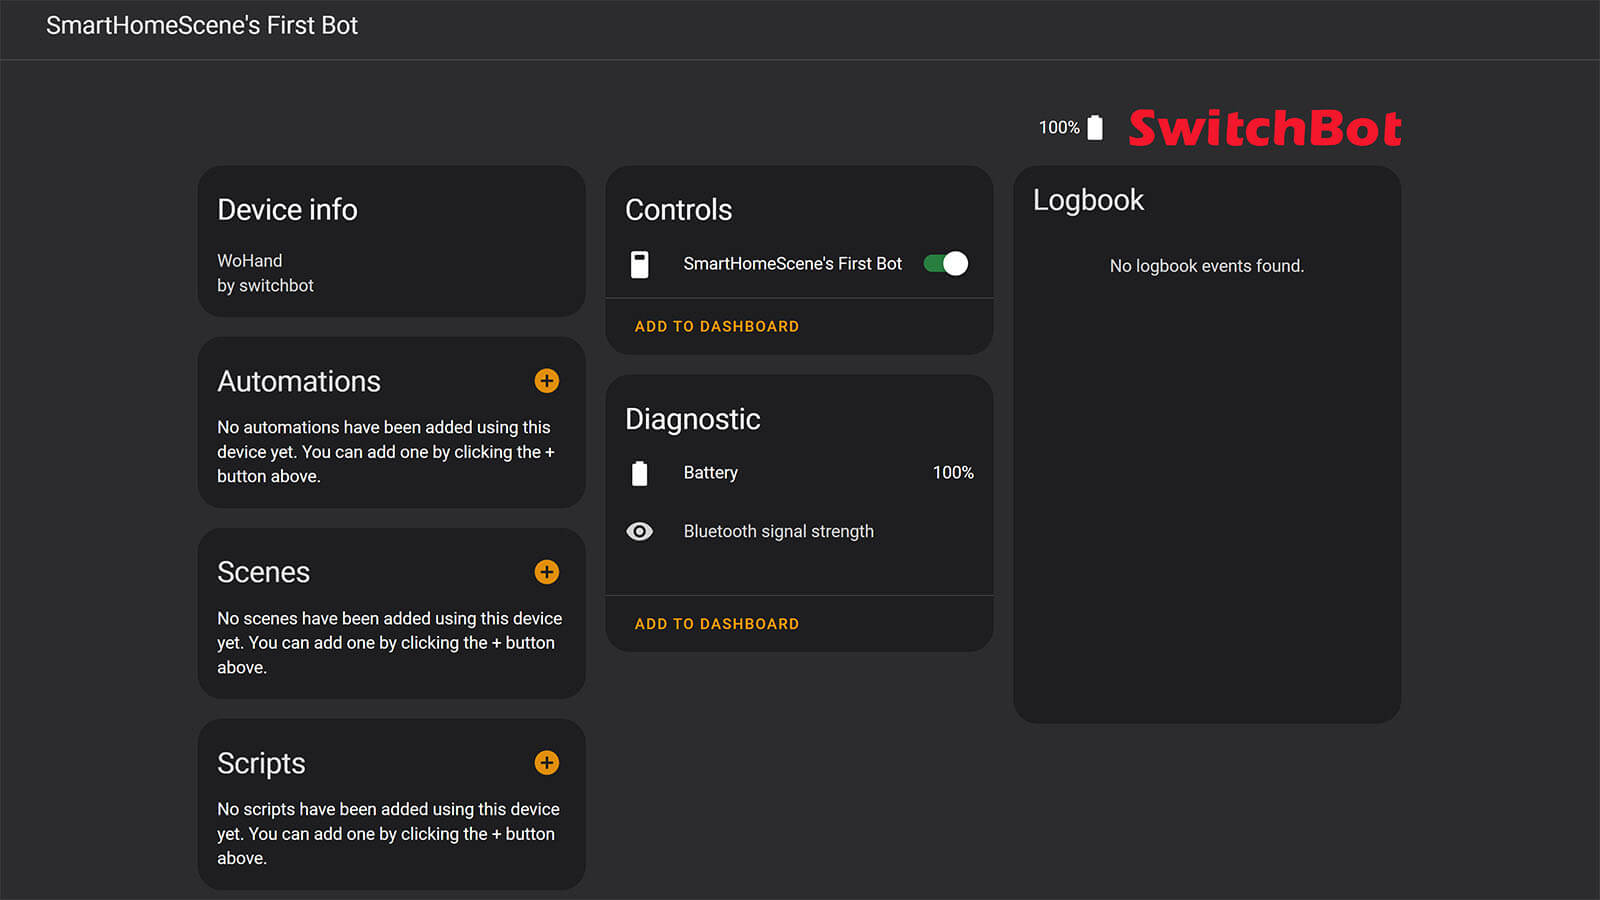
In Home Assistant, the SwitchBot Bot will populate it’s entity attributes with some useful information:
last_run_success: true If True, it means the last trigger of the Bot was successful
switch_mode: false If False, it means the Bot is operating in momentary Push Mode (default)
You can one-time use the app to change the mode to Switch, which the Bot will remember and you can control it in Home Assistant in the preset mode.
SwitchBot Meter Plus
In the same manner as the Bot, your Meter Plus will get auto-discovered. If exposes the following entities in Home Assistant via the official SwitchBot Integration: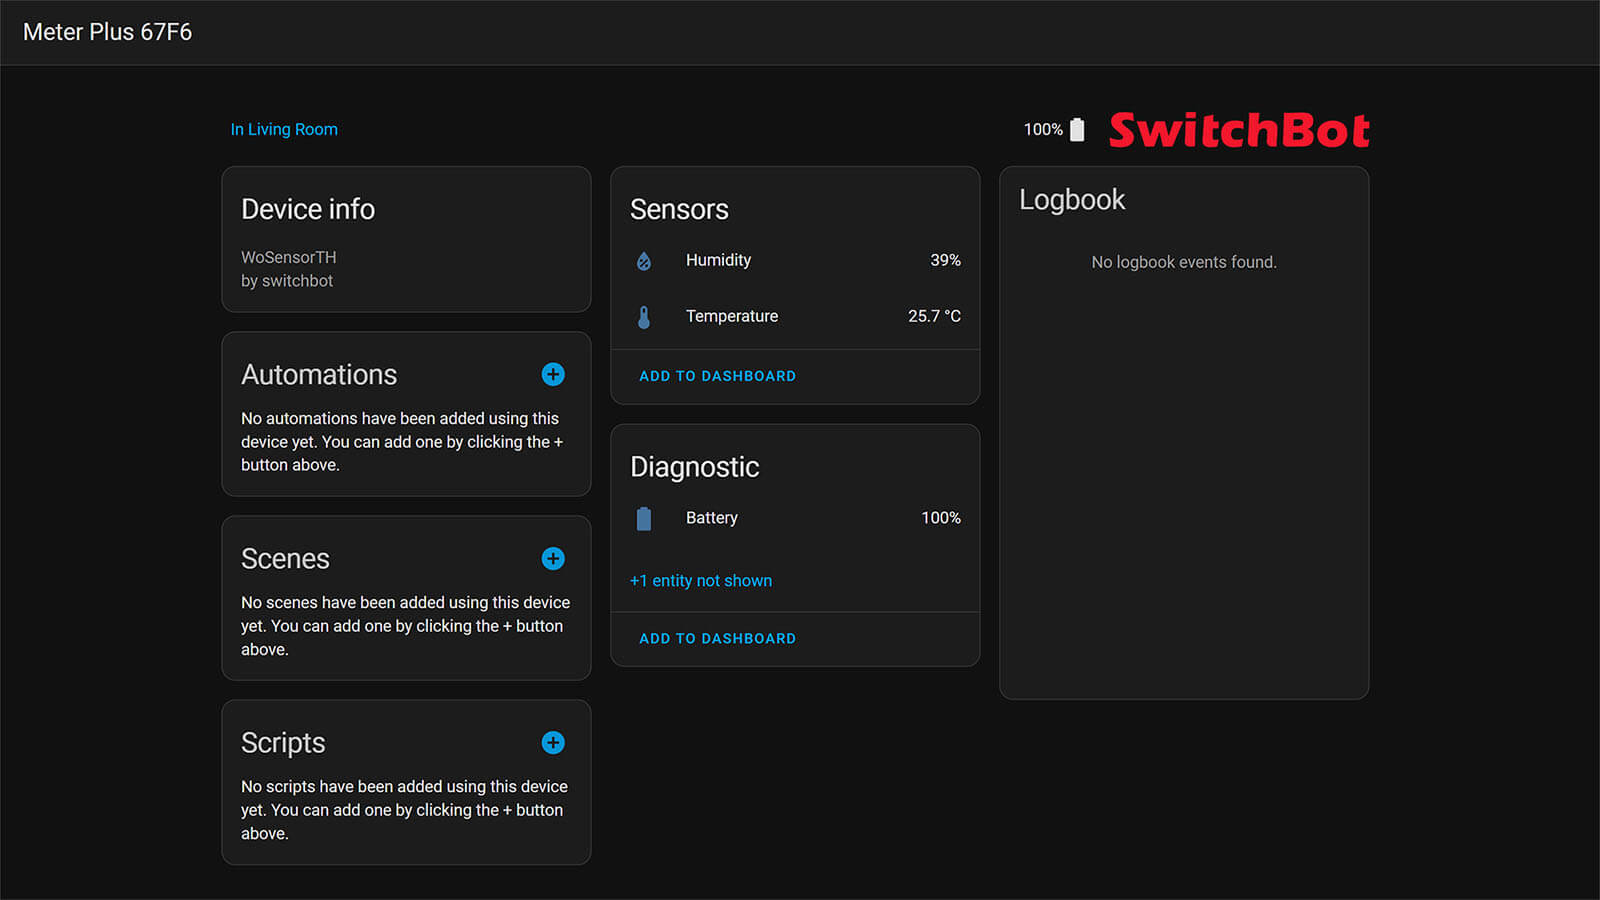
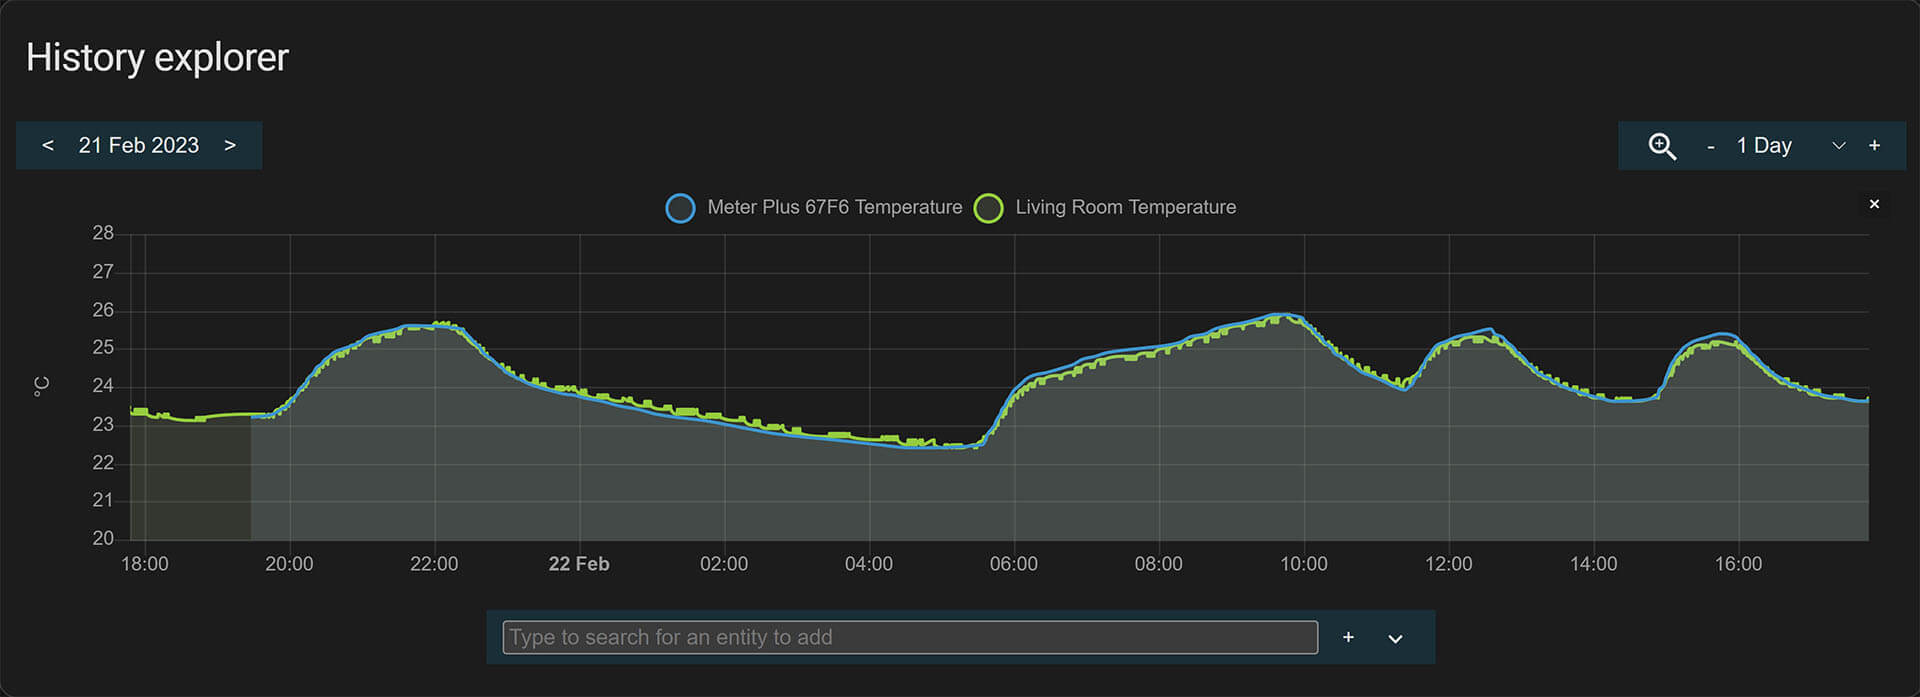
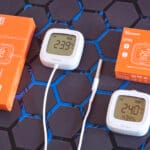
To benchmark it’s accuracy, I compared the SwitchBot Meter Plus to a calibrated Xiaomi LYWSD02 Sensor which I have already deployed in my home. My Xiaomi sensor is a lot noisier, I am picking up it’s readings using an ESP32 board setup as a ble_tracker. The temperature measurements are identical, the Sensirion sensor performs perfectly:
Humidity measurement gave me an offset reading of ~5%, which meant one was incorrect. I began to doubt the humidity reading of my LYWSD02 sensor as I have never calibrated the humidity, only the temperature. This can be easily remedied with a template sensor as long as you have an accurate measurement to compare it too. It was not important for me, so I left it as is.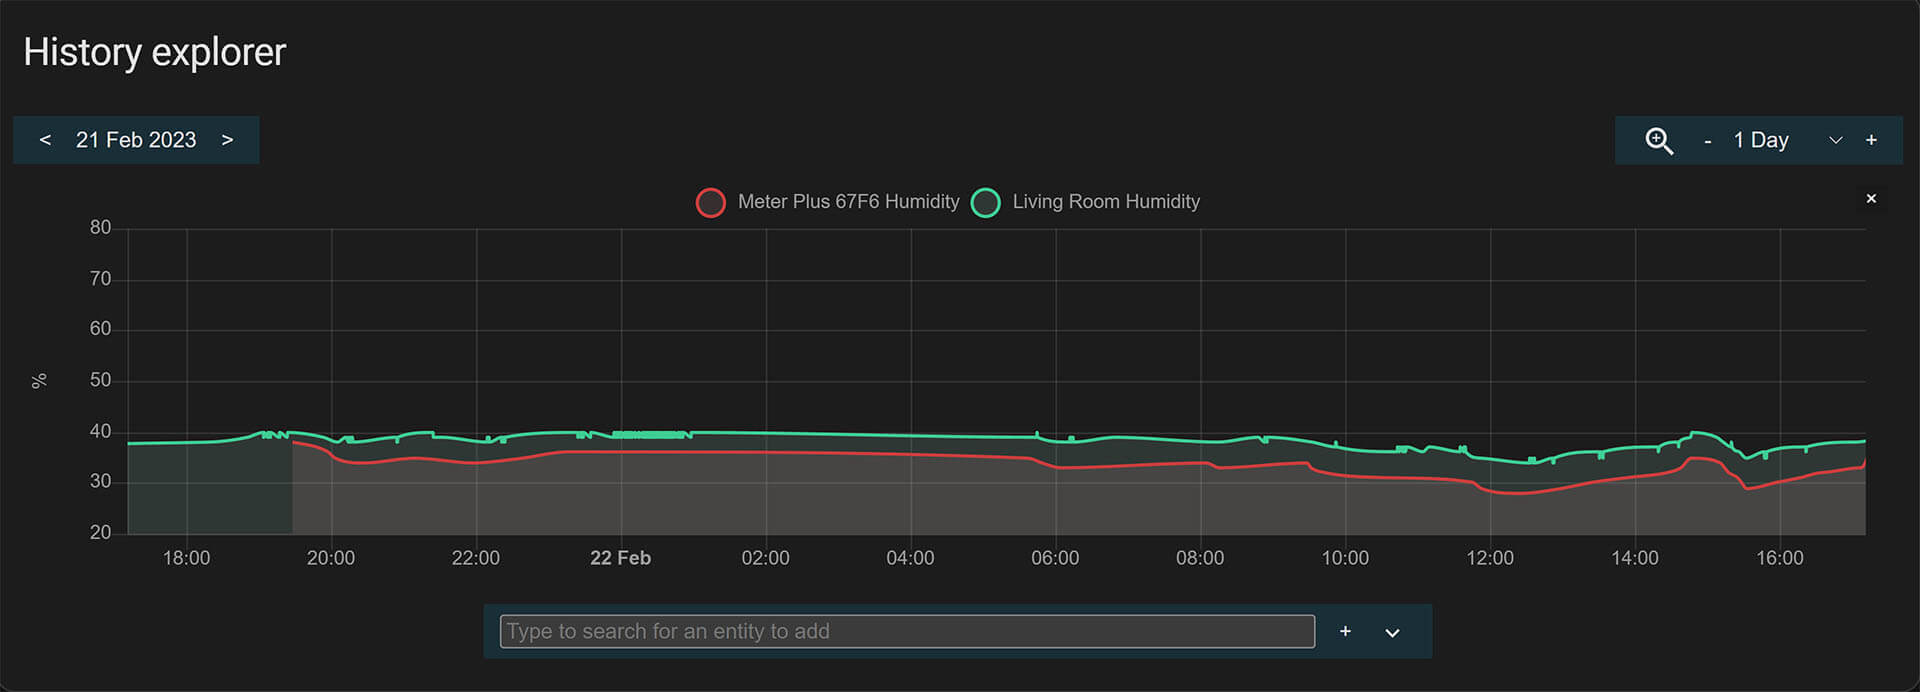
SwitchBot MQTT BLE ESP32
Considering the official SwitchBot Integration can be pretty limited for certain devices, there is an alternative way of integrating SwitchBot devices locally to Home Assistant. It requires an ESP32 Board, to capture their BLE packets and an MQTT Broker setup in Home Assistant to which responses will be sent. Setup is a little bit more involved, but does provide a higher level of control, customization and allows for “unlimited” SwitchBot devices to be controlled via MQTT sent to the ESP32. To use this method, here’s what you’ll need:
- ESP32 Board [Drivers]
- MQTT Broker Setup in Home Assistant (Mosquitto)
- MAC Addresses of your devices
- Can be found in the App, under each Device Info
- Installation Method
- Arduino IDE or
- Visual Studio Code PlatformIO
For the purpose of this tutorial, I’m going to install the custom component using Visual Studio Code. I consider this method to be easier and there are other people out there showing the Arduino IDE method, if you want to use that.
Visual Studio Code Guide
1. Open Visual Studio Code and click the Extensions Icon on the left
2. Search for PlatformIO and install it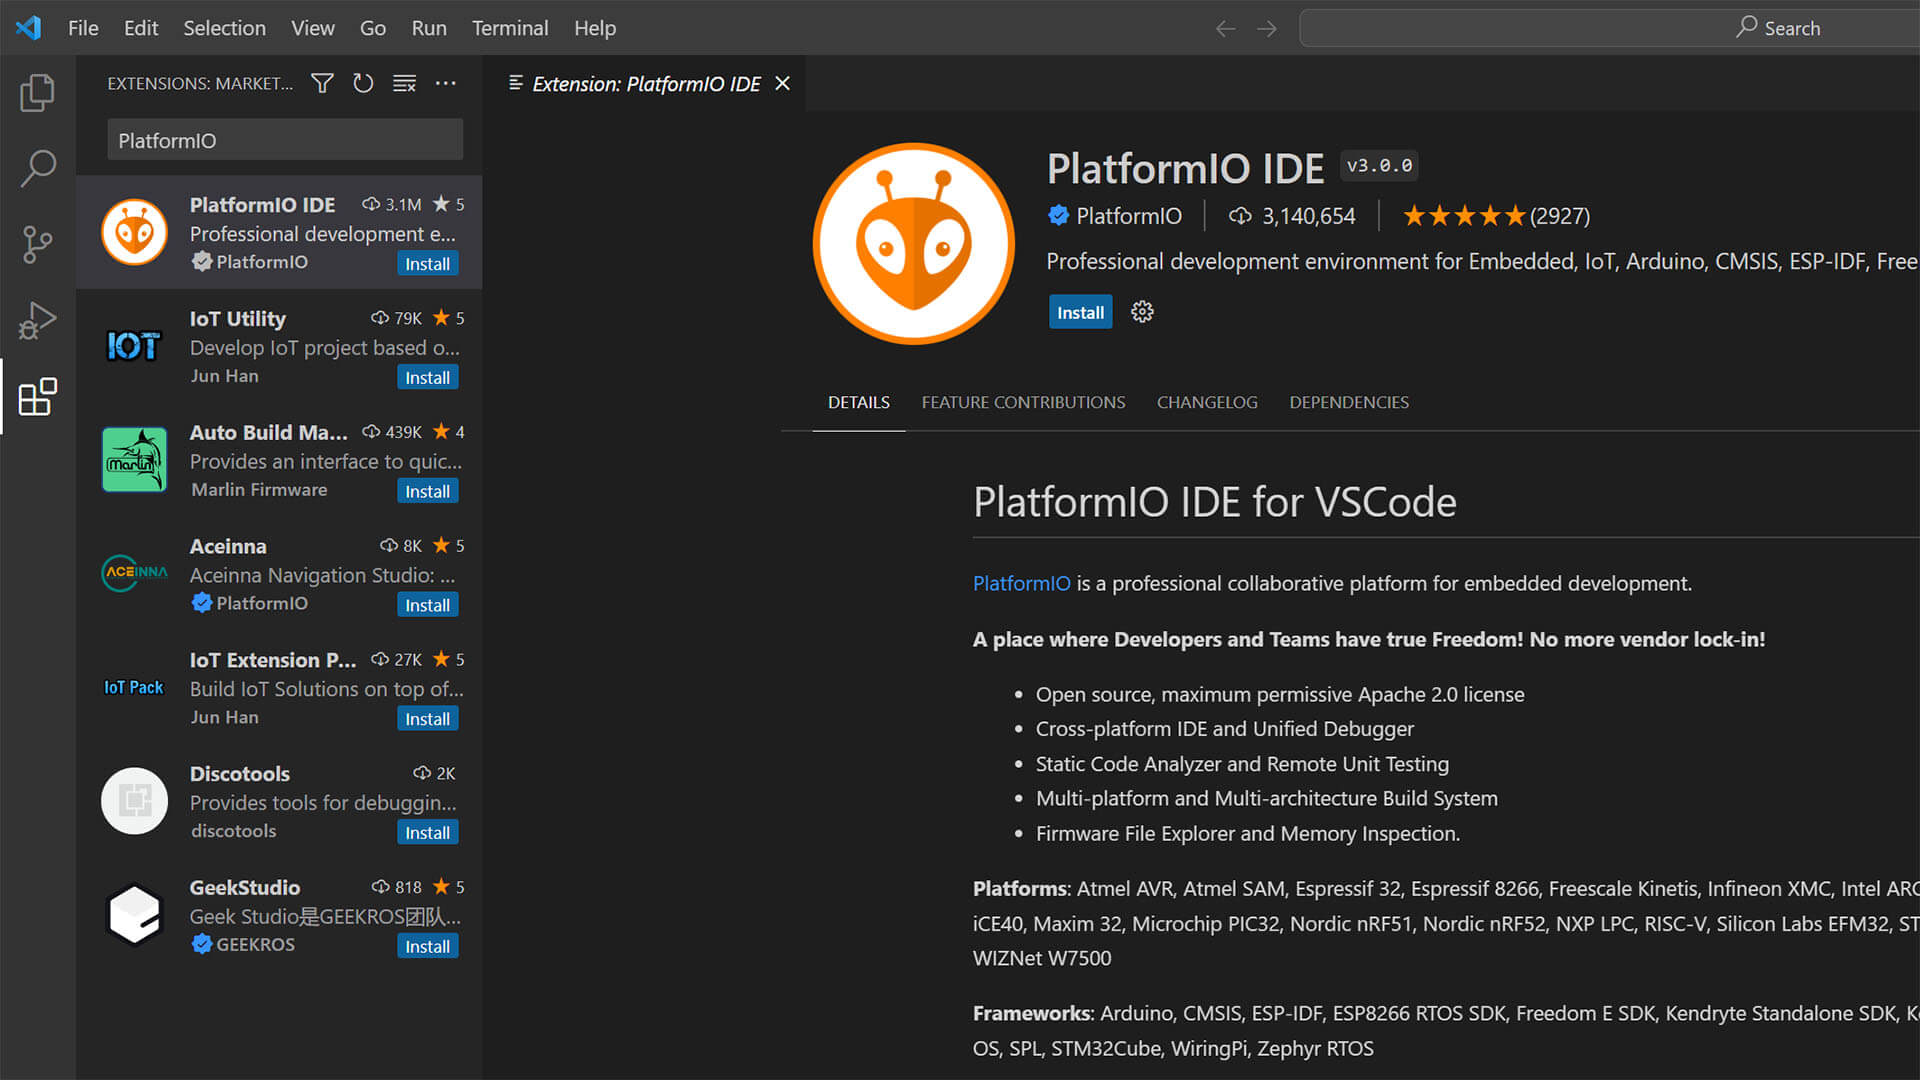
3. Download the Switchbot-MQTT-BLE-ESP32 Repository as zip
4. Extract it to your desktop for easy access
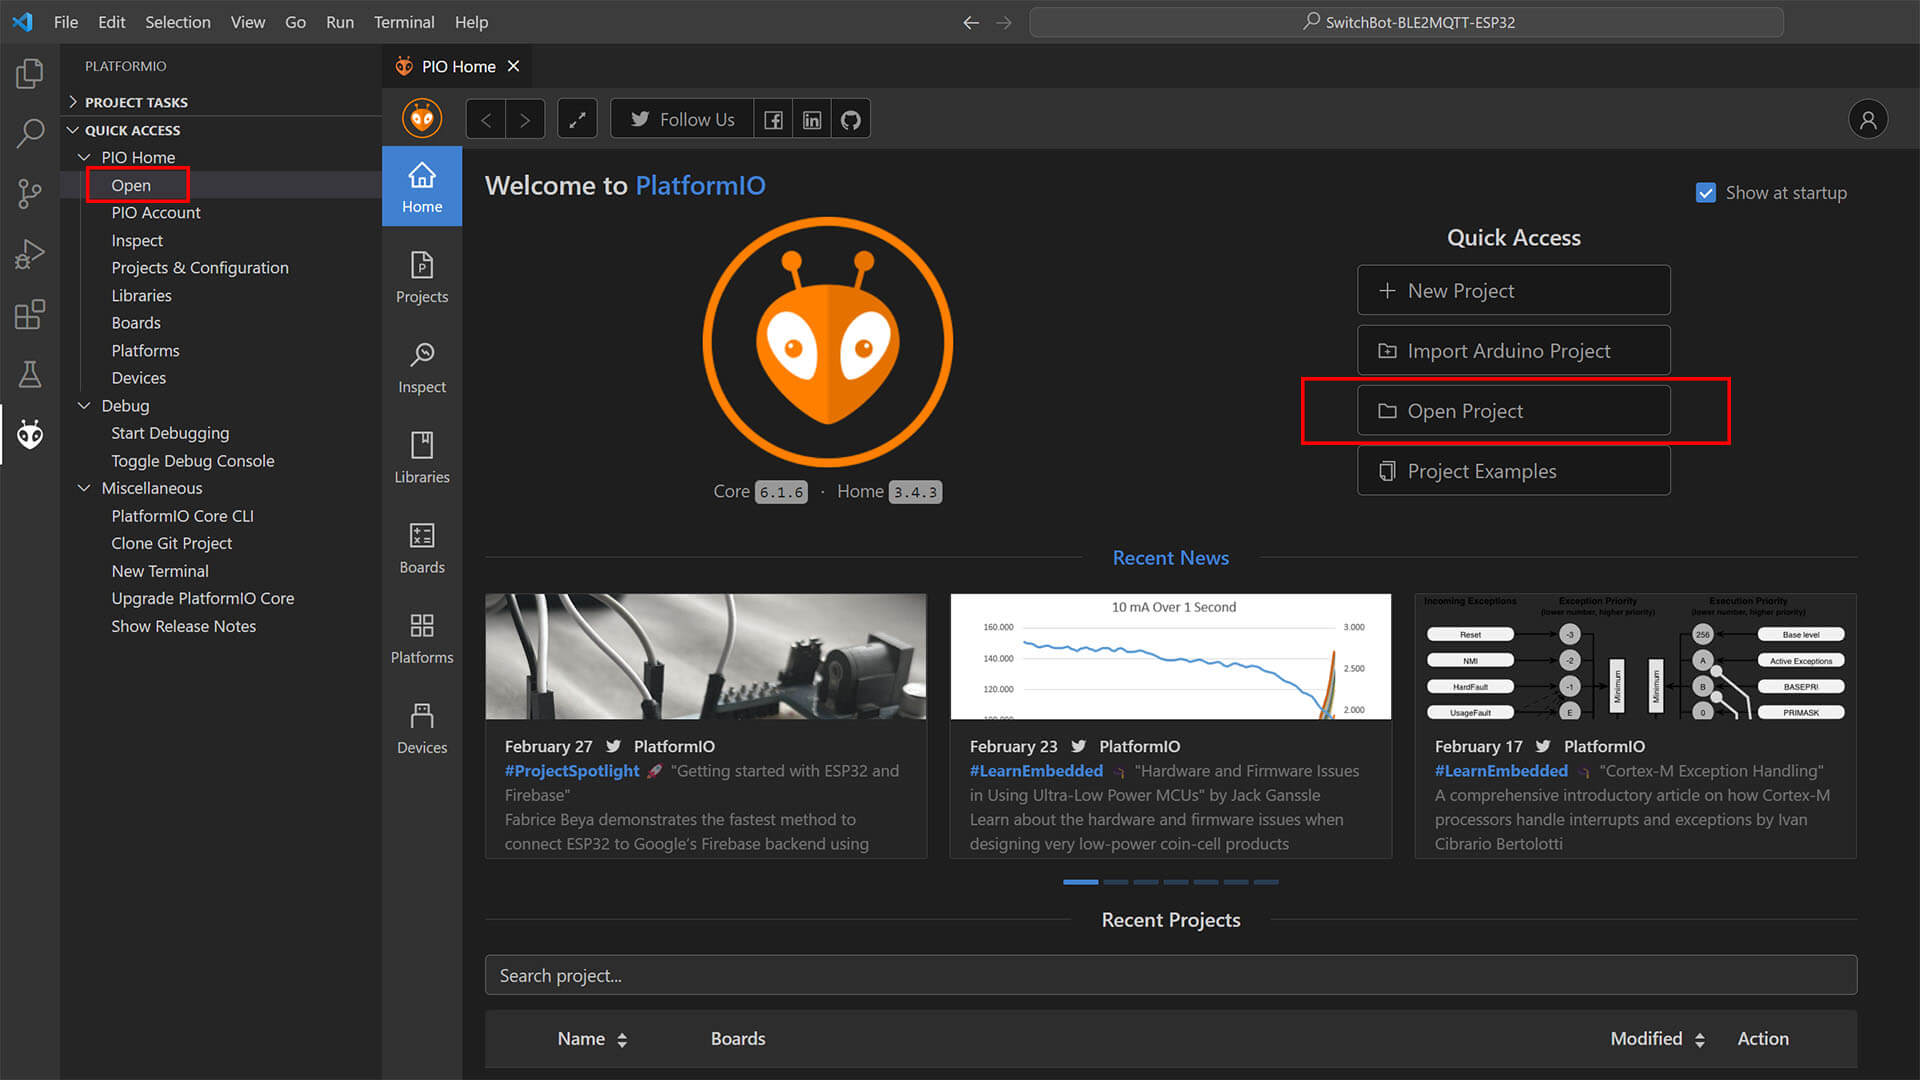
5. Open the PlatformIO Extension and click Open
6. Click Open Project in the Menu
7. Navigate to the SwitchBot-BLEMQTT-ESP32 subdirectory and click Open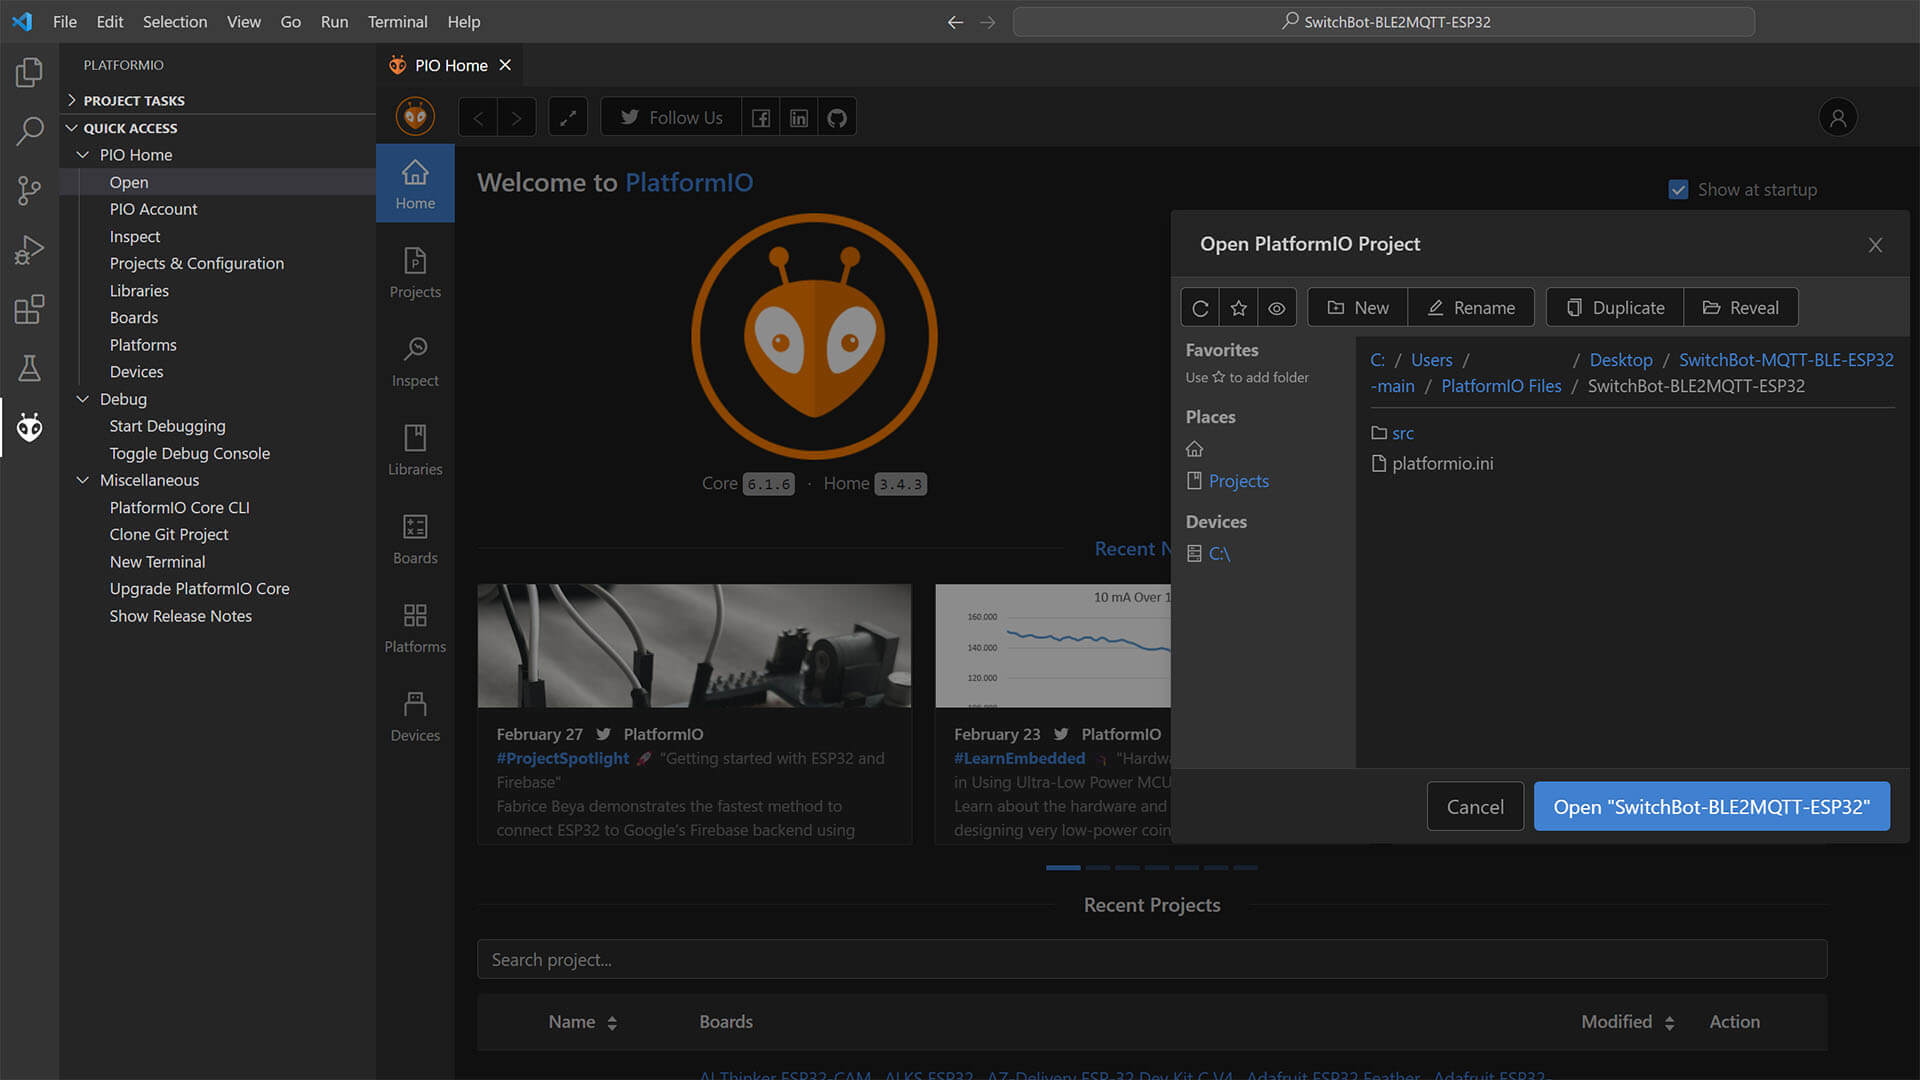
8. Wait for the project to load and automatically install any dependencies
9. Once the project is open, open the SwitchBot-BLEMQTT-ESP32.cpp file
10. Scroll down to the CONFIGURATIONS TO CHANGE line
11. Input your Wi-Fi Credentials and MQTT Host, User & Pass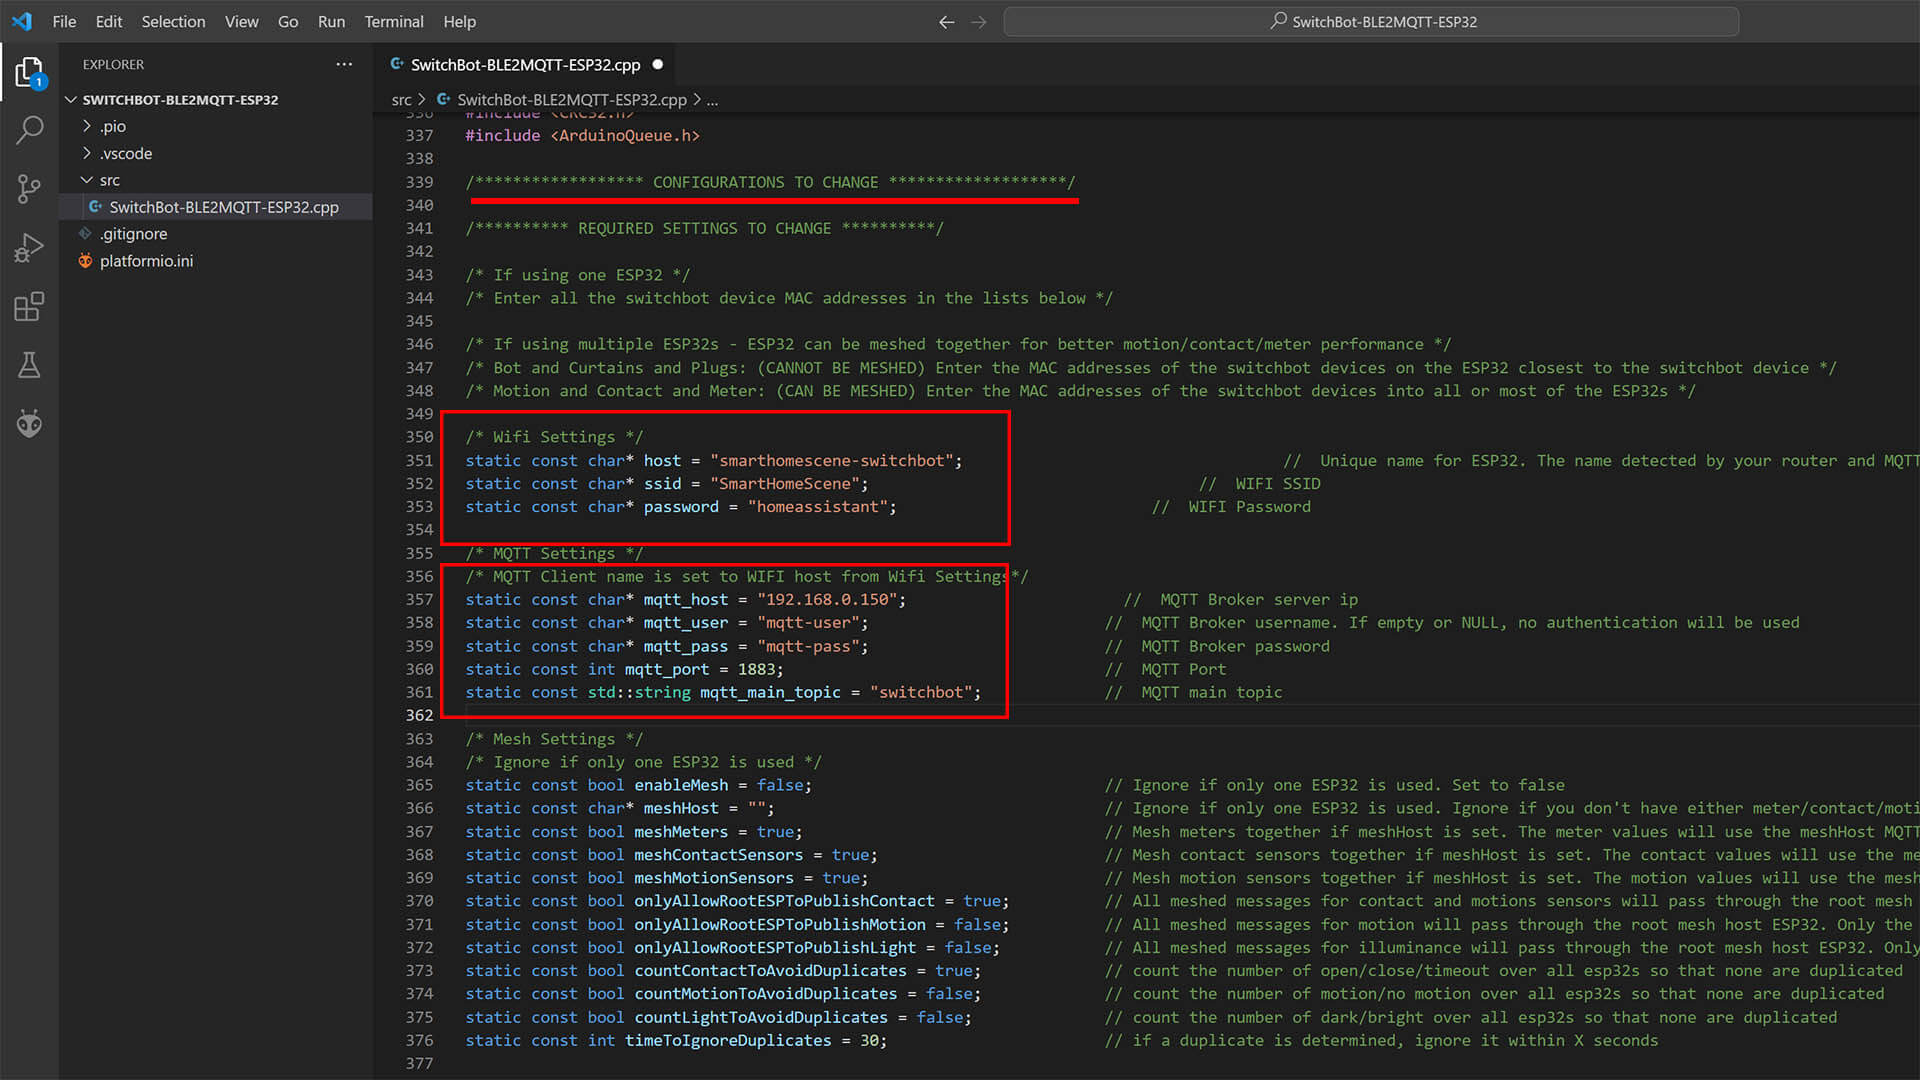
12. Scroll down to the list of devices
13. Remove the “/*” before each line to uncomment and enable the device
14. Input your device MAC Address under each device type, example for SwitchBot Bot
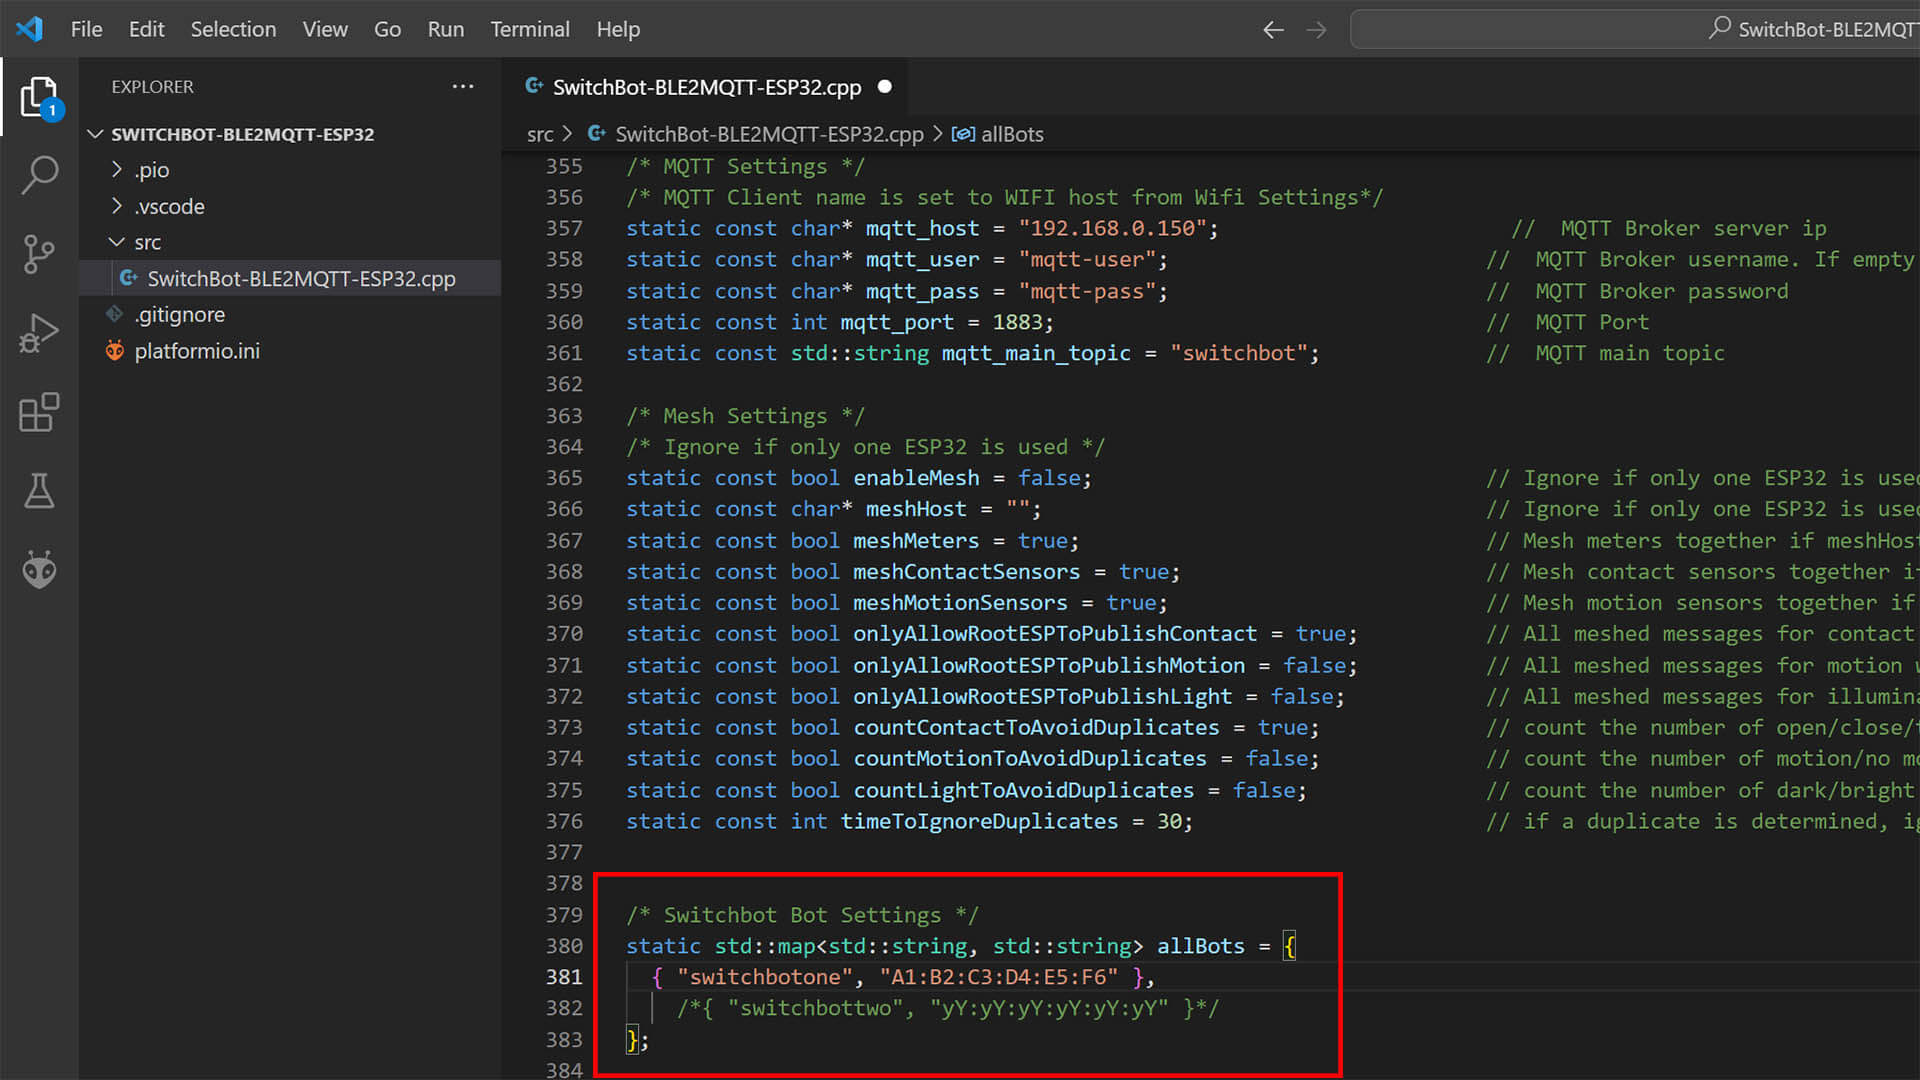
15. Repeat for each device type and add as many as you have and save the file
16. Click the PlatformIO Extension icon again
17. Select your ESP32 Board type and click Upload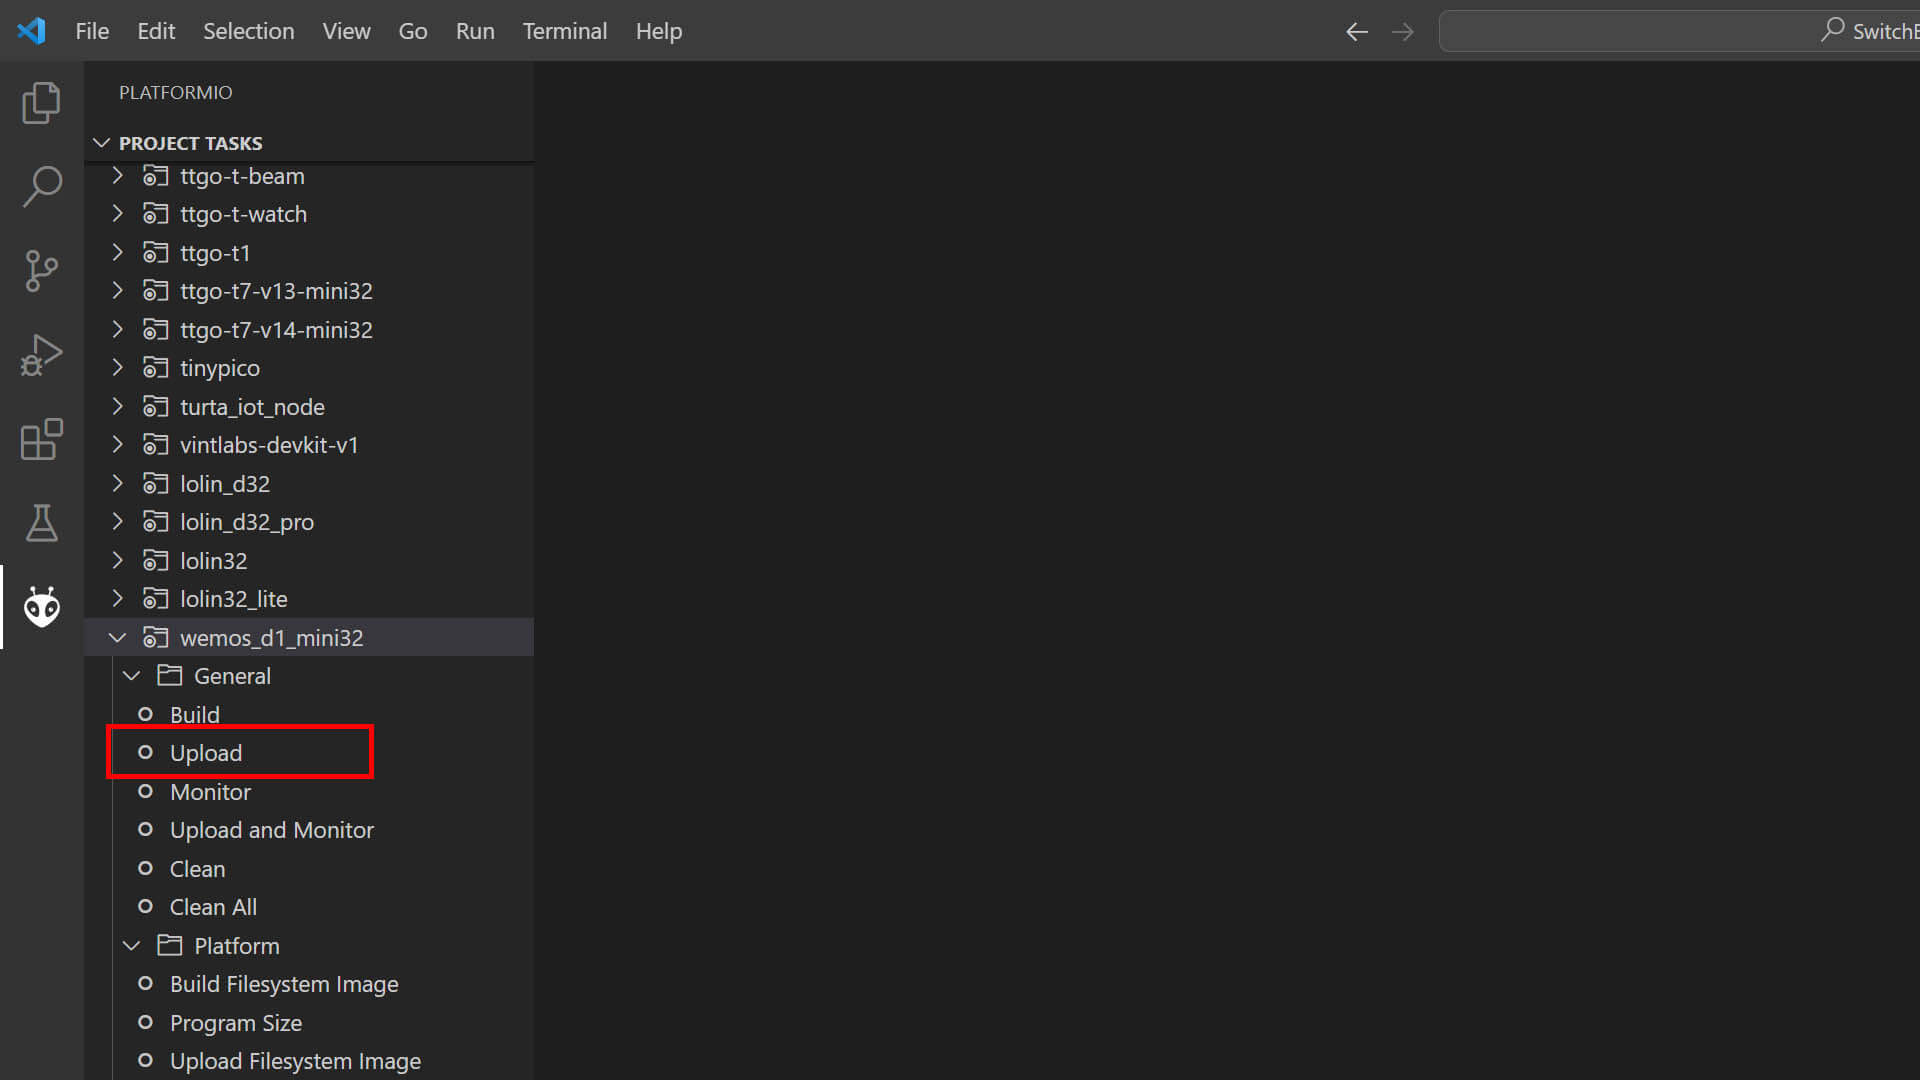
18. Wait for the process to finish
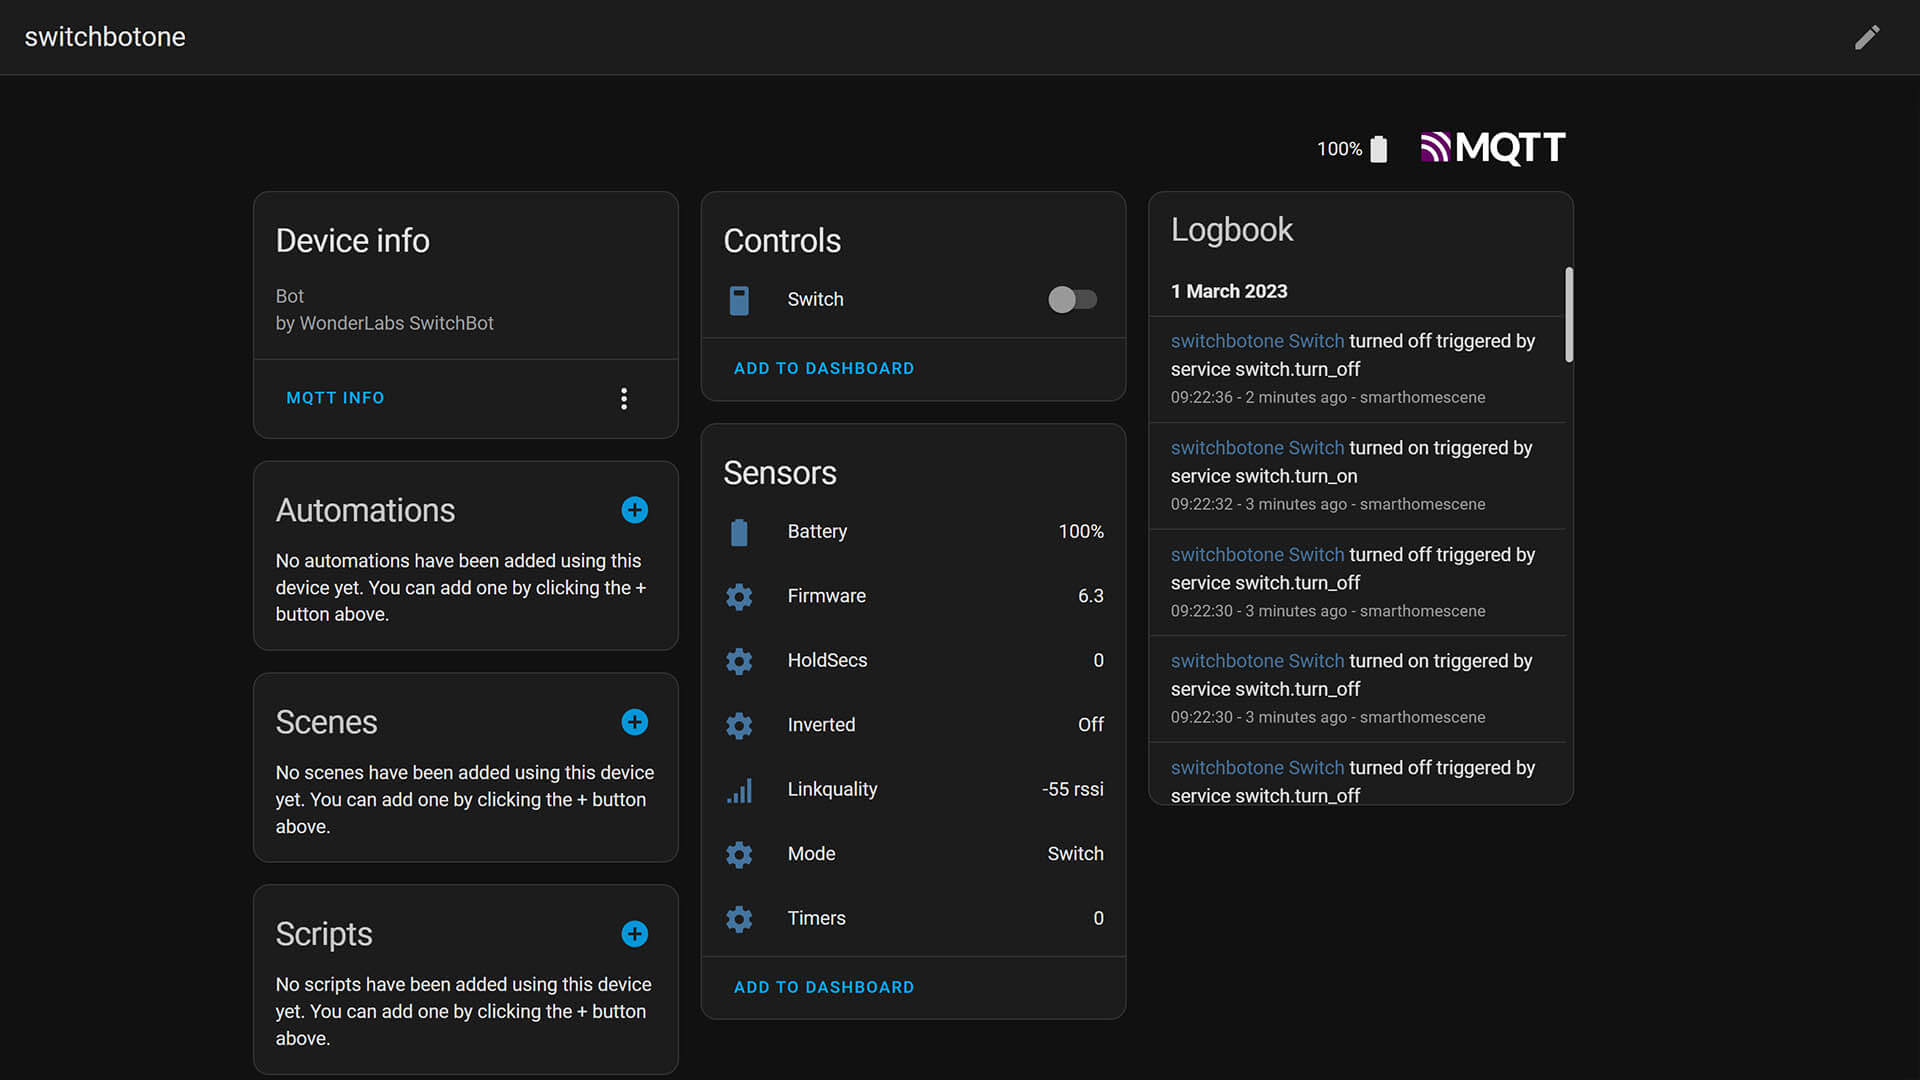
19. If you’ve setup everything correctly open Home Assistant
20. Navigate to your MQTT Broker and see if your devices appeared and are controllable
To change the SwitchBot Operation mode (Switch, Button or Light) you need to find the following line and uncomment the bot id. It will default to switch when nothing is configured: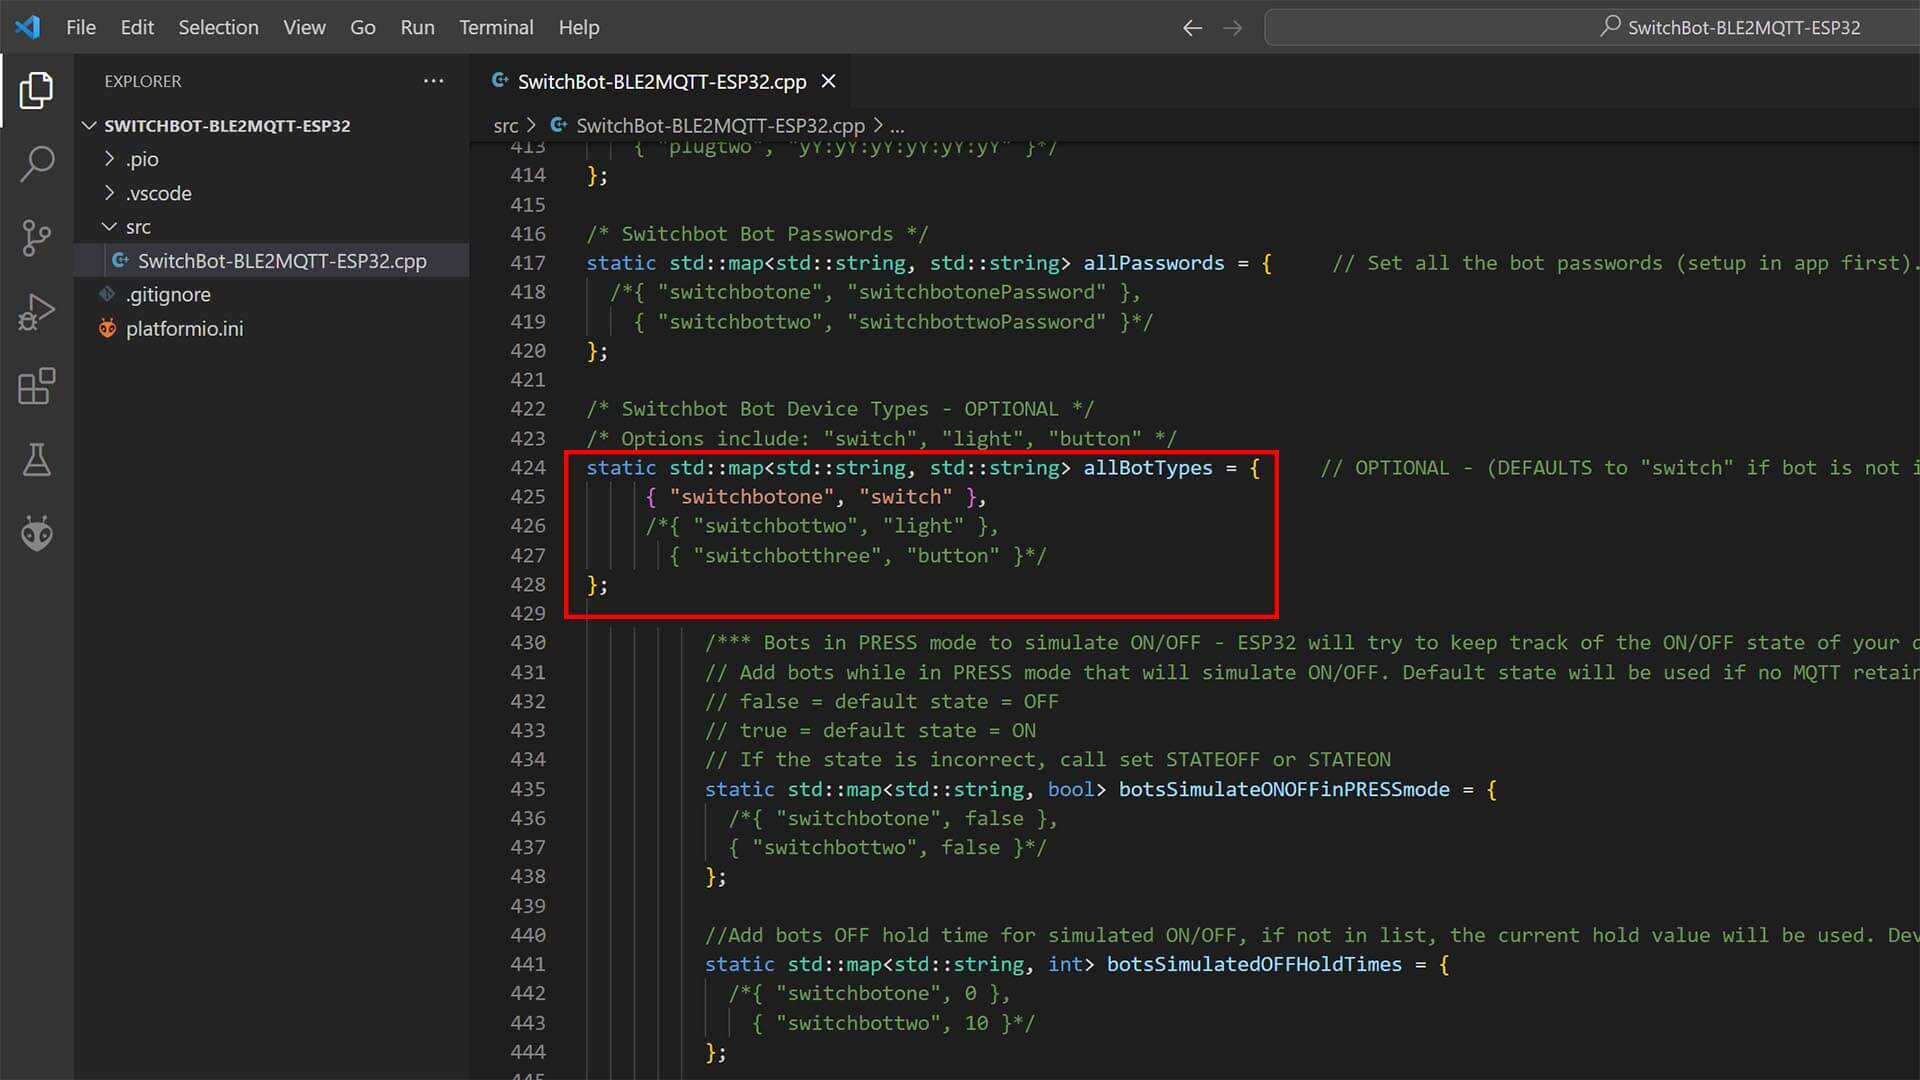
There are many other settings and tweaks which can be configured using this custom component. If you have any questions please leave a comment bellow or visit the GitHub repository.
Verdict
I’ve been tinkering with SwitchBot’s devices since I got the package, which was about a 10 days ago. For anyone looking into this smart ecosystem, here is my bullet points and a few insights on the SwitchBot Smart Ecosystem and their devices:
- SwitchBot App & Ecosystem:
- Adding Devices: Seamless and easy onboarding process. You would have to try really hard to fail in adding a device, changing a general setting or creating actions to be triggered. As far as official smart apps go, it was a pleasant experience using SwitchBot’s.
- Design & Features: Probably a big part of what made the app setup easy was their intuitive UI design. I don’t use vendor apps frequently, if at all, but with this one I didn’t struggle in finding a feature or a setting. Visual installation tips and guides were frequent throughout the process of adding devices, so you don’t feel stuck or confused. All the basic features and some advanced ones are there. SwitchBot has their own API, which you can utilize in controlling your devices by generating a token with the app (Profile > Preferences > Tap Version 10 Times > Developer Options.)
- Cloud Services: SwitchBot Devices support a variety of virtual assistants: Google Home, Amazon Alexa, IFTTT or Clova (Japan). However, there is currently limited support for Apple HomeKit out of the box. They have announced their jump to Matter with the Hub 2, until then the only HomeKit enabled device is the SwitchBot Plug Mini.
- SwitchBot Hub Mini:
- IR Blaster: The Hub Mini doubles as an IR Blaster, which you can use to control your dumb devices like TV remotes, sound system remotes, AC remotes and similar. Adding a remote in the app gives you a few templates to try out and see if your device respond to the commands. This is an appreciated feature to a simple device.
- Build Quality: I felt the build quality of the Hub Mini was subpar compared to their other devices. It’s possible they made it lightweight because of the IR blaster, so you can install it easily where convenient with the sticker.
- Home Assistant Integration: I felt no need to integrate the Hub Mini in Home Assistant to act as an IR Blaster, because the procedure is very involved.
- SwitchBot Bot:
- Build Quality: Solidly build, nice case, feels premium and compact.
- Performance: In my tests, the Bot operated without issues. You need to be wary of it’s swing angle (135° when considering it’s installation position though, especially when using Switch Mode which is intended to bring the switch back to its original state. I was surprised the little motor produces almost no noise, so that’s a big plus for me.
- Home Assistant Integration: Seamlessly integrated via Bluetooth and the official SwitchBot Integration. A small con is you cannot change the Press Mode within Home Assistant, you have to use the app.
- SwitchBot Meter Plus:
- Build Quality: I am very pleasantly surprised by the build quality of the Meter Plus. When I unboxed it and scanned through the manual, I was disappointed they used an LCD screen instead of E-Ink. However, after deploying it next to my Xiaomi E-Ink Thermometer the difference did not bother me at all. Viewing angles are great as far as LCDs go and the numbers on the screen are large enough so you can see the information from a distance.
- Performance: The temperature reading was on point in my test to the smallest decimal, you can see the screenshot above. I compared it to my calibrated Xiaomi LYWSD02 BLE sensor. The humidity test was inconclusive though, because my Xiaomi sensor’s humidity reading is not calibrated and I had no way of knowing which one was incorrect and producing a ~5% offset.
- Home Assistant Integration: The Meter Plus was instantly auto-discovered in Home Assistant via Bluetooth and the official SwitchBot Integration. It pushes it’s state frequently and without any incorrect spikes.
- SwitchBot Remote:
- Build Quality: Very small and nice clicky remote with two buttons: a concave one and a convex one. You can attach it to your keychain or next to your wall switches using the included stickers.
- Performance: The device operates well within it’s ecosystem, but it’s crippled by only having single clicks to the buttons. Double press and hold are not available as options.
- Home Assistant Integration: The SwitchBot Remote is not supported in Home Assistant via the official integration. If you want to use it, you are going to have to use the SwitchBot MQTT BLE ESP32 custom component
Things I didn’t like in the SwitchBot Ecosystem:
- Bluetooth is probably the weakest communication protocol to deploy in a Smart Home
- Zigbee would have been more suitable for SwitchBot’s devices.
- Hub is required for Virtual Assistant Integration (Google Home, Amazon Alexa etc.)
- I would have preferred an E-Ink display in the Meter Plus
- The Remote lacks double click and hold actions
- Deploying a Bot on a mechanical light switch has a couple of drawbacks:
- Not good looking
- Using sticker for on/off switch mode is even worse
- Can sometimes block the switch from being operated manually
- Flip switches are not supported
Buy
SwitchBot Devices can be bought on their website and Amazon official stores. Their products are relatively inexpensive, considering they are only sold in Western markets and can’t be sourced from AliExpress. If you are interested in their product line-up, use smarthomescene’s exclusive discount code 10HOMESCENE for 10% OFF on the Amazon Store and 15HOMESCENE for 15% OFF on the SwitchBot official store:
SwitchBot Smart Home Products
Amazon Store: 10HOMESCENE for 10% OFF
SwitchBot Store: 15HOMESCENE for 15% OFF
SWITCHBOT OFFICIAL STORE
Hub Mini | Hub 2 (Matter) | Plug Mini (HomeKit)
Bot | Meter Plus | Remote | Blind Tilt | Curtain![]()
United States | Canada | United Kingdom
Germany | Netherlands | Sweden | Spain
France | Italy | Poland | Australia
*If links fail to open, try disabling your AdBlocker.


Re: Meter Plus
1. I have a huge sample size of one unit so far, but it consistently reads ~2-3% lower humidity, and within +/- 0.2°F than my calibrated Psychrometer, which seems to be pretty close to published accuracy specs. It follows very, very closely to the similar Govee H5075 (also based on a SHTC3 sensor), and a bit lower humidity than my Xiaomi LYWSD02 and Acurite 06044 and 00592 sensors.
2. Why muck around with manual VS/PlatformIO configuration, when ESPHome BT Proxy makes it dead simple to achieve the same functionality? (https://esphome.github.io/bluetooth-proxies/) Once you have a device set up, any new BLE sensors will just automagically appear in HA, just like the native Switchbot Integration.
Hi,
Thank you for your reply.
1. I completely agree with your observation about the Meter Plus device. It’s pretty darn accurate and that LCD screen is weirdly good. Usually, viewing angles are really bad on cheap LCD-based thermometers. This SwitchBot model is really neat.
2. You are clearly uninformed or maybe misunderstood something. Currently, ESPHome is great for passive BLE advertisement, such as the Meter Plus which just broadcasts it’s reading to be freely captured by any Bluetooth dongle. Once you need to implement active communication and control (switch, curtain, bot etc.) things become way trickier. Complex Lamdba functions need to be developed for other SwitchBot devices and even than it’s a PIA to get it working. There is ongoing GitHub discussion here: https://github.com/esphome/feature-requests/issues/454
If you look at the code, you will see that it’s quite complex hence why there isn’t a custom EPSHome custom component.
The custom component I linked, supports all of SwitchBot devices, supports BT proxies (if you need to add them) and is easier to setup. The difference is it doesn’t use ESPHome, it pushes it’s payload to your MQTT broker.
The developer offered to help create a custom ESPHome component (see link I gave you), which would support all SwitchBot devices, but it’s been a dead end.
Cheers!
10HOMESCENE shows invalid in US Amazon
Hmm, I will check. If you don’t mind using the switchbot store it works there.
The screen feels like actual eInk based on the pictures I see about it (even in this review).
I do not see the typical shadows of the LCD like on the Govee devices.
Strange.
Yes, I’ve mentioned several times through other reviews of LCD-based temperature sensor that the SwitchBot Meter Plus has the best LCD by far.