Home security is essential to consider and think about when building your smart home, especially if you are going the DIY route. I’ve talked about integrating smart sirens a couple of times in the past, testing two Zigbee-based devices that work with Home Assistant:
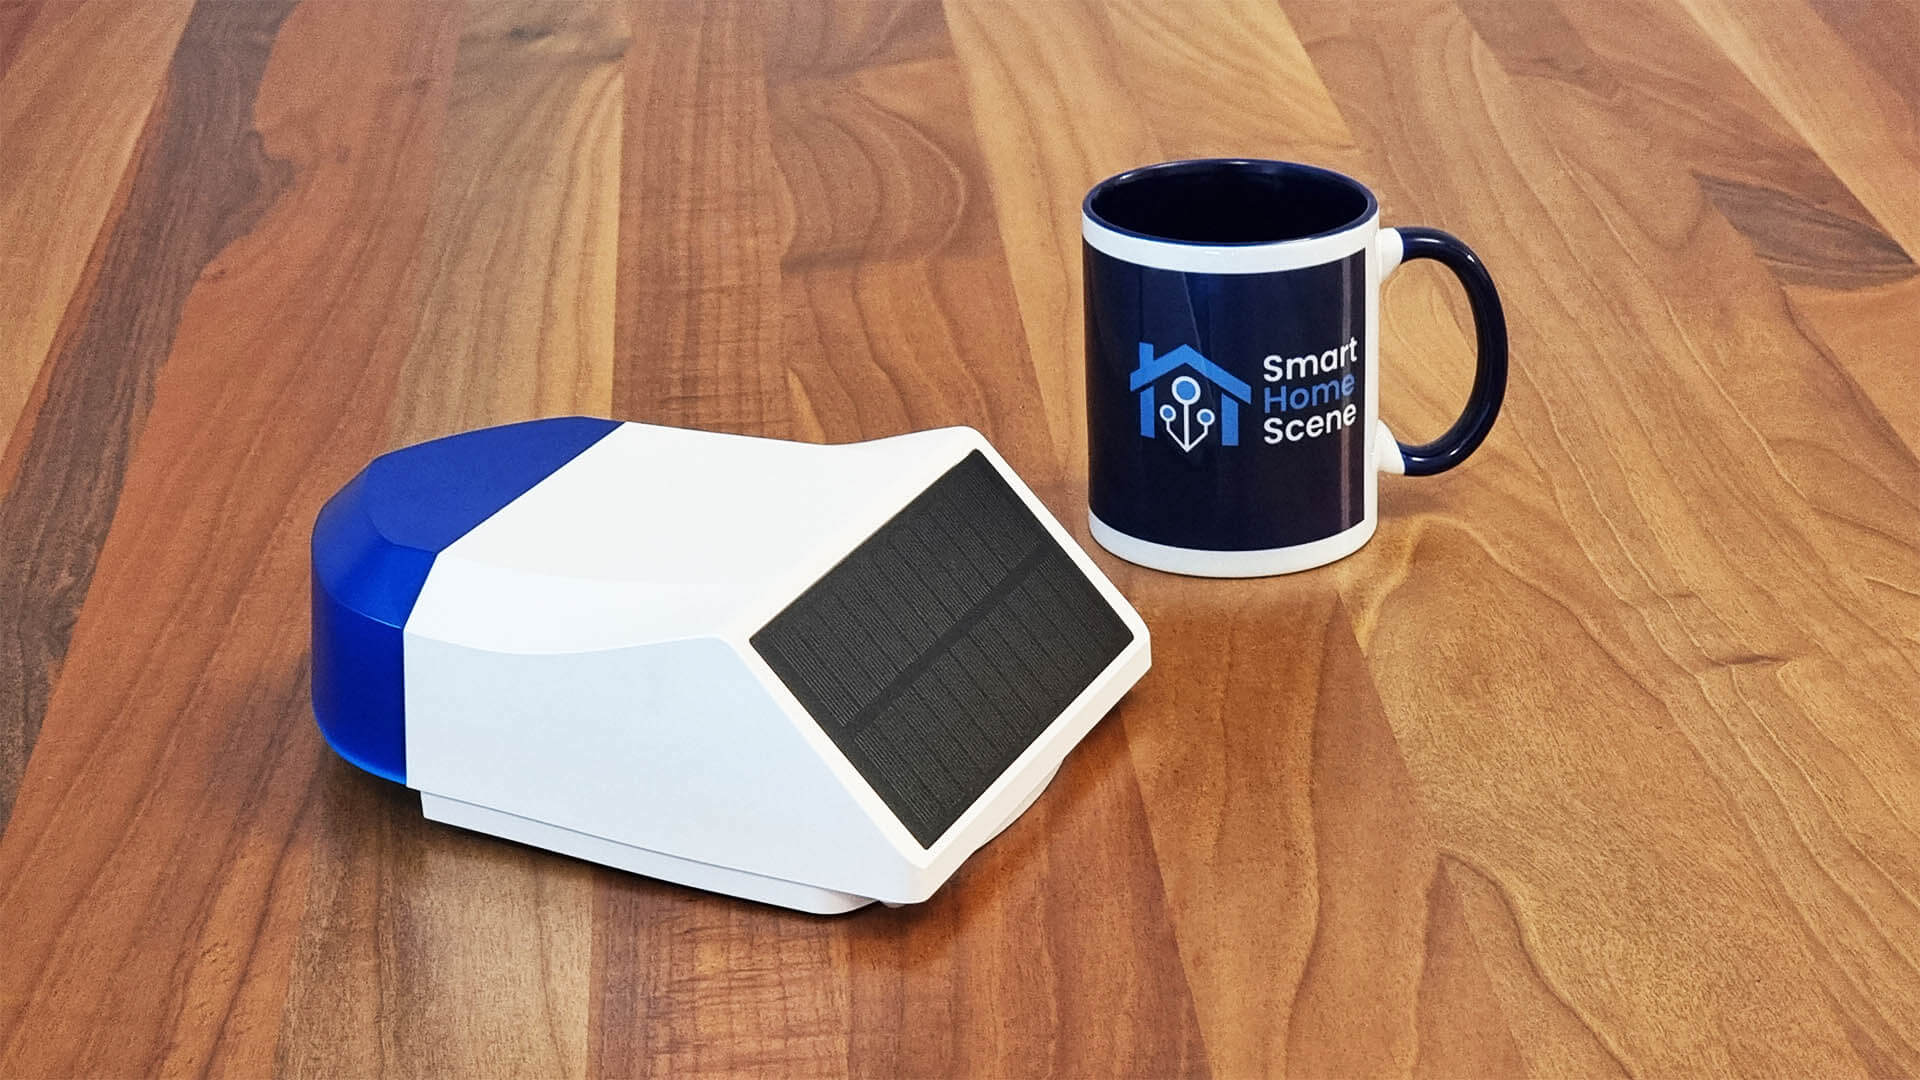
In this article, I’m reviewing perhaps the most interesting Zigbee siren powered by a solar panel, the Neo Zigbee Siren model NAS-AB06B2. I’m testing everything this device has got to offer, talk about some pros and cons and Home Assistant Integration.
I bought this device for $35 on AliExpress, it’s not available on Amazon although MoesHouse rebrands and sells it on their Webstore.
SIDE NOTE: I highly suggest you read: Alarmo: Make your own Alarm System in Home Assistant, which guides you in creating a smart alarm system from your existing door sensors, motion sensors and other devices you already have in your home.
Technical Specification
- Power Supply: USB-C (5V/1A) or Battery (18650 Solar Panel Rechargeable)
- Wireless Standard: Zigbee 3.0
- Wireless Range: 45m
- Working Current: 700mA Standby current: 2.5mA
- Maximum Alarm Sound: 100dB@1m; 90dB@3m
- Alarm Tone Types: 3
- Waterproof Grade: IPX5
- Working Temperature: -10°C ~ 60°C (14°F ~140°F)
- Working Humidity: 0% ~ 90%RH (no condensation)
- Product Size: 200mm x 150mm x 66mm
- Solar Panel Size: 132mm x 62mm
- Minimum Light Value for Charging: 10000Lux
Teardown
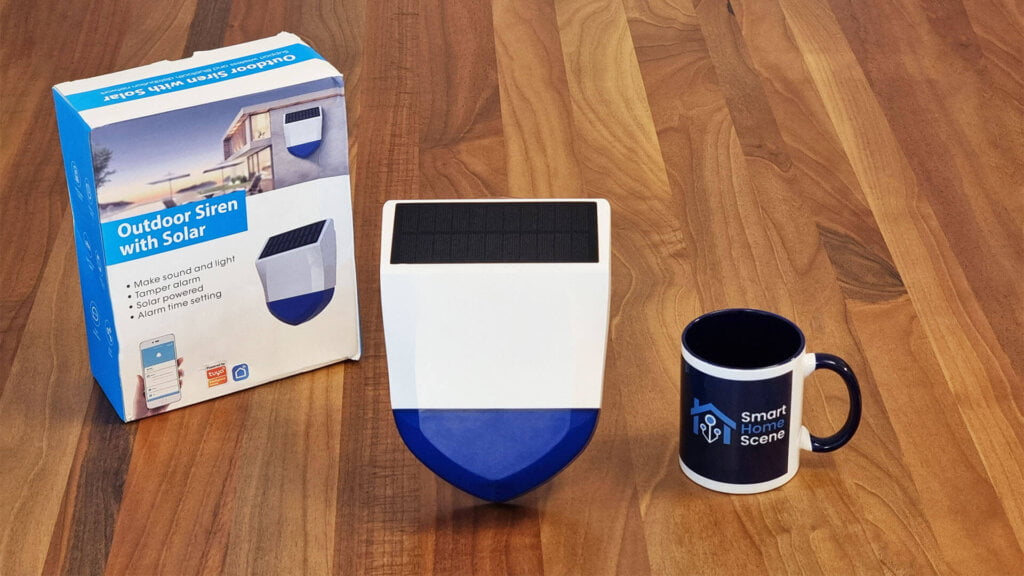
The Neo Zigbee Siren NAS-AB06B2 came packaged in a Tuya branded box, containing the device itself, some screws for installation and a simple user manual. The box (and siren) is quite large, so it was banged up from shipping but the device was intact.
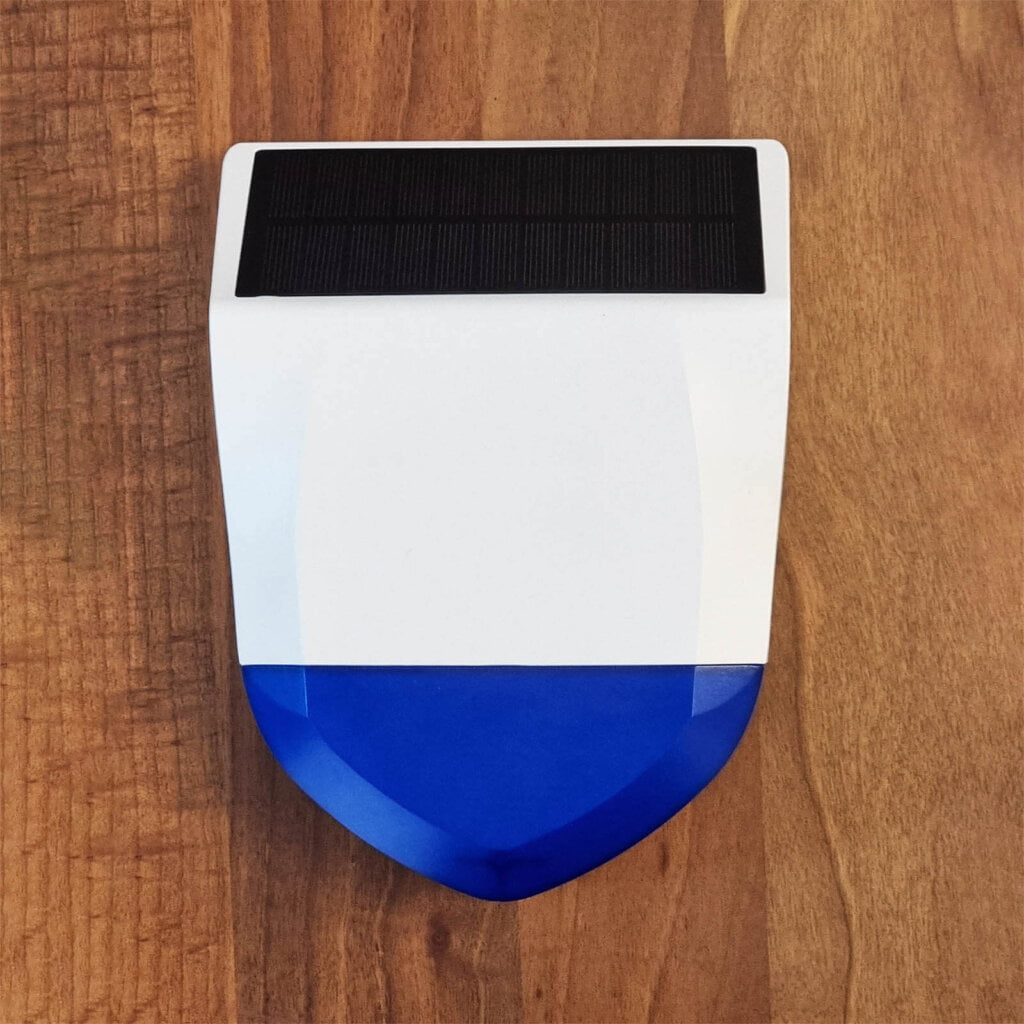
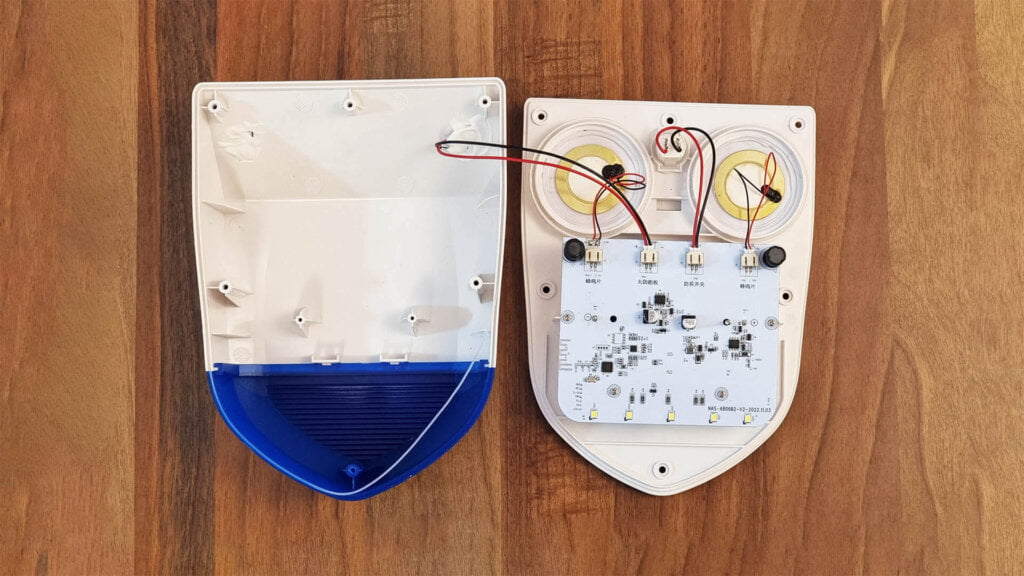
The front case of this Zigbee smart siren is very neat looking, composed from two parts: the top of the case which holds the solar charging panel and the bottom (blue) which holds the alarm LEDs. They slot into each other nicely, forming one unanimous body resistant to outdoor elements (IPX5).
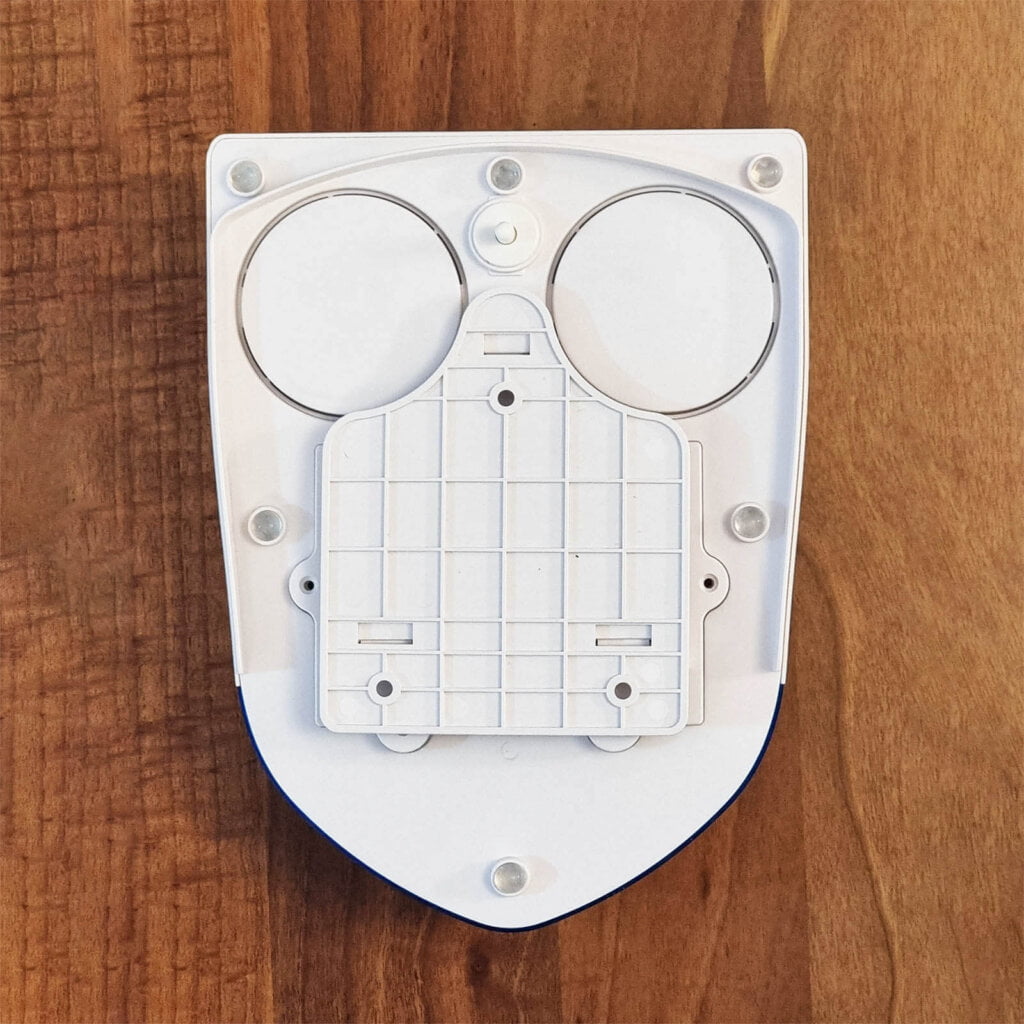
On the backside, the two circles that look like eyes are the actual alarm sirens. There is an anti-tinker/theft button between them which is pressed once the siren is installed in place. If someone tries to remove it, the devices gets triggered and sounds the alarm. I stupidly pressed and released this button while the device was plugged in, it almost deafened me.
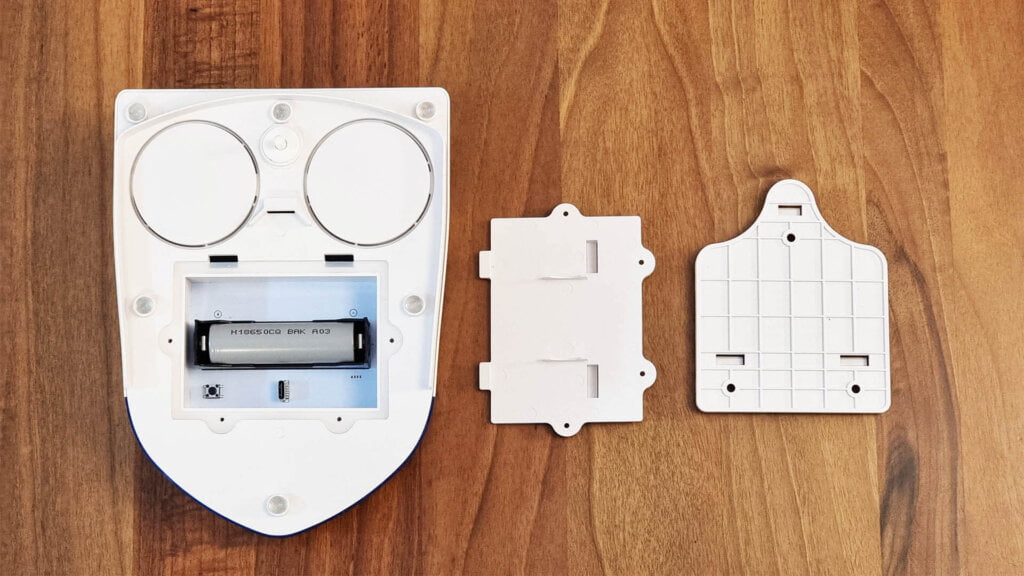
The mounting backplate slots on three hinges to the main case, which should make installation easy and seamless. Each bolt holding the siren together is protected with silicone covers, avoiding water damage.
The battery compartment is held in place by 4 screws, which also has a silicone ring for water protection. Removing this cap, reveals the reset button and a USB-C charging port. You need to use this port to initialize and pair the siren, after that you can use the solar panel to charge the battery.
The device is powered by an easily replaceable 18650 battery found on AliExpress or Amazon.
Once I opened the siren, another silicone ring popped out of it’s place. This one circles around the full frame of the case, creating a seal and keeping water out.
Everything is connected with 2-Pin JST connectors to the main PCB, which is a recognizable white color found in other products from this company. Although labelling is in Chinese, it’s simple enough to understand what’s what. One connector from the solar panel, one from the anti-theft button and two from the sirens – one each.
At the bottom of the PCB, there are 4 LEDs used as a visual alarm. These light up whenever the device is triggered. Communication is handled by a Z2 Module [Datasheet], a series of low-power ZigBee chips developed by Tuya for battery powered devices, compatible with the ZigBee 3.0 protocol.
What’s interesting, the module is directly integrated with the main PCB and not soldered on top like most Tuya-reliant devices. This is also the case in the Neo Zigbee LCD Climate Sensor and this cheap door & window sensor.
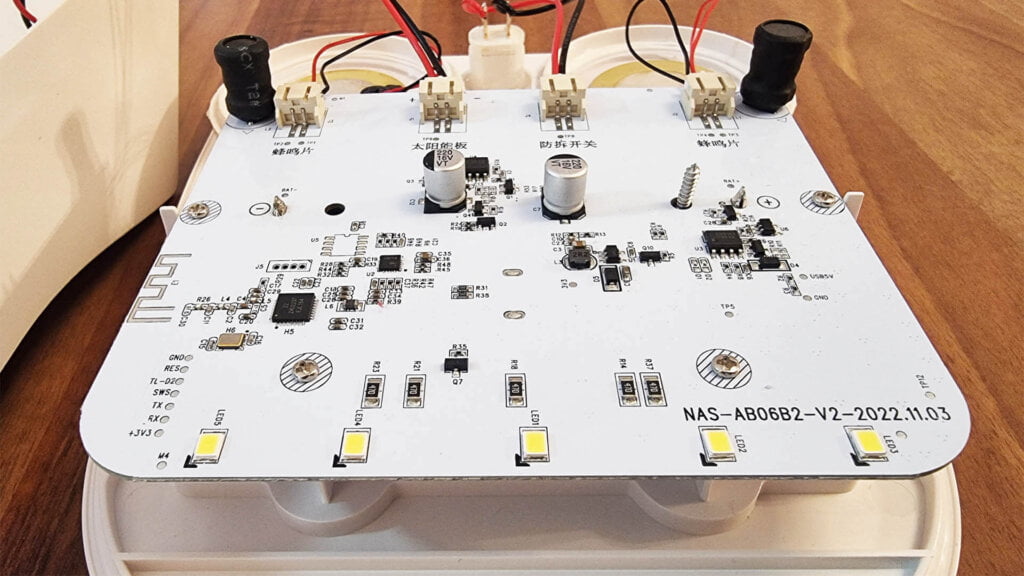
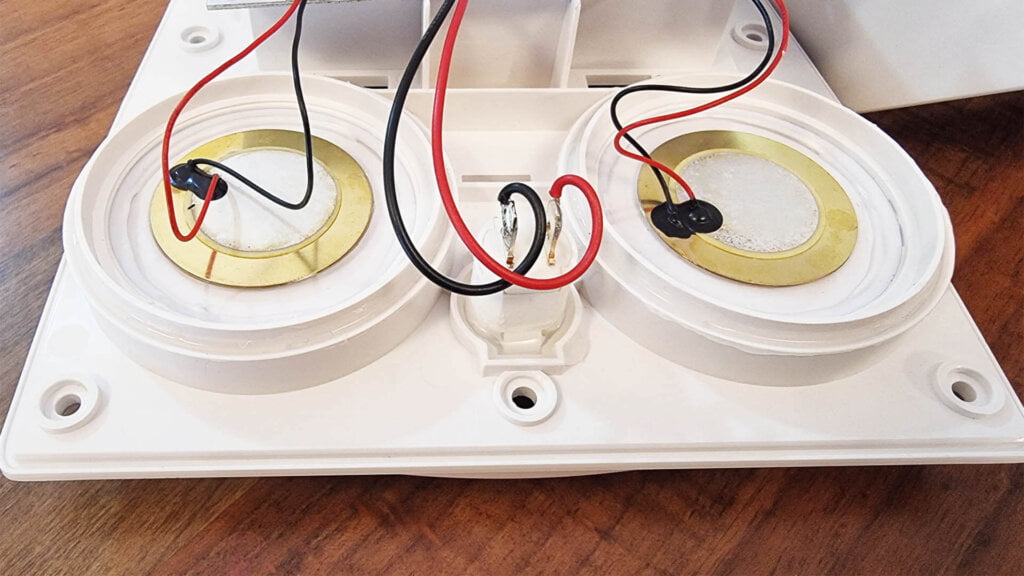
The sirens are glued in place with white silicone on the top of the case, making them impossible to remove without damaging them completely. The device impressed me so far hardware-wise, remains to be seen how it works and operates which is arguably more important.
Home Assistant Integration
The Neo Solar Siren model NAS-AB06B2 can be integrated in Home Assistant only through Zigbee2MQTT. There is no support in ZHA and there isn’t a custom quirk available. There is a an ongoing device support request though and you can follow development there if you must use ZHA.
For the time being, Zigbee2MQTT is your best bet.
Zigbee2MQTT
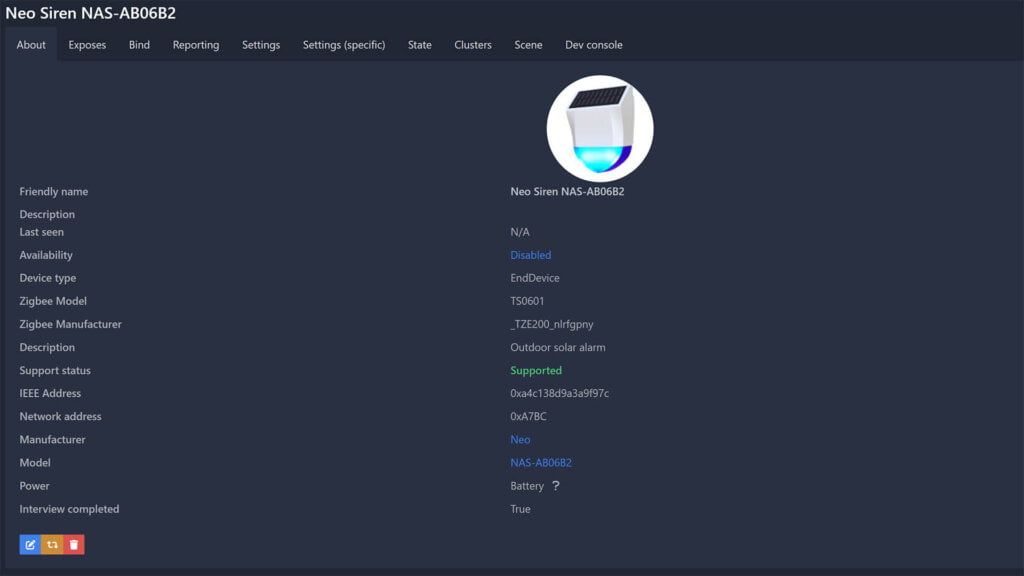
Once paired to Zigbee2MQTT, the device is identified as model NAS-AB06B2 by manufacturer _TZE200_nlrfgpny. It’s labelled as an EndDevice since it’s battery powered, even if you plug it in 5V1A you wont be able to set it up as a router, it’s meant to be used with a battery. It exposes the following entities in Home Assistant:
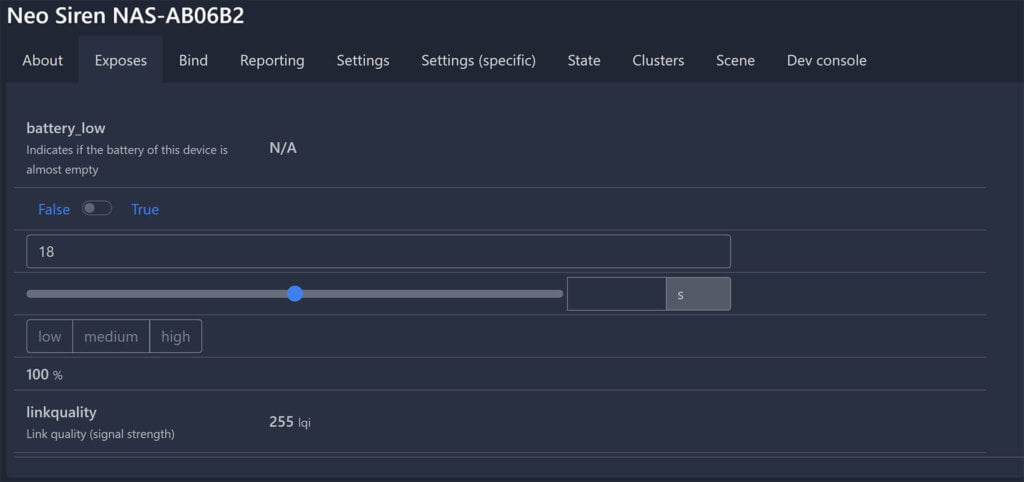
- battery_low: Binary indicator when the battery needs charging
- alarm: Trigger manually on/off
- melody: 1-18 available
- IMPORTANT: there are only three melody types available, 18 are listed possibly because the converter is reused from another device.
- duration: Duration of the alarm in seconds 1-1800s
- volume: low, medium, high
- Does not work, siren works on full volume only
- battery_percentage: Battery state in %
- linkquality: Signal quality in LQI
This alarm entity is actually a simple switch in Home Assistant. Toggling it ON send the predefined alarm payload, toggling it OFF stops the siren. This is much simpler than the Heiman Siren for example, for which you needed to manually send full payloads containing duration, melody type, volume etc.
Zigbee2MQTT External Converter
Some awesome people in a github thread managed to developed a better external converter for this Neo Solar Siren. It exposes some additional clusters and controls:
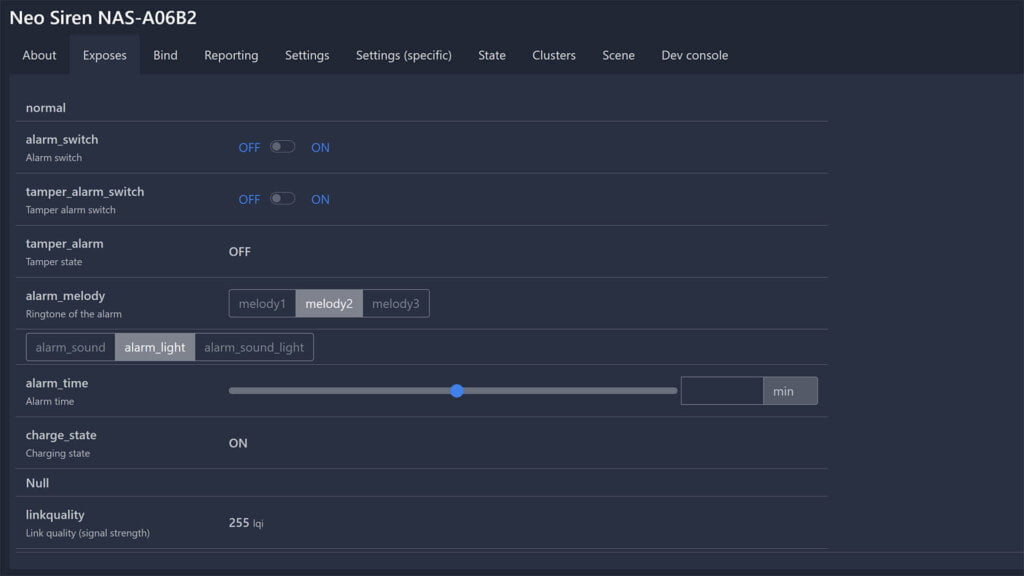
The tamper switch can be manually turned off, thank god. If left on, there is an additional tamper_alarm entity which changes state whenever the switch is toggled. This adds an additional layer of security, by using the entity in a separate automation.
The alarm_melody can be correctly selected from only three options and not 18 like with the original coverter. Further, you can set the alarm_type to sound, light or both light and sound.
The charging_state entity is a binary sensor which changes state to ON whenever the siren is charging via USB-C.
There are some issues with the battery reporting currently, so you can’t rely on the accuracy of the percentage reported, see the thread for more info.
To apply this external coverter:
- Create a new file in zigbee2mqtt folder (next to configuration.yaml)
- Name it ts0601_siren.js (make sure it ends with .js)
- Open the file and copy the content from here:
- Save the file
- Open Zigbee2MQTT’s configuration.yaml file (NOT Home Assistant’s)
- Location of the file is zigbee2mqtt/configuration.yaml
- Enable the external converter by adding the following lines:
- Restart Zigbee2MQTT and pair the siren
external_converters:
  - ts0601_siren.js
Installation and Testing
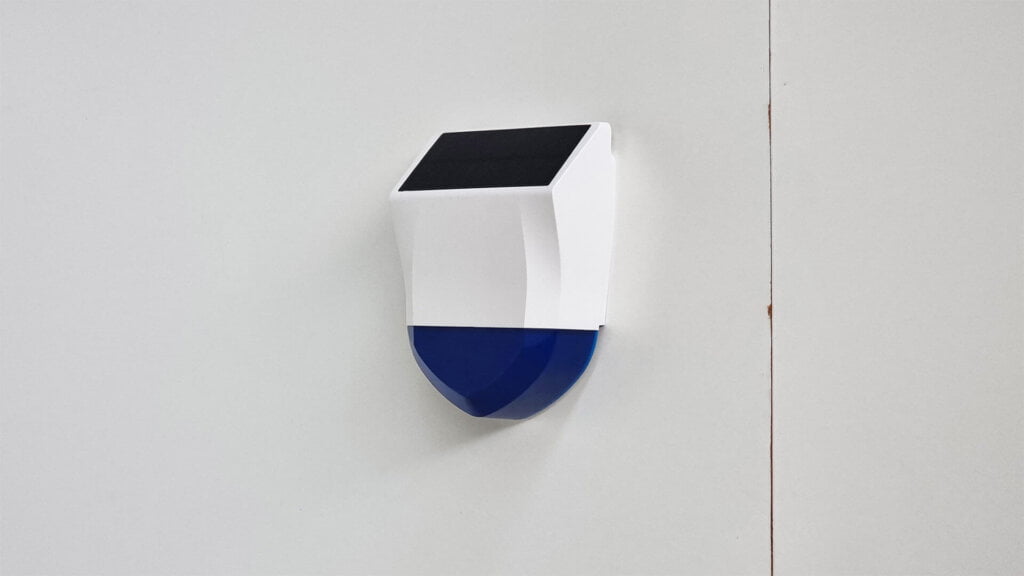
I installed the siren on a chipboard wall in my office, to go through the installation and get the sense of the process. It’s simple enough, three screws and you can attach the siren on the hooks.
However, I highly suggest you turn off the tamper switch from Zigbee2MQTT before you install it in place. The button is very sensitive, just gently pressing it triggers the siren. It made my ears bleed from that distance, so I suggest you be careful.
I recorded a video testing the siren on my workbench, so you can judge yourself. Sound start immediately, be warned
Pricing and Availability
The Neo Solar Siren NAS-AB06B2 can be found rebranded by various Chinese smart home companies and sold on their webstores. Here’s a general AliExpress search link for the siren, which will give you results dependent on your location.
It’s price varies greatly, ranging from $32-$60, the device is not available on Amazon:
Neo Zigbee Solar Siren NAS-AB0602 ~ $32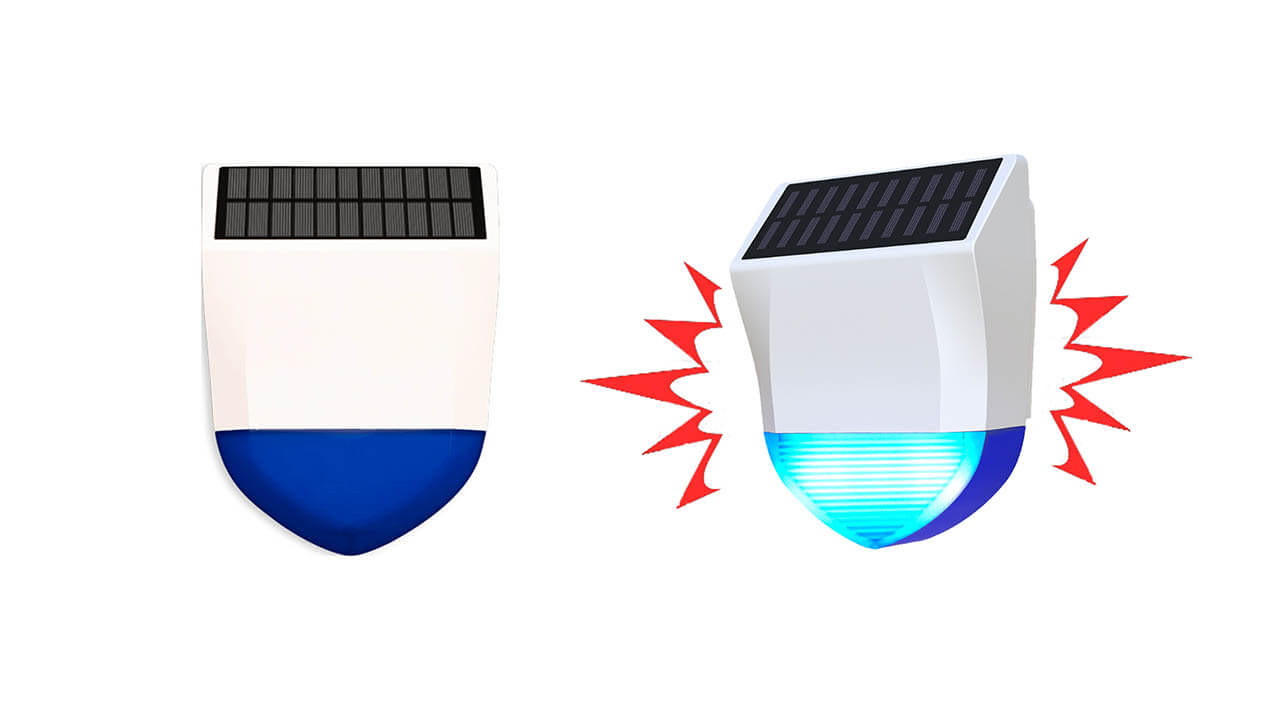
![]()
AliExpress | AliExpress | AliExpress
NEO ALIEXPRESS STORE
Wi-Fi Version | Zigbee Version
MOESHOUSE WEBSTORE
Wi-Fi Version | Zigbee Version
*If links fail to open, try disabling your AdBlocker.
Summary
This Neo Zigbee Solar Siren NAS-AB06B2 is definitely capable of deferring any lingering thieves or burglars. If you opt in to get one, I would install it in a place of prominence. It looks like a siren, so anyone with bad intentions should know better than to approach your home.
If someone decides to knock it off the wall with the intention of disconnecting it before it goes off, the anti-theft button will trigger the siren and go off in his face. From experience, that’s not a pleasant feeling.
Per the manufacturer, the battery needs 9 hours of solar power to be fully charged. If it get’s no sunlight for 2 months, remove it from the wall and charge it manually via the USB-C port.
There are three total melody types you can trigger from Zigbee2MQTT, all a variant of traditional alarm siren sounds. Even though there is a volume changer in Z2M, you cannot change it for this siren. Not even with the Tuya app, the siren blasts on full volume every time.
Zigbee communication was perfectly fine in my setup, the siren responded to my commands sent through Zigbee2MQTT without issues. I suggest you apply the external converter to gain more functionality, whenever it gets merged I will update the review. There is a slight delay of about 0.5s when triggered since the device is sleeping and is woken up by the payload.


hi, can you test the device using mqtt publish (ie in home assistant service test) because I can’t succeed in testing that, so I can’t write any automation with this siren
Hello,
The payload works, make sure you are not using legacy triggers in zigbee2mqtt and use device ID in the automation editor.
This will auto-populate the MQTT trigger, see here: https://smarthomescene.com/reviews/simple-and-cheap-zigbee-smart-button-moes-ers-10tzbvb-aa-review/#automations-using-mqtt-triggers
No I use the Device ID ( friendly name )
When I try to test with mqtt publish, I use:
topic: zigbee2mqtt/”FRIENDLY_NAME”/set (without ” “)
payload: {“alarm”: true}
nothing happened.
Can you tell me if that work for you
Hi SHS
I just bought this siren and tested anti-theft button :
I install the alarm on a wall, the button is pressed. When I remove from the wall, the button is released, but the anti theft system don’t trigger alarm sound. It ring when button is pressed only. The system seems to be reverted :/
That’s weird, it should be the other way around.
I triggered the siren multiple times when the button was unpressed, so it working fine.
Try adding the external converter and triggering the
tamper_switchon/off.Do you think you are confident enough to dismantle the siren?
There’s a rubber ring that you need to be careful with, otherwise it’s only screws and easy to teardown.
Take a look at the button, try pressing it when
stupid question, i know, but how do you pair it? i kept the reset button pressed until the strobe light starts flashing, but my z2m is somehow unable to detect it. am i doing something wrong or was i lucky enough to get a bad one? thanks!
No, I do not think you got a faulty one.
It might be possible you got the WiFi version by mistake?
Please plug in the cable and use the reset button to try pairing again.
Yeah, you were right. I wasn’t even aware there’s a WiFi version as well. Thanks!