Short Intro
When I first met the SwitchBot S10 at IFA Berlin, I was so impressed by its abilities that I remember thinking how difficult and complex it must be to develop and create such a device. The S10 refills your humidifier automatically and comes with a wet station that drains dirty water through your pipes instead of keeping it in a canister.
I’ve had it’s small brother, the K10+, for a while now and I’ve been using it constantly since November 2023. If you are looking for a small robot vacuum that can navigate tight spaces easily, the K10+ is great and I highly suggest you checkout my review.
After a long Kickstarter campaign and manufacturing process, the S10 finally got it’s official release. SwitchBot provided a testing sample for SmartHomeScene, which as usual, will not influence my opinion and thoughts on the device.
In this article, I’m sharing my installation, setup and operating experiences with the SwitchBot S10 Robot Vacuum. I’ve been using it for several months now and I feel confident that I can write a useful review for anyone looking into this robovac.
The SwitchBot S10 Robot Vacuum is available on their Official Webstore as well as
Amazon US | Amazon UK | Amazon DE | Amazon NL | Amazon ES | Amazon IT
SwitchBot S10 Technical Specification
- Model: SwitchBot S10 Robot Vacuum
- Connectivity: Wi-Fi, Matter
- Color: White
- Suction power: 6,500Pa
- Navigation: 360° Lidar
- Threshold Crossing: 20mm
- Brush: Single rubber roller
- Mop: Single roller mop
- Dust Bag: Four liters (onboard bin 310ml)
- Mop cleaning: Cold water, hot air
- Battery: 4,000mAh
- Runtime: 140 minutes
- Size:
- Robot: 365x365x115mm
- Auto-empty station: 412x260x207mm
- Water station: 400x165x100mm
Overview and Package Contents
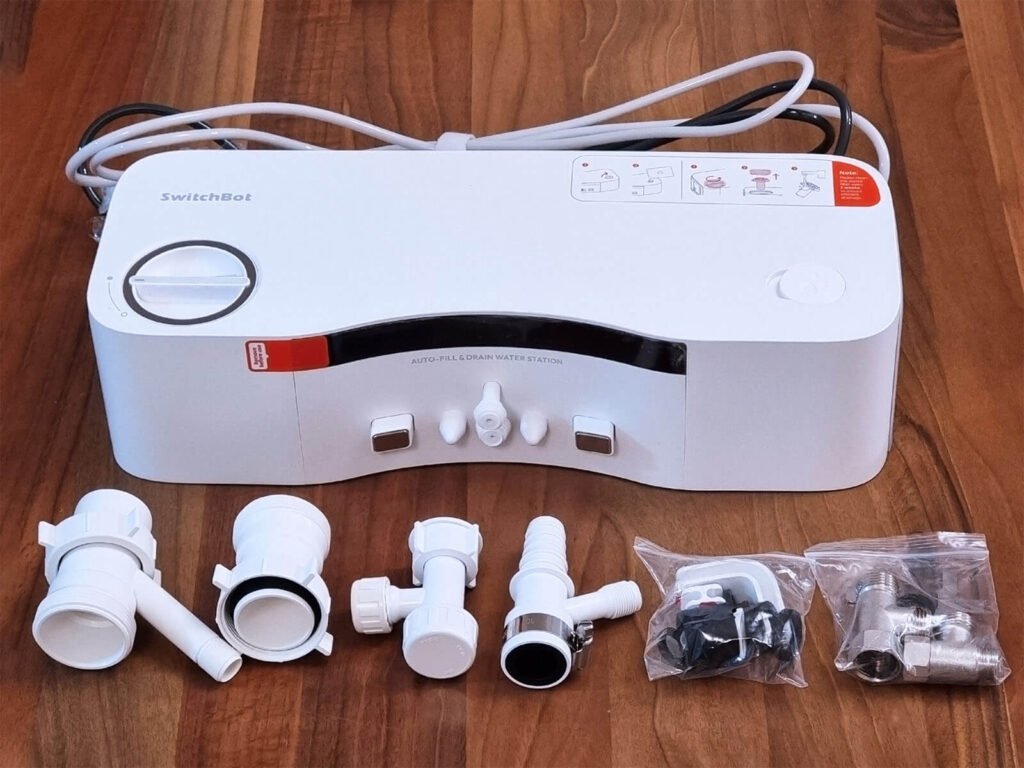
The SwitchBot S10 comes in a giant box containing the main unit, the dry station dock, the wet station, two spare side brushes, four total dust bags, two bags of cleaning solution for mopping, a cleaning brush and a bunch of installation accessories and adapters. It gets overwhelming just by looking at the bag of accessories, but as usual, installation is much easier that it appears.
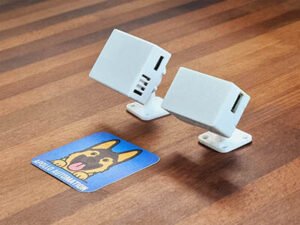
The first thing I did was set the S10 next to the K10+ for a size comparison photo:
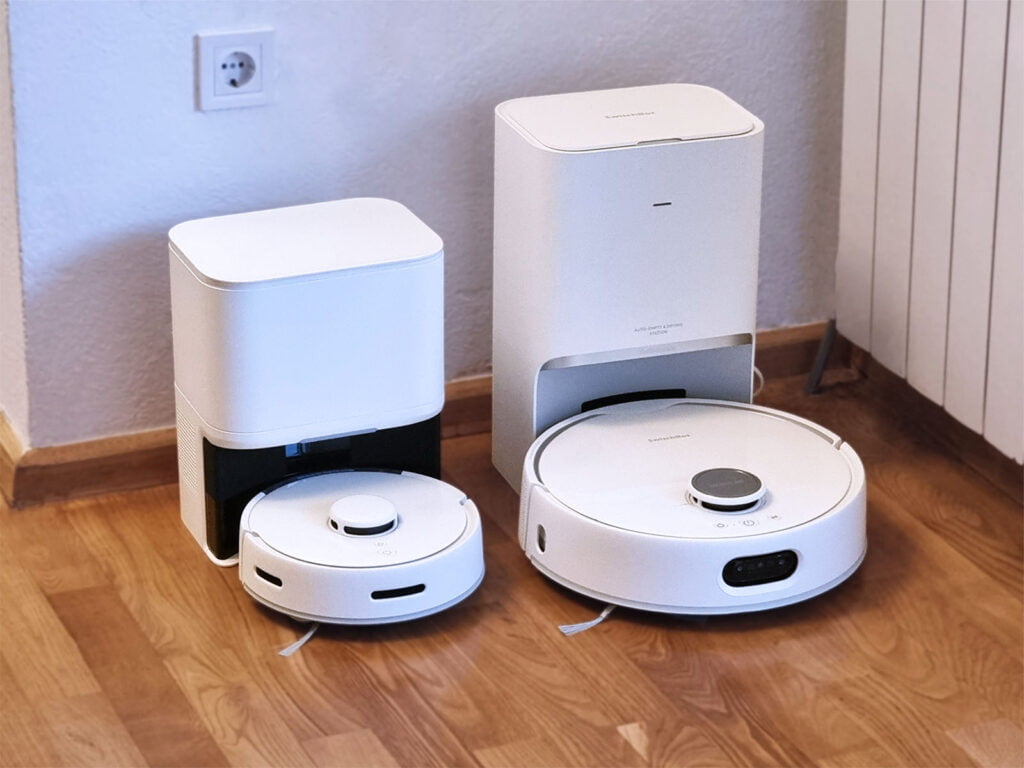
Naturally, the size difference between the two is very significant. The S10 is 30% bigger in diameter than the K10+ and about 22% taller. The bulky size of the S10 is what worried me at the beginning, but it turned out the S10 is quite capable of navigating my living space because of its LIDAR radar system. More on this later.
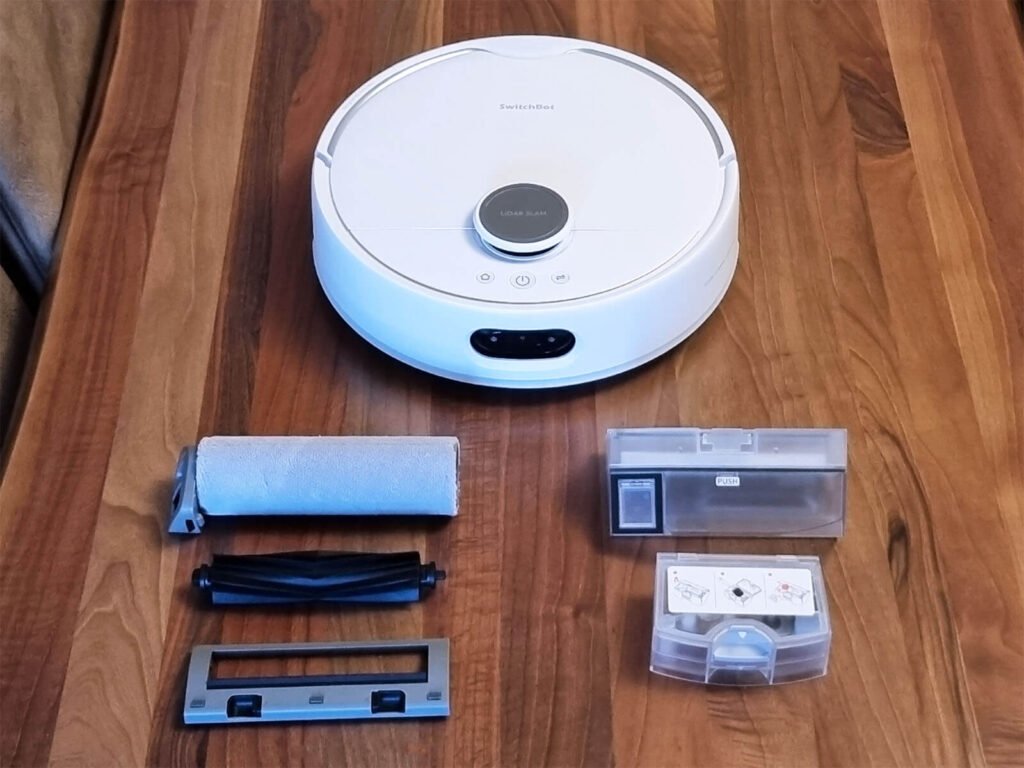
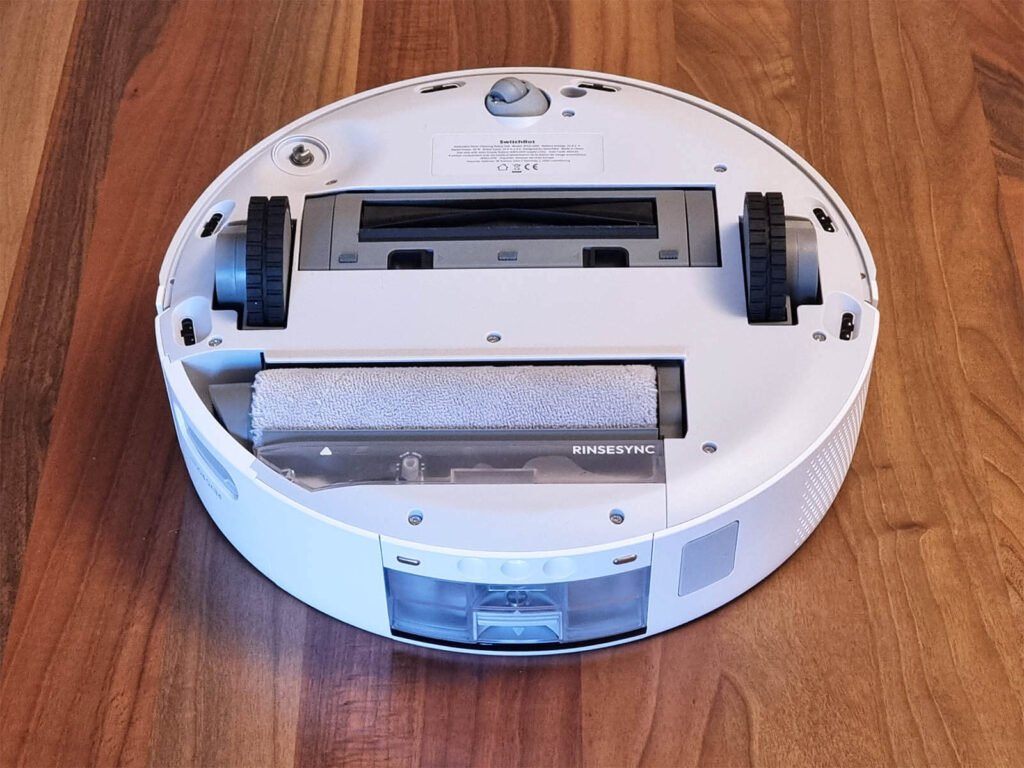
I set the S10 on my table and took out the brush and mop rolls. Besides being large, the S10 is also very heavy. It feels like a brick when held, definitely not easy for handling. The canisters and brushes are very easy to take out by releasing the holding clips. There’s useful quick guide stickers applied everywhere, so even the most uninitiated can find their way around the S10 for maintenance and upkeep.
Unlike the K10+, which had this hybrid brush roll made from fibers and rubber, the S10’s brush roll is all rubber. It feels very soft to the touch, almost flimsy, although the performance turned out to be excellent.
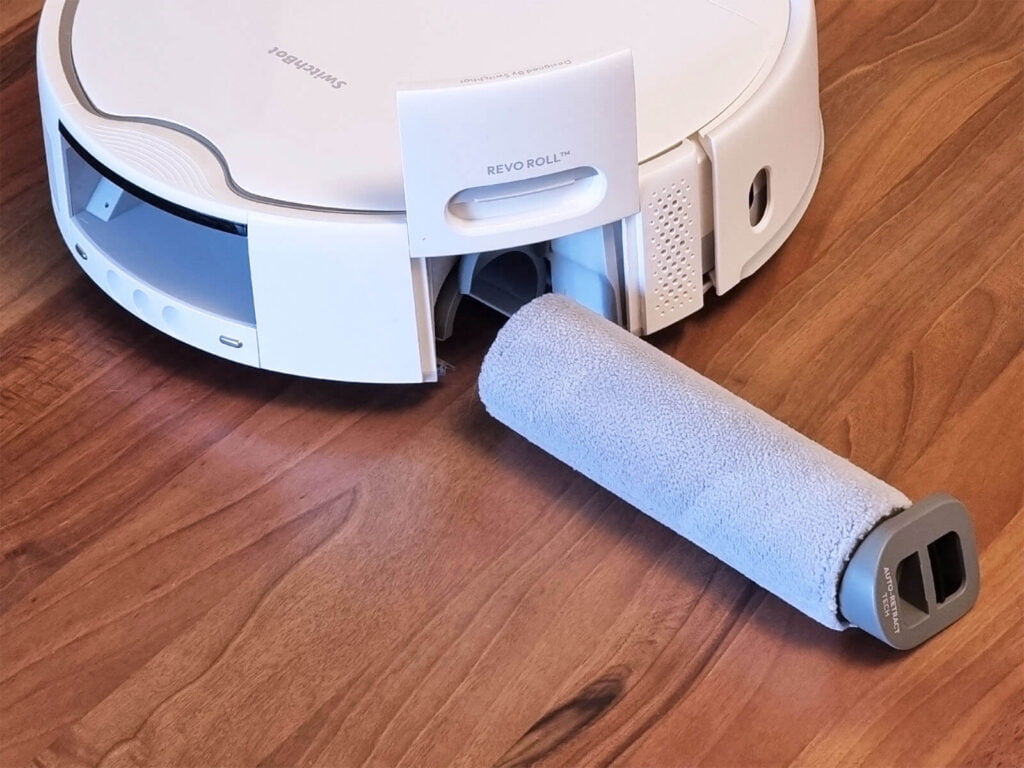
Instead of the bottom, the mop brush (Revo Roll) is installed from the side. The door slides up easily so you can access the brush. This is a self-drying and cleaning brush, which means you will rarely need to take it out for maintenance. More in this later.
The dryer mop is automatically retracted whenever the S10 detects carpet. The sensor is located on the front, so there is enough time to retract the mop before it reaches the carpet. I’ve never experienced a wet carpet edge thanks to this mechanism.
The dirty water tank, which is located on the back of the S10 (seen in image), needs to be cleaned from time to time with the included brush. Even though it discharges the dirty water automatically, some wet dirt still remains and needs to be scooped out manually. The good news is there are no smells whatsoever, since the container is sealed shut with a rubber ring.
The wet station can be used in one of two ways: it can be attached to your existing water and drain system and operate fully automatically or it can be used with a set of canisters, for clean and dirty water. If you decide to attach the station like I did, SwitchBot includes all the necessary adapters and accessories for making it very easy.
A word of warning here: just because everything is available and you think you know how to do it doesn’t mean you should. Water pipes are pressurized and failing to form a good seal can result in a flood. If you are unsure if you can do this yourself, ask for a competent professional.
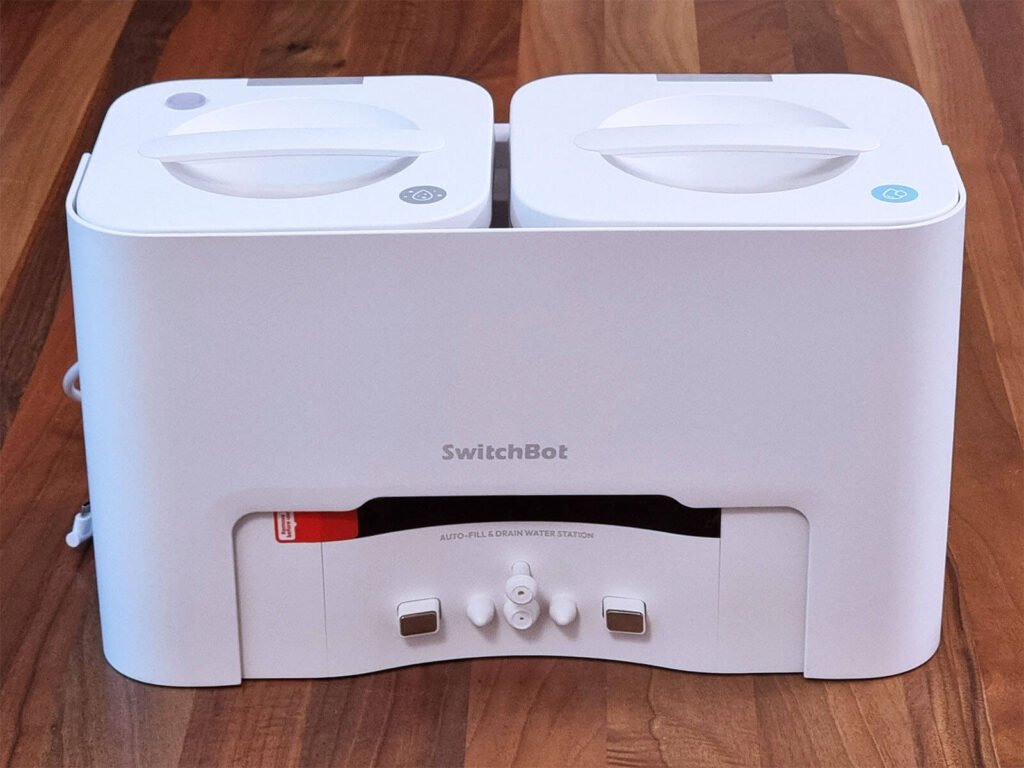
If you decide to use it with the canisters (perfectly viable solution), you only need to attach the two pipes coming in from the sides of the wet station to the canister unit. This does makes the wet station taller and bulkier, so choosing a good location might be a challenge.
The canisters are clearly marked for clean and dirty water and there’s a small see-through hole in the dirty water one for visual inspection of it’s current water level. To add cleaning solution to the mix, you need to remove the clean water canister and access the small hole underneath.
The main drawback of this setup is the smell. Dirty water, especially when it has spent a while in the canister can smell like death. If you don’t mind it, using this setup is a perfectly good solution.
Installation and Station Setup
Once I was done inspecting the S10, I was ready to install it in my home. The dry station comes with a dirt bag pre-installed, so I just chose a position for it and plugged it in the wall. The station is taller than the one of the K10+, but that was not a problem for me.
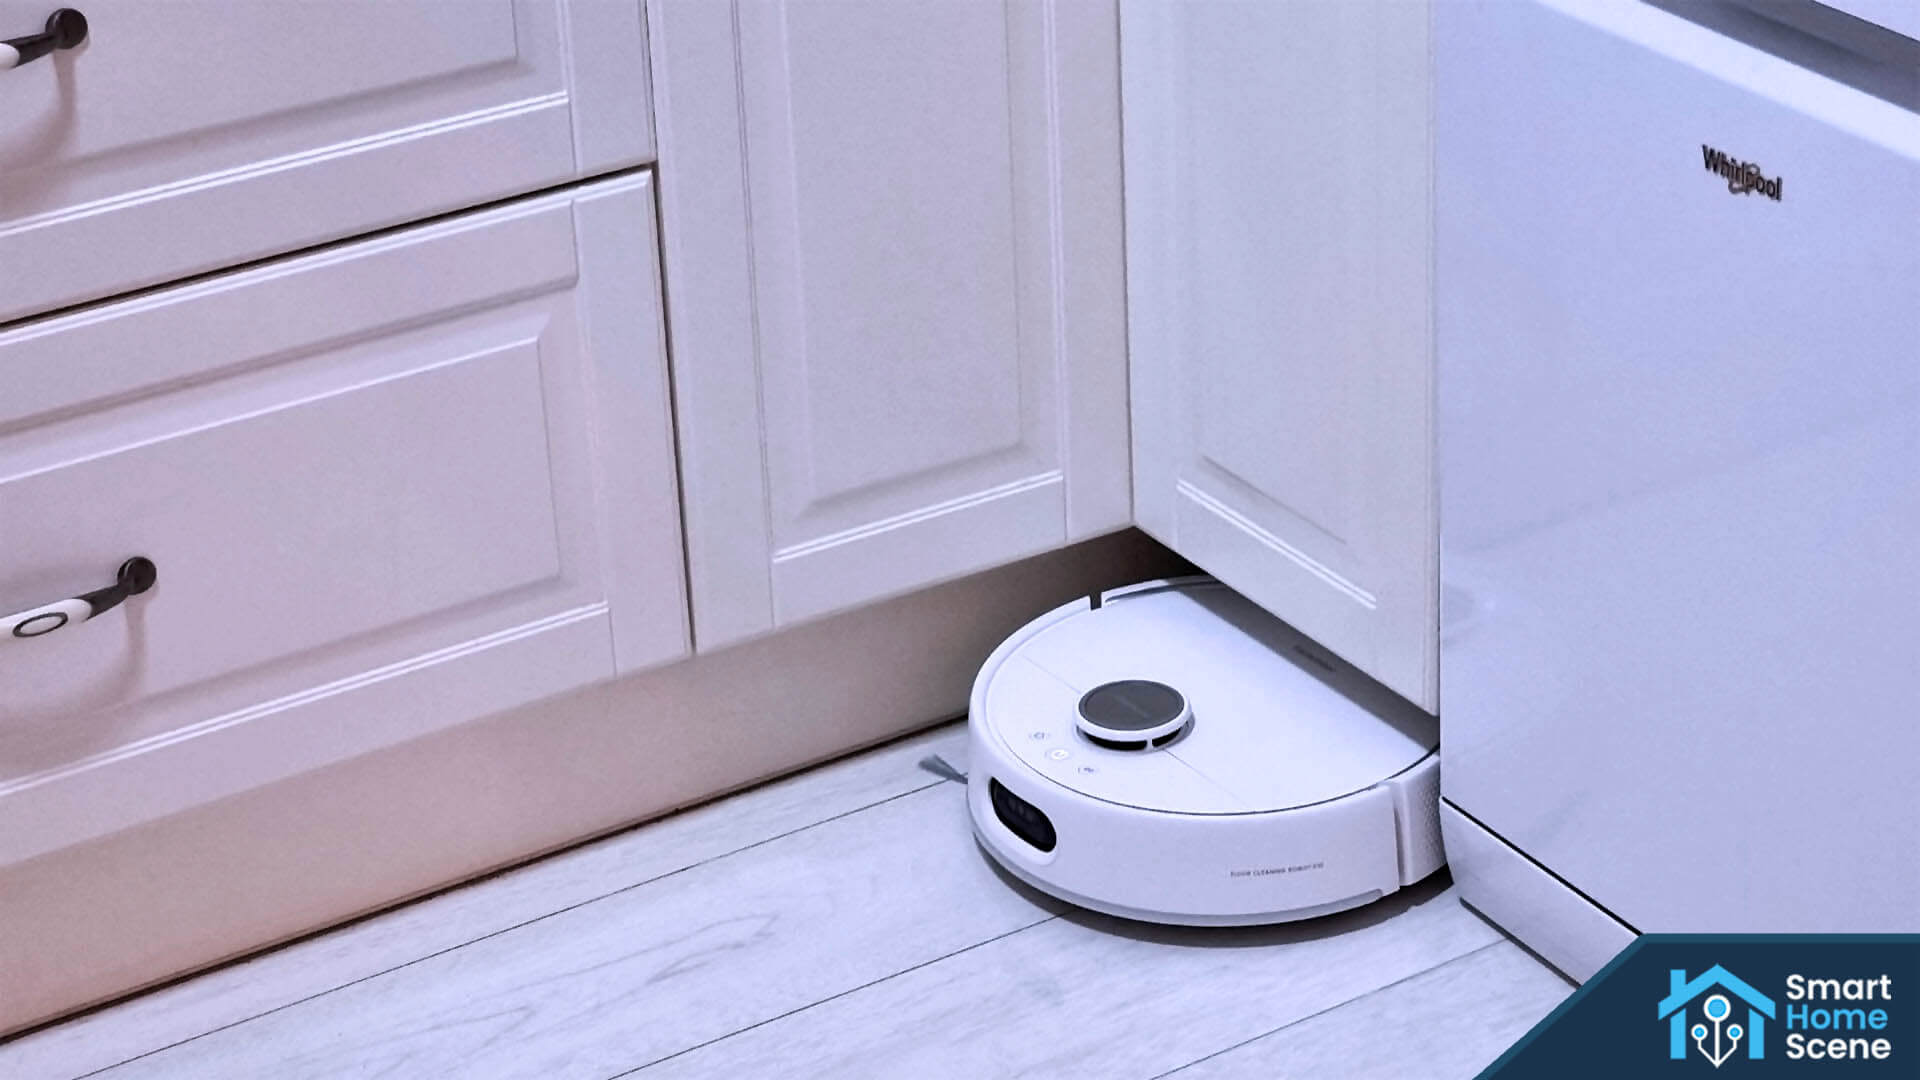
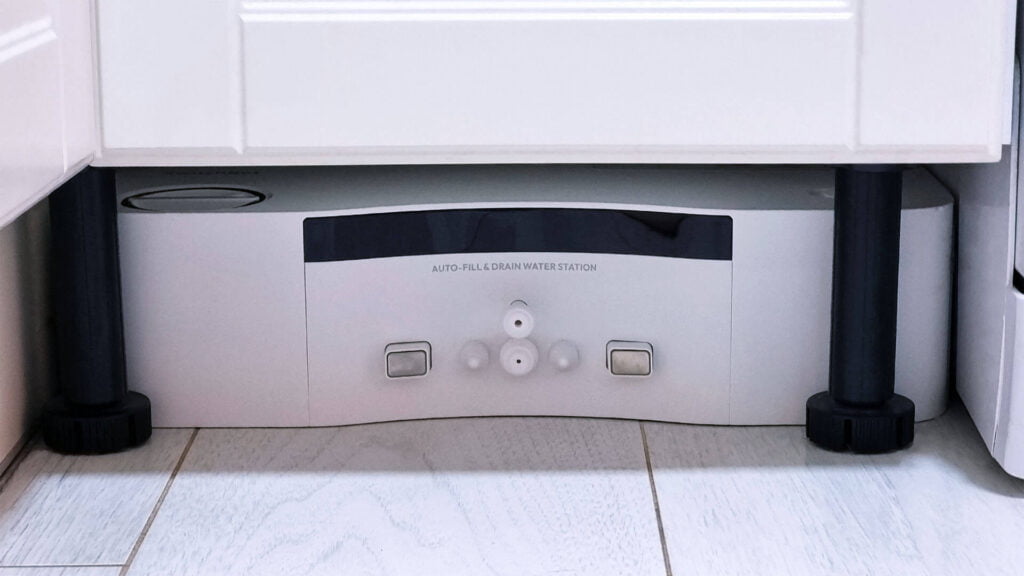
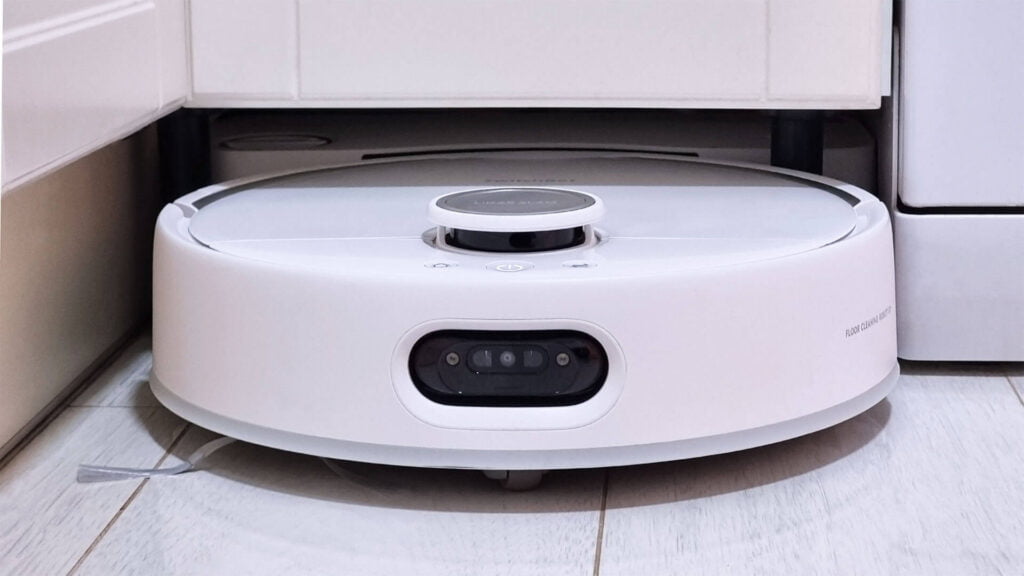
I carefully considered the location for the wet station. It stands at 10cm tall without the canisters, so I decided to fit it under my kitchen standing cabinets. I chose the corner as the best location, next to the sink and dishwasher, which made things quite easy to install. When docked, the robot slides about 30% under the cabinets, resulting in this awesome look:
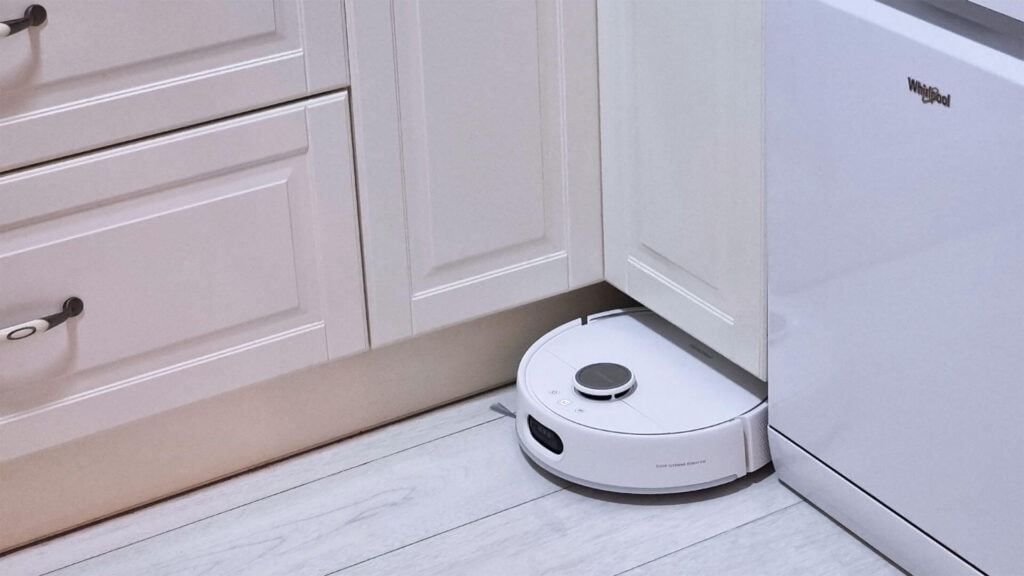
The wet station was a tight fit behind the legs of the cabinets, but ultimately it turned out great. I installed a small rubber strip behind the station to prevent it from sliding backwards when the S10 was docking. The robot kind of swivels onto the station from the side in order to form a good seal with the connectors. Because of it circular shape, only the back reaches the connectors and it does not touch the cabinet legs.
There’s one caveat to my setup here: In order to add cleaning solution, I needed to take out station from time to time. This was not an issue, as I could easily rotate it sideways and pull it out, add the solution, and put it back in place.
Next thing to do was the actual attachment of the tubing to my water and drain system. I carefully threaded the tubes behind the cabinets and got them under the sink, being mindful not to bend them too much and stop water flow. SwitchBot gives you several attachments for mounting the tubes on corners 90° too, so the flow remains unobstructed. I stopped the water, used the connectors that matched my pipes and that was it, the wet station was connected and ready to go!
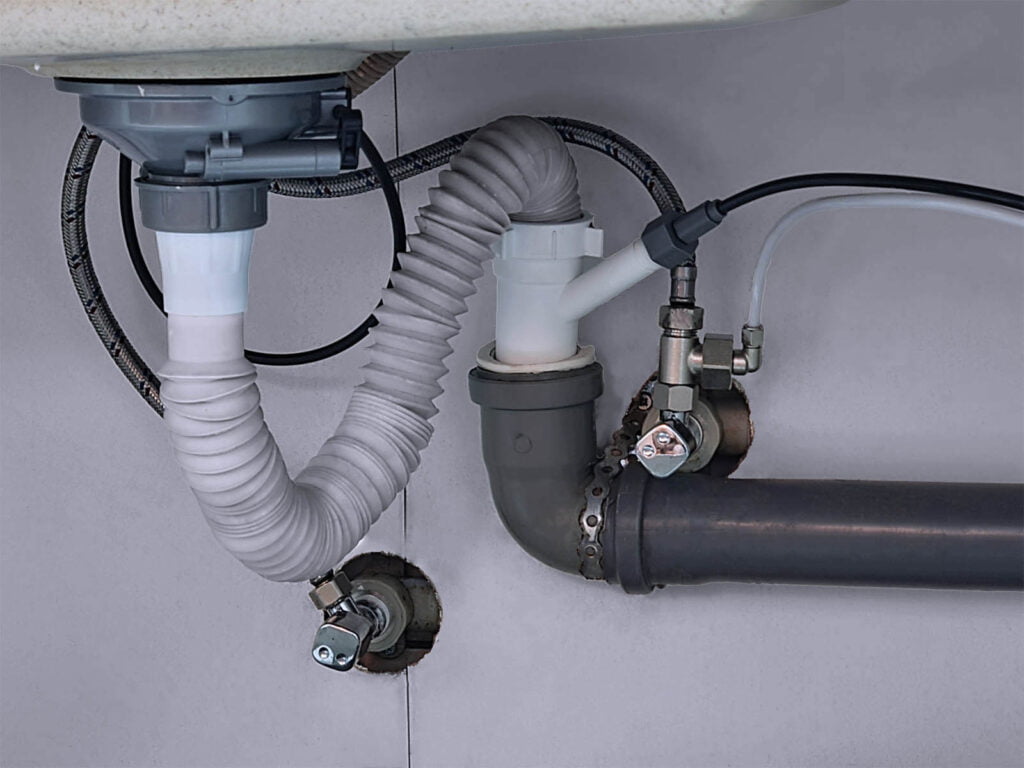
My kitchen sink has a bit of a non-standard piping setup. Instead of the drain going straight in the wall, it attaches to a pipe traveling about 1 meter to the side before attaching to the main pipe. This was not an issue, as I managed to form a good seal with one of the attachments inside the SwitchBot box.
When the S10 docked, it discharged the dirty water, refilled itself with fresh water and cleaning solution and did it’s job. The robot does not spend too much time on the wet station, so it was not an issue that it sticks out in the room. It was such a seamless setup that worked great!
App Onboarding and Configuration
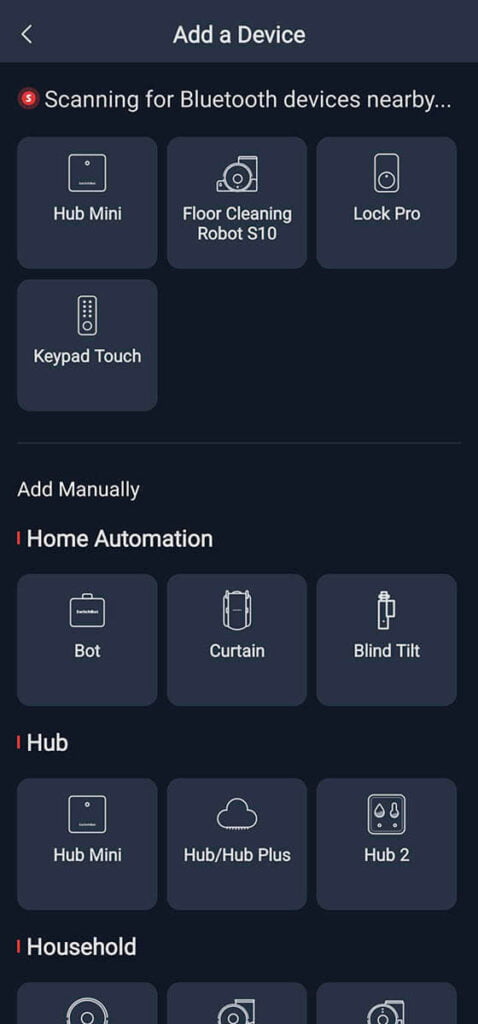
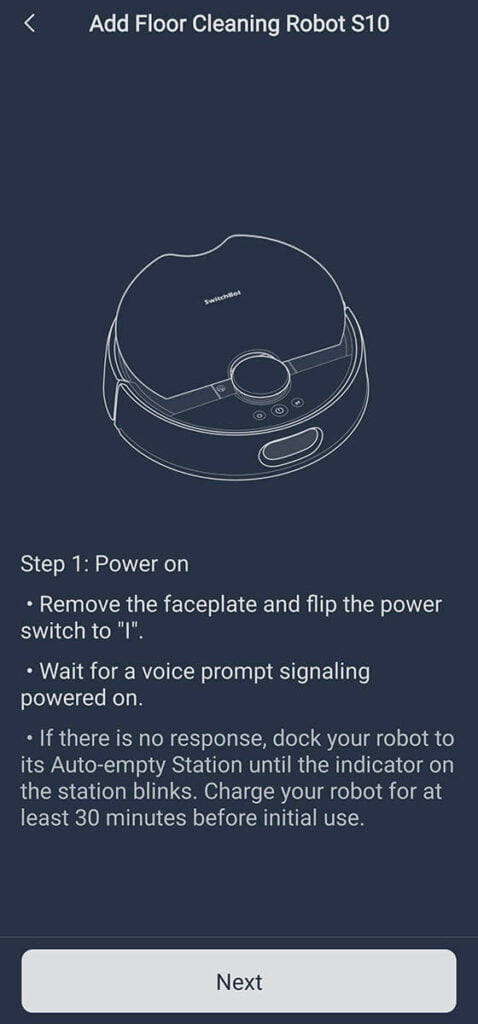
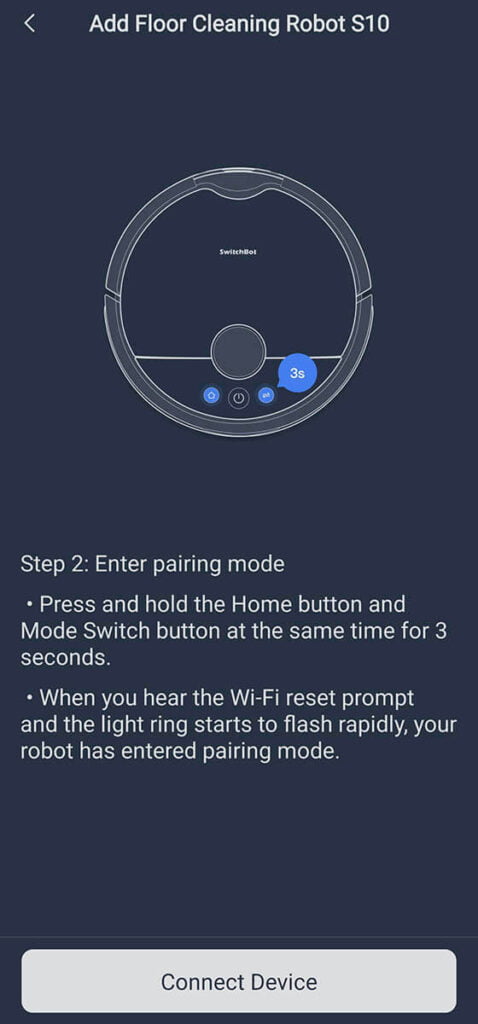
Pairing the S10 in the SwitchBot app was a seamless experience. I’ve mentioned many times that if I have to pick one proprietary brand app to use for my smart home, I would choose SwitchBot’s. The UI is so intuitive and easy to use, it makes setup and maintenance a breeze. The whole manual of the S10 is visually presented to the user during the onboarding process. Here’s how it looks in a few screenshots, after skipping the installation instructions:

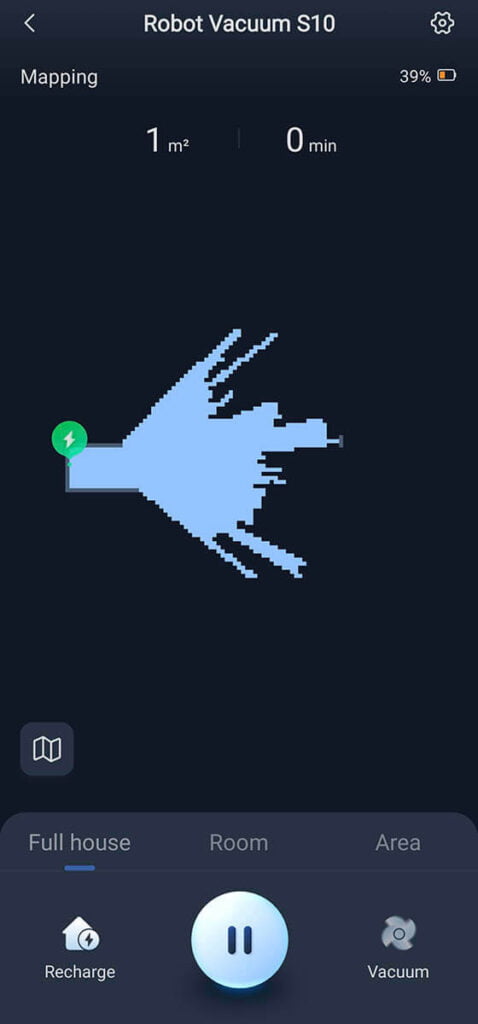
Once I added the S10 to the app, I could begin the mapping process. Just like any other robot, you let it roam your space and record the map. Once its done, you name your rooms and you are ready to use it. One additional step was needed here, which was setting the location of the wet station. I just dropped a pin on the map and S10 found it without any issues.
Here’s how the initial mapping went:
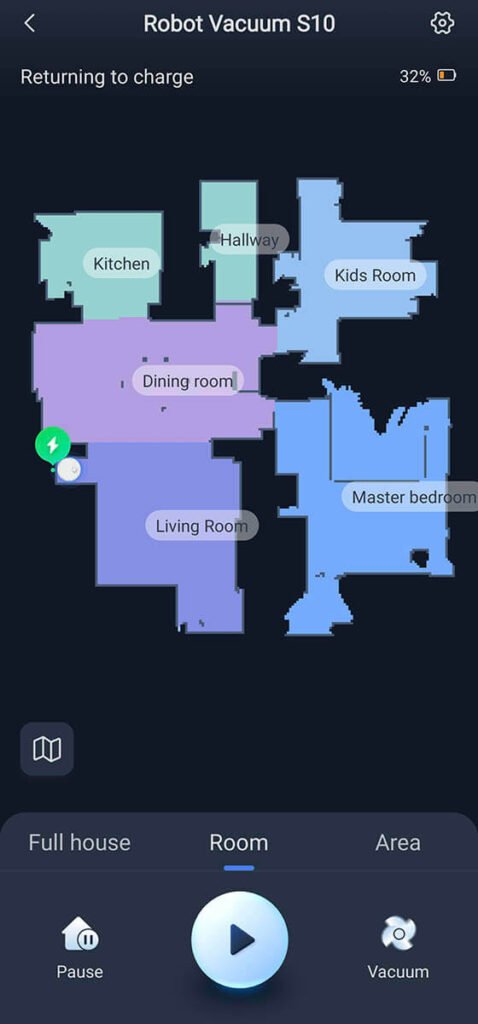
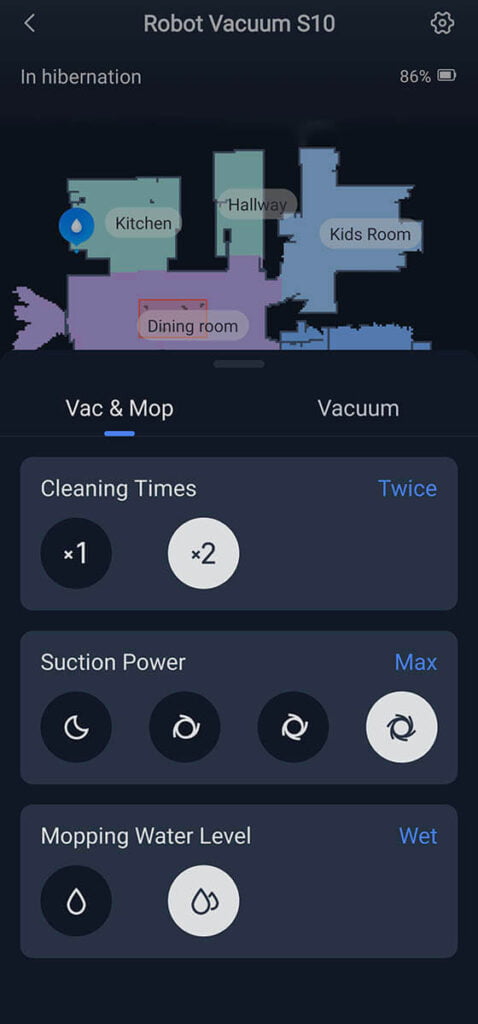
Once the initial mapping was complete, I took the the time to name the rooms and tweak some things. I added a no-go zone under my dining room table and my kids playground, which was full with toys. There are some interesting settings in the app that you can use to improve the performance of the S10. For example:
- Carpet settings: Allows you to define your carpets in light and dark mode. The robot will automatically increase suction in these zones, improving the vacuuming performance.
- Adapt to carpets: This option automatically raises the mop whenever the S10 detects carpets. If set to Avoid carpets, it will skip cleaning those areas by default.
- Audio settings: This controls the volume level of the S10 as well as the language it uses. You can choose from a bunch of languages like English, German, French, Spanish, Italian, Dutch and Japanese.
- Maintenance: In this menu, you can keep track of all the components that need maintenance/replacement. The auto-add solution toggle is also found here, which will automatically mix the cleaning agent with the water when the S10 refills itself for mopping.
- More features: This menu allows you to control things like child lock, AI obstacle avoidance, enable reduced collision mode and change humidifier settings.
- Device info and firmware updates: The first one gives you some basic information about the S10, like its Wi-Fi and BLE MAC addresses. The latter allows you to check the current battery levels of the robot and stations along with the current firmware version. I suggest you enable automatic firmware updates to always stay updated.
Adding the S10 to Home Assistant
The SwitchBot S10 can be added to Home Assistant over Matter, if you have one of their Matter hubs (SwitchBot Hub 2 or SwitchBot Hub Mini). In the SwitchBot app, you can generate a QR code in the settings menu of the hub and expose the S10 as a sub device.
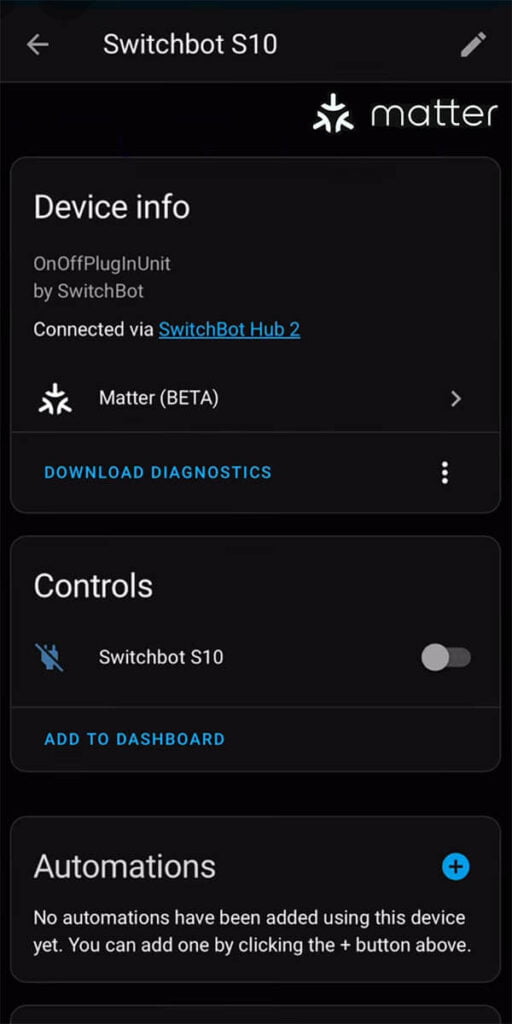
Once you pair the Hub to Home Assistant using the code, every device you’ve enabled through the app will get exposed to Home Assistant. Depending on the device type, it allows you control and change several things.
Unfortunately, with the current state of Matter, it only allows you to turn on/off the S10 through Home Assistant.
Essentially, the last settings you’ve saved in the SwitchBot app will be applied and the bot will start vacuuming/mopping according to those parameters once turned on from HA.
I works, but obviously it’s severely limited.
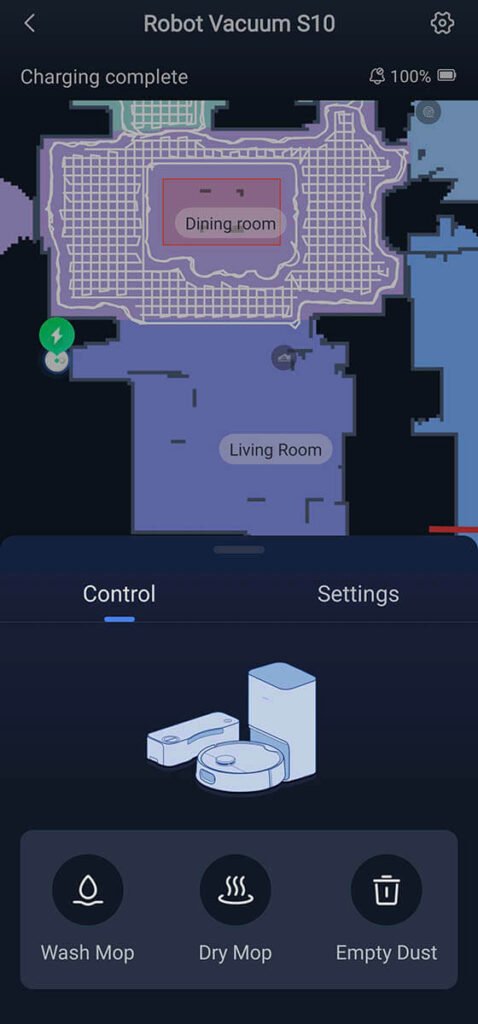
Vacuuming and mopping performance
Before I share my experience with the S10, I would like to preface this section with the fact that I’ve only used a Roomba 971 and the SwitchBot K10+ before the S10. I am no robot vacuuming expert by any means, but I do know when my floors are cleaned and mopped properly.
Ever since I deployed the S10 about two months ago, I’ve updated the firmware almost every week. To me, this is a good sign and tells me SwitchBot is keeping their ear to the curb and listening to the community feedback. Every firmware update brought some kind of improvement and quality changes that made the S10 even more powerful than it is.
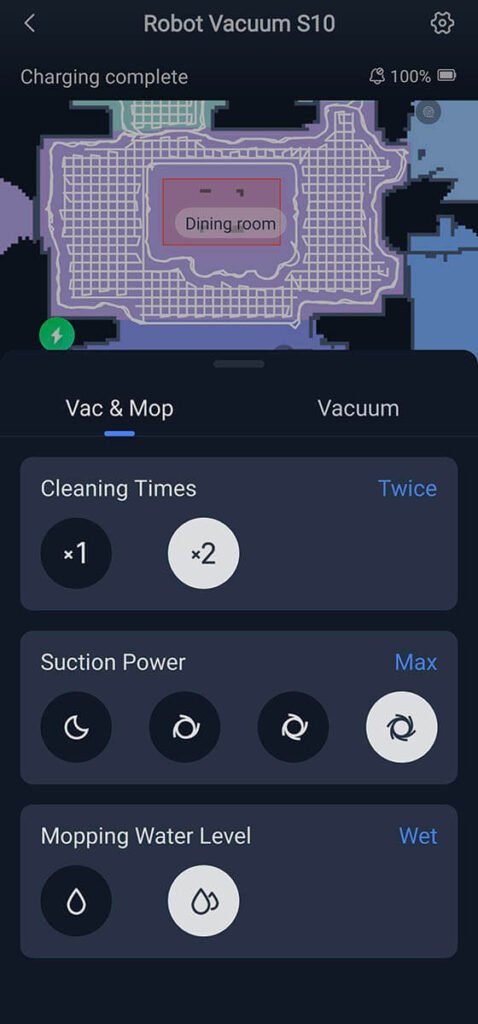
In terms of vacuuming performance, the SwitchBot S10 is the most capable robot I’ve encountered. It vacuums my floors and carpets without a challenge. It’s worth mentioning that I like to use the vacuum mode at the strongest setting, so I make no compromises there.
I usually use two runs per room, but I’ve come to the realization that this is unnecessary in most cases. It will clean sufficiently well with just one run, so you might want to try vacuuming only with one run first.
It’s worth mentioning that the robot is very loud at this setting and sounds like a traditional vacuum cleaner. You wont be able to stay in the room when its operating in this mode, that’s for sure.
In terms of mopping performance, the S10 also performs as advertised. The mopping rolls leaves a visible trace when it travels and makes my floors shiny.
I have tiles in my kitchen and oak parquet in the other rooms, which makes no difference to the S10. I will clean them both without issues. I love coming home from work and seeing the sun’s shiny reflection of my floors.
I would add here that I’ve found the mopping water level needs to be set to wet for the best performance. Using moist results in very dry mopping and leaves uncleaned areas in some cases.
It’s also worth noting that the S10 cannot mop only. It needs to vacuum and mop at the same time, which a weird feature. Whenever I’m doing a mopping run, I always set the suction power to the lowest setting, which generates no noise.
In terms of battery life, I would say this is the weakest point of the S10. At the strongest cleaning mode, it drains the battery very fast. Sure, it will save battery at the lower settings, but what good is a robot vacuum in this price range if it cleans sub-par? I would say it can vacuum and mop about 80m² with a full battery before it needs to recharge. The good news is, the S10 manages this automatically. If during cleaning it drains the battery, it will automatically recharge and resume cleaning, successfully completing the task.
I’ve set up schedules to clean my space while no one is home, so I don’t really care how many times it recharges as long as my floors are sparkling clean when I get home.
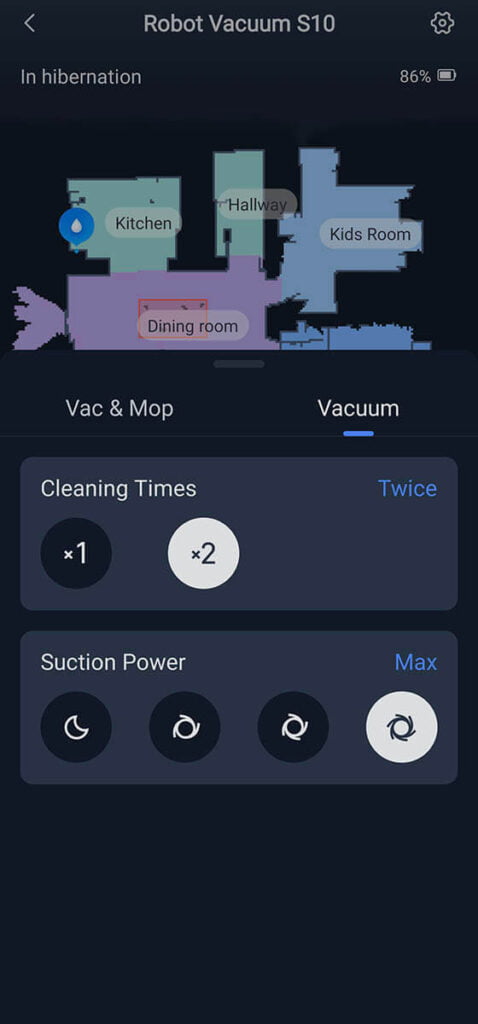
In terms of mapping and additional features, the S10 has been working flawlessly for me. The mapping process was significantly faster than my K10+, thanks to it’s LIDAR navigation system. It did not even need to travel to the far edges of the room before noticing that there’s a wall there. You can also add a virtual wall in the app, if you need to prevent the S10 from traveling to an area. Also worth noting is that not once did it fail to dock at the dry or wet station, except when the stations were physically obstructed.
The next thing I love about the S10 is the manual control mode. With my toddlers spilling things all around the house, I frequently use this mode to clean up an area that needs immediate attention. For reference, you can also drive the K10+ manually but not while it’s vacuuming.
The next difference I noticed between the two is the self-emptying mechanics. The K10+ uses one full blast to discharge waste into the basket, which sometimes leaves debris inside the robot’s container, stuck behind the small plastic door. The S10 handles this much better. It uses two blasts with about a 5-second delay between, which prevents dirt from getting stuck behind the container flap door. I’ve never encountered dirt remaining inside the S10 after a discharge.
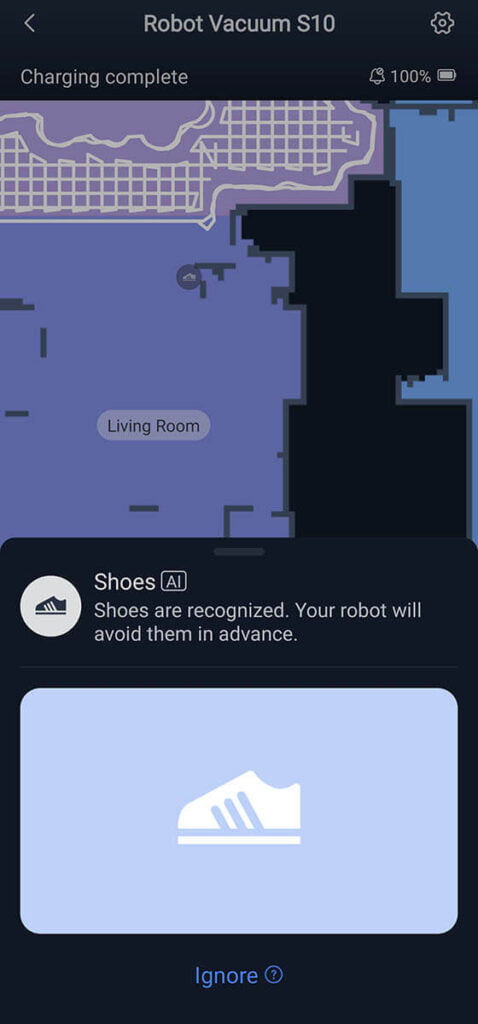
With the latest firmware update, came another very interesting feature for the S10. The AI object detection mode was improved significantly, allowing the bot to map things and objects as it went along.
For example, if it detects shoes laying around it will place an icon on the map, alerting you that you need to remove them before that area can be cleaned.
I’ve only been using this feature for about a week, and so far it has placed icons for shoes, fabrics, cables, and objects.
Final Thoughts
My overall experience with the SwitchBot S10 Robot Vacuum has been pretty awesome. This is the best robot vacuum I’ve owned, in terms of performance and features. I have no complaints of it’s vacuuming and mopping capability, as well as advanced mapping features.
There was a feature long requested in community forums, which was that the S10 was not capable of mopping a second floor. With the latest firmware update, this has been fixed and you can now map, vacuum and mop a second floor without issues, even without the wet station present.
Some things that can be considered a drawback and are worth noting:
- The robot is very wide, tall and heavy. If you have tight spaces that needs cleaning, forget about using the S10, you need to look into the K10+.
- Battery life could be better. If you have a larger home that you want cleaned in one run, the S10 may fall short and need a recharge before resuming the cleaning task. This is not an issue for me, but it’s worth noting.
- Installation can be difficult. If you are not of the tinkerer type, installation of the wet station can be tricky. You can always use it with the canisters without attaching the tubes, but I would advise going the extra mile and finding a way to attach it to your water and drain system. It’s very convenient and doesn’t require any type of maintenance once attached.
Overall, I can comfortably recommend the SwitchBot S10 to anyone looking for a capable top tier robot vacuum. It’s full box of components, premium features and advanced cleaning capability come at a premium, as the S10 costs $1200 for the full set.
If I’ve helped you made a purchasing decision and you found my review valuable, here’s some links for the S10. These support SmartHomeScene in the form of affiliate commission at no additional cost to you.
The SwitchBot S10 Robot Vacuum is available on their Official Webstore as well as
Amazon US | Amazon UK | Amazon DE | Amazon NL | Amazon ES | Amazon IT


Hi thanks for the review. What about using 3rd party matter hub (conbee ii) Is that supported or you need specifically the switchbot one ?
No, you need one of SwitchBot’s hubs.
wtf is going on under the sink? get a plumber.
A little DIY magic that works great!
It’s on my to-do list lol
How well does it vacuum and mop along the edge of the room and under cabinets? It seems to have a side brush, but how well does it do in corners. On mopping, it does not have a side or swing-out mop pad like the Dreame L10s. So do you tend to have a mopping “border”. Does it have a way to handle that. Also notice that the mopping roller is not the full width of the unit!
Nice review.
It does not have an extendable side brush, but the bristles are pretty long and the corners get cleaned very well.
It cannot slide under most cabinets I would say, it’s 115mm in height which is taller than most robot of this type.
You are correct about mopping, it mops only at the lengths of the roller.
Which does mean about 5cm from the wall are left unmopped.