If you’ve been following SmartHomeScene’s deep-dive device reviews, you are already aware that presence sensors are a huge focus on our website. I’ve tested almost every mmWave presence sensor out there, and created a few of my own.
Check out the DIY section for guides and code.
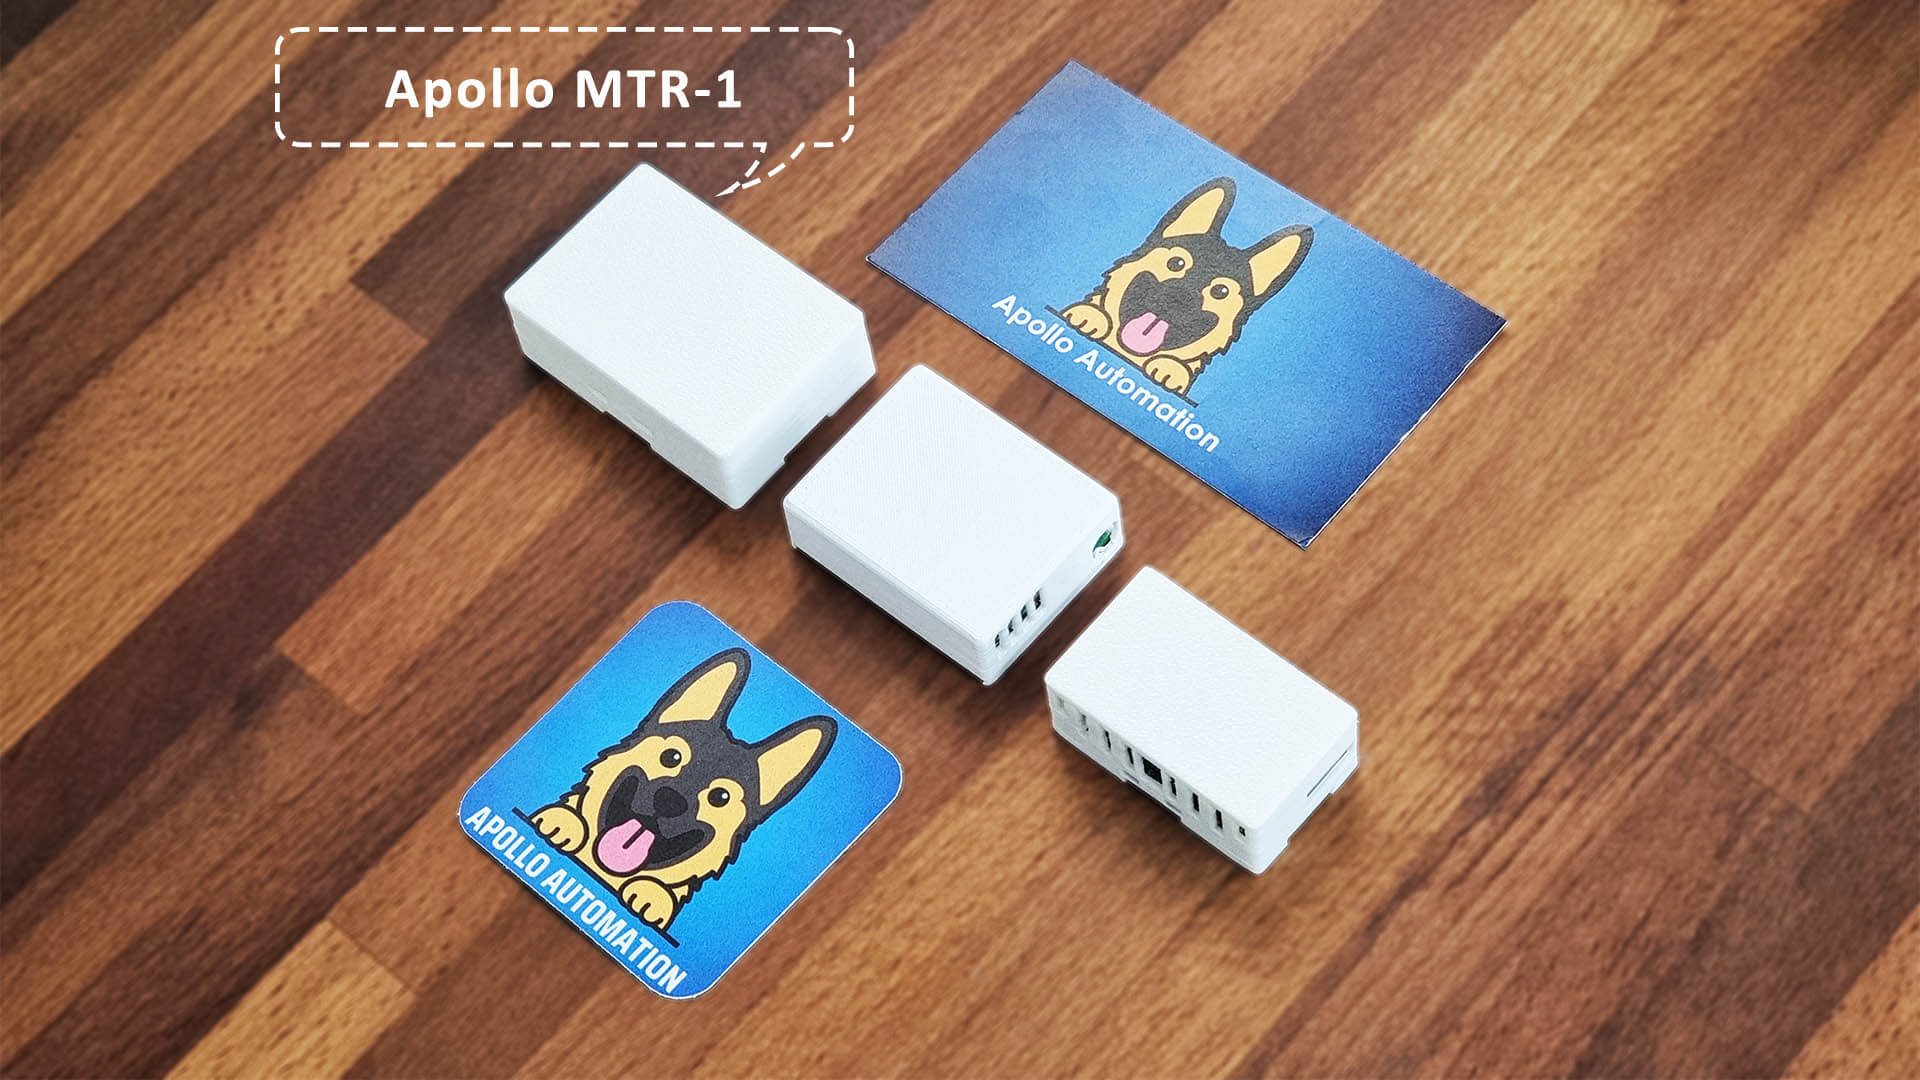
I’ve also shared many times that I consider Apollo sensors the best open-source and completely local presence multi-sensors. Over time, this has proven to be more true than ever. To learn why, here’s a list of Apollo Automation devices I’ve tested:
- Apollo MSR-1 Presence Multi-sensor
- Apollo MSR-2 Presence Multi-sensor
- Apollo AIR-1 Air Quality Monitor
In this article, I’m sharing my experience with the MTR-1, Apollo’s latest multi-target tracker, based on the HLK-LD2450 mmWave radar sensor. Just like the MSR-1/MSR-2, this one is also a very small and modular presence sensor with an acceptable price tag.
You can get the Apollo MTR-1 on their Official Webstore (US) and OpenCircuit (EU).
Apollo MTR-1 Technical Specification
- Model: Apollo Automation MTR-1
- Dimensions: 49x32x15mm
- Connectivity: Wi-Fi/Bluetooth
- Main Module: ESP32-C3 Mini
- Interface: USB-C
- mmWave Radar: Hi-Link HLK-LD2450
- Max distance: 6 meters
- Max targets: 3
- Max zones: 4
- Illuminance and UV: Liteon LTR-390UV
- Temperature and Pressure: Infineon DPS310
- CO₂ Sensor: Sensirion SCD-40 (Optional)
- ESPHome Support
- RGB Pixel LED
- Piezo Buzzer
- Expansion Slot (Back)
- Price: From $36.99
Overview and Package Contents
The Apollo MTR-1 is available for purchase with some additional add-ons that improve it’s installation flexibility. You can add an outlet mount, that allows the MTR-1 to sit on a wall outlet, an articulating stand, that allows you to pivot the device towards your presence tracking area and a male USB-C connector, which essentially converts the connector on the back so you can use it with an adapter directly.
While the device does not come with a USB cable and adapter, you can get one from Apollo or simply use your own. There’s also a GPIO Header Addon for the MTR-1, a very interesting addition that opens up more possibilities for the already great MTR-1. More on this later.
Apollo MSR-1 vs. MSR-2 vs. MTR-1
All Apollo Automation sensors are similarly shaped, with a square-ish design of about the same size. The MSR-2 is the smallest of the bunch, by about 9mm in height. Considering these are actually multi-sensors, it’s really impressive of how they managed to fit everything inside such small cases.
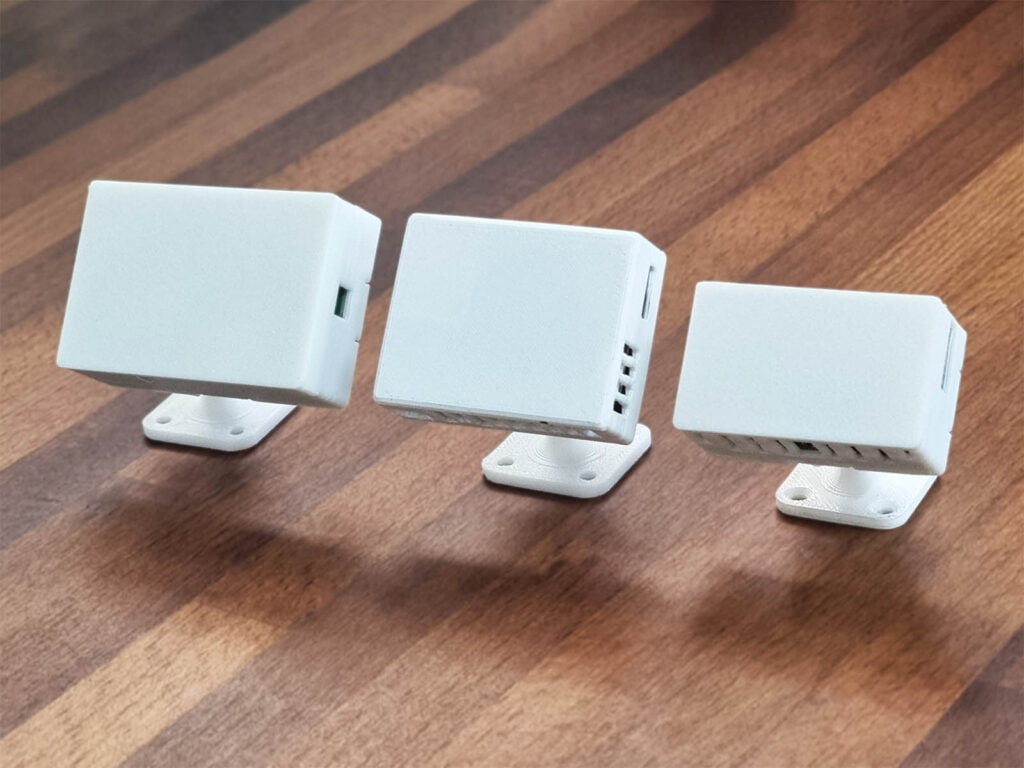
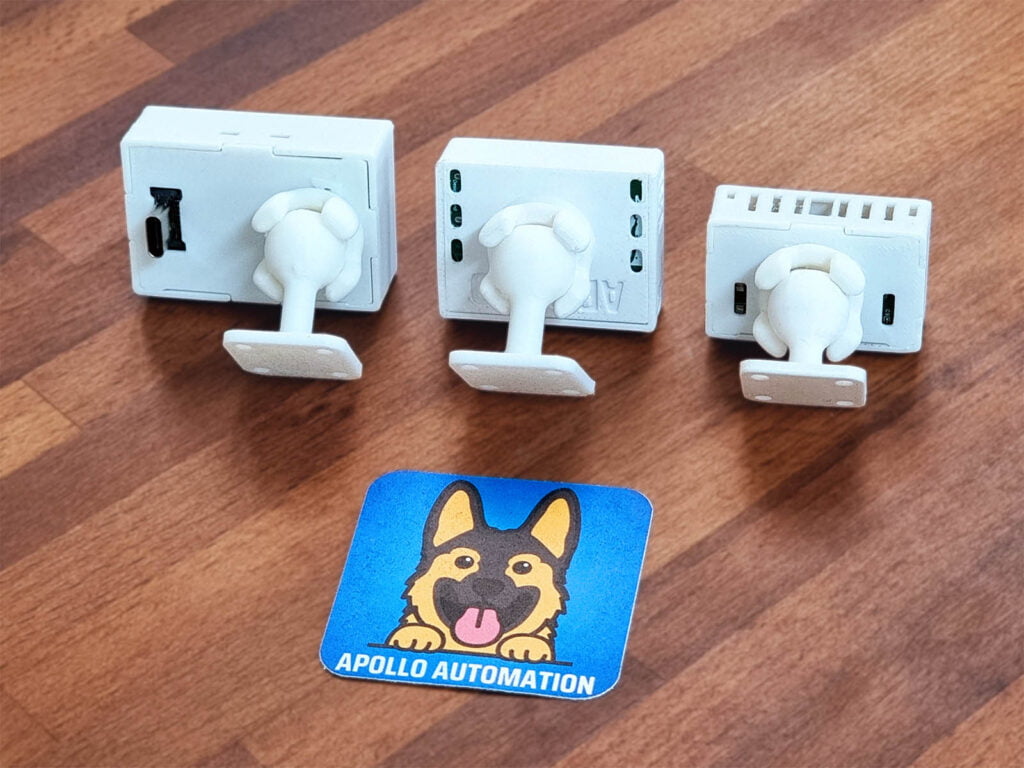
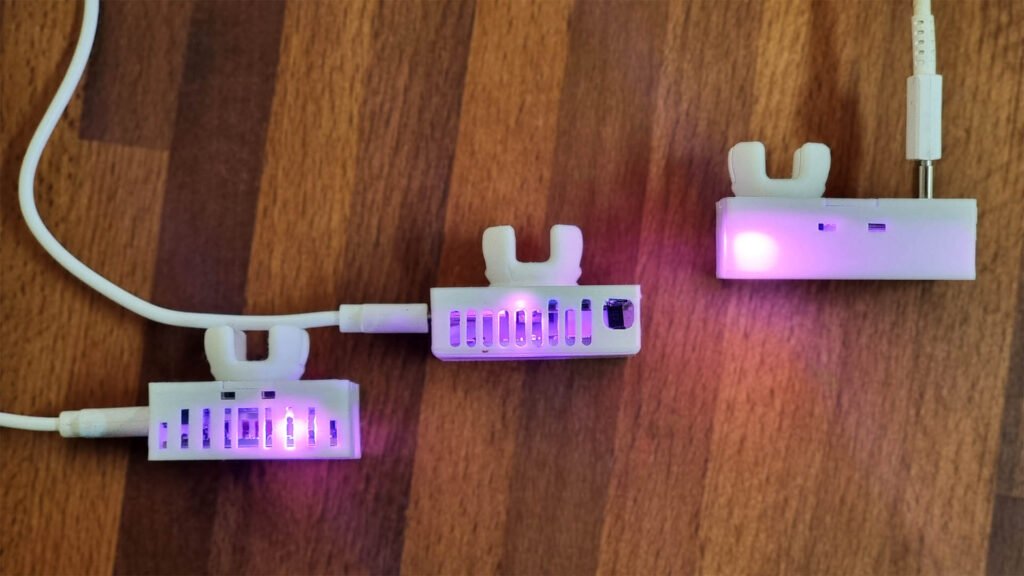
All three models come with an articulating stand (optional), that you can use to rotate the device towards the area you are monitoring. The MSR-2 and MTR-1 also have a back-facing USB-C port option (installed on MTR-1 in the image) that allows you to hide the cable a bit better.
All devices are meshed on different sides to allow heat to escape the case more easily.
I powered all three sensors to test out the RGB Pixel LED. This is a small light controllable through Home Assistant that can be used as a visual indicator of the current state of any of the sensors. When you think about it, it doesn’t even have to be related to the Apollo sensors. You can automate the RGB LED any way you wish.
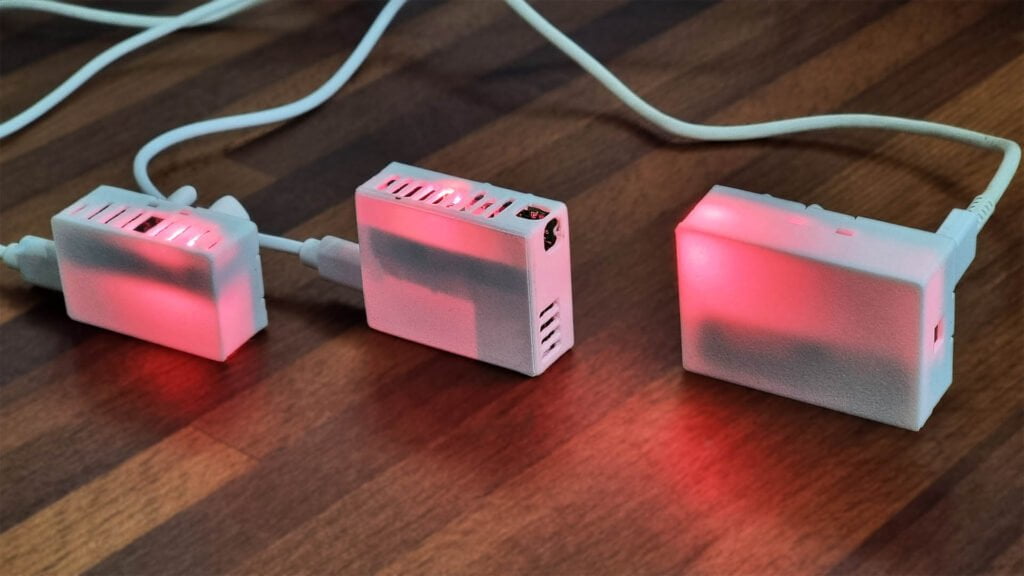
It generates colors surprisingly well, which makes it very suitable for creating different kinds of automations. Here’s another image of the RGB Pixel LED viewed from the top:
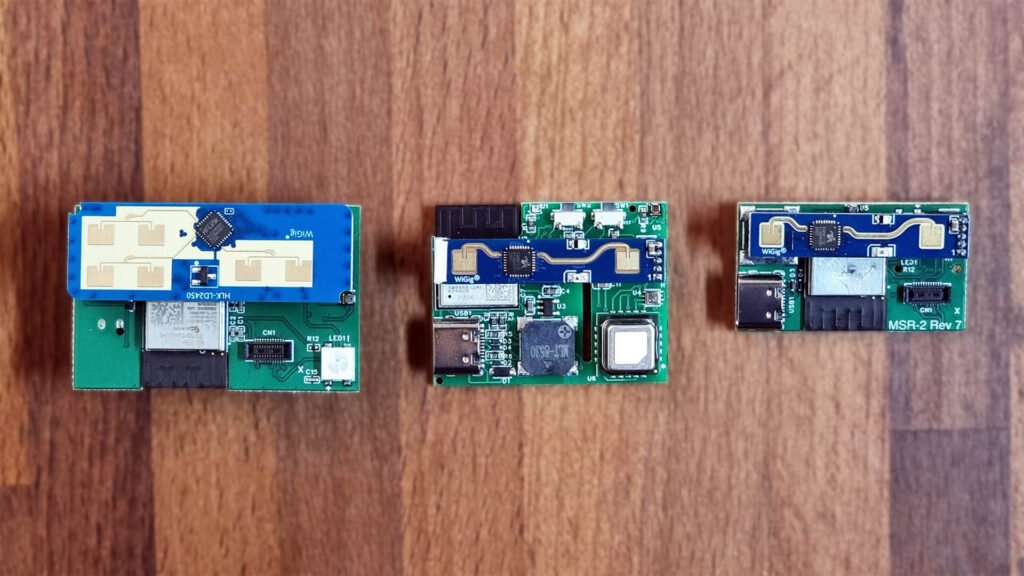
Taking out the sensors from the cases and you can really appreciate the skill their development required. The devices are only as large as the actual radar sensors. The LD2450 in the MTR-1 is double the width of the LD2410, yet the PCB remains roughly the same size as the MSR-1.
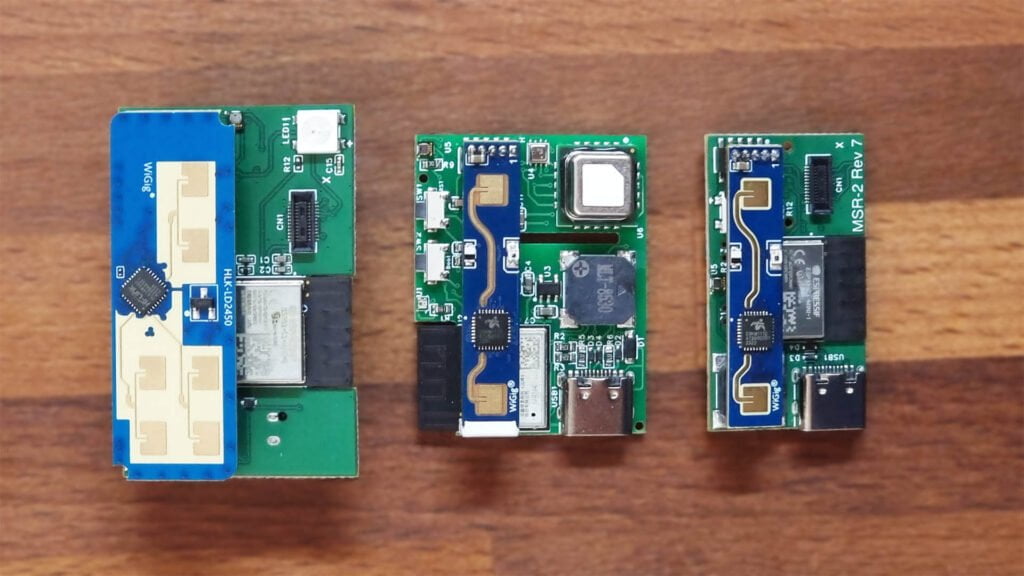
The LD2410 and LD2450 span the width of the PCBs and not a millimeter more. The ESP32-C3 that powers Apollo sensors is neatly integrated underneath each sensor, along with the expansion slots and USB connectors. Each sensor can also be equipped with an optional CO2 sensor (Sensirion SCD-40) and get a carbon dioxide reading in Home Assistant.
What’s very interesting to me, is the fact that the MSR-1 was already the smallest sensor on the market and Apollo decided to make it even smaller by releasing the MSR-2. They are essentially the same device with the same capability, in a slightly different form factor.
Here another image of the PCBs vertically aligned:
Apollo MTR-1 Home Assistant Integration
Just like other Apollo sensors, the MTR-1 ships pre-flashed and ready to use. Once plugged it, it will broadcast a hotspot that you can connect to and input your Wi-Fi credentials. Once it’s connected, it will be automatically discovered in ESPHome in Home Assistant. If not, you can add it manually by inputting the IP address of the MTR-1.
Sensors and Entities
Once added to Home Assistant, the Apollo MTR-1 exposes a total of 68 entities. Most of these are pretty self-explanatory and include the current state of the mmWave sensor. CO2, pressure, temperature, light and illuminance are sensors not relevant to the LD2450 tracking radar.
The ESPHome firmware also includes a bunch of diagnostic and maintenance entities. You can disable any you think you might not need.
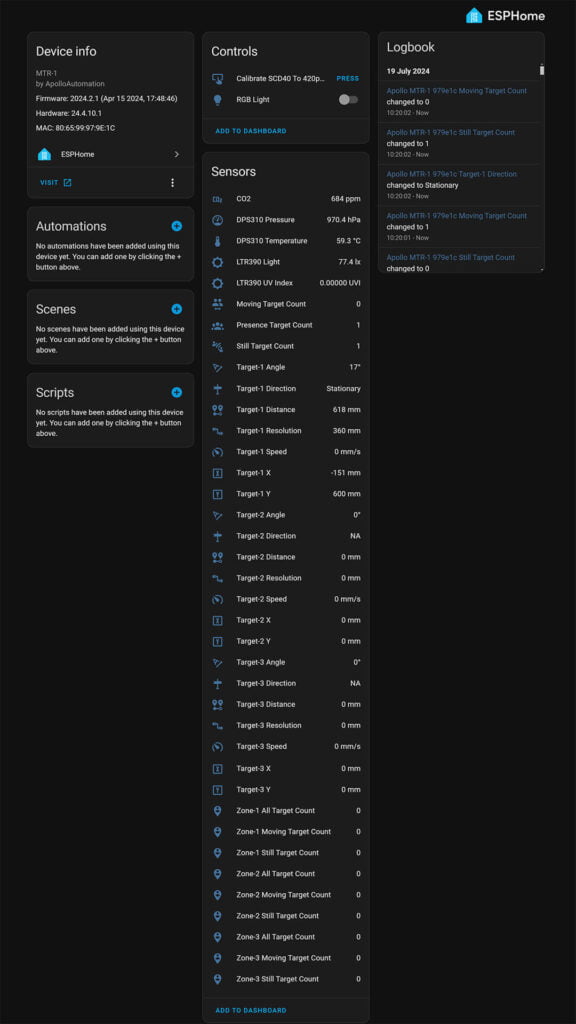
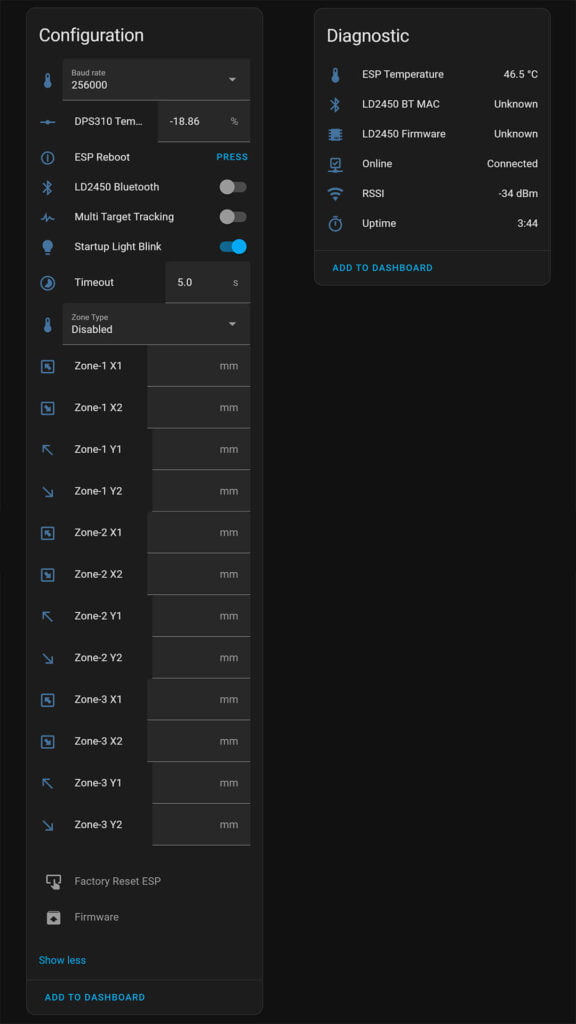
Proper Installation
Before any zone parameters can be defined, it’s important to properly mount the MTR-1 and its LD2450 sensor. Hi-Link’s guide says that the LD2450 needs to be mounted at a height of about 1.5 to 2 meters for optimal performance. The sides of the sensor need to be facing like in the image bellow, otherwise you would get skewed results when defining zones.
Here’s the image for reference:
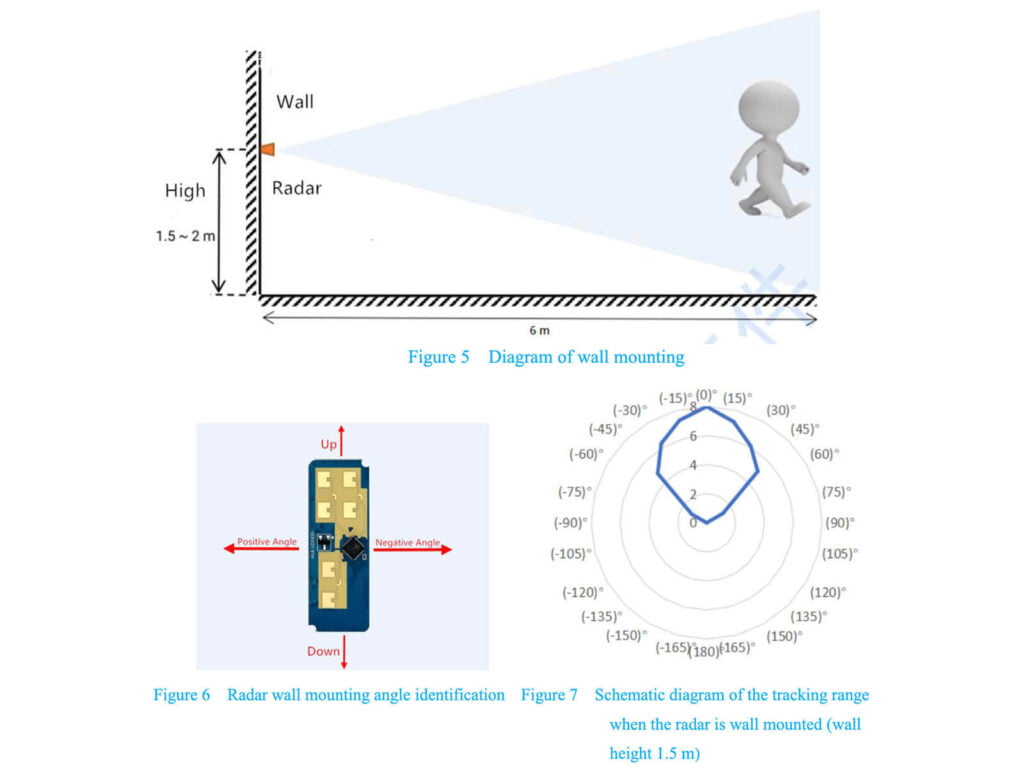
It’s also worth noting that the Illuminance sensor is mounted inside the small hole on the top of the MTR-1. This allows enough light to enter and the sensor to get a better reading. The Apollo MTR-1 needs to be mounted vertically for the best results, with the small hole faced towards the top (image).
Defining Detection Zones
The Apollo MTR-1 has a maximum detection distance of 6 meters. It can track up to 3 separate targets and allow you to define 3 detection areas (zones). Even though the zones can be easily set in Home Assistant by defining their X and Y coordinates, Apollo notes that there is currently an issue which prevents zone configuration from being saved after a device restart.
Therefore, the best (and easiest) way to define zones for the LD2450 sensor is to use Hi-Link’s HLKRadarTool App. This app method connects to the LD2450 over Bluetooth and allows you to save the zone coordinates in Home Assistant directly. Once the MTR-1 is properly installed, follow this guide:
- Install the HLKRadarTool App on your phone [Android, Apple]
- Open Home Assistant and navigate to:
- Settings > Devices & Services > ESPHome > Apollo MTR-1
- Turn on the LD2450 Bluetooth toggle under Configuration
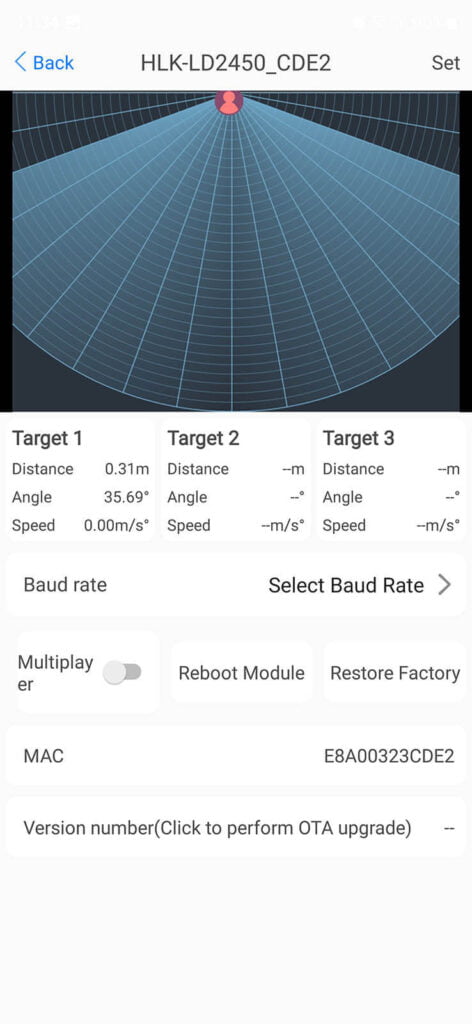
- Using your phone, connect to the LD2450 via the app
- Once the device connects, press the Set button in the top right corner
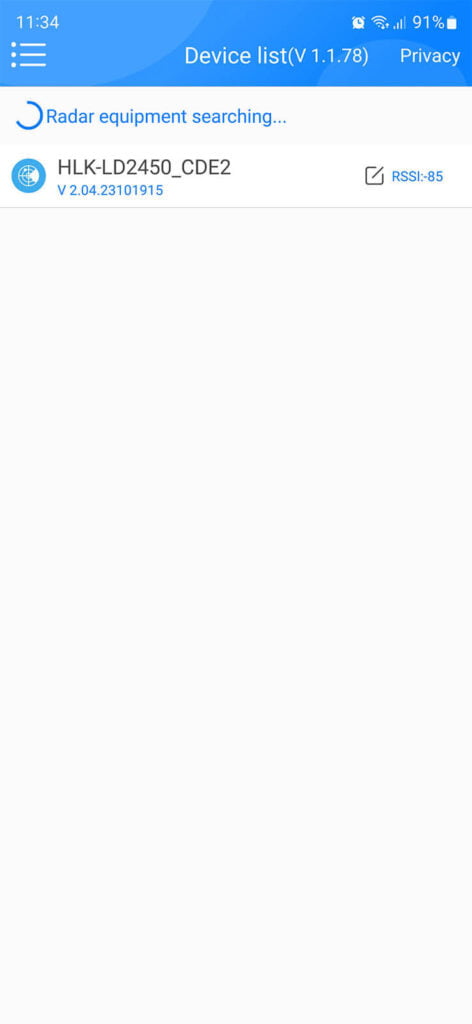
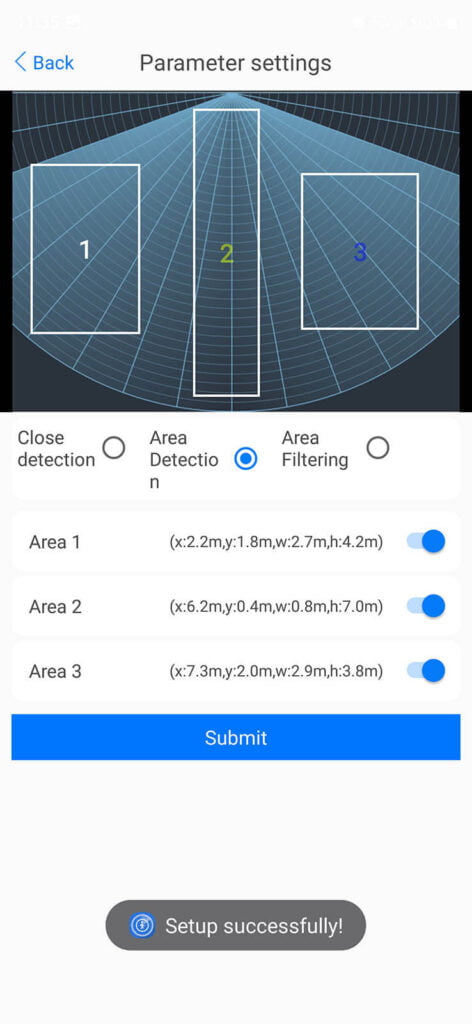
- In the next menu, set the toggle to Area detection. For reference:
- Close Detection: Disable zone area detection
- Area Detection: Only detects targets in the specified zone
- Area Filtering: Excludes a zone from detection
- Enable all three Area toggles at the bottom
- When the squares appear, drag and resize them to define your 3 zones
- When you’re done, press Submit which should be confirmed with “Setup successfully”
- Done
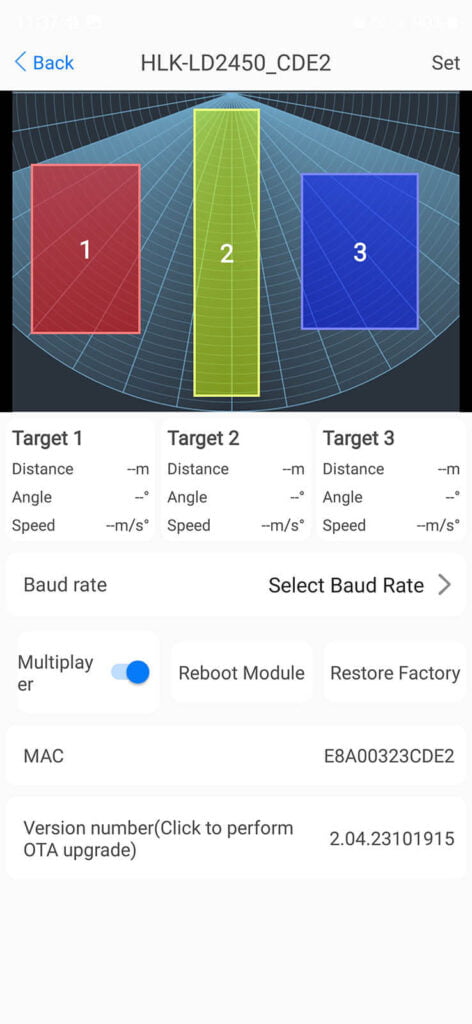
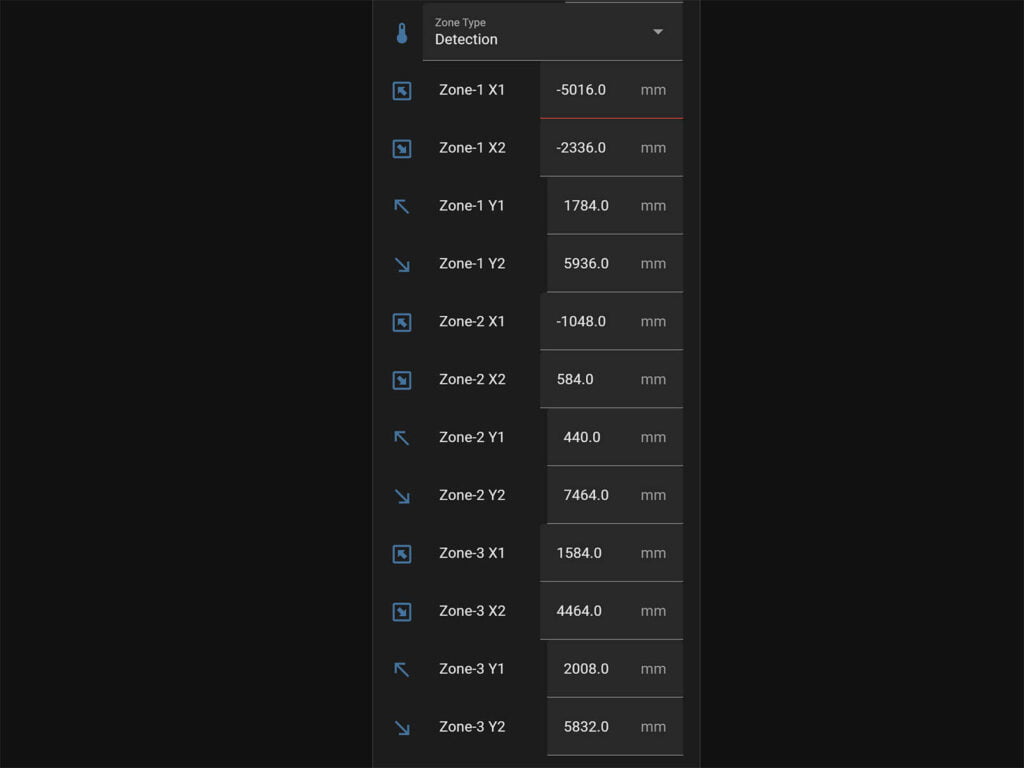
If everything saved as it should, you can now check the Zone parameters in Home Assistant. The list should be automatically populated with the values from the app and saved in Home Assistant. Turn off the LD2450 Bluetooth mode and you are done.
Visualizing Detection Zones
The zones defined with the HLKRadarTool can be visualized in Home Assistant using the Plotly card. This card is very versatile and configurable, but it does take a lot of time to setup properly. I’m sharing the code here, adapt it to your MTR-1 by replacing the entity names for each entity in the list:
Apollo MTR-1 Zones with Plotly Card
type: custom:plotly-graph
title: Target Positions
refresh_interval: 1
hours_to_show: current_day
layout:
  height: 230
  margin:
    l: 50
    r: 20
    t: 20
    b: 40
  showlegend: true
  xaxis:
    dtick: 1000
    gridcolor: RGBA(200,200,200,0.15)
    zerolinecolor: RGBA(200,200,200,0.15)
    type: number
    fixedrange: true
    range:
      - 4000
      - -4000
  yaxis:
    dtick: 1000
    gridcolor: RGBA(200,200,200,0.15)
    zerolinecolor: RGBA(200,200,200,0.15)
    scaleanchor: x
    scaleratio: 1
    fixedrange: true
    range:
      - 7500
      - 0
entities:
  - entity: ''
    name: Target1
    marker:
      size: 12
    line:
      shape: spline
      width: 5
    x:
      - $ex hass.states["sensor.apollo_mtr_1_979e1c_target_1_x"].state
    'y':
      - $ex hass.states["sensor.apollo_mtr_1_979e1c_target_1_y"].state
  - entity: ''
    name: Target2
    marker:
      size: 12
    line:
      shape: spline
      width: 5
    x:
      - $ex hass.states["sensor.apollo_mtr_1_979e1c_target_2_x"].state
    'y':
      - $ex hass.states["sensor.apollo_mtr_1_979e1c_target_2_y"].state
  - entity: ''
    name: Target3
    marker:
      size: 12
    line:
      shape: spline
      width: 5
    x:
      - $ex hass.states["sensor.apollo_mtr_1_979e1c_target_3_x"].state
    'y':
      - $ex hass.states["sensor.apollo_mtr_1_979e1c_target_3_y"].state
  - entity: ''
    name: Zone1
    mode: lines
    fill: toself
    fillcolor: RGBA(20,200,0,0.06)
    line:
      color: RGBA(20,200,0,0.2)
      shape: line
      width: 2
    x:
      - $ex hass.states["number.apollo_mtr_1_979e1c_zone_1_x1"].state
      - $ex hass.states["number.apollo_mtr_1_979e1c_zone_1_x1"].state
      - $ex hass.states["number.apollo_mtr_1_979e1c_zone_1_x2"].state
      - $ex hass.states["number.apollo_mtr_1_979e1c_zone_1_x2"].state
      - $ex hass.states["number.apollo_mtr_1_979e1c_zone_1_x1"].state
    'y':
      - $ex hass.states["number.apollo_mtr_1_979e1c_zone_1_y1"].state
      - $ex hass.states["number.apollo_mtr_1_979e1c_zone_1_y2"].state
      - $ex hass.states["number.apollo_mtr_1_979e1c_zone_1_y2"].state
      - $ex hass.states["number.apollo_mtr_1_979e1c_zone_1_y1"].state
      - $ex hass.states["number.apollo_mtr_1_979e1c_zone_1_y1"].state
  - entity: ''
    name: Zone2
    mode: lines
    fill: toself
    fillcolor: RGBA(200,0,255,0.06)
    line:
      color: RGBA(200,0,255,0.2)
      shape: line
      width: 2
    x:
      - $ex hass.states["number.apollo_mtr_1_979e1c_zone_2_x1"].state
      - $ex hass.states["number.apollo_mtr_1_979e1c_zone_2_x1"].state
      - $ex hass.states["number.apollo_mtr_1_979e1c_zone_2_x2"].state
      - $ex hass.states["number.apollo_mtr_1_979e1c_zone_2_x2"].state
      - $ex hass.states["number.apollo_mtr_1_979e1c_zone_2_x1"].state
    'y':
      - $ex hass.states["number.apollo_mtr_1_979e1c_zone_2_y1"].state
      - $ex hass.states["number.apollo_mtr_1_979e1c_zone_2_y2"].state
      - $ex hass.states["number.apollo_mtr_1_979e1c_zone_2_y2"].state
      - $ex hass.states["number.apollo_mtr_1_979e1c_zone_2_y1"].state
      - $ex hass.states["number.apollo_mtr_1_979e1c_zone_2_y1"].state
  - entity: ''
    name: Zone3
    mode: lines
    fill: toself
    fillcolor: RGBA(200,120,55,0.06)
    line:
      color: RGBA(200,120,55,0.2)
      shape: line
      width: 2
    x:
      - $ex hass.states["number.apollo_mtr_1_979e1c_zone_3_x1"].state
      - $ex hass.states["number.apollo_mtr_1_979e1c_zone_3_x1"].state
      - $ex hass.states["number.apollo_mtr_1_979e1c_zone_3_x2"].state
      - $ex hass.states["number.apollo_mtr_1_979e1c_zone_3_x2"].state
      - $ex hass.states["number.apollo_mtr_1_979e1c_zone_3_x1"].state
    'y':
      - $ex hass.states["number.apollo_mtr_1_979e1c_zone_3_y1"].state
      - $ex hass.states["number.apollo_mtr_1_979e1c_zone_3_y2"].state
      - $ex hass.states["number.apollo_mtr_1_979e1c_zone_3_y2"].state
      - $ex hass.states["number.apollo_mtr_1_979e1c_zone_3_y1"].state
      - $ex hass.states["number.apollo_mtr_1_979e1c_zone_3_y1"].state
  - entity: ''
    name: Coverage
    mode: lines
    fill: tonexty
    fillcolor: rgba(168, 216, 234, 0.15)
    line:
      shape: line
      width: 1
      dash: dot
    x:
      - 0
      - $ex 7500 * Math.sin((2 * Math.PI)/360 * 60)
      - 4500
      - 4000
      - 3000
      - 2000
      - 1000
      - 0
      - -1000
      - -2000
      - -3000
      - -4000
      - -4500
      - $ex -7500 * Math.sin((2 * Math.PI)/360 * 60)
      - 0
    'y':
      - 0
      - $ex 7500 * Math.cos((2 * Math.PI)/360 * 60)
      - $ex Math.sqrt( 7500**2 - 4500**2 )
      - $ex Math.sqrt( 7500**2 - 4000**2 )
      - $ex Math.sqrt( 7500**2 - 3000**2 )
      - $ex Math.sqrt( 7500**2 - 2000**2 )
      - $ex Math.sqrt( 7500**2 - 1000**2 )
      - 7500
      - $ex Math.sqrt( 7500**2 - 1000**2 )
      - $ex Math.sqrt( 7500**2 - 2000**2 )
      - $ex Math.sqrt( 7500**2 - 3000**2 )
      - $ex Math.sqrt( 7500**2 - 4000**2 )
      - $ex Math.sqrt( 7500**2 - 4500**2 )
      - $ex 7500 * Math.cos((2 * Math.PI)/360 * 60)
      - 0
raw_plotly_config: true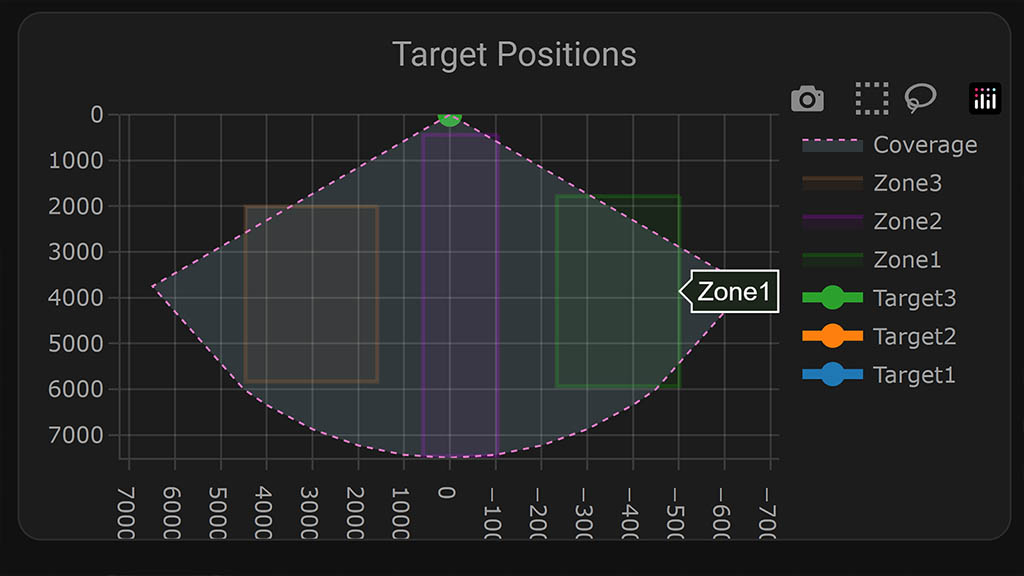
Performance and Testing
Even before I tested the Apollo MTR-1, I was quite familiar with the capability of the HLK-LD2450 radar sensor. Basically, this mmWave sensor is very suitable for detecting targets and their position in predefined zones. But, it does fall short in static presence detection compared to other well-known sensors like the HLK-LD2410 and the recent powerhouse of a sensor, the DFRobot SEN0609.
Like any other device I test, I mounted the MTR-1 in my office. It overlooked the entrance, my work desk and a sitting area. Before the MTR-1 can track multiple targets, I needed to toggle the Muti-target tracking toggle in Home Assistant.
I sat at my desk and asked someone else to enter the office. The MTR-1 immediately plotted the current position of both targets and tracked our movements continuously. Here’s a screencap of the Plotly card:
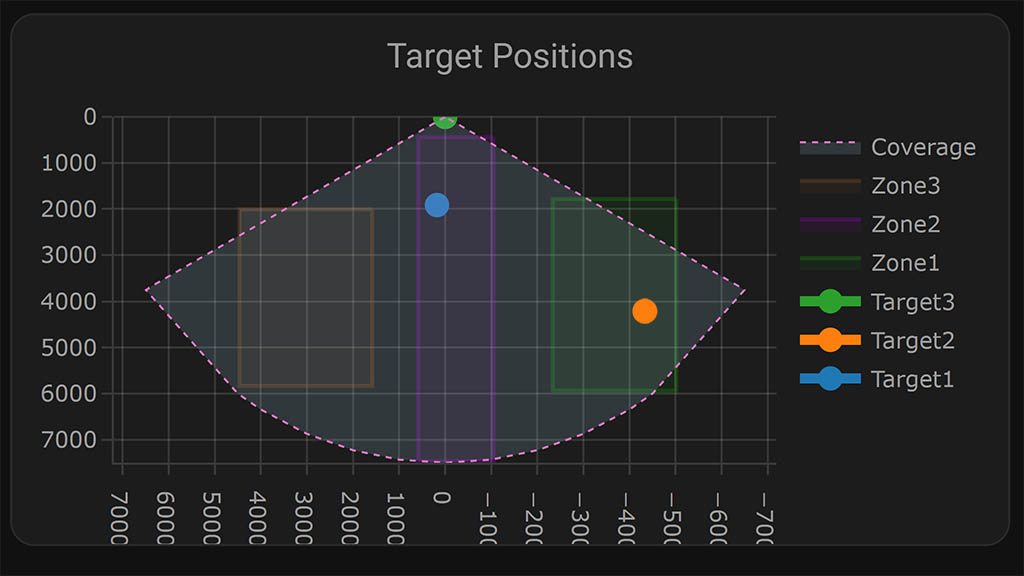
Since I was sitting in Zone2, the Zone2 Still Target Count entity changed to 1. When I was moving around, the still target went to 0 but the Zone2 Moving Target Count changed to 1. The Zone2 All Target Count remained at 1 until I left the room. The same happened for the other person in Zone1.
I was very pleasantly surprised to discover just how accurate the MTR-1 is in tracking a person. If your zones are defined correctly (you can do this as many times as you want), it will always place the target in the proper zone. I don’t have a reliable way of measuring this number exactly, but my estimate is that it can place you correctly within 20-25 centimeters on the map/zone!
If you remember back in the Aqara FP1 days, zones were a hit and miss. Sometimes it would trigger and detect you properly, others it will completely ignore your presence. The MTR-1 never failed to place me inside the proper zone. The initial plot can be skewed by a few centimeters, but it corrects itself in about 1 to 2 seconds.
Like I mentioned earlier, static presence is where the LD2450 in the MTR-1 falls short. Once I moved beyond 2 meters and sat completely still, the target count eventually went to zero and the sensor cleared presence completely. It is not able to detect static presence at more than 2 meters, at least from my tests. As soon a you wiggle just a little bit, the sensor detects you and goes through it’s process or recording moving, still and total target count.
Automating the MTR-1
Using the Apollo MTR-1 as a multi-target tracker opens up a world of automation possibilities. You can create flows based on the target count, zone count or the direction of which someone entered the room. You can also use distance or moving speed in automations, although I would note that the value of these sensors is very jumpy and will most likely yield unreliable results.
For example, here’s an automation to turn on a movie scene whenever there are more than 1 person in the theater room’s entrance zone:
description: ""
mode: single
trigger:
  - platform: numeric_state
    entity_id:
      - sensor.apollo_mtr_1_979e1c_zone_1_all_target_count
    above: 1
condition: []
action:
  - service: scene.turn_on
    metadata: {}
    target:
      entity_id: scene.movie_time
If you have some interesting automation ideas, I’d love to hear them in the comments!
Summary
The Apollo MTR-1 is a very reliable multi-target tracking sensor. If you have a use case for it, there is no better device, all things considered. It’s size is very small, the price is adequate and you can expand it’s functionality by adding an optional CO2 sensor or using the GPIO header to control an LED!
With that being said, you need to forget about using the MTR-1 (and the LD2450 inside it) as a reliable presence sensor for static detection. You are going to get many false negatives that are out of your control. The HLK-LD2450 just isn’t designed for detecting static presence.
So, depending on your goals:
- Apollo MSR-2 – great for static presence detection
- Apollo Automation (US), OpenCircuit (EU)
- Apollo MTR-1 – great for multi-target tracking in different zones
- Apollo Automation (US), OpenCircuit (EU)
As the MTR-1 allows you to define 3 separate detection zones that can be used in automations, it’s worth mentioning here that the Apollo MSR-2 is also capable of utilizing linear zones. Basically, each zone is an extension of the previous one on a single axis. For example, if Zone 1 is set to 50cm, it detects presence within 0-50cm. Zone 2 starts where Zone 1 ends; if set to 300cm, it detects presence from 50-300cm etc.
Side note: I’ve shared a couple of example for automating the RGB Pixel LED and Piezzo Buzzer of the MSR-2 and MTR-1. Check out this section of my previous review to learn more or watch this YouTube video.
