When it comes to energy consumption monitoring with a smart device, there are a couple of option you could go for. Some are plug and play (smart plugs) while others require some wiring and setup.
For instance, the Colorock 30A Relay is a great option for high powered appliances, but wiring of the device is required. This is sometimes called an invasive energy monitor, meaning you will have to cut wires and attach the relay to the circuit of the appliance being powered/monitored.
Oppositely, there are non-invasive power meters available such as the 80A single clamp PJ-MGW1203 model which can be used for monitoring energy consumption on a single phase. If you are looking for a full home energy meter solution, the 3-Phase Zigbee PC321-Z-TY is a capable and accurate device, definitely one of my favorite additions to my smart home.
Smart Plugs aside, there is another option available which is kind of a hybrid between the two. Replacing your sockets with energy-monitor capable ones, like the subject of this review.
I bought this BSEED 16A Smart Outlet and Switch (EU version) on AliExpress for ~$15, but you can also find it on Amazon.de for ~27€ if you do not want to wait.
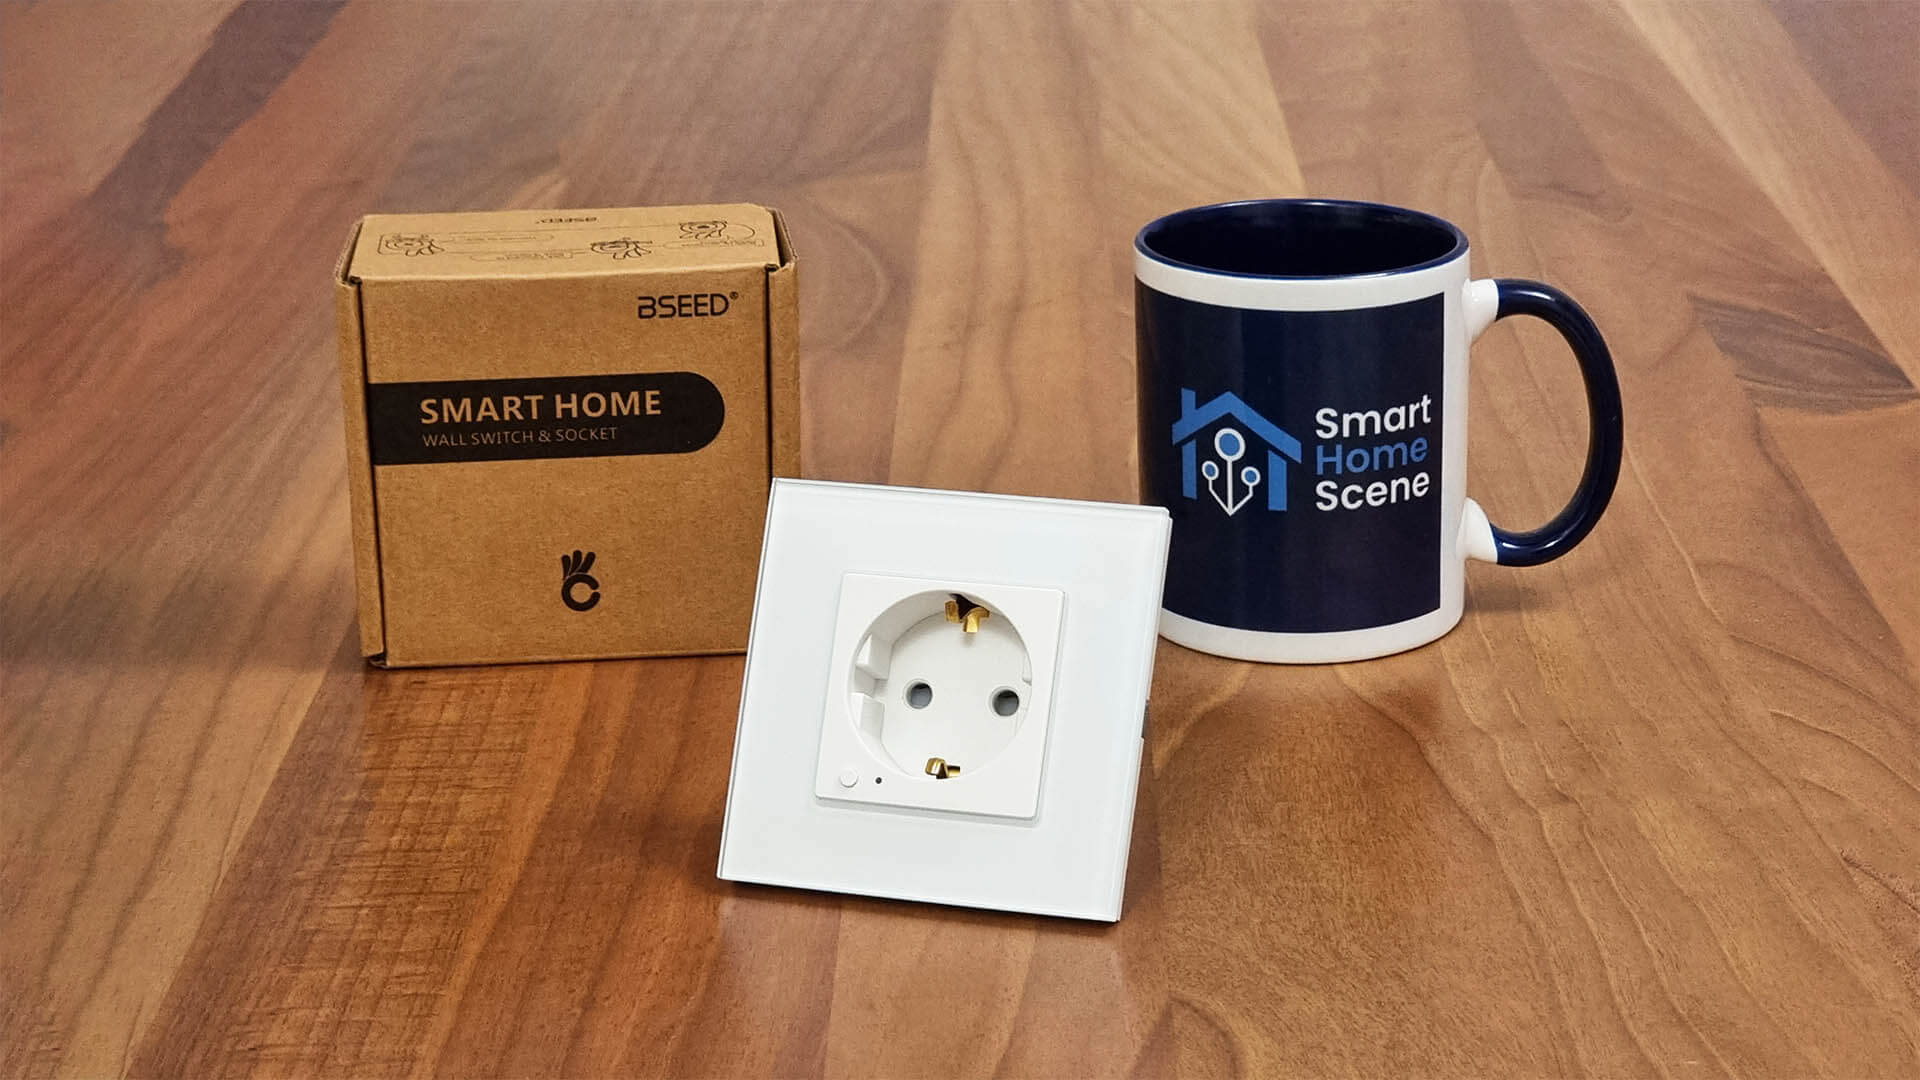
Technical Specification
- Maximum Load: 16A
- Power Supply: 100V-240V AC 50/60HZ
- Neutral Wire: Required
- Wireless Standard: Zigbee 2.4 GHz IEEE 802. 15.4
- Idle Power Consumption: ≤0.2W
- Operating Humidity: 10% ~ 93%
- Operating Temperature: -30 °C ~ +70°C
- LED Back Light: ON-Light Blue, OFF-Weak Blue
- Shape: Square
- Wall Box Type: Round & Square
- Certification: CE, BS, RoHS, GCC, FC
- Price: $14.32 AliExpress, 26.99€ Amazon.de
Teardown
By my standards, it’s important to take a peak inside these types of devices and get a sense of it’s build quality. Ultimately, they are going in your wall so you want something durable and dependable.
The BSEED 16A Smart Socket came packaged in a cardboard box, containing the socket itself, the glass panel that you assemble yourself, a user manual and some screws for installation. Contents are neatly and orderly packed, with the glass panel being in a separate box to avoid scratches and damage.
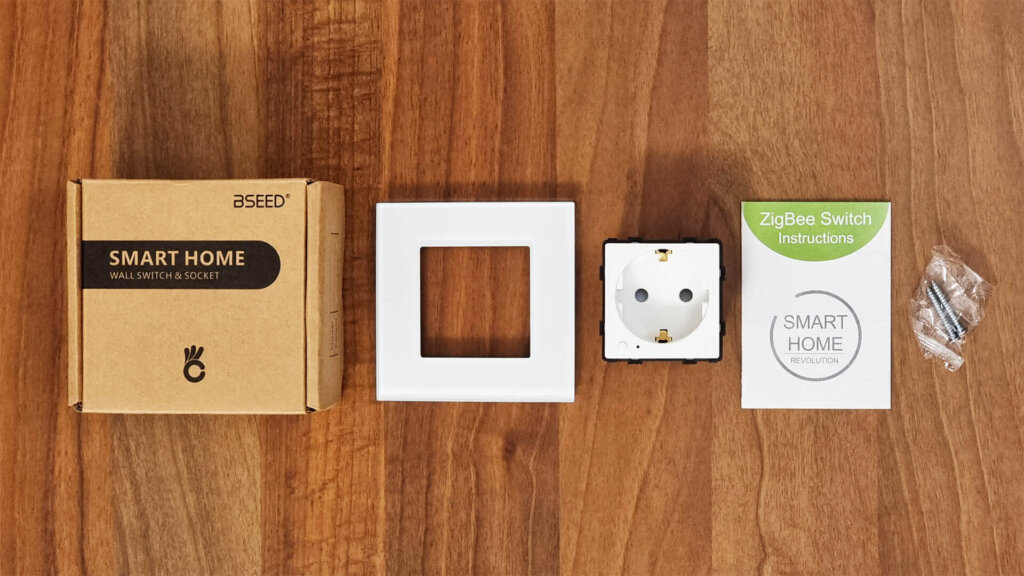
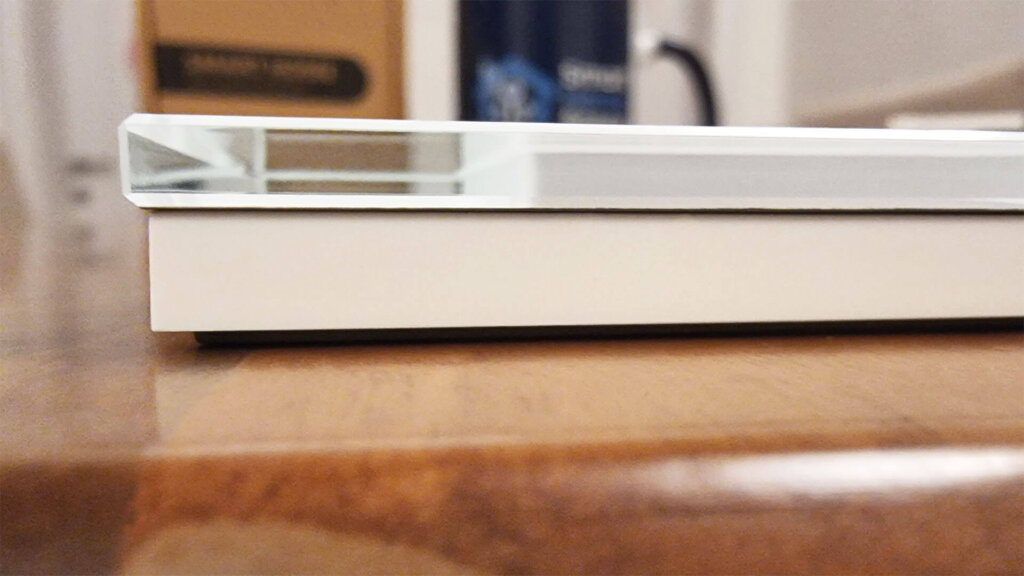
Unpacking the glass panel frame, I immediately got a sense of good quality. It’s thick, heavy and smooth around the edges. The mounting backplate is made out of some metal alloy with various mounting holes drilled for different wall boxes. It’s much heavier than I expected, certainly better than standard wall sockets mounting brackets.
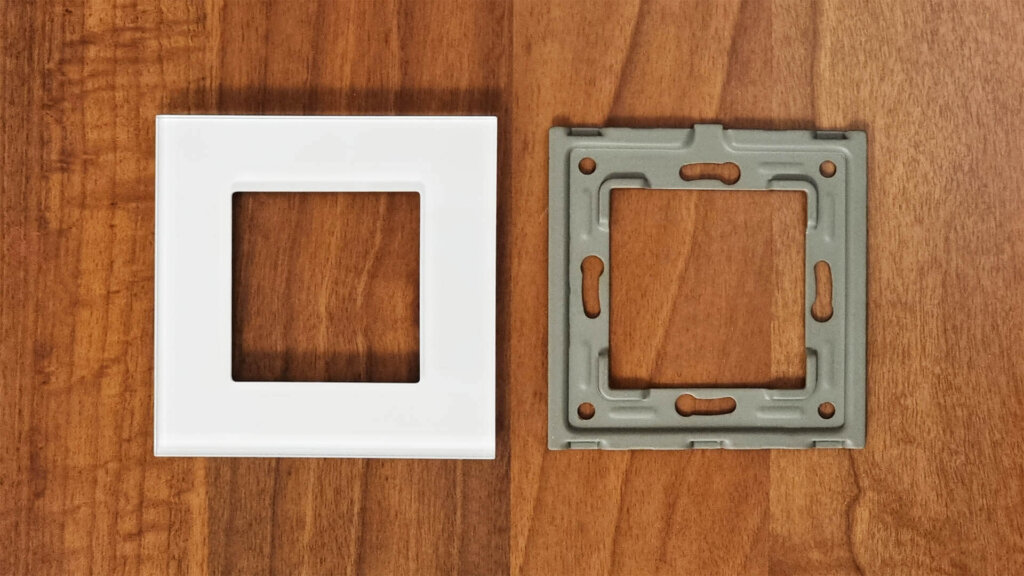
Looking at the socket from the sides gives off a faint 3D appearance, which I expect to be differently pronounced in the color variants this devices is sold (white, black, gold and gray). The glass panel snaps in place by pushing it on to the metal mounting bracket.
You can remove it with a flathead screwdriver, inserting it between the plastic frame of the glass and the metal mounting bracket.
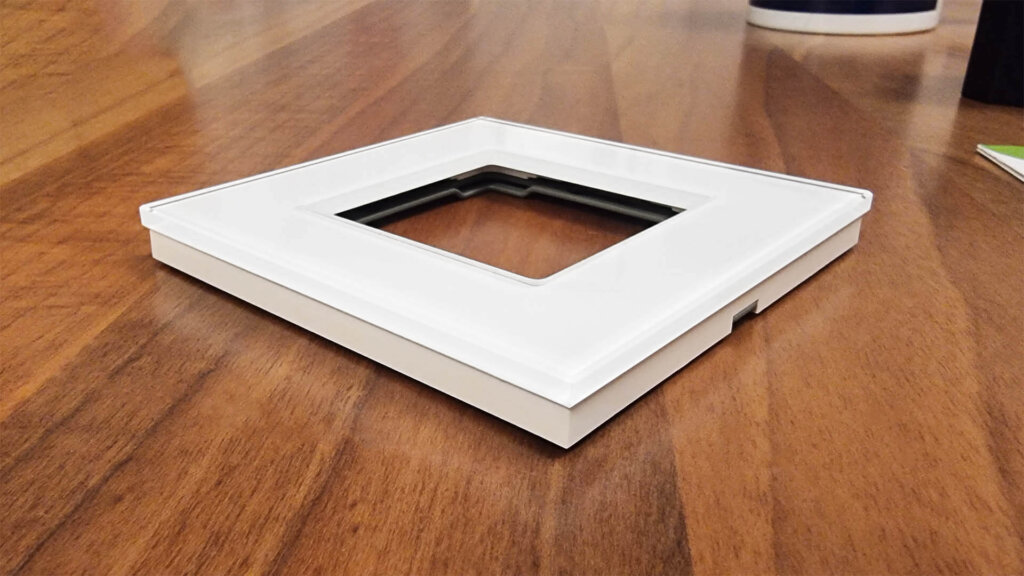
The glass appears matte when looked at directly, but in reality it’s completely transparent. The matte look is given off by the back plastic bracket and a pale color layer on top.
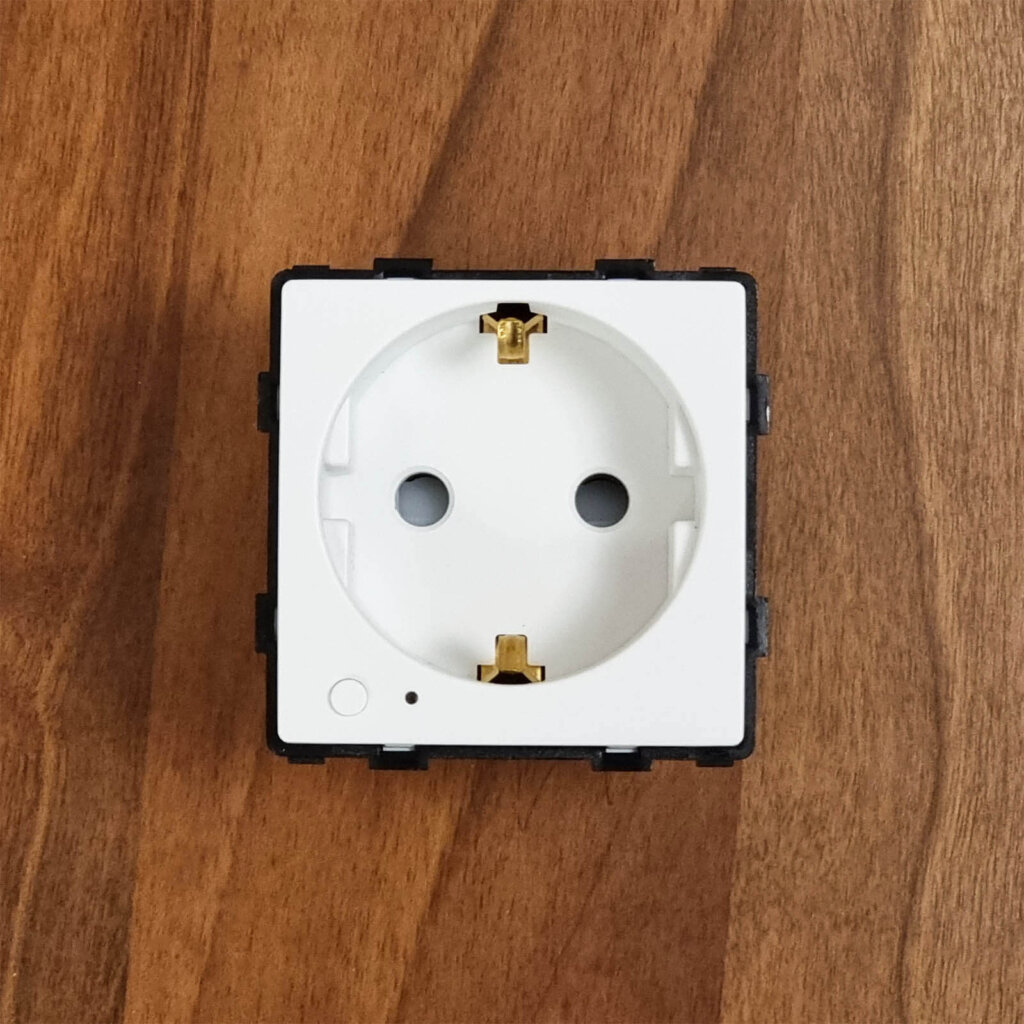
Moving onto the plug, the pairing button is unnoticeably placed on the front next to an indicator LED. You can turn of the LED completely, as well as lock the button so the device is not toggleable from it, this is the so-called child-lock mode.
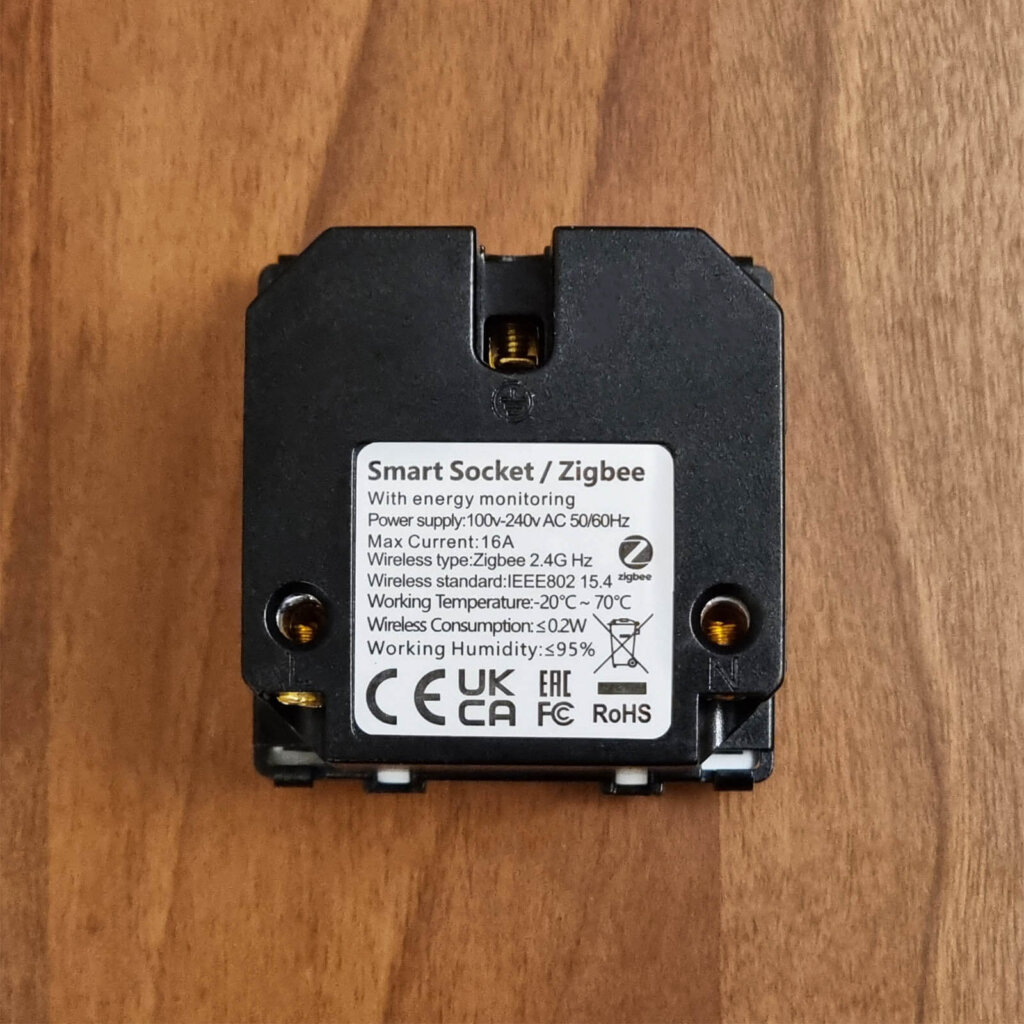
The back has the three terminals (L, N, G) labelled and conveniently separated, with the ground being at the top. The specs of this smart outlet are printed on the back, as a reminder to whoever is installing this smart outlet. It’s all one, unanimous, square-shaped case with nothing dangling on the outside.
Removing the top cap reveals an interesting layout of things. The communication module is placed perpendicular in relation to the main PCB instead of laying flat. This brings the antenna closer to the glass panel instead of laying in the back, improving range and connectivity.
There is a spring loaded protective cover over the L & N holes, preventing dust or other objects going inside easily. This also counts towards child protection, however in my experience a child can easily pick inside with a pen or something, so it’s wise to leave the relay off and lock the button when not in use.
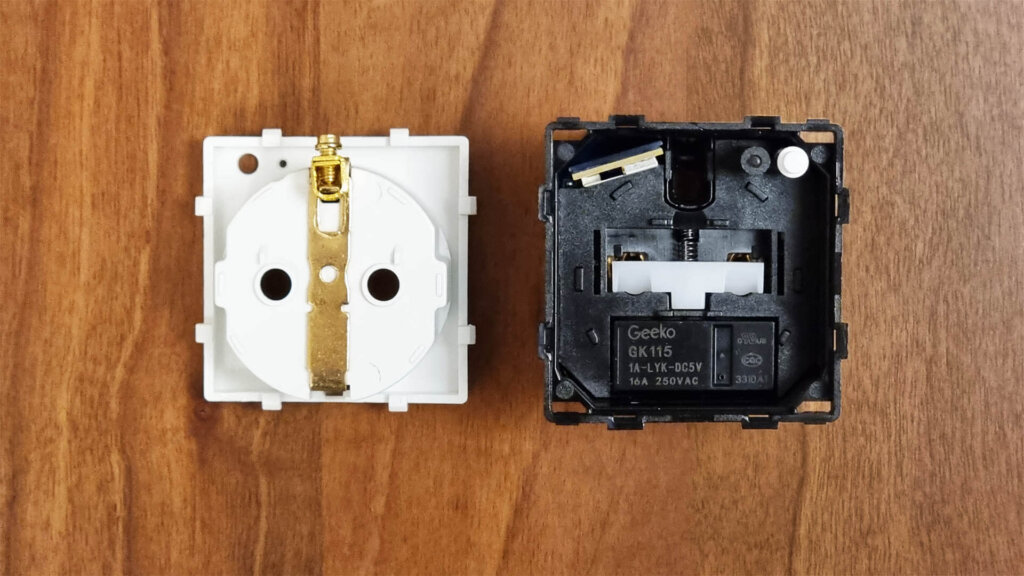
The main relay is labelled as Geeko GK115 [Datasheet], a 16A 250 VAC electromagnetic relay manufactured by a company called Suzhou Jikong Electric Co., Ltd. from China. It’s not too clicky when triggered, just enough so you can get a hearing confirmation of the outlet being toggled.
The terminals are soldered completely onto the PCB, seems like a solid connection and I can’t see any weak traces, although this claim needs to be tested.
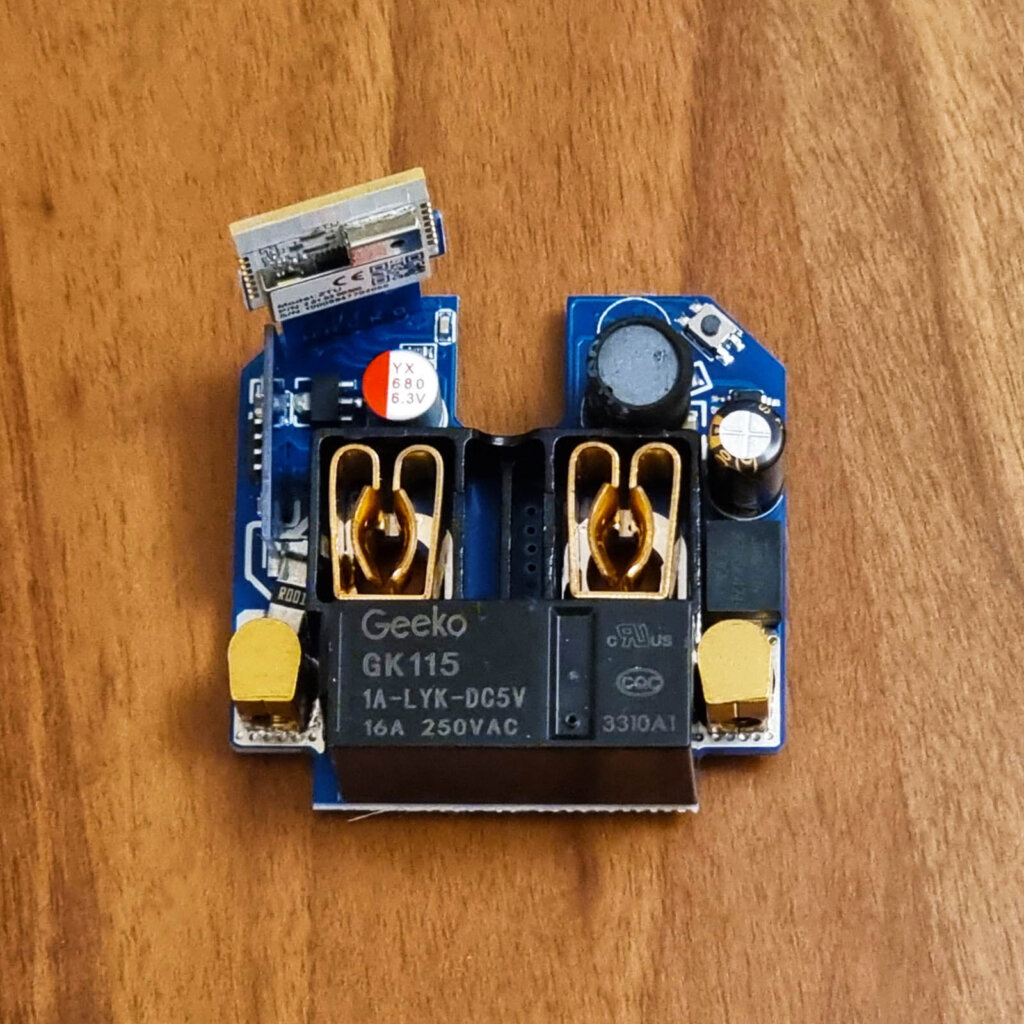
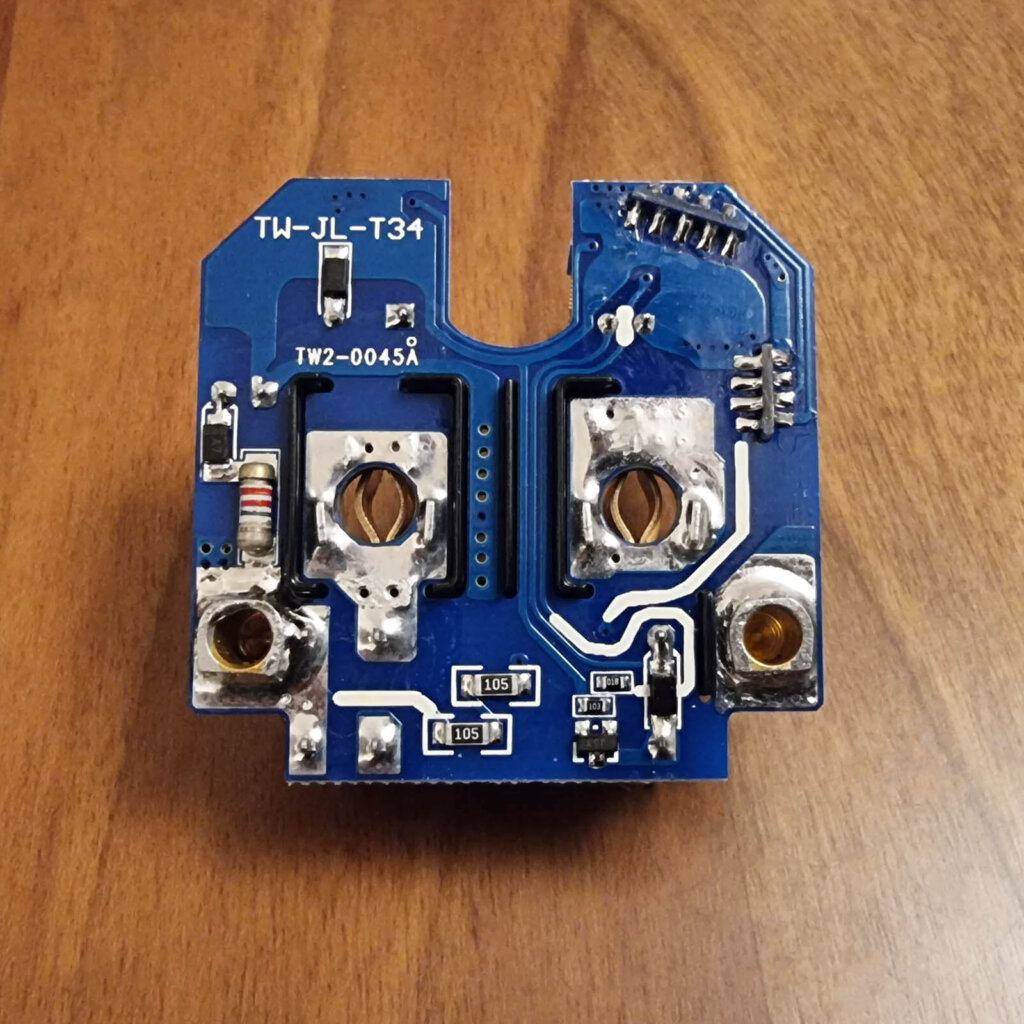
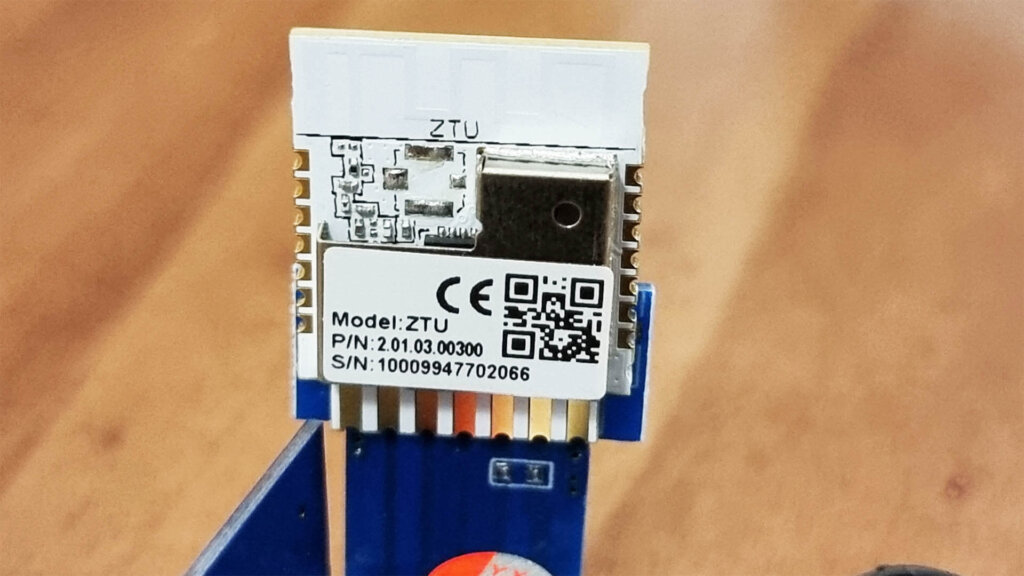
Zigbee connectivity is enabled by a ZTU Tuya [Datasheet], a low-power 32-bit CPU, 1024-KB flash and 64-KB RAM embedded module. I’ve encountered this particular chip on several occasions while reviewing home automation hardware, for example the SZ-T04 Temperature and Humidity Sensor with a Screen as well as the ZP-LZ-FR2U Moes Dual USB Smart Socket, I’ve had no issues with communication in these devices.
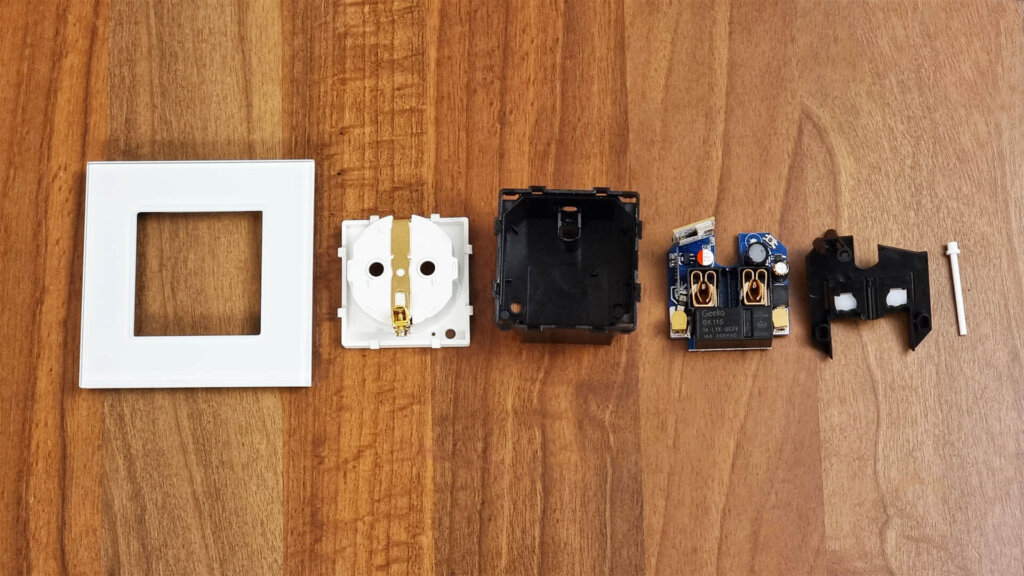
Here’s a photo of the BSEED 16A Smart Socket with Energy Meter fully disassembled:
Wiring and Installation
This device replaces your existing outlets, so wiring and installation is fairly simple in terms of know-how. If you are not feeling confident handling wires though, have a certified electrician do it for you. I like to challenge the buzz gods by doing it with the power on, but you definitely should turn it off.
The diagram is so simple I almost feel stupid for sharing it:
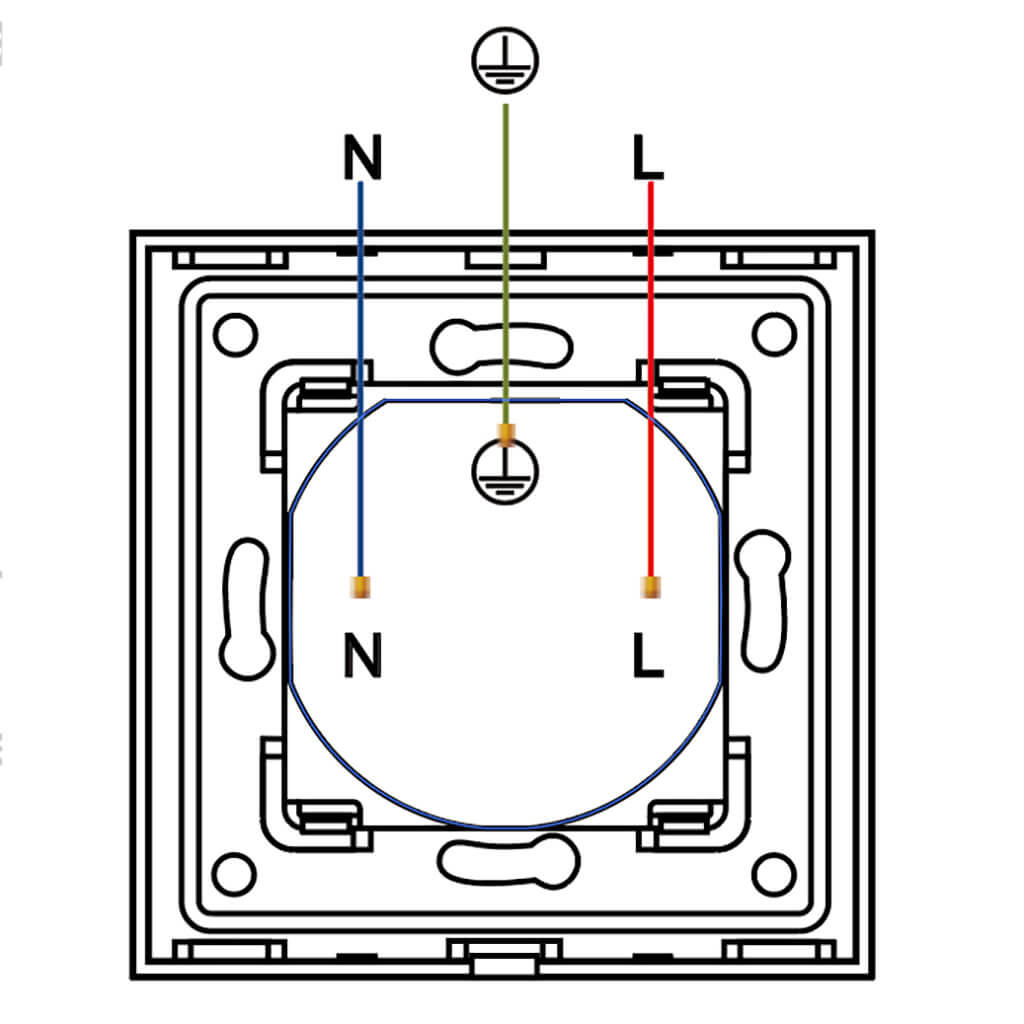
My particular model is suitable for EU sockets, so if you get the US or UK version, obviously the mounting bracket will vary. In any case, the process is the same:
- Gently remove the glass panel with a small screwdriver
- Install the mounting bracket in place
- Wire the smart outlet
- Put the smart outlet in place
- Snap on the glass panel
- Done
Home Assistant Integration
The BSEED 16A Smart Outlet is officially supported in both Zigbee2MQTT and ZHA. To pair it, hold the button on the front for ~5 seconds until the LED starts blinking.
Zigbee2MQTT
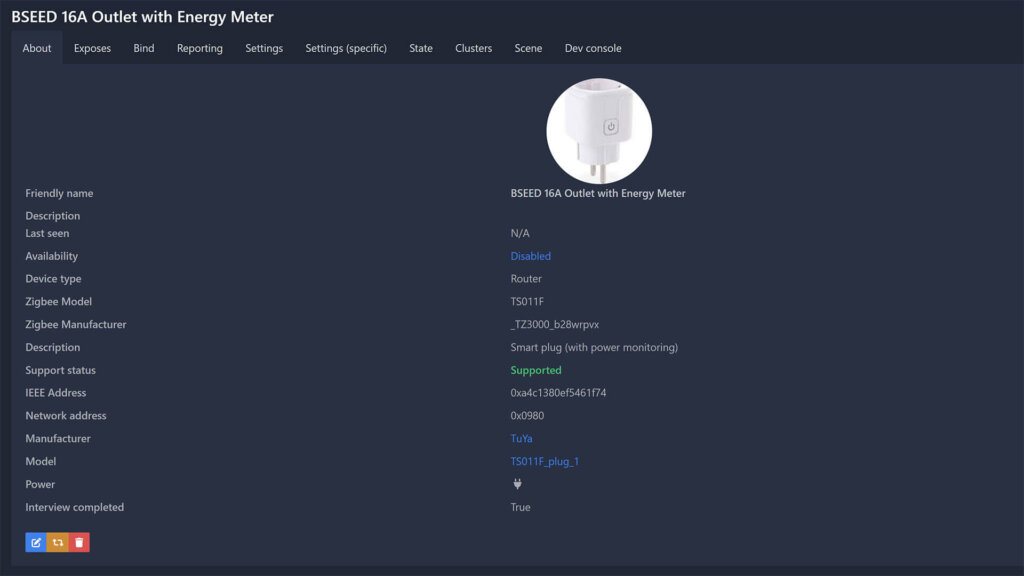
This Zigbee outlet reuses an external converter from a familiar 16A smart plug, the Tuya TS011F. It’s identified as model TS011F_plug_1 by Zigbee Manufacturer _TZ3000_b28wrpvx. Since it’s mains powered, the devices is a router capable of relaying Zigbee traffic.
Side note, a version of the Tuya Smart Plug labelled TS011F_plug_3 is plagued with problems from firmware 1.05 onwards. Reporting is broken and the plug turns on/off automatically. I’ve reviewed the first version of this smart plug, labelled TS011F_plug_1 which works perfectly fine, although it’s important to note there is no way to know which one you are getting. So it’s best to stay way from this model.
The first thing you want to do once you pair the BSEED Smart Outlet to Zigbee2MQTT is check for OTA updates, since this devices supports them. In Zigbee2MQTT, click the OTA tab at the top and click check for updates:

You will get a popup message telling you an update is available. Click the red button Update device firmware and wait for the process to finish.

The remaining time numbers it reports are scary, at start it gave me a whopping 4 hours remaining time. This is completely false, because the process finished in about 10minutes. Once everything is updated, you can check the exposes tab of the device and tweak a few things:
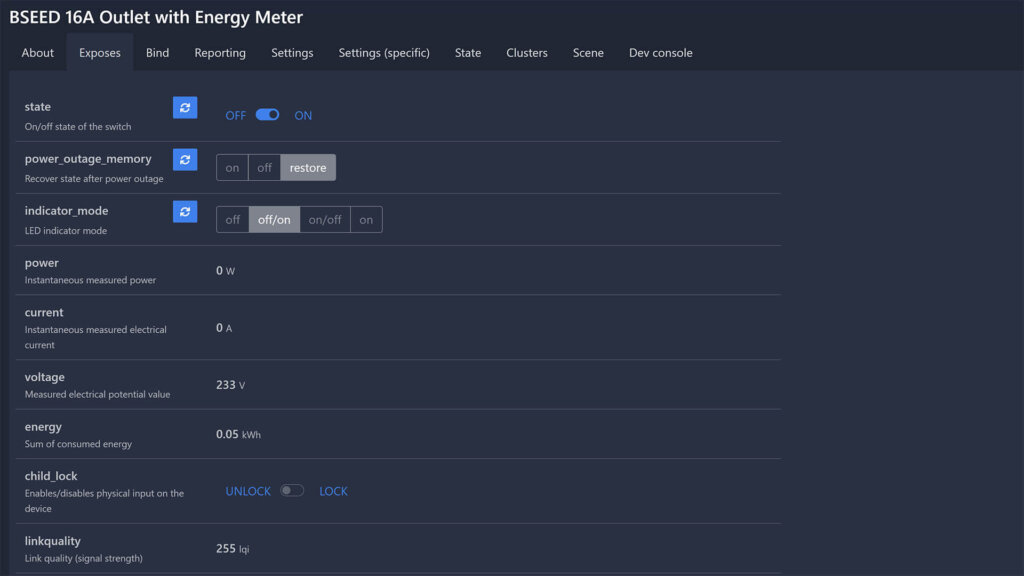
- state: Toggles the switch on/off
- power_outage_memory: Remember state after power outage
- indicator_mode: Turn off/on the LED indicator
- power: Instantaneous measured power in W
- current: Instantaneous measured current in A
- voltage: Instantaneous measured voltage in V
- energy: Sum of consumed energy in kWh
- child_lock: Locks the physical button the device
- linkquality: Signal quality in LQI
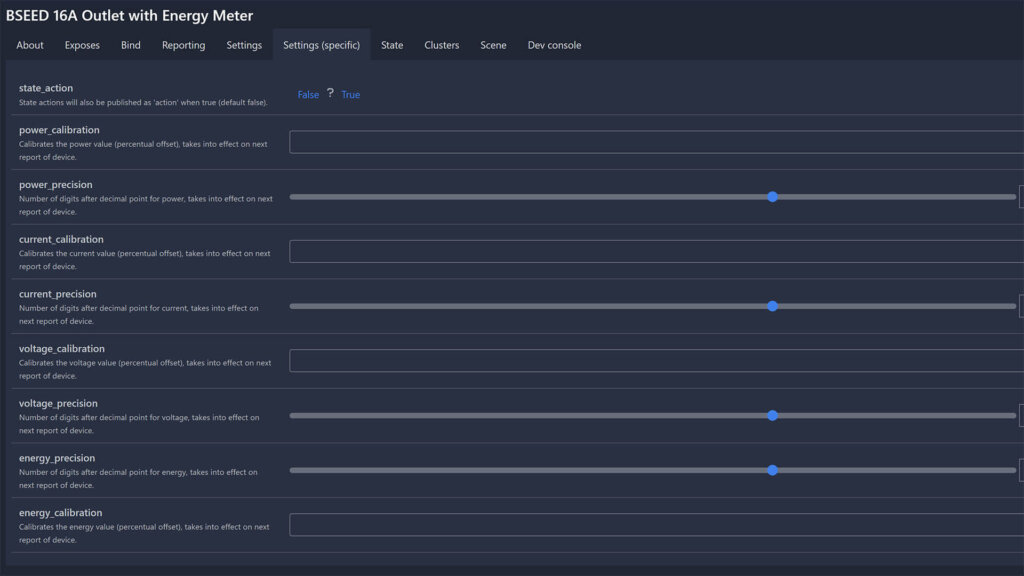
If you find the meter to be inaccurate, you can calibrate the values in the Settings (Specific) menu of Zigbee2MQTT. You can tweak power, current, voltage, energy as well as set reporting precision for each one (reported decimal points of the measurements).
ZHA
Pairing the BSEED 16A Outlet to ZHA, gives you the same features like in Zigbee2MQTT meaning the device is also supported in ZHA. The device also reuses a custom quirk from the Tuya TS011F Smart Plug, being automatically applied as zhaquirks.tuya.ts011f_plug.Plug.
It’s identified as model TS011F by manufacturer _TZ3000_b28wrpvx, exposing the following entities:
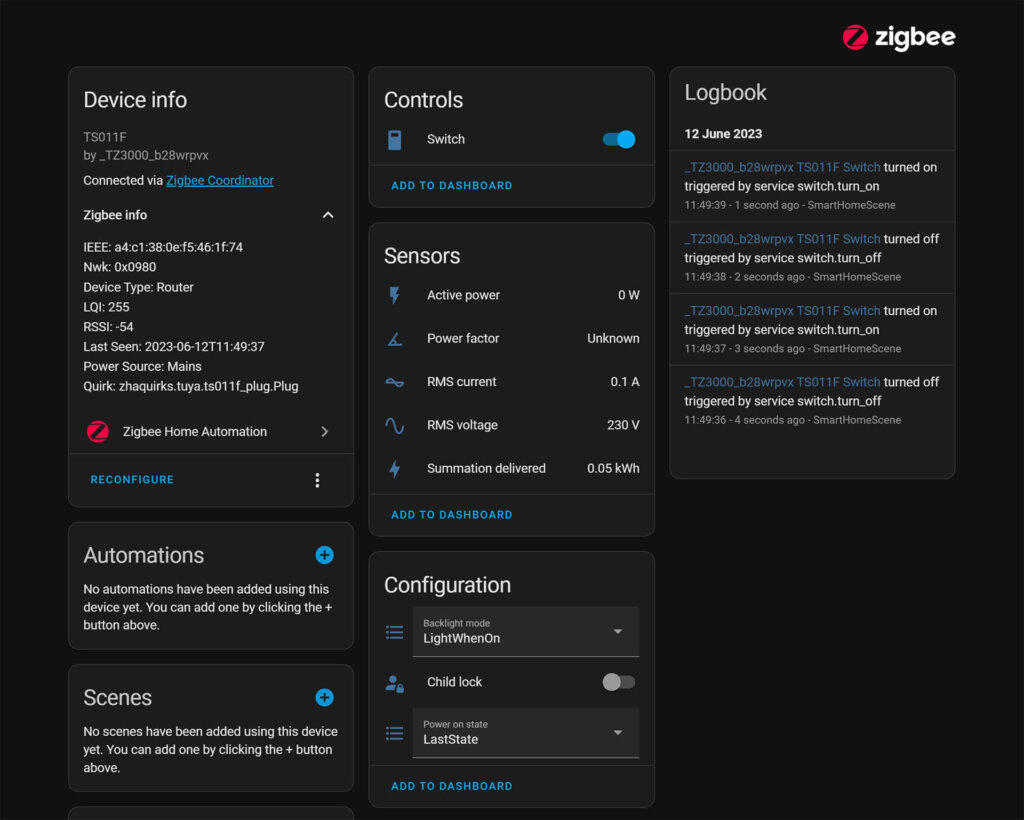
If you want to calibrate any of the readings in ZHA, the easiest way would be to create a template sensor offsetting the original values, for example:
template: #Calibrate Current +0.5
  - sensor:
      - name: "TS011F Current Calibration"
        unit_of_measurement: "A"
        value_template: "{{ (states('sensor.tz3000_b28wrpvx_ts011f_rms_current') | int + 0.5)}}"
Testing
Unfortunately, I currently do not have a calibrated multimeter to be able to verify the reported energy values. I connected a couple of different things to get a sense of the accuracy of the readings, so take these with a grain of salt.
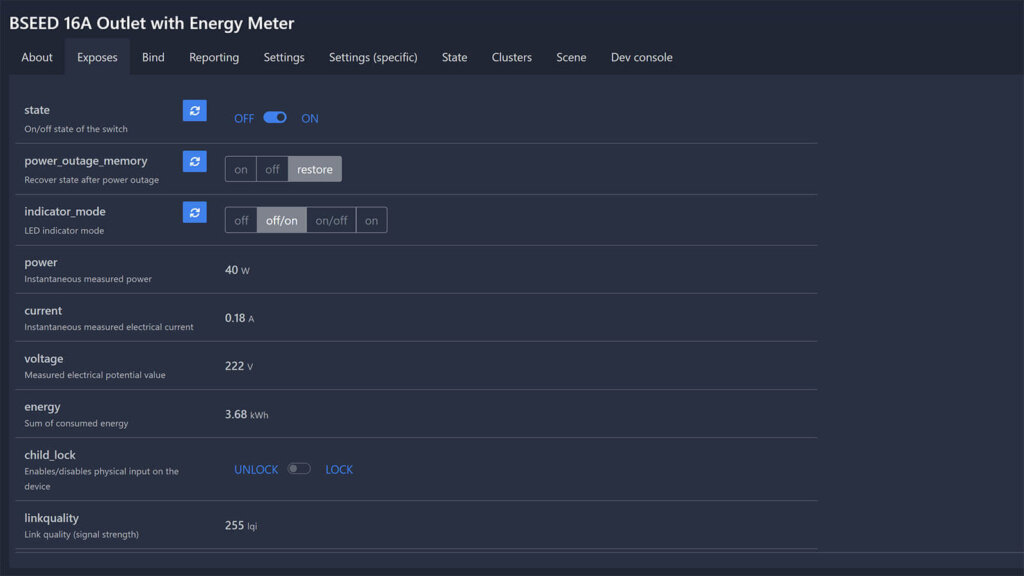
First, I plugged in a 40W incandescent light bulb I had laying around. Assuming a power factor of 1.0, which is standard for light bulbs, I get W = V x A x p.f or 222×0.18×1.0=39.63W which the outlet reported as 40W in Zigbee2MQTT. The reported values seem correct.
Further, I ran a cycle of my dishwasher plugged in on an extension cord to the outlet. I was interested in the final energy sum for the duration of the cycle, since the manufacturer has these values stored in the manual.
For the Intensive 65°C cycle, they claim a 1.60kWh energy consumption used in about 1 hour and 45 minutes. Zigbee2MQTT gave me a final reading of 1.75kWh for the duration of the cycle, which is close to correct but not quite. This offset can be attributed to many things, but in reality it does not matter since the values can easily be calibrated.
Summary
When I was rebuilding my Zigbee mesh network about 2 years, I scattered cheap smart plugs all around my home to improve network coverage and stability. I wish I installed smart outlets instead.
The routing capabilities of the device are great, if you install enough they can significantly improve your Zigbee experience. I had no connectivity issues whatsoever, but it’s important to disclose that I have a pretty robust mesh network to begin with, LQI is almost always 255 for every device on my network.
In terms of energy metering, the values reported seem reasonable and on point, judged by the appliances I connected to it. I could not verify the readings without a multimeter, so consider this just an observation. In any case, offsets can be created within Home Assistant without much hassle for power, current, voltage and energy.
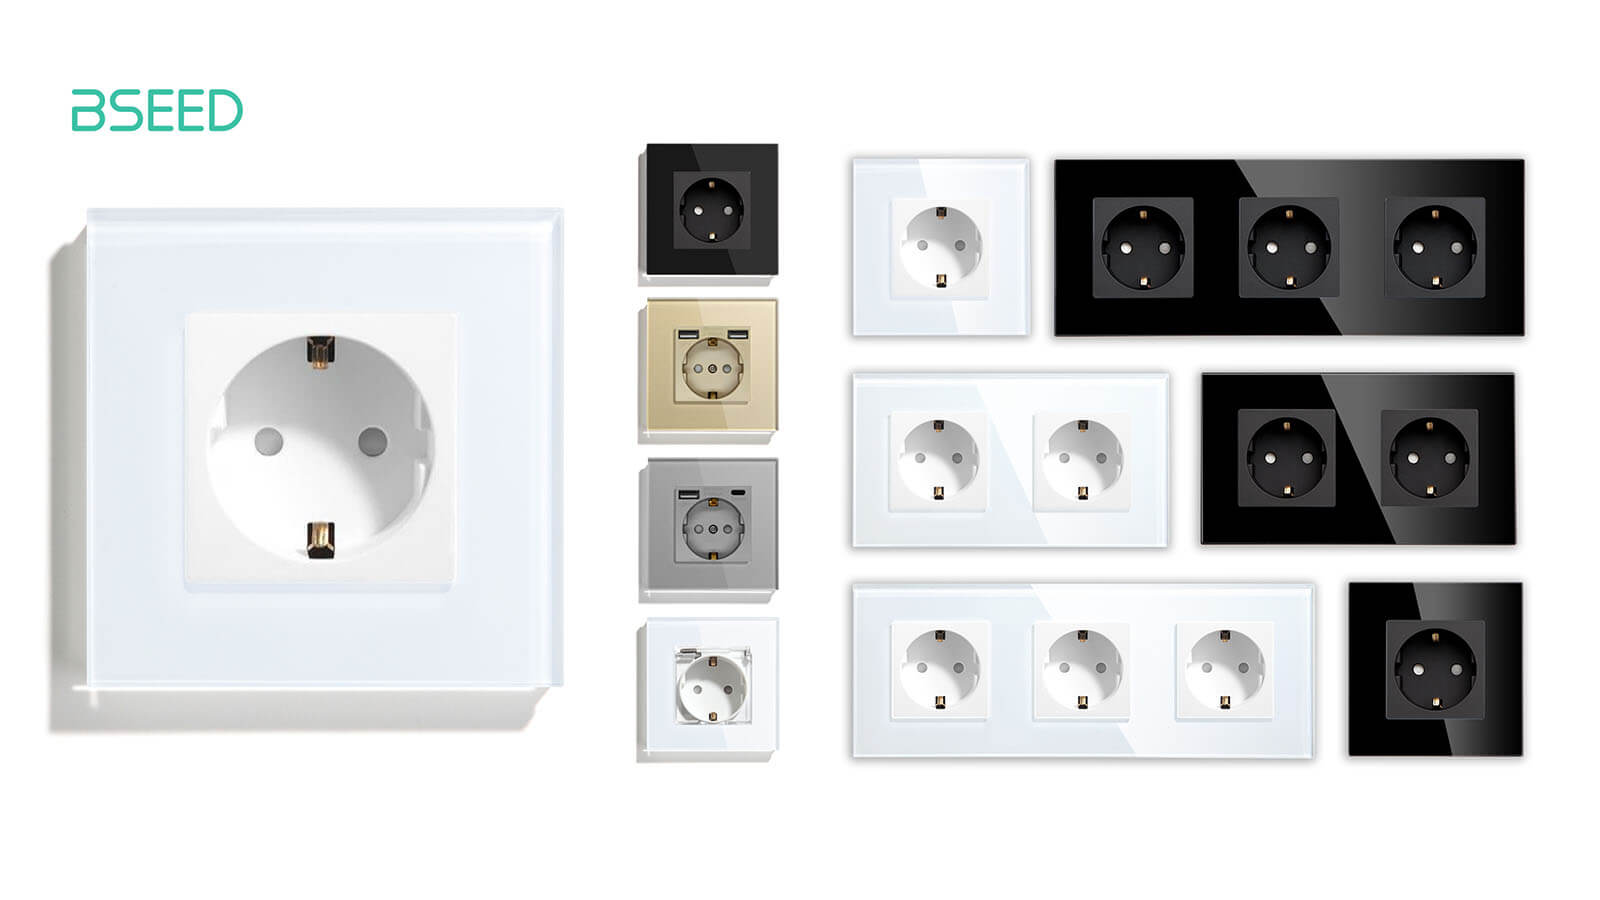
If you are considering smartifying your dumb outlets, consider this BSEED 16A Smart Socket as a viable option. The company also manufactures and sells different versions of their switches, with 1/2/3 sockets and USB ports, adapted for different markets. Most of these are available on their official AliExpress Store, with scarce models and quantities on Amazon.
I recommend you have a certified electrician do the installation for you, or at least do it with the power off. If you actually are an electrician looking for a job, Jooble is a great place to start.
![]()
AliExpress | AliExpress | AliExpress | AliExpress![]()
United States | Canada | United Kingdom
Germany | Netherlands | Sweden | Spain
France | Italy | Poland | Australia
*If links fail to open, try disabling your AdBlocker.
NOTE: Whenever I share something that needs to go inside a wall, I always get comments about compliance with US/UK/EU safety standards. I understand this is an important requirement for many of you, but I am not a lawyer and cannot attest to a company’s claim over such standards. I am simply reviewing the hardware and software aspects of a device. BSEED has offices in the US and EU, so maybe you should ask them for verification.
However, it is my understanding that these safety certificates as well as certificates of origin are often falsely printed on the case/box of a device by Chinese manufacturers, so verifying for certain if they hold merit is next to impossible.
As always, do you own research and make your own judgements when deciding to purchase a device.


Great content and nice to see that this is available now and actually works.
The picture in your article, the last one, made me look for this Zigbee energy monitoring outlet with USB. But…according to the seller (BSEED Official Store) this is not available.
So the advertisement is incorrect, outlets with USB aren’t available.
Maybe you are aware of any good alternatives like this one, but WITH USB(-C) in it?
Not with USB-C, no.
This Moes double USB socket is Zigbee: https://smarthomescene.com/reviews/moes-dual-usb-zigbee-socket-zp-lz-fr2u-review/
And this outlet has USB-C and I rather like it, but it’s NOT smart: https://smarthomescene.com/reviews/tessan-wall-outlet-extenders-with-usb-c-ports/
Thank you for these options, but not quite what I meant.
What I meant, is an outlet you are reviewing in this article … including USB(-C).
And what I wanted to point out, is that I talked to the official AliExpress Store and they tell me, that there is not any Zigbee Energy Outlet including USB. That means, that the image you’re using isn’t correct (which is showing a Zigbee Energy Monitoring Outlet WITH USB).
No offense, I love your articles, this was just to let you know.
I didn’t notice the image was wrong. Thank you for pointing it out, I will replace it.
Cheers!
Edit: These hybrid ones have USB-C, but no energy meter as far as I can tell.
https://s.click.aliexpress.com/e/_DE6sCdR
great review! from my experience, for the dishwasher (and other appliances, as well), i would rather trust the plug than what the manufacturer claims, though.