Even though my smart home is strictly local-only and based around Home Assistant, I like to test out other apps and ecosystems too. By reviewing a smart lock by WeLock recently, I got a nice reminder of why Home Assistant is irreplaceable. Their app and setup flow was atrocious.
However, sometimes companies do make it pleasant on users and create a good app with an intuitive interface. SwitchBot is one of those brands, their app is superior to any proprietary smart home application I’ve ever encountered.
I took a deep dive in their smart home ecosystem recently as well as test out their latest Hub 2 with Matter support. They are missing a couple of things by my standards, but as far as cloud-based smart homes go it’s one of the best.
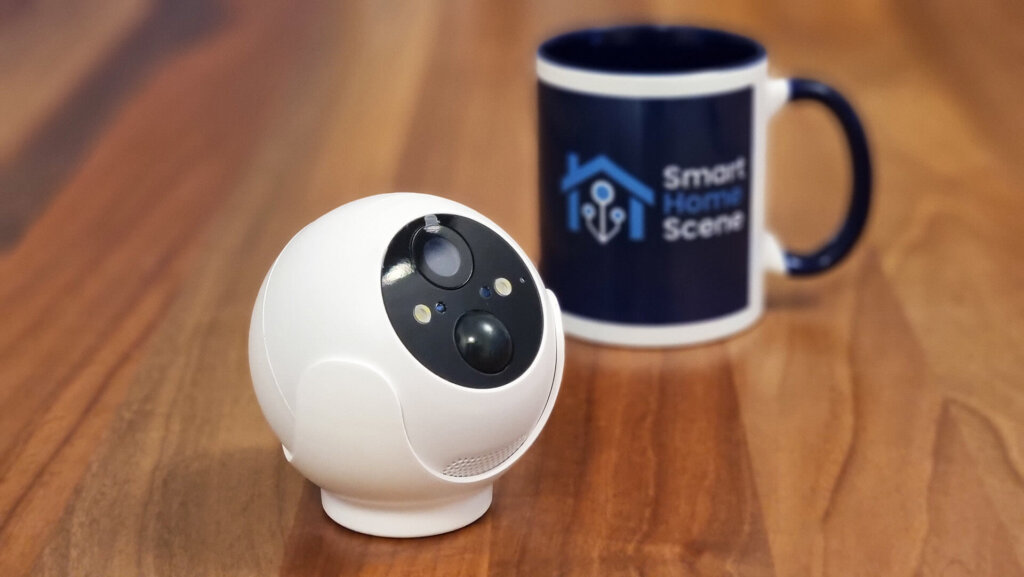
In continuation of my review efforts, I am testing out SwitchBot’s Outdoor Spotlight Camera, a 1080p cam with night vision, AI capabilities and two-way audio stream. You can get the cam on the official SwitchBot Webstore as well as Amazon, however I suggest you hold off until Prime Day!
Features and Technical Specs
The SwitchBot Outdoor Spotlight Camera is outfitted with Infrared night vision LEDs, a PIR motion sensor which is used to trigger recording events and a speaker and microphone combo for two-way audio.
It can record your videos on an SD Card of up to 256GB or save them on the cloud if you have an account. It’s field of vision is about 110° and can be powered by 5V2A on a USB-C connector. Here’s the full list of technical specs:
- Material: ABS + PC
- Field of View: Diagonal: 126º, Horizontal: 110º, Vertical: 53º
- Video Resolution: 1080P HD
- Image Compression: H.265
- Night Vision: 850nm LED Infrared Night Vision (Black and White), LED Spotlight (Color)
- Audio: Microphone + Speaker
- Power: DC 5V2A
- Charging Port: USB Type-C
- Wi-Fi: IEEE 802.11 b/g/n; 2.4 GHz
- Bluetooth: BLE 4.2
- Storage: FAT32 microSD card up to 256GB
- Weather Resistance: IP55
- Operating Temperature: −20°C to 50°C(−4°F to 122°F)
- Operating Humidity: ≤ 95 % RH
- Battery Type: 18650/Lithium-ion battery × 1
- Capacity per Battery: 3x3350mAh
Package Contents
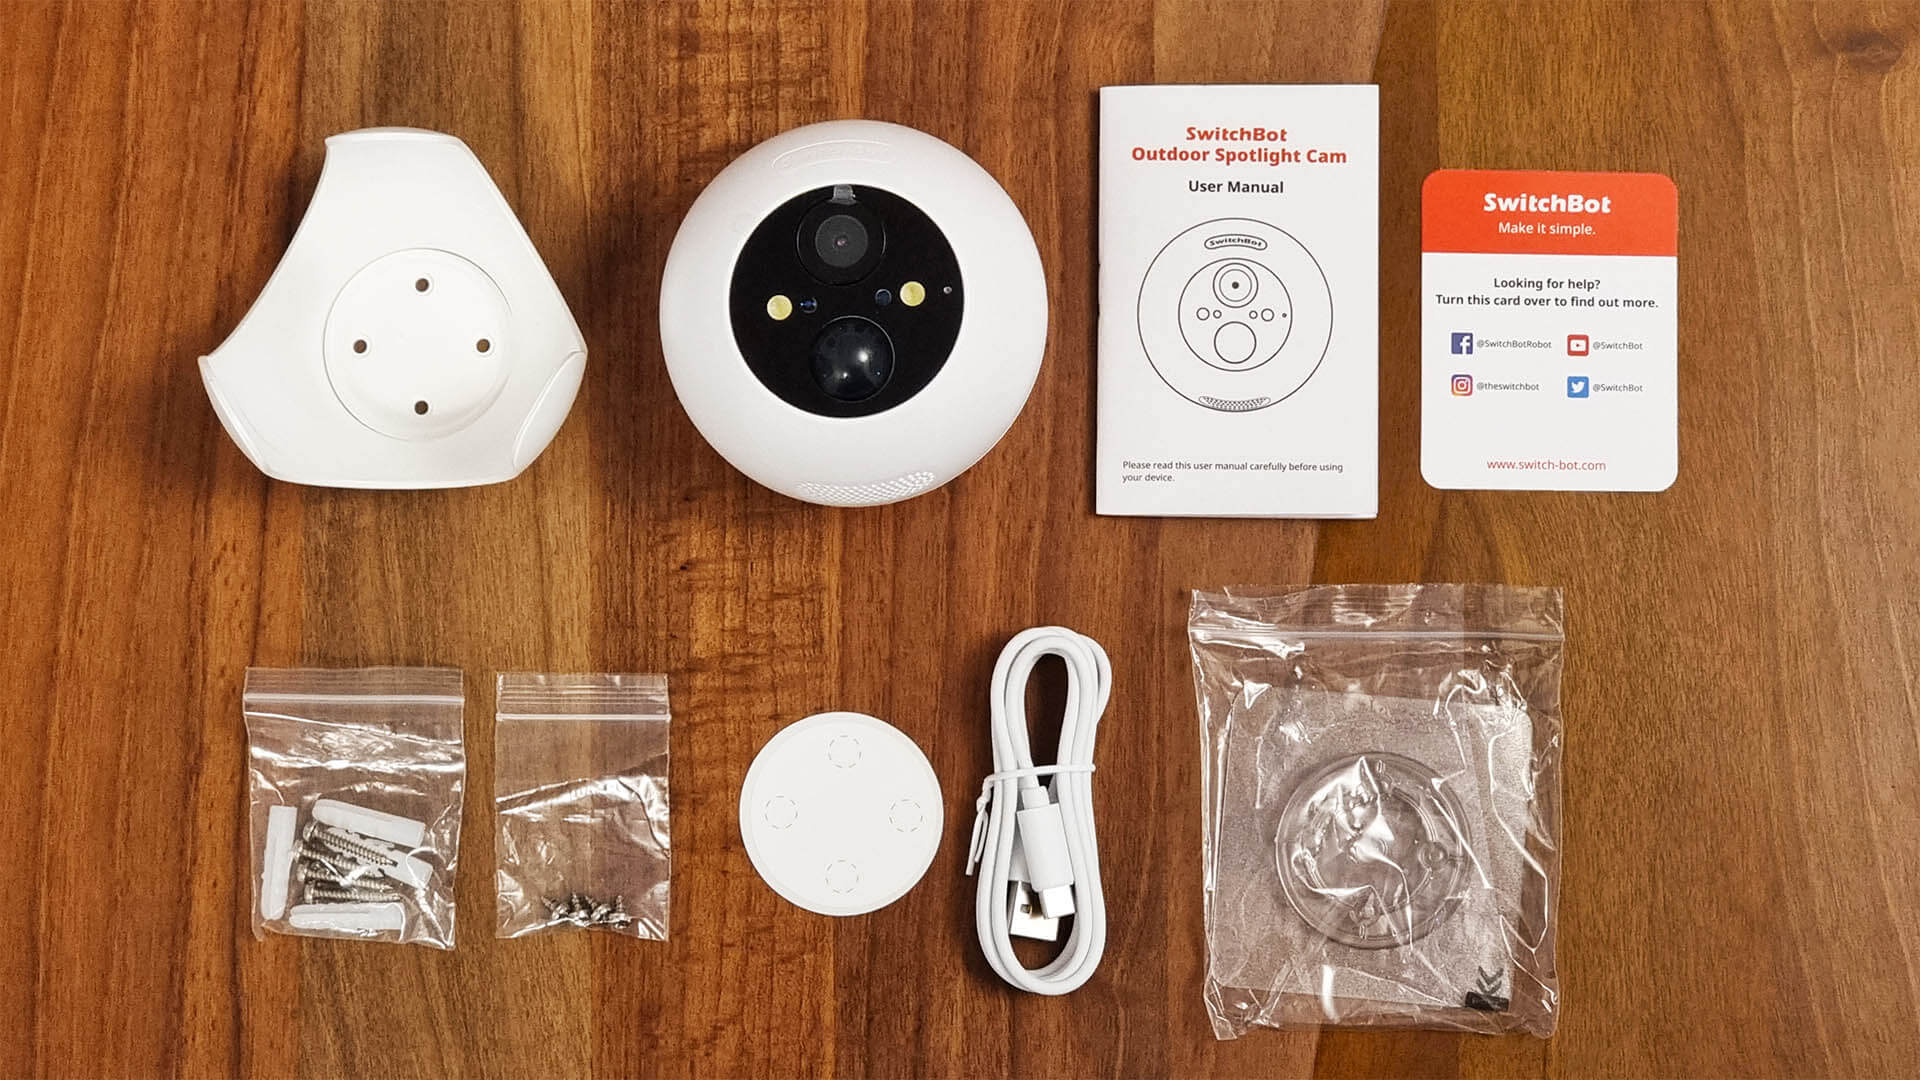
The SwitchBot Spotlight Cam came in a recognizable branded box, containing some interesting things. A mounting bracket, a USB-A to USB-C cable, a sticker, a user manual and two sets of screws for installation. You can either use those to mount the cam or use the adhesive sticker mount on a flat and clean surface.
The body of the camera is one solid and completely round ball. I get childhood flashbacks when holding it, an urge to just smash it on the wall. I resisted and just tossed it around a little bit.
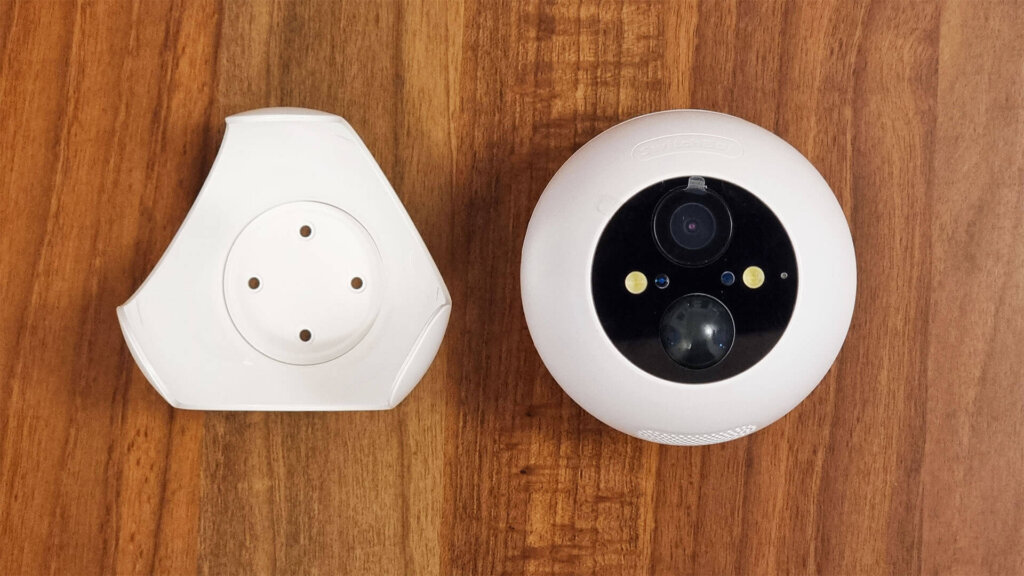
The device slots nicely in the mounting bracket, you can move it around and fine tune it’s facing direction after you install it in place. There is a perforated mesh on the bottom, which is where the speaker is placed for the audio output.
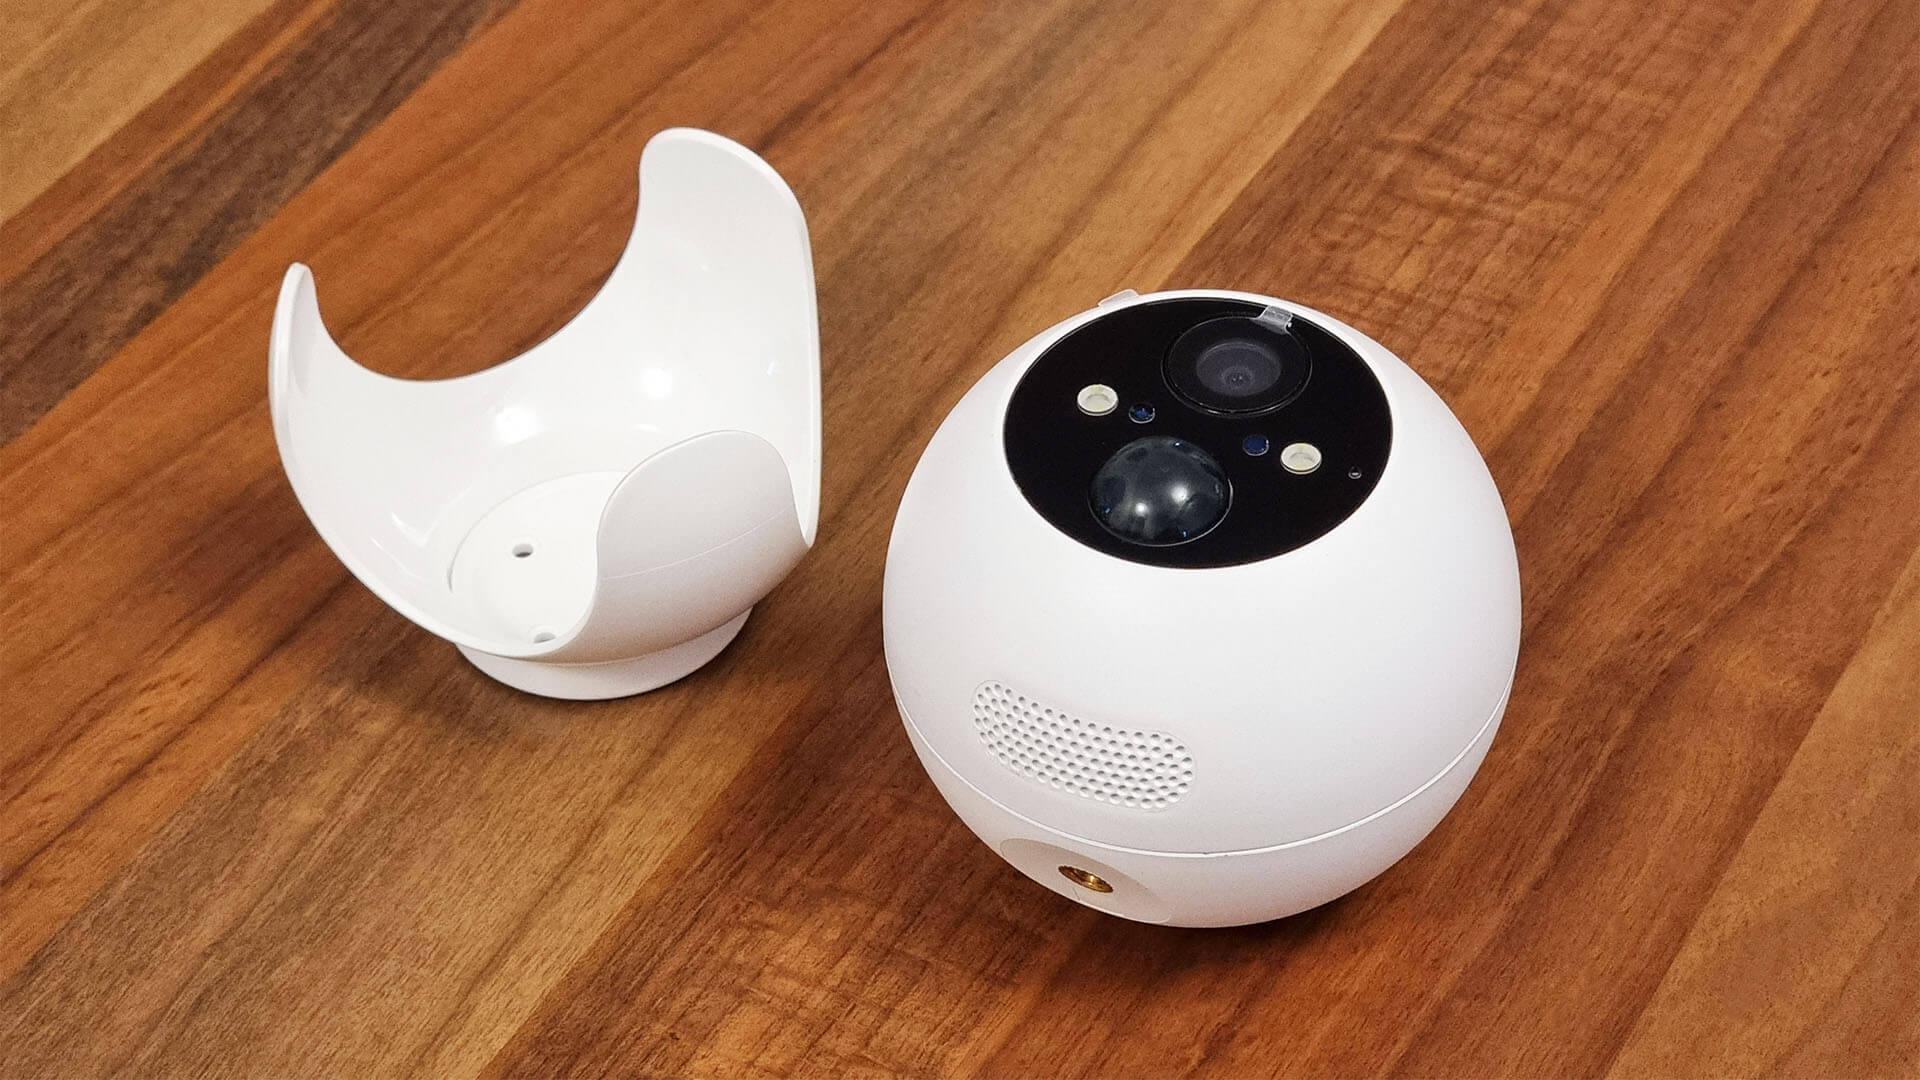
It’s fitted with two LED spotlights for night vision which are triggered automatically by the light sensors adjacent to them. The small dot seen on the right is the microphone, used for the two-way audio feature.
The large dome protruding on the bottom is a PIR motion sensor, which triggers recordings and different automations of the camera in the app. The two Infrared sensors are underneath the glass on both sides of the lens, they emit dim red light when they are active during night.
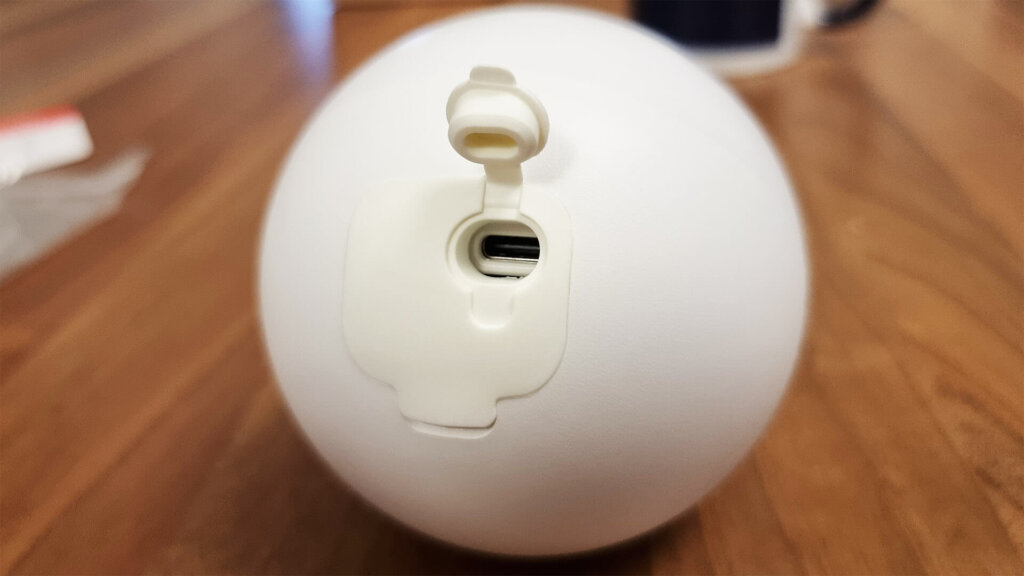
On the backside of the cam, the input connectors are protected with a two part silicon cover which feels very airtight in closing, hence the IP55 rating. Opening the first cover reveals only the USB Type-C connector for powering the camera.
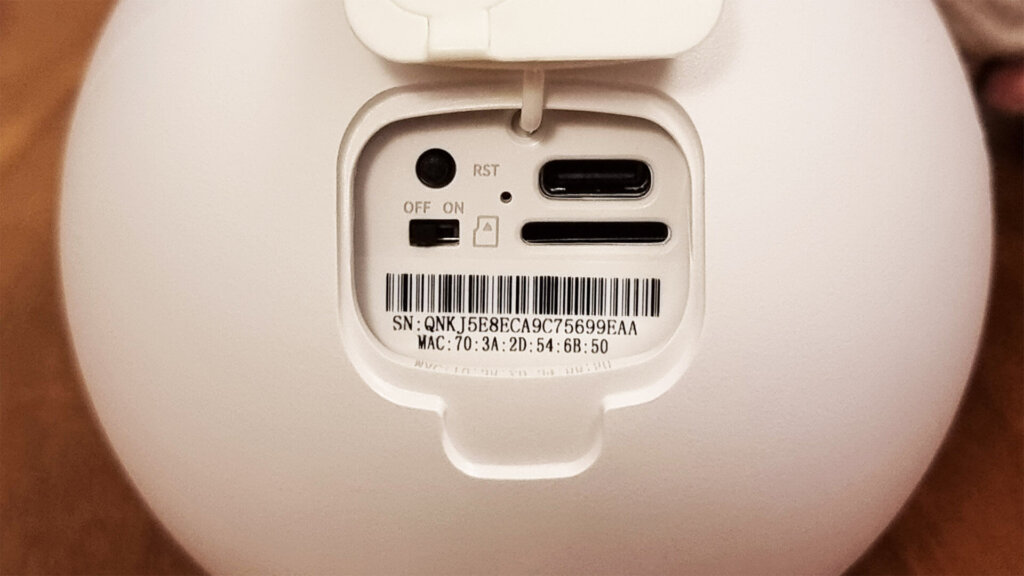
Opening the second chamber as well, reveals a reset button, a toggle button ON/OFF and an SD Card slot, which supports FAT32 formatted microSD up to 256GB. A small indicator LED tells you if the device is charging or running on battery backup.
Installation and Onboarding
The app setup and setup process of any SwitchBot devices, including this spotlight camera, is very easy to complete and follow along. Whoever designed the UI and setup flow of the SwitchBot ecosystem and their app, knows their trade.
To illustrate what I mean, here are a few screenshots of their app when initializing the SwitchBot Spotlight Cam:
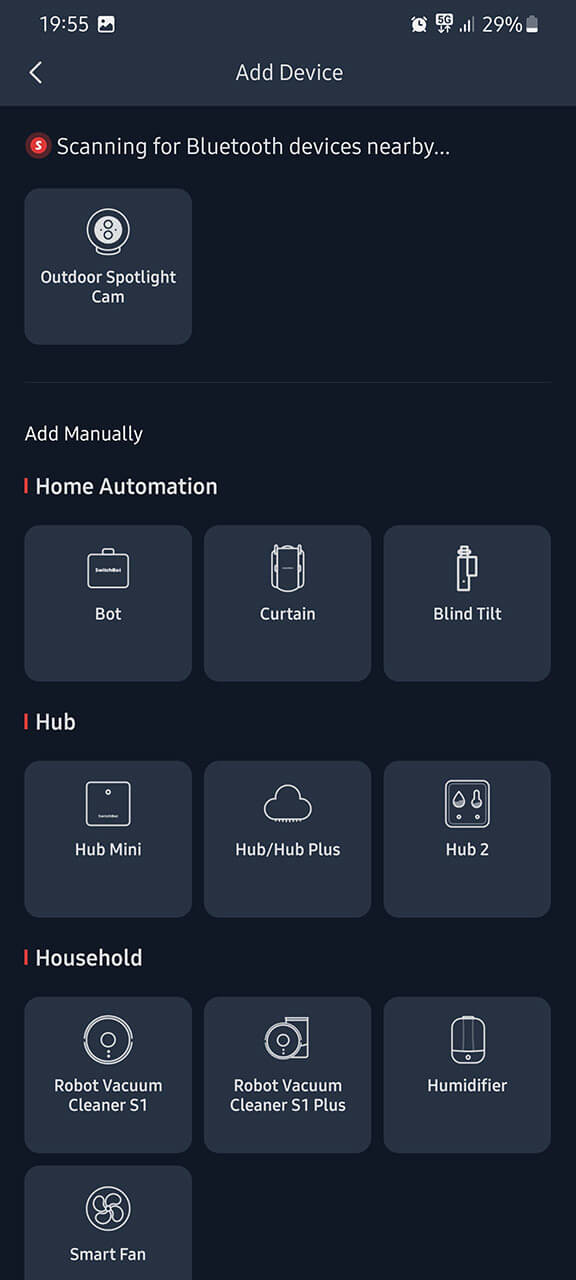
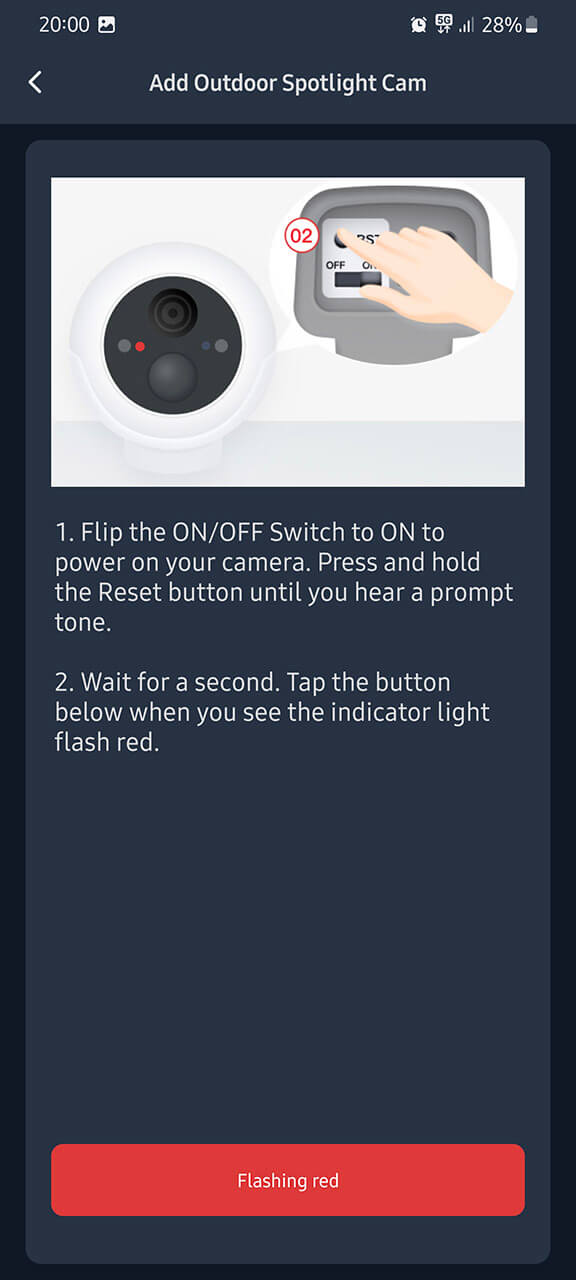
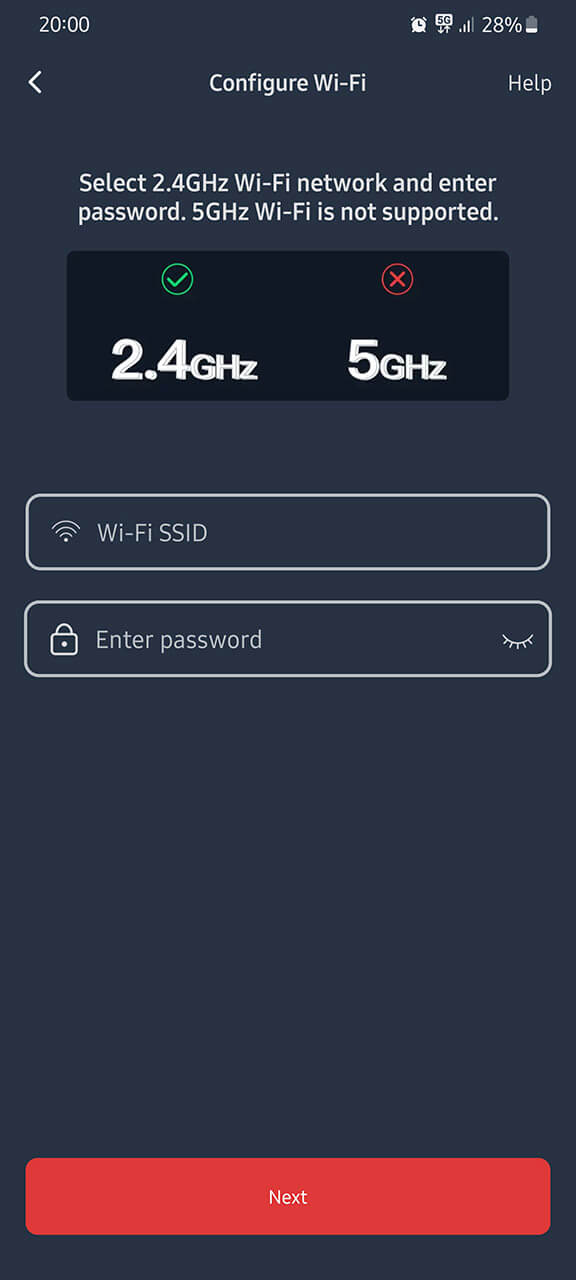
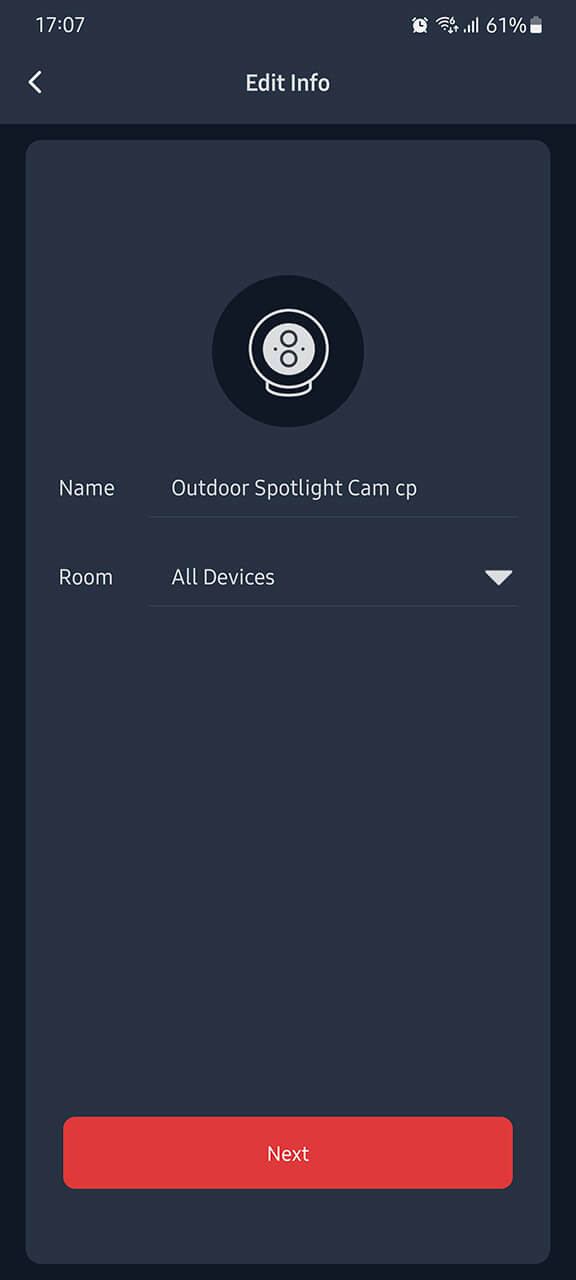
When you click add device, it automatically discovers the camera nearby if it’s powered on. The app tells you to flip the ON switch and hold the Reset button until the LED on the front starts blinking red. The next screen setups your Wi-Fi connection, and that’s it. You can press skip, add the device to a room and finish the process.
However, if you simply continue following the installation guide in the app, there are a lot of useful tips and information the setup will guide you through. First, it will ask you for your intended method of installation:
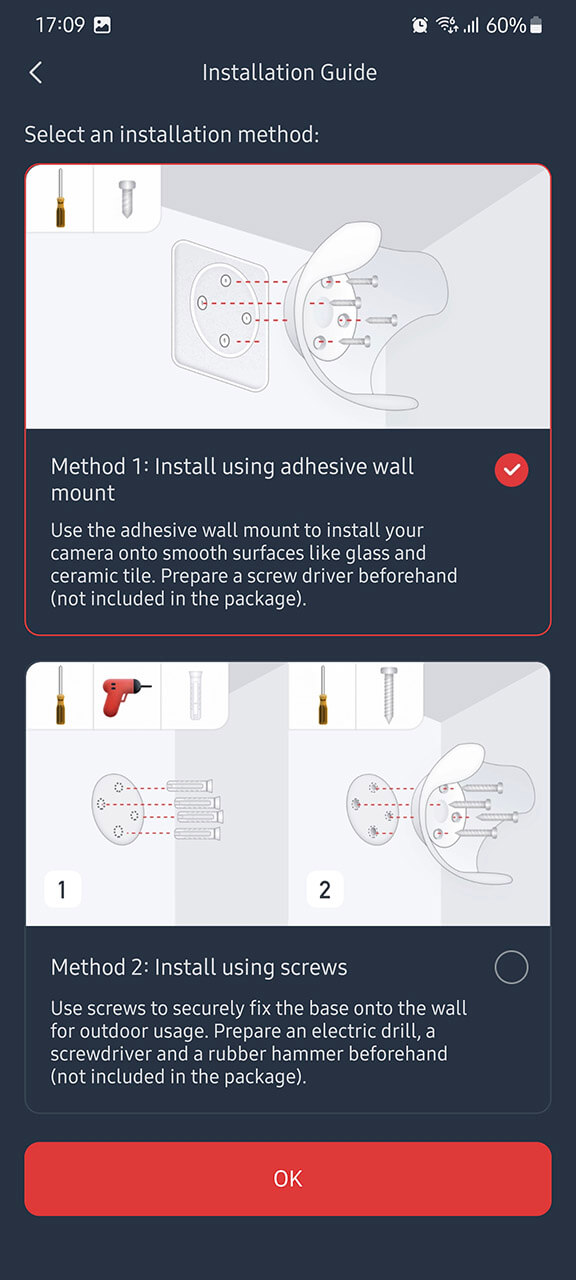
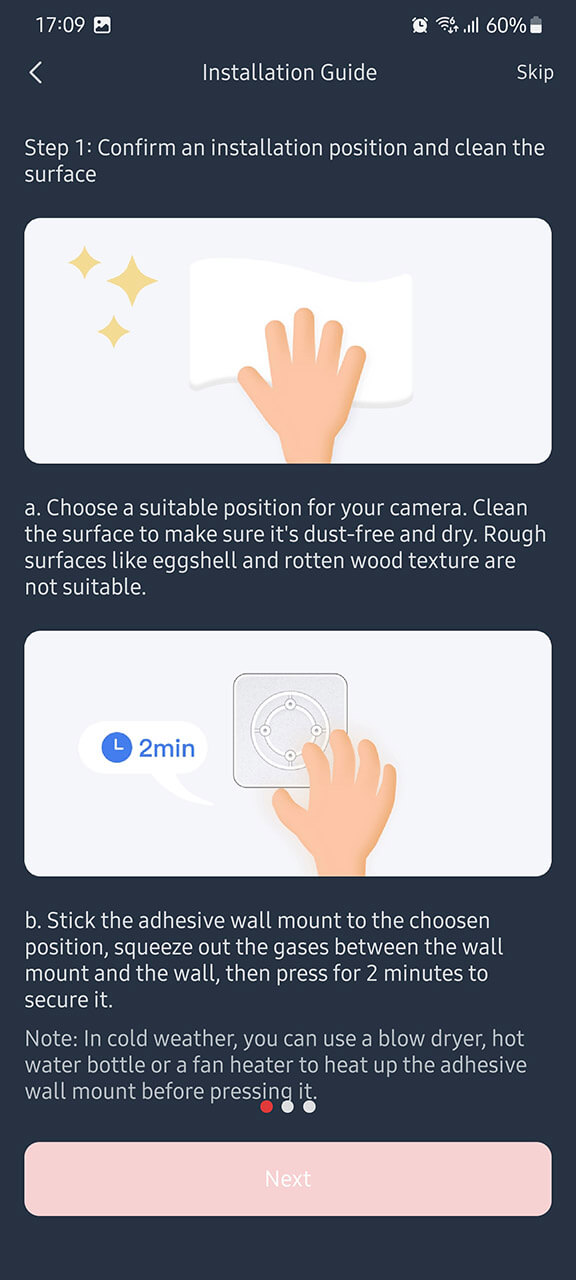
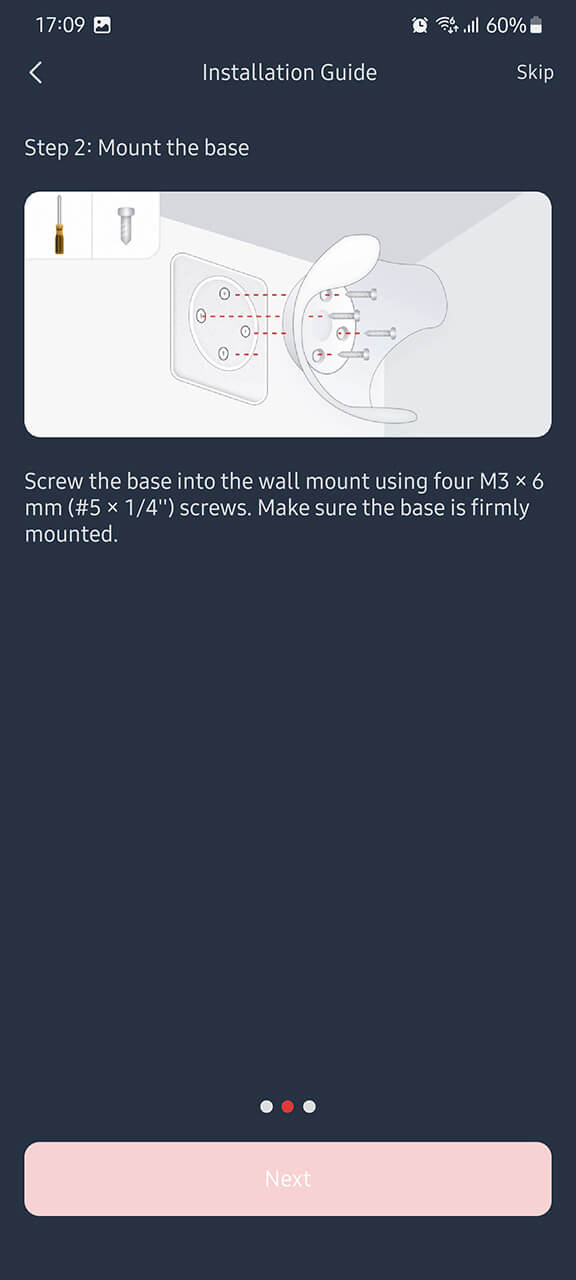
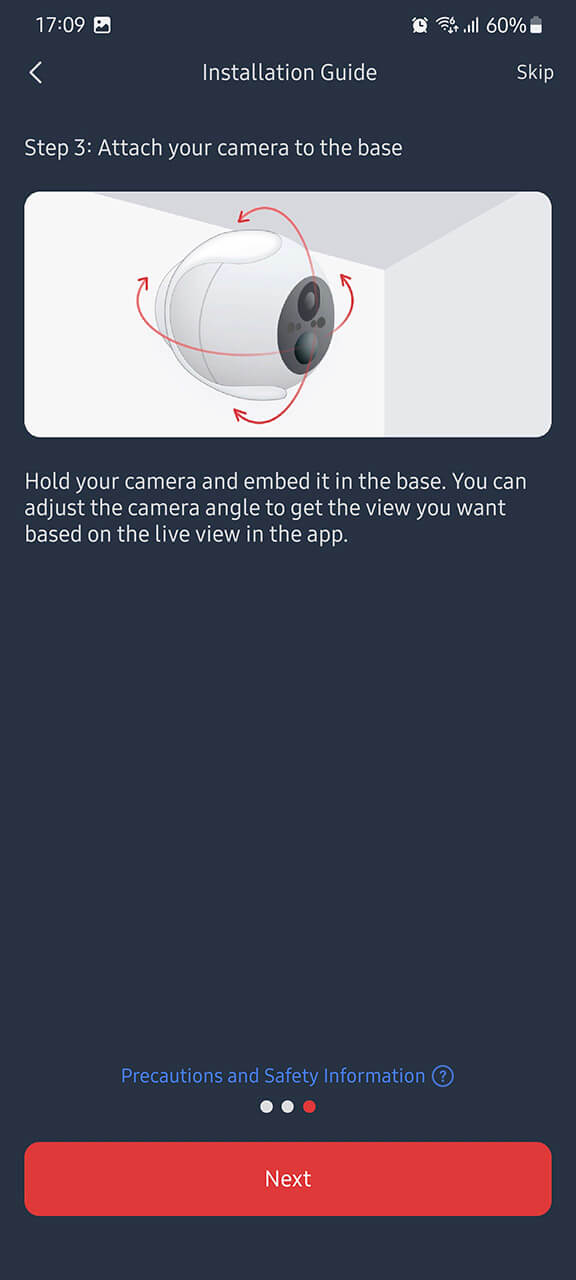
Depending on which method you choose (adhesive wall mount or screws), it will give you steps and tips for properly installing the device. Most of these are just common sense, nothing special that you actually need to be mindful of but it’s good to know the app is helpful even for the extremely non-technical users.
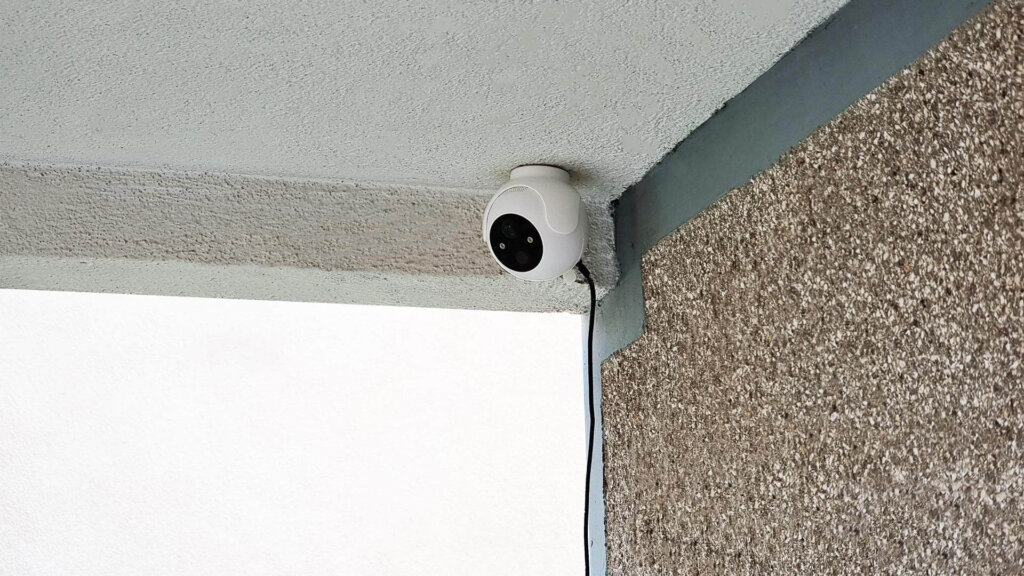
I installed the camera with the screws directly in the ceiling, although I used 2 instead of 4 as this is a testing setup. I flipped the camera upside down to make the cable fall on back bottom, there is an option in the app to actually flip the image vertically if you need to.
If you bought the SwitchBot Solar Panel too, you can also browse through the tips of installing and properly angling the device. This is useful to ensure you mount it correctly facing towards sunlight.
Once you complete the setup process, you are most likely going to get a Firmware update available prompt. Confirm to update and your SwitchBot cam is ready to be used.
Testing
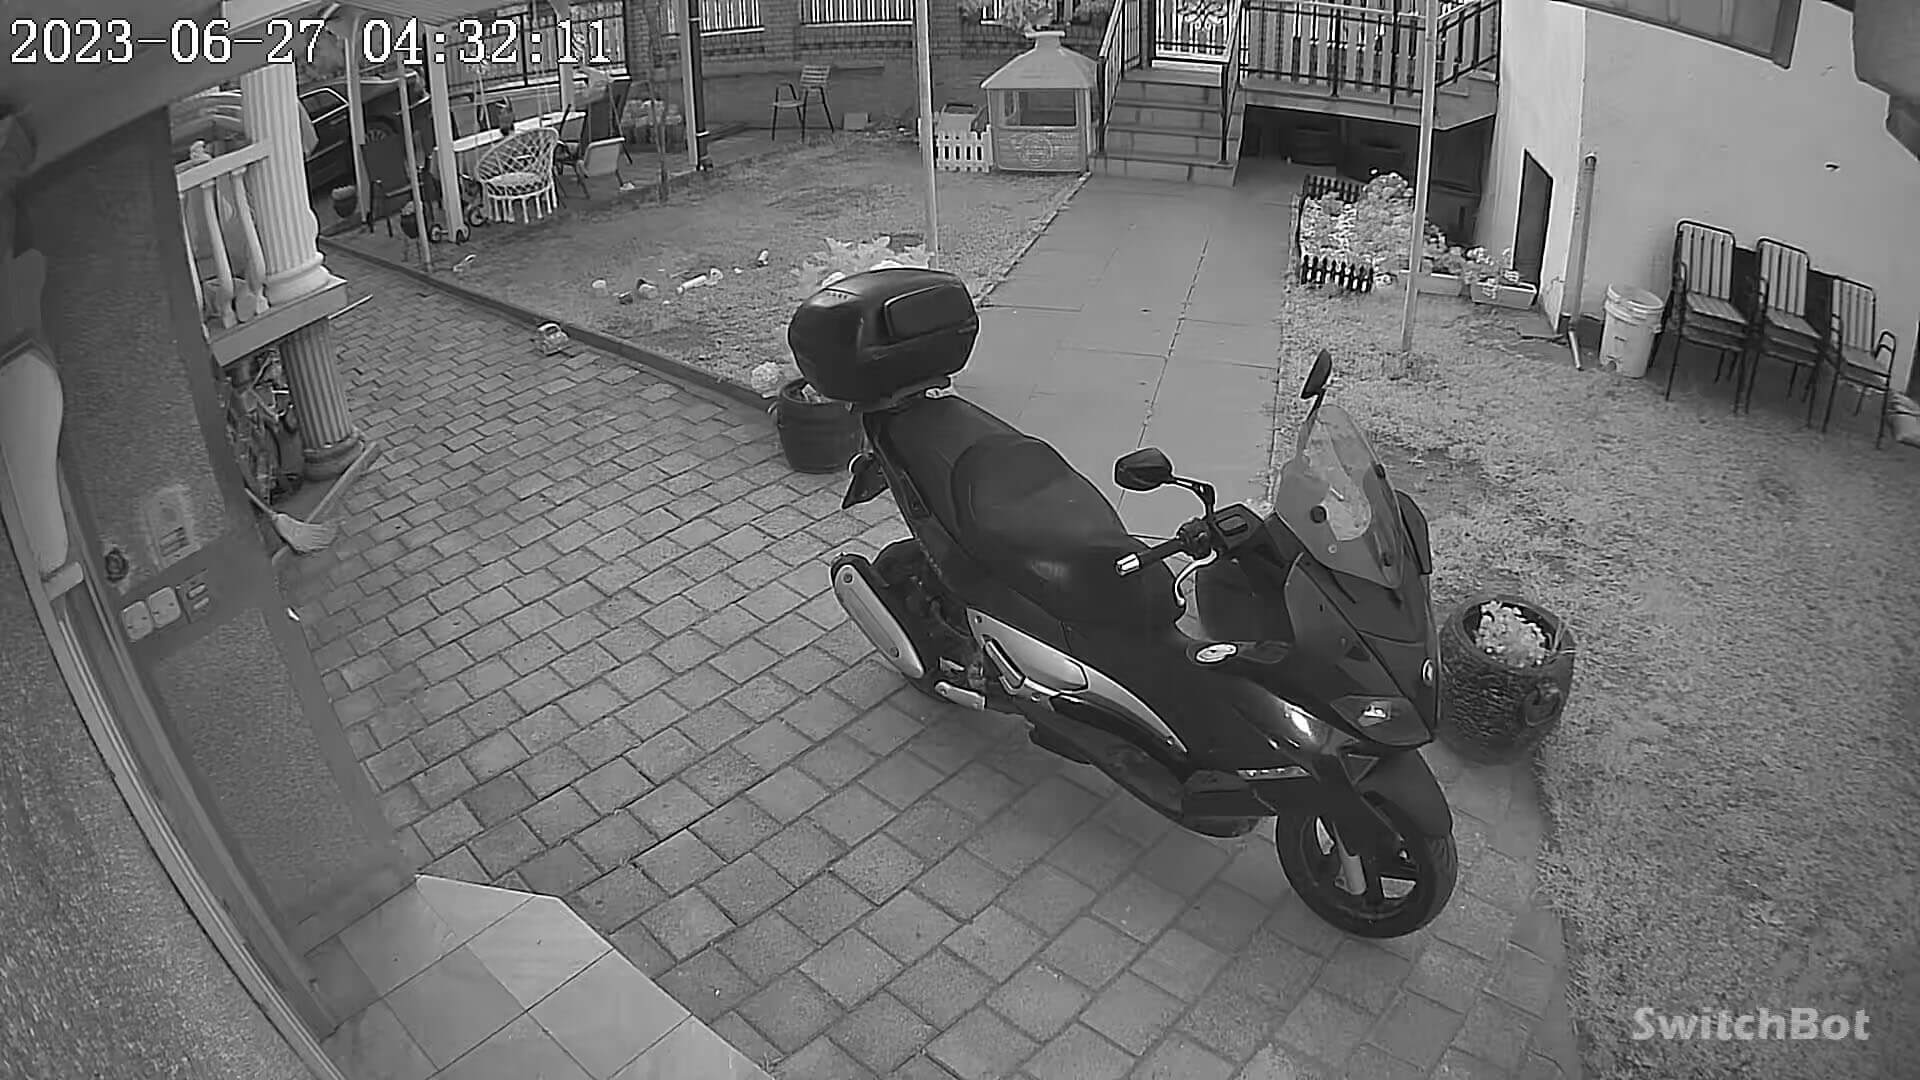
I decided to deploy the SwitchBot Spotlight Camera in my front yard to get a sense of its capabilities. There were no issues with onboarding and installation for me, so the whole thing was seamless. It is however, important to provide a stable Wi-Fi connection with a capable router otherwise performance might degrade.
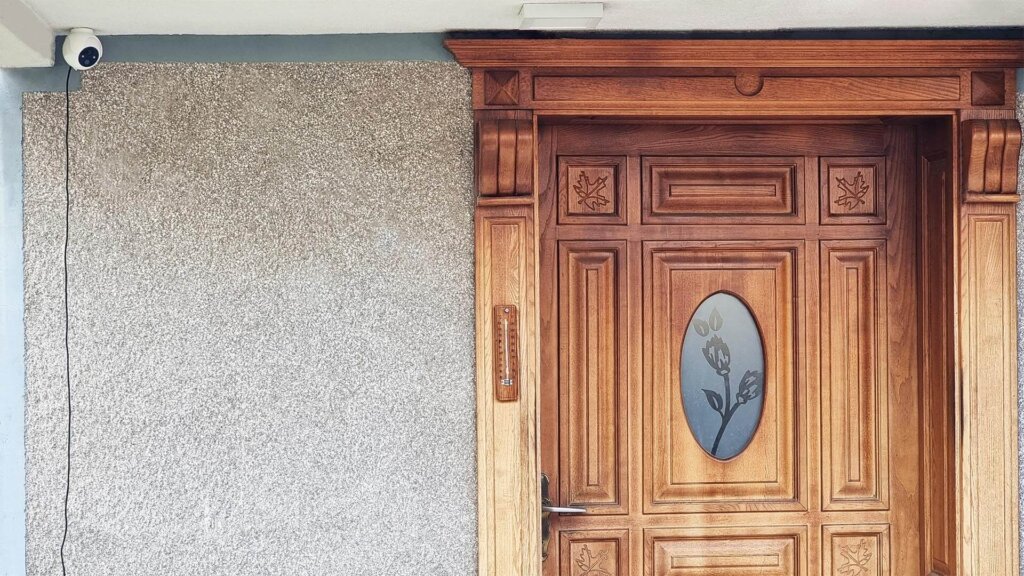
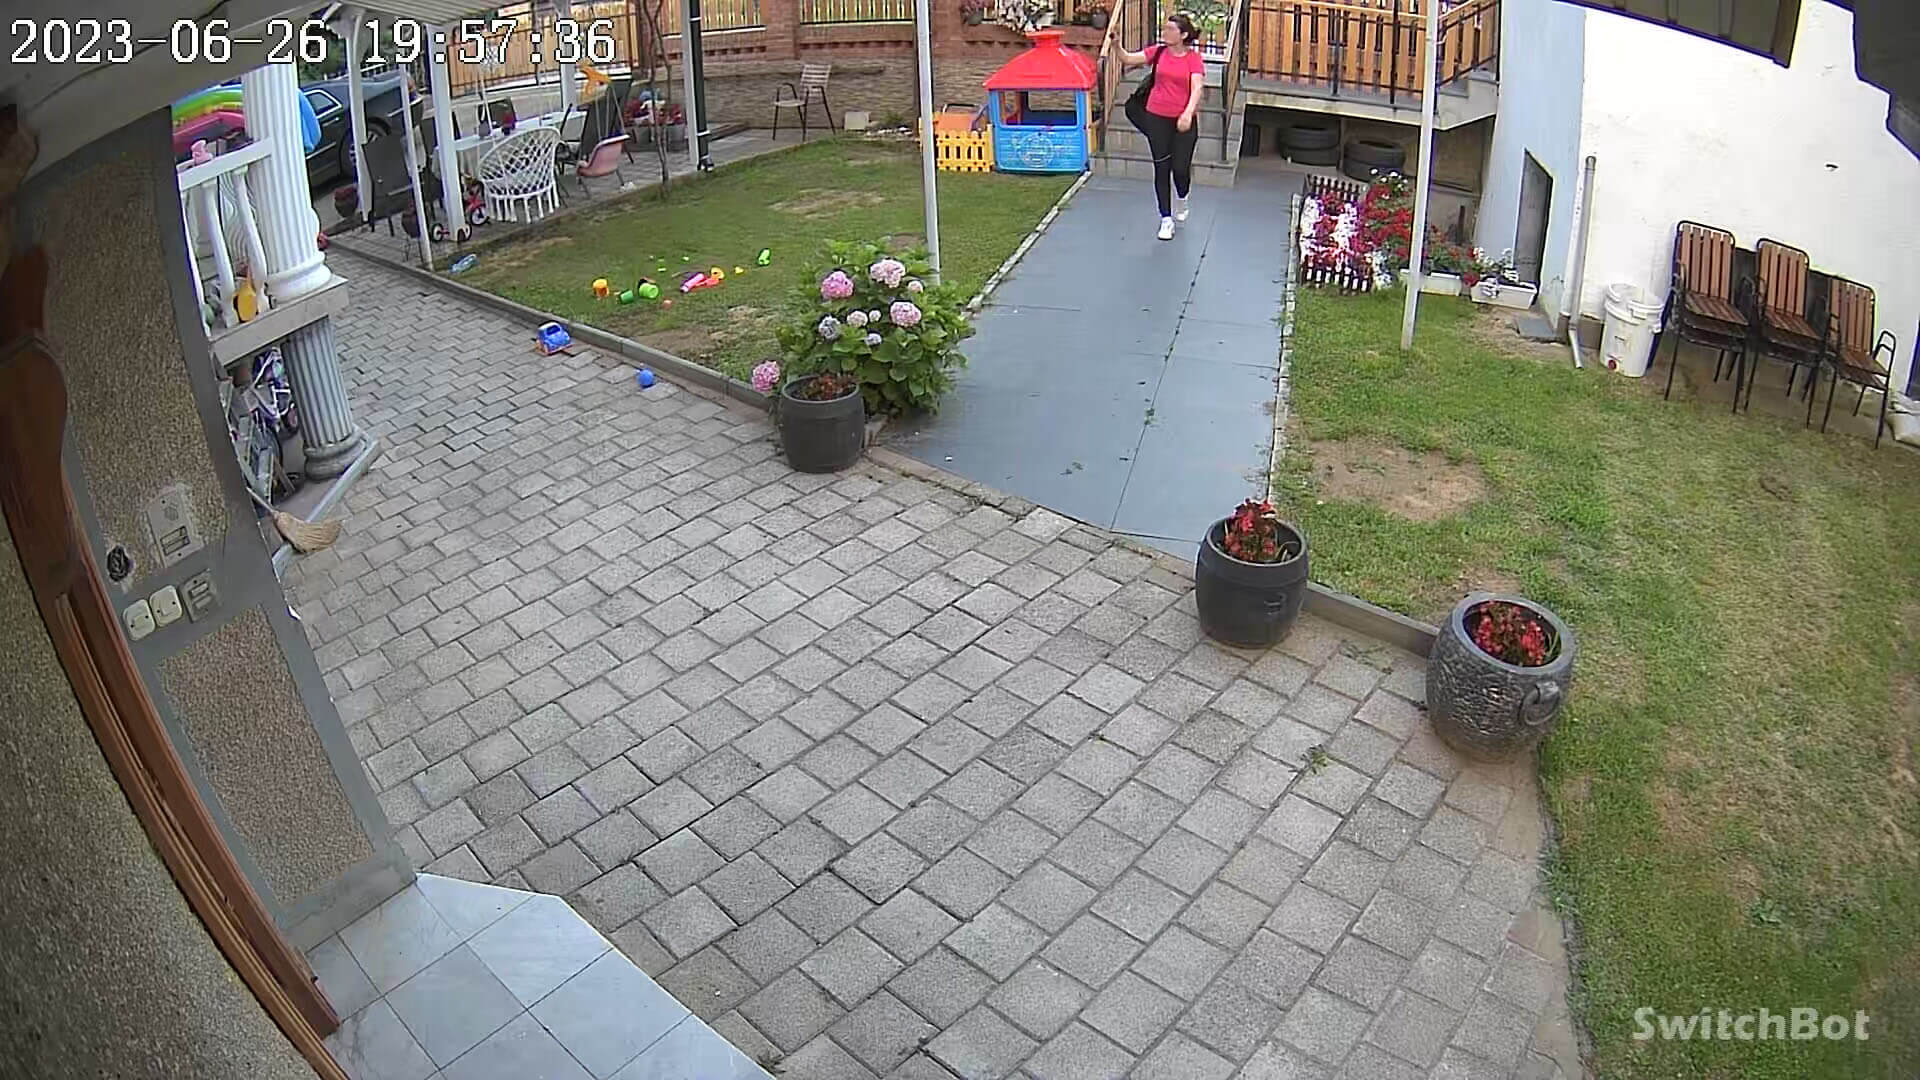
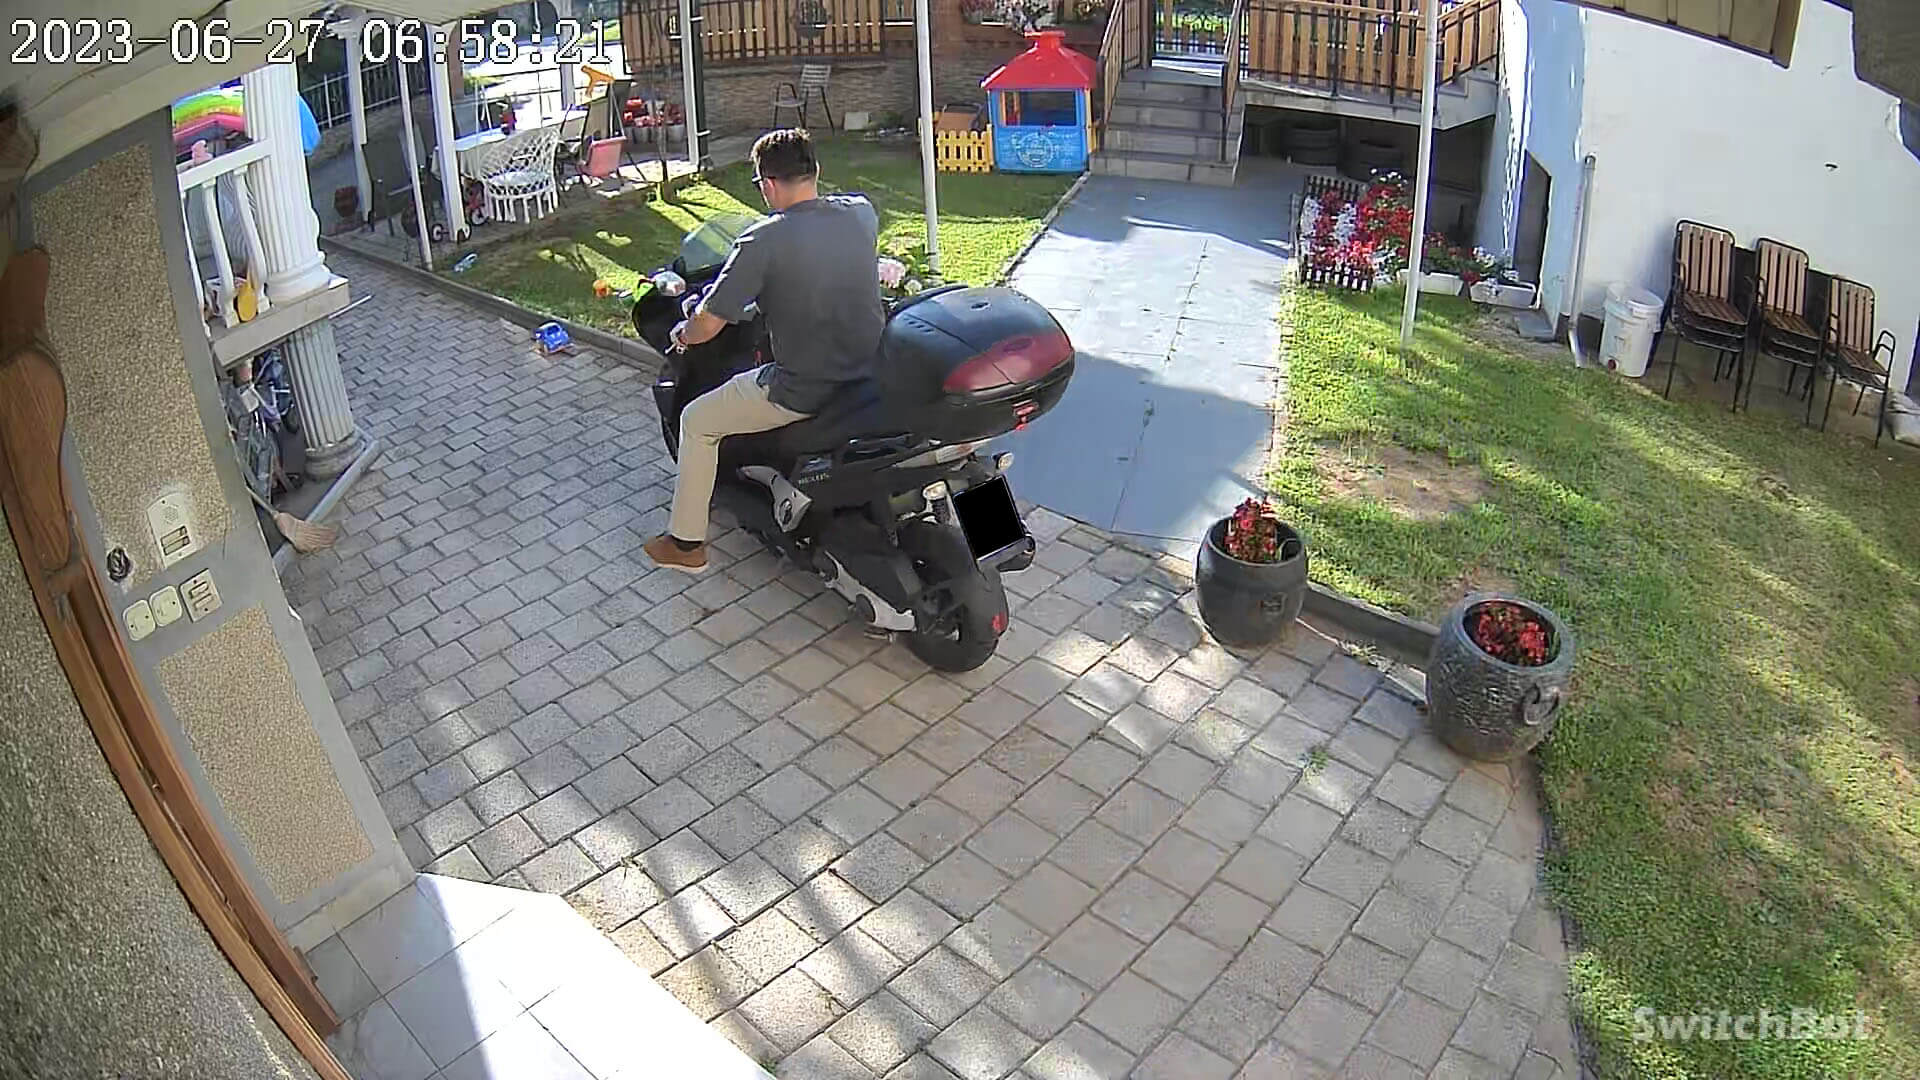
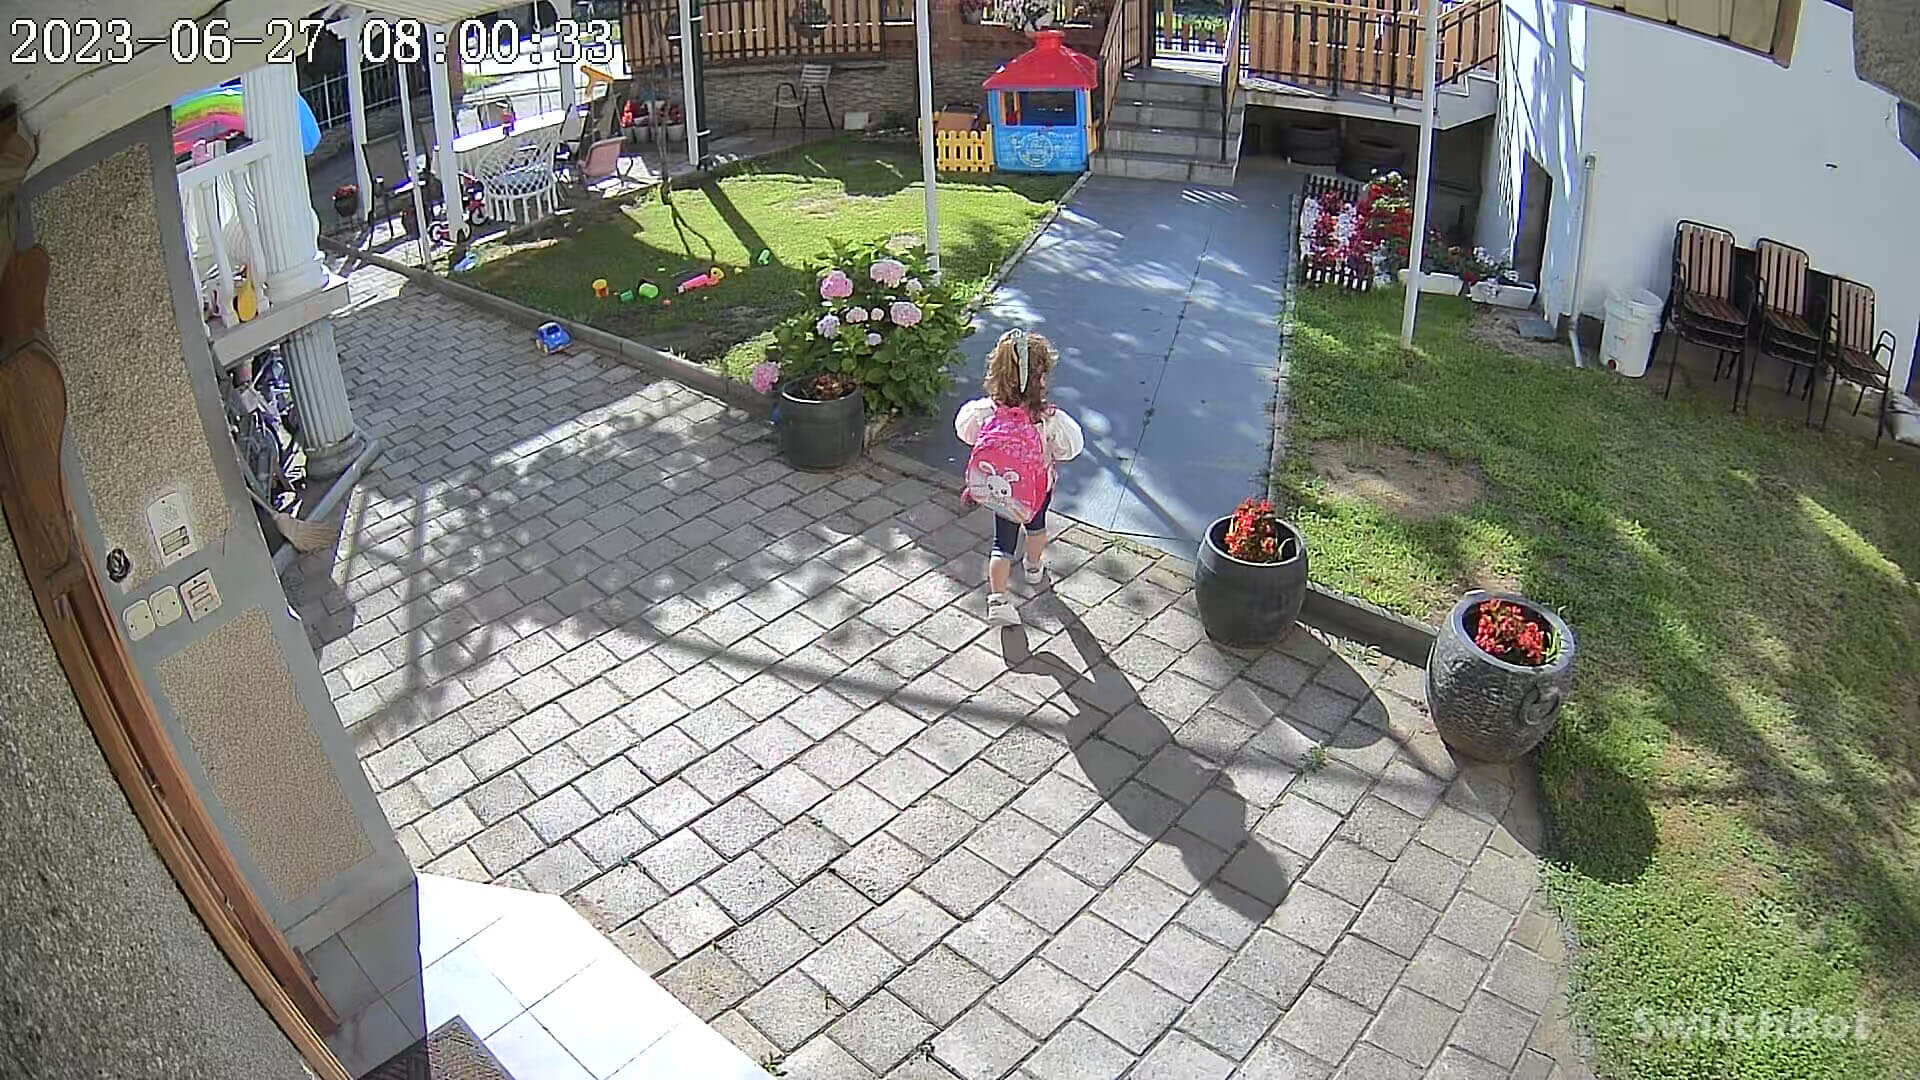
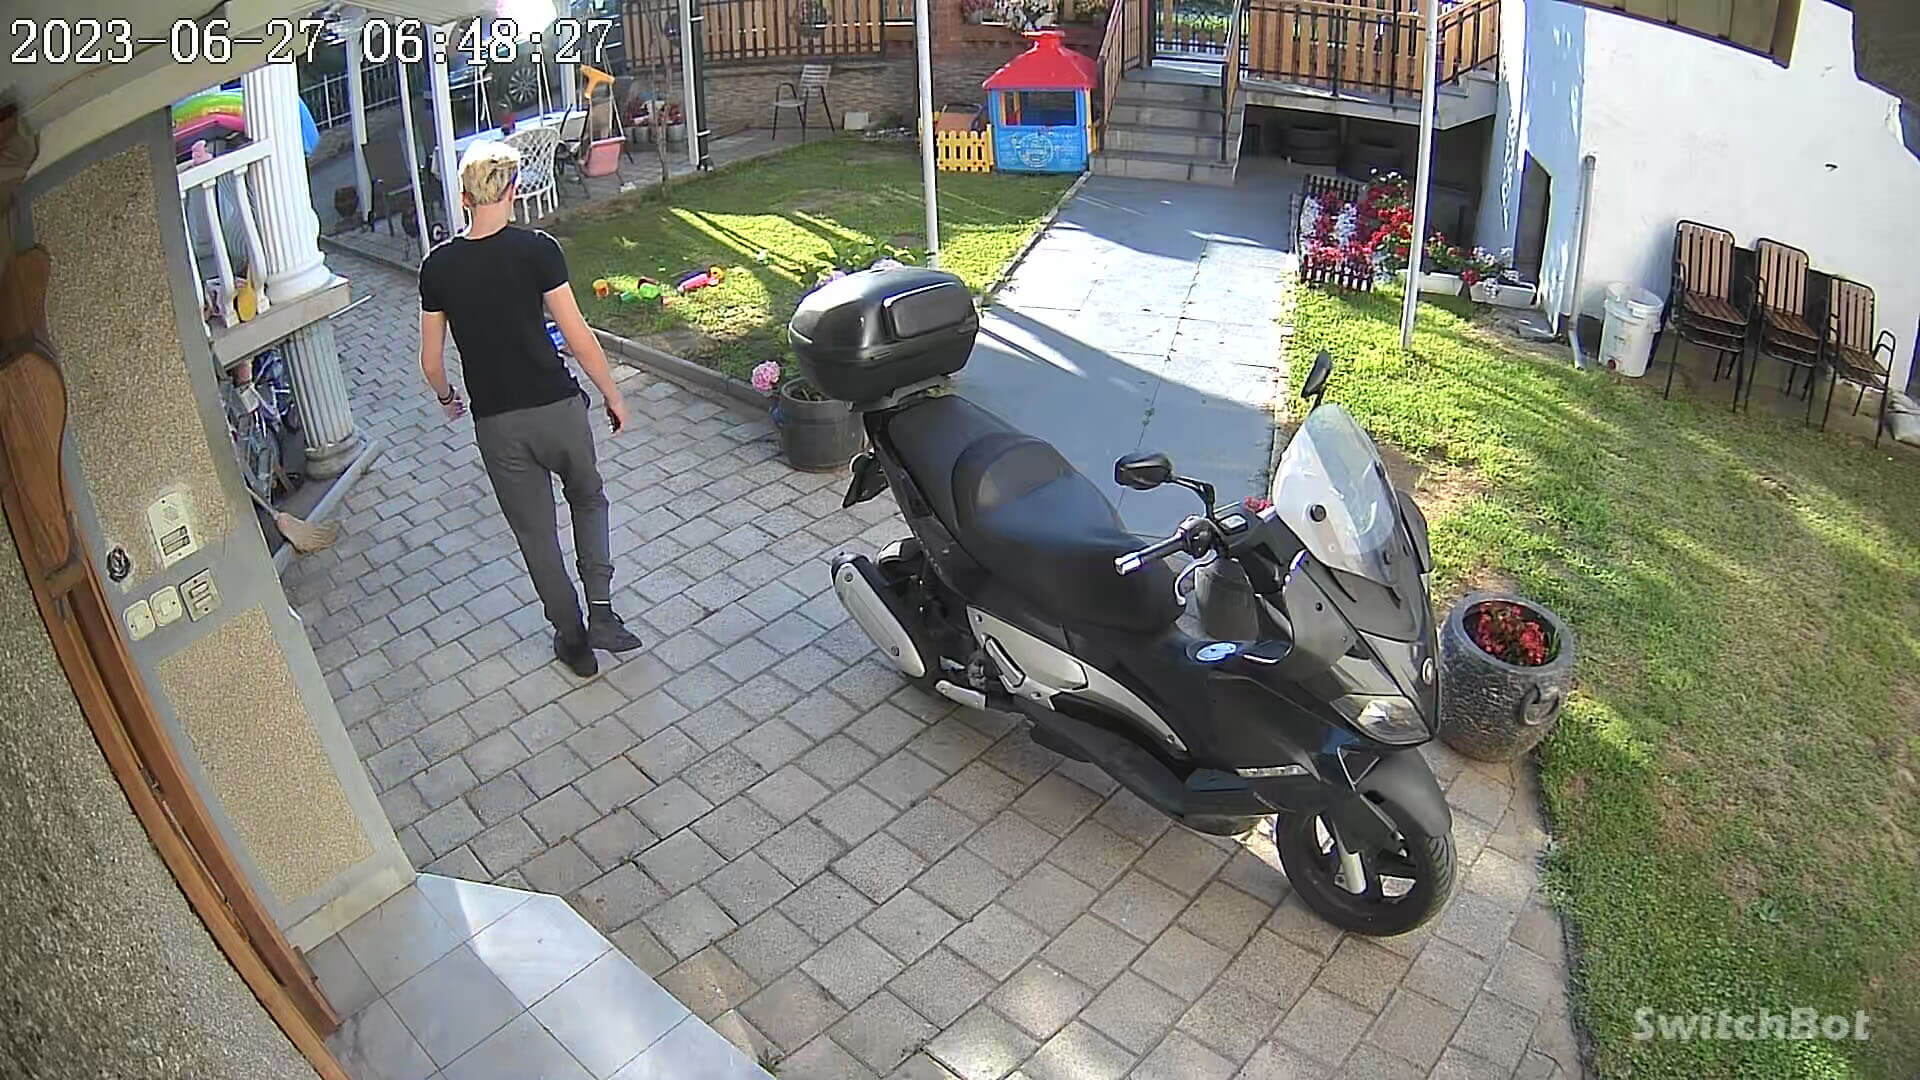
Since it’s summer, my front yard is constantly filled with people coming, going and my toddlers playing around. I used this opportunity to test the detection features as well as image and video quality.
Detection Features
As far as AI detection features go, the camera performed surprisingly well. I set the motion sensitivity to medium in the app and expanded the detection zone to fill the full frame. With both human and animal detection turned on, I tested it both during day and night.
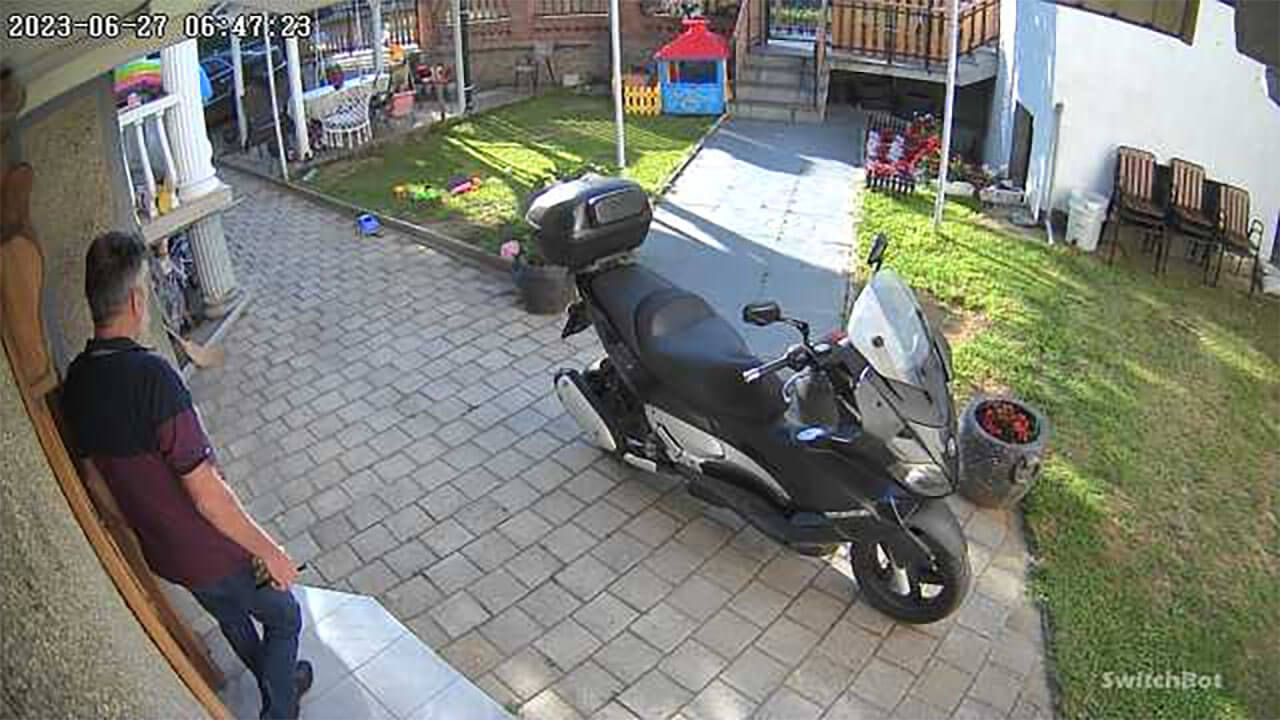
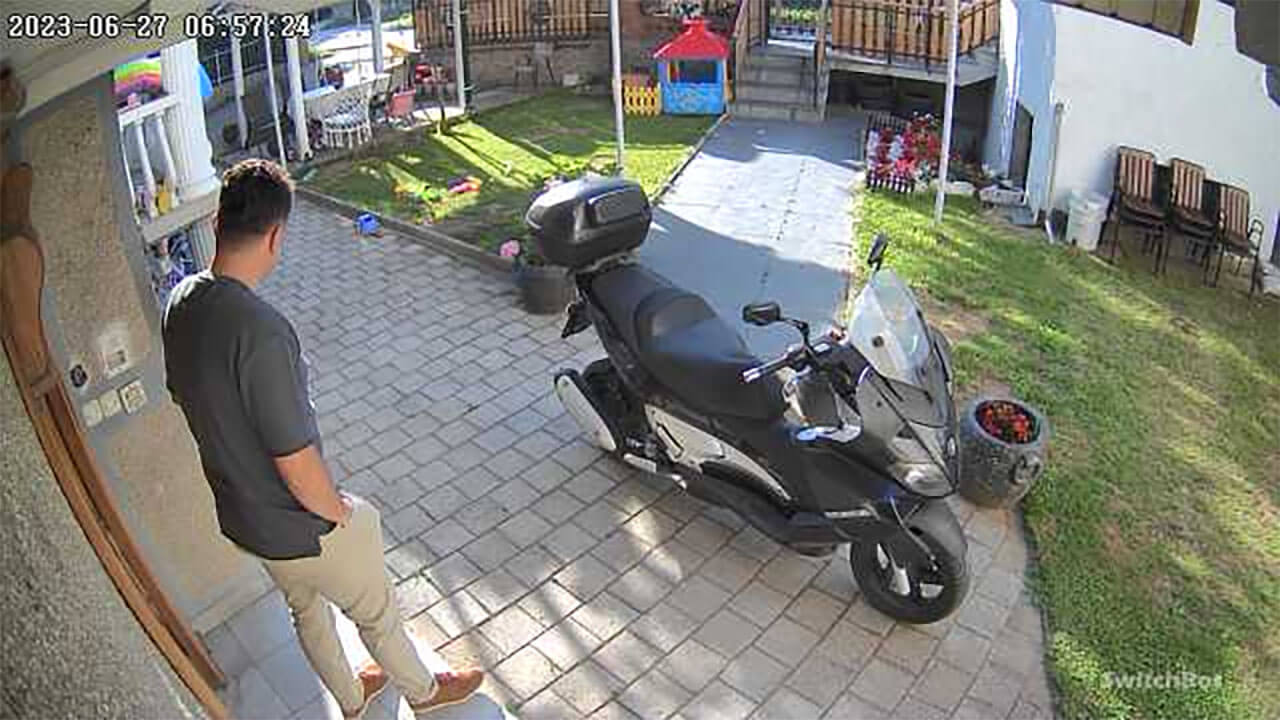
It immediately detected me and my father leaving for work in the morning, as soon as we moved through the door.
Regarding night surveillance, there are two options available in the app. The first one is traditional infrared mode, which records in black and white while the latter is spotlight mode, which records in color but requires the LED lights to be turned on. With the infrared light turned on, it detected human motion again with no problems.
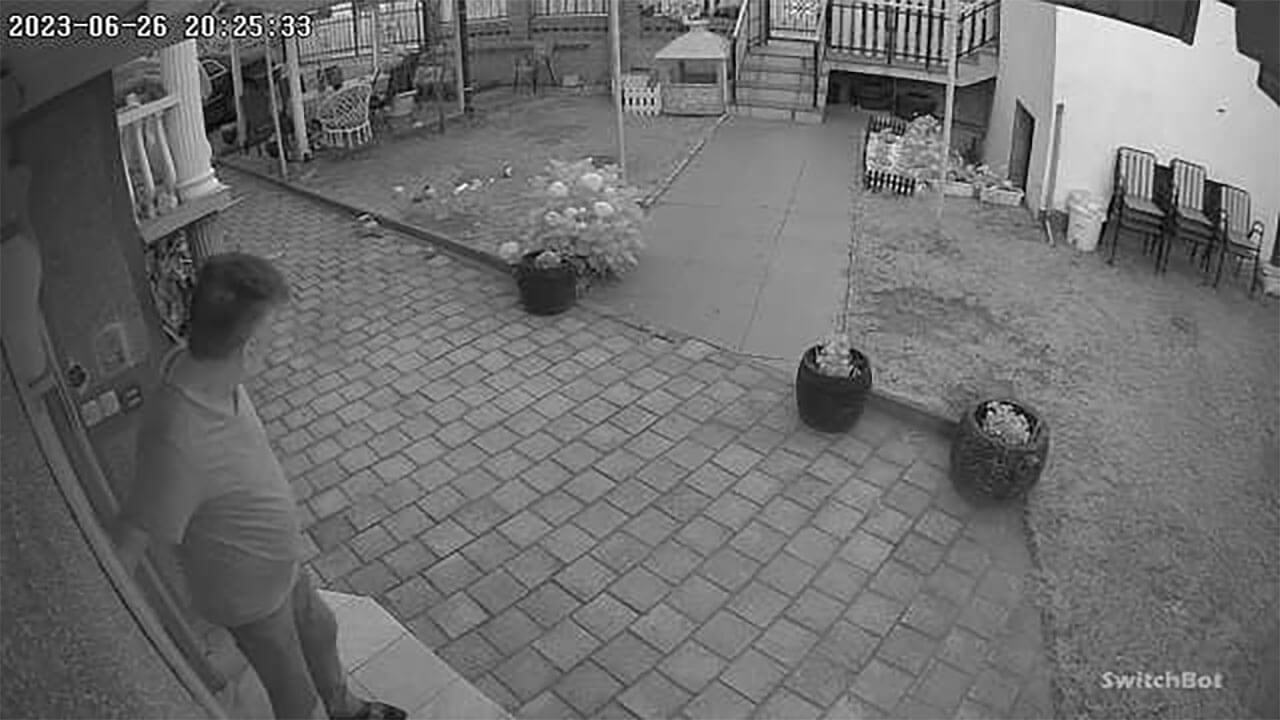
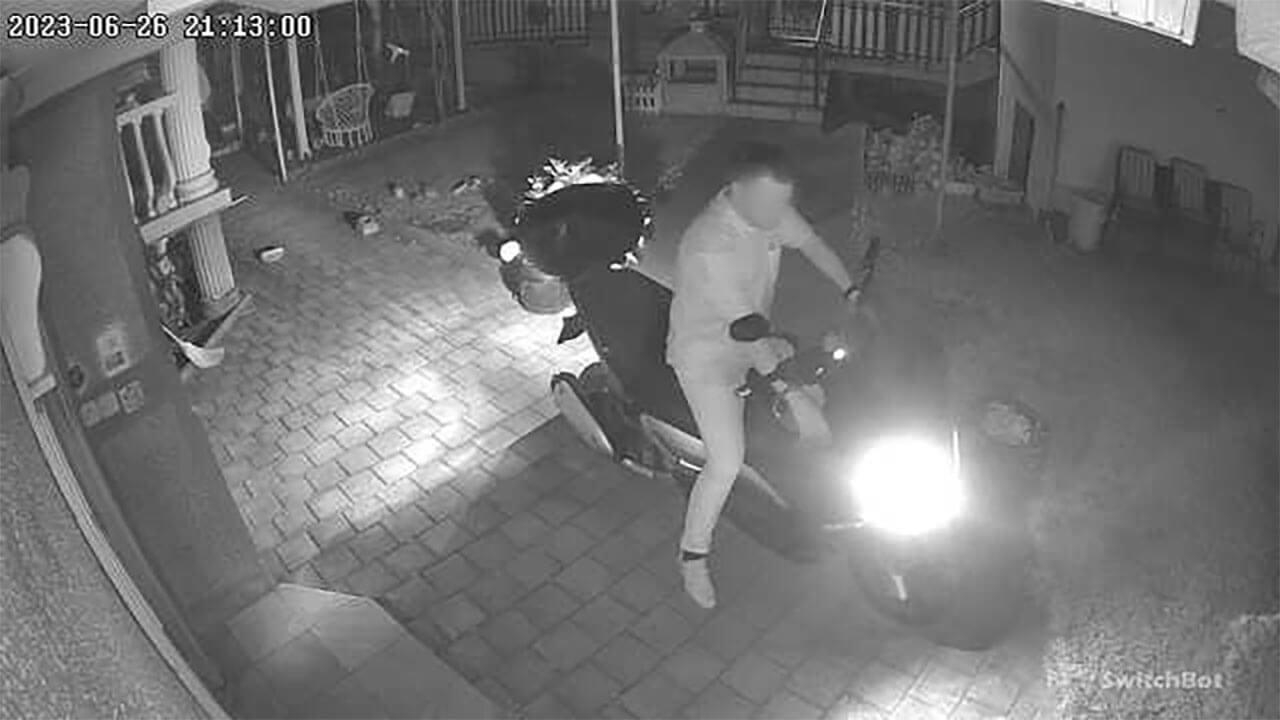
Image Quality
Considering this is a 1080p camera, it’s able to produce great image quality, this appears to be true 1080p. It’s important to note, all motion detection screenshots are saved at 640×360 resolution. This is perfectly fine for checking out who was detected at your front door.
Manual screenshots however, are saved at 1920×1080 pixels, for better image quality when you intentionally take a snapshot. If you go to the playback menu and capture a frame from there, it’s also saved at 1080p. Here are a few examples.

Video Quality
Video quality is also quite satisfactory for me, especially the day recordings. The image is clear with no motion blur, with a smooth framerate. You can actually tweak this a bit in the settings, going from 50Hz to 60Hz.
It downgrades in infrared night mode however, creating noise in certain aspects of the frame. Moving objects are blurred but still clear enough. Be the judge yourself.
Audio Quality
Honestly, I did not expect much in terms of the two way audio quality. After playing with for a while and harassing family members to help me test it, I find it surprisingly adequate.
I beefed up the talk volume in settings all the way to 10, but it degraded the quality as that was pushing the speaker to it’s limits. I found lowering it to 7-8 works best and produces optimal audio quality. You can freely use it as a door phone, it’s loud enough at 7 for guests to hear and understand you.
There is some delay of about 0.5 seconds when using the two-way audio feature. I don’t know if this is attributable to Wi-Fi signal quality or the SwitchBot app, but it’s not a deal breaker for me.
Battery Life
This SwitchBot Camera has a whopping 10000mah battery installed, capable of running unplugged in standby mode up to 90 days according to the manufacturer. Removing the USB-C charger and setting the mode to Battery in the app I found this is inline with their claims as long as you are not in a high traffic area.
To differentiate between the two available power modes:
- Battery Mode:
- The camera spends it life in standby, and is only awaken by motion (human or animals) which automatically triggers the recoding and snapshot features
- Wired Mode:
- The camera is always on, running and recording motion whenever the PIR sensor is triggered.
- Whenever battery drops bellow 30%, the camera goes into battery mode automatically.
If you pair it the camera with their solar panel, you can safely set and forget it, it will charge itself and you can simply monitor the status in the app. Provided there is enough sunlight, the panel can charge the camera fully in about 10-12 hours.
Automatic Spotlight
You can set the camera to automatically turn on the spotlight when it detects motion at night. This means turning on the two LED lights and illuminating the scene whenever the PIR sensor is triggered. These setting will cause the camera to automatically start recording and take a snapshot. To set this mode up:
- Power Mode: Battery
- Night Vision: Auto
- Screen Settings: Color
Alternatively, you can set the camera to have the spotlight always on during the night. Whenever the illuminance sensors reach their “night” threshold, they will turn on the lights and keep them on for the duration of the night. The camera will record and take snapshot like it normally would when motion is detected:
- Power Mode: Wired
- Night Vision: Auto
- Screen Settings: Color
Home Assistant Support
Unfortunately, the SwitchBot Spotlight Camera doesn’t work with Home Assistant as there is no RTSP support. I’ve asked their PR representative about a future update maybe enabling this feature, but they could not give me a definitive answer.
There is a workaround you can use to add this cam in Home Assistant via the Tuya integration. However, it involves sacrificing the SwitchBot app and depend on Tuya’s cloud instead. Which is worse, however you look at it.
Pricing and Discount Codes
You can currently get the Outdoor Spotlight Camera on the official SwitchBot Webstore or Amazon. If you are considering this device, I suggest you go for the solar panel combo and make things easy on yourself.
SwitchBot has a sale coming up, offering a 25% automatic discount of ALL PRODUCTS in preparation and during Amazon Prime Day. The sale will start a few days earlier on the official SwitchBot webstore, here are the dates and coupons:
- SwitchBot Webstore
- July 4th – July 12th
- 25% discount for the duration of the sale
- 5% additional discount with code XMSWITCHBOT
- Valid for US/UK/CA/EU only
- Amazon Prime Day
- July 9th – July 12th
- 25% discount for the duration of the sale
- 5% additional discount with code XMSWITCHBOT
- Valid for US/UK/CA only
For example, you can get the Blind Tilt or Curtain Rod 2 seriously discounted during prime day:
- SwitchBot Blind Tilt regular price is $69.99, with the discount it becomes $48.99.
- SwitchBot Curtain Rod 2 regular price is $99.99, with the discount it becomes $69.30.
Summary
If you have other SwitchBot device and are already using their smart home ecosystem, the Outdoor Spotlight Camera can be a good addition to beef up security. Although, what if someone steals the cam? Nothing is holding it place, it’s so easily installed and removed so it’s best to hide it out of sight if you can.
Image and video quality are great for a 1080p camera, quality degrades slightly in night mode with moving subjects but it’s still good enough to be labelled a safety cam.
The two-way audio feature was surprisingly good which I did not expect at all. I though a robotic sounding and crackling speaker is what I was gonna hear, but setting the audio quality to 7-8 made it sound perfectly fine, clear and loud enough.
The AI Detection features were a hit and miss for me, human motion was always perfectly detected while animal (pet) detection was almost always logged without motion. I don’t own any pets.
The main drawback of this camera is the lack of RTSP support, which essentially means it cannot be used with other software like Home Assistant or Blue Iris. You can only use the SwitchBot App and share it to other smart home controllers like Amazon Echo, Apple HomeKit or Google Home.


