Home Assistant has grown significantly over the years and even though 2023 is officially “The Year of The Voice“, there were some significant user interface changes as well. For example, the light dialog pop-up window received an overhaul with update 2023.3:
It’s certainly a step in the right direction and inline with Home Assistant’s community incentive to customize everything. I’ve written many articles and tutorials for customizing Home Assistant’s dashboards and UI, I will include a list of reading material at the end of this article.
This guide will focus on creating custom pop-up cards using Browser Mod and replacing any more-info dialog window of any entity in Home Assistant. Each tweak will contain an example along with the YAML code, so you can copy and adapt to your instance.
Before You Start
Make sure Browser Mod 2.0 is installed and running on your Home Assistant Instance. Register a browser and make sure the basic service calls work. You don’t have to customize anything like custom permissions, sensors or popups.
Understanding the Browser Mod Popup Service
Browser Mod has a popup service feature (browser_mod.popup) that basically displays any customizable dialog window on your selected browser. This can contain custom cards, actionable buttons, sliders, input schemas, HTML content and can be styled using CSS. It has the following structure:
service: browser_mod.popup
data:
  title: <string>
  content: <string / Dashboard card configuration / ha-form schema>
  size: <normal/wide/fullscreen>
  right_button: <string>
  right_button_action: <service call>
  left_button: <string>
  left_button_action: <service call>
  dismissable: <TRUE/false>
  dismiss_action: <service call>
  autoclose: <true/FALSE>
  timeout: <number>
  timeout_action: <service call>
  style: <string>
  browser_id: <Browser IDs>
We can call upon this service calls from anywhere in Home Assistant, like a script, automation but most importantly a card on the dashboard. For example, a sensor entity will show you the more-info dialog and some historical data on a single press by default. I can replace this with some advanced graphs or a combination of graphs instead.
About Targets: Server Calls vs Browser Calls
Browser Mod services can be called in two different ways which behave slightly differently, but can be crucial in correctly creating a popup.
- Server Call: When the service is called from an automation, script, dashboard with the
call-serviceaction - Browser Call: When the service called from a dashboard using
fire-dom-event action, as part of abrowser_mod.sequenceor as abrowser_mod.popup _action.
The notable difference between the two is when no browser_id is specified:
- A server call will perform the service on all registered browsers.
- A browser call will perform the service on the current browser only
Both are used through the examples bellow, for the purpose of using them correctly.
Browser Mod Popup Examples
Example 1: Simple HTML Content
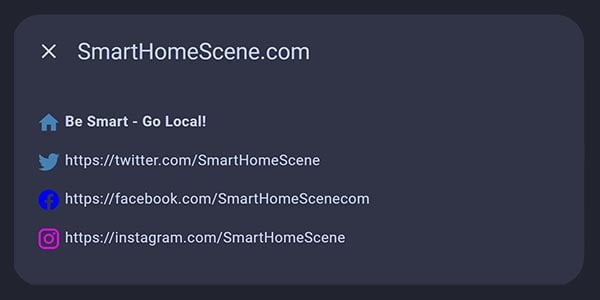
Any HTML can be added to the content variable of the browser_mod.popup service call and styled as you wish. Here’s an example executed through a service call in developer tools:
service: browser_mod.popup
data:
  title: SmartHomeScene.com
  target:
    device_id: dd902a1fafdfbdb69d60722ba32aa964
  content: >
    <p> <ha-icon icon="mdi:home" style="color: steelblue;"> </ha-icon> <b>Be Smart - Go Local!</b> </p>
    <p> <ha-icon icon="mdi:twitter" style="color: steelblue;"> </ha-icon> https://twitter.com/SmartHomeScene </p>
    <p> <ha-icon icon="mdi:facebook" style="color: blue;"> </ha-icon> https://facebook.com/SmartHomeScenecom </p>
    <p> <ha-icon icon="mdi:instagram" style="color: magenta;"> </ha-icon> https://instagram.com/SmartHomeScene </p>
You can add this same service call in a card on your dashboard. For example, If I want to add it to a button card I can use the following code:
type: button
entity: light.living_room
name: Living Room Light
tap_action:
  action: call-service
  service: browser_mod.popup
  data:
    title: SmartHomeScene.com
    target:
      device_id: dd902a1fafdfbdb69d60722ba32aa964
    content: >
    <p> <ha-icon icon="mdi:home" style="color: steelblue;"> </ha-icon> <b>Be Smart - Go Local!</b> </p>
    .....
Example 2: Entities Card Popup
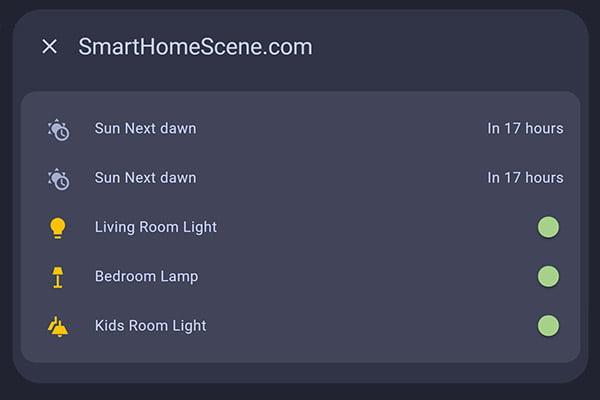
Let’s say I want to create a card within the popup dialog window that will control some lights and show the sun’s info. To start with something simple, I’m going to list a few things in an entities card:
type: button
entity: light.living_room
name: Living Room Light
tap_action:
  action: fire-dom-event
  browser_mod:
    service: browser_mod.popup
    data:
      title: SmartHomeScene.com
      target:
        device_id: dd902a1fafdfbdb69d60722ba32aa964
      content:
        type: entities
        entities:
          - sensor.sun_next_dawn
          - sensor.sun_next_dawn
          - light.living_room_light
          - light.bedroom_lamp
          - light.kids_room_light
Nesting an entities card within the more-info window is a quick and simple way to create a popup lights control dashboard that will remain uncluttered. You can have a few simple room overview items on the dashboard and control everything through popups.
Example 3: Weather Info Popup
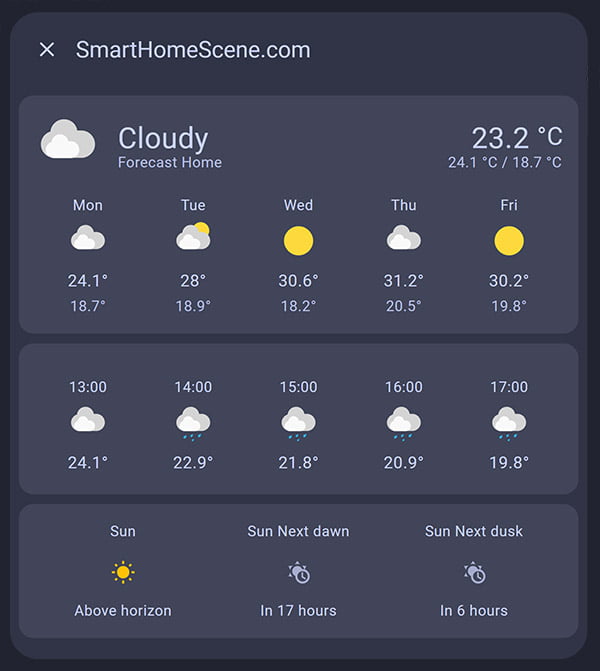
Let’s say I want to keep my dashboard minimalistic and create a small weather card on the main dashboard yet expand more information within the popup. Further, I want to add some information about the Sun. I can nest everything within a vertical-stack card.
Using this small minimalistic card in the dashboard:
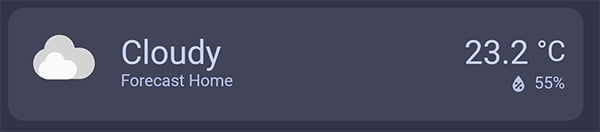
And expanded information in the popup:
type: weather-forecast
entity: weather.forecast_home
show_forecast: false
tap_action:
  action: call-service
  service: browser_mod.popup
  data:
    title: SmartHomeScene.com
    target:
      device_id: dd902a1fafdfbdb69d60722ba32aa964
    content:
      type: vertical-stack
      cards:
        - type: weather-forecast
          entity: weather.forecast_home
          forecast_type: daily
        - type: weather-forecast
          entity: weather.forecast_home
          forecast_type: hourly
          show_current: false
        - type: glance
          entities:
            - entity: sun.sun
            - entity: sensor.sun_next_dawn
            - entity: sensor.sun_next_dusk
forecast_type: daily
PRO Tip: There are many weather custom cards you can use instead, this example simply shows an how a popup would look using only built-in Home Assistant weather cards.
Example 3: Actionable Popups
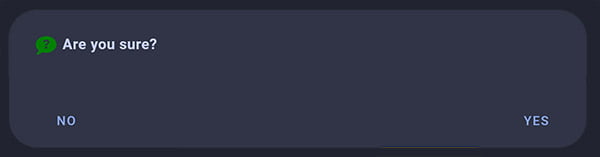
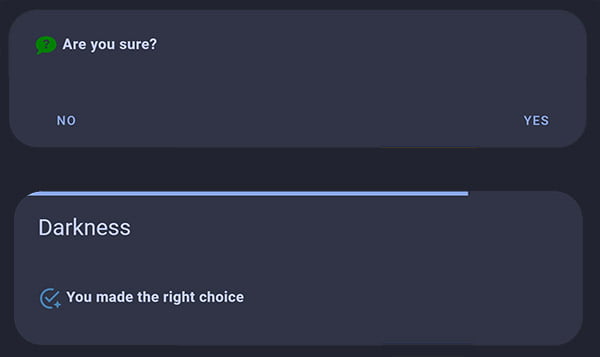
Browser Mod allows you to add buttons to the pop window, which can be used to execute another service call or produce other popups. To start off with something simple, let’s say you would like to confirm the light toggle action with a yes/no button:
type: button
entity: light.living_room
name: Living Room Light
tap_action:
  action: call-service
  service: browser_mod.popup
  data:
    content: >
      <p> <ha-icon icon="mdi:chat-question" style="color: steelblue;"></ha-icon> <b> Are you sure?</b> </p>
    right_button: 'Yes'
    left_button: 'No'
    right_button_action:
      service: light.turn_on
      data:
        entity_id: light.living_room
    left_button_action:
      service: light.turn_off
      data:
        entity_id: light.living_room
  target:
    device_id: dd902a1fafdfbdb69d60722ba32aa964
This YAML changed the default tap action on a card on your dashboard with a popup that executes a turn on or off service calls upon user input. Basically, a confirmation window for executing actions. You can use any other service call for the actionable buttons, for example:
type: button
entity: light.living_room
name: Living Room Light
tap_action:
  action: call-service
  service: browser_mod.popup
  data:
    content: >
      <p> <ha-icon icon="mdi:chat-question" style="color: green;"></ha-icon>
      <b> Are you sure?</b></p>
    right_button: 'Yes'
    left_button: 'No'
    right_button_action:
      service: light.turn_on
      data:
        entity_id: light.living_room
    left_button_action:
      service: browser_mod.popup
      data:
        content: >
          <p> <ha-icon icon="mdi:checkbox-marked-circle-auto-outline"
          style="color: green;"></ha-icon> <b> You made the right choice</b>
          </p>
        dismissable: false
        title: Darkness
        timeout: 1500
  target:
    device_id: dd902a1fafdfbdb69d60722ba32aa964
Example 4: Custom Graphs in Popup
Depending on the entity type, the default more info dialog has a bunch of information presented when called. For a sensor, this is usually a chart displaying the data for the day. But since the default chart is very limited, so let’s say I want to use something more flexible like the History Explorer Card instead.
This card allows you to dynamically explore you database, meaning you can go back in time with scrolling and see information about the entity in question without setting date ranges in the history tab. For example, here’s an example for my living room temperature:
type: entities
entities:
  - entity: sensor.living_room_temperature
    tap_action:
      action: call-service
      service: browser_mod.popup
      data:
        title: SmartHomeScene.com
        target:
          device_id: dd902a1fafdfbdb69d60722ba32aa964
        content:
          type: custom:history-explorer-card
          header: Living Room Temp
          defaultTimeRange: 24h
          decimation: true
          graphs:
            - type: line
              entities:
                - entity: sensor.living_room_temperature
                  color: orangered
Example 5: Room Information Popup
Let’s say I want to create a custom popup containing every information available in Home Assistant for a particular room. This allows me to keep the main dashboard clean and only display information when needed.
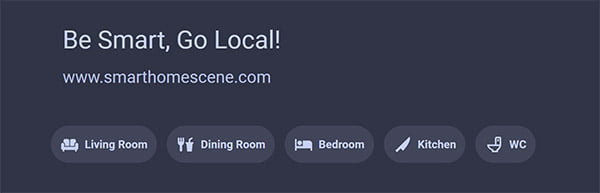
I’ve created a simple Mushroom Chips and Title Card dashboard, which will be used to call a custom popup for each room. For the living room, I want to add a bunch of information that will give me a room overview and some entities control when clicked. I will use a combination of vertical and horizontal stacks to keep everything in place:
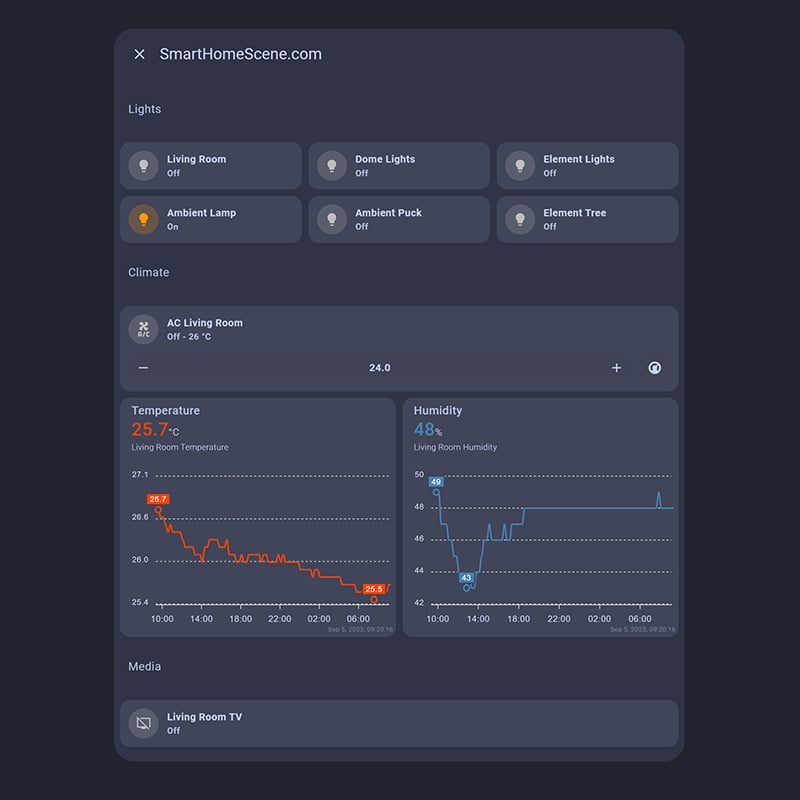
This popup uses ApexCharts for charting the temperature and humidity and Mushroom Cards as light and media control. Here’s the full code:
type: custom:mushroom-chips-card
chips:
- type: template
icon: mdi:sofa
content: Living Room
tap_action:
action: fire-dom-event
browser_mod:
service: browser_mod.popup
data:
title: SmartHomeScene.com
style: |
--popup-min-width: 800px;
--popup-border-radius: 28px;
target:
device_id: dd902a1fafdfbdb69d60722ba32aa964
content:
type: vertical-stack
cards:
- type: custom:mushroom-title-card
subtitle: Lights
- type: horizontal-stack
cards:
- type: custom:mushroom-light-card
entity: light.living_room
- type: custom:mushroom-light-card
entity: light.dome_lights
- type: custom:mushroom-light-card
entity: light.element_lights
- type: horizontal-stack
cards:
- type: custom:mushroom-light-card
entity: light.ambient_lamp
- type: custom:mushroom-light-card
entity: light.ambient_puck
- type: custom:mushroom-light-card
entity: light.element_tree
- type: custom:mushroom-title-card
subtitle: Climate
- type: custom:mushroom-climate-card
entity: climate.ac_living_room
show_temperature_control: true
hvac_modes:
- auto
- type: horizontal-stack
cards:
- type: custom:apexcharts-card
graph_span: 24h
show:
last_updated: true
header:
show: true
show_states: true
title: Temperature
series:
- entity: sensor.living_room_temperature
type: line
color: orangered
group_by:
func: last
duration: 15m
stroke_width: 2
show:
extremas: true
- type: custom:apexcharts-card
graph_span: 24h
show:
last_updated: true
header:
show: true
show_states: true
title: Humidity
series:
- entity: sensor.living_room_humidity
type: line
color: steelblue
group_by:
func: last
duration: 15m
stroke_width: 2
show:
extremas: true
- type: custom:mushroom-title-card
subtitle: Media
- type: custom:mushroom-media-player-card
entity: media_player.sony_kd_55xf9005
name: Living Room TV
- type: template
icon: mdi:food-fork-drink
content: Dining Room
- type: template
icon: mdi:bed
content: Bedroom
- type: template
icon: mdi:knife
content: Kitchen
- type: template
icon: mdi:toilet
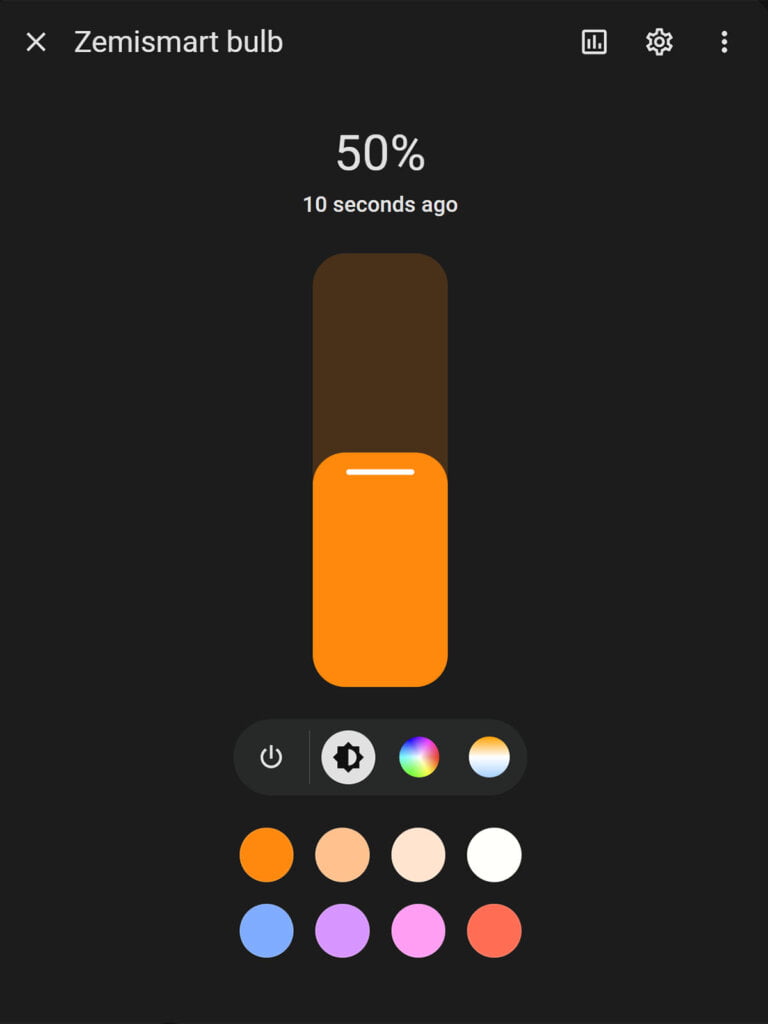
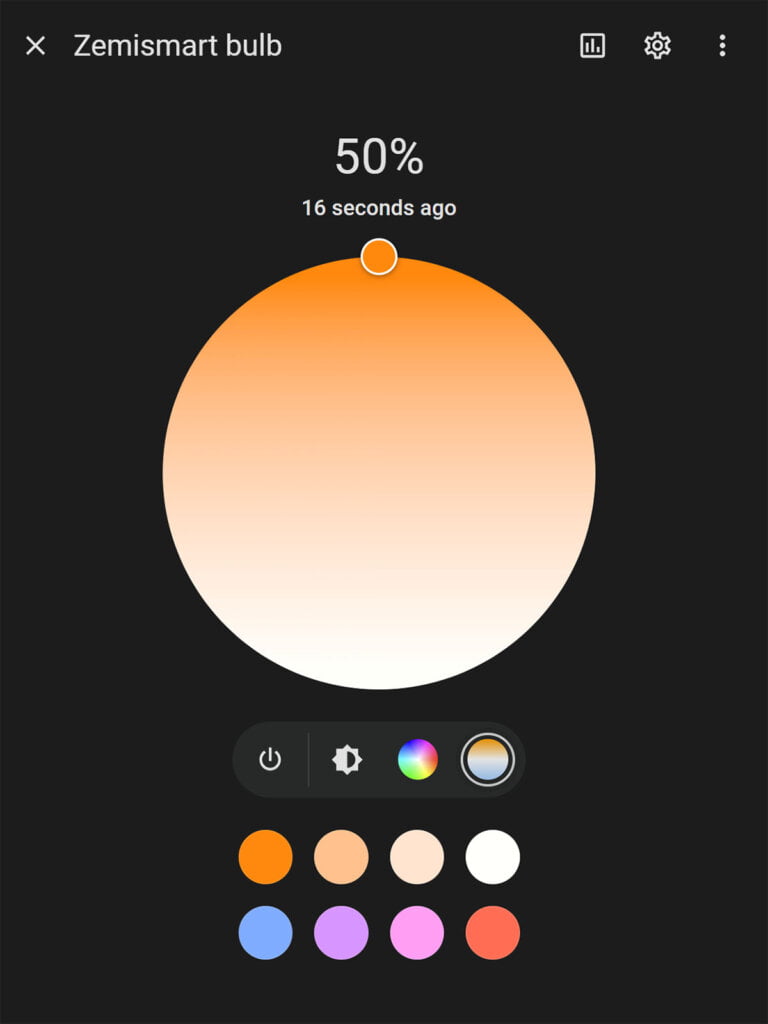
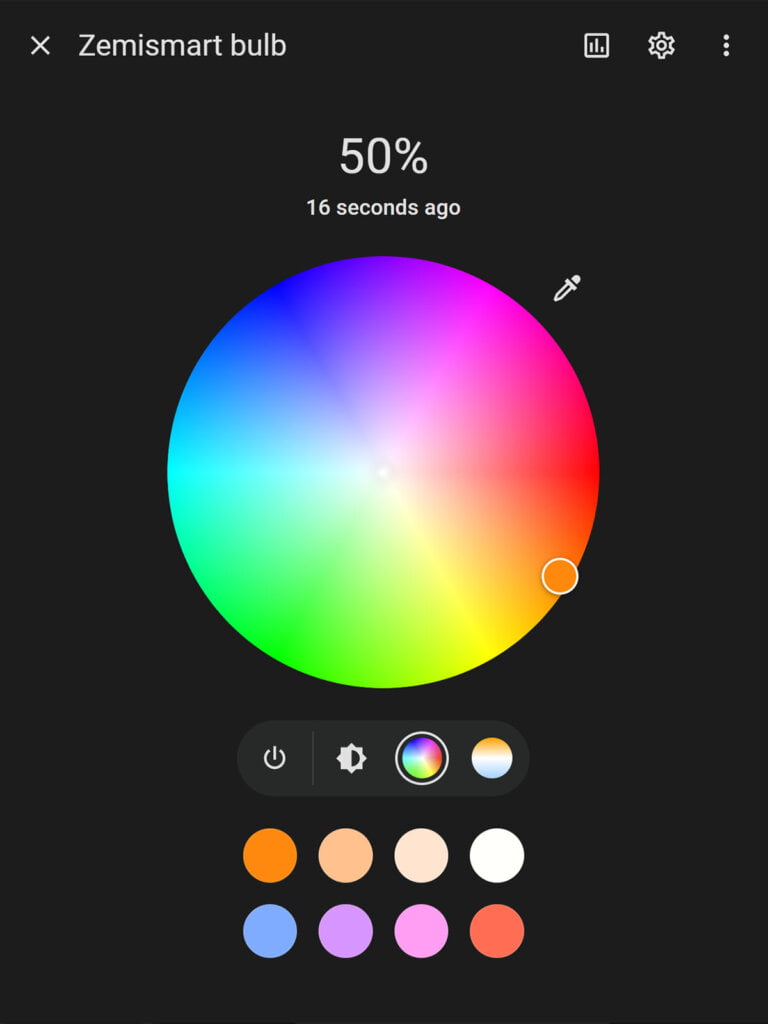
content: WCExample 6: Mushroom Lights Popup
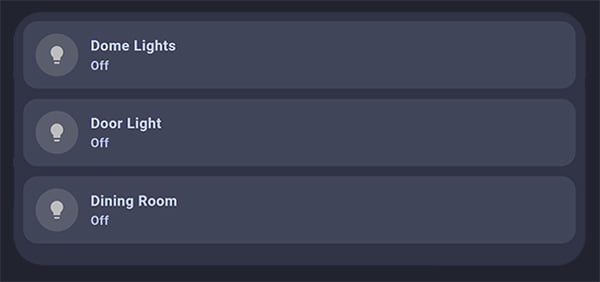
This example allows you to create a grid stack for all your lights and control them within the popup. You can call the service from anything on your dashboard and keep it neat and tidy. For example, I will use a similar Mushroom Chips layout but use categories instead:
Clicking the Lights chip will render something like this:
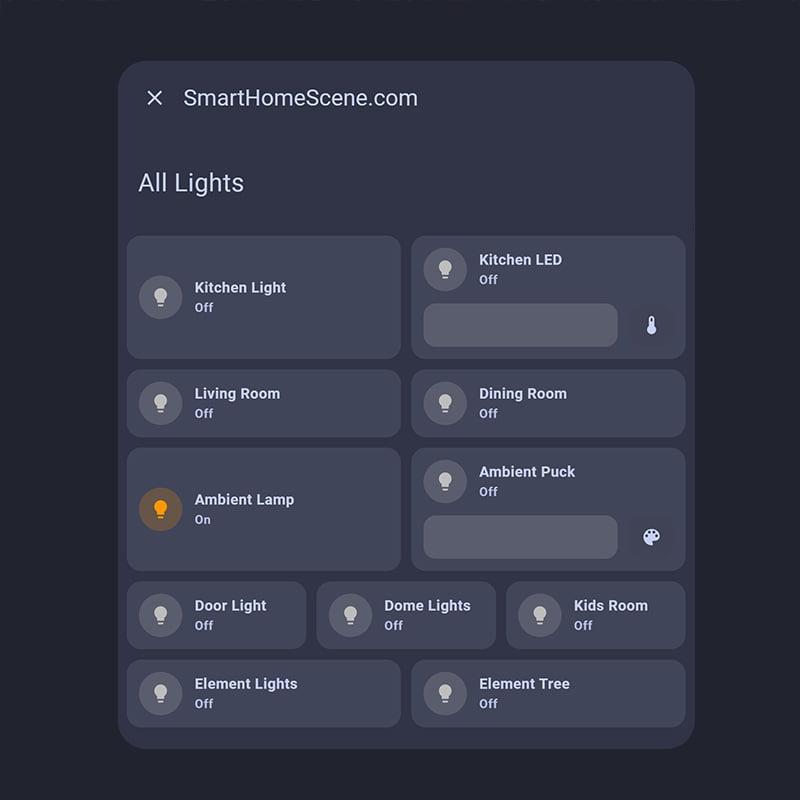
The full code for this popup:
type: custom:mushroom-chips-card
chips:
  - type: template
    icon: mdi:lightbulb-group
    content: Lights
    tap_action:
      action: call-service
      service: browser_mod.popup
      data:
        title: SmartHomeScene.com
        target:
          device_id: dd902a1fafdfbdb69d60722ba32aa964
        content:
          type: vertical-stack
          cards:
            - type: custom:mushroom-title-card
              title: All Lights
            - type: horizontal-stack
              cards:
                - type: custom:mushroom-light-card
                  entity: light.kitchen_light
                  use_light_color: true
                  fill_container: true
                - type: custom:mushroom-light-card
                  entity: light.kitchen_led
                  show_brightness_control: true
                  fill_container: false
                  use_light_color: true
                  show_color_temp_control: true
                  show_color_control: false
            - type: horizontal-stack
              cards:
                - type: custom:mushroom-light-card
                  entity: light.living_room
                - type: custom:mushroom-light-card
                  entity: light.dining_room
            - type: horizontal-stack
              cards:
                - type: custom:mushroom-light-card
                  entity: light.ambient_lamp
                  fill_container: true
                - type: custom:mushroom-light-card
                  entity: light.ambient_puck
                  use_light_color: true
                  show_brightness_control: true
                  show_color_temp_control: false
                  show_color_control: true
            - type: horizontal-stack
              cards:
                - type: custom:mushroom-light-card
                  entity: light.door_light
                - type: custom:mushroom-light-card
                  entity: light.dome_lights
                - type: custom:mushroom-light-card
                  entity: light.kids_room
            - type: horizontal-stack
              cards:
                - type: custom:mushroom-light-card
                  entity: light.element_lights
                - type: custom:mushroom-light-card
                  entity: light.element_tree
  - type: template
    icon: mdi:thermometer-auto
    content: Ambient
  - type: template
    icon: mdi:youtube-tv
    content: Media
  - type: template
    icon: mdi:human-queue
    content: Family Map
  - type: template
    icon: mdi:package-variant-closed-check
    content: System
Example 7: Mini Graph Card Popup
The ambient chip from the previous example can be populated with graphs about each individual room temperature and humidity reading. This can be useful to glance the temperature and humidity of your home on a single popup.
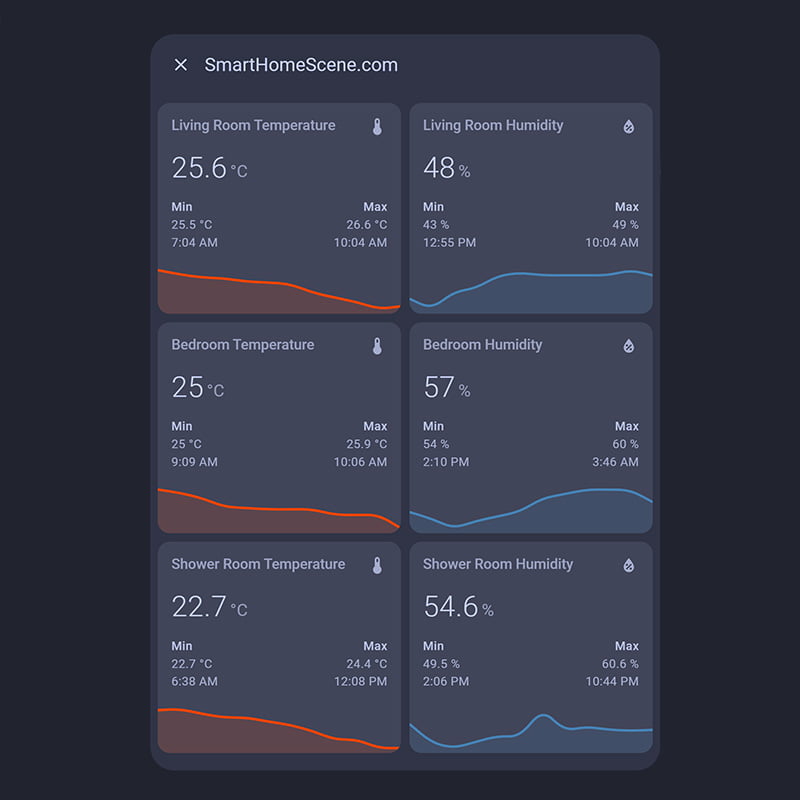
All mini graph cards are nested within a single vertical and multiple horizontal stacks, you can tweak if you need too. The card code is kept minimal for the sake of length:
type: custom:mushroom-chips-card
chips:
- type: template
icon: mdi:lightbulb-group
content: Lights
- type: template
icon: mdi:thermometer-auto
content: Ambient
tap_action:
action: call-service
service: browser_mod.popup
data:
title: SmartHomeScene.com
target:
device_id: dd902a1fafdfbdb69d60722ba32aa964
content:
type: vertical-stack
cards:
- type: horizontal-stack
cards:
- type: custom:mini-graph-card
hours_to_show: 24
entities:
- entity: sensor.living_room_temperature
line_color: orangered
show:
extrema: true
- type: custom:mini-graph-card
hours_to_show: 24
entities:
- entity: sensor.living_room_humidity
line_color: steelblue
show:
extrema: true
- type: horizontal-stack
cards:
- type: custom:mini-graph-card
hours_to_show: 24
entities:
- entity: sensor.bedroom_temperature
line_color: orangered
show:
extrema: true
- type: custom:mini-graph-card
hours_to_show: 24
entities:
- entity: sensor.bedroom_humidity
line_color: steelblue
show:
extrema: true
- type: horizontal-stack
cards:
- type: custom:mini-graph-card
hours_to_show: 24
entities:
- entity: sensor.shower_room_temperature
line_color: orangered
show:
extrema: true
- type: custom:mini-graph-card
hours_to_show: 24
entities:
- entity: sensor.shower_room_humidity
line_color: steelblue
show:
extrema: true
- type: template
icon: mdi:youtube-tv
content: Media
- type: template
icon: mdi:human-queue
content: Family Map
- type: template
icon: mdi:package-variant-closed-check
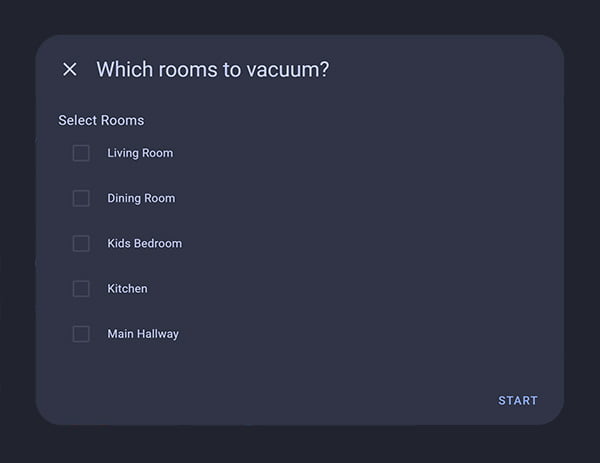
content: SystemExample 8: Sending Form Data
Let’s say you want to start your vacuum with a button on your dashboard. But you don’t want it cleaning everything as it goes, you would like to choose which rooms to be cleaned. If your integration is properly setup, you can use a Home Assistant Selector and send data commands:
type: button
entity: vacuum.s7_roborock_start
name: Roborock S7
tap_action:
  action: fire-dom-event
  browser_mod:
    service: browser_mod.popup
    data:
      title: Which rooms to vacuum?
      right_button: Start
      right_button_action:
        service: vacuum.send_command
        data:
          entity_id: vacuum.s7_roborock
          command: app_segment_clean
      content:
        - name: params
          label: Select Rooms
          selector:
            select:
              multiple: true
              options:
                - label: Living Room
                  value: 1
                - label: Dining Room
                  value: 2
                - label: Kids Bedroom
                  value: 3
                - label: Kitchen
                  value: 4
                - label: Main Hallway
                  value: 5
Depending on your model and integration, you might need to adjust the parameters for your rooms. See the Home Assistant Vacuum integration for more information.
Example 9: Popups in Automations
Browser Mod popups in scripts and automations need to be created slightly differently. They don’t depend on an _action as a trigger (like in the dashboard), but can triggered by anything else.
Let’s say I want to create an automation which will give me the temperatures of my rooms at 15:00 o’ clock everyday as popup on my wall mounted dashboard. Using the browser_id of the wall tablet, adding some HTML and sensor templating I get the following result:

alias: Temperature Popup
description: ""
trigger:
  - platform: time
    at: "15:00:00"
condition: []
action:
  - service: browser_mod.popup
    data:
      title: SmartHomeScene.com
      target:
        device_id: dd902a1fafdfbdb69d60722ba32aa964 #Wall Mounted Dashboard Browser-ID
      content: >
        <p> <ha-icon icon="mdi:sofa" style="color: steelblue;"> </ha-icon> The <b>Living Room</b> Temperature is {{ states('sensor.living_room_temperature') }}°C</p>
        <p> <ha-icon icon="mdi:bed" style="color: green;"> </ha-icon> The <b>Bedroom</b> Temperature is {{ states('sensor.bedroom_temperature') }}°C</p>
        <p> <ha-icon icon="mdi:knife" style="color: blue;"> </ha-icon> The <b>Kitchen</b> Temperature is {{ states('sensor.kitchen_temperature') }}°C</p>
        <p> <ha-icon icon="mdi:teddy-bear" style="color: magenta;"> </ha-icon> The <b>Kids Room</b> Temperature is {{ states('sensor.kids_room') }}°C</p>
mode: single
Example 10: Popups in Scripts
Now let’s assume I want to create a sequence of popups within a script, which will be executed when certain conditions are met. This will create a script entity which can be activated from anywhere in Home Assistant (dashboard, automation etc.).
For example, let’s create two alternating popups every 10 seconds: one showing temperature and the other humidity. They will run for 5 minutes and remain on the wall tablet until user dismissed:
alias: Browser Mod Script
sequence:
  - repeat:
      count: "20"
      sequence:
        - service: browser_mod.popup
          data:
            title: SmartHomeScene.com
            target:
              device_id: 0aba4fae94c09461f665b9ecb8a90ccb
            content: >
              <p> <ha-icon icon="mdi:sofa" style="color: steelblue;"> </ha-icon> The <b>Living Room</b> Temperature is {{ states('sensor.living_room_temperature') }}°C</p>
              <p> <ha-icon icon="mdi:bed" style="color: green;"> </ha-icon> The <b>Bedroom</b> Temperature is {{ states('sensor.bedroom_temperature') }}°C</p>
              <p> <ha-icon icon="mdi:knife" style="color: blue;"> </ha-icon> The <b>Kitchen</b> Temperature is {{ states('sensor.kitchen_temperature') }}°C</p>
              <p> <ha-icon icon="mdi:teddy-bear" style="color: magenta;"> </ha-icon> The <b>Kids Room</b> Temperature is {{ states('sensor.kids_room_temperature') }}°C</p>
          target:
            device_id: 0aba4fae94c09461f665b9ecb8a90ccb
        - delay:
            hours: 0
            minutes: 0
            seconds: 10
            milliseconds: 0
        - service: browser_mod.popup
          data:
            title: SmartHomeScene.com
            target:
              device_id: 0aba4fae94c09461f665b9ecb8a90ccb
            content: >
              <p> <ha-icon icon="mdi:sofa" style="color: steelblue;"> </ha-icon> The <b>Living Room</b> Humidity is {{ states('sensor.living_room_humidity') }}%</p>
              <p> <ha-icon icon="mdi:bed" style="color: green;"> </ha-icon> The <b>Bedroom</b> Humidity is {{ states('sensor.bedroom_humidity') }}%</p>
              <p> <ha-icon icon="mdi:knife" style="color: blue;"> </ha-icon> The <b>Kitchen</b> Humidity is {{ states('sensor.kitchen_humidity') }}%</p>
              <p> <ha-icon icon="mdi:teddy-bear" style="color: magenta;"> </ha-icon> The <b>Kids Room</b> Humidity is {{ states('sensor.kids_room_humidity') }}%</p>
          target:
            device_id: 0aba4fae94c09461f665b9ecb8a90ccb
        - delay:
            hours: 0
            minutes: 0
            seconds: 10
            milliseconds: 0
Closing Browser Mod Popups
There are 3 ways to actually close a Browser Mod Popup, each useful in different scenarios.
- Close with the X button or simply clicking on the side
- Close automatically on a time-out
- Close with a service call (browser_mod.close_popup)
The first one is the default behavior’s of a dialog popup window, you need to close it manually by pressing the X button or clicking to the side to dismiss it.
The second one is used to display the popup for a certain amount of time (in milliseconds) after which it’s automatically dismissed. For example:
service: browser_mod.popup
data:
  title: Automatically Dismissable Popup
  content: www.smarthomescene.com
  dissmissable: false
  timeout: 3000
target:
  device_id: dd902a1fafdfbdb69d60722ba32aa964
The third one is used to close the popup with a service call, usually in an automation after an action has been completed. For example, you can create a popup to display your doorbell camera feed on your TV. When no motion is detected, automatically dismiss the popup. The service call is simple:
service: browser_mod.close_popup
data: {}
target:
  device_id: 0aba4fae94c09461f665b9ecb8a90ccb
Changing More-Info Dialog With a Popup Card
Browser Mod is capable of changing the More-Info dialog popup per entity without creating complex service calls for each card. This way, you create a custom popup card which is invisible on the dashboard (unless in Edit mode) which changes the behavior for that particular entity.
Creating custom popups this way allows to easily edit and change your configuration without having to dig through lines and lines of code within your dashboard. Create a new card and define the entity and card(s) shown within the popup:
type: custom:popup-card
entity: light.kitchen_light
card:
  type: vertical-stack
  cards:
    - type: custom:mushroom-light-card
      entity: light.dome_lights
    - type: custom:mushroom-light-card
      entity: light.door_light
    - type: custom:mushroom-light-card
      entity: light.dining_room
Whenever you open the more-info dialog of the entity (e.g. light.kitchen_light) within that view, your newly defined popup card will appear instead of the default more-info dialog window:
Vertically Centering Popups
Home Assistant popup show up at the top of your screen by default, slightly offset with a margin. This behavior can be changed with card-mod by adding the following code to your theme file:
ios-dark-mode-dark-blue:
  card-mod-theme: ios-dark-mode-dark-blue #change with theme name
  card-mod-more-info-yaml: |
    .: |
      ha-dialog {
        --vertical-align-dialog: center !important;
      }
Notice the indentation under the theme name and the correct name. Add this to your theme_name.yaml file, save, clear cache and reboot Home Assistant. This will center all popups, even the default more-info dialog window.
Summary
Browser Mod is most likely the most powerful custom integration you can add to Home Assistant. It’s extremely versatile and packed with features. You can go over my article of setting up Browser Mod and using it’s service calls for a better understanding of this statement.
This article showcased a bunch of examples for creating custom popups instead of the default more-info dialog windows in Home Assistant. Most of the examples are simple and easy to follow, I aimed for beginner-friendly approach so anyone can understand what’s actually going on.
If you apply a little bit of creativity, templating and a little bit of Browser Mod magic you can achieve a bunch of awesome things and create awesome dashboards. If you appreciate what we do and would like to support SmartHomeScene, consider getting us a cup of coffee.
Resources
- How To Add Custom Icons in Home Assistant
- How to Setup Tabbed Card for Home Assistant
- Home Assistant Decluttering Card Tutorial
- How To Track Home Assistant Updates
- World Air Quality Index in Home Assistant
- WallPanel: Home Assistant Screensaver for your wall-mounted control panel
- Honeycomb Module: Hex PopUp Menu for Home Assistant
- ApexCharts Tutorial: Advanced Graphs for your Home Assistant UI
- Mushroom Cards Part 1: How To Build a Clean Minimalistic UI
- Mushroom Cards Part 2: Room Layout & Card Combinations
- Track The Sun and Moon in Home Assistant
- Sidebar Shortcuts: Customizing the HA Sidebar
- Dynamically Explore Your Database With The History Explorer Card in Home Assistant
- Top 10 Home Assistant Lovelace Themes
- Another Top 10 Home Assistant Lovelace Themes
- How to Track the ISS with Home Assistant


Great, but it’s working only on web desktop and not on tablet or phone :/
Clear your cache and use fire-dom-event for action, which will call the card on the current device. See Example 2
Amazing, there is option to popup another page we created? Like remote control page that include 9 buttons we designed for android streamer? How its can be done?
Yes, you can insert ANY card you want in the popup.
So, first FULLY create your remote card in the dashboard.
Than copy paste your card in a browser mod popup, set it to trigger from any other card on your dashboard.
Example for triggering from a button card:
type: buttonentity: light.living_room
name: Living Room Light
tap_action:
action: fire-dom-event
browser_mod:
service: browser_mod.popup
data:
title: SmartHomeScene.com
target:
device_id: dd902a1fafdfbdb69d60722ba32aa964
content:
type: FULL REMOTE CARD HERE
I have two dashboard panels showing the same HA page. Is it possible to show a popup only on the device where the more-info action was pressed? All the examples specify a specific device (or more than one), and I can’t find any information to say this is possible.
Thanks.
Yes, you can use
browser_idinstead ofdevice_idin the service call and it will popup on the chosen device only.Cheers
Thank you for taking the time to reply SHS! I also appreciate all the tutorials you create for HA as they are immensely useful.
Sorry about this, I’ll explain what I mean with an example. Say I have the following card:
```- type: 'custom:button-card'
tap_action:
action: call-service
service: browser_mod.popup
data:
dismissable: true
autoclose: true
timeout: 120000
title: Test
size: fullscreen
browser_id:
- 2a67daeb-5dca2516
- 7ad8e140-5ab4e3d8
content:
type: picture-glance
entities: []
camera_view: live
camera_image: camera.reolinkdoorcam
```
This button-card appears on a kiosk.yaml page which is displayed on two tablets. If I tap the button on one table, the video feed appears on both because two browser_ids have been specified.
However what I would like is the ability to only show the video feed on the tablet where the button was pressed and not the other one. I don’t think this is possible but wanted to check I’ve not missed anything.
Cheers
Hello Jarrah,
You can use
fire-dom-eventand code your card like this, which will make the popup show up only on the device that pressed the button:type: 'custom:button-card'tap_action:
action: fire-dom-event
browser_mod:
service: browser_mod.popup
data:
title: Test
target:
browser_id: THIS
dismissable: true
autoclose: true
timeout: 120000
size: fullscreen
content:
type: picture-glance
entities: []
camera_view: live
camera_image: camera.reolinkdoorcam
Let me know, cheers.
Hi,
Fantastic and well written article, thank you.
One question (or is it even possible?)
I have this automation
alias: Birdseye Pop up ROG - Browser Moddescription: Pop up the Birdseye camera when person detection is triggered.
trigger:
- platform: state
entity_id: binary_sensor.frigate_person_detection_cameras_group
to: "on"
condition: []
action:
- service: browser_mod.popup
target:
device_id: ROG
data:
dismissable: true
autoclose: false
title: Birdseye
size: fullscreen
timeout: 120000
card:
type: picture-glance
entities: []
camera_image: camera.birdseye
camera_view: live
mode: single
I want to have it just pop up on my PC. But as you said above this is a server wide command. Is there a way to amend this automation to use the Browser Call
(When the service called from a dashboard using fire-dom-event action, as part of a browser_mod.sequence or as a browser_mod.popup _action)
Can you tell me first, what exactly are you trying to achieve?
I have security cameras (frigate) that can detect objects (people) and frigate has the ability to make all these into a camera view called camera.birdeye
I would like to have for example if I am in my home office or remote office when an object (person) is detected it will pop up using browser mod on my office (remote or home PC)
I have it working, but it will now pop up on any device that has browser mod registers. Eg my living room tablet. Trying to see if I can target it to just some browsers.
I also have my front door bell that when it rings opens every registered browser with a live reeling doorbell feed.
Okay, use the service call like this:
service: browser_mod.popup

data:

dismissable: true

autoclose: false

content: Test

target:

device_id:

- dd902a1fafdfbdb69d60722ba32aa964

- 33098a4955e0bb2028173dcfb6f0acc3
List any registered devices you want the feed to popup
Thank you. Appreciate your help. Still cant get it to work as expected. For some reason even with the target like this:
target:
device_id:
– ROG
NB: ROG is my office computer.
It still pops up on my tablet. Note its an old tablet that may be causing issues.
Go into the automation editor, select the browser_mod.popup call service, click Device and select your PC.
It will auto-populate the device_id with the ID, don’t use ROG.
Let me know how it goes.
Thank you I have got it going. Deleted all the registered devices and let it populate with its built-in string rather than renaming. That did the trick.
I noticed something. If I use the local IP to connect to HA the browser-mod thinks its a different from my external IP. Do you account for this? Or, which do you use to register?
Hi in your examples your are using device_id: this shoud be browser_id: thats why its showing on every device
Hi, nice tutorials.
I have a question trough, in a popup if I have a button that navigate to a HA page, but is possible to close the popup automatically after navigation? I need something like a button to call two actions or using a script for:
tap_action:
action: fire-dom-event
browser_mod:
service: browser_mod.close_popup
and:
tap_action:
action: navigate
navigation_path: /lovelace/cam
it is possible? I don’t use device_id on phones because we change it allot, Thank you!
Yes, you can add:
autoclose: true

timeout: 1500
Which will auto-close the popup after 15 seconds.
Thanks for the great post!
Is it possible to put a template in the name of a button of a popup?
Say I want the button to say “turn on” if a given switch is off, and “turn off” if it is already on.
This post was very helpful,thanks!
But I would like repetitions for my Roborock,to be able to choose how many times my vacuum cleans every room.
I like when it criss cross the room when you choose x2 instead of going in the same pattern.
Anyway I can´t get my head around how to do it.
The example in this post is working great for just one repetition but how can you insert repetitions?
I can do it in a script like this:
– service: vacuum.send_command
data:
command: app_segment_clean
params:
– segments:
– 18
repeat: 2
But you don´t define “segments” its just “params” in this card.
I´ve tried the best I can to get to work but no success at all.
Does anbody else have some ideas?
Excelent tutorials! You have right, this ist the most powerfull custom integration.
Everything is working as expected, only the centering of the pop-up is not working, i’m afraid it has something to do with identation, would you be so kind and share a screenshot of your themes.yaml
This is mine, and is not working, no matter what I try:
my-theme:# blurring-background-behind-popup
dialog-backdrop-filter: blur(5px)
dialog-border-radius: 1em;
dialog-box-shadow: 0em 0em 0.5em;
iron-overlay-backdrop-opacity: 1
iron-overlay-backdrop-background-color: rgba(0, 0, 0, 0.32)
mdc-dialog-box-shadow: 0em 0em 0.5em
mdc-shape-medium: 1em
card-mod-theme: my-theme #change with theme name
card-mod-more-info-yaml: |
.: |
ha-dialog {
--vertical-align-dialog: center !important;
}
You code is correct. You need to clear cache completely and test on a different device.
Hallo. Gibt es auch eine Möglichkeit bei einem 3D Floorplan in der Picture Elements Card ein PopUp zu erstellen? Bekomme es da einfach nicht zum laufen und da läuft das Dashboard auf Panel. Haben sie da eine Idee? vielen Dank.
Browser Mod doesn’t care what the trigger is, as long as you call the service correctly. Use firedom event example from the article, I can’t write it right now from my phone.
And please use english next time, cheers.